

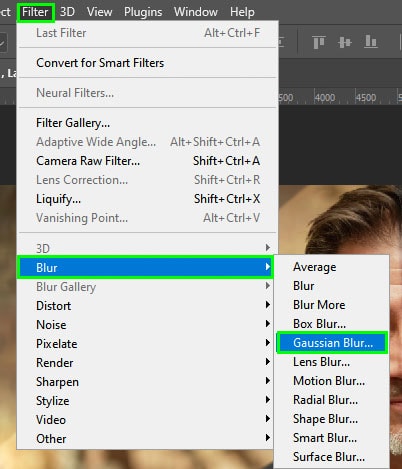
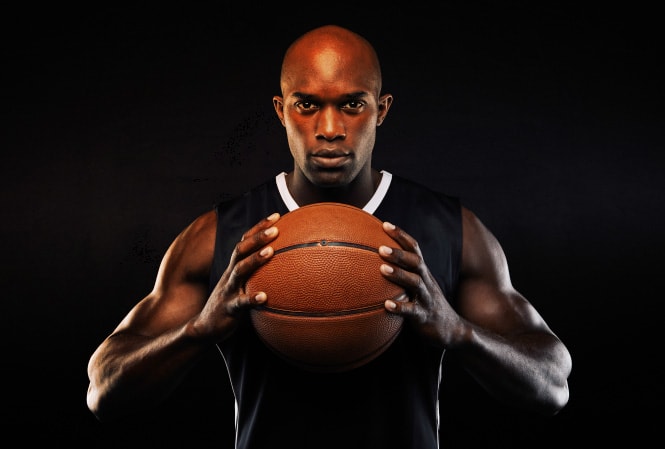
When you want to create an artificial light source or are blending images together, learning different lighting effects in Photoshop will ensure you get a realistic final image. Depending on the style you’re going for, there are four main ways to add lighting effects to your images in the program.
You can use any method, but some are more suited for creative effects, while others are best when adding natural-looking lighting.
Let’s get started!
Video Tutorial
Option 1: Natural Lighting Effects
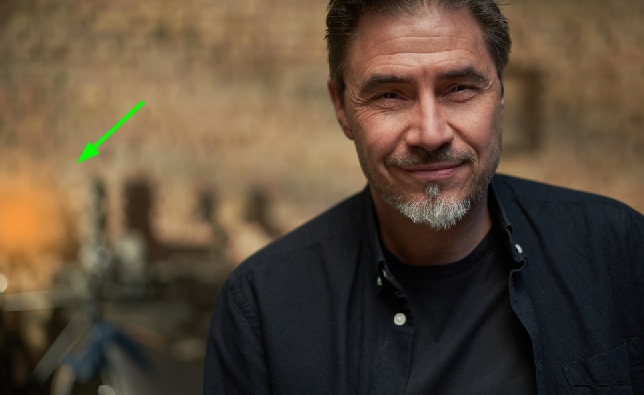
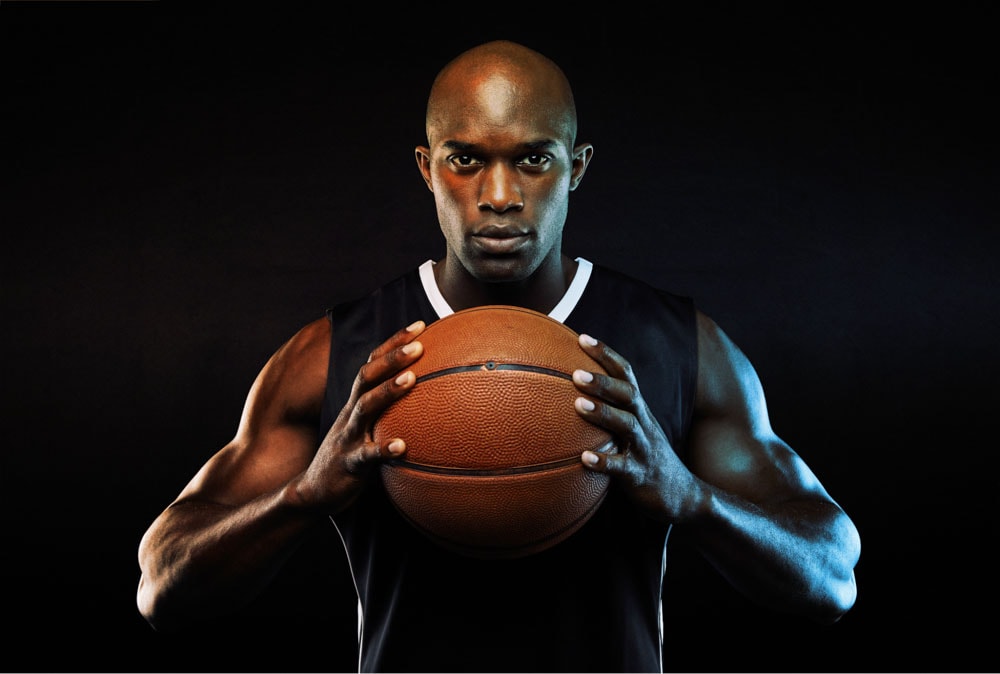
Using this method, you can simulate a direct light source hitting a subject. In this method, you create the light source and a light ray that shines directly on a subject.

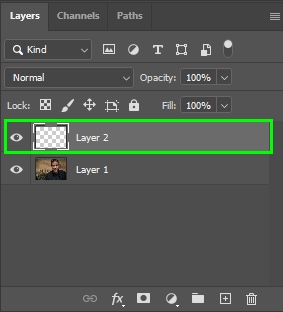
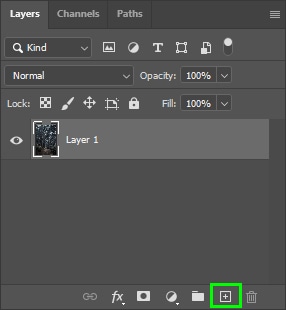
Step 1: Create A New Layer
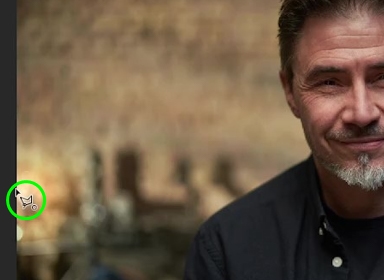
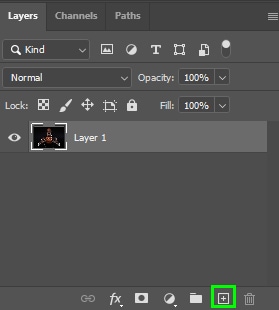
First, create a new layer to place the light source. To do this, click the plus sign icon in the Layers panel.

Step 2: Draw The Light Source
Enable the Brush tool (B) in the Toolbar.

Set both brush Opacity and Flow to 100%.

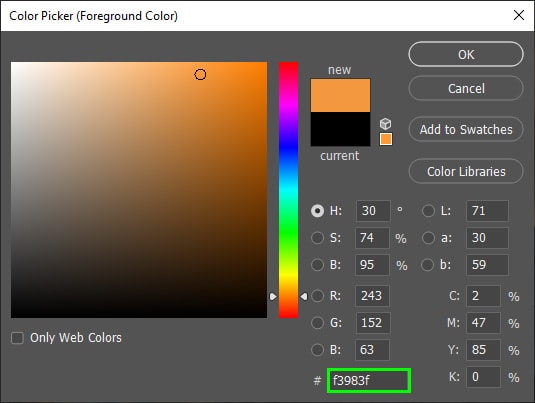
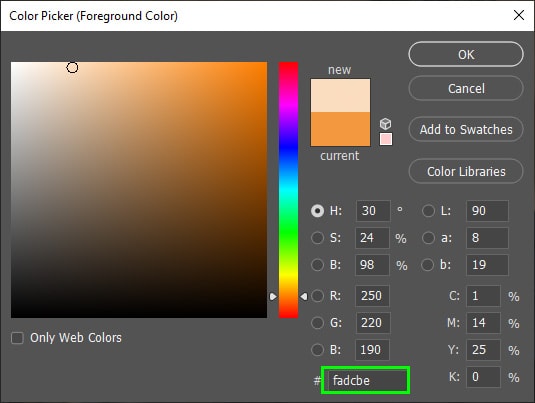
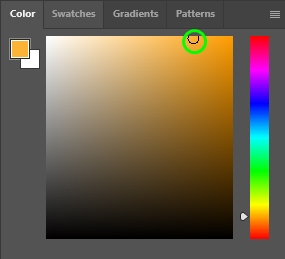
Pick a color for your light source using the Foreground swatch. Double-click on the color block to open the Color Picker. In my case, I chose an orange shade.

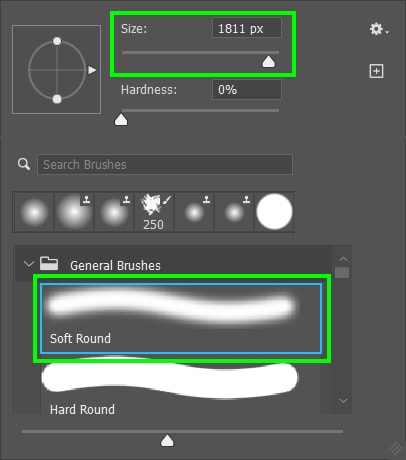
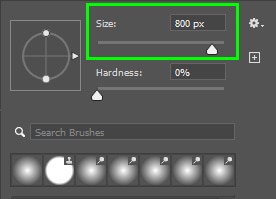
Now, define the light source size. To do this, right-click your image to bring up the Brush Settings panel and select a brush Size. Choose a Soft Round brush for this task.
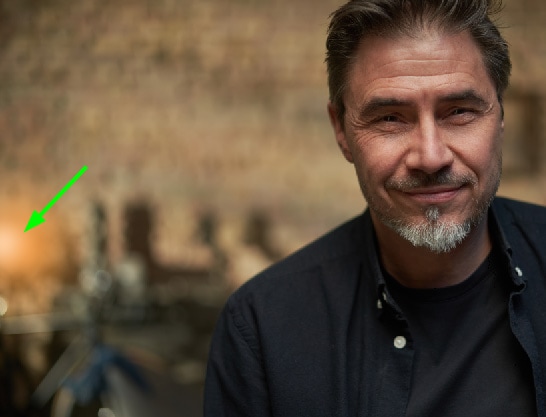
Next, click the desired spot to create the glow.
Now, go back to the Color Picker and choose a new color for the center of the glow. That will be the brightest glow spot, so it should ideally be a lighter shade of your base color.
Now, bring down the brush Size so the bright spot fits the center of the glow.
Next, click the center of the glow once to add that bright spot.
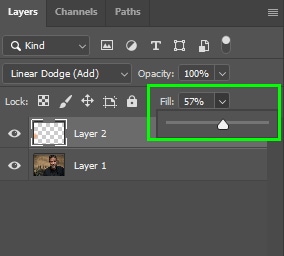
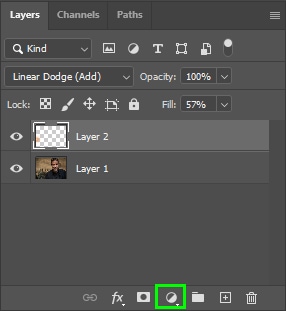
Now, change the layer blend mode to Linear Dodge (Add).
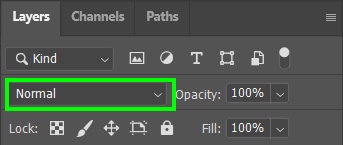

Then, bring down the layer’s Fill if you think the effect came out too harsh.
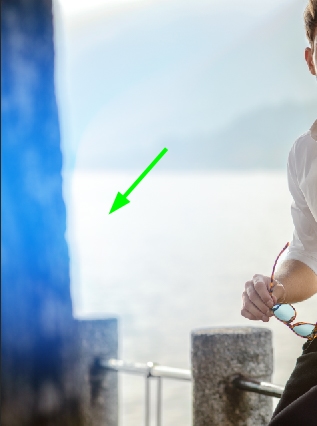
Step 3: Determine The Light Ray Area
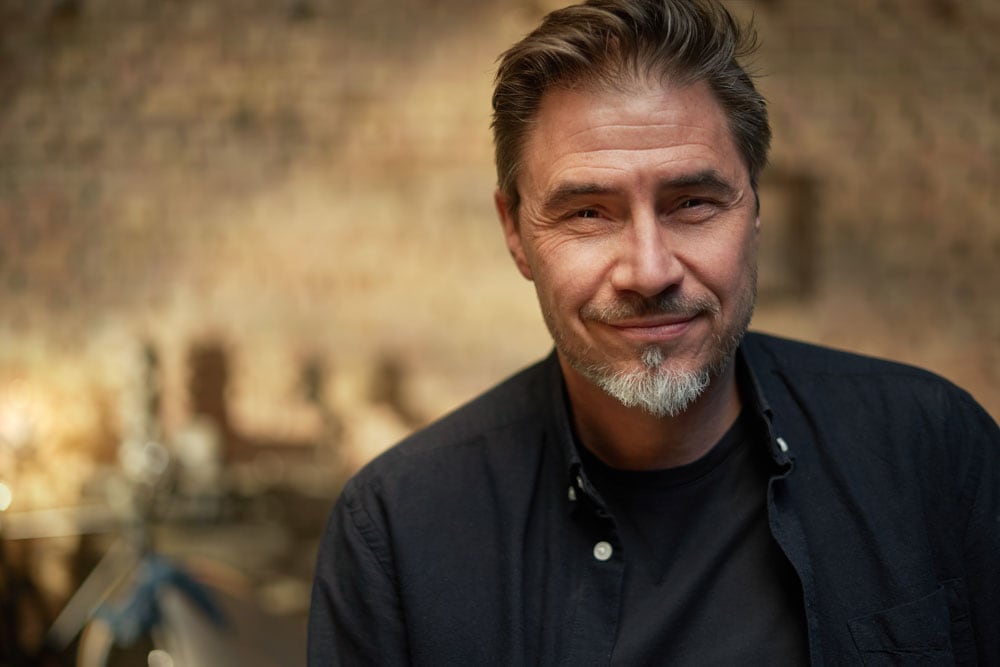
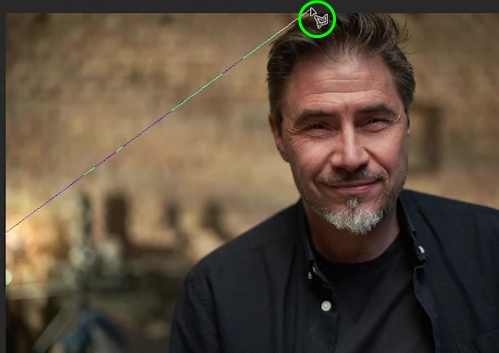
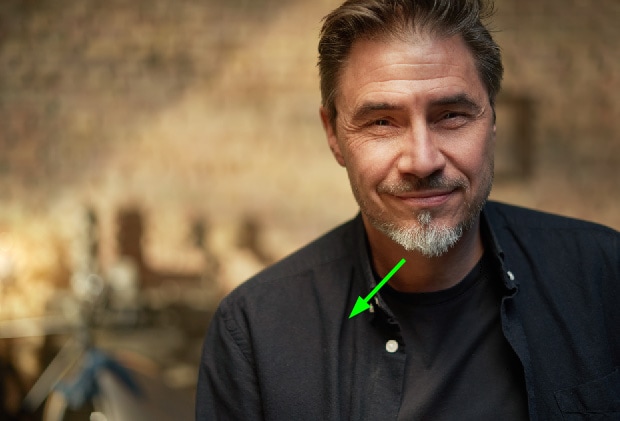
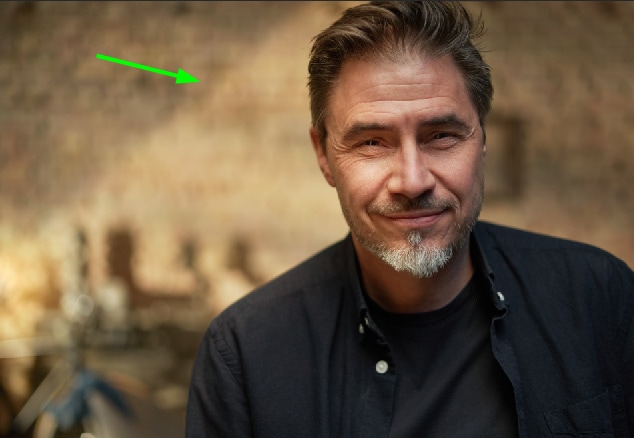
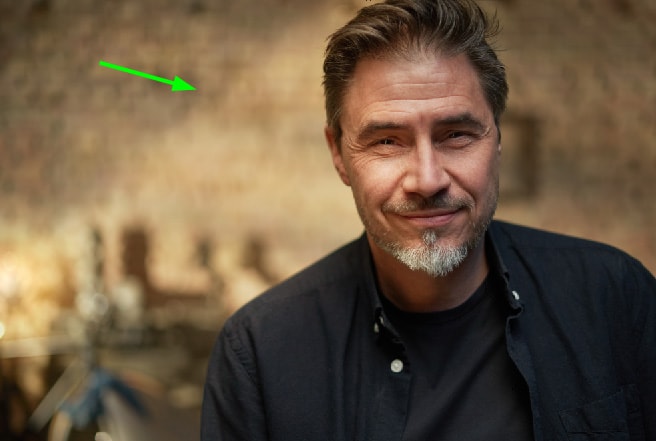
A light source has light rays coming out of it; consequently, those light rays hit objects in an image. For my photo, I created a light ray that starts in my light source and hits my subject’s face.
To create a light ray, you will first need to select the area where you want the glow added. To do this, select the Polygonal Lasso Tool from the Toolbar.

In the Options bar, set the Feather to 15 px.

To create a selection with the Polygonal Lasso tool, click any image spot, preferably at one of the image’s edges.
After that, click another spot to continue the selection.
Keep clicking to cover the area to be selected.
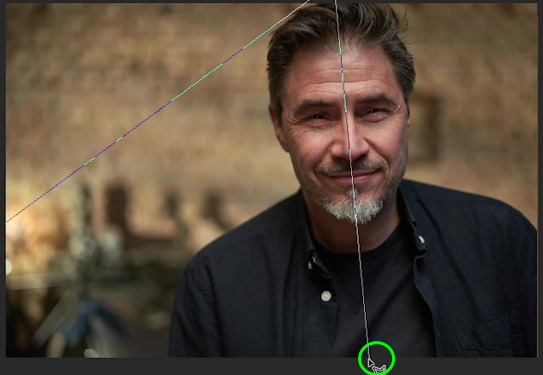
When you finish the selection, link the initial selection point to its endpoint.
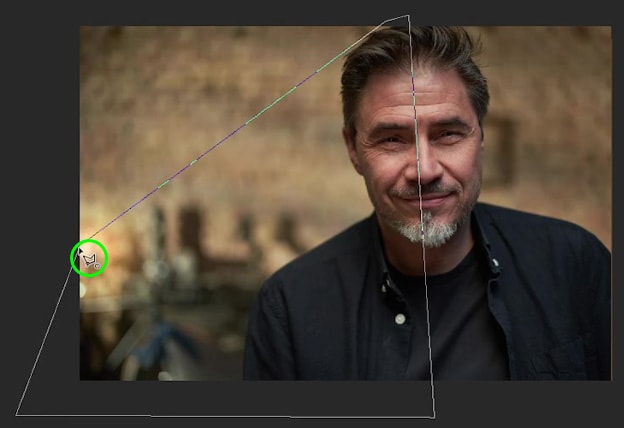
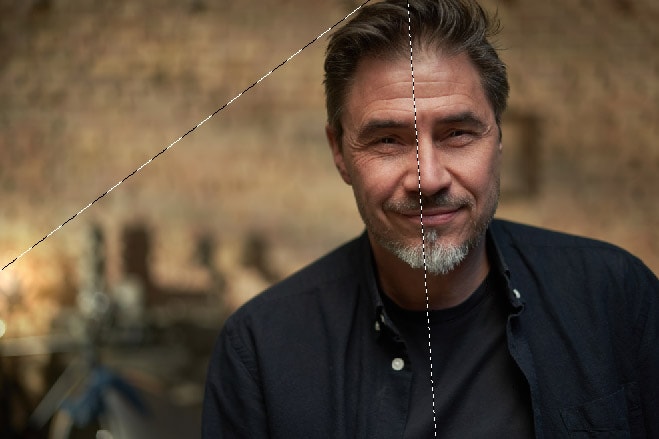
After closing your selection, marching ants will indicate the selection is active.
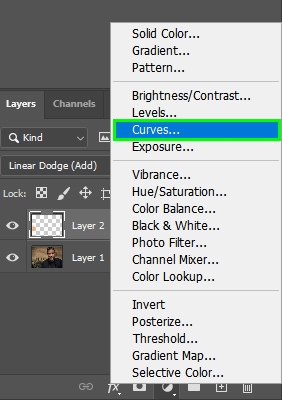
Step 4: Fill The Light Ray Selection
Now, create a Curves adjustment layer by clicking the half-moon icon in the Layers panel and choosing Curves.
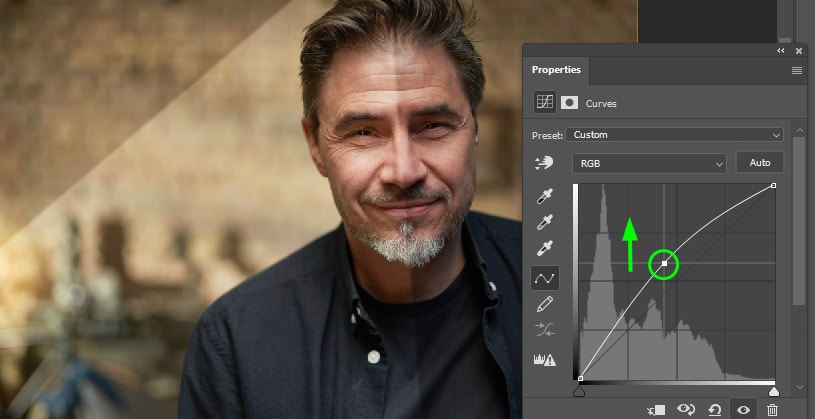
When the Curves panel pops up, drag the curve upward to brighten the selected area. Try to match the light ray brightness to the light source brightness as much as possible.
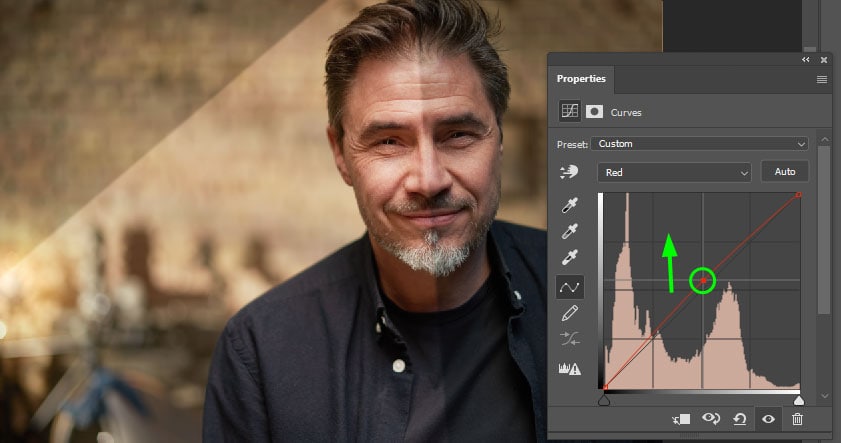
Now, it’s time to match the light ray color to the color of the light source since it’s primarily white now, and the light source has a warmer tone. Within the Properties panel, select the Red channel.
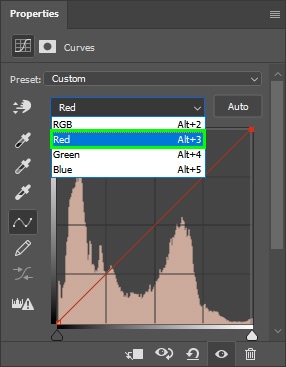
Now, drag the red curve upward until the light ray matches the light source more.
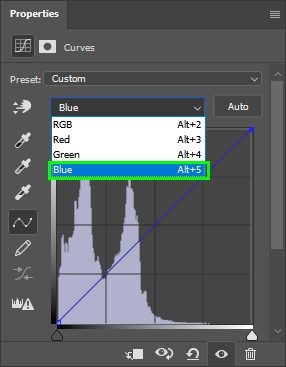
Next, select the Blue channel.
Drag the blue curve down to make the light ray more yellow. This will make the light ray match the light source better.
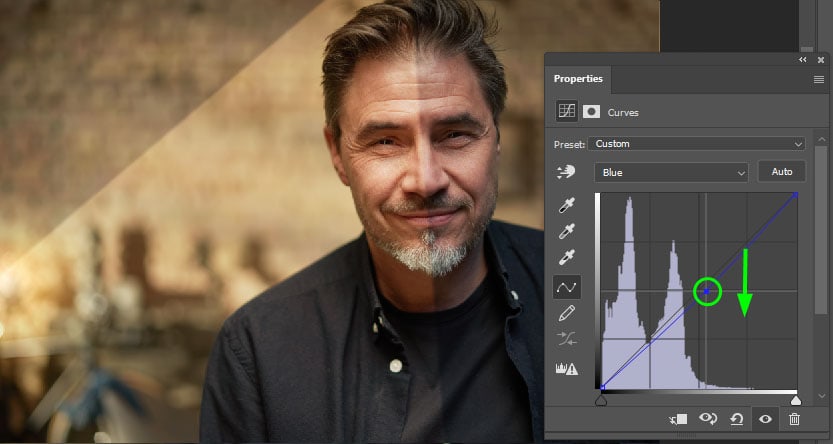
Close the Properties panel when satisfied with the light ray’s new color.
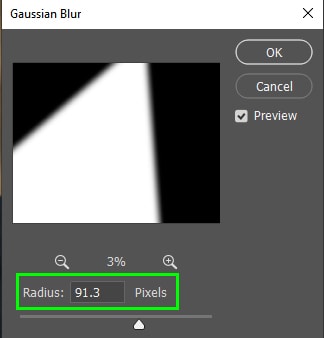
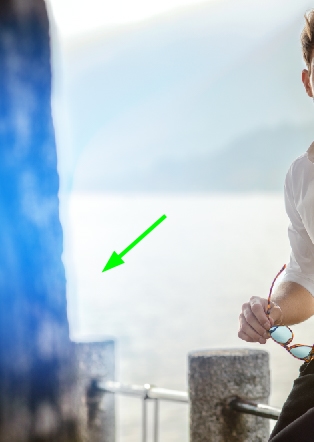
Step 5: Soften The Light Ray Edges
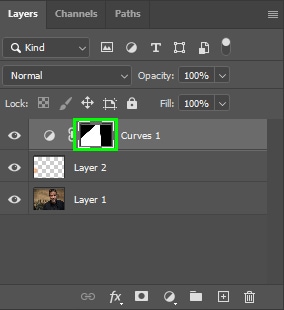
After creating your light ray, you need to blur its edges, so it blends better with the background. First, select the Curves layer mask.
Then, go to Filter > Blur > Gaussian Blur.
Now, increase the Radius until the light ray edges are blurred enough.
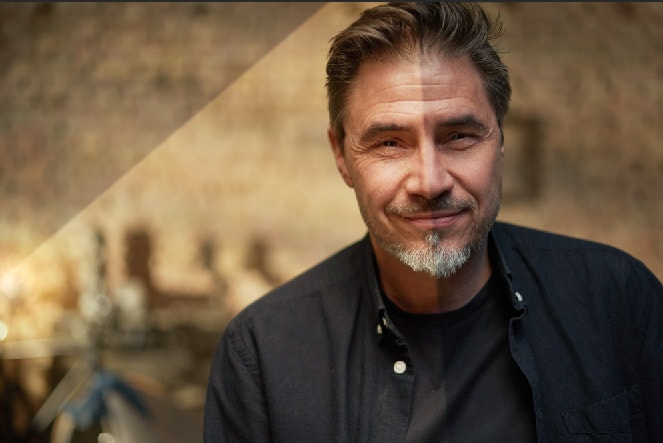
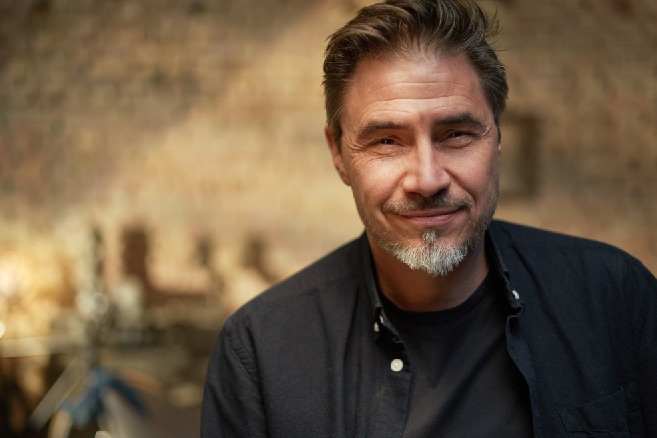
After blurring the edges of your light ray, you will still need to touch up its edges so it can blend naturally with the background. To do this, grab the Brush Tool (B).
Ensure the foreground color is set to black while the background color is set to white. If it isn’t already, press D on your keyboard.
Then, select the Curves layer mask again.
Now, paint over the areas where the light ray looks off. For example, I had to erase part of the light ray from the area on the left side of the man’s chest because it didn’t make sense in the image.

In areas where the bright spots look too harsh, lower brush Opacity in the Options bar.

Then, paint over those areas to soften them. For example, I painted over the edges of the light ray so it looked less harsh.
Option 2: Using Lighting Overlays
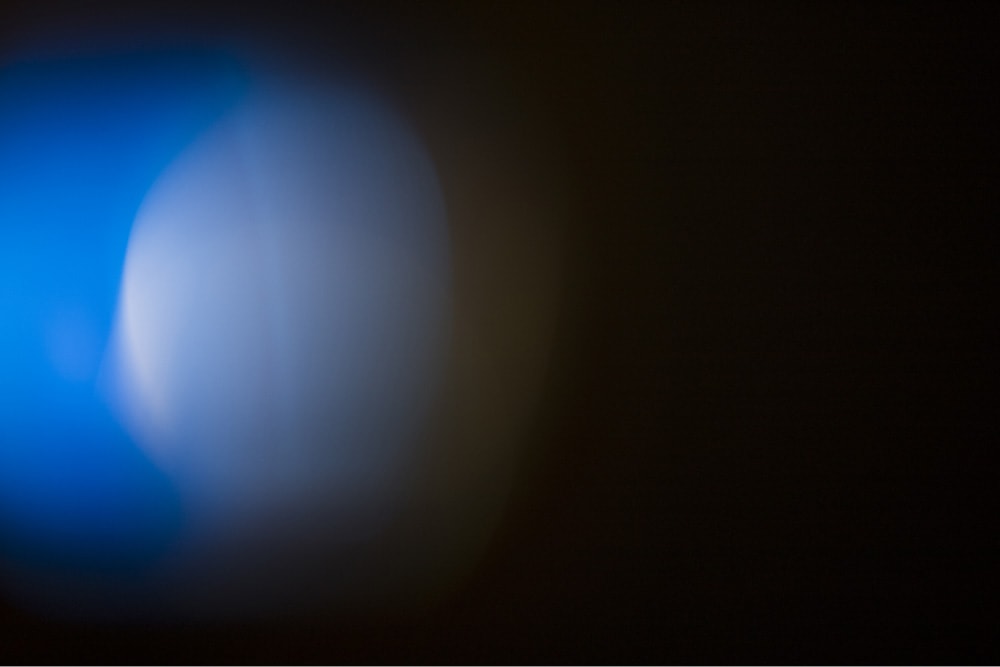
For this method, you don’t need to create a light source but blend a light source image with your original photo.

These light source images can easily be found online and should look similar to the image below: like this glow against a dark background from Freepik.
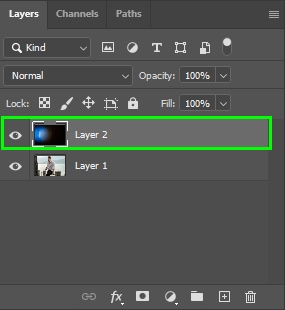
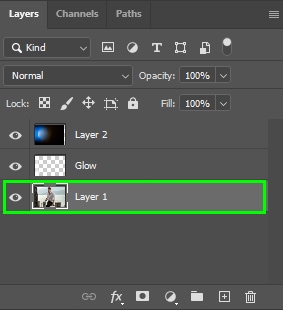
Step 1: Organize Your Layers
Put the light source layer on top of your original image layer.
Step 2: Change The Blend Mode
Next, change the blend mode from Normal to Screen.
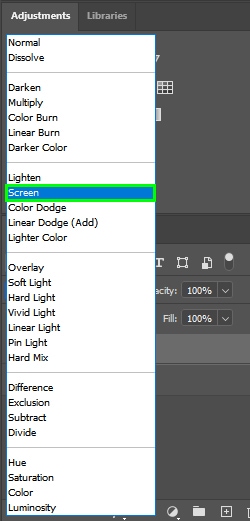
That will blend your layers so that the light source will look like it’s part of the image.
If you’re unhappy with the light source position, use the Move Tool (V) to place it anywhere you like.
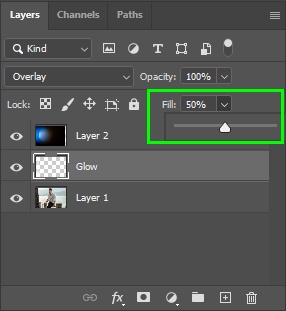
Step 3: Add A Glow To The Light Source
The light source will shine in your photo, but you can make it shine even brighter. To do this, create a new blank layer on top of your original image layer.


You can call the new layer Glow or something like that to differentiate the new layer from the others. With that new layer selected, grab the Brush Tool (B) in the Toolbar.
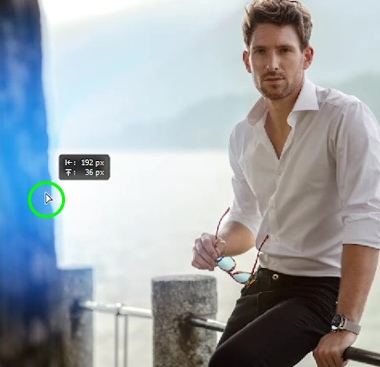
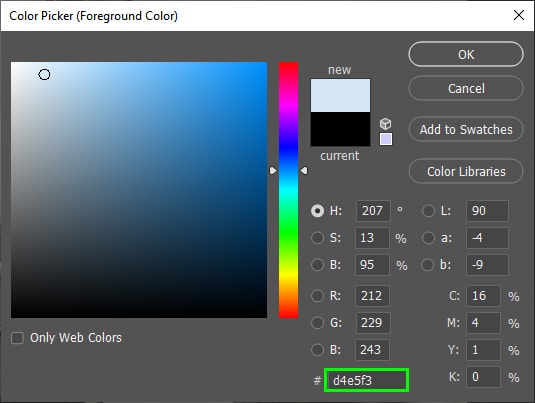
Then, double-click the foreground swatch to open the Color Picker panel and pick a color for the glow. I recommend selecting a color similar to your base color yet brighter. In my case, since my light source is blue, I chose light blue.
Now, adjust the brush Opacity to 50% in the Options bar.

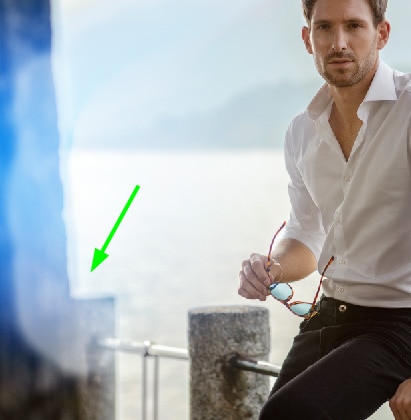
Next, paint over the areas where you want them to be brighter. In my case, I painted over the edges of the post. Don’t worry if it looks “painted”; we will fix it shortly.
Now, go to the Layers panel and change the blend mode to Overlay.
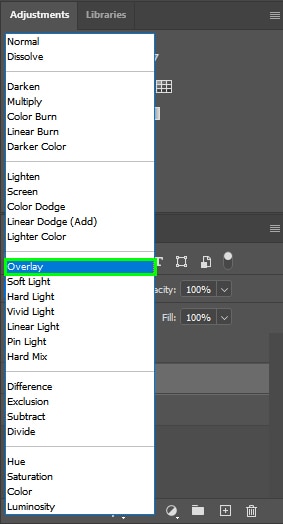
This blend mode will make the bright colors brighter and the dark shades darker. Therefore, the painted area will appear as a shiny magical glow.
If you think the effect came out too harsh, decrease the Glow layer Fill.
Step 4: Correct the Image’s Tones
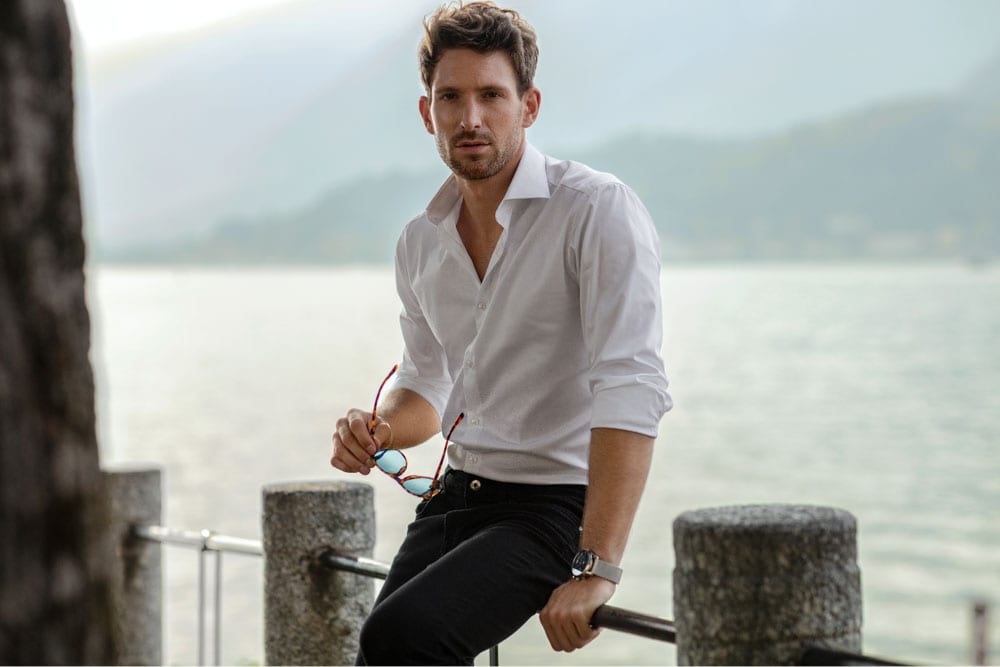
After finishing creating the glow and using overlays, you might need to adjust your image tones because its tones might not match the glow tones. For example, while the flare in my image is blue, the subject’s skin tones are very warm.
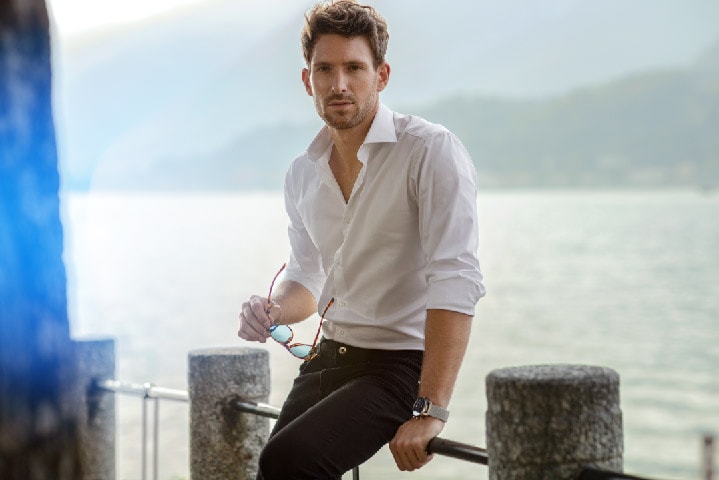
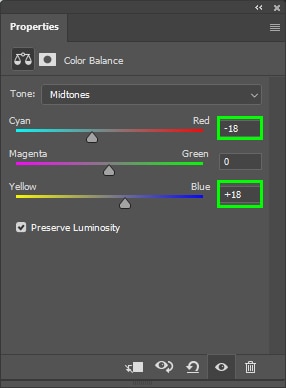
To correct that, click on your image layer and create a new Color Balance adjustment layer.

Now, balance the colors as needed. In my case, I increased my image’s Cyans and blues.
Option 3: Using Brushes To Create Light Glows
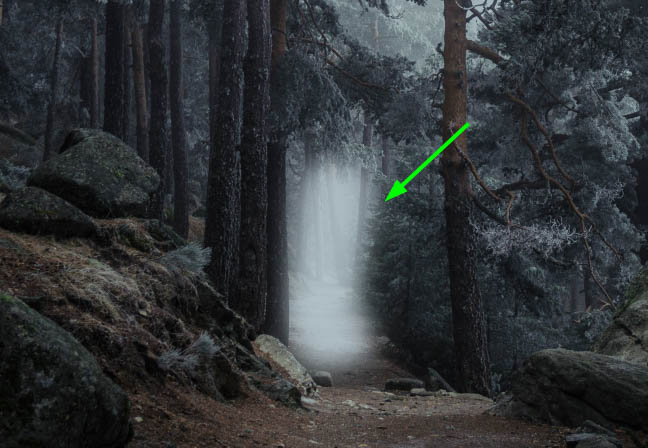
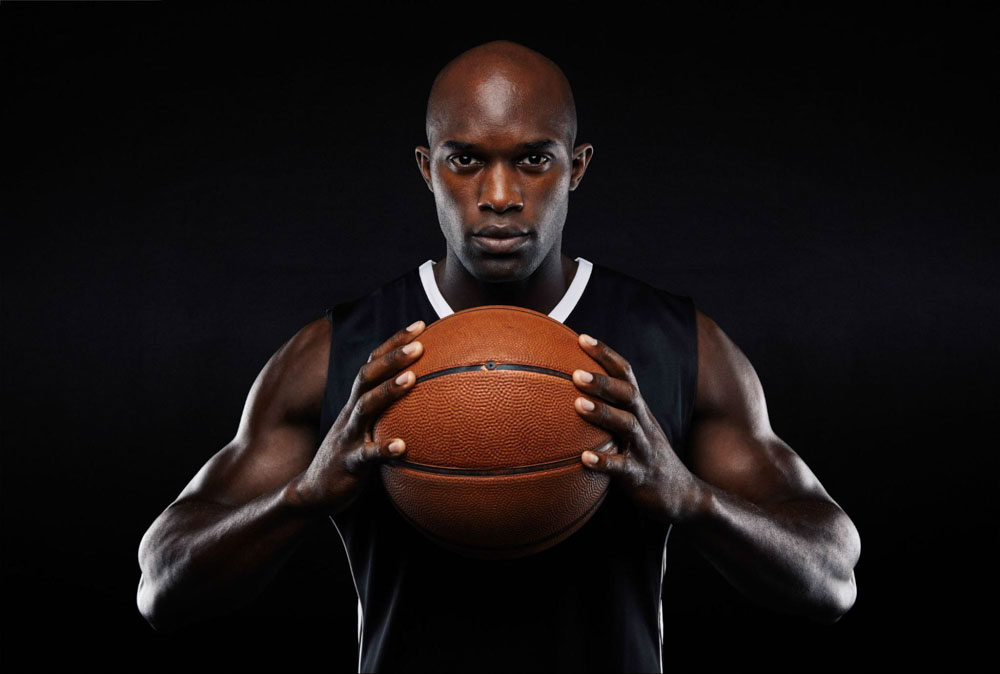
This method comes down to sampling colors from the sky in an image to create glows on objects using your brush. In addition, you can intensify the effect by duplicating the glow layer. This method works best with partially visible skies.
Step 1: Create A New Layer
First, create a new layer to place the glow effect. You can call it Base Glow.
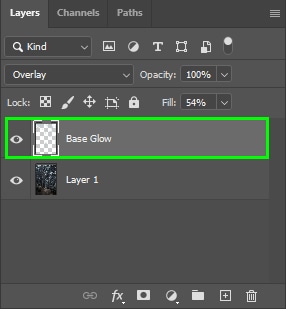
Next, select the Brush Tool (B) from the Toolbar.
Now, set brush Opacity to 50% in the Options bar.
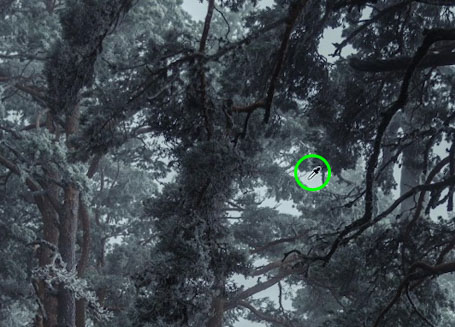
Step 2: Sample A Color From The Sky
Now, hold Alt (Win) or Option (Mac) and click a color in the sky to sample. When your cursor turns into an eyedropper tool, you can click to sample the color.
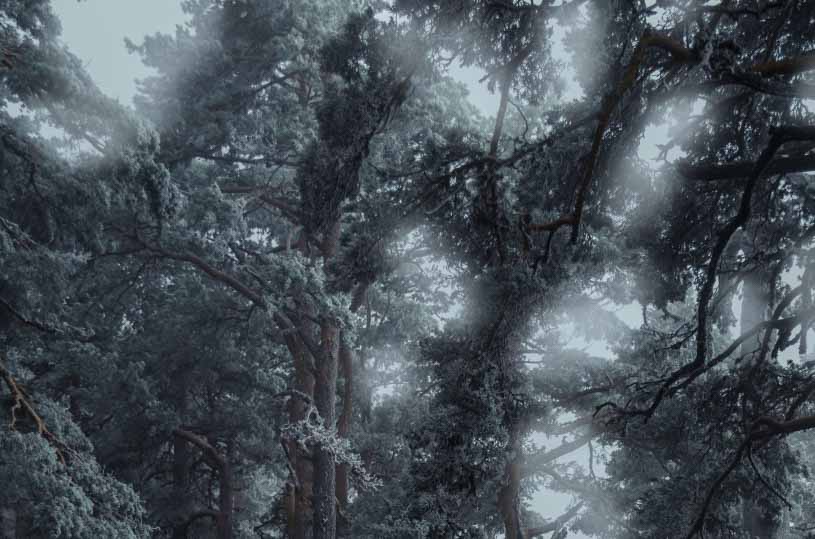
Step 3: Paint Over The Desired Areas
As we want to create a glow effect, I advise you to sample the brightest sky color possible in your image. After sampling the desired color, paint over the areas where you want to add the glow.
Keep the following things in mind while using your brush to cover the desired areas.
You will need to adjust the brush size according to the area to be painted. For example, in small areas, press the left bracket key [ to decrease brush size and for larger areas, press the right bracket key ] to increase brush size.
Paint over an area once to add a subtle effect, and paint more times where you want the effect to be more noticeable. For example, I painted the area below three times instead of the single brush stroke I applied to other areas I painted.
After covering the desired areas, go to the Layers panel and change the blend mode to Overlay.
Step 4: Soften The Glow Effect
You can make the effect less intense by bringing the Fill down a little.
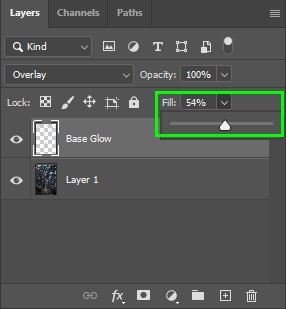
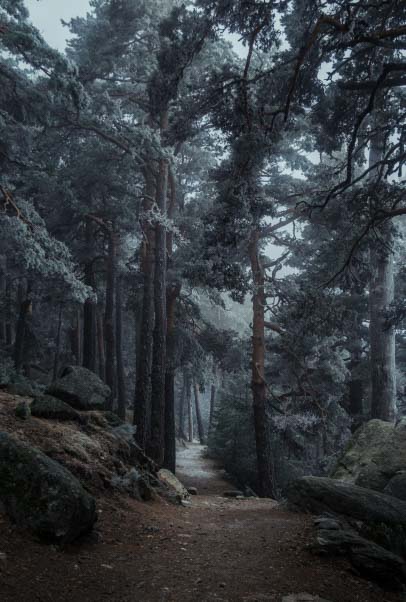
After following the above steps, your image will gain a subtle glow effect.
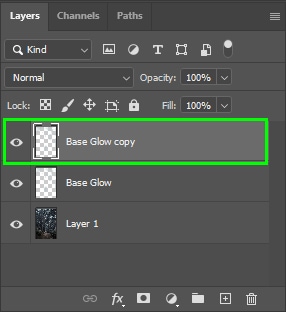
Step 5: Duplicate The Glow Layer
To make the effect more intense, duplicate the Base Glow Layer by selecting it and hitting Control + J (Win) or Command + J (Mac).

Step 6: Change The New Layer Blend Mode
With the new layer selected, change the blend mode to Soft Light.
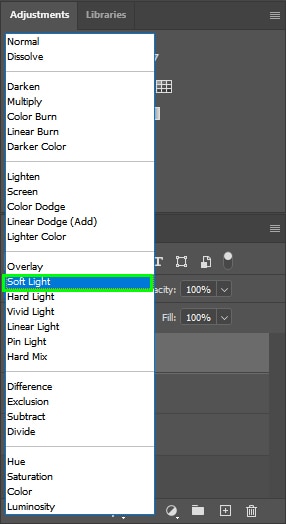
Step 7: Refine The Glow
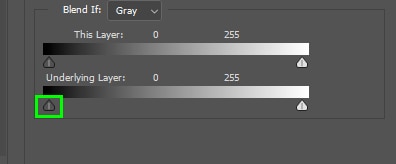
You can make the glow effect look nicer by making the glow brighter and reducing the effect in dark areas. To do this, double-click the layer copy to bring up the Layer Style dialog.
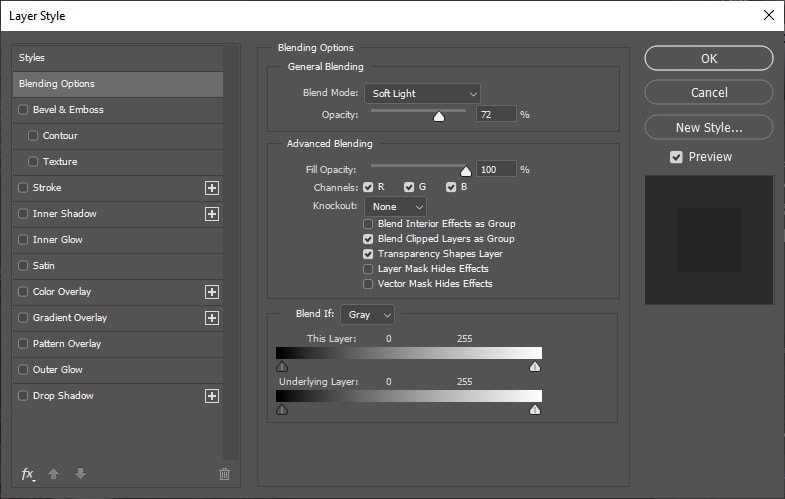
Now, hold Alt (Win) or Option (Mac) and click the left arrow from the Underlying Layer. That will split the arrow in two.

Then, drag half the arrow to the right.

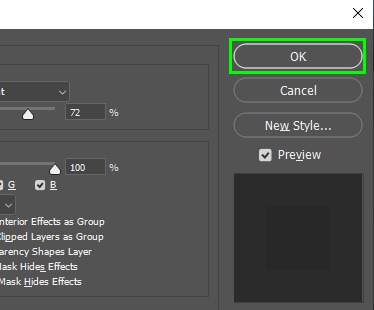
Click OK to close the dialog box after that.
Option 4: Using Gradients For Colored Lighting Effects
This method is ideal for creating lighting effects with different color combinations for modern creative purposes. It uses foreground to transparent gradients, and it’s pretty easy to apply with a few clicks.
For this example, I will create two gradients and apply them to my image’s left and right sides.
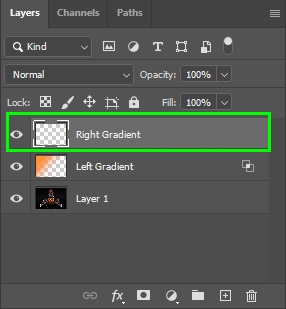
Step 1: Create A New Layer
First, create a new layer in the Layers panel to place the first gradient.
Step 2: Pick A Color For The First Gradient
Now, choose a color for the first gradient in the color panel on the right side of the Photoshop workspace. In my case, I chose an orange color.
Step 3: Create The First Gradient
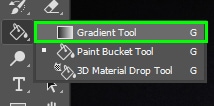
Now, select the Gradient Tool (G) from the Toolbar.
Ensure the gradient is set to Foreground To Transparent by clicking on the gradient editor icon in the Options bar, then choosing a foreground to transparent gradient in the editor. If the gradient color isn’t the one you chose earlier, you can change the gradient color to the one you want.

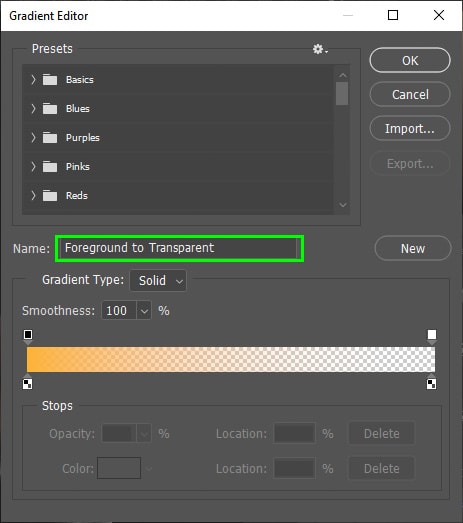
Set the gradient orientation to Linear.

And set Opacity to 100%.

Now, click the point where you want the gradient to start and drag it toward the spot where you want the gradient to fade. In my case, I placed the initial point at the edge of the image and the other on my subject’s arm.
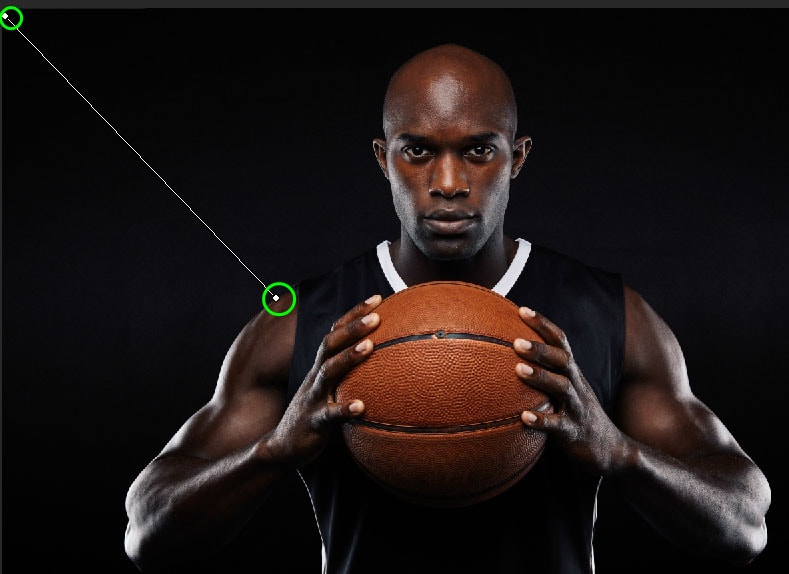
If you don’t get it right on the first try, keep pushing the gradient until it has covered the desired area.
You can repeat the process at different angles for better results.
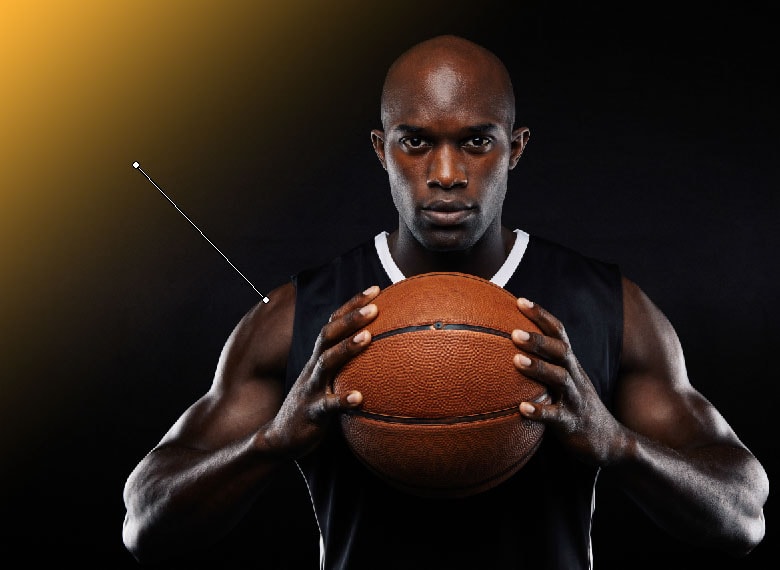
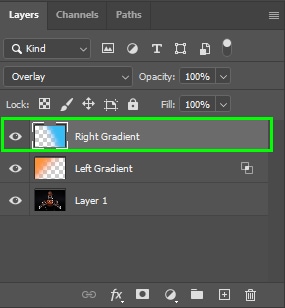
Step 4: Change The Gradient Layer Blend Mode
Now, go to the Layers panel and change the blend mode to Overlay to make the color blend better with your subject.
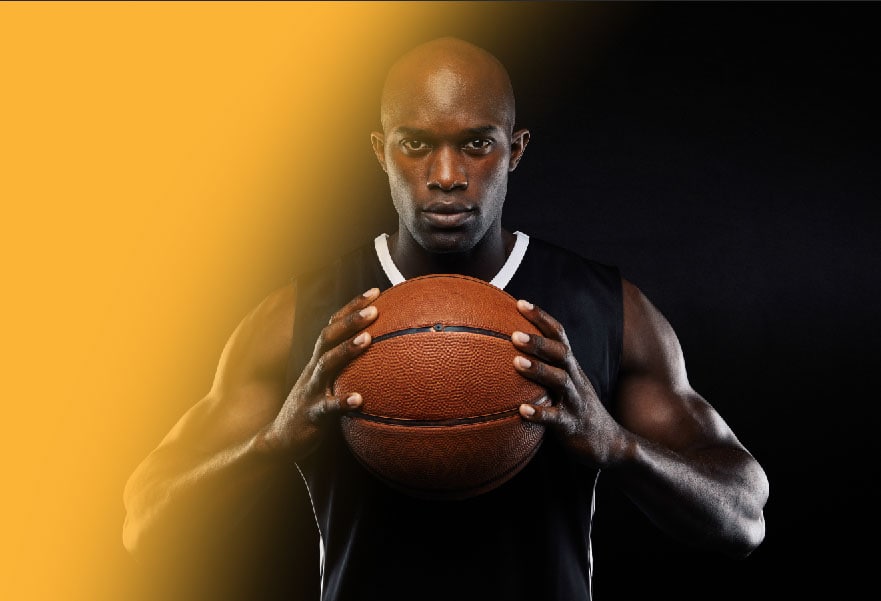
Step 5: Create A New Layer For The Second Gradient
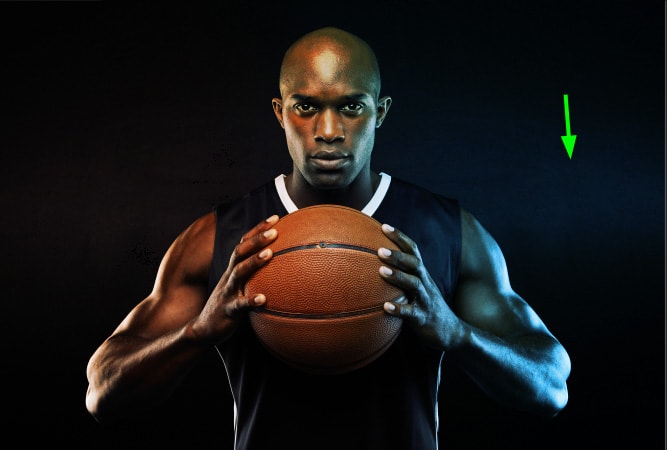
Now, we will repeat the process for the right side of the image. To do this, create a new blank layer to place the second gradient.
Step 6: Pick A Color For The Second Gradient
Next, pick a new color from the Color panel.

Step 7: Create The Second Gradient
Now, grab the Gradient Tool (G) again.
And click and drag on the image to create the gradient, as demonstrated in the previous step.

Step 8: Remove Color Stains From The Background
After changing the new gradient layer’s blend mode as you did for the first gradient, you may notice colored stains in the background, as happened to my image.
If that happens, you can easily remove the stains by double-clicking the gradient layer.
That will bring up the Layer Style dialog.
Then, click the underlying layer arrow.
And hold Alt (Win) or Option (Mac) to split the arrow. Next, drag the arrow to the right until the blue stains disappear from the background. This will remove the color from the background, so it only applies to the subject. Unfortunately, this method only works with solid-colored dark backgrounds. With other images, you may need to create a selection of your subject instead of using blend if.
With these four different lighting effects in Photoshop, you can add a creative flare to your images or make your digital art look more realistic. As with anything in Photoshop, these techniques take some practice to get just right. But eventually, you’ll have all of them in your toolkit to call upon when you need to level up the lighting in your images!


