

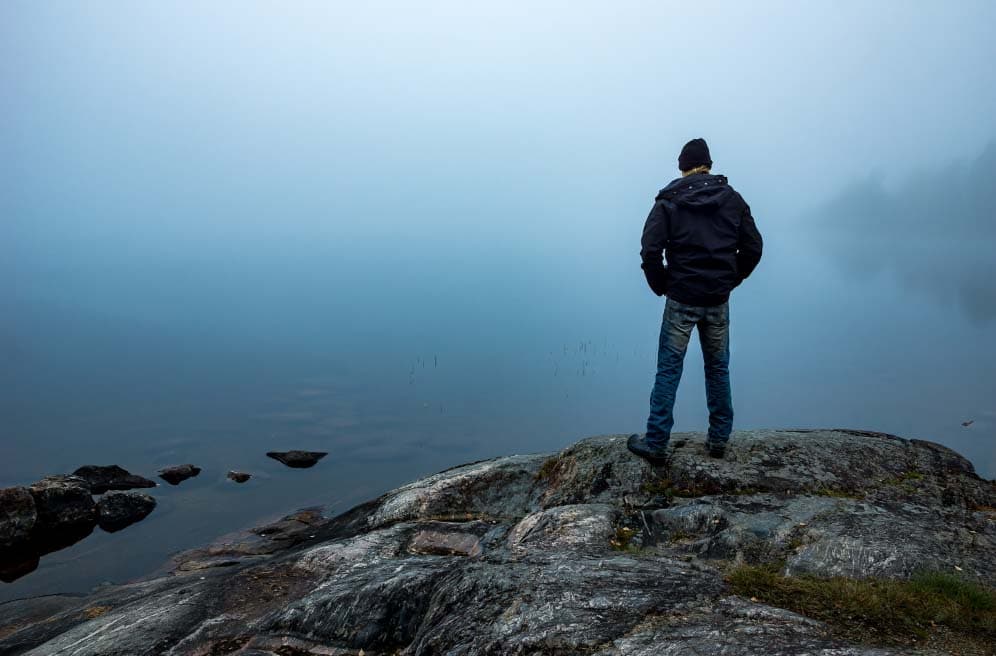
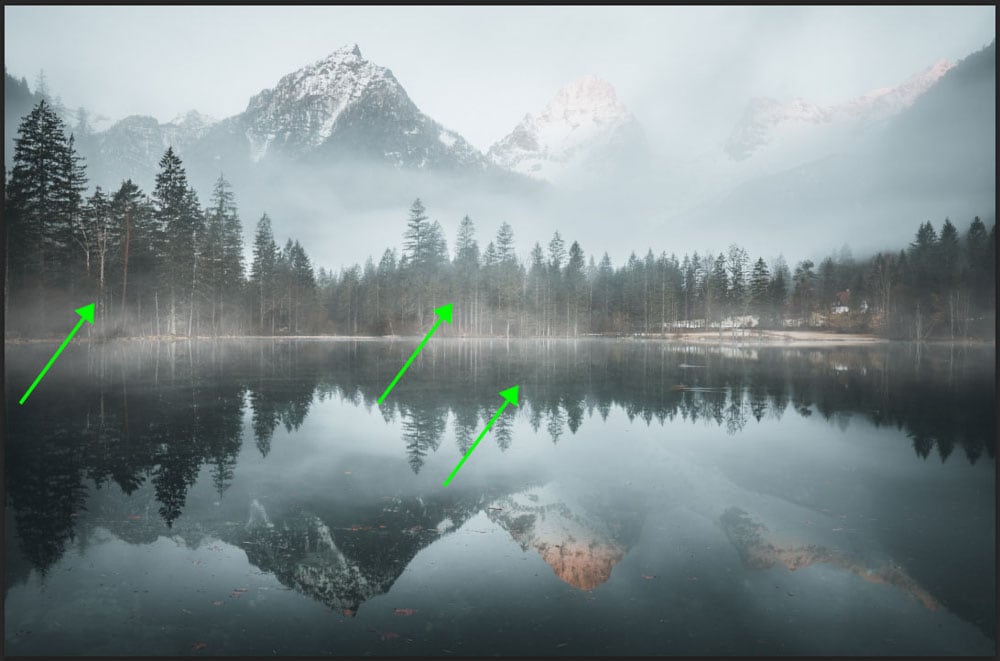
Fog is a moody element that adds character and emotion to images and is perfect for landscape scenes. Learning how to add fog in Photoshop is easy, although it requires a few steps as well as some patience to make it look real.
You can either add fog to an entire image with a few quick adjustments, or you can spend a bit more time and add fog to specific areas for a more natural look, such as the horizon line. Let’s start with a general fog effect that covers the entire image.
Video Tutorial
Option 1: How To Add Fog In Photoshop Using The Clouds Filter
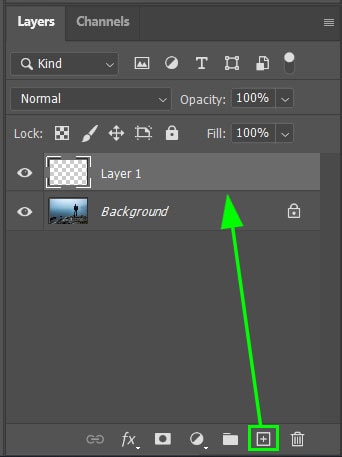
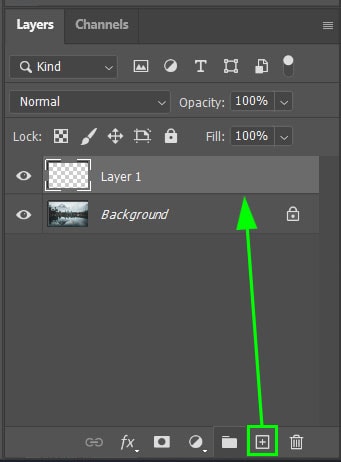
Step 1: Add A New Blank Layer Above Your Image
Once the image is open, create a new layer by clicking the New Layer icon at the bottom of the Layers Panel.
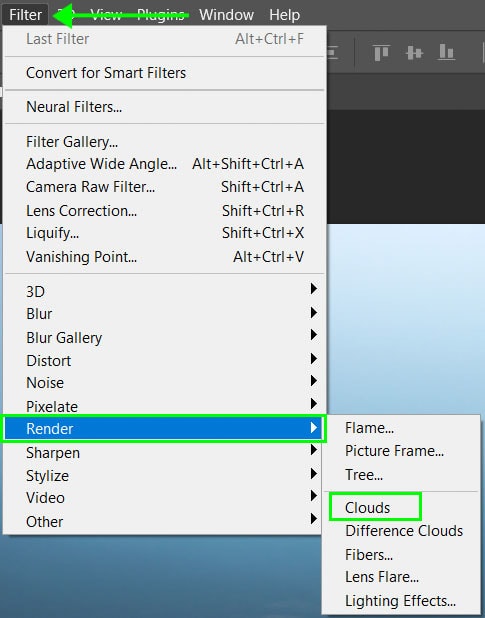
Step 2: Set The Foreground Color To White & Go To Filter > Render > Clouds
Then, make sure that the foreground color is set to white. With the new layer selected, go to Filter > Render > Clouds to add a cloud effect to the image.
When the cloud filter has been added, your image will be covered in black-and-white smudges to create a cloud-like effect.
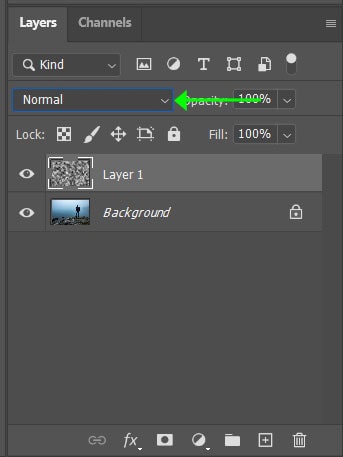
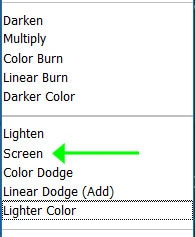
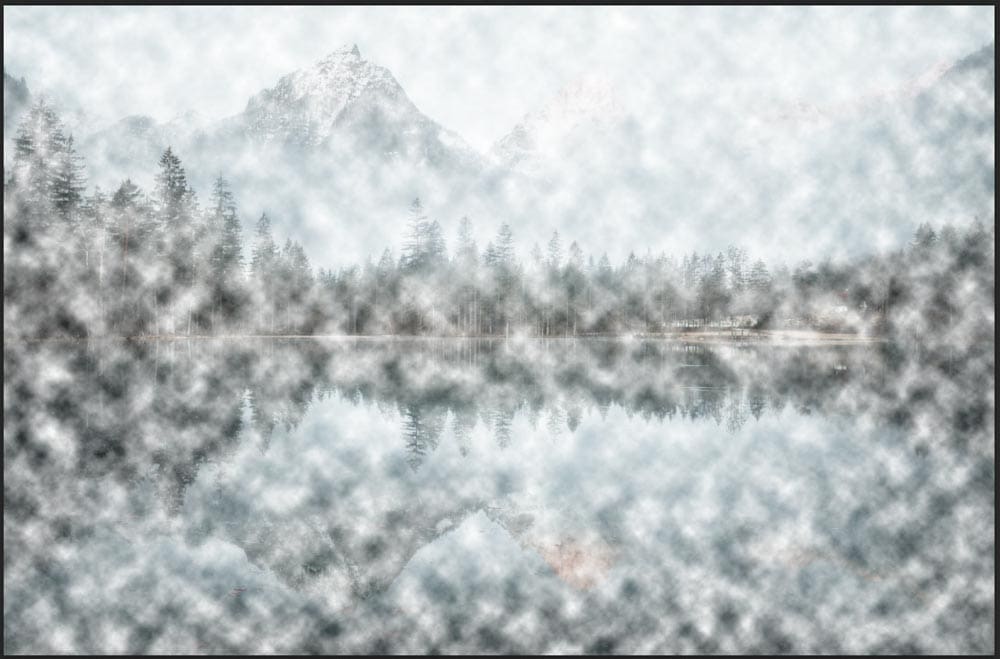
Step 3: Change The Filter Layer’s Blending Mode To Screen
The cloud effect now needs to be blended into the image to remove the black areas and leave the white areas that will create the fog effect. To do this, change the blend mode of the cloud layer to Screen using the drop-down menu at the top of the Layers Panel.
Once the blend mode is added, the image will look cloudy, and you will be able to see the image in the background.
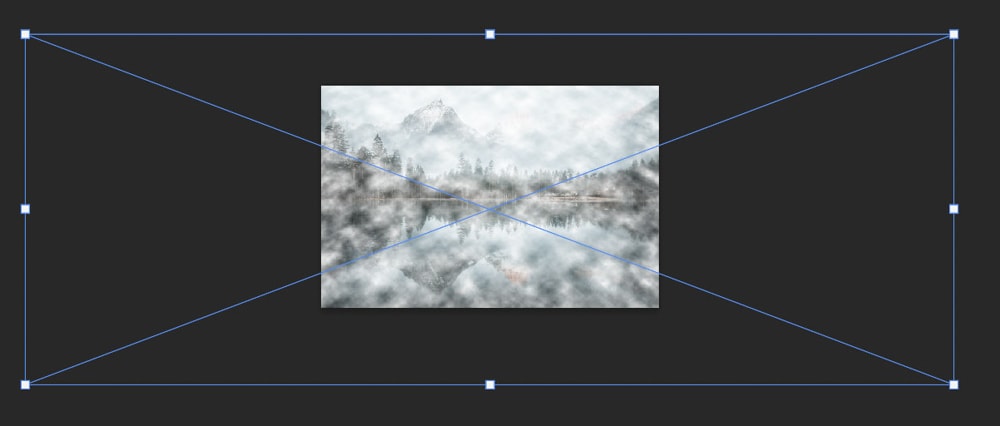
Step 4: Increase The Size Of The Cloud Filter Using The Transform Tool
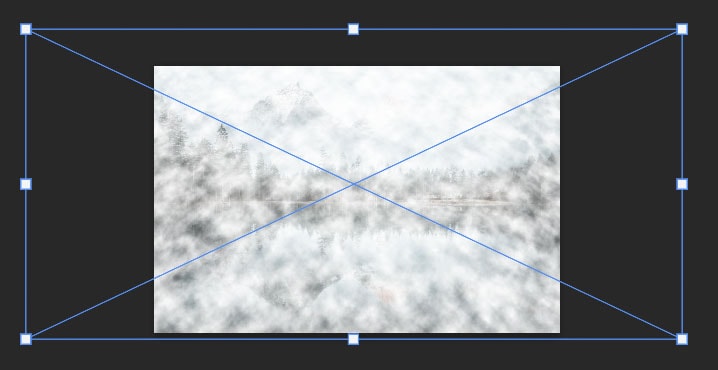
First, right-click (Win) or Command + click (Mac) on the cloud layer and select Convert to Smart Object. Then, scale up the cloud layer with the Transform Tool by pressing control + T (Win) or Command + T (Mac). Next, use the anchor points to drag the layer outwards.
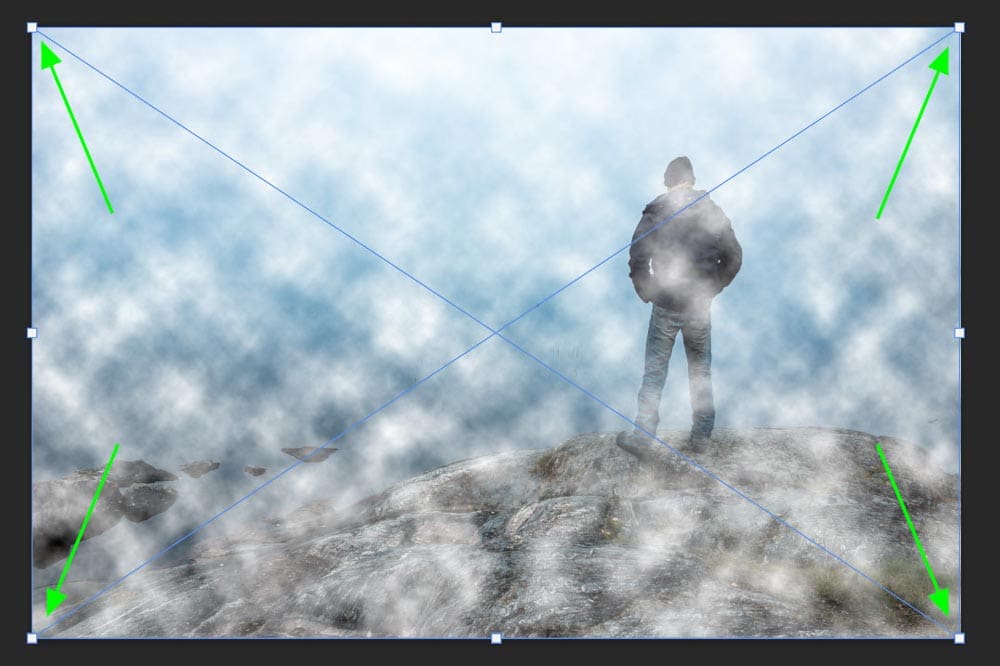
This layer will extend beyond the canvas, which means that the entire layer won’t be visible anymore, but the clouds will be larger in the image. Press the checkmark in the Options Bar when you are happy with the new size of the layer.
Step 5: Press Control/Command + J To Duplicate The Layer
Now, because we are after a fog effect and not clouds, we need to add more clouds to the image. To do this, duplicate the first cloud layer by pressing Control + J (Win) or Command + J (Mac).
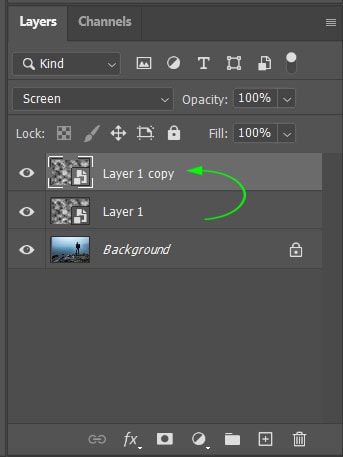
Then, rename your two cloud layers so as not to get confused by the layers. Double-click on the layer name and type your new name to rename the layers.
Step 6: Resize The Duplicated Cloud Layer
The new cloud layer, which I have renamed “Small Clouds,” needs to be resized to create a dynamic cloud effect. With the Small Cloud layer selected, press Control + T (Win) or Command + T (Mac) to access the Free Transform Tool. Then, resize the layer to be smaller than the Large Cloud layer. Press Enter when you have correctly resized the layer.
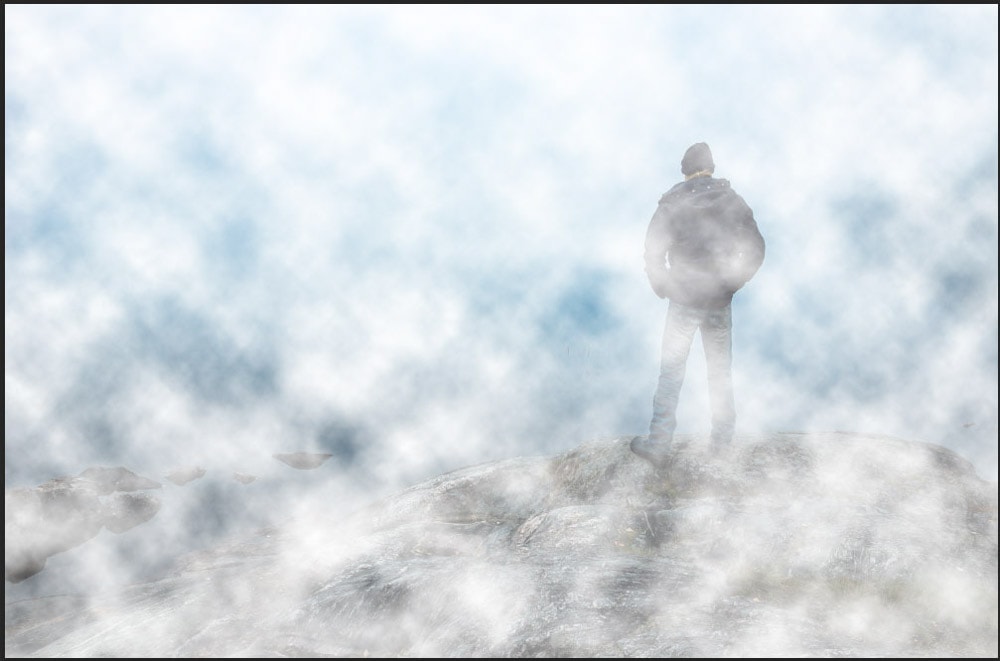
The image will be covered with clouds, and the subject won’t be very visible at this stage.
Step 7: Decrease The Opacity Of The Cloud Layers
To lessen the fog effect, we need to decrease the opacity of the cloud layers. To do this, first, select the Small Cloud layer and reduce the Opacity using the slider at the top of the Layers Panel. Then, select the Large Clouds layer and repeat the step above to reduce the Opacity on this layer.

If you want to adjust the look of the clouds over the image, you can move the cloud layers around. Do this by selecting the layer, then selecting the Move Tool (V), and clicking and dragging over the image to move the layer.
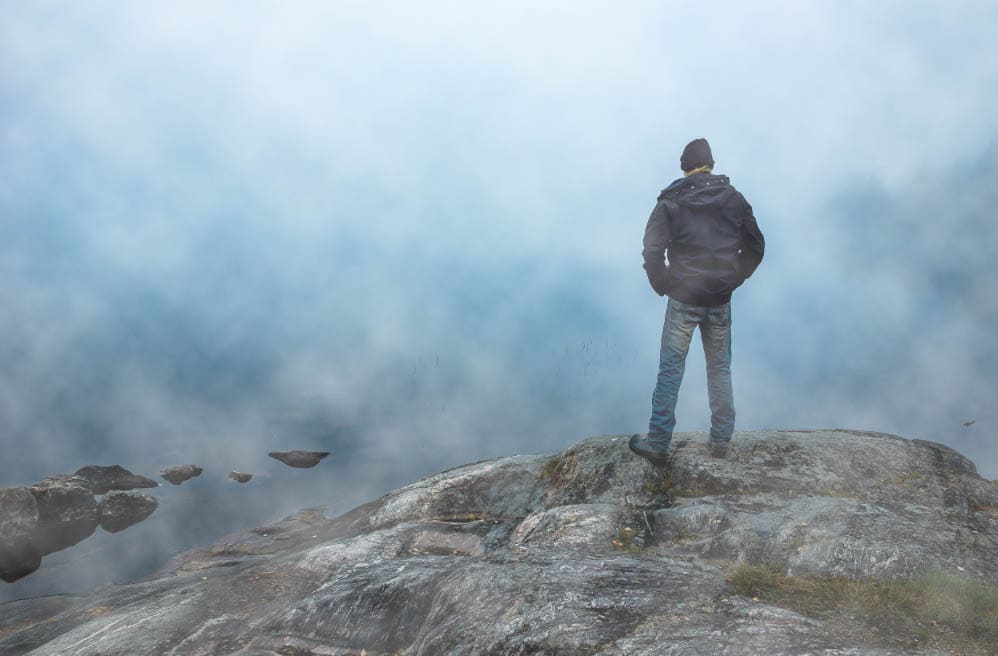
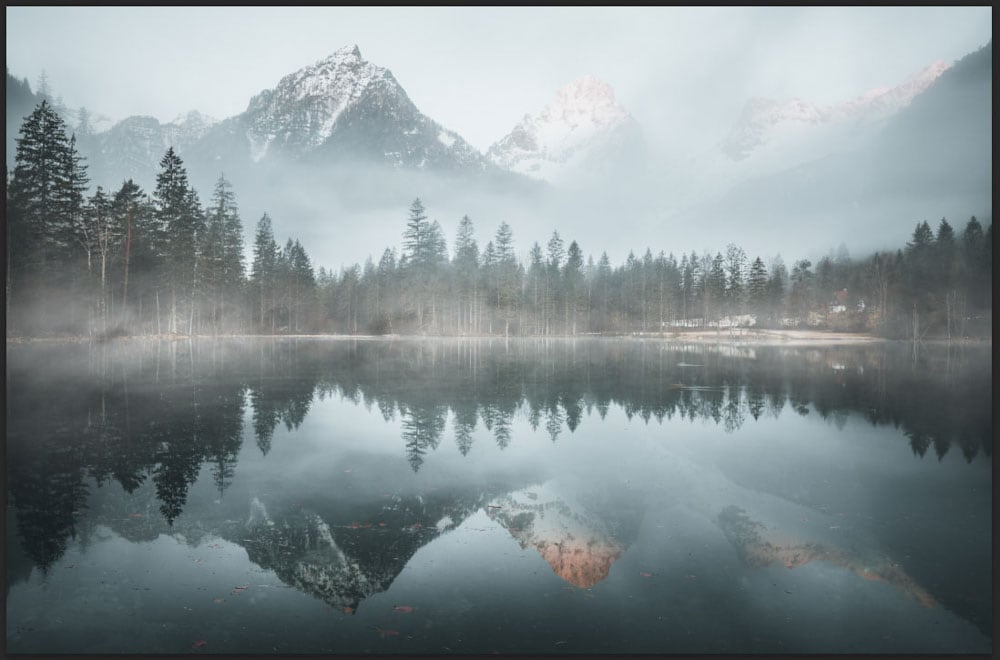
Once you have the cloud layers in the correct position and at the right opacity, your image will now have the desired fog effect added to it.
Option 2: How To Add Fog In Photoshop Using The Warp Tool
Step 1: Add A Blank Layer Above The Image Layer
Once the image is open, create a new layer by clicking the New Layer icon in the Layers Panel. Then, make sure that the foreground color is set to white.
Step 2: Go To Filter > Render > Clouds And Set The Blend Mode To Screen
Next, as in the first method, add the cloud effect by going to Filter > Render > Clouds. Blend the new layer into the image by changing the blend mode to Screen in the drop-down menu at the top of the Layers Panel.
The image will be slightly visible now but still covered in white clouds.
Step 3: Change The Perspective Of The Clouds Using Perspective Transform
To change the perspective of the layer, access the Free Transform Tool by clicking Control + T (Win) or Command + T (Mac). Then right-click (Win) or Command + click (Mac) and select Perspective.
Then, drag one of the bottom anchors outward and notice how the layer tilts at an angle. Press Enter when you are happy with the angle of the layer.

Step 4: Increase The Size Of The Clouds Using The Transform Tool
Before scaling the layer, we need to convert it to a Smart Object to retain the quality of the layer. To do this, right-click (Win) or Command + click (Mac) on the layer and select Convert to Smart Object.
Next, scale the layer up by pressing Control + T (Win) or Command + T (Mac) and using any of the anchor points to increase the size of the layer. When scaling the layer, be mindful that the angled layer may not cover parts of the image. Click and drag the layer to make sure that the cloud effect covers the entire image.
Press Enter when you have increased the size enough.
Step 5: Duplicate The Filter Layer And Resize
Next, duplicate the layer by pressing Control + J (Win) or Command + J (Mac). Then, re-size the new layer to create slightly smaller clouds by pressing Control + T (Win) or Command + T (Mac) before using the anchor points to decrease the size of the layer.
Step 6: Duplicate The Cloud Layer Again And Stretch It
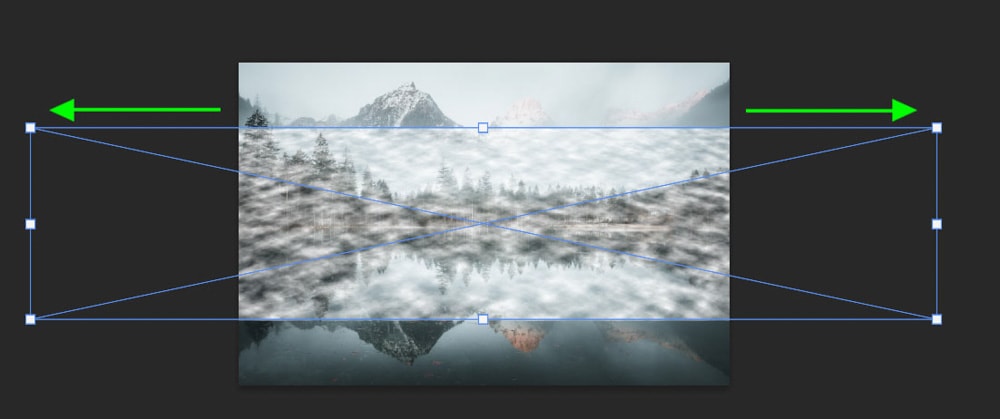
Then, once again, duplicate the new layer you just created and resize it once more. When resizing this layer, you want to make it small enough to just cover the horizon. You can stretch the layer outwards by holding in Alt (Win) or Option (Mac) and dragging out the side anchor to make sure the layer covers the entire horizon across the image.
You can hide the other two cloud layers to make sure you are covering the horizon with this new layer.
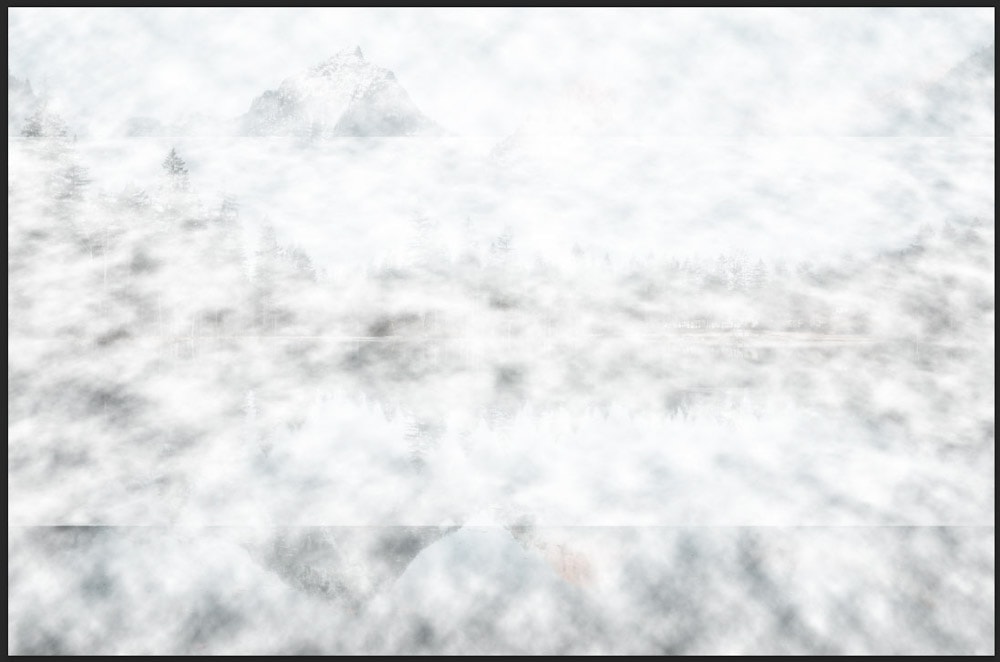
Hit Enter and switch the layer visibility back on for the other two layers. Your image should now be full of dense-looking clouds of various sizes.
Neaten up your Layers Panel by renaming each layer. This allows you to easily go back and edit layers as needed.
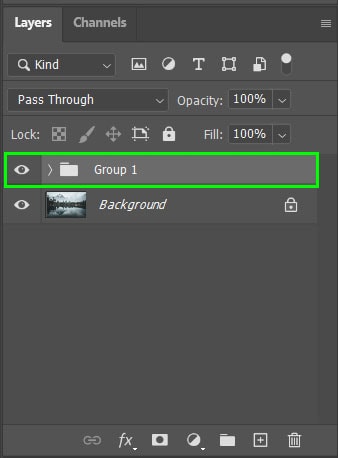
Step 7: Group The Fog Layers By Selecting And Pressing Control/Command + G
Next, group your layers by selecting the three fog layers. To do this, hold in Shift and select the first and last fog layer. This will select all the fog layers. Then press Control + G (Win) or Command + G (Mac) to group the layers. You will now have a new layer group in the Layers Panel.
Step 8: Add An Inverted Layer Mask To The Grouped Layers
Now, add a Layer Mask to the Grouped layers by selecting the Layer Mask icon at the bottom of the Layers Panel.
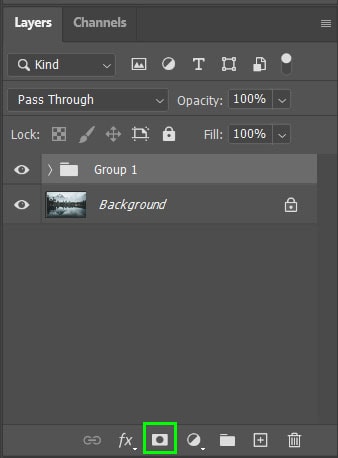
Then press Control + I (Win) or Command + I (Mac) to invert the layer mask. The layer mask will turn black in the Layers Panel, and you will see your image clearly.
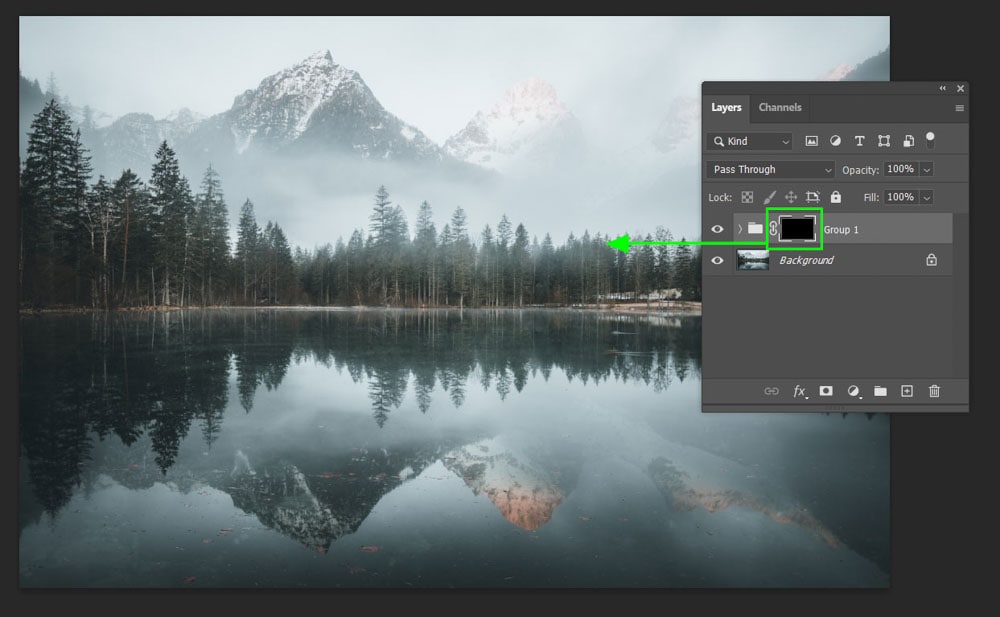
Step 9: Paint The Fog Back Into The Image
Now, you can use the Brush Tool to carefully paint the fog over the horizon line. To do this, select the Brush Tool (B), make sure your foreground color is set to white, and change the brush size using [ to decrease the size and ] to increase the size.
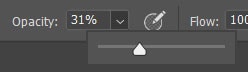
When using the brush, you don’t want to paint all of the fog back in but a faded version of the fog you created. You do this by lowering the opacity of the brush tool in the Options Bar.
When brushing the fog onto the horizon line, start by drawing a line across the horizon. Then, decrease the brush size slightly and add more fog to some areas where you want the fog to look denser.

Next, increase the brush size and lower the opacity before adding slight bits of fog in the trees and over the water.
Continue brushing fog over the areas you want to add the fog, adjusting the opacity based on how dense you want the fog to be in certain areas. You should be focusing on the placement of the fog here more than the intensity.
Step 10: Adjust The Opacity Of The Fog Layers
Once you are happy with the fog placement, open the layer group and adjust each fog layer’s opacity to reduce the intensity of the fog to create a natural look.

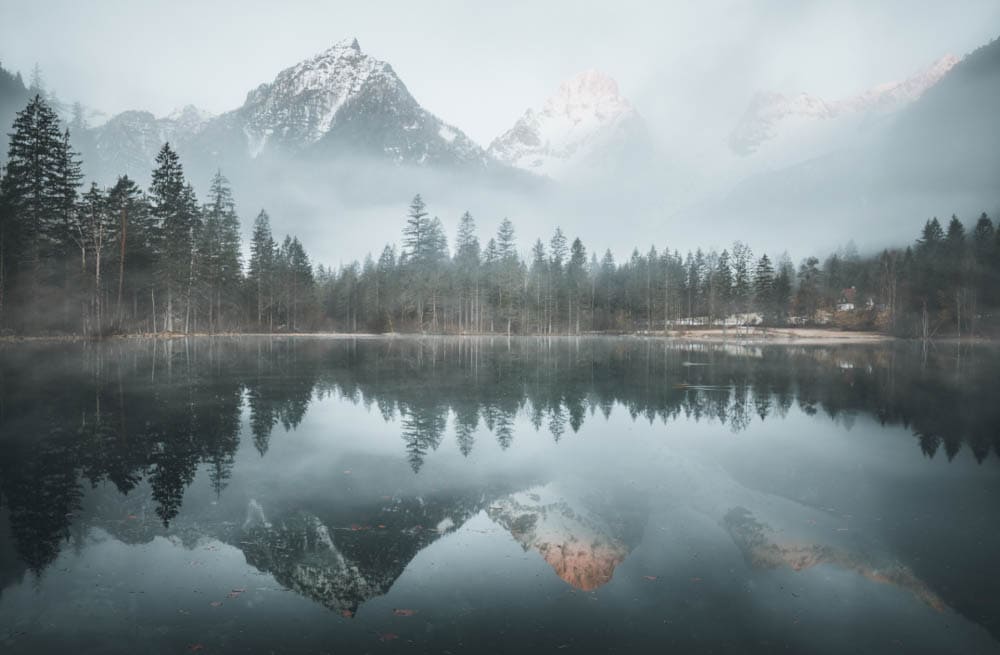
After adding in as much or as little fog as you would like, you should now have an image with natural-looking fog added to it. The fog may be quite subtle, but it adds depth and character to the image.
Note: It is usually better to add subtle fog to an image as this looks more realistic than adding lots of fog unless that is the effect you are after.
Happy editing!


