fbpx

How To Unmerge Layers In Photoshop

Last Updated:

Can You Unmerge Layers In Photoshop?

So you’ve run into a bit of a snag, and you can’t figure out how to unmerge layers in Photoshop. Whether you merged or flattened your layers, the result is going to be the same. Multiple layers now have become one, and there’s no way to edit them individually. Fortunately, there are a few simple ways you can unmerge layers in Photoshop using some easy commands to get all your layers back.

How To Unmerge Layers In Photoshop

The problem with merging or flattening layers is that it’s completely permanent. Yes, you can ‘undo’ the changes, but once a layer is merged, you’re committed. This form of editing is known as ‘destructive photo editing’ since you’re making a permanent change to your layers.

The only way to unmerge layers is to step back in your history. Depending on how far along you are, this could be extremely annoying since it may undo adjustments you wanted to keep.

Depending on how far back you need to undo, the method you should use will change. Here are the different options you have to unmerge layers in Photoshop.

1. Use The Undo Command

If you’ve recently merged or flattened your layers, you can simply use the undo command to step backward.

Just press Command + Z (Mac) or Control + Z (PC) to undo changes.

Alternatively, you can go up to Edit > Undo.

Using the keyboard shortcut is ideal for undoing several times quickly.
2. Use The History Panel

The history panel keeps track of all of the adjustments made throughout a project. By default, the history panel will display 50 different history states. This means you can step backward through 50 different adjustments as necessary. Assuming you merged your layers within this range, you’ll be able to unmerge them in one click.

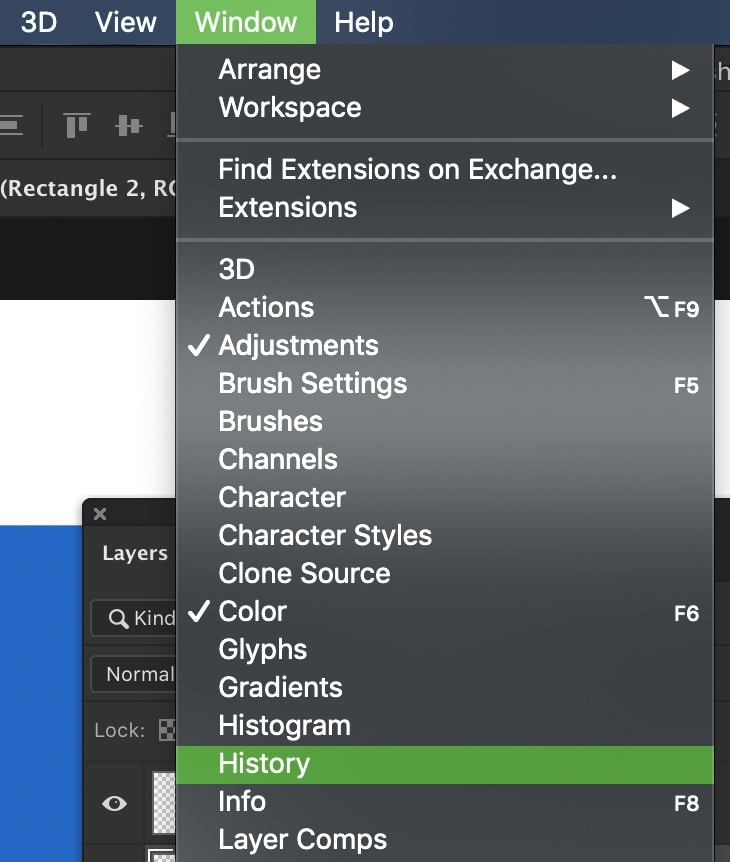
Open your history panel or locate it by going to Window > History.
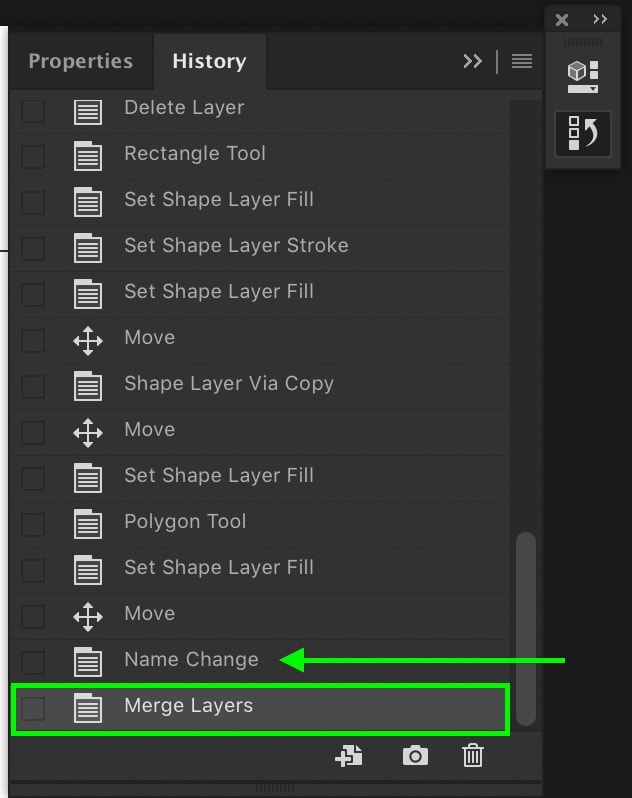
Inside the history panel will be a list of recent adjustments. Scroll through until you see the merge layer adjustment.

Unmerge-layers-in-photoshop-tutorial-4

Click on the history state before the merge layers to step back before the merge. This will undo all your previous adjustments and step back to the point before you merged or flattened the layers.
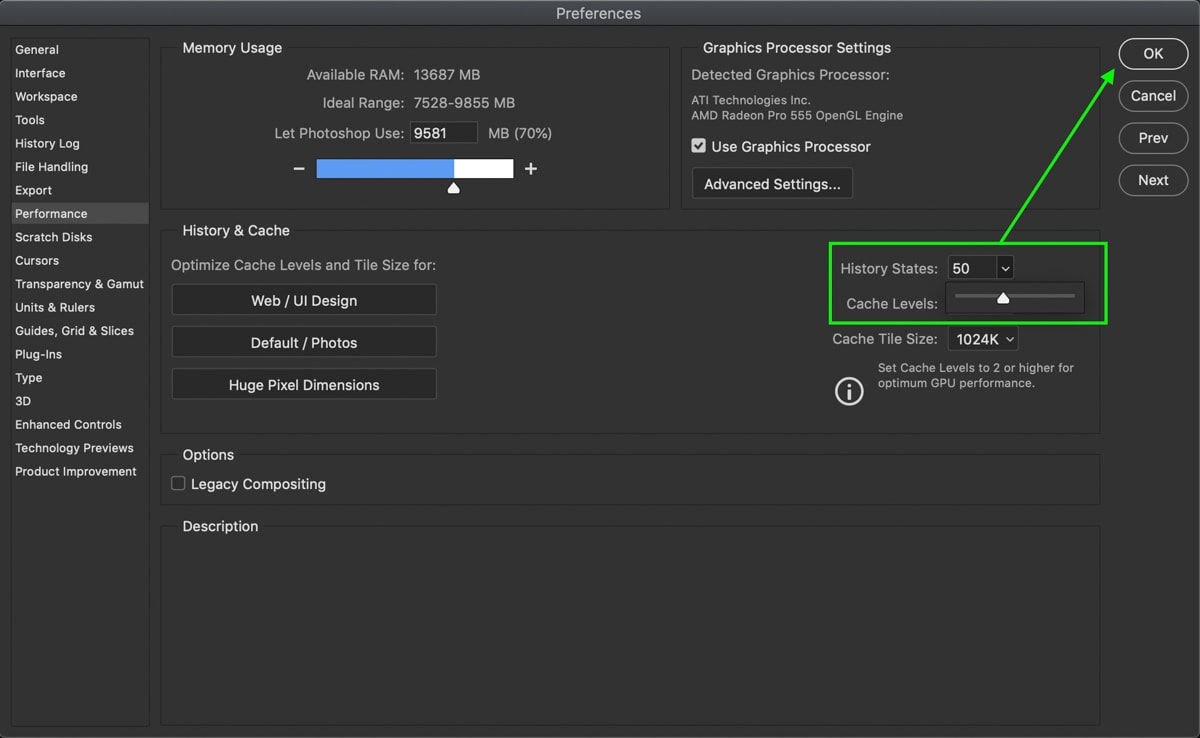
If 50 history states doesn’t feel like enough for you, you can increase the amount as necessary.

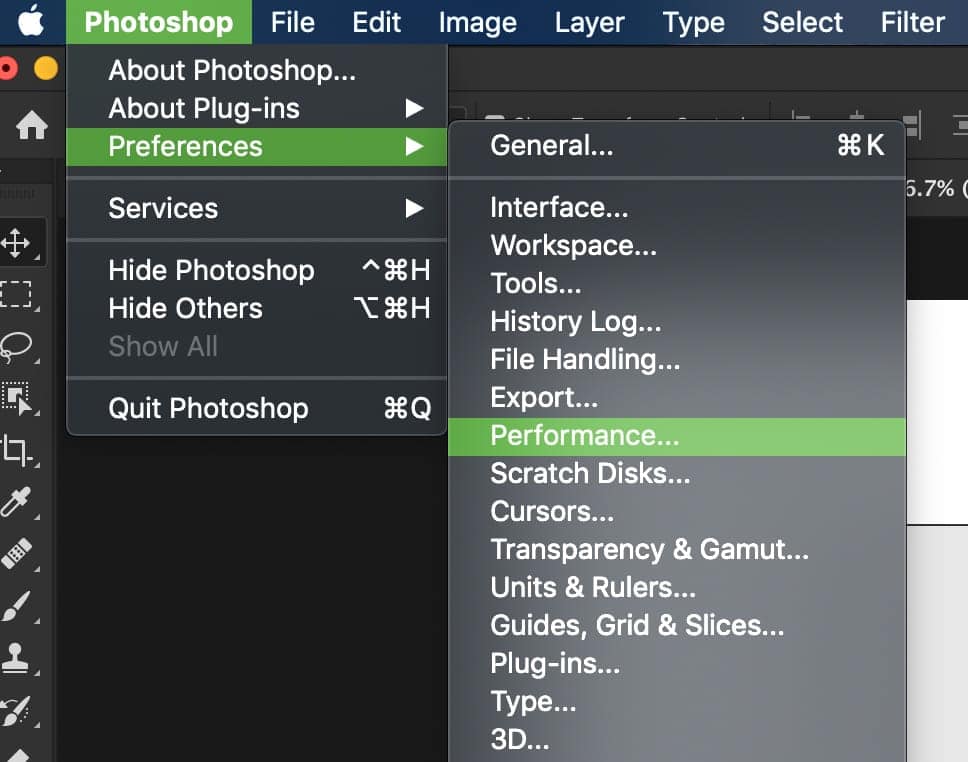
To increase the number of history states, go to Photoshop > Preferences > Performance > History States. After this number has increased, you’ll have more history states to step back to in the future. Keep in mind that this may affect the performance of the program, depending on your computer specs.
Unmerge-layers-in-photoshop-tutorial-5
Unmerge-layers-in-photoshop-tutorial-6

Non-Destructive Ways To Merge Layers In Photoshop

The trouble with merging layers in Photoshop is that it isn’t easily undone. Often you’ll have to undo other adjustments you wanted to keep, which just creates more work.

To avoid this problem altogether, there are a variety of ways to combine layers without making permanent changes. Here are a few better alternatives to merging layers in Photoshop.

– Create Smart Objects

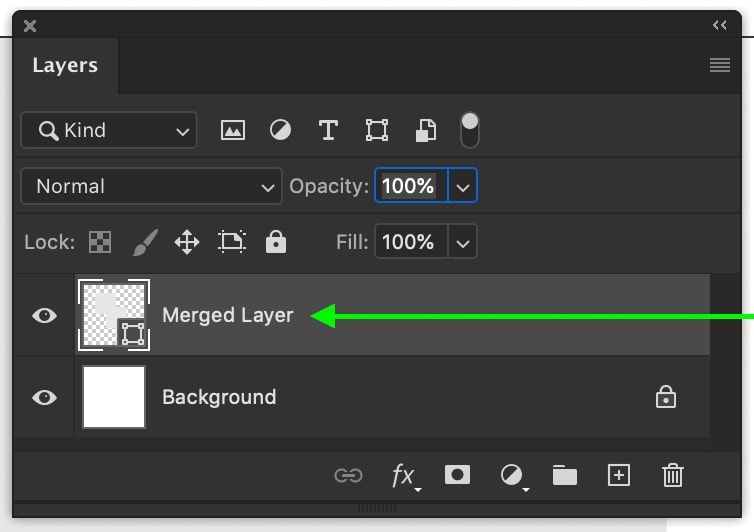
Smart objects are a fantastic feature that will merge multiple layers, while each layer can still be individually accessed. In Photoshop CC 2019 and earlier, you could only access these layers by double-clicking on the smart object. This would open a new project tab containing the individual layers.

Although that’s mostly the same in Photoshop CC 2020, there’s a bit of a twist. In CC 2020 and newer, you can choose to convert smart objects back to layers at any time. This makes it the perfect alternative to merging or flatting layers!

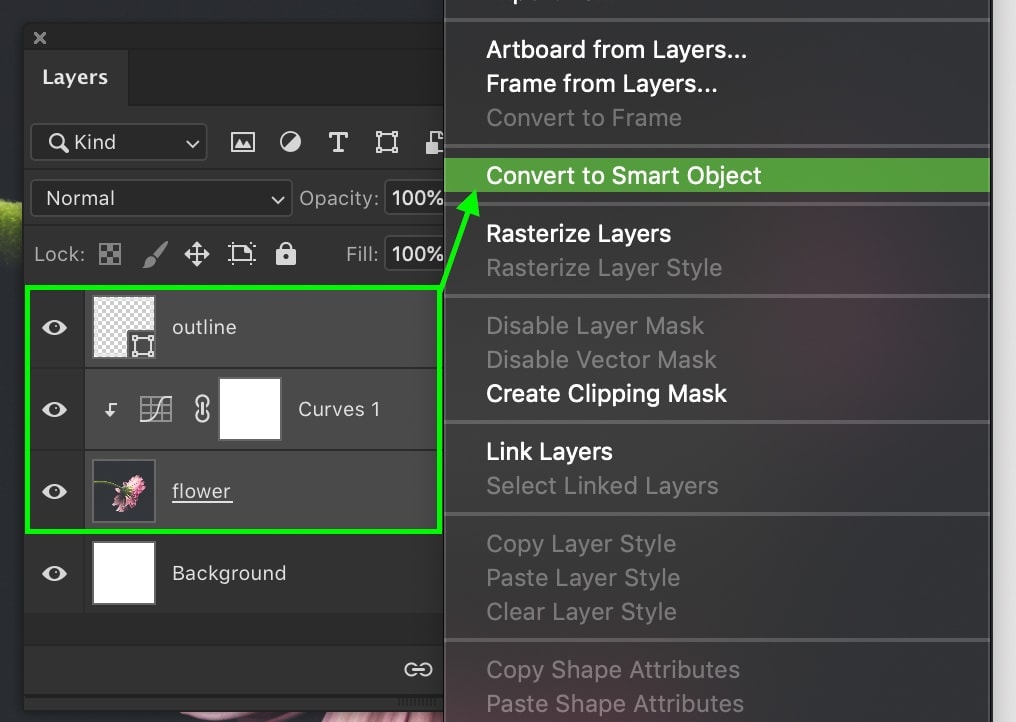
To create a smart object, select the layers you want to merge. Right-click on the highlighted layers and select ‘create smart object.’

Unmerge-layers-in-photoshop-tutorial-7

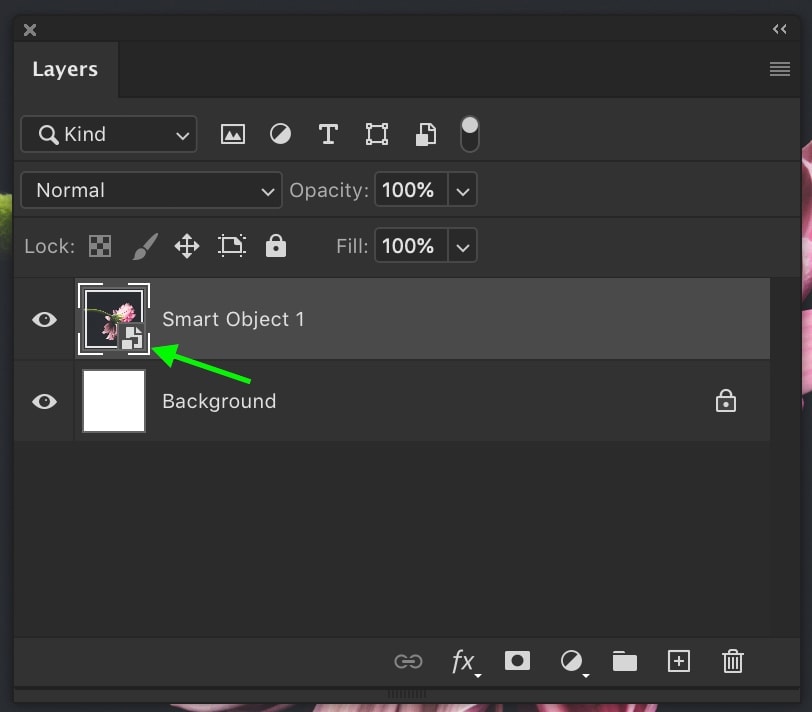
All the layers will merge and you’ll notice a smart object icon over the layer thumbnail. If you double click on the layer thumbnail, the smart object will open in another tab.
In this new tab, you can edit individual layers as necessary and save them back into your original project window.

Unmerge-layers-in-photoshop-tutorial-9

If you’re using Photoshop CC 2020 or later, you can also right-click and select ‘convert to layers.’ This will unmerge the smart object and place your layers into a group.

Smart objects are much easier to work with and can be unmerged at any time without having to undo anything.

– Group Your Layers

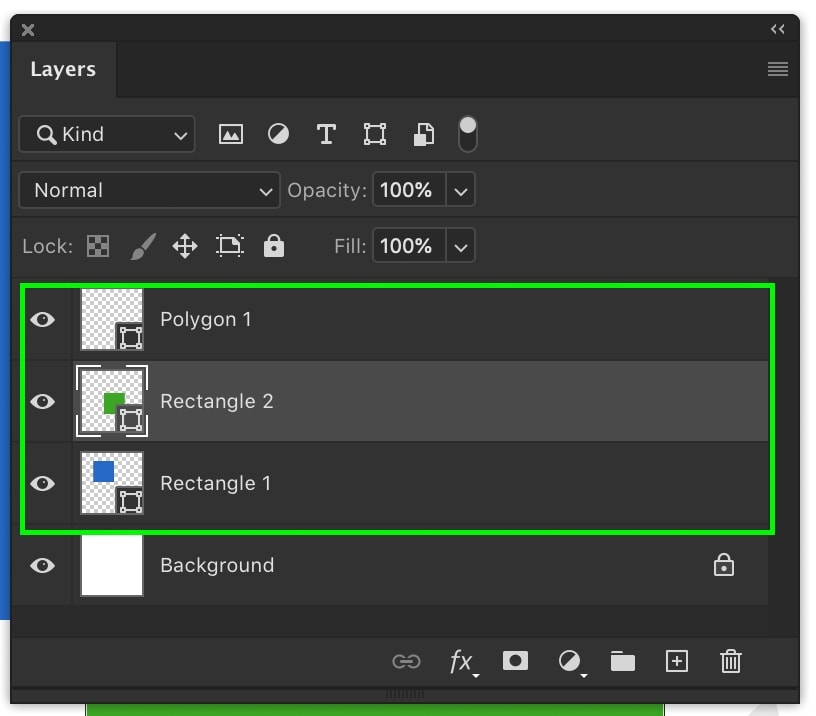
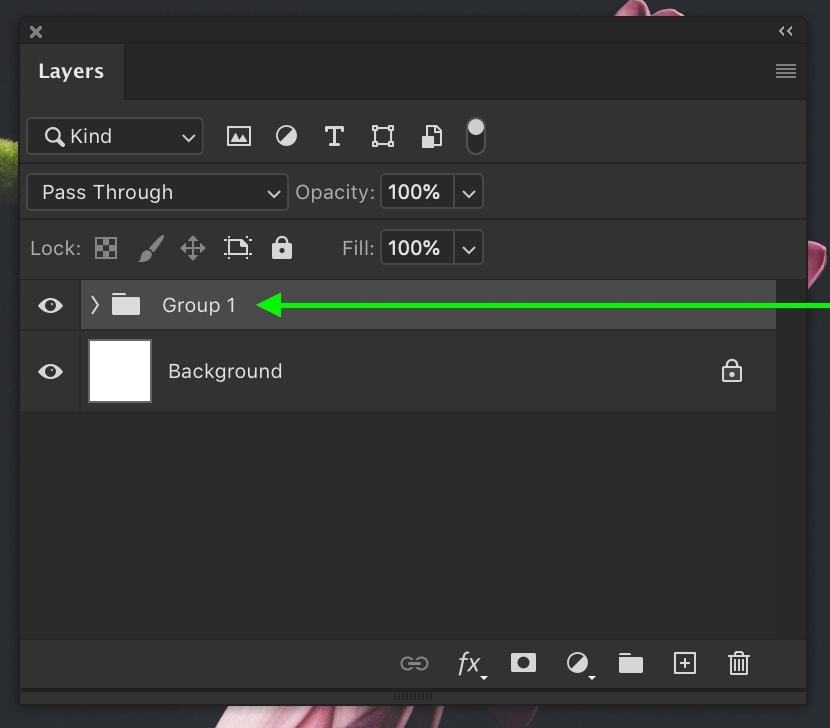
If you find yourself merging layers to declutter your layers panel, consider using a group instead. Groups are a folder of layers that can be edited as a whole or individually. They not only free up space in your layers panel but make it much easier to find specific layers.

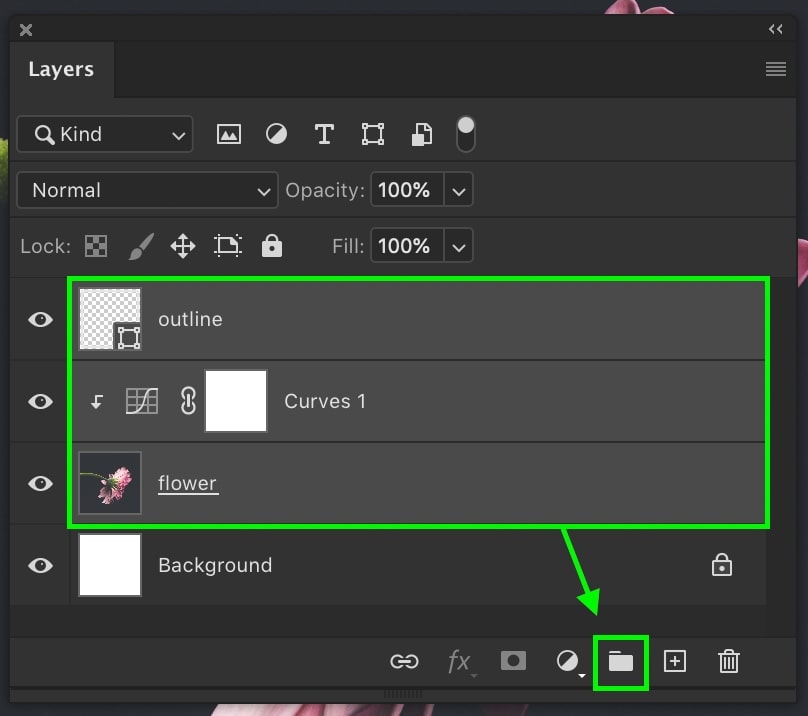
To create a group, highlight the layers you want and press Command + G (Mac) or Control + G (PC).

You can also click on the group icon at the bottom of your layer panel instead.

– Merge Layers Into A New Layer

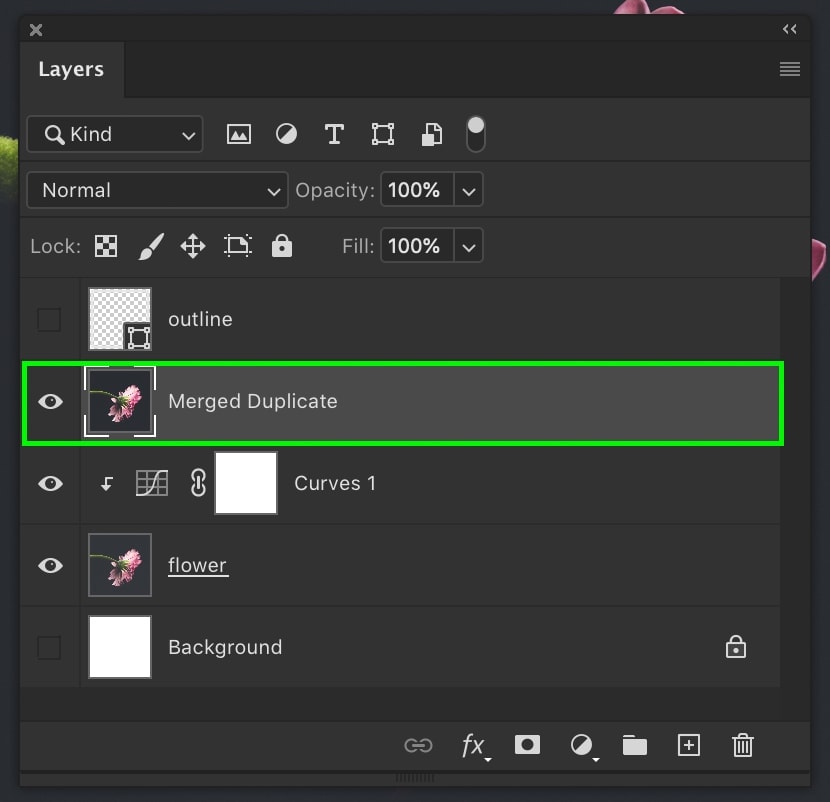
If you still want to merge layers, consider merging them onto an entirely new layer. This way, you always have the original layers to go back to if need be.

Before you do the following shortcut, click on the eyeball icons of the layers you don’t want to merge. The eyeball icons should only be visible beside the layers you wish to combine.

To merge and duplicate your layers, pressing Command + Option + Shift + E (Mac) or Control + Alt + Shift + E (PC). This will duplicate and merge all visible layers.
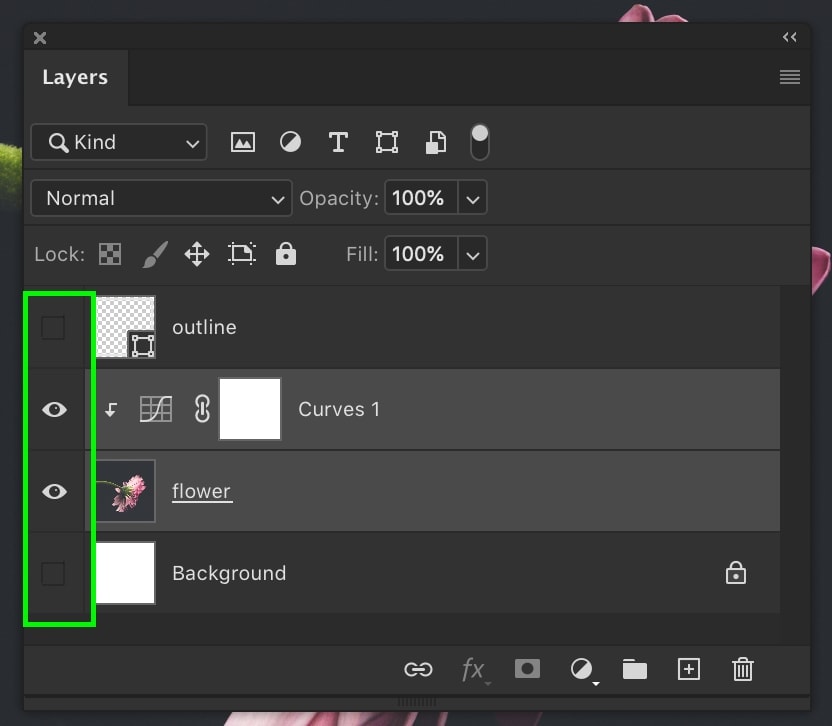
Turn back on the visibility of your other layers by toggling the eyeball icon once again.

Now you have a new merged layer while keeping the individual layers as a backup!

Conclusion

There aren’t many options for how to unmerge layers in Photoshop besides undoing your actions. Since merge adjustments are destructive edits, it’s hard to go back on them in any other way. That’s why it’s so valuable to consider alternative options to merging layers like smart objects, groups, or merging to a new layer.

Want more tutorials like this? Subscribe to our weekly newsletter for more photography, and photo editing tips delivered straight to your inbox!

– Brendan 🙂


Photo of author
I'm a Canadian photographer and photo retoucher turned founder of bwillcreative.com. Around here I help you to decode the mystery of photo editing with no-fluff videos and written guides to help you achieve your creative goals. Outside of shooting photos and my passion for educating, you'll find me mountain biking or on the trails with my dog, Sunny!

Continue Reading:

How To Use The Marquee Tool In Photoshop

Learn how to use the Marquee Tool in Photoshop to crop layers, create basic selections, add selective adjustments, and more with ease.

How To Crop A Layer In Photoshop (3 Simple Methods)

If you're struggling to figure out how to crop a layer in Photoshop, you're not alone. Fortunately, there are a few easy (not so obvious) methods to help you crop a single layer in Photoshop.

How To Fill A Selection In Photoshop (5 Best Ways)

Learn how to fill anything in Photoshop from selections, shapes, and text with solid color, gradients, and even images!

What Are Embedded Previews In Lightroom + How To Use Them

Use this guide to help you understand the use of embedded previews in Lightroom along with tips to help you use them in your workflow.

Adobe Lightroom System Requirements For Mac & PC

Here's a breakdown of the system requirements for Adobe Lightroom Classic and Lightroom CC to make sure it will run smoothly on your computer.

How To Add A Watermark In Lightroom Classic & CC

Learn how to add a text or graphic watermark to a photo in Lightroom Classic and Lightroom CC to protect your photos from theft.

How To Outline An Image In Canva

Learn how to outline anything in Canva from outlining images, shapes, text, designs, and more with a few easy steps.

How To Add A Border In Canva (To Images, Shapes & Text!)

Learn how to easily add a border to your designs, images, shapes, and text in Canva using these step by step techniques.

How To Make A Background Transparent In Canva

Learn how to create and export images with transparent backgrounds in Canva to open up more design options and creative styles.

Subscribe
Notify of
guest
0 Comments
Inline Feedbacks
View all comments