
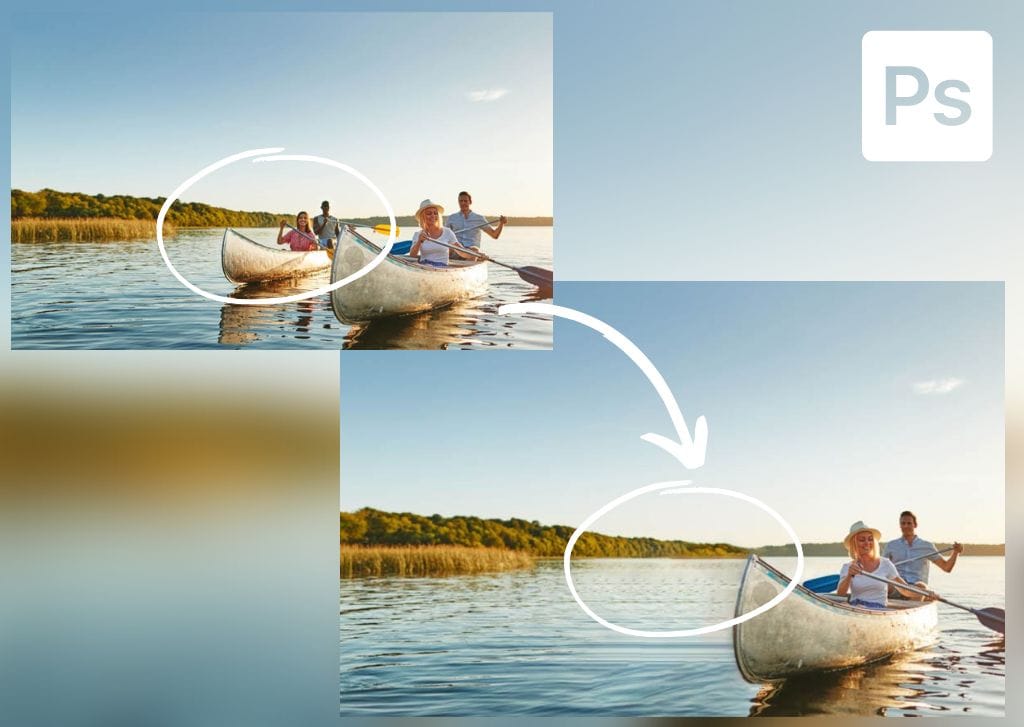

The new Remove Tool (released in the 24.5 Photoshop update) eliminates distracting objects and blemishes and fills in the deleted areas with a simple brush stroke. However, there are a few things to note to get the best results from this tool and achieve proficient, seamless edits.
After thoroughly learning the tool myself, I show you how to use the Remove Tool in Photoshop.
Video Tutorial
How To Remove Objects With The Remove Tool In Photoshop
Step 1: Make A New Layer And Select The Remove Tool (J)
Add a new layer to your document to edit non-destructively. Click the Create New Layer icon at the bottom of the Layers Panel. Select the new layer in the Layers Panel before you continue with the edits.
Click and hold on to the Spot Healing Brush Tool to select the Remove Tool (J) from the fly-out menu.

Check the Sample All Layers setting in the Options Bar when the Remove Tool is active. This setting ensures that the brush samples pixels from all the layers.
Step 2: Adjust The Settings In The Options Bar
Firstly, the Brush Size is important as you need to adjust it based on the object you want to remove. It’s always a good idea to paint slightly over the object into the background to allow Photoshop to replace the pixels accurately.
Use the Size slider in the Options Bar to set the size based on the objects in your image. Like any other brush, you can use [ to reduce the brush size or ] to increase the brush size.
Next to the brush size option, you can check the pen pressure on or off if you are using a drawing pad or stylus. This will use the pen pressure to decide the size of the brush.
Lastly, you can check the option Remove after each stroke, depending on the object you remove and your workflow. This setting tells Photoshop to remove the pixels whenever you let go of the mouse or lift the stylus.

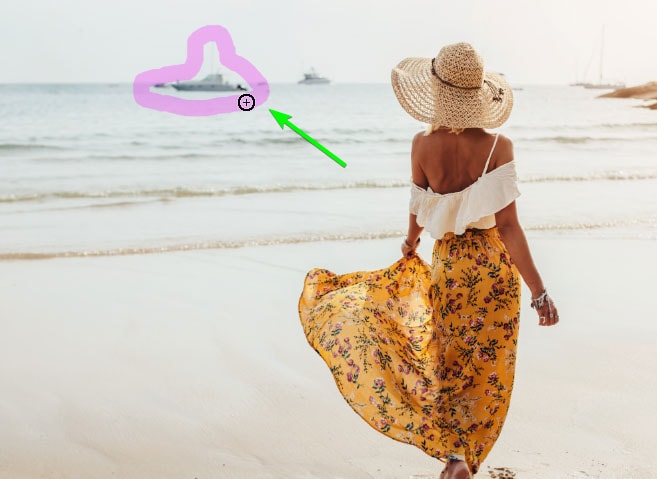
Step 3: Brush Over The Object You Want To Remove
You can now start brushing over the object you want to remove. When you paint over the object, it shows a purple mask where you have painted.
Paint slightly over the edges of the object for the best results. Once Photoshop has finished processing, the object will be removed and replaced with new pixels that match the background.


If you have Photoshop 2024 (version 25.0) or later, you can now simply paint a “lasso” type stroke around the object, and Photoshop will automatically mask everything inside the stroke. Be sure to close the lasso to ensure the correct area is removed.
Step 4: Remove Large Or Complex Objects In The Image
You must be more careful when dealing with larger objects or ones with a more complex surrounding background area. Photoshop may repeat the background pattern too many times because there isn’t enough sample area, and the result won’t be realistic.
To avoid this, you can press Control + Z (Win) or Command + Z (Mac) to undo any areas that don’t look correct. Then, make small strokes to remove the object slowly, brushing only over one edge of the object. Allow Photoshop to fill in the pixels based on the surrounding pixels.


Then, you can continue by painting small strokes on the edge to give Photoshop more pixels to sample. You will achieve a more realistic result using this technique.

Step 5: Correct Any Inconsistencies
When you notice a few minor errors, you can quickly fix these by brushing over the areas with the tool again. Here, you can uncheck the Remove after each stroke option. This enables you to lift the brush and paint over new areas to speed up your workflow.

Once you’re done painting, press Enter or click the Checkmark in the Options Bar.


Using The Remove Tool And Selections To Remove Objects In Photoshop
Step 1: Create A Path Using The Pen Tool (P)
You can use any selection tool to make a selection around the object you want to remove. However, the Pen Tool (P) creates an accurate selection while giving you complete control over its edges. Ensure that Path is selected from the Mode drop-down menu in the Options Bar.

Then, begin drawing a path around the object. Click to add an anchor point, and click and drag to curve the path around the object. Close the path by clicking the last anchor point on top of the first anchor point.


Note: Zoom in using Control + + (Win) or Command + + (Mac) to create a more accurate path.
Step 2: Right-Click And Click Make Selection
Once you have closed the path, you can convert it to a selection by right-clicking or Control + clicking inside the path and selecting Make Selection.
In the open window, set the Feather Radius to 0 or 0.5 pixels, check Anti-Aliased and New Selection, and click OK.

The path will turn into a selection.

Step 3: Use The Remove Tool
Once the selection is created, activate the Remove Tool (J) by selecting it from the Toolbar. Then, adjust the settings in the Options Bar. Ensure Sample All Layers is checked. I will uncheck Remove after each stroke, so I don’t need to worry about keeping the mouse pressed down.
Add a new blank layer to make the edits by clicking on the Create a new layer icon at the bottom of the Layers Panel.

Now that everything is set up, you can paint inside the selection over the areas you want to be removed.
Step 4: Re-Paint Over Sections To Touch Up Areas
When removing more complex objects and ones close to others, you will likely see some inconsistencies after the removal process, especially around the selection’s edges.

To correct the image, keep painting over the problem areas with the tool. If small lines are missing in areas, you can correct this by brushing over the area and including both sides of the line in the brush stroke. Photoshop will then successfully join the lines to correct the area.
Once you are happy with the result, press Control + D (Win) or Command + D (Mac) to deselect the area.


When To Enable Or Disable The “Remove After Each Stroke” Setting
When the Remove after each stroke option is enabled, the Remove Tool will replace the pixels when you release the mouse or lift your stylus. It’s helpful to keep this option checked when painting over a small area you can cover with one brush stroke.
However, it is suggested that you disable the option when painting over larger objects that you must cover using multiple brush strokes. This setting is especially helpful when you want to adjust the brush size while painting over the object. For instance, use a smaller brush around the edges and a larger brush to cover the inside of the object.
You should also disable this setting if you want to paint over multiple small objects scattered around the image. You can then remove them all at once without waiting for Photoshop to process the changes each time.
Limitations Of The Remove Tool
The Remove Tool often struggles when removing an object touching another prominent object in the image. As described above, you can use a selection to fix this problem. You can also use Content-Aware Fill on the edges to get a better result in some cases.
Another case of the tool not working as desired is if there aren’t enough sample areas to build the background and accurately replace the pixels. This usually occurs when the background is busy, and the area surrounding the object has multiple textures, objects, and colors, complicating the process.


Another limitation of the tool is that when lines are behind the object, the Remove Tool doesn’t always accurately continue the line. However, you can brush over the area a few times or use the Clone Stamp Tool (S) to correct the area.
