


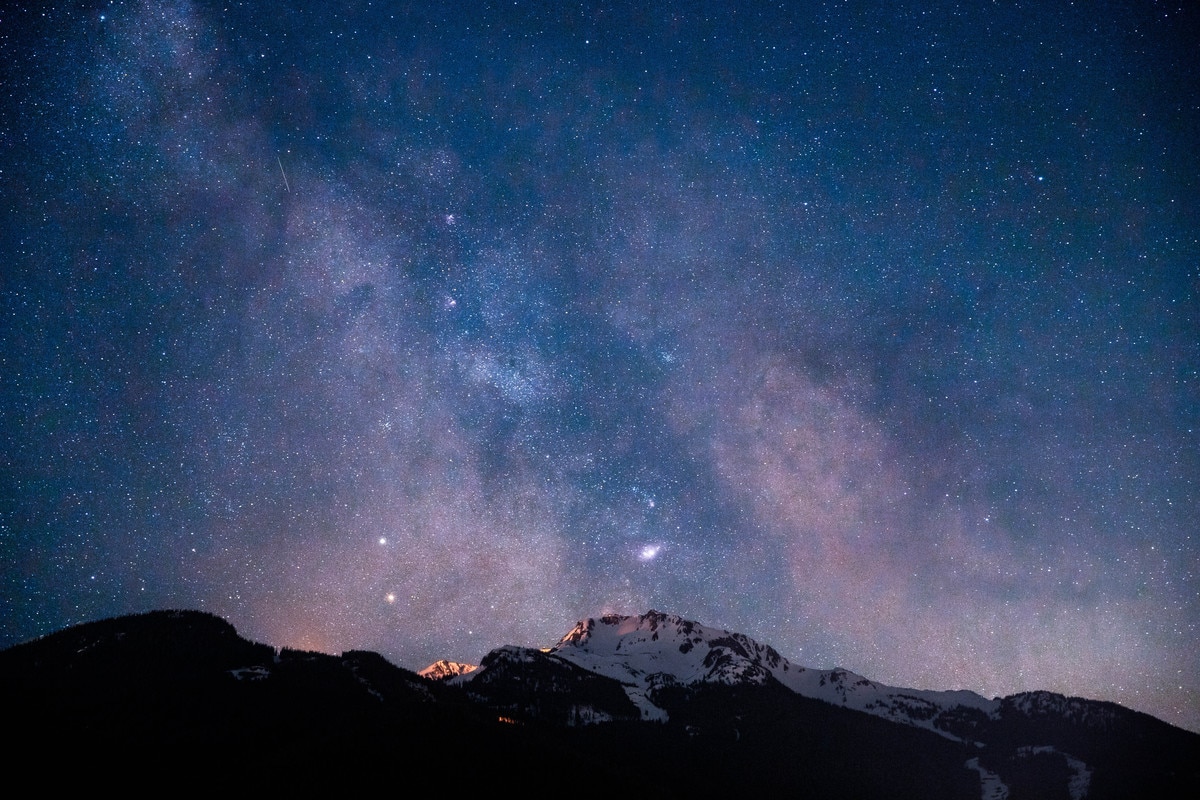
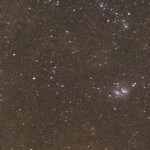
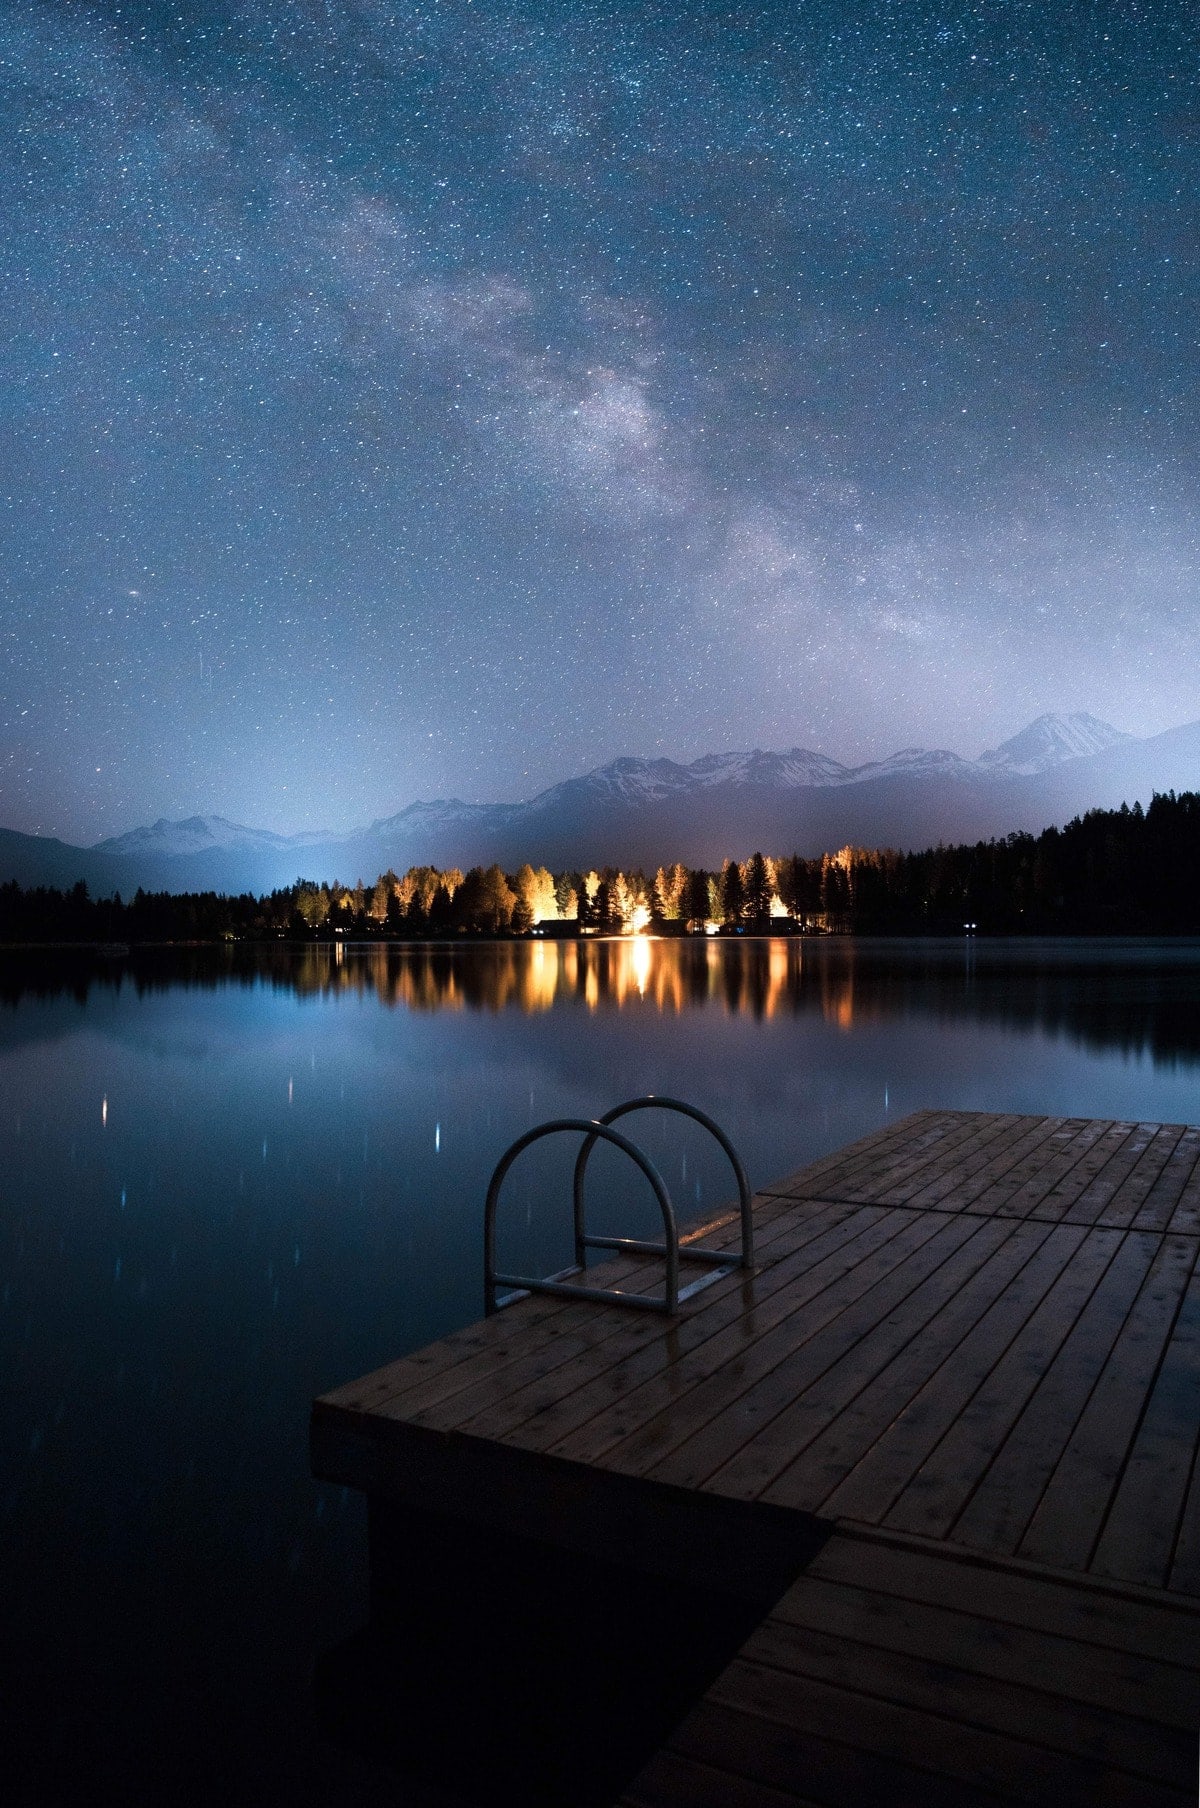
Astro Photography And The Milky Way
The milky way is something I hope everyone gets to see with their own eyes at some point in their lives. An incredible cloud-like cluster of stars stretching across the sky. There’s nothing quite like it. There’s also nothing like taking photos on the milky way… so let’s talk about how to make the best of your astro images with these 7 tips! No matter what camera you shoot with.
1. Know The Current Moon Phase
What the heck does the moon have to do with anything you ask? While the sun is safely tucked away on the other side of the planet, the moon later shows up to light up the world below…and also wash out your sky. No matter how far away you might be from the light pollution of the city, a full moon will make it next to impossible to see the milky way. Now during what phases should we try to shoot the milky way?
The absolute BEST time to shoot the milky way is when there is a new moon. A new moon is when the moon is completely blacked out. A good rule of thumb I’ve come to work by is 3 days before and 3 days after a new moon are great times to shoot the stars. Within this time frame, the moon is less than 35% illuminated and does little washing to your night sky.
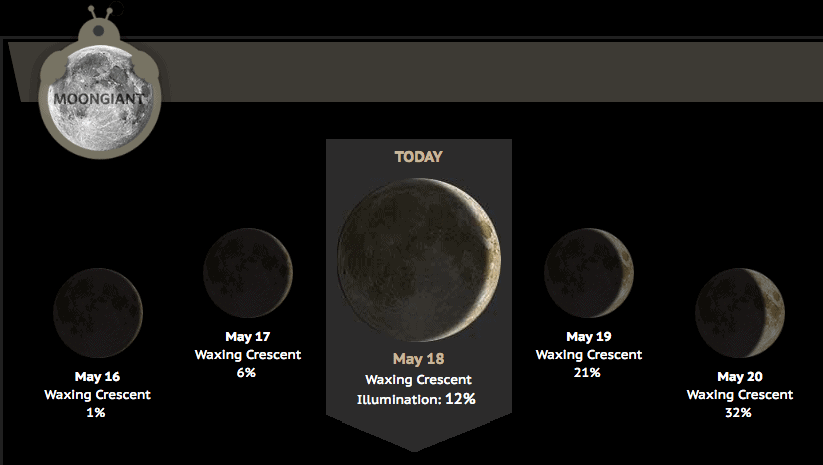
Unless you are some type of astronomy god, you likely won’t be able to keep track of the moon phases(like me, being the commoner I am). Luckily there is a really great site that can help us with that called: Moon Giant. Just find the correct date for when you’d like to shoot and see what moon will be out that night!
If you do want to try to shoot while a brighter moon is out, pay close attention to when the moonrise/moonset is. I will get more into that below!
2. Get Away From The City
The city might be great to be in for a lot of things, but astro photography is not one of them. The lights from the city actually cause this thing called “light pollution” where the glow of the lights washes out the sky. The milky way is only visible when there is little to no light pollution around you so it’s super key to get as far away as possible.
Some of you may live in extremely rural areas already, but if you’re like me, prepare to find a good playlist on Spotify and drive a few hours out of town to somewhere truly dark. Now how do we know what areas don’t have light pollution?
There are these amazing maps called “light pollution maps” online that actually show you the amount of light pollution in any area on the planet.
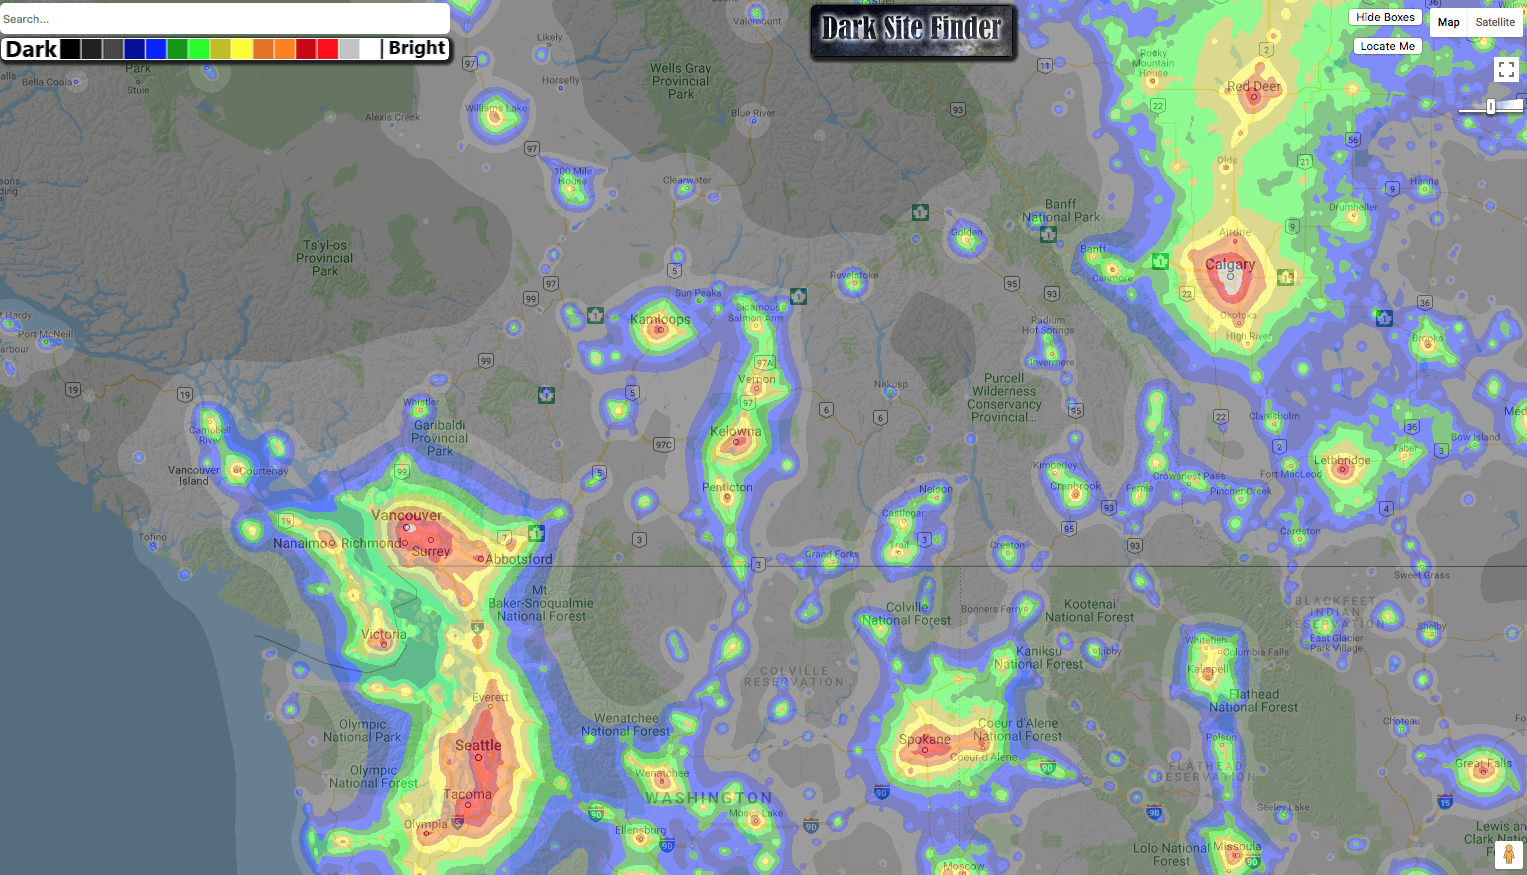
Here is the light pollution map I always use: Dark Site Finder
Any areas between the black and blue colors on the Dark Site Finder will typically yield the best results, especially during a new moon!
3. Pre-Plan Your Shots
When I first started taking photos of the milky way, I just pointed my camera at the sky and hoped for the best. This will get you a shot of the stars, but it likely won’t create anything completely ground breaking for your work. To really get some incredible astro photos you need to plan your shots well ahead of time.
There are actually a few great apps that will help to tell you when and where you can find the milky way. The app I always use is called PhotoPills. With this app, I can plot points on a map and it will tell me everything regarding the sun, stars, and moon in that particular area. Things such as sunrise/sunset times, when the milky way will be in the sky and at what angle hour to hour, and so much more!
An incredible part of PhotoPills is a the Night Augmented Reality feature. This allows you to see in real-time where the milky way is just by looking through your phone camera. This feature alone is well worth the $14 this app costs and has been my best friend during every astro mission.
*Please note I am not affiliated with PhotoPills, I just like to fangirl over them*
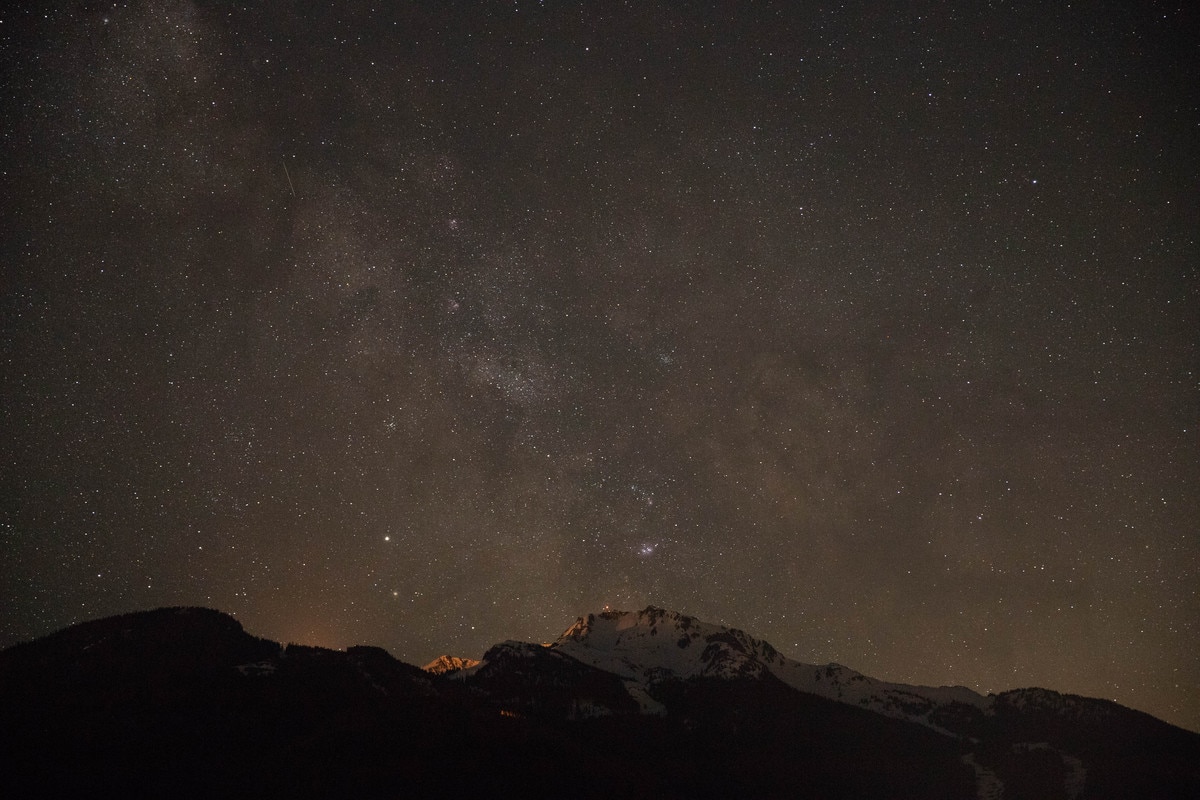
4. Be Aware Of Star Trailing
Shooting stars seems pretty straight forward right? Make your aperture super wide, bump up your ISO and max out your shutter speed to 30 secs. Wrong. As tempting and logical as it is to do a 30-second exposure it actually will cause your stars to trail. So what is star trailing and how can we avoid it?
As we all know, the earth is constantly spinning; including while you’re taking a long exposure. During that time you are taking the photo, that rotation of the earth causes your stars to streak or trail making them look blurry, unnatural, and just blah looking. To prevent this, shoot around 10secs – 13sec exposures on wide angles(16mm-35mm), while just around 8secs-5secs if you are shooting on a longer lens of 50mm or greater(generally). The stars may appear dark in the camera but keep in mind you can bump the exposure in Lightroom and it will look amazing! See below for an example of star trailing:
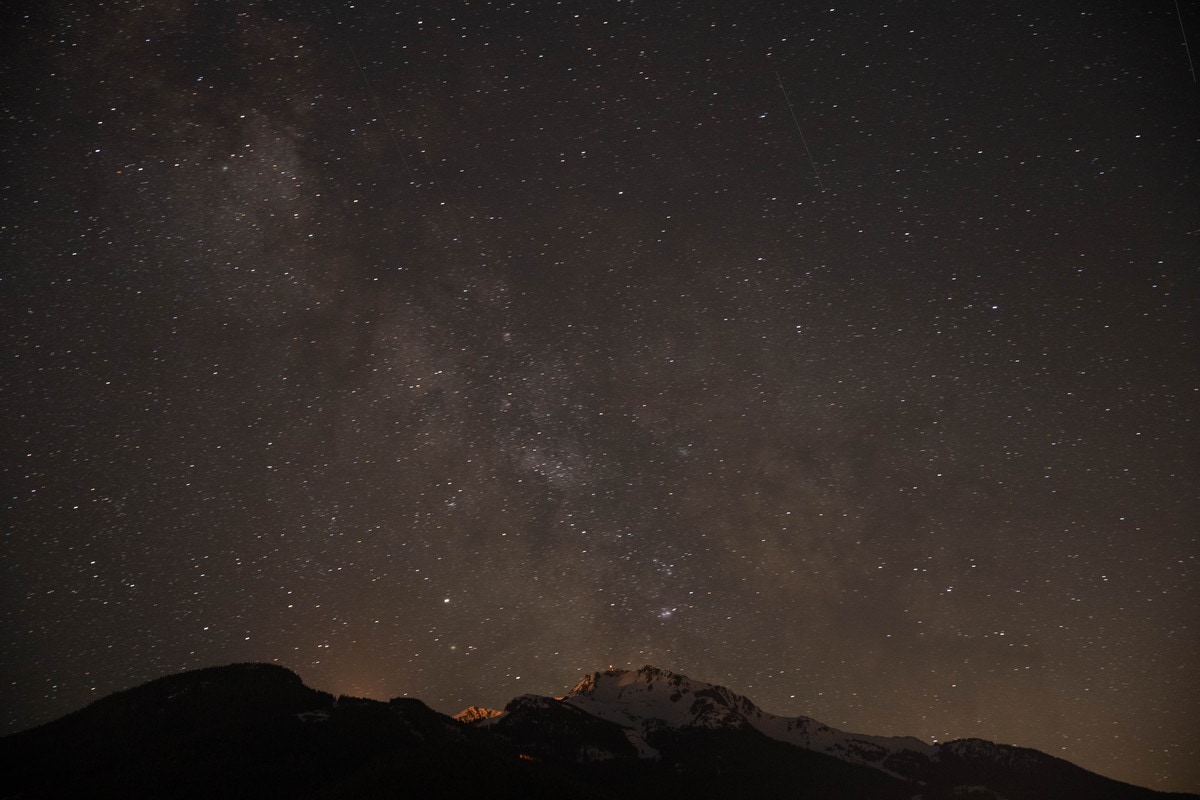
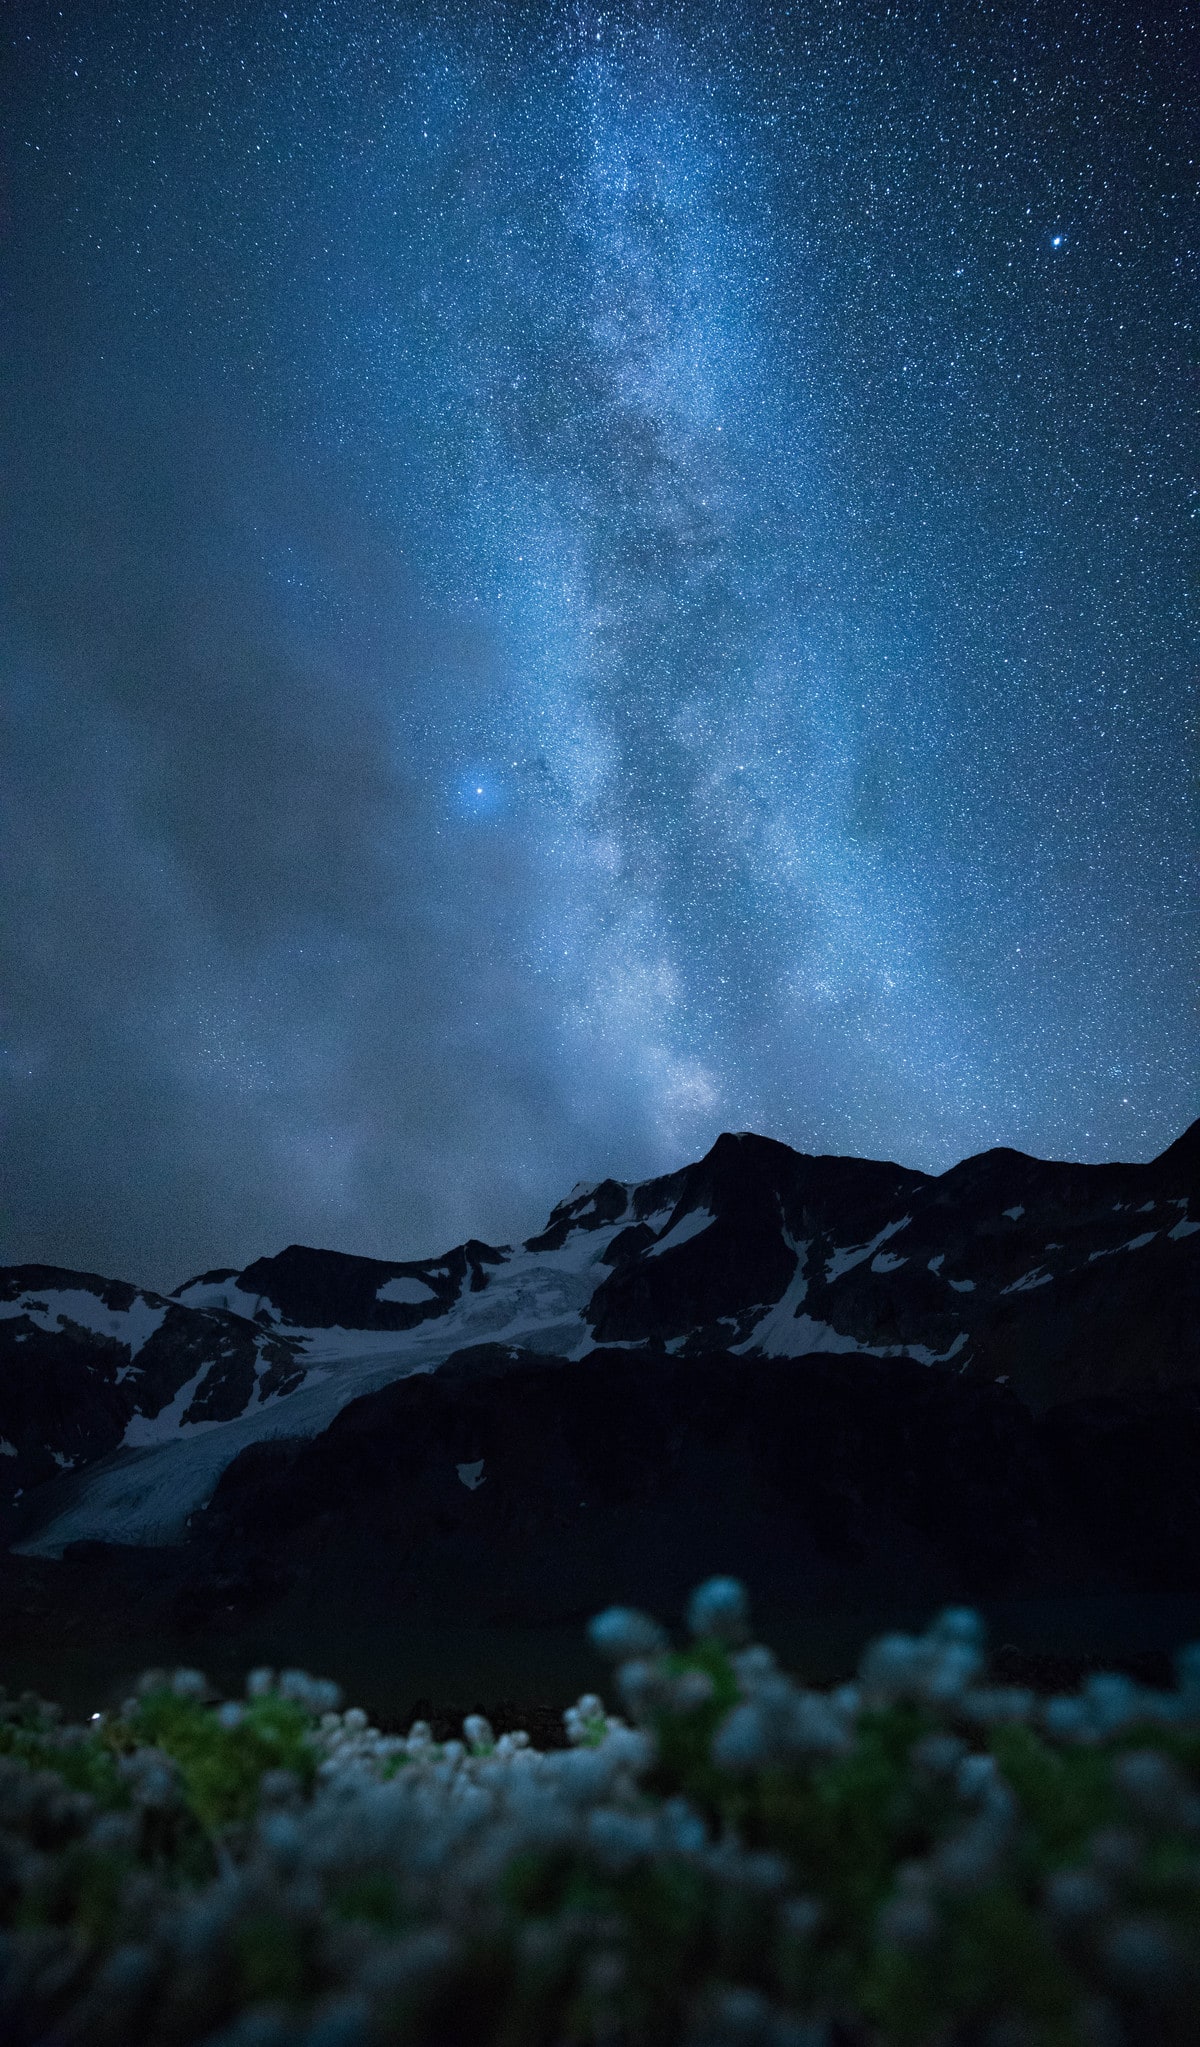
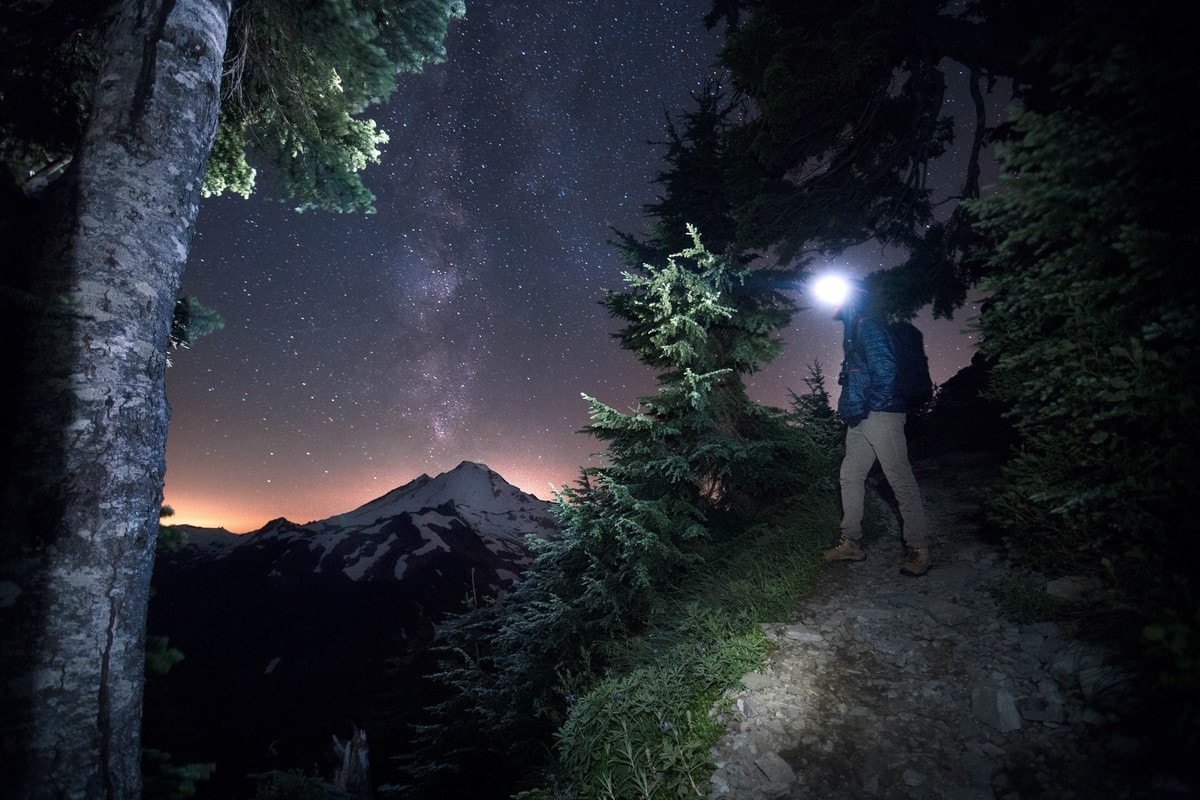
5. Illuminate Your Foreground With A Headlamp
It’s pretty damn dark at 2:00am. So dark that, sometimes, not even a long exposure can produce much detail in the shadows. Luckily you have(or should have)your trusty headlamp strapped to your head! While your camera is taking the photo, try flashing the foreground with your headlamp for a moment, and then turn it off. This will help to lighten things up in the shadowy areas and can add a cool effect! This takes a ton of experimenting but once you get it right… it’s oh so good! See a few examples below:
6. Check Your Focus
I can’t even count the number of times that I would have tried to shoot star photos and they would end up being out of focus the second I saw them on my computer. Focus is a tricky thing to keep tabs on when its dark outside. So here’s a cheeky trick to keep things crispy. Hint: it doesn’t involve just setting your lens to infinity.
Go into LiveView on your camera(when you can see the scene through your camera screen)and look for any visible star. There is always at least 1 bright star that will show up on LiveView. Magnify your LiveView to get a closer look at the star. From here, focus up on the star until it looks nice and sharp. Now you’re good to take the photo! I tend to repeat this process every time I change setups.
7. Just Have Fun
As cliche as this might sound, astro photography is all about having fun. Pulling an all-nighter with some of your best photo pals, taking in the views that everyone else is missing out on. Experiment with different things to spice up your photos and explore new compositions in the dark! Every night shooting stars is a guaranteed adventure and an evening full of excitement. What’s your excuse?
8. BONUS TIP: Use A Faster Lens
What does a faster lens mean? “Fast” is a term used to describe how wide of an aperture your lens is capable of. For example, a lens with a max aperture of F/1.4 is considered “faster” than a lens with a max aperture of F/4.
When it comes to astro photography you want to have your lens as wide open as possible to allow the most light into your sensor. At the very minimum using an F/2.8 lens or faster is your best bet to capture the milky way. Shooting at F/4 makes things a bit more tricky in the sense we have to compensate by bumping the ISO, adding grain, and lowering the quality of your image.
If you have the resources, try shooting your star photos at a wide aperture like F/1.4 and see how the photos compare to shooting at F/2.8 or F/4! The results may surprise you!
Now that you know how to SHOOT the milky way, let’s talk about editing! Click below for a full-length video tutorial sharing some secret post-processing tricks geared towards astro photography:
Secret Astro Photography Post Processing Tricks
Final Thoughts
I hope this helped you guys to get the ball rolling with your astro photography! I had a ton of you asking me questions about how to get started with it so I thought this would be a fitting article for this week. Milky way season is happening as we speak so get out there and get shootin’!
I’d love to see the photos you guys take so make sure to tag me @brnwills on Instagram whenever you upload 🙂
Make sure to RATE this article if you found it useful and SHARE it to help others with their astro photography.
Happy Shooting!
-Brendan


5