


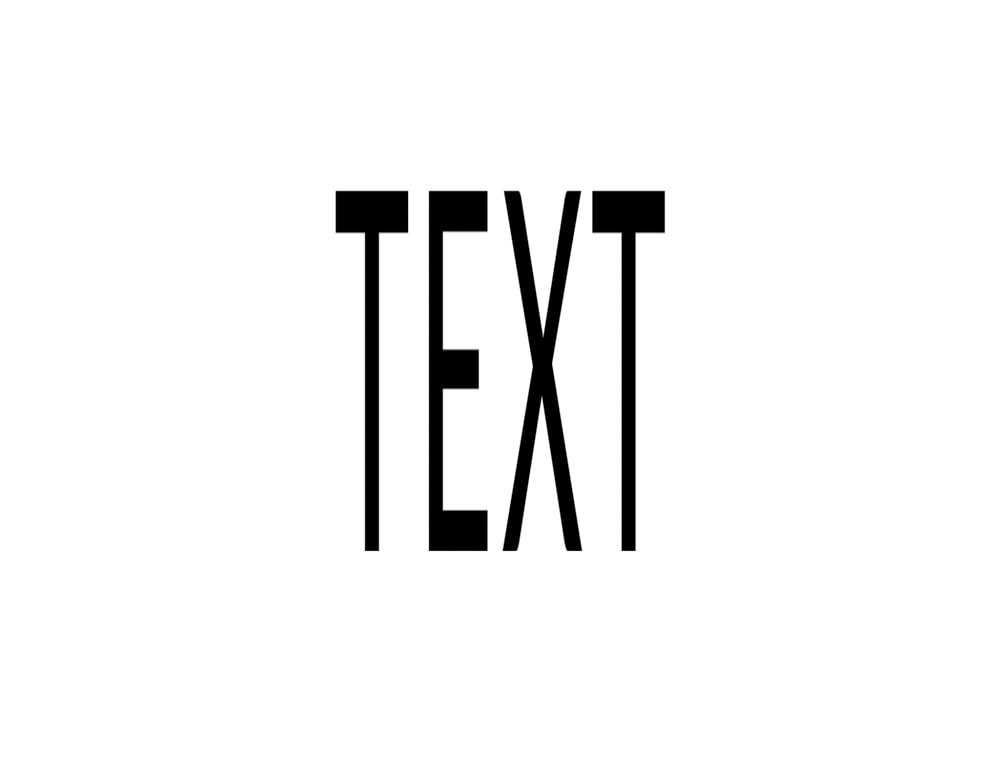
Distorted text is perfect for album covers, movie posters, and other creative projects. In this tutorial, I will show you different ways to distort text in Photoshop without rasterizing the text layer to ensure the highest possible quality.
Avoiding rasterizing a text layer when distorting it allows you to edit the text later on in the project. It also ensures the text layer remains as a vector layer rather than a raster layer (pixel-based). This is helpful if you have text you may need to change later on to adjust character spacing or typos.
How To Distort Text In Photoshop
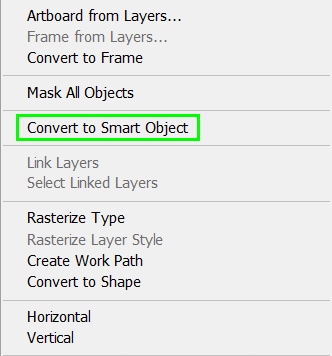
You can distort text manually using the Free Transform set to Distort. However, you first need to convert the text layer to a Smart Object.
To do this, right-click your text layer and choose Convert To Smart Object.
Converting your text to a Smart Object allows you to distort it without losing the option to edit the text within the smart object. Additionally, you can warp the text however you want without reducing its quality.
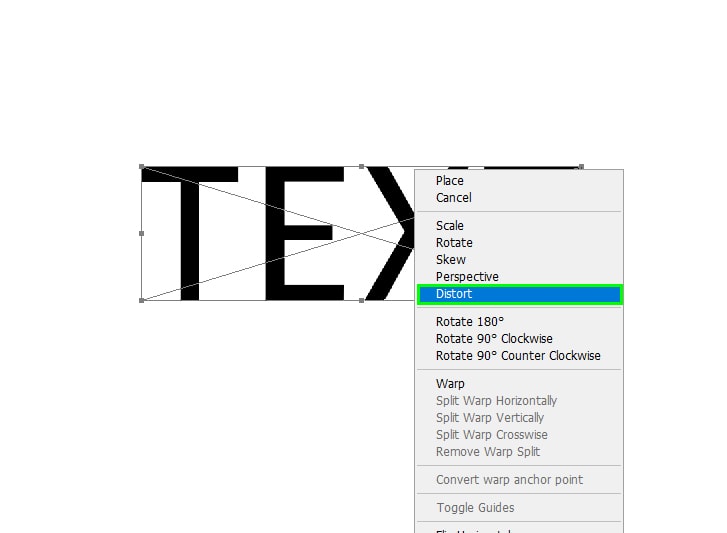
After converting the text to a Smart Object, enable Free Transform by pressing Control + T (Win) or Command + T (Mac).
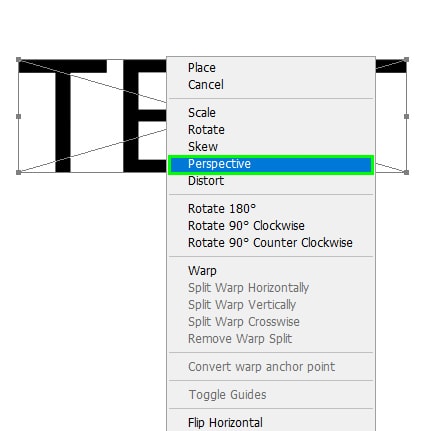
Then, right-click the transform box and select Distort.
After that, click the Warp Tool in the Options bar.

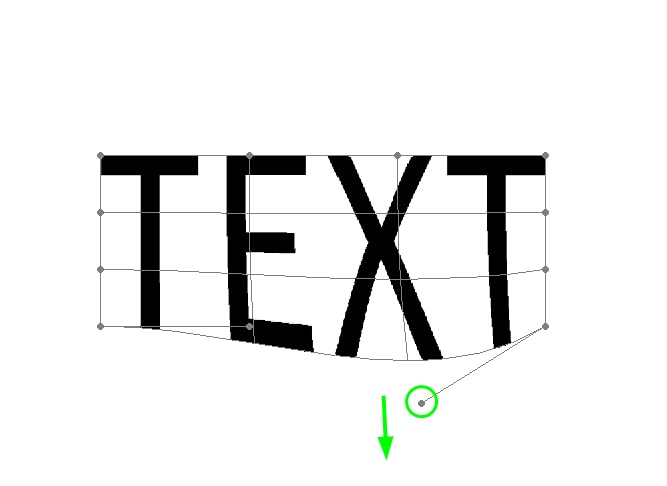
A mesh will appear on your text.
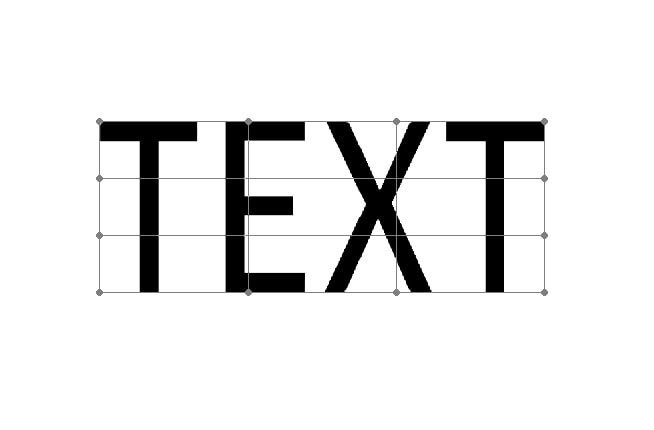
To distort your text, drag the mesh’s outer lines or even the inner part of the mesh in any direction.
You can drag the control points around the mesh up or down to distort your text.
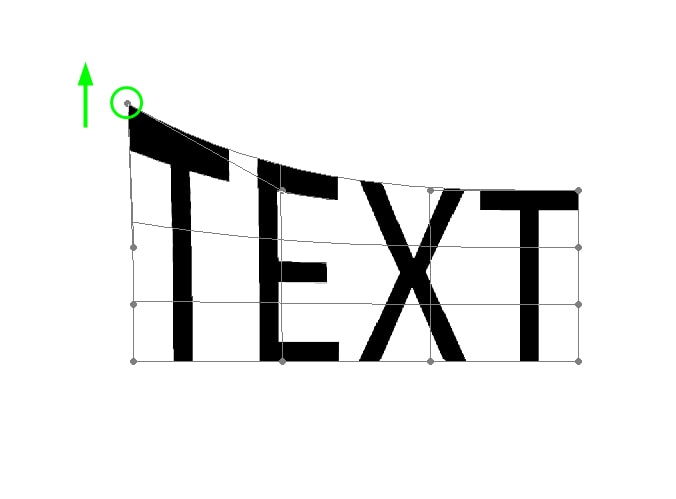
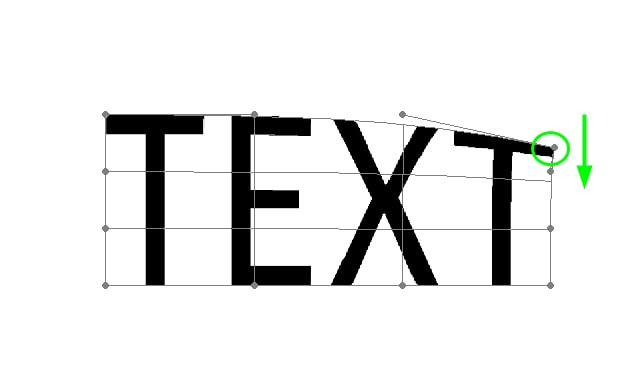
There are also handles connected to the mesh’s control points. You can drag any of them up or down to curve your text.
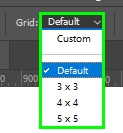
If you aren’t happy with the default mesh for the warp tool, you can pick a different grid size for it within the Grid drop-down menu in the Options bar. Each grid has different numbers of columns and rows.
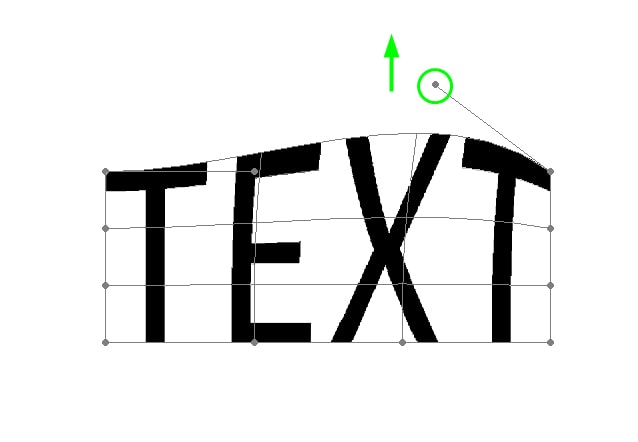
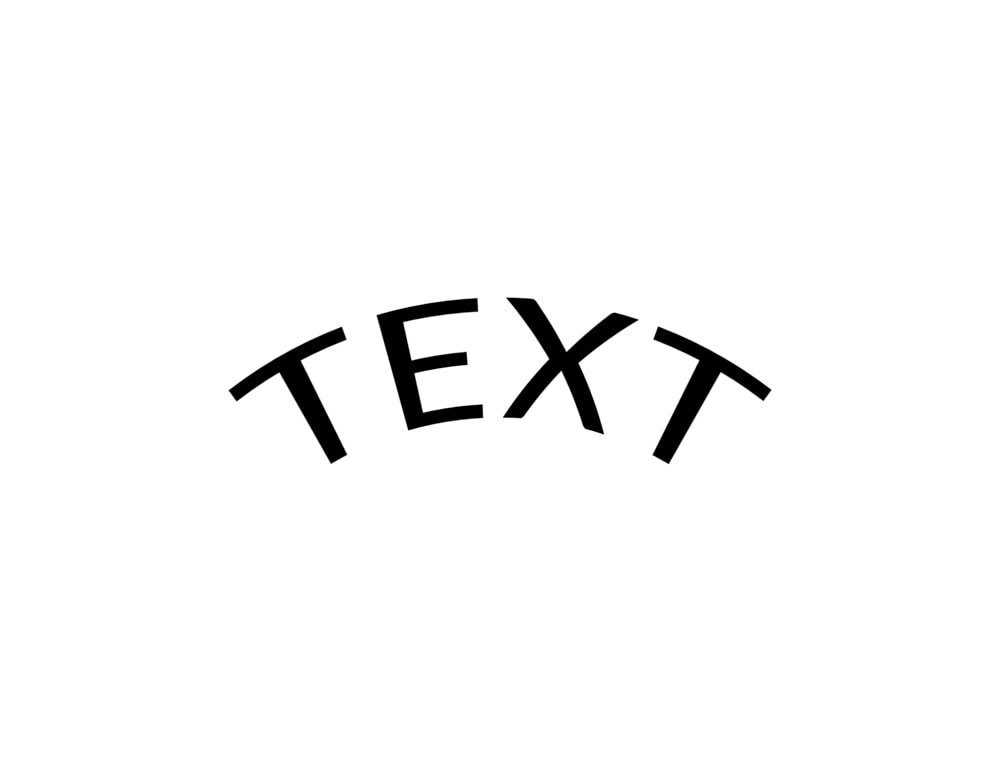
For quick results, you can use one of the preset warp options to distort your text within the Warp drop-down menu.
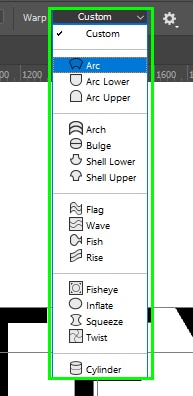
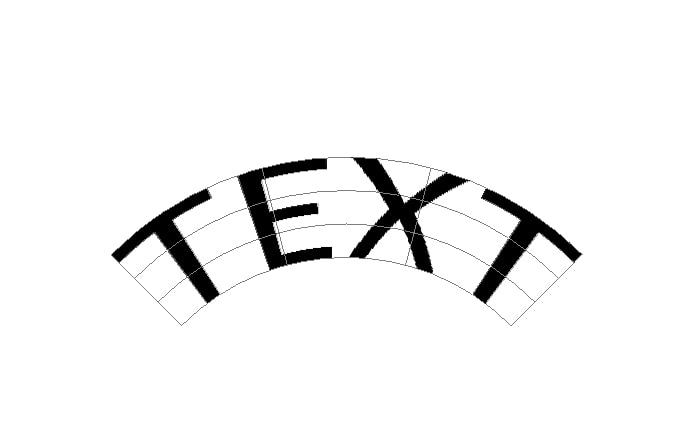
These options warp your text into different shapes. In my case, I picked an arc shape.
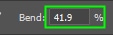
Once you choose a preset shape, you can customize it by changing some settings in the Options bar.
You can adjust the warp’s bend.
You can control its horizontal distortion.
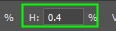
And its vertical distortion.

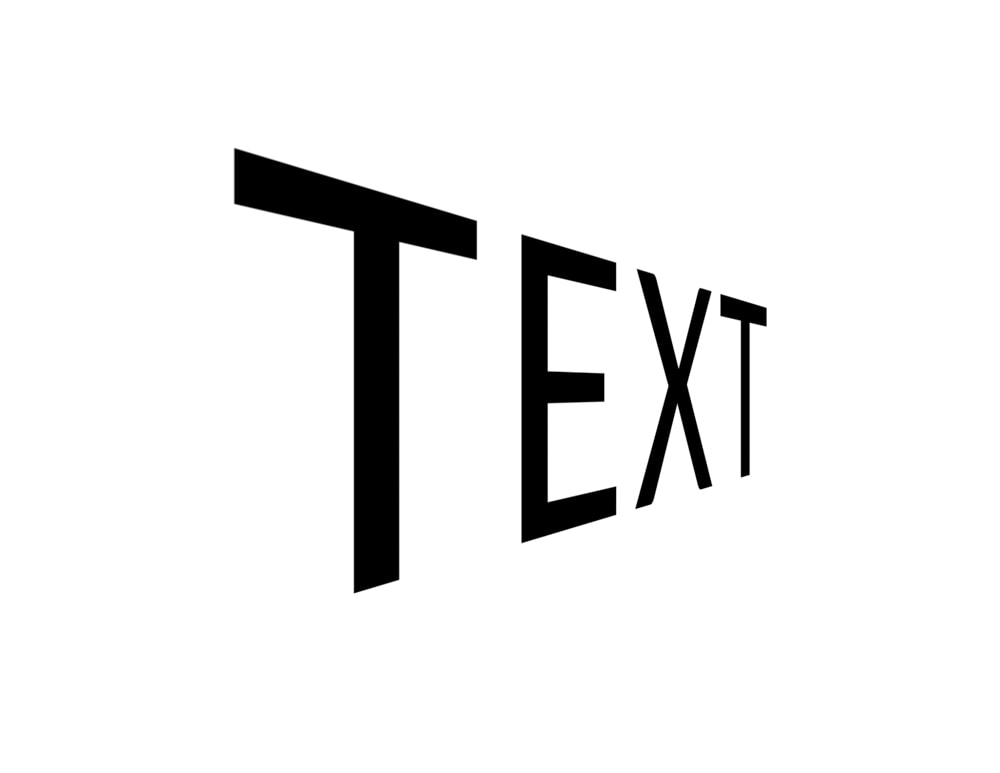
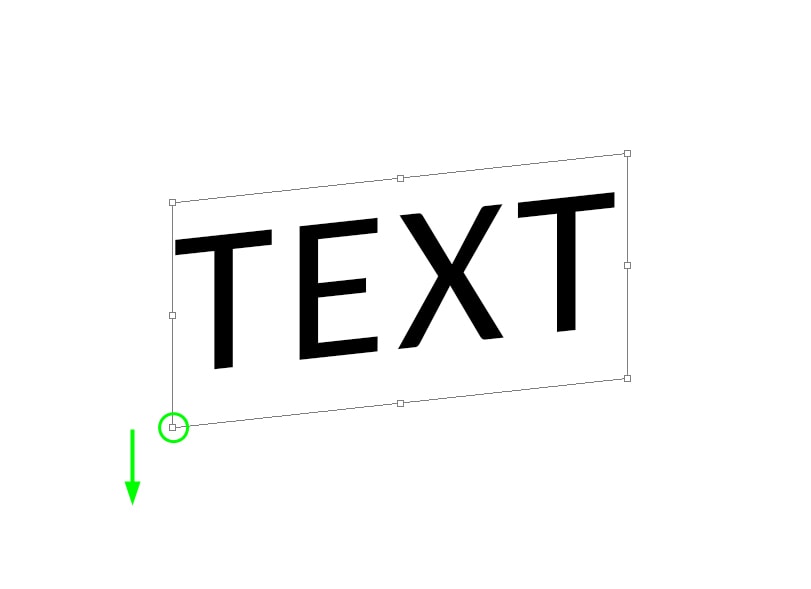
Using Perspective Transform To Manipulate Text
You can make your text follow the perspective of an object in an image. You can also perspective warp your text to make it stand out more in a layout.
First, convert the text layer to a Smart Object as detailed above, then enable Free Transform by pressing Control + T (Win) or Command + T (Mac).
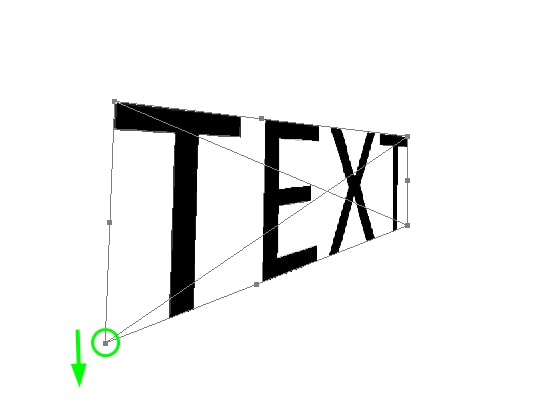
Then, right-click the transformation box and choose Perspective.
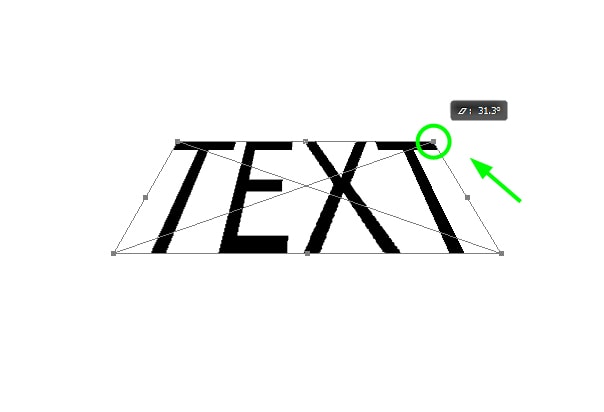
Pull the top or down control handles around the text in any direction to change its perspective.
How To Stretch Text In Photoshop
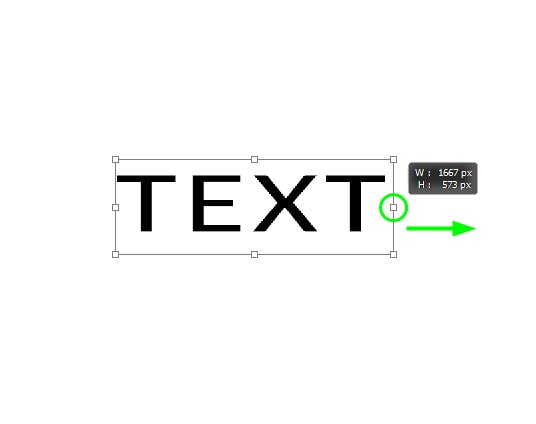
Stretching text in Photoshop is simple and easy. You can extend your text horizontally to make it look wider or vertically to make it look taller.
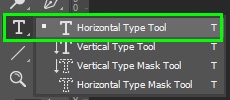
First, grab the Type Tool (T) and type anything on the canvas.
Then, press Control + T (Win) or Command + T (Mac) to enable Free Transform.
Note: You don’t need to convert the text layer to a Smart Object to stretch the text.
If you want to stretch the text horizontally, hold Shift and pull the anchor point horizontally.

If you want to distort the text vertically, do the following.
Enable the Free Transform Tool by pressing Control + T (Win) or Command + T (Mac).
Then, hold Shift and pull the text up or down.

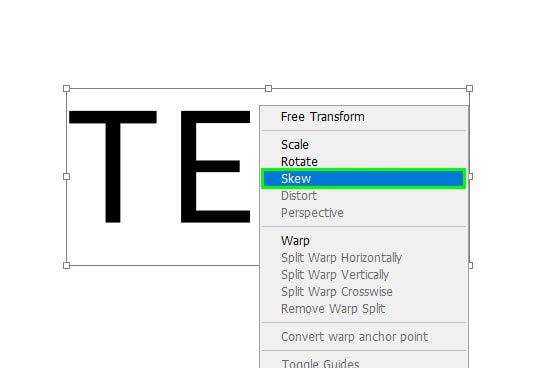
How To Skew Text In Photoshop
You can easily skew text in different directions. You can also control how warped it looks.
First, enable the Type Tool (T) and enter any text on the canvas.
Then enable Free Transform, right-click the bounding box around your text, and choose Skew.
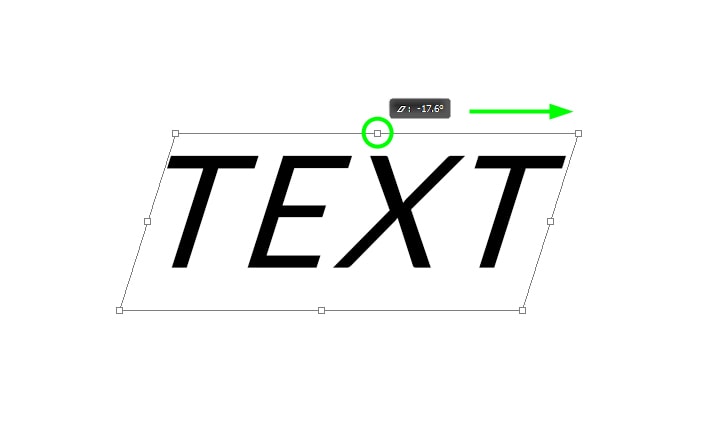
After that, click the control point in the middle of the bounding box around your text. Then, drag it to the left or right to skew your text horizontally.

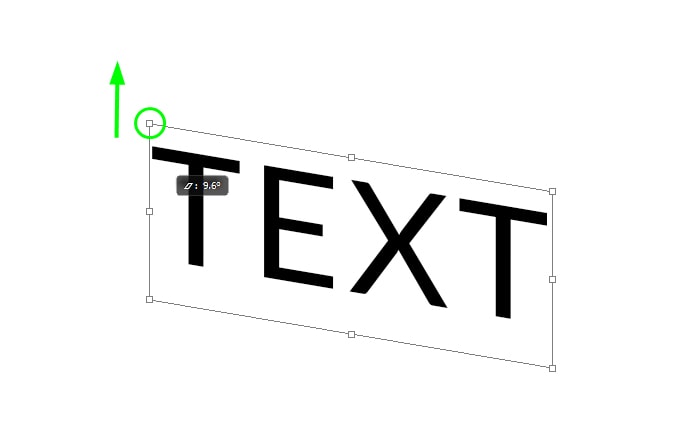
When dragging one of the top control points up, your text will be skewed upward. The text will be skewed downward when dragging one of the bottom control points down.
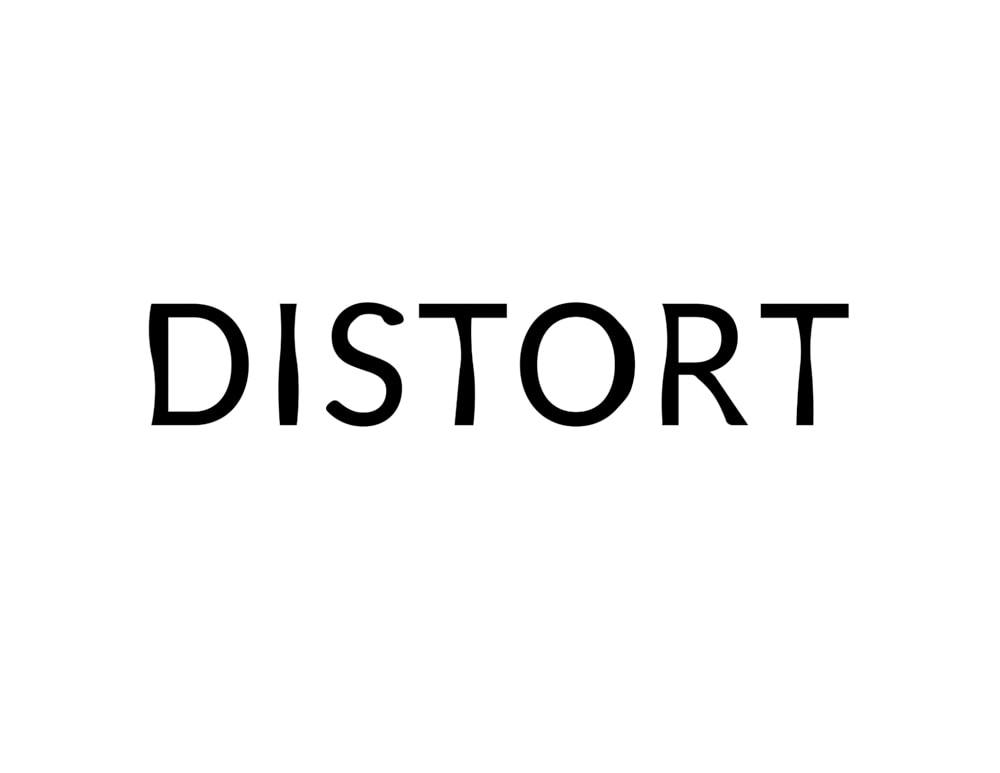
How distorted your text will look will depend on how much you drag it in the direction you want. I pulled my text far to the right in the example below.
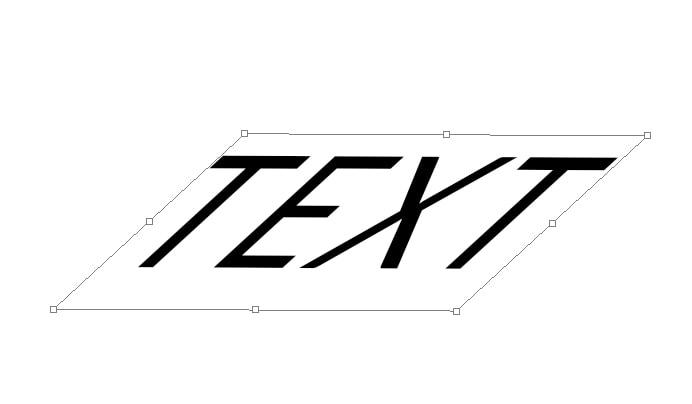
Adjust the skew as much or as little as you need to achieve the final result you are after.
How To Distort Individual Characters
By distorting individual characters of a text, you can customize them in several ways, making them more suitable for your project’s theme.
Distorting letters of a text requires you to follow a sequence of steps. However, it offers endless creative possibilities. I’ll show you some ways to distort the individual characters of a line of text.
First, grab the Type Tool (T) and type your text.
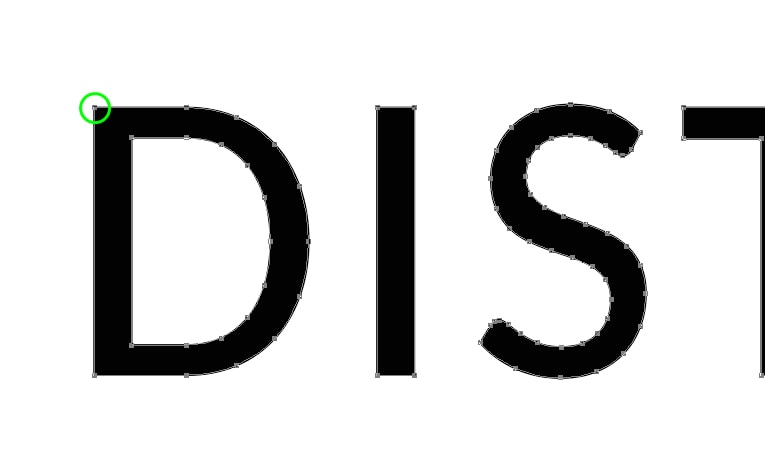
Second, go to the Layers panel, right-click the text layer and select Convert To Shape.
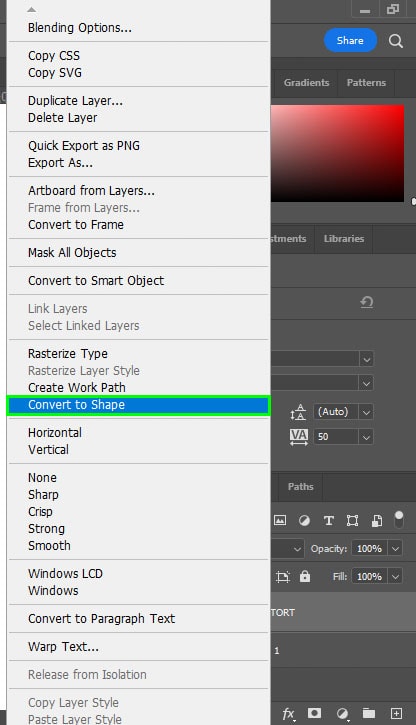
You can now manipulate your text as if it were a shape. As shapes can be manipulated in countless ways, there are no limits to what you can do to change the appearance of the letters of your text.
The only drawback to turning your text into a shape is that it will no longer be editable.
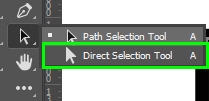
To distort the letters of your text, you will need to activate the Direct Selection Tool found in the Toolbar.
After enabling the Direct Selection Tool, click the letter you want to distort. Control points will appear around it since the text was converted into a shape layer.
You can edit control points individually or collectively. I will show you how to do both.
– Edit Control Points Individually
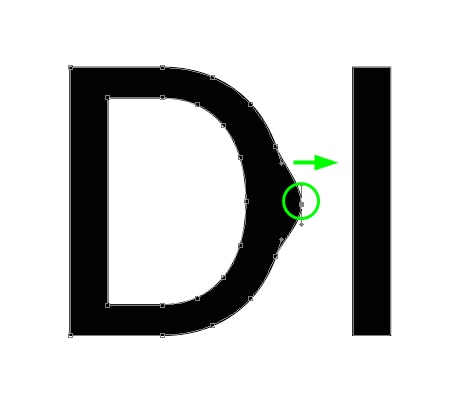
To edit an individual control point, click it and drag it in any direction you want. This will distort the portion of your text in the direction you pull it.
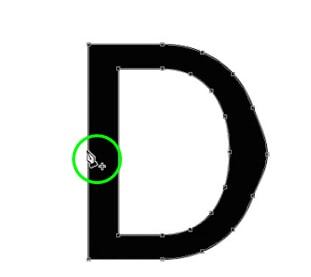
If you want to create more control points to distort your letter, click the Pen Tool (P) in the Toolbar.

After that, click the segment of the letter to which you want to add a control point.
Then, pull the new control point, using the Direct Selection Tool, in any direction, as demonstrated above.

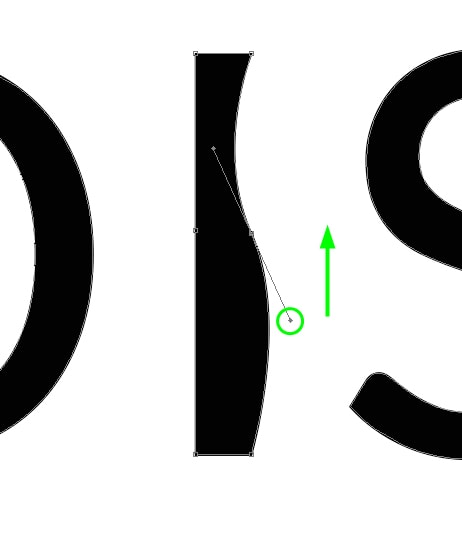
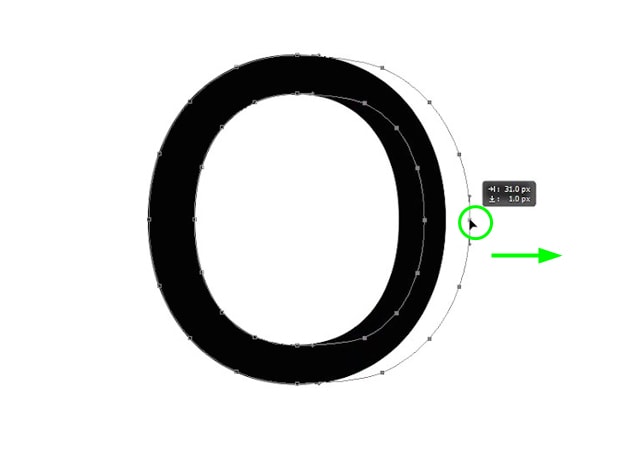
You can also turn segments of a letter into curves. To do this, click any handle connected to the given letter’s control points.
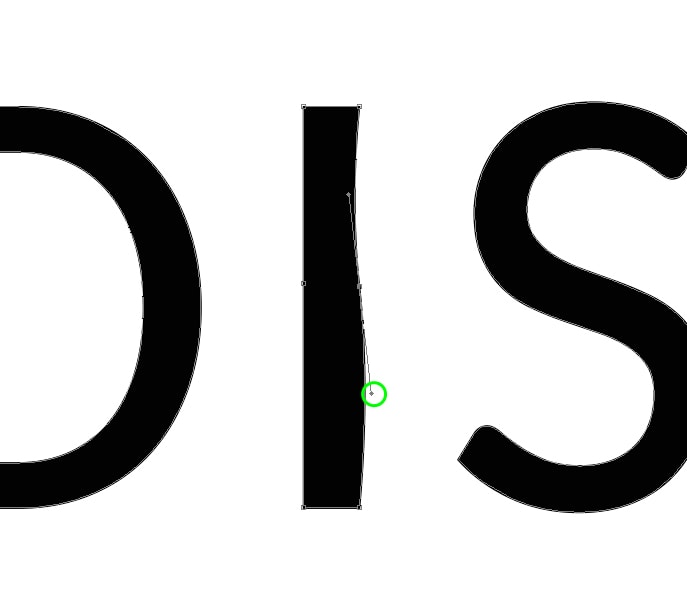
Then, pull the handle in any direction to create a curve. In my case, I pulled the handle up. The slope of the curve will depend on how far you pull the handle.
– How To Edit Multiple Control Points At The Same Time
You can edit more than one control point at the same time. This stretches the letter.
First, grab the Direct Selection Tool (A).
Then, drag around the portion of the letter you want to distort. In my case, I dragged around half of the letter O. You will be able to distort the part of the letter you selected. The part of the letter you left behind will remain untouched.
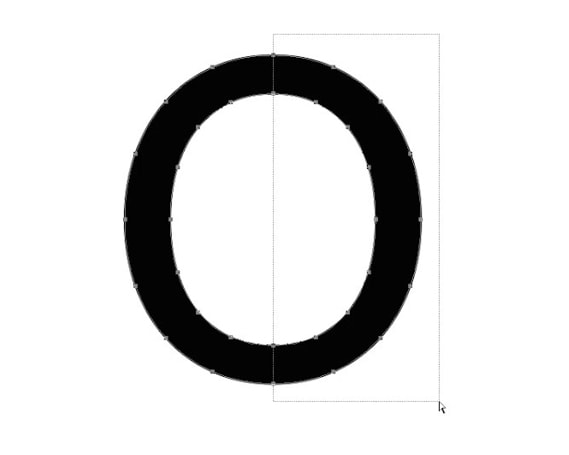
Once the target area is selected, click the part of the selected letter and push it in the direction you want.
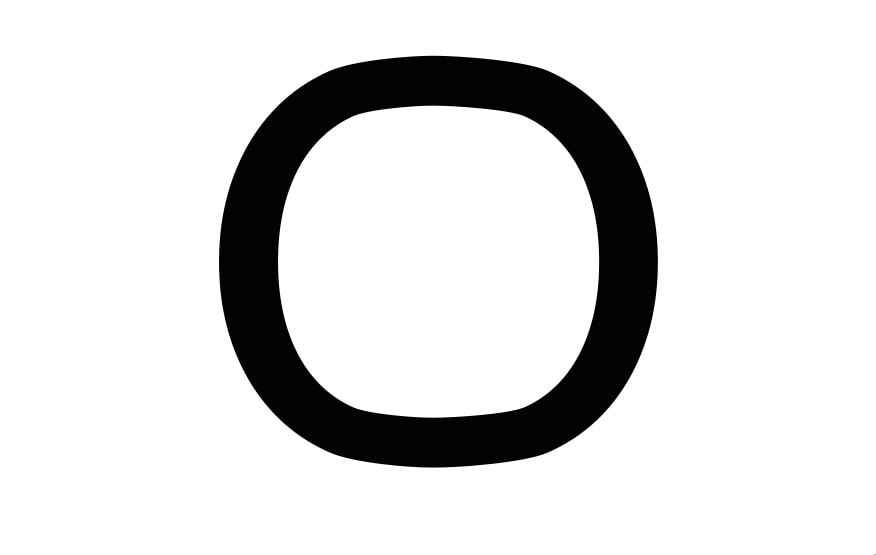
In my case, I pushed the letter O to the right, making it look wider.

Learning how to distort text is only the tip of the iceberg when learning to use text in Photoshop. To further your skills with the Type Tool, check out my ultimate guide to the Type Tool in Photoshop.
