
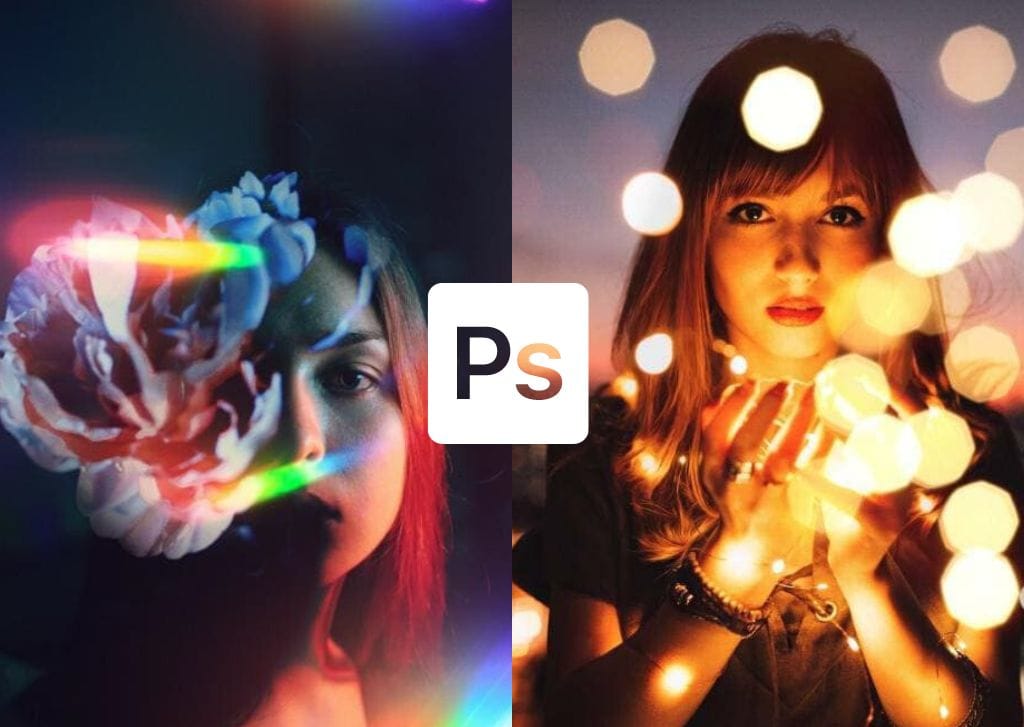

You can add creative flair to a photo by knowing how to overlay images in Photoshop. This can enhance your images and designs; you’ll likely use the effect often!
In this guide, you’ll learn how to use an overlay with your photos, which images work well, and where to find them.


How To Overlay Images In Photoshop
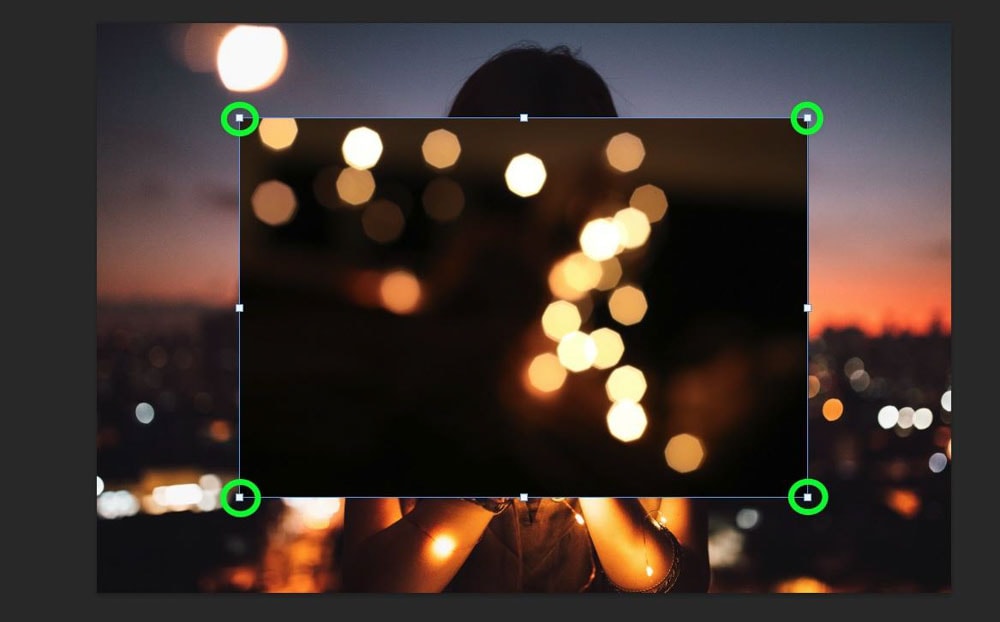
Step 1: Add Your Overlay As A Separate Layer Onto Your Image Layer
To start this process, make sure the project you’re working on is open. In a separate window, drag the overlay you want to use into your project. Use the corner handles to resize the overlay to fill the entire canvas.
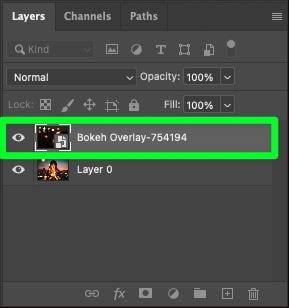
You should see the overlay above your original image in the Layers Panel.
The best overlays tend to be flares, sparks, flames, and other lighting effects. You want the background of your overlay to be as close to black as possible, with plenty of light areas.
Step 2: Set The Overlay Layer’s Blend Mode To Screen
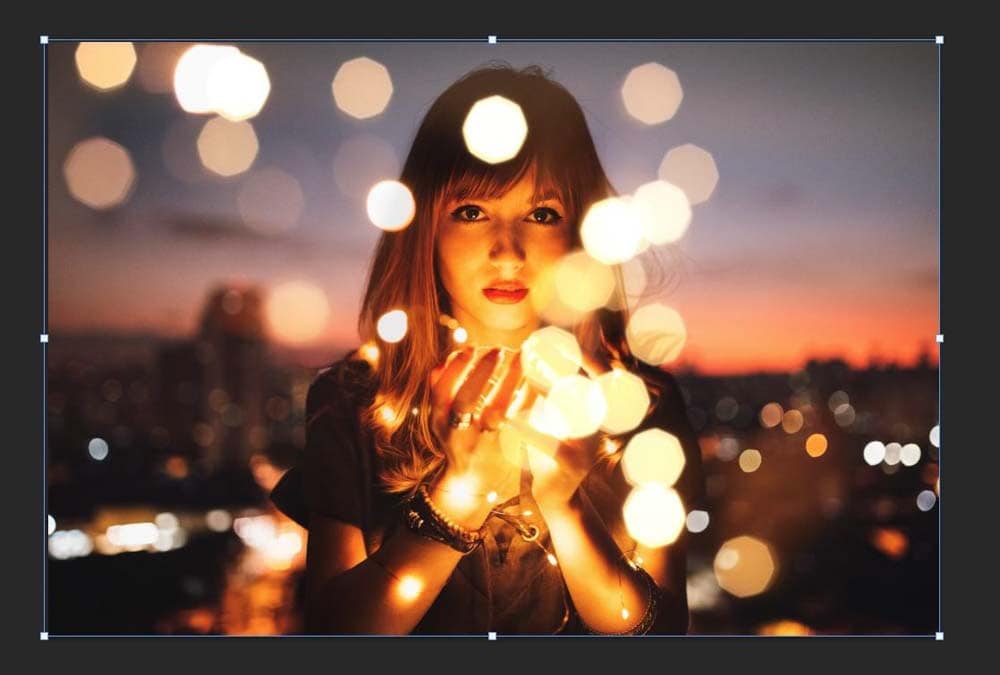
Select the overlay layer, then click on the Blending Mode drop-down menu. Select Screen from the list. With the Screen blending mode selected, each pixel in the image is lightened, which is determined by the brightness levels of the pixels in both layers.

You should now see your original image through the overlay.
Note: Some overlays may create discoloration. Use Blend-If on your overlay to remove discoloration and retain the contrast.
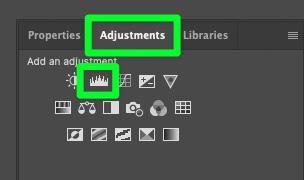
Step 3: Add A Levels Adjustment Layer Above Your Overlay
First, add a levels adjustment layer to your project by opening the Adjustments Panel and the Levels icon. Or, go to Layer > New Adjustment Layer > Levels. Make sure the Levels adjustment layer is above your overlay layer.
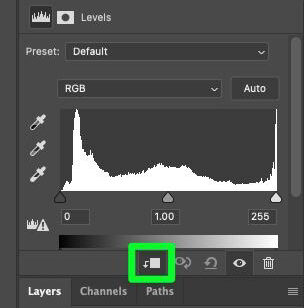
Step 4: Clip The Levels Adjustment Layer To The Overlay Layer
The next important step is to ensure the levels adjustment layer only affects the overlay layer and not any other layers in the project. This means you need to add a clipping mask to the adjustment layer to clip to the overlay layer.
In the Properties Panel, click the Clipping button at the bottom of the panel. This will clip the layer you have selected to the layer below it.
Step 5: Darken The Shadows In Your Overlay
To get the most out of using the Screen blending mode, you must ensure that you have no gray pixels in your overlay. The Screen blend mode will brighten white pixels and erase black pixels, but for gray, it will only bring down the opacity slightly.
To darken as many gray pixels as you can, adjust the levels in the Properties Panel by dragging the leftmost handle toward the right.
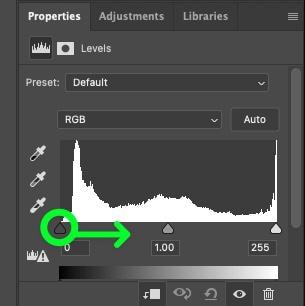
Your image should now look even more clear and crisper.


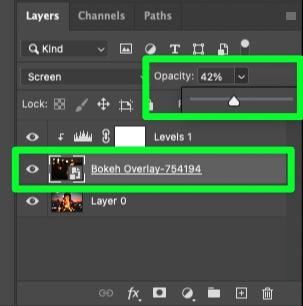
Step 6: Adjust The Opacity Of The Overlay Layer (Optional)
If your overlay looks too bright, consider adjusting the Opacity of the layer.
To do this, select the overlay layer first, then click the Opacity drop-down menu. Adjust the Opacity slider until you’re satisfied with how the overlay blends with your project.
Best Places To Find Image Overlays For Photoshop
For something free, Pexels is a great choice. Pexels offers over three million royalty-free photos. With such an extensive library, you should be able to find something that works for your vision! But, the images can be hit-or-miss in quality.
Creative Market, an online marketplace for buying and selling digital assets, is another option. The overlays on Creative Market won’t be free, but they’re of the highest quality. If you use overlays often, a subscription with Envato Elements would be the way to go. Envato offers unlimited downloads of millions of digital assets per subscription.
