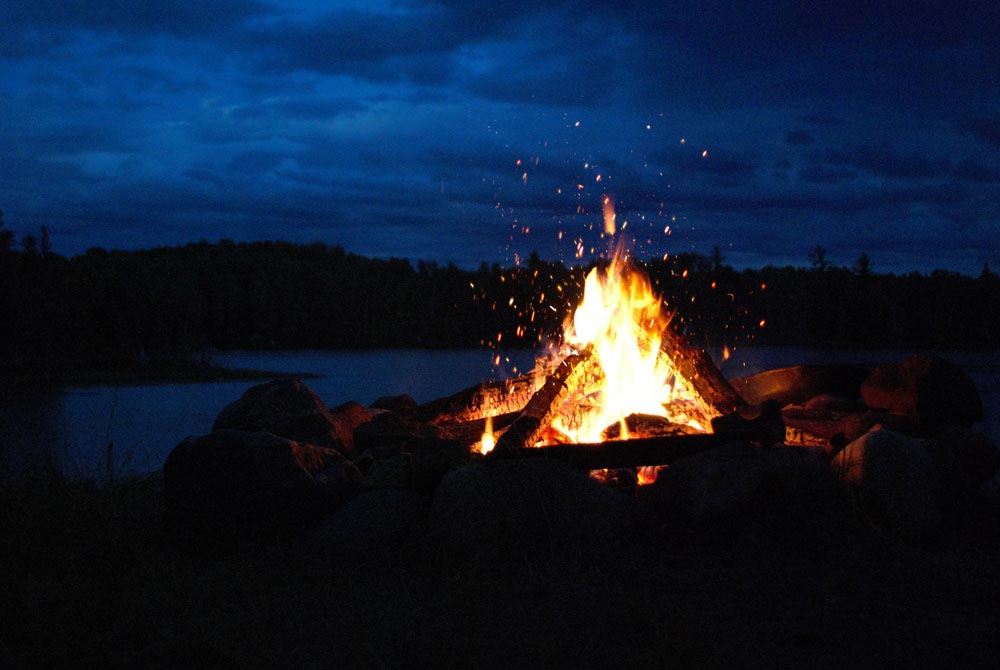
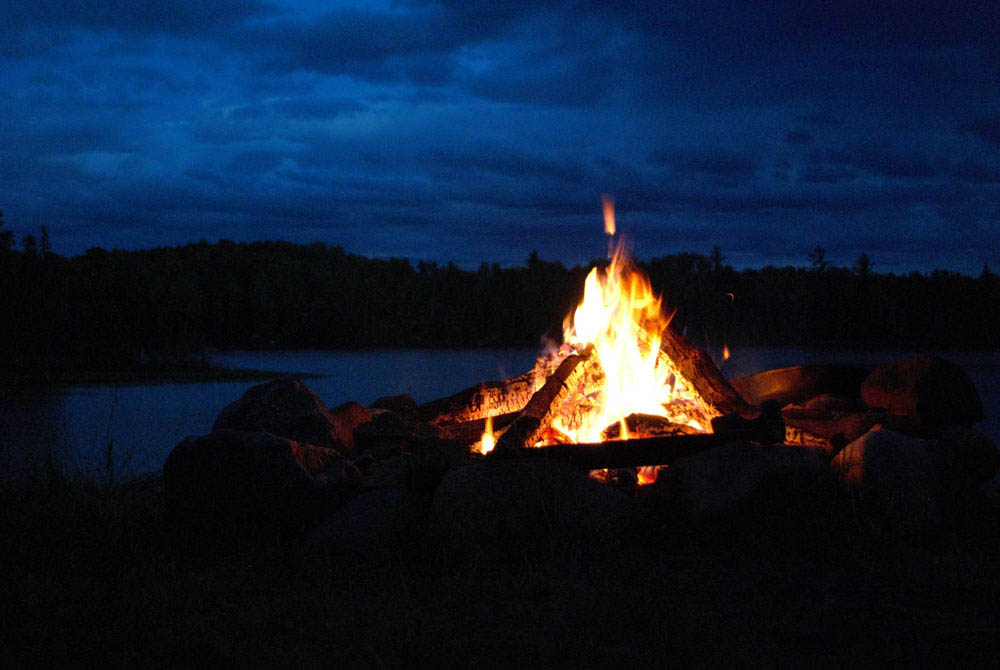
Fire is a warm and intriguing subject to photograph, but capturing the vibrant colors of flames can be challenging. Whether you couldn’t get the campfire photo you wanted or need to add a warm fire to a fireplace for real estate photography, here is how to make flames in Photoshop.
You can create flames from scratch using the flames filter, which gives you complete control over the result. Creating your own flames allows you to draw the shape of the flame and add various effects, such as tapering, the width, and the opacity of the flames. You can then alter the color of the flames if you need to.
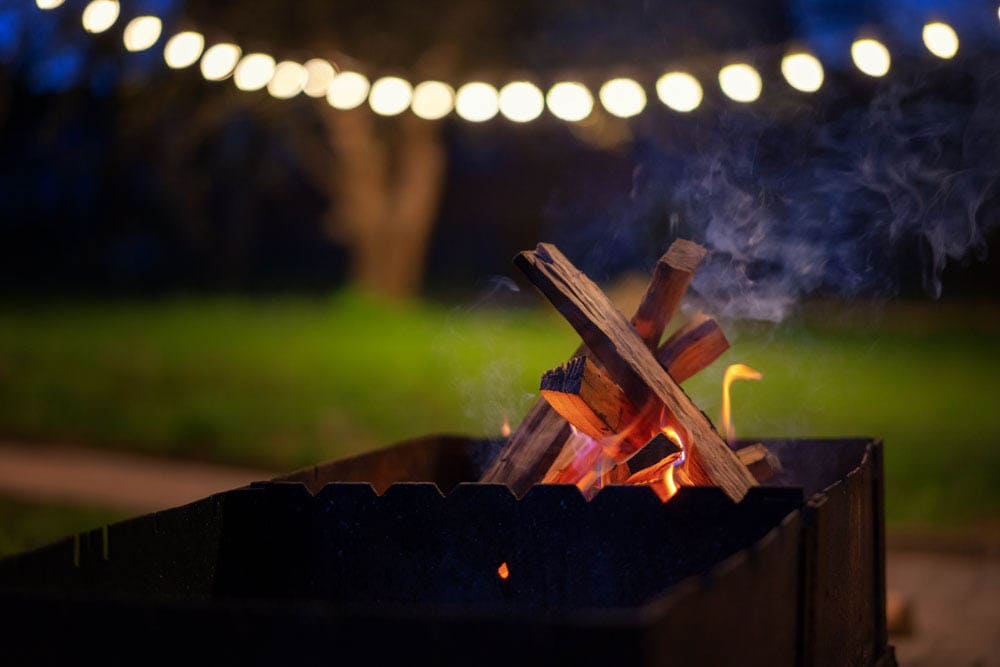
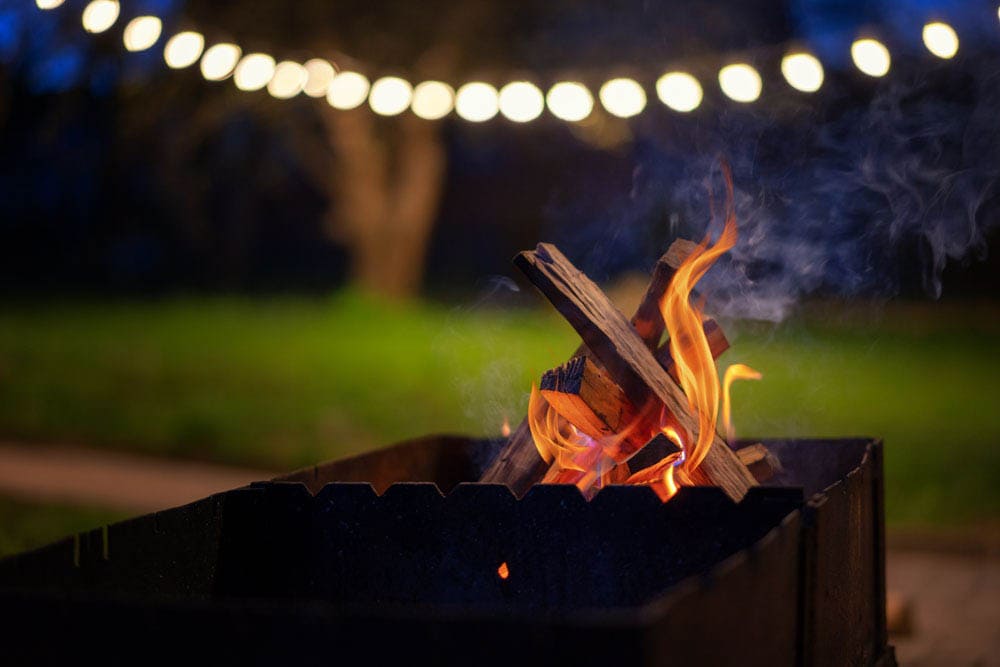
If you already have a photo of a fire to which you want to add more vibrancy, you can add sparks to an image using an overlay that you have downloaded. You can then alter the overlay to match the curves and direction of your flames.
How To Create Flames In Photoshop
You can use this method if you want to create flames from scratch to add to a fireplace or campfire. If you already have a few flames in the image, you can also use this technique to bulk up the fire by adding more flames that match the existing flames.
Step 1: Draw Flame Lines Using The Pen Tool (P)
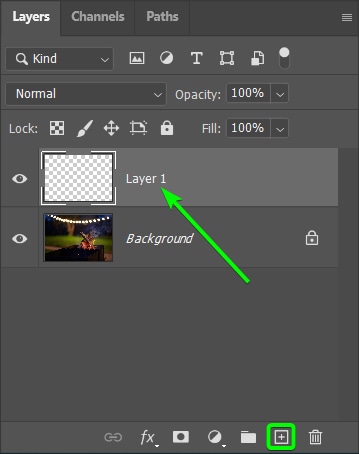
To start, you need to draw basic lines to show where Photoshop should place the new flames and the shape you want the flames to be. To do this, add a new layer by clicking on the New Layer icon in the Layers panel.
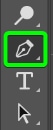
Then, select the Pen Tool from the Toolbar or press P.
Once the tool is selected, ensure it is set to Path in the Options bar by using the drop-down menu to choose Path.

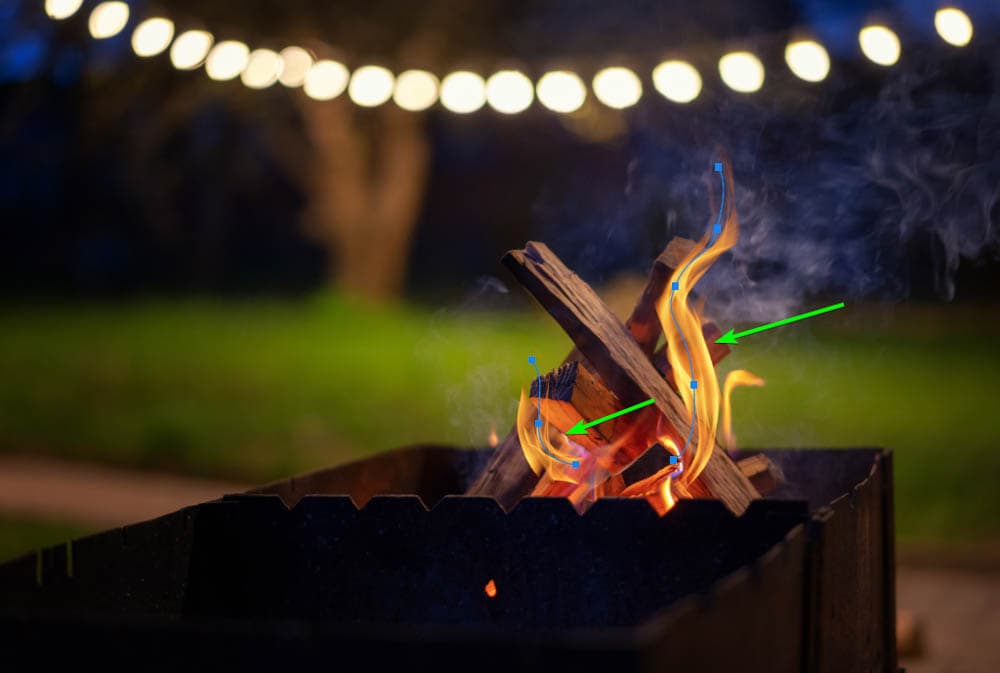
Once the settings are correct, start drawing a path on the image by clicking to add the first anchor point.
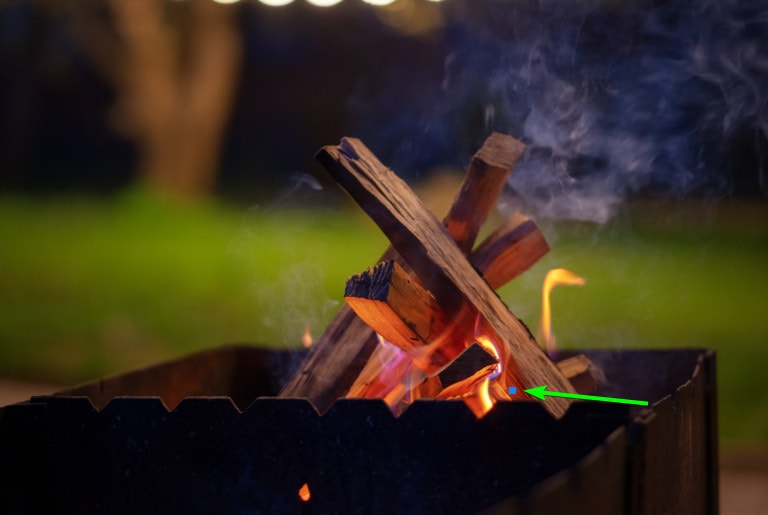
Then, click on a new spot to add a line. Hold in the mouse and drag the path to create a slight curve if you need. You will notice two control points on either side of the anchor, which you can use to correct the curve at any moment.
Continue clicking and dragging to create a curved path for the flame to follow.
Once you have finished the line, hold in Control (Win) or Command (Mac) and click anywhere on the image to complete the path without needing to loop back to the starting point.
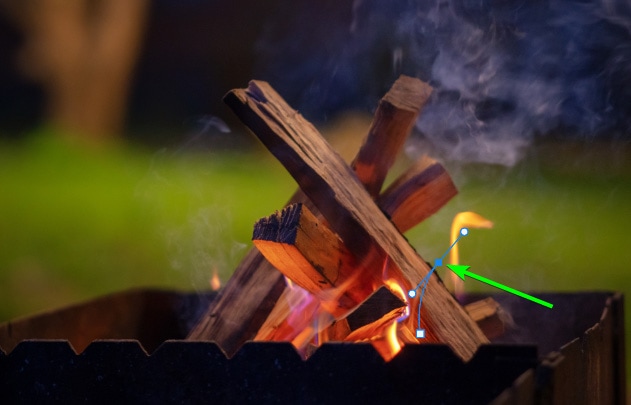
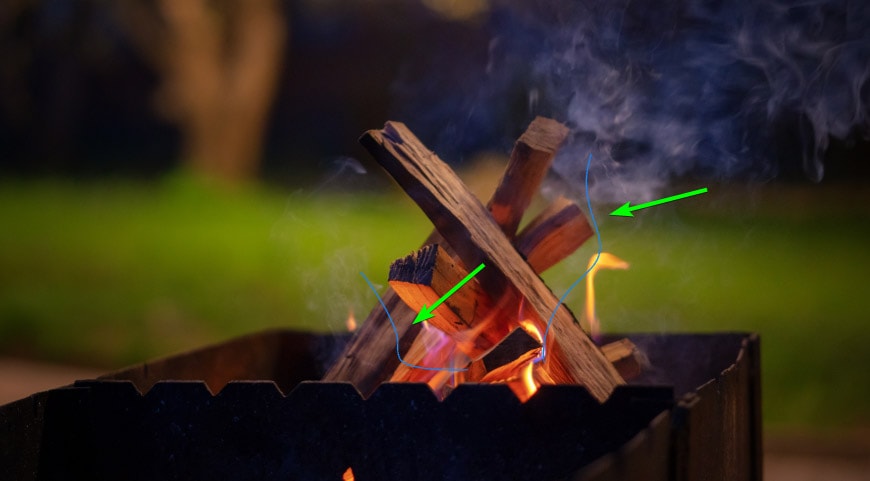
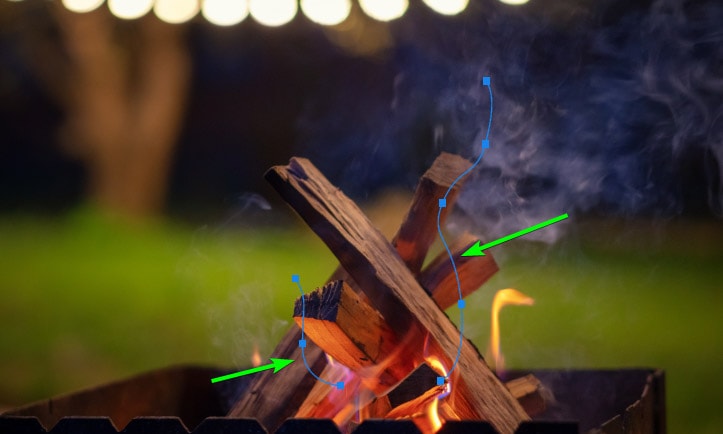
You have now made your first flame line. You can edit the path to correct the curves if you need. Then repeat the steps above to create as many flame paths as you need for your image. I want to keep the flame simple, so I have only added two flame lines to the picture, but you can add more if you’d like.
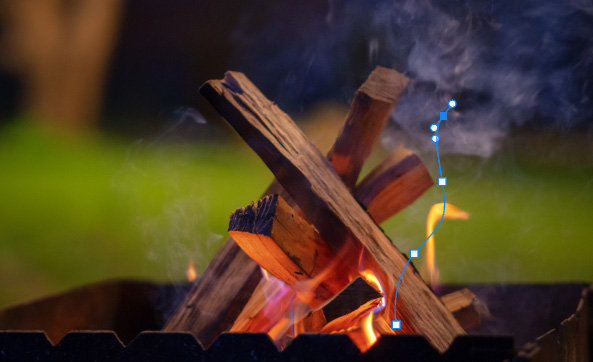
Step 2: Select All The Pen Paths Using The Path Selection Tool (A)
Once you have created all the flame lines, you can select them as a group to show Photoshop the lines to which you want to add the flames. To select all the lines, activate the Path Selection Tool by selecting it in the Toolbar or pressing A.

Then click and drag around the lines to select them all.
You now have all the flame lines selected together, and you can add the flames to these paths in the next step.
Step 3: Add The Render Flame Filter
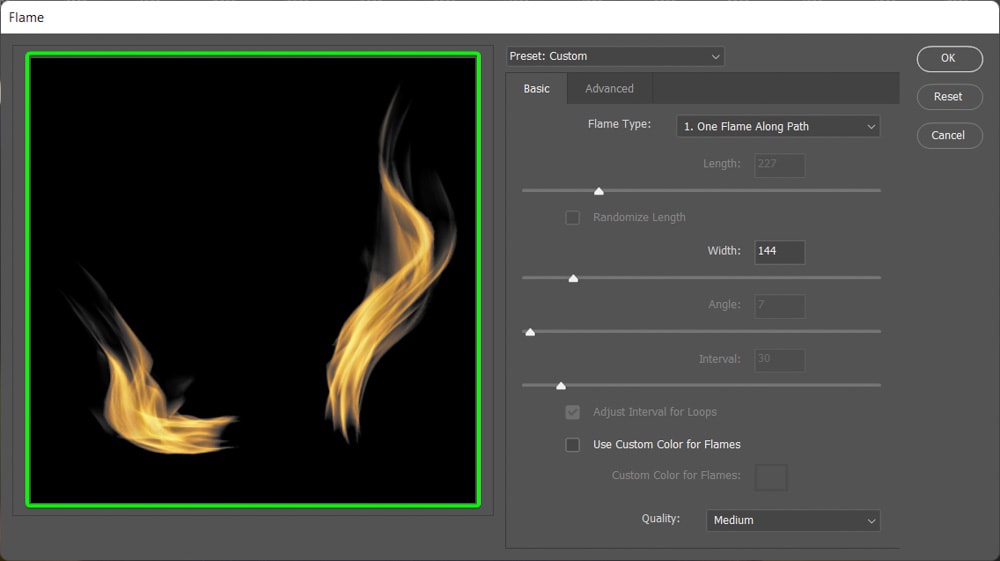
Once the paths are selected, you can add the flames using the Render Flame Filter. To set the filter, navigate to Filter > Render > Flame.
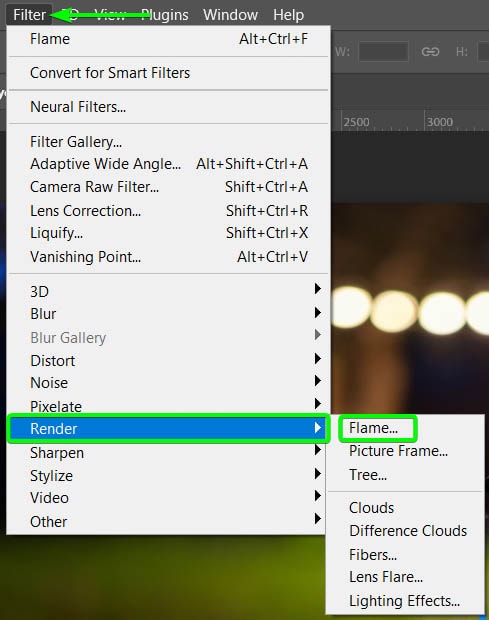
The Flame window opens, giving you several settings to adjust to create the type of flame you need for your image. You won’t see the flames in your photo yet, but you can see a render of the flames in the preview panel of the window.
Step 4: Change The Flame Filter Settings
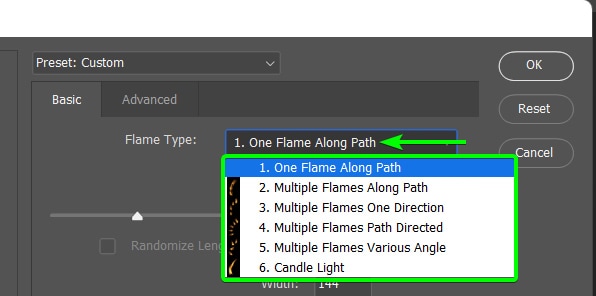
Now, you need to move through the various settings to determine how you want your flames to show in your photo. Firstly, you need to check the Flame Type using the drop-down menu at the top of the window.
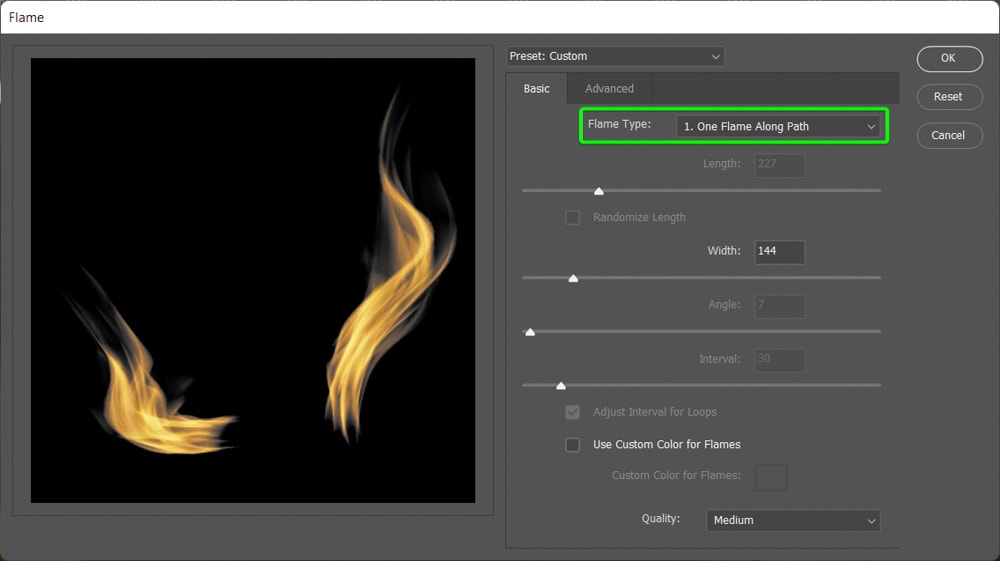
You can choose between adding one or multiple flames along each path with various angles and directions. You can also select a Candle Light flame from the list. I recommend you set the type to One Flame Along Path for the best results in a fireplace or a campfire.
Next, you can use the Width slider to make the flame(s) fatter or thinner, depending on how large you want them to be.
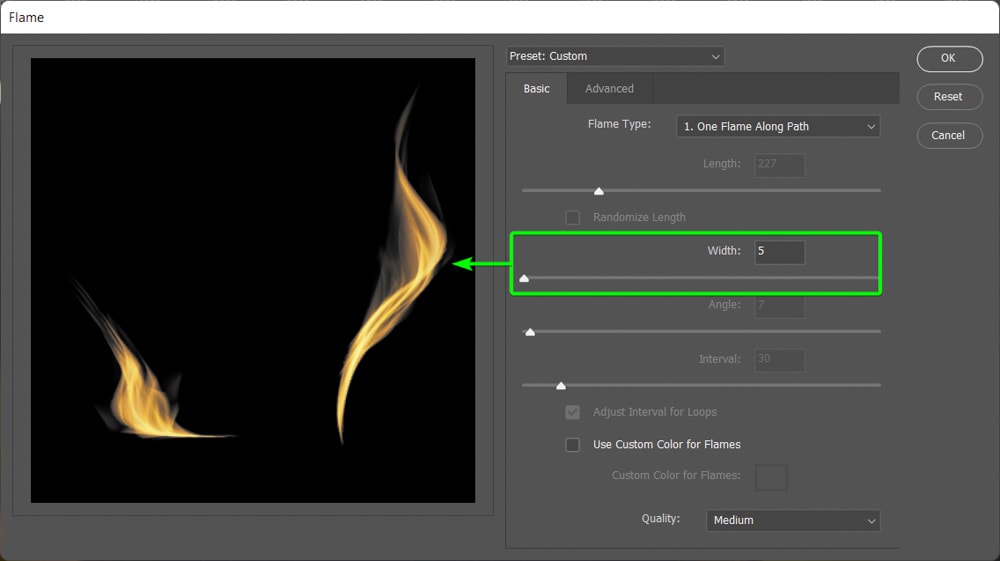
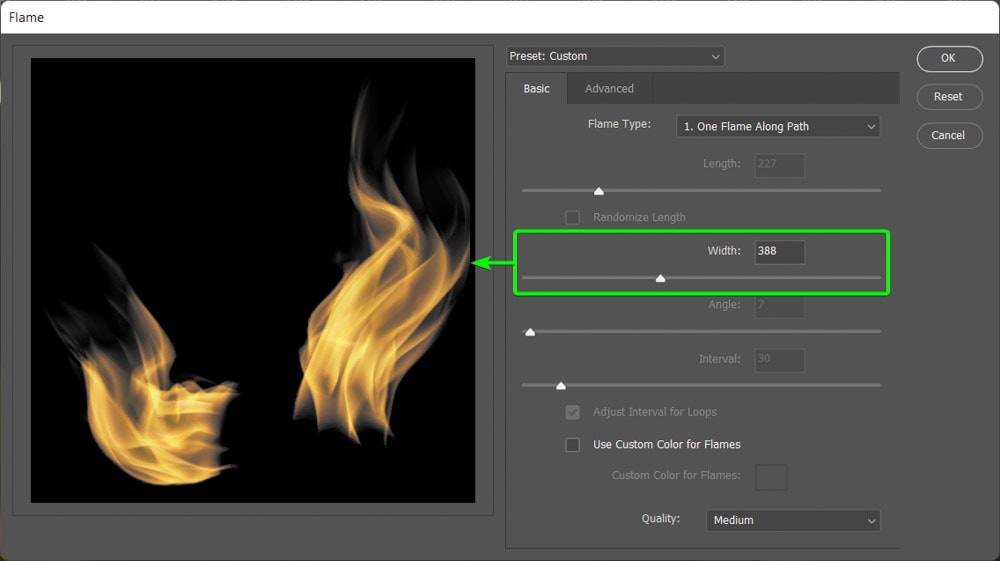
Adjust the width until you are happy with the thickness of the flame(s).
Once you have set the Type and Width for the flame, you can move on to the more advanced settings. To see the extra settings, click on the Advanced tab, and more options appear for you to adjust.
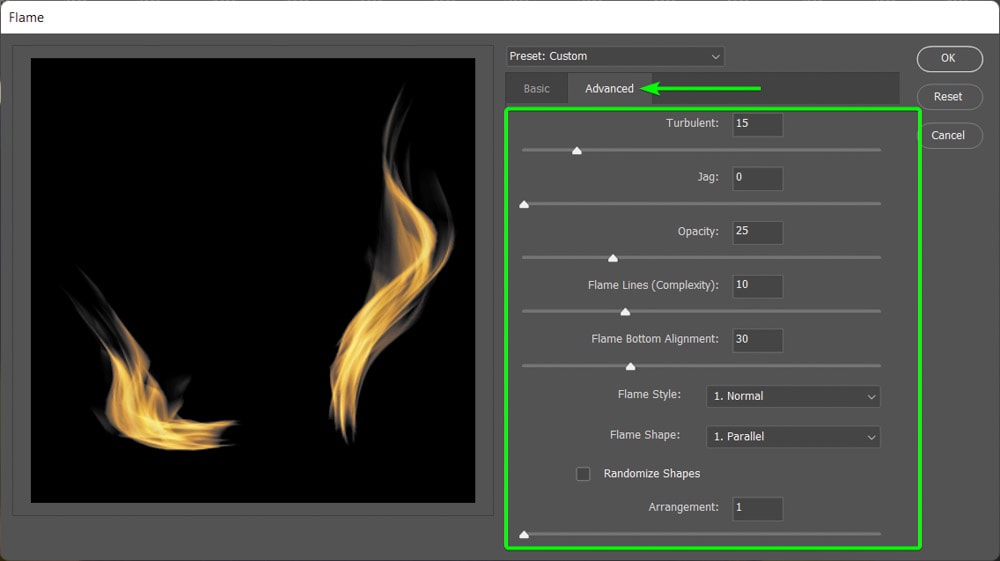
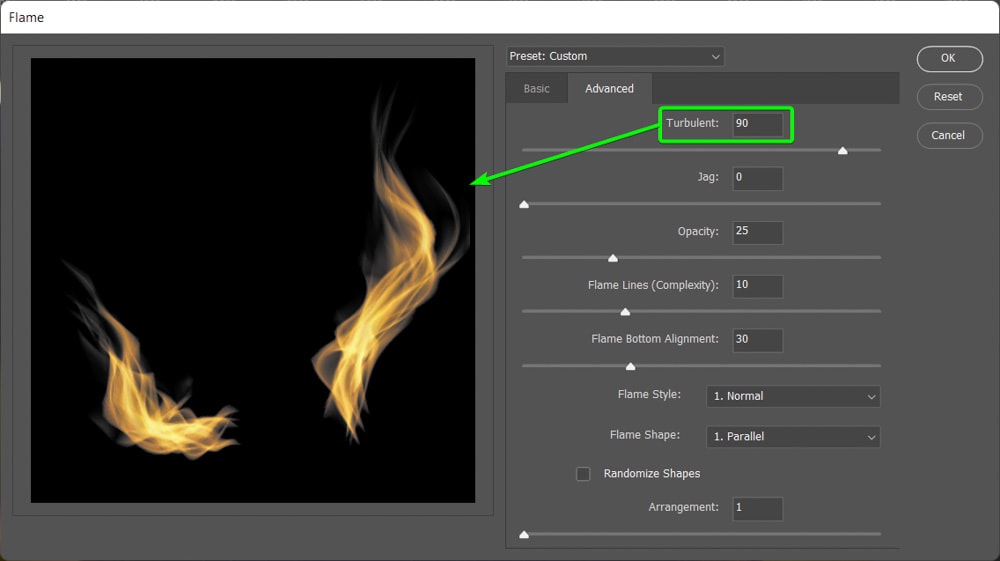
Use the Turbulent slider to determine how unpredictable the flames should look. Increasing the slider adds more small flames and curves to the overall flame.
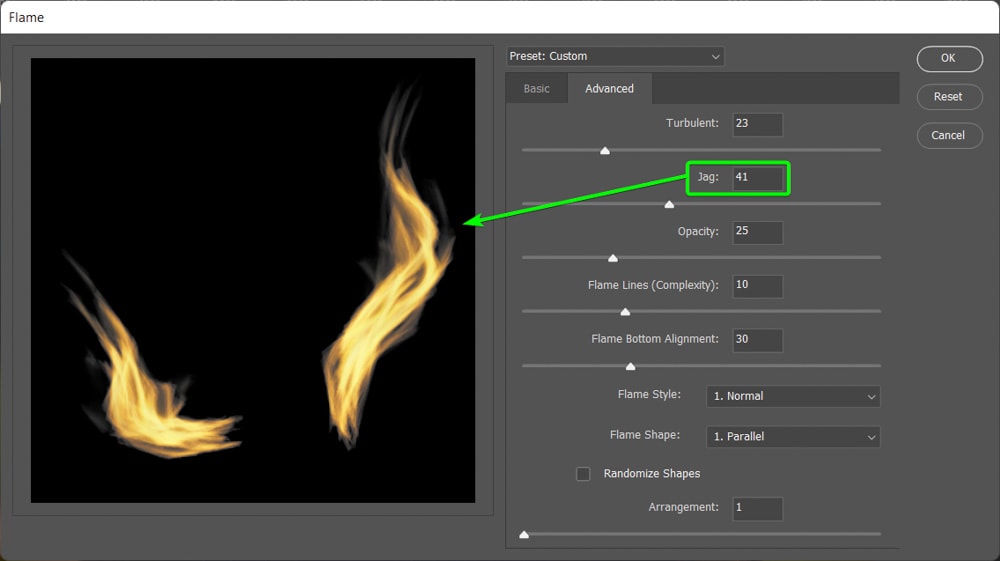
The Jag slider creates more jagged edges around the flame, almost blurring the flame a bit, which indicates more movement on the flame as if you used a low shutter speed to capture the image.
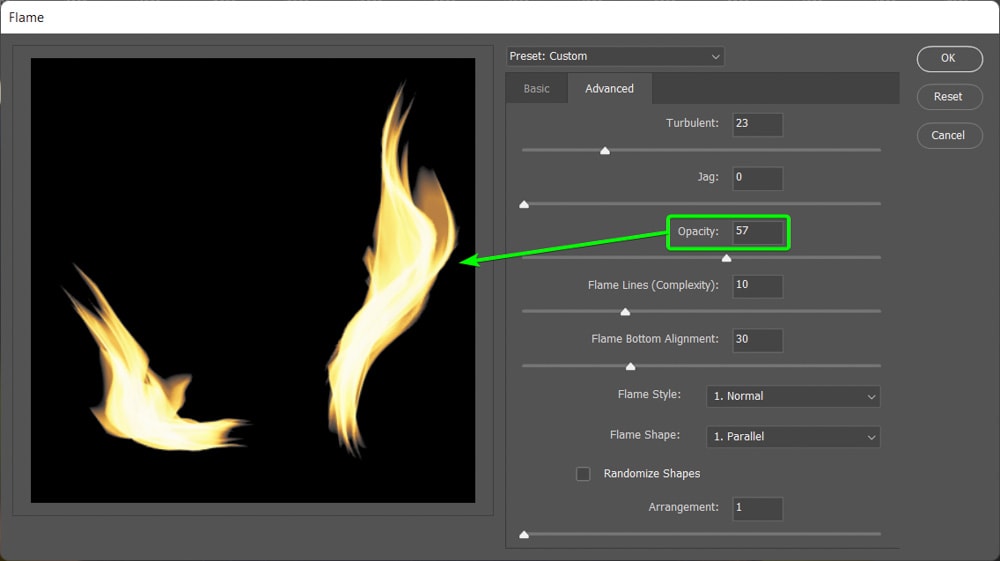
Next, the Opacity slider increases or decreases the transparency of the flame(s), which will create an overexposed effect if you move the slider too far to the right.
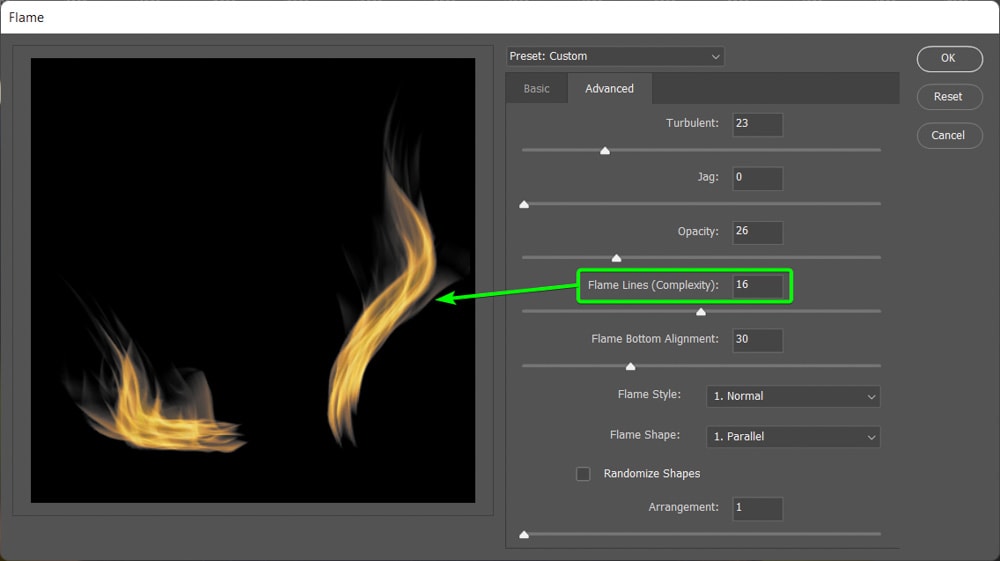
The Flame Lines (Complexity) slider adjusts the number of lines in the flame. Move the slider to the right to increase the number of lines in the flame.
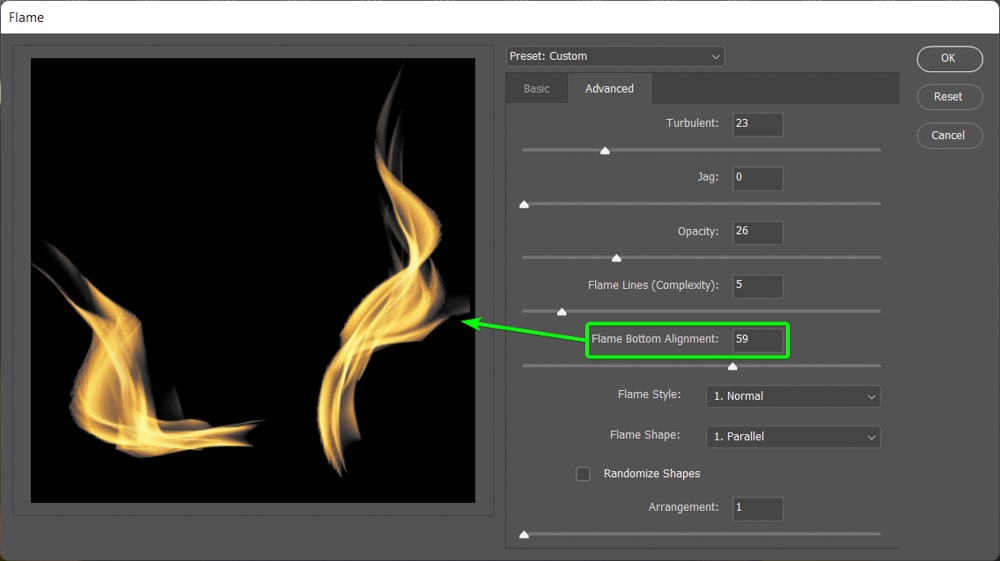
The Flame Bottom Alignment slider controls whether the lines found within the flame are aligned to each other or randomly spaced out. Increasing this slider makes the lines more inconsistent.
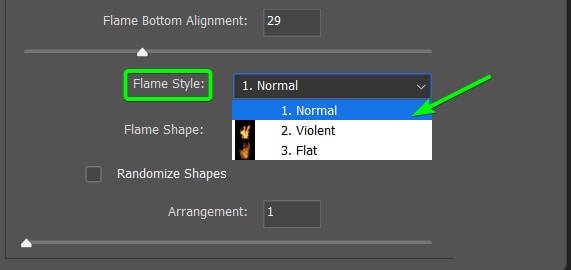
Next, you can change the Flame Style between Normal, Violent, or Flat using the drop-down menu.
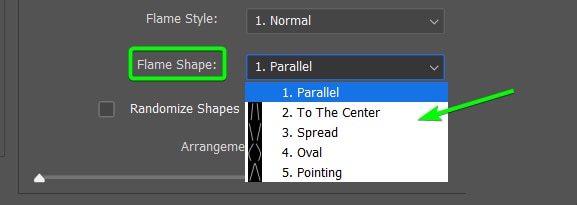
You can also change the Flame Shape using the next drop-down menu.
Check the box next to Randomize Shapes to create a more irregular-looking flame.

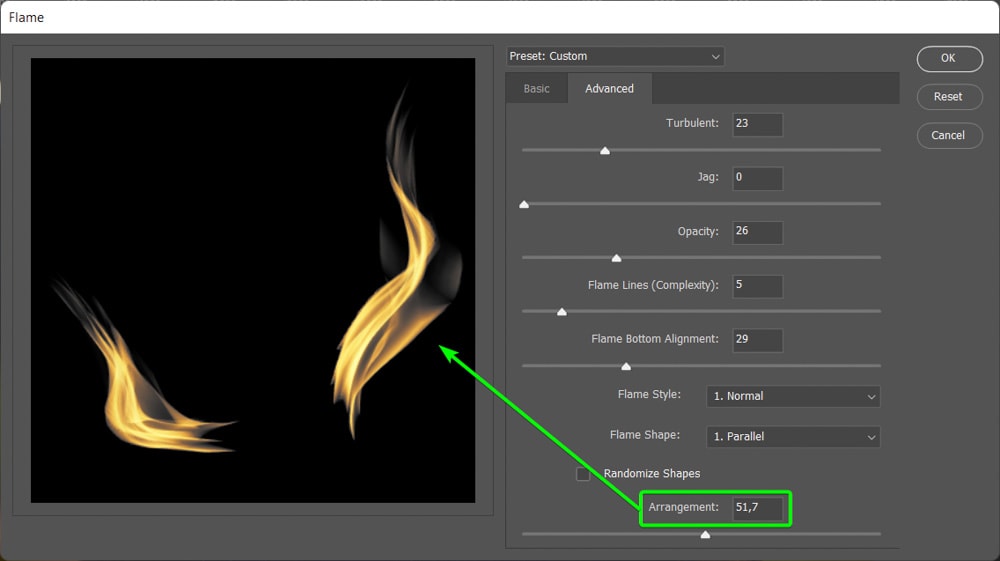
Instead of checking the box, you can also use the Arrangement slider to move the lines within the flame around to create different effects.
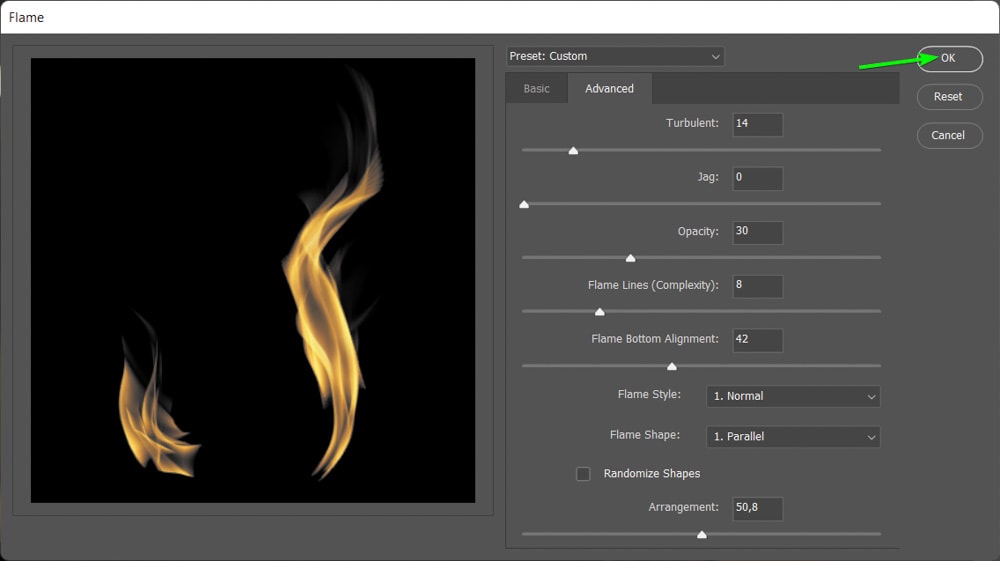
Play around with the various settings to create the type of flames you want for your image. You can create several different types of flames by using the different options. I have used the following settings for my flames.
- Flame Type: One Flame Along Path
- Width: 220
- Turbulent: 14
- Jag: 0
- Opacity: 30
- Flame Lines (Complexity): 8
- Flame Bottom Alignment: 42
- Flame Style: Normal
- Flame Shape: Parallel
- Randomize Shapes: Unchecked
- Arrangement: 50.8
Press OK when you have the settings as you need them.
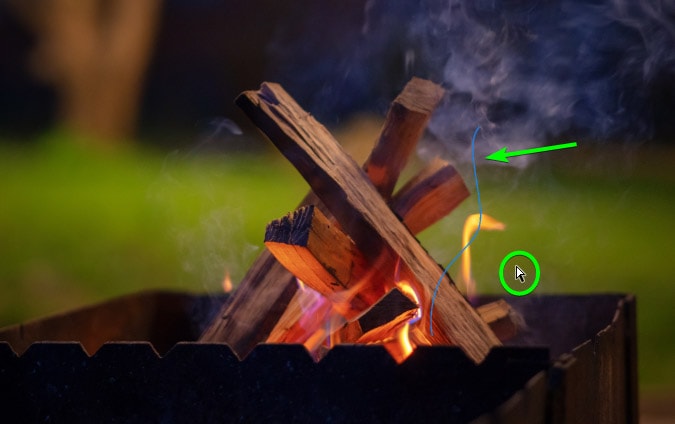
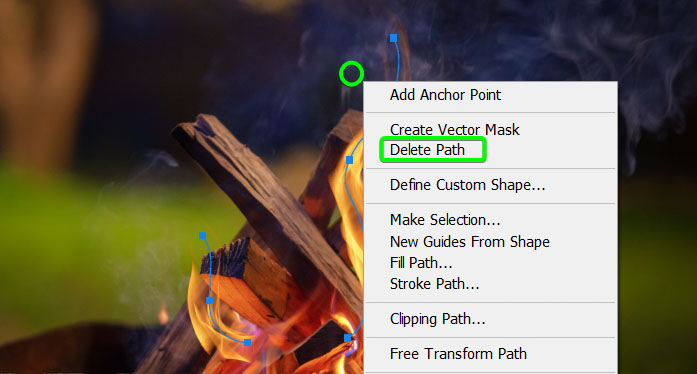
You will now see the flames on your photo behind the path lines you originally created.
Right-click (Win) or Control + click (Mac) and click Delete Path to remove the paths on the image.
You have now created your own flames, which you can leave as they are if you like them or continue to the next step if you want to change the color of the flames.

Step 5: Adjust The Color Of The Flame Using A Hue/Saturation Adjustment Layer
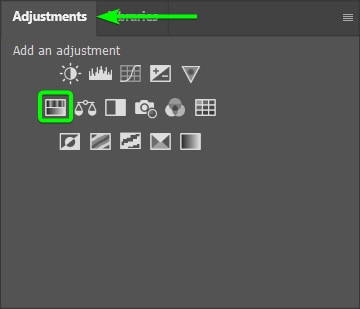
Add a Hue/Saturation adjustment layer by selecting the icon in the Adjustments panel.
Then, with the hue saturation adjustment above your flame layer, clip the layer to the flame layer by clicking on the clip to layer icon at the bottom of the Properties panel.

You can now adjust the Hue, Saturation, and Lightness sliders to adjust the flame’s color and vibrancy.
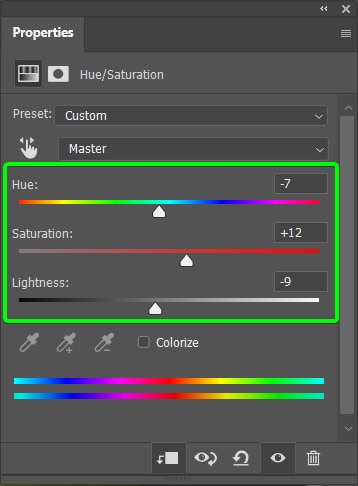
After changing the color and vibrancy, I have bolder flames that match my image better.
How To Add Sparks In Photoshop
If your photo already has flames and fire, but you want to add an extra flair to the image, you can do this easily in Photoshop. Using a spark overlay, you can add sparks to the flames and warp them to fit your picture.
Step 1: Download A Spark Overlay
First, you need to download a spark overlay, which is a black or transparent image with a few sparks on it. The image’s background will blend into your photo and only show the sparks on top of your photo.
You can find various overlays online, and I recommend you look at Creative Market or Envato Elements to find a free overlay for your image. I will be using the following overlay, which has a transparent background. Many overlays have black backgrounds, and these will work just as well.

Search the websites to find an overlay and download the image to your computer before heading to the next step.
Step 2: Add The Overlay To Your Image
Once you have downloaded your overlay, open it in Photoshop over your image layer.
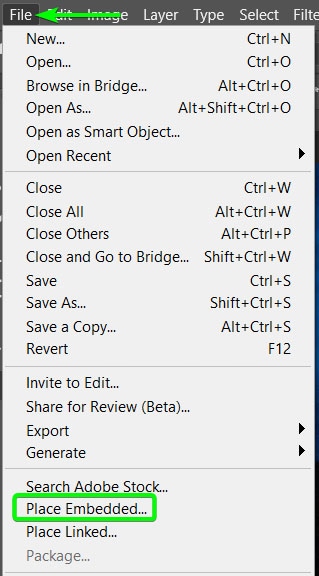
You can do this by opening the overlay in a separate tab and then dragging it to your photo tab. You can also open your image tab and go to File > Place Embedded and find the image on your computer to add.
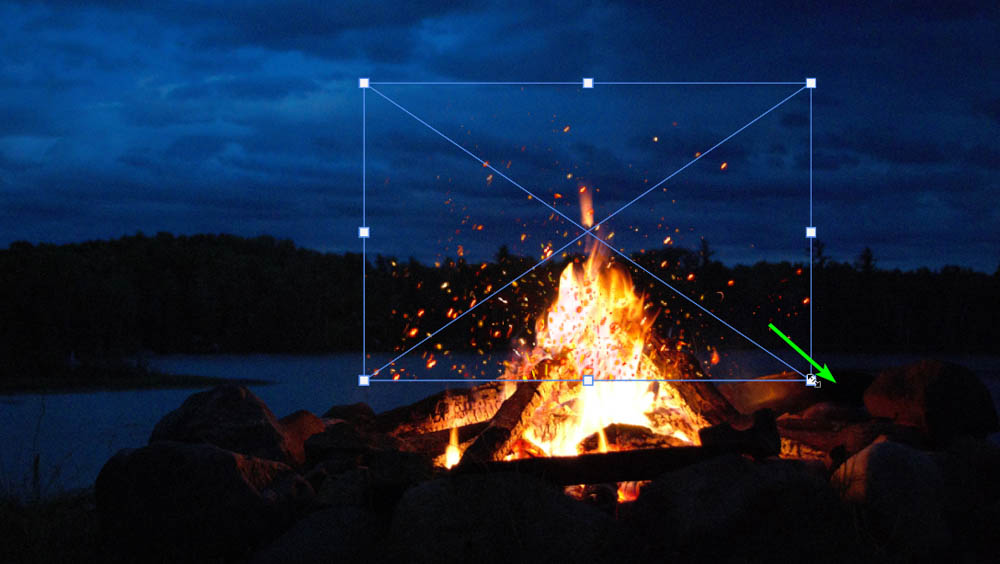
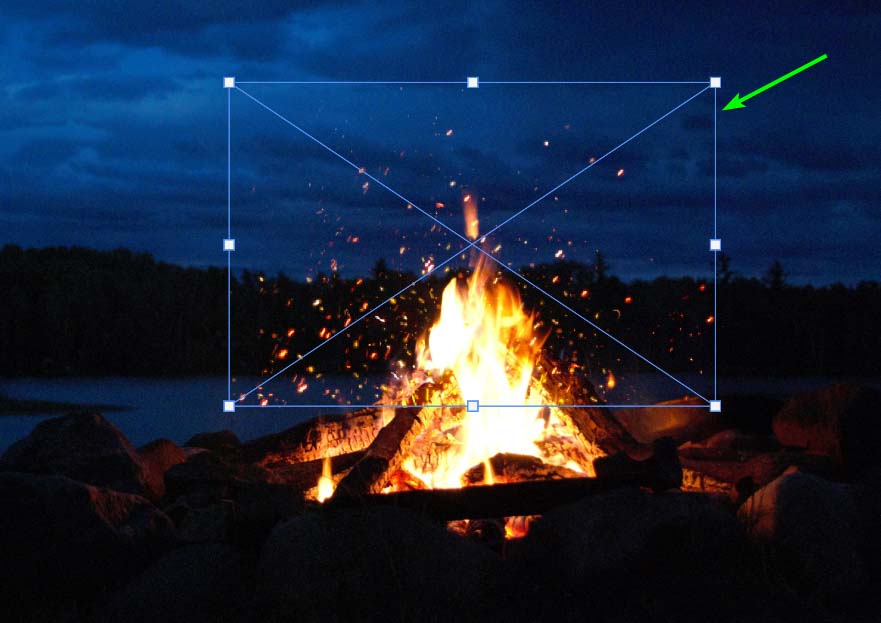
Once the overlay is added to your picture, you may need to reposition and resize the overlay.
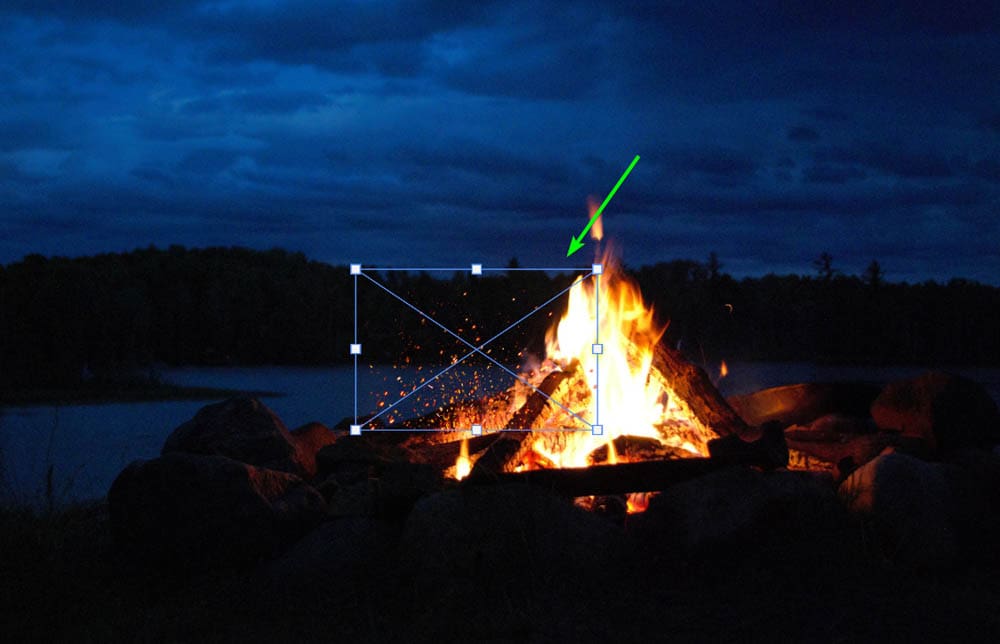
Use the Move Tool (V) to reposition the overlay on top of your fire, and then use the anchor points to resize the overlay. Click Enter to accept the new position.
Step 3: Change the Layer Blend Mode To Screen Or Linear Dodge (Add)
You must change the overlay layer’s Blend Mode to blend the sparks into the image. To change the blend mode, find the drop-down menu in the Layers panel set to Normal by default.
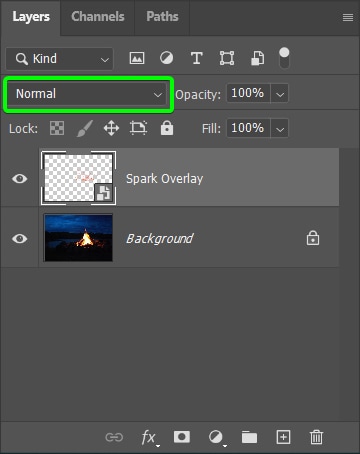
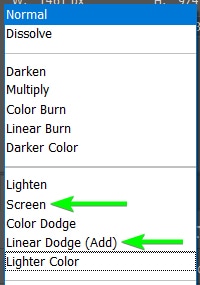
Then select the correct blend mode for your overlay. If you have an overlay with a transparent background like mine, set the blend mode to Linear Dodge (Add). Set the blend mode to Screen if you have an overlay with a black background.
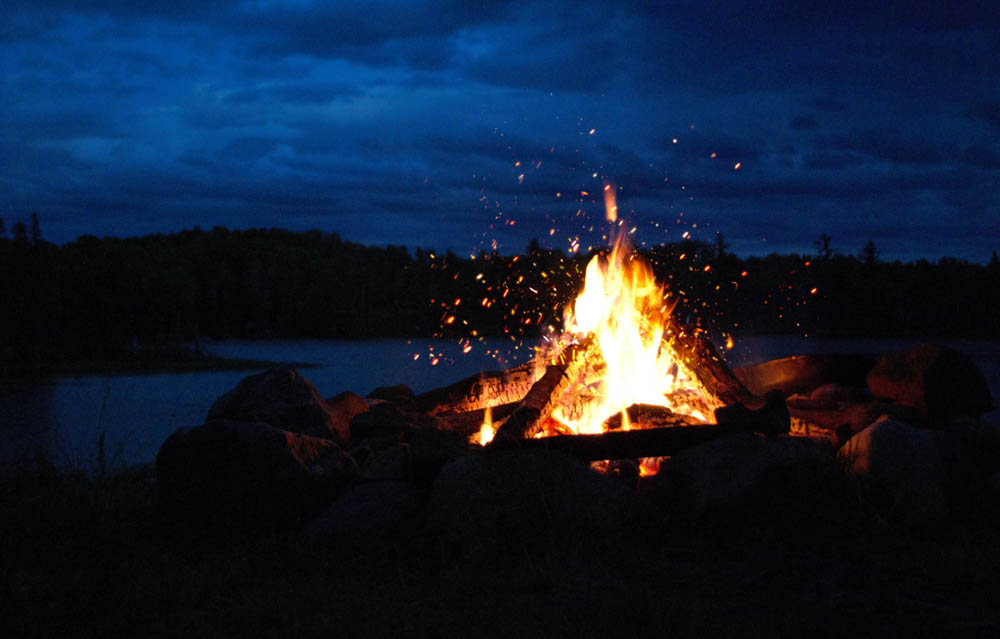
Once you choose the proper mode, the sparks will blend nicely into your photo and make them look realistic. If the sparks look good, you can continue with your other edits.
However, if your sparks aren’t sitting just right or your flame has a curve that the sparks don’t match, you can use the last step to warp them to fit the flame better, as I need to for my image.
Step 4: Warp The Overlay Layer To Fit The Fire
To warp the overlay layer and match the fire in your image, activate the Free Transform tool by pressing Control + T (Win) or Command + T (Mac). The anchor points will appear around the overlay on your image.
Then, activate the warp function by right-clicking (Win) or Control + clicking (Mac) and selecting Warp.
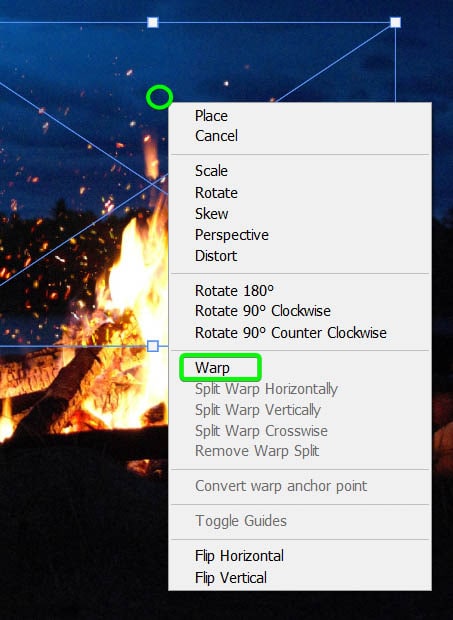
You will notice a mesh grid appear around your image. You can use the anchor points around the mesh and the gridlines inside the mesh to warp the image.

Click and drag the anchor points and the mesh grid around to get the warp you need for your overlay. Once you move an anchor point, control points appear to allow you to create a more custom warp for the overlay.
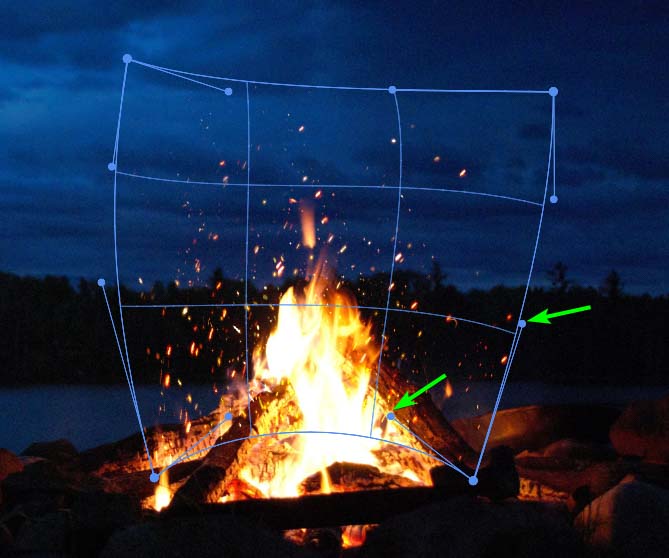
Keep moving the mesh around until you are happy with the angle and placement of the sparks, and then click Enter to accept the warp. You now have sparks naturally added to your flames.