
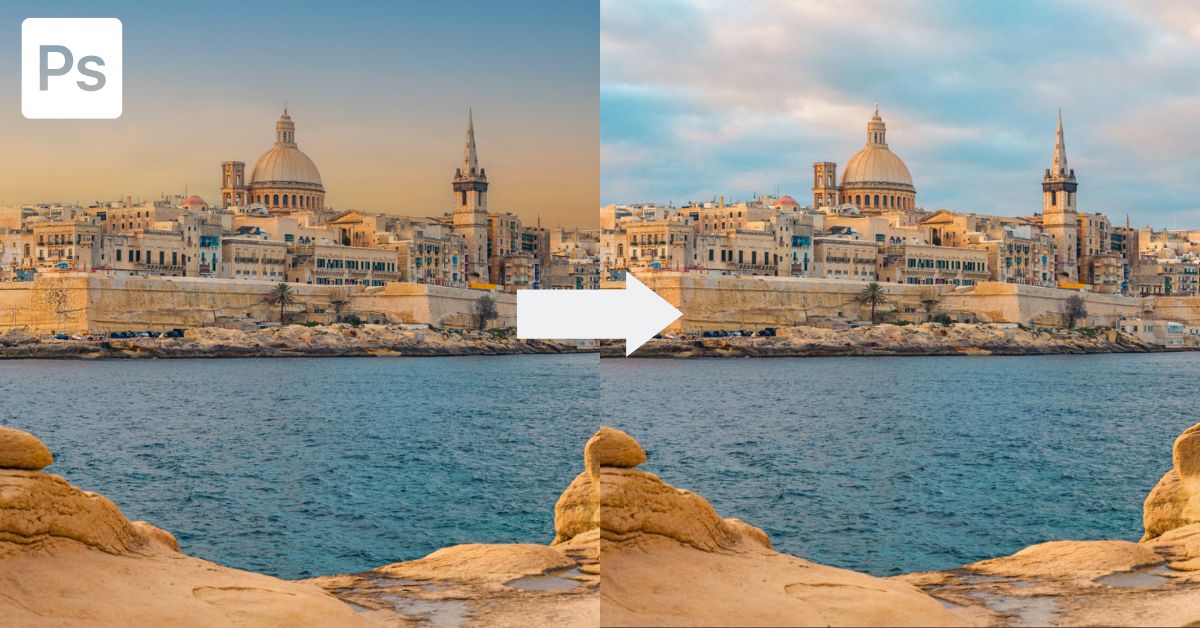

We’ve all been there: you’ve taken a photo where the foreground and subject are just right, but the sky isn’t. Maybe it’s too cloudy, or even too plain and blue. Adding the right sky is an easy way to upgrade your images. So, even if you haven’t shot the sky you want, you can still replace the sky in a photo using a few different methods in Photoshop.
Let’s look at the two best ways to replace a sky and break them down into bite-sized pieces to make the task extra simple.
How To Replace A Sky Using The Sky Replacement Tool
The first method is using the Sky Replacement Tool. That’s right — Photoshop has a specific tool that helps you replace the sky in your image in just a few clicks.
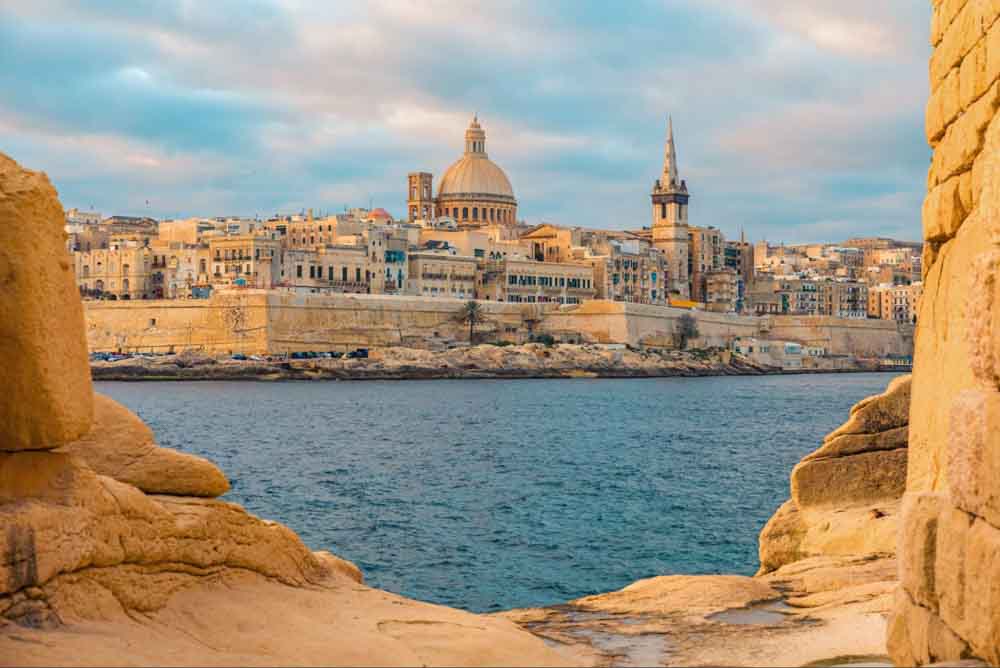
This tool is best for photos where the skyline is easily distinguishable without too many uneven edges — like the image below. The edge of the city against the sky has a few crooked areas, but nothing too complicated that Photoshop won’t be able to detect automatically.
Step 1: Upload Your Image
First, you’ll want to open your image in Photoshop. Do this by heading to File > Open and selecting the picture from your files. The image will appear in the workspace.
Step 2: Locate The Sky Replacement Tool
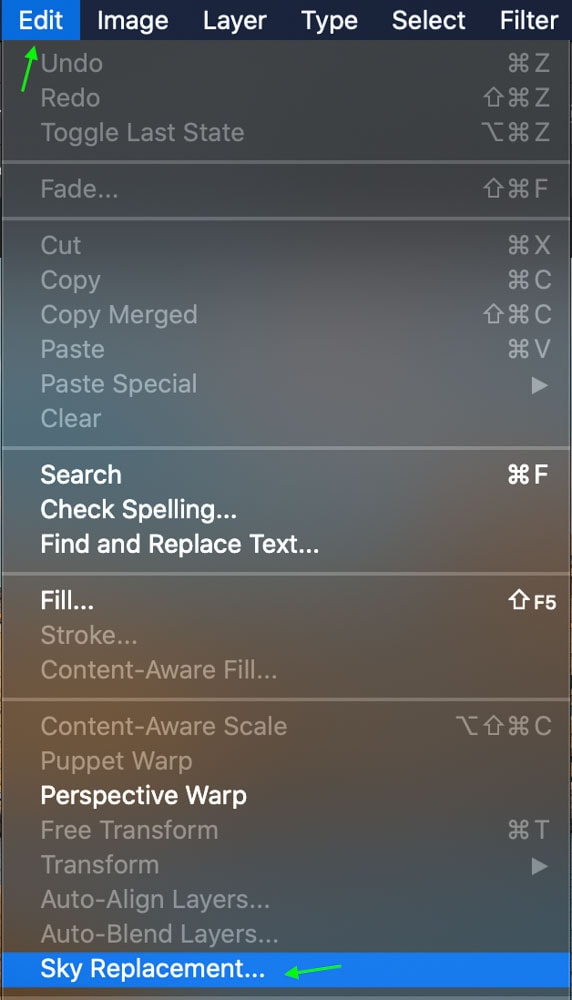
Next, head to Edit > Sky Replacement.
The sky replacement window will appear.

It will take a moment to load, but soon a new sky will appear on your image automatically.
Step 3: Select The Right Sky For Your Image
Photoshop chooses the sky from the sample skies that come with the program. Click the drop-down arrow next to the Sky preview to change the sky.

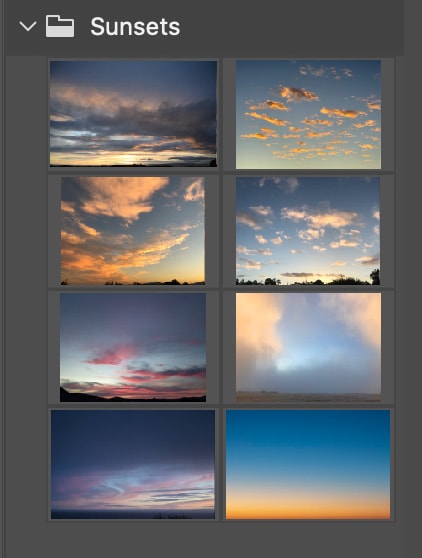
You’ll see the different sky options that come with Photoshop: Blue Skies, Spectacular, and Sunsets.
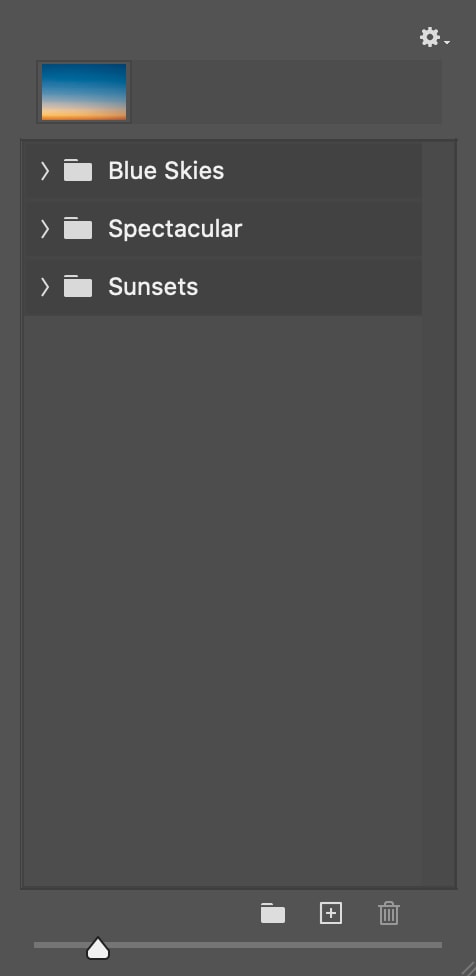
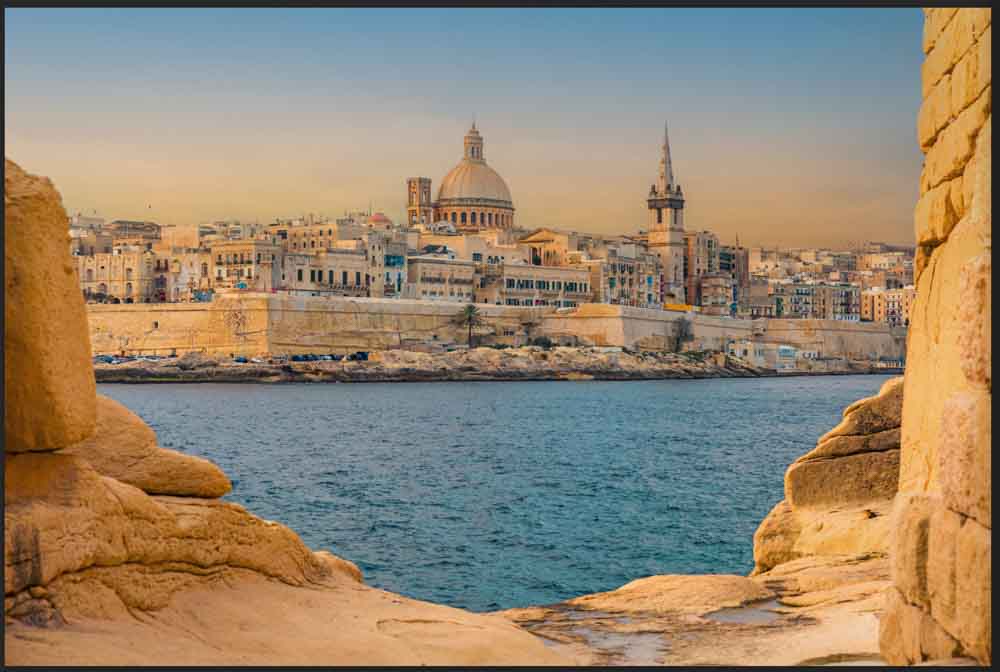
To keep in line with the warm tones of this image, we’ll go with a sunset.
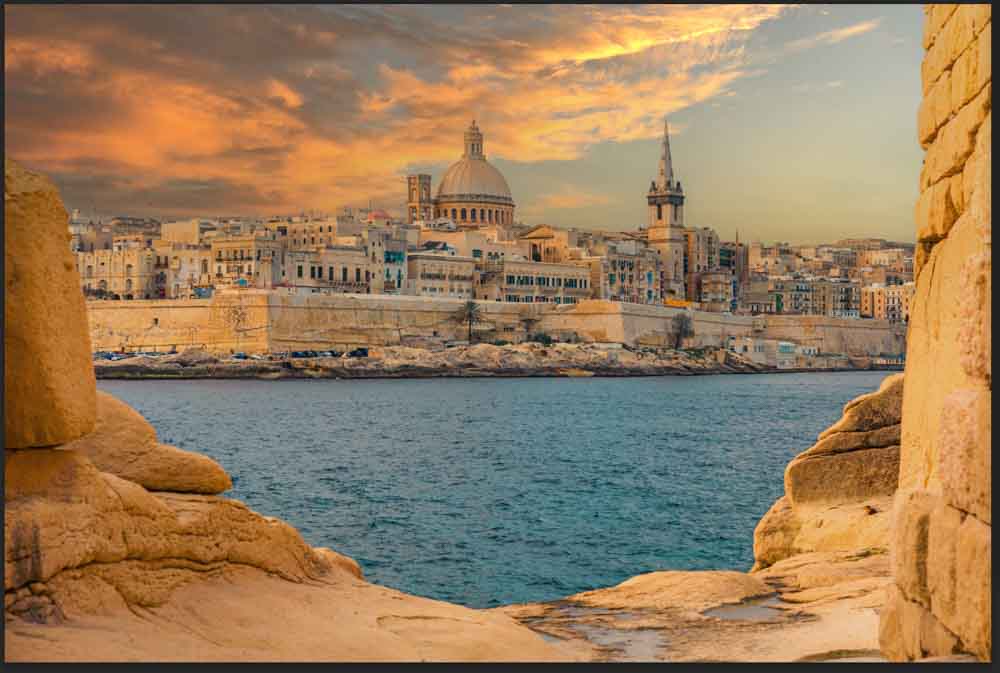
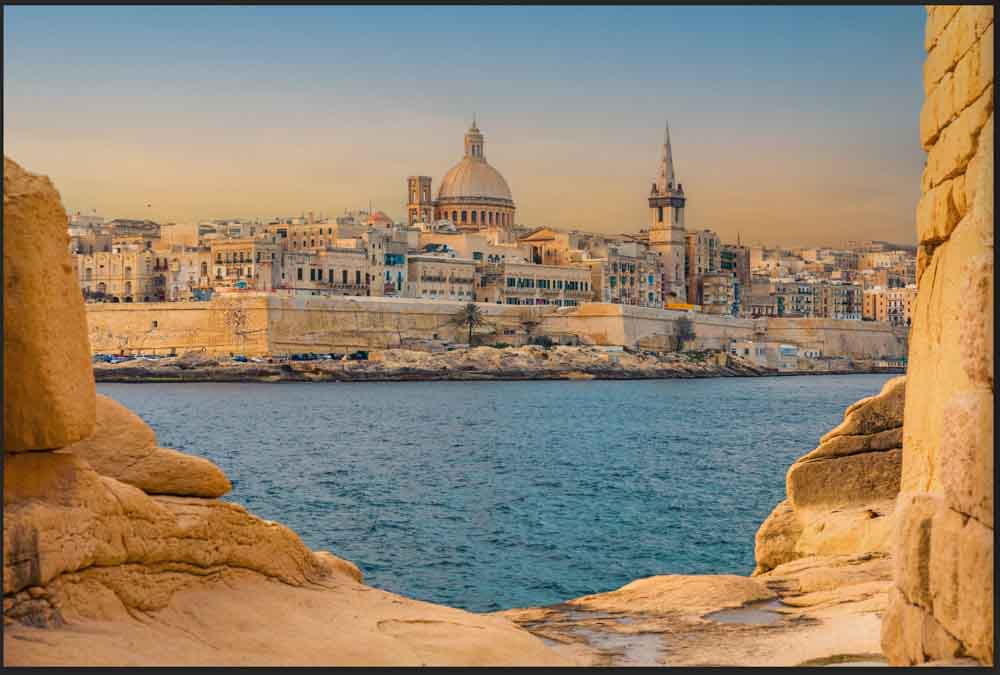
This stunning sky adds drama to the image and fits with the color scheme and composition. However, it is relatively bright and saturated. Remember that not all skies will fit your photo, so try out a few before you decide on the one you like. Let’s stick with the one we had in the beginning.
Step 4: Adjust The Edges Of The Sky
Now we can adjust the way our sky looks. This is best done by two sliders. The Shift Edge setting will move the skyline up (left) or down (right), while Fade Edge will determine the level of blur in the line between the sky and the foreground.
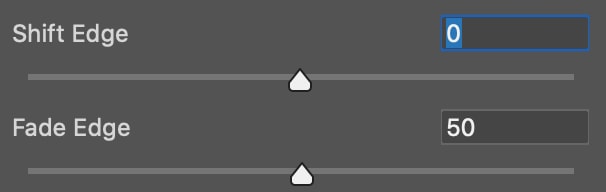
Adjust these as you see fit; the image will change as you adjust so you can see the settings work in real-time.
Step 5: Adjust The Tone & Temperature Of The Sky
You can further adjust how the sky looks by changing the Sky Adjustments. Brightness will determine the amount of light in the image. Temperature will determine whether the overall colors in the image appear cool or warm-toned and adjust accordingly. Finally, Scale will determine how zoomed in the sky area of the image appears.
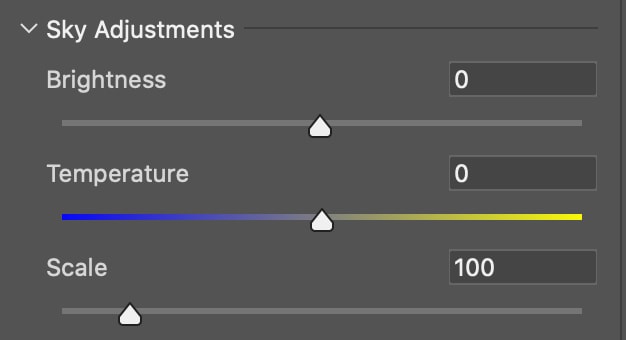
Drag these toggles left and right to adjust the image.
Step 6: Adjust The Foreground
You can use several settings to adjust the foreground of the image. You can change the Lighting Mode between Multiply and Screen by clicking the drop-down arrow.

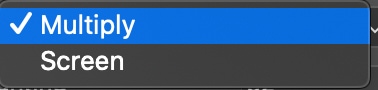
You can then adjust the sliders for the Edge Lighting, Foreground Lighting, and Color Adjustment to further edit the foreground.

Step 7: Set The Output And Click OK
Next, you can click the drop-down arrow next to Output and select whether you’d like the sky replacement to output to New Layers or a Duplicate Layer.


Finally, click OK to set your sky.

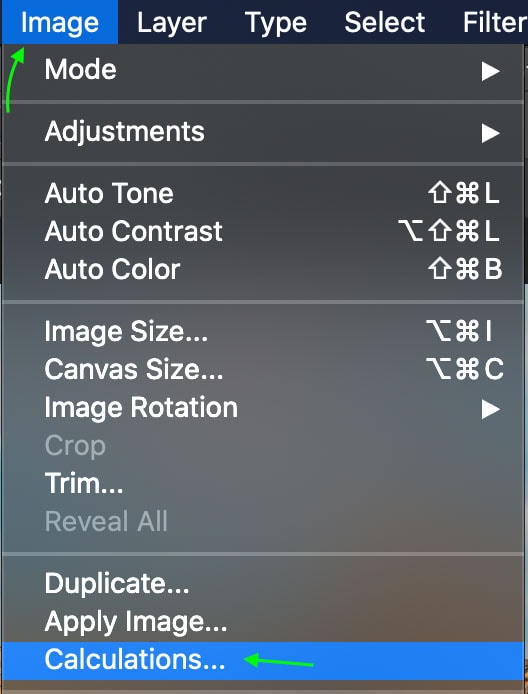
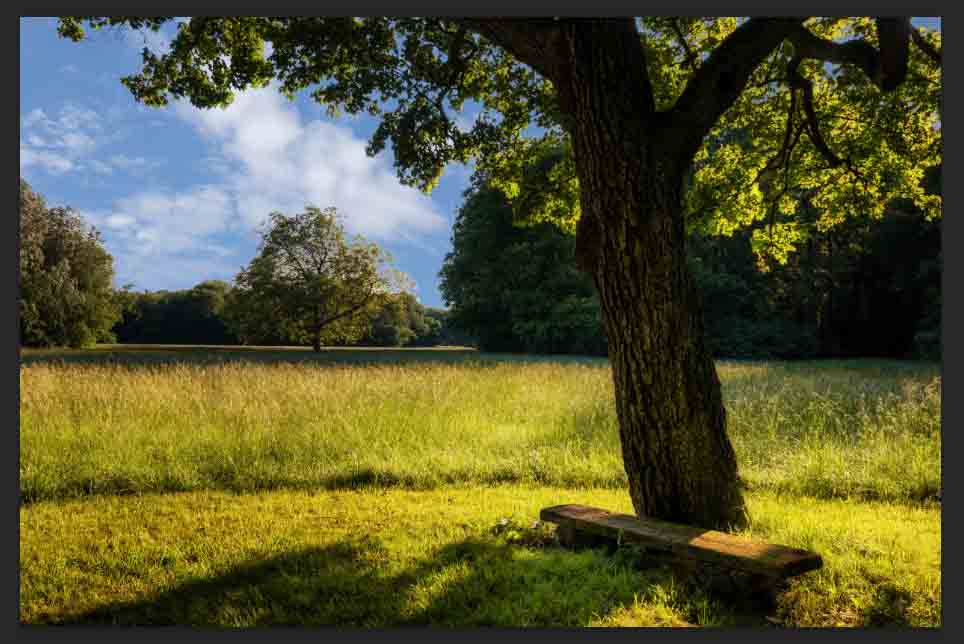
How To Manually Replace A Sky With More Complex Edges
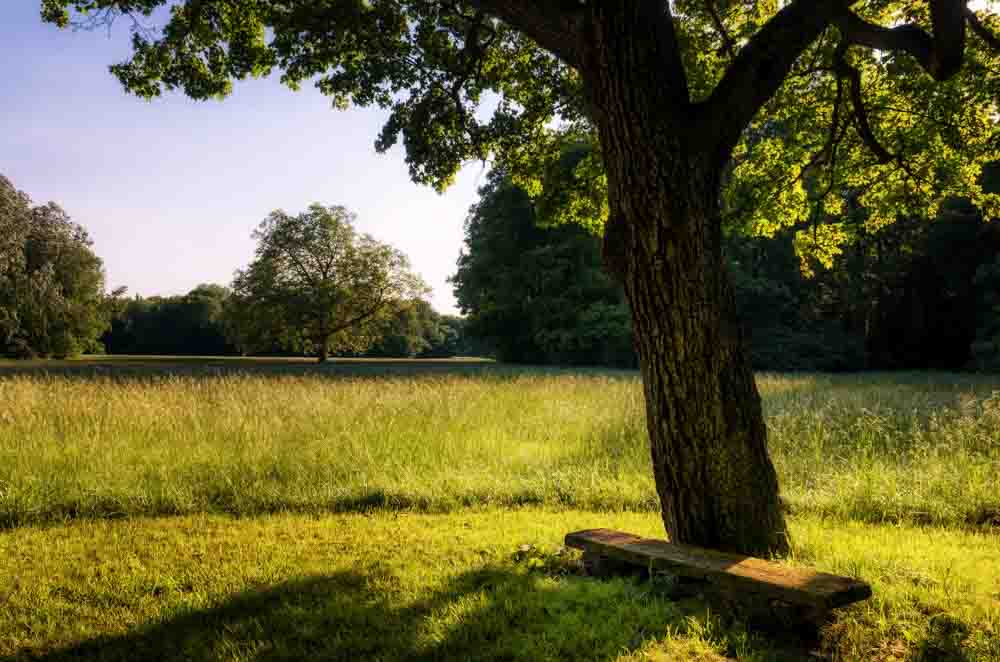
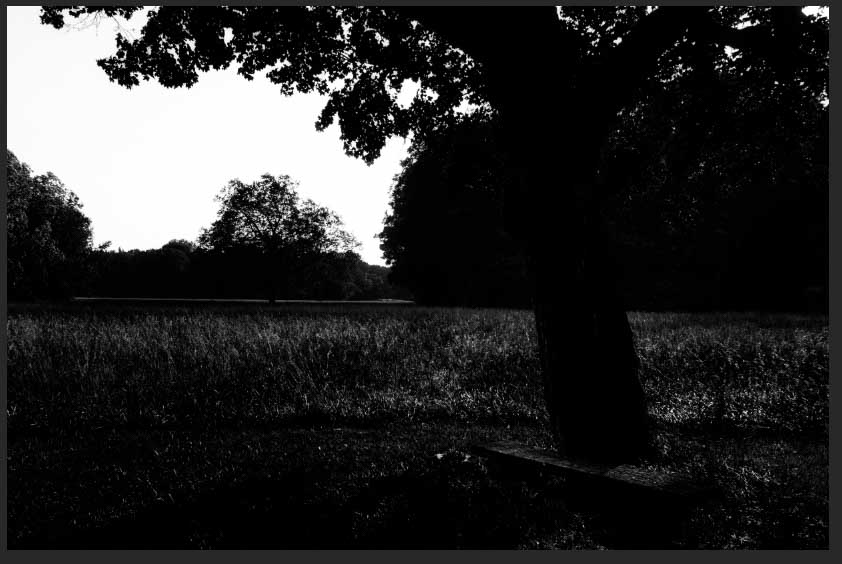
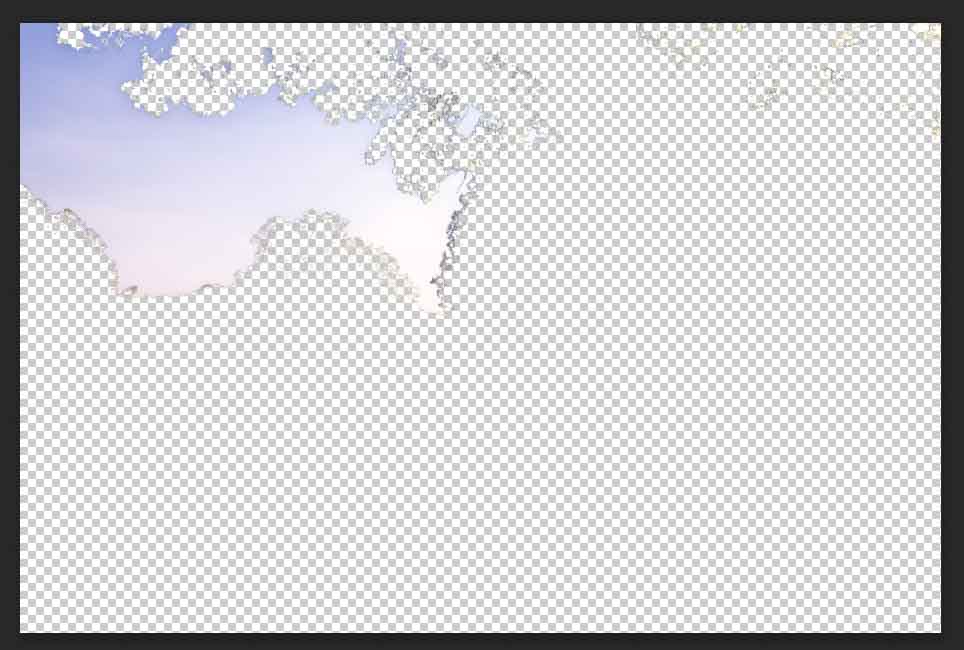
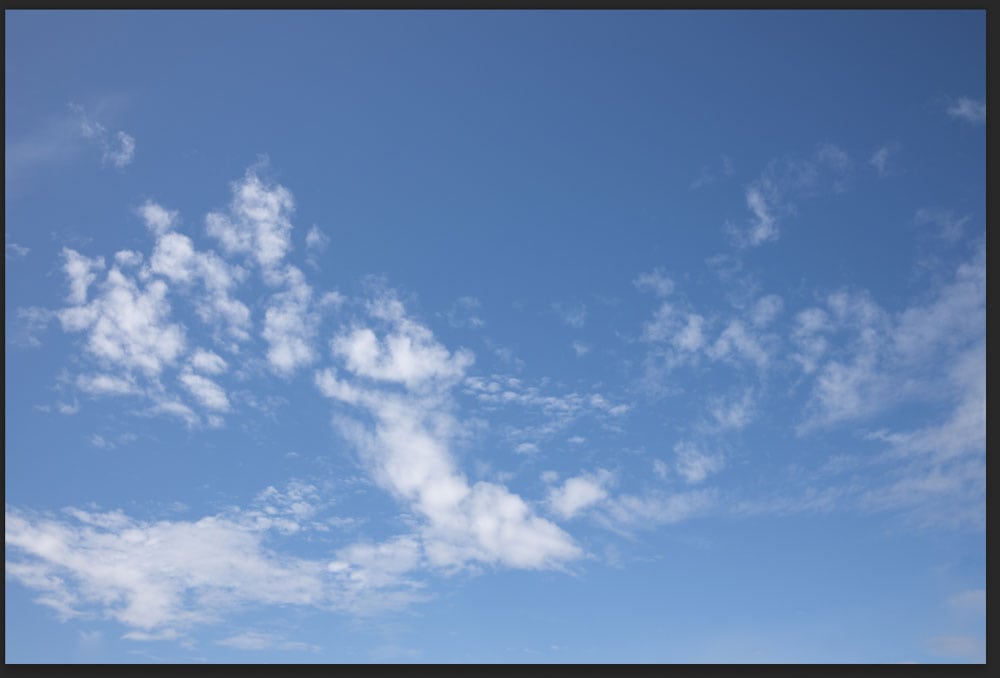
While the first method works great with images where the foreground’s edge is relatively simple, you might need to get a bit more in-depth to replace skies with more complex edges. Such as this image of a tree with a bland sky in the background.
For this, you’ll want to use the Calculations method. Calculations work similarly to Channels, except rather than selecting one channel to work with, Calculations select two Channels to create even more contrast.
Step 1: Go To Image > Calculations
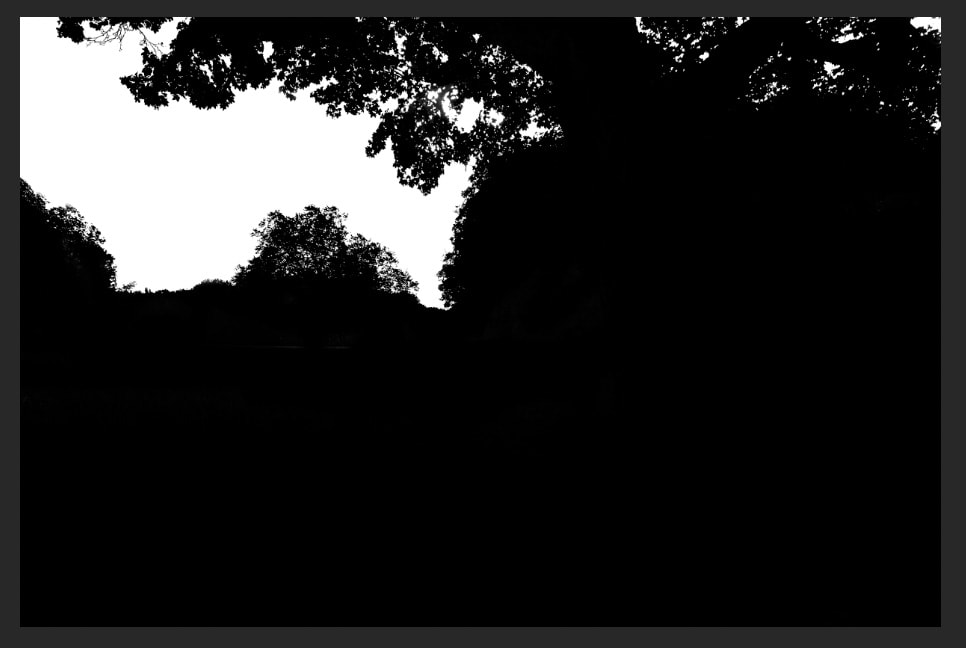
Once your image is open, head to Image > Calculations.
After a moment, the image will change to black and white as represented by the two channels.
Step 2: Set The Layers And Channels
Now you can set the Layer you’d like to affect and the Channel you’d like to use for both Source 1 and Source 2. The sources, in this case, will be the sky and the foreground of the photo.
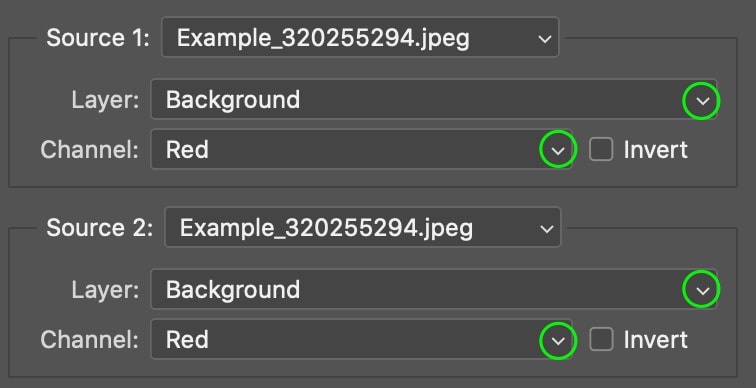
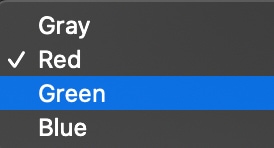
You can mix and match the various channels to find the ones that have the most contrast. For this image, it seems to be the blue channel for both the sky and the foreground.
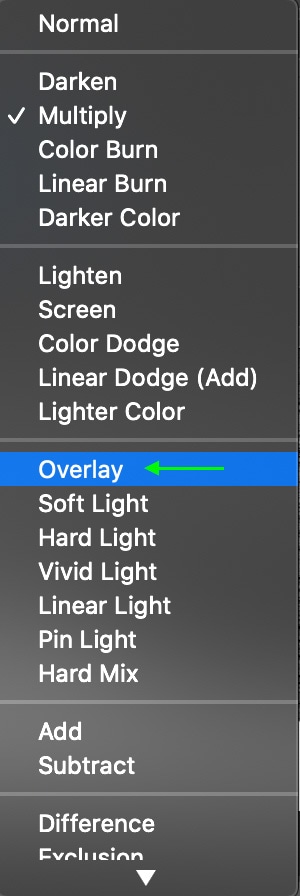
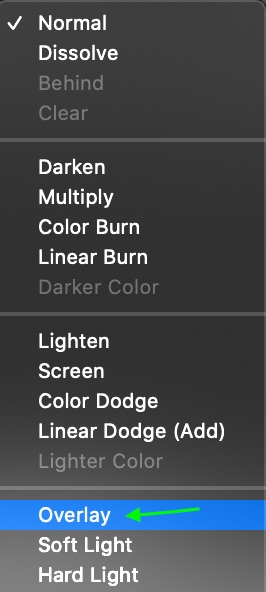
Step 3: Add More Contrast Using The Blending Mode
You can add even more contrast using the Blending Mode. Click the drop-down menu to open the different Blend Modes and select one that makes the most contrast. The Overlay option is usually a good bet.

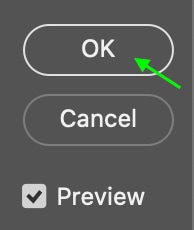
Step 4: Set The Result To New Channel
Now, make sure the result is set to New Channel.

Click OK.
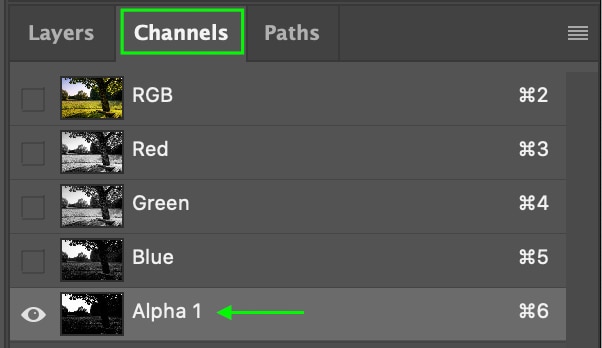
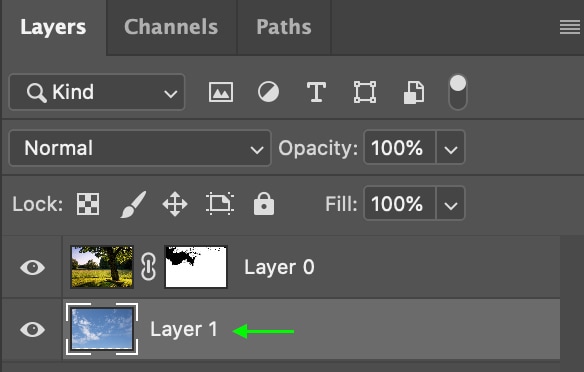
Step 5: Switch To The Alpha 1 Channel
Now in the Channels tab, you’ll see there is an Alpha 1 channel. Click to see the image change to that channel.
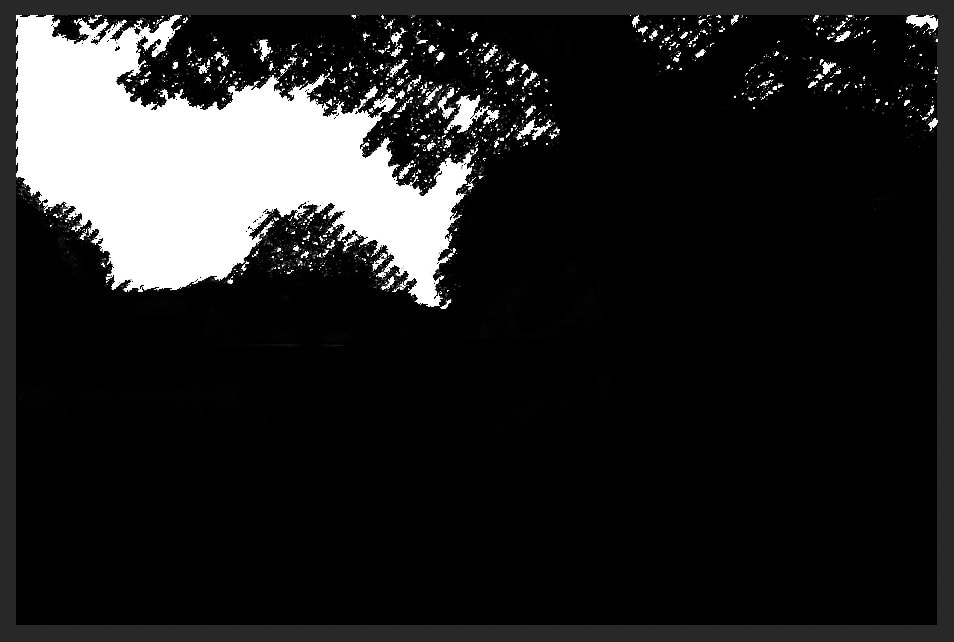
Step 6: Paint Over Any Gray Areas Using The Brush
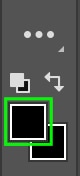
Now, we want the only two colors in the image to be black and white; no gray areas. So, head to the Brush tool.

Make sure the foreground color is set to black when painting the foreground and white when painting the sky.
When painting over uneven or jagged edges, you can set the brush mode to Overlay rather than attempt to perfectly stay inside the lines.

Now, as you paint over the edges between the sky and foreground, you will notice the black parts just get darker while the white areas are unaffected. This will ensure the edges between the sky and the foreground are as accurate as possible.
You may need to go over the lightest areas of your foreground a few times, but you will eventually make the foreground entirely black.
Now, do the same thing with the white area; it may look completely white already, but most likely, the color is a light gray. Go over with white to make sure the sky is fully white.
Step 7: Cut Out A Selection
Now, head back to the Channels panel and make sure Alpha 1 is still selected. Then, click the New Selection icon at the bottom of the panel.
The channel will become an active selection on the image.
Now, head to the Layers panel and click the layer to make sure the layer is selected.
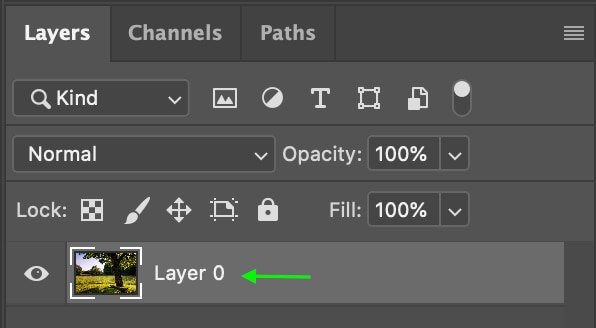
Then, add a layer mask by clicking on the icon at the bottom of the Layers panel.
The Layer mask will appear on the image.
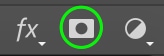
Now, this is the opposite of what we want — we need the sky selected, not the foreground. Press Control + I (Win) or Command + I (Mac) to inverse the selection. The Layer Mask will switch to hide the sky.
Step 8: Add The New Sky
Add the new sky by opening your sky image in a new tab in Photoshop.

Head to the tab, click the image, and drag it to the tab with the sky cut out. Hover above the tab for a moment until it opens, then drag the cursor to the document before releasing it. The sky will appear on top of the original image.
Step 9: Adjust The Sky Placement
The new sky may not be in the correct placement. To fix the placement, first, head to the Layers panel and ensure the sky layer is beneath the foreground layer, as this will ensure the sky sits behind it instead of in front.
Now, drag the toggles on the sky image to increase the size and get the sky placement the way you want it.
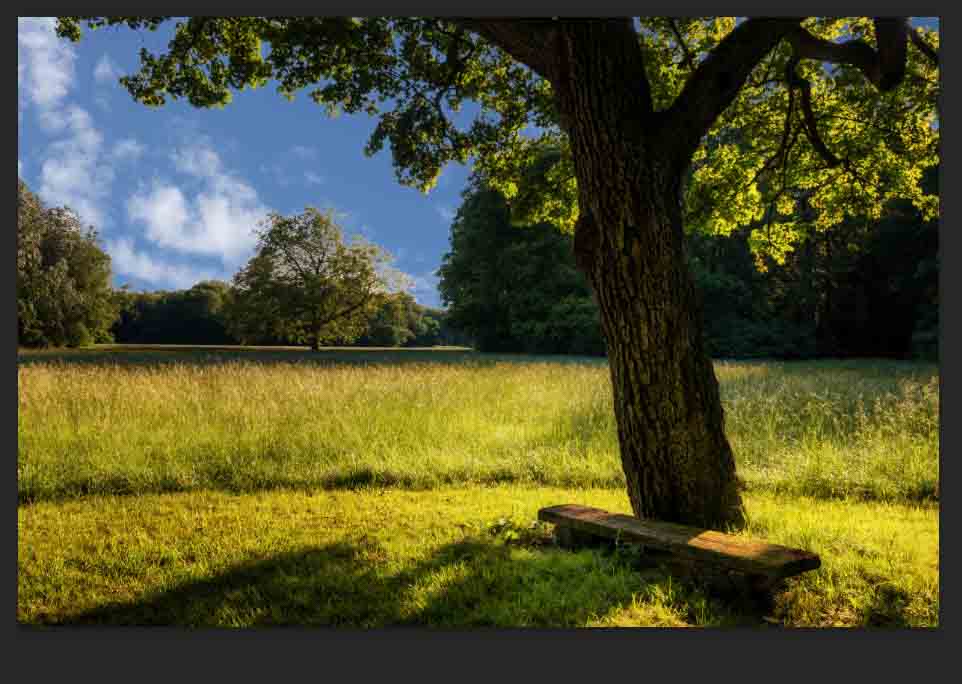
You will have now transformed a somewhat dull sky into something a bit more eye-catching.
Now in situations where you would just like to add a few clouds to a blank blue sky, it’s often better to add a cloud or two with a simple brush. I share how to paint clouds into your photo in this next tutorial.
