
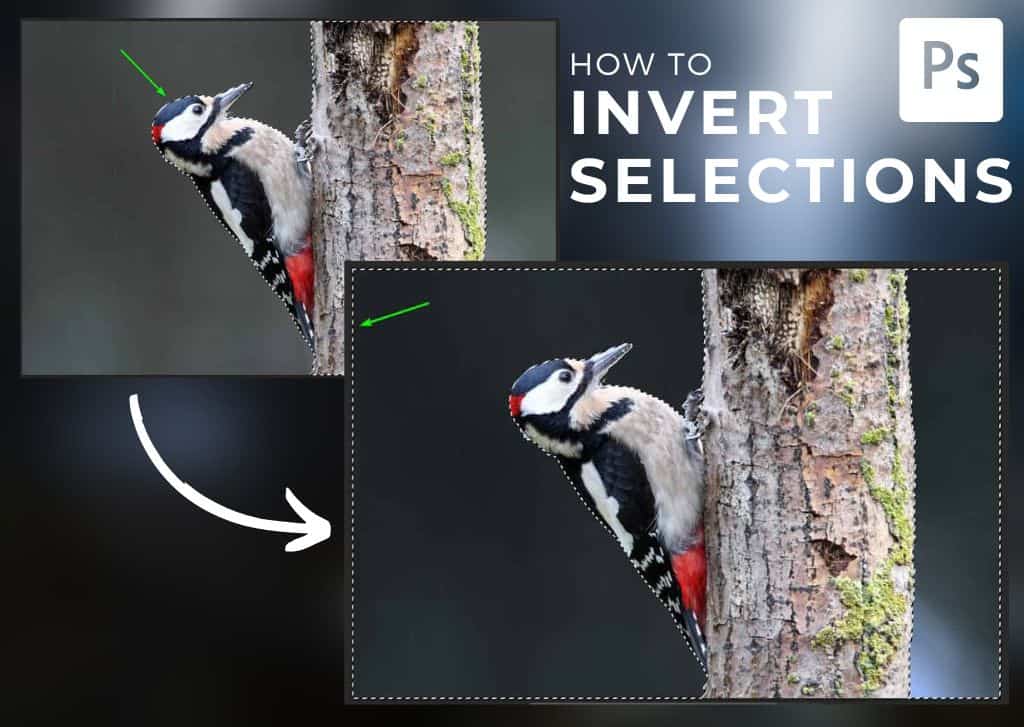

Whether you selected the wrong object or find that it’s much easier to select the subject using an AI feature and inverting the selection to select the background; knowing how to invert a selection in Photoshop can save you a ton of time.
Let’s go into more detail about this process, plus a couple of additional ways to get the same result!


How To Invert A Selection In Photoshop
Step 1: Create A Selection Using Any Selection Tool
You can create the initial selection using any selection tool. One of my favorites is the Select Subject method, which is available from the Contextual Task Bar and uses AI to quickly select the main subject in the image.

With the new selection active, you can now see the marching ants that represent the selection area.
Step 2: Click On Invert Selection In The Contextual Task Bar
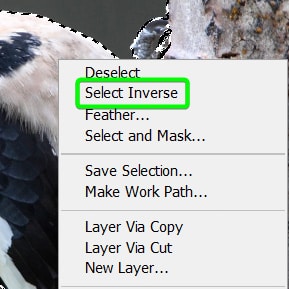
There are a few ways you can invert the selection. You can use the Invert Selection button in the Contextual Task Bar or use the menu path by right-clicking inside the selection and choosing Select Inverse.
Lastly, you can use a keyboard shortcut by pressing Shift + Control + I (Win) or Shift + Command + I (Mac) to invert the selection.

The selection will now be around the opposite contents, which, in this case, is the background. I can now remove the background or add selective adjustments, such as darkening the background.
Step 3: Press Control/Command + D To Deselect The Selection
If you want to remove the selection entirely, you can press the Deselect button in the Contextual Task Bar or press Control + D (Win) or Command + D (Mac).
If you want to revert back to the original selection, you can undo the inversion by pressing Control + Z (Win) or Command + Z (Mac).

How To Invert A Layer Mask Selection In Photoshop
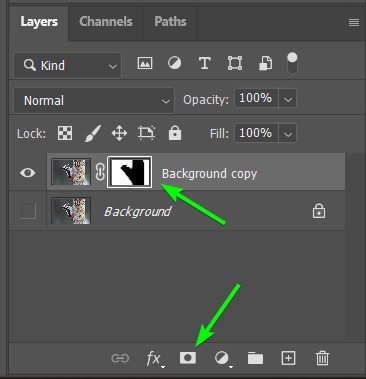
If you are creating a layer mask with your selection, you can shorten the process by adding the layer mask and inverting the selection simultaneously. Firstly, create your selection as detailed above. Then, hold in Alt (Win) or Option (Mac), and click on the Add Layer Mask icon at the bottom of the Layers Panel.
If you have already created a layer mask, you can invert the mask by selecting it and pressing Control + I (Win) or Command + I (Mac). I discuss in detail how to invert a layer mask in this article.
Note: If you created a selection using a layer mask (pressing Control/Command and clicking on the mask), you can invert the selection the same way that you would with a regular selection.
With a simple shortcut or menu path, you’ve successfully learned how to invert a selection in Photoshop. Rather than wasting time to remake or adjust your selection, the inverse selection option swaps to the opposite selection area. This is the perfect thing to use when dealing with layer masks or cutting out objects from your image!
– Brendan 🙂
