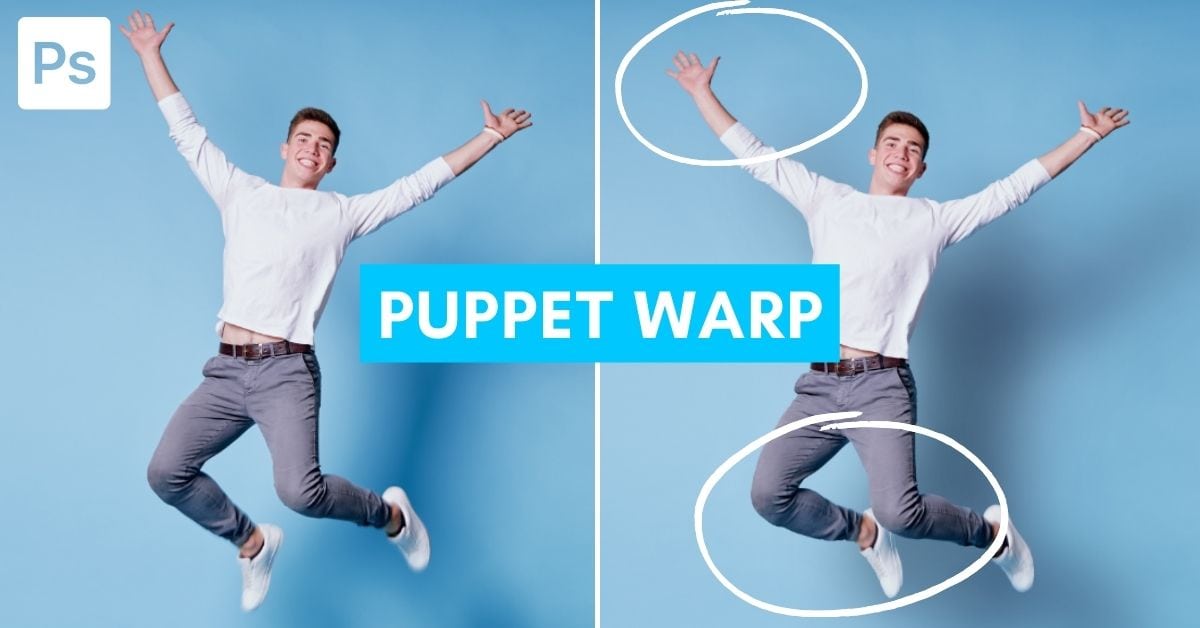

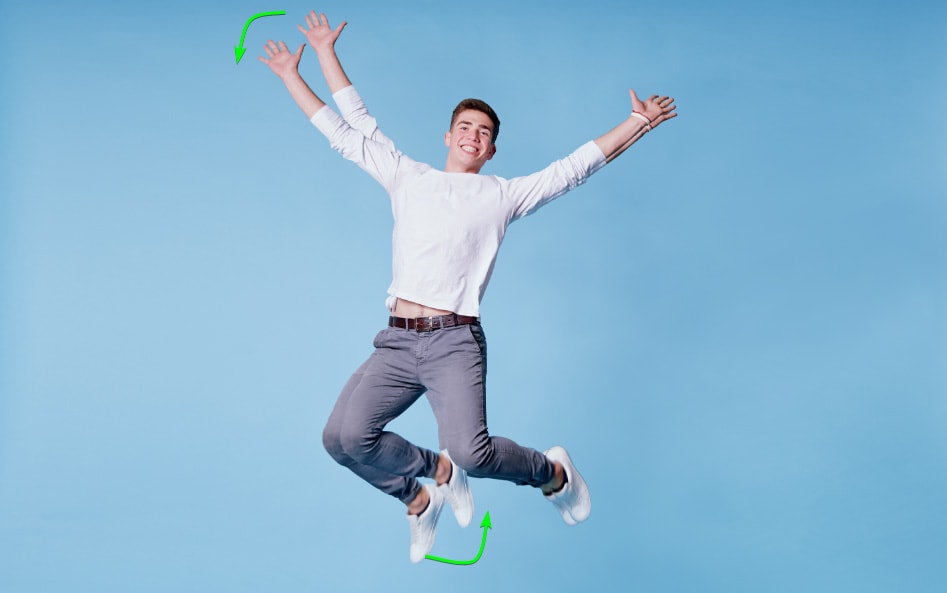
Have you ever taken an amazing photo only to find out your subject’s stance is awkward? Or do you have a creative project where you’d like to move a person’s limbs in the photo like a puppet? There’s a lesser-known tool in Photoshop to do this, called the Puppet Warp Tool. Here’s how to use it.
The Puppet Warp Tool is an excellent way of manipulating objects in your image to reposition parts of the subject, such as a person’s arms or legs. While the tool is more complex than the ones you find in the Toolbar, once you understand the tool’s settings and practice a bit, you can easily manipulate any object you like.
What Does Puppet Warp Do In Photoshop?
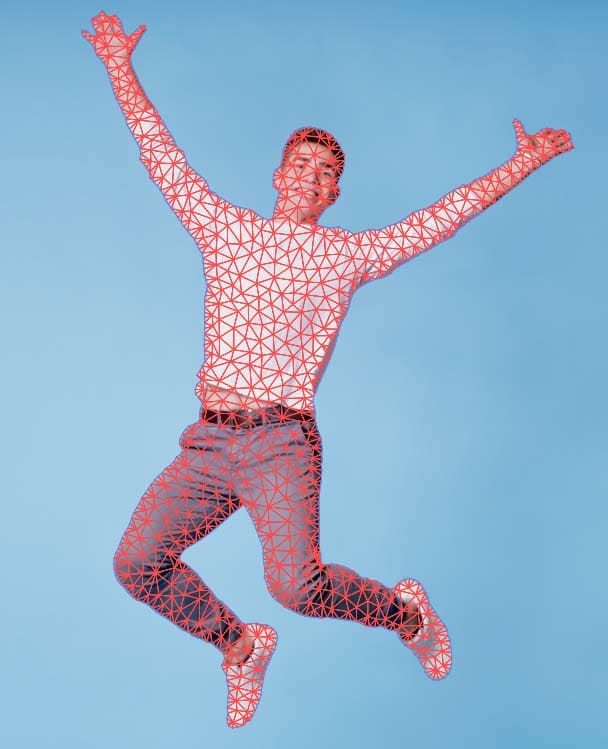
The Puppet Warp Tool in Photoshop is like other warp tools, as it adds a mesh onto a subject in an image. The mesh allows you to manipulate certain parts of the subject while keeping other areas intact and in the original position.
The tool allows you to make subtle adjustments to the photo or extreme distortions of limbs, tree branches, and more. To manipulate an object, you must use the tool to add pinpoints around specific areas to pin them in place. Then you can add a pinpoint to pull and distort the area into a new shape.
The Puppet Warp Tool is excellent for fixing awkward poses in pictures or dramatically changing limb positions to create new poses. You can use the tool on limbs that are wide apart, but the tool won’t work well when limbs are stacked against each other.
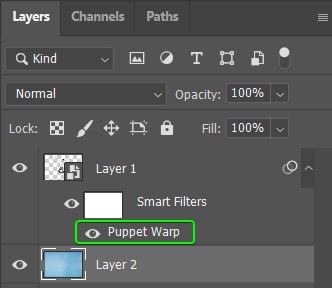
You can only use the Puppet Warp Tool on a layer containing pixels, so you can’t create an additional layer to edit non-destructively. However, converting the image layer to a Smart Object allows you to re-edit the warping later.
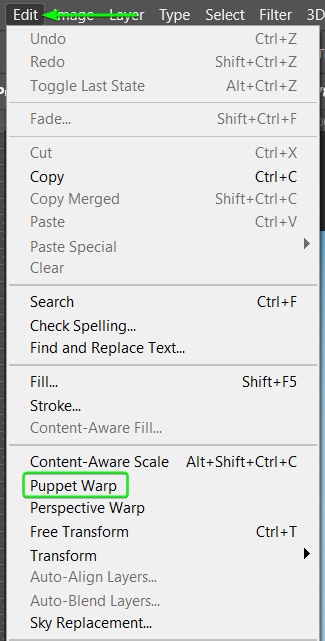
How To Access Puppet Warp In Photoshop
To access the Puppet Warp Tool, you need to have a pixel layer selected. Then navigate to Edit > Puppet Warp.
Once you select the tool, settings appear in the Options bar, which I will detail in the next section.

A mesh also appears over your image. Since I have isolated the subject in a separate layer from the background, the mesh only covers the person.
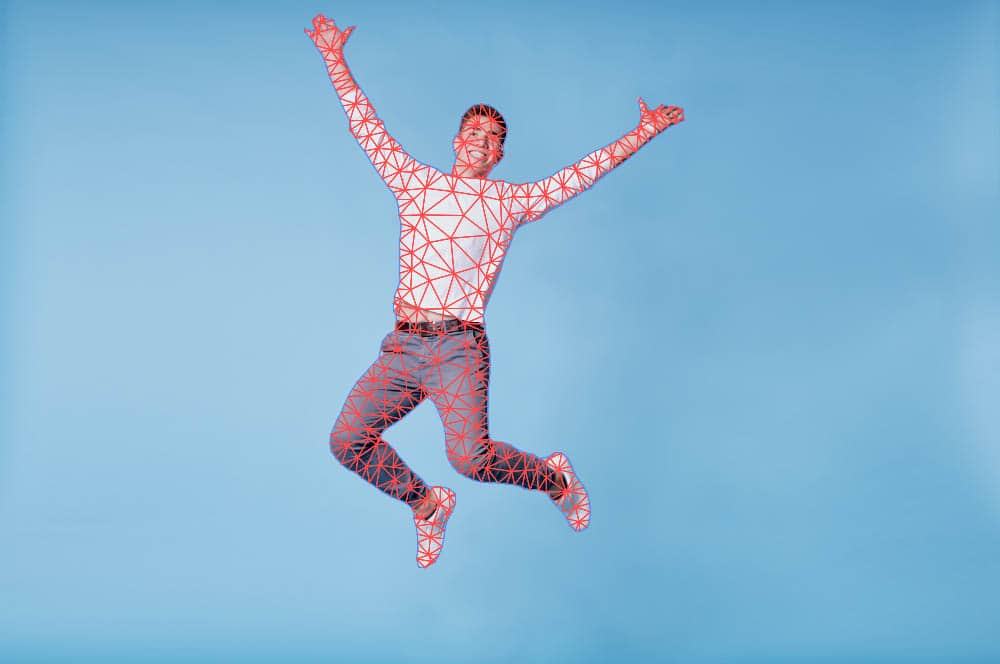
It’s essential to separate or isolate the subject you are warping from the background. Even though you can pin areas in place, it is more difficult to pin the background in place than simply isolating the subject.
Puppet Warp Settings Explained
Once you have selected the tool, the Options bar contains various settings to alter how the tool works. To understand how the settings work, you first need some insight into the tool.
To use the tool, you add pins on the mesh to keep the subject in place. Once the tool is active, you can start adding pins by clicking on areas around the mesh. The mesh shows where you should add the pins. A pin turns blue when it’s selected.
If you need to delete a pin, hold in Alt (Win) or Option (Mac) and click on the pin to remove it when the scissors icon appears. You can also click on a pin and press Delete to remove it.
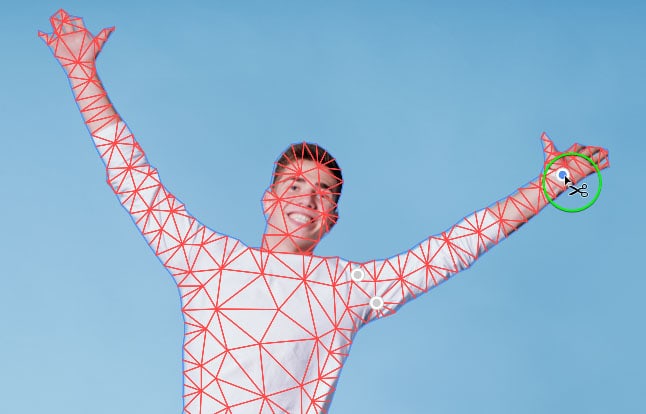
When you have placed your pins, you can adjust the settings in the Options bar. I recommend placing at least three pins before you warp anything because the more pins you add, the more control you have over the distortion.
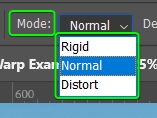
The Mode Setting
First, you can alter the Mode between Rigid, Normal, and Distort. The Mode determines how stretchable the mesh becomes.
Rigid keeps the limbs (or area you are distorting) as straight as possible between the pins. If I were to move the man’s arm down with the Mode set to Rigid, the arm would remain relatively straight. The rigid mode is suitable for warping hands and feet.
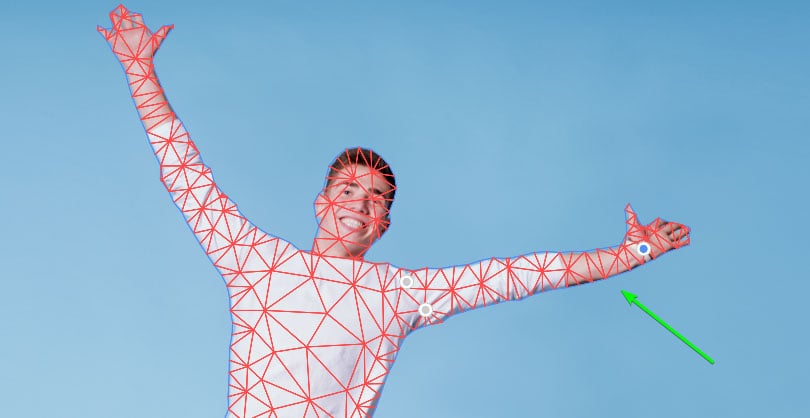
When you set the Mode to Normal, you will notice a slight bend in the arm around the wrist and elbow areas. Normal mode keeps the distortion looking the most natural because it allows for a standard amount of flexibility between pins.
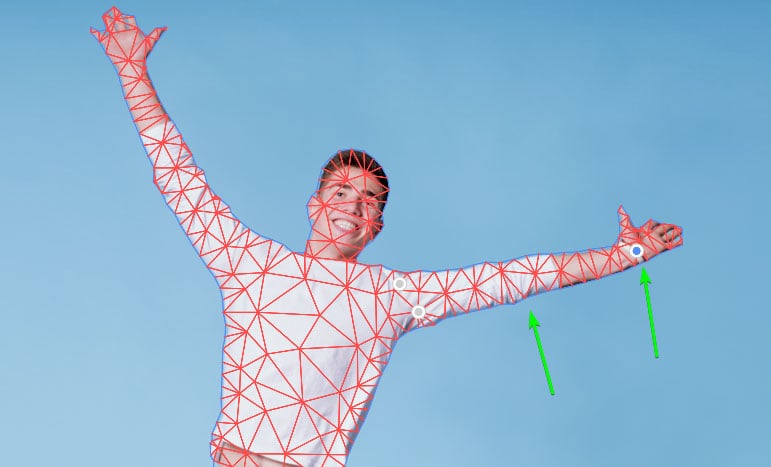
Setting the Mode to Distort creates a dramatic distortion in the area that you have shifted. Keeping the arm in its new position, when I change the Mode to Distort, you can see the drastic bend in the wrist. This highly elastic setting is best used in wide-angle photographs.
In most cases, I recommend you set the Mode to Normal. This mode allows you to move the limbs around without creating unnatural results, as seen when I set the Mode to Distort.
The Density Setting
The next setting is the Density drop-down menu, which allows you to adjust the mesh that covers the subject while you distort the subject. You can choose between Fewer Points, Normal, or More Points.
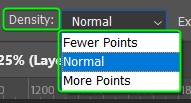
The Density setting adds fewer or more mesh points to adjust the spacing of the mesh. More points give you a more accurate distortion but increase the processing time.
I recommend using Normal density in most cases.
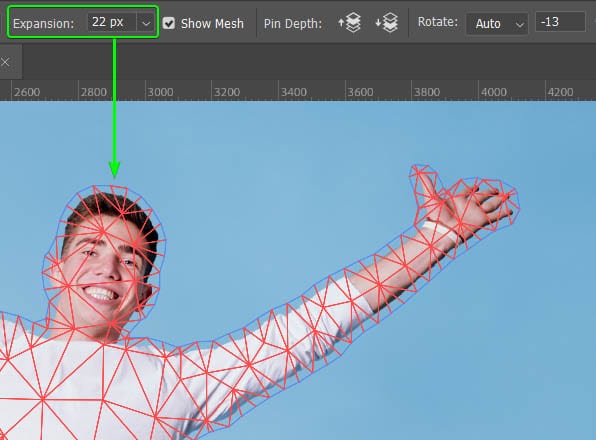
The Expansion Setting
The next setting is the Expansion slider, which lets you contract or expand the edge of the mesh. The expansion setting gives you control over the distortion, with a higher number producing more manageable warp movements.
The Expansion is set to 2 pixels by default, and the mesh movement becomes harder to manage if you set it lower than this. You can increase the expansion value slightly to give yourself more control as you warp the subject.

Setting a low Expansion value (such as -16px) crops your subject, often causing unpleasing results.

Setting the Expansion higher expands the mesh beyond your subject.
Other Puppet Warp Settings
You can toggle the mesh on and off if you want to warp the subject without the mesh by checking or unchecking the box next to Show Mesh.

The Pin Depth setting lets you move the pin backward or forward to decide what areas you place in front or behind. This setting is helpful when you are moving a limb behind another one.

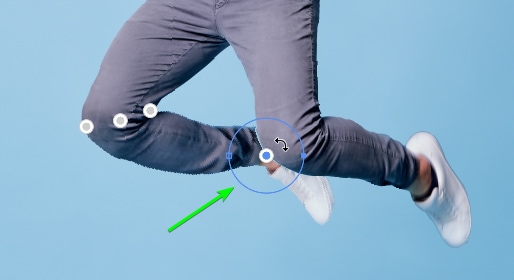
For instance, if I bend the man’s leg toward the other, it places the bent leg on top of the other leg.
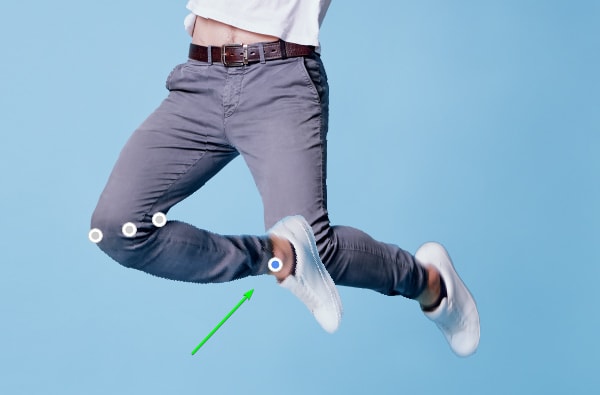
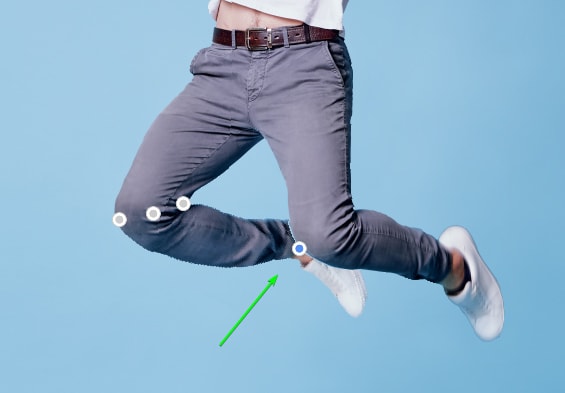
If I want the bent leg to move behind the other leg, I can change the pin depth by shifting it backward.

I have now placed the bent leg behind the other leg.
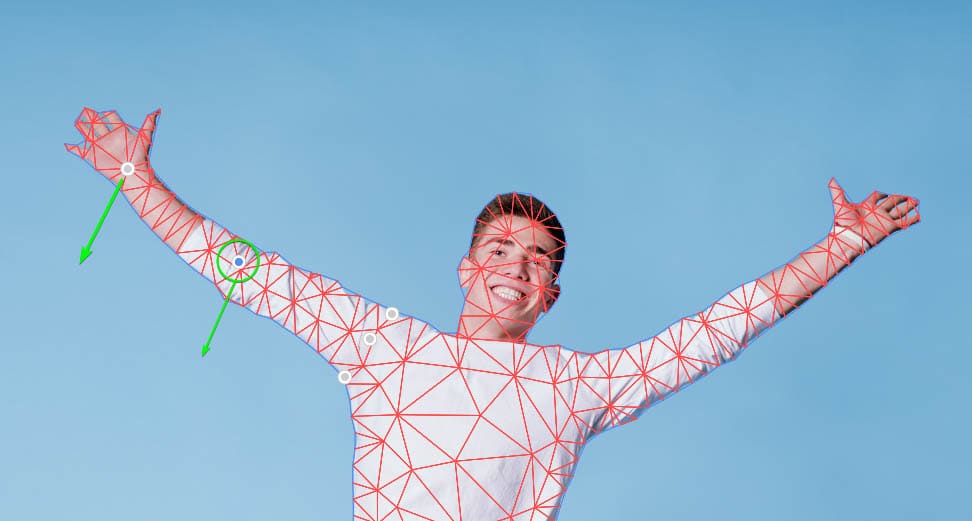
You can also adjust the Rotate option between Auto and Fixed. By default, it’s set to Auto, which automatically rotates the mesh around a set pinpoint depending on the selected mode.
You can also add a degree amount to rotate the subject around a set pinpoint.

To manually rotate the subject, hold Alt (Win) or Option (Mac) and hover the mouse near the pinpoint until a circle appears, then click inside the circle and rotate the subject.
Lastly, in the Options bar, you can use the last three icons to either Remove All Pins, which undoes any distortions you have made, Cancel Puppet Warp to exit the tool without making the changes, or Commit Puppet Warp to make the changes and exit the tool.

How To Use The Puppet Warp Tool In Photoshop
Once you understand the settings, you can use the tool to move elements around, such as limbs. Firstly, you must separate your subject from the background to isolate the warping without affecting the background.

Step 1: Isolate The Subject From The Background
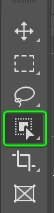
There are many ways to remove the background from an image. Since the background is simple in my example, I will use the Object Selection Tool (W) and click the Select Subject button in the Options bar.

Once you select the subject, copy and paste it to a new layer by pressing Control + C (Win) or Command + C (Mac) and then Control + V (Win) or Command + V (Mac). This action places the subject in a new layer.
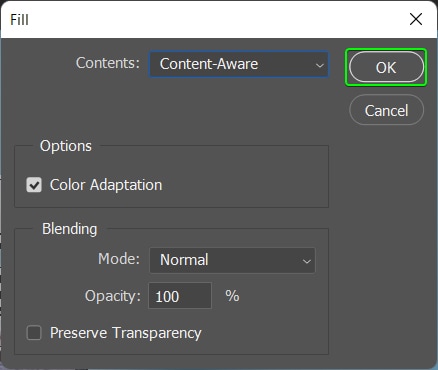
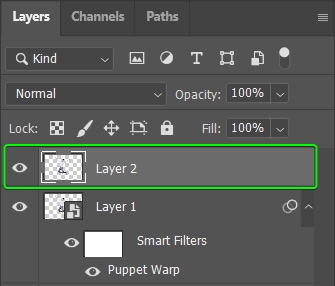
Select the subject once more, then click on your background layer (Layer 2, in my case) and press Shift + Backspace. This action opens a Fill dialogue box. Select the drop-down next to Contents and select Content-aware.
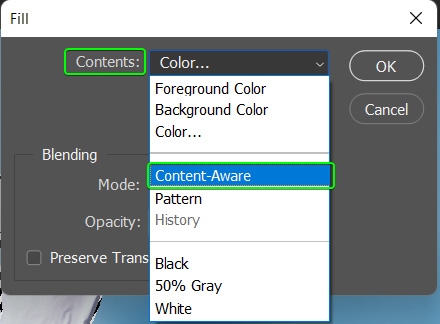
Click OK to fill in the selection with the background. Photoshop’s AI fills the selection as best as possible but may be slightly inconsistent.
You can use a tool such as the Patch Tool (J) to fix up the background before moving on.

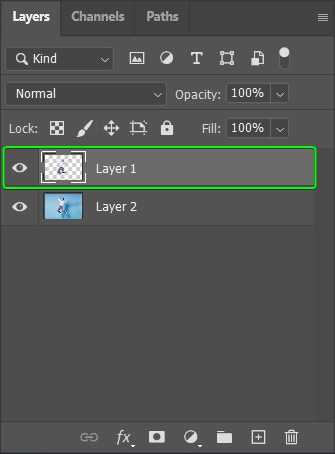
Step 2: Convert The Subject Layer To A Smart Object
To transform the subject you’ve now isolated from the background, convert the subject layer to a Smart Object. Converting the layer to a Smart Object allows you to edit the warp later.
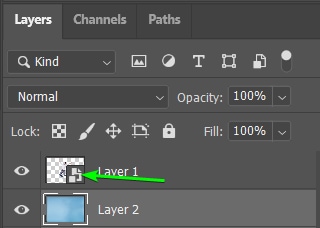
To convert the layer, right-click (Win) or Control + click (Mac) on the layer and select Convert to Smart Object.
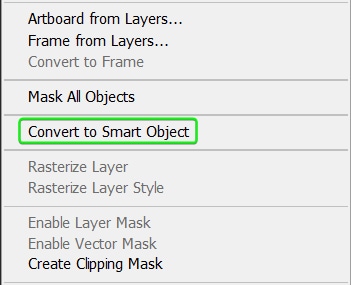
The icon in the layer’s thumbnail shows it has been converted.
Step 3: Activate The Puppet Warp Tool And Adjust The Settings
Select the smart object layer and activate the Puppet Warp Tool by navigating to Edit > Puppet Warp.
Adjust the settings as needed for your image based on the explanations of the settings in the previous section. For my image, I have kept the default settings.

Step 4: Add The Pins To Lock Parts In Place
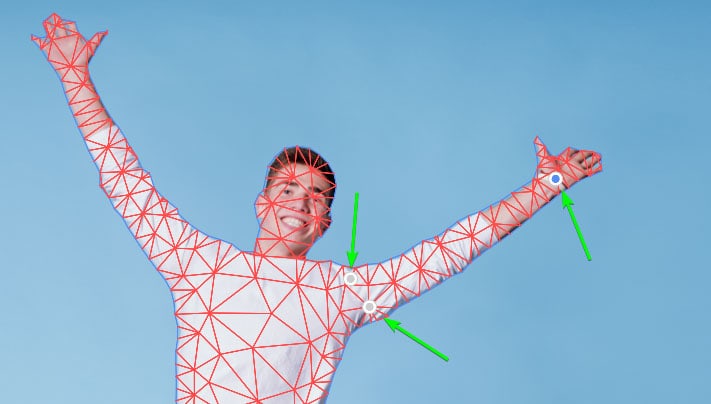
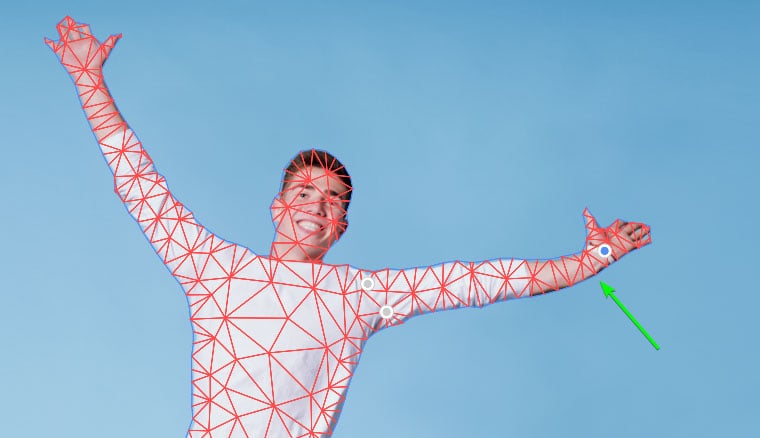
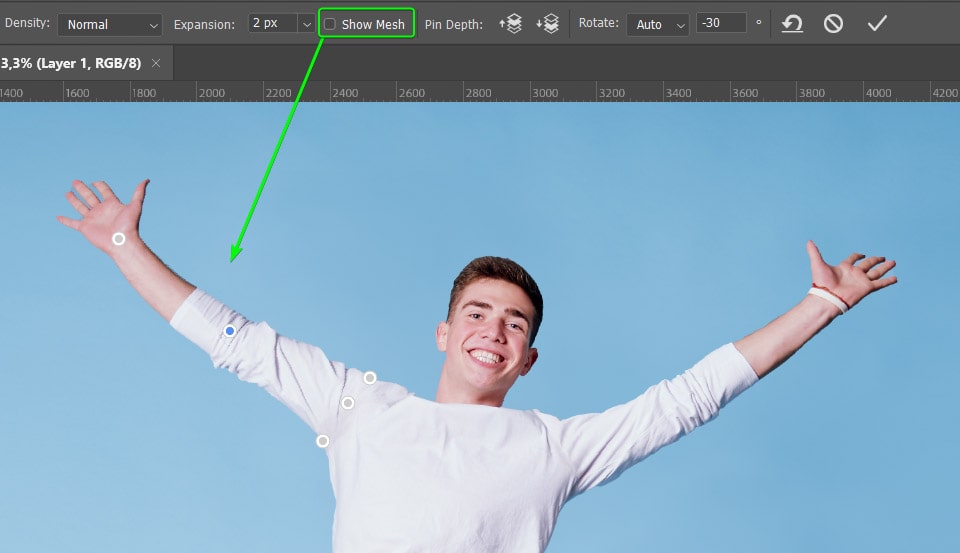
Once you have the settings as needed, you can start warping your subject. First, place pins where you want the body to remain in place. For example, as I want to adjust the right arm, I need to lock the man’s shoulder in place. To lock the shoulder, I need to place a few pins around that area.
Note: Zoom in using Control + + (Win) or Command + + (Mac) for more accuracy.
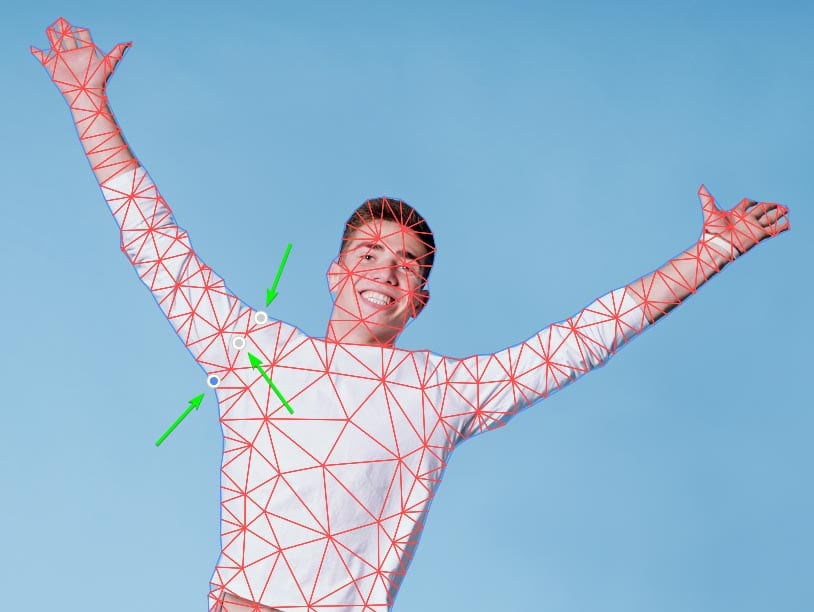
Then, add a pinpoint around the area you want to manipulate. I added a pin on the man’s wrist to move the arm.

Step 5: Move The Pins To Warp The Subject
Then, to move the arm down, click on the pin placed on the wrist and slowly drag the arm down. Look out for unnatural distortions as you move the arm — such as the elbow weirdly bending if you move the arm down too much.
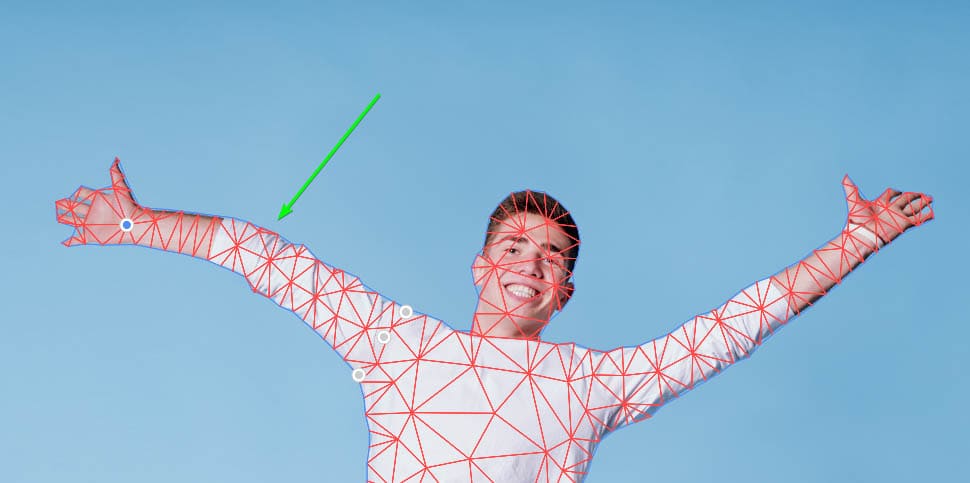
To prevent distortion, add another pinpoint around the elbow area, and drag both pinpoints down. You can’t select more than one pin at a time, so you must pull down one at a time, keeping the arm looking as natural as possible.
You can turn off the mesh by clicking the Show Mesh box in the Options bar to see how the image looks without exiting the warp tool. You can keep adjusting the pins without the mesh if it’s easier to see the result.
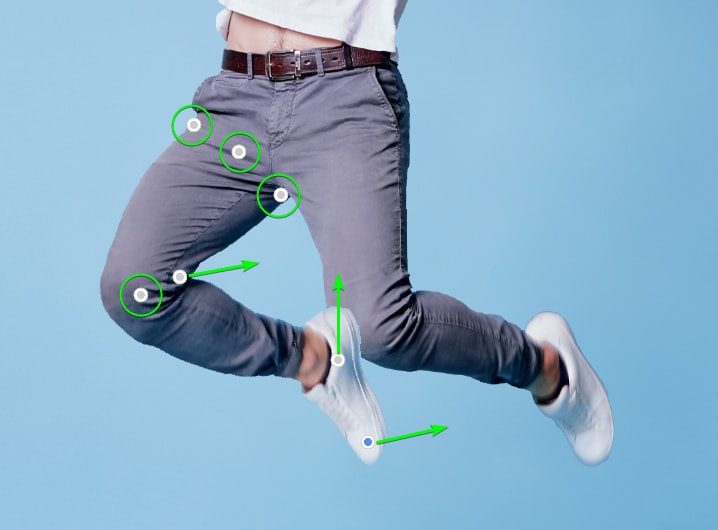
Step 6: Warp Another Part Of The Body
You can move on to other body parts if you want to warp anything else. I will distort the man’s leg by bending it. First, I placed my pins around the thigh and knee to keep those in place, then a pin near the ankle to bend the leg.
Then I click on the pin on the ankle and knee and pull them up to bend the leg. Then I added a pin on the foot and adjusted it to point the foot more.
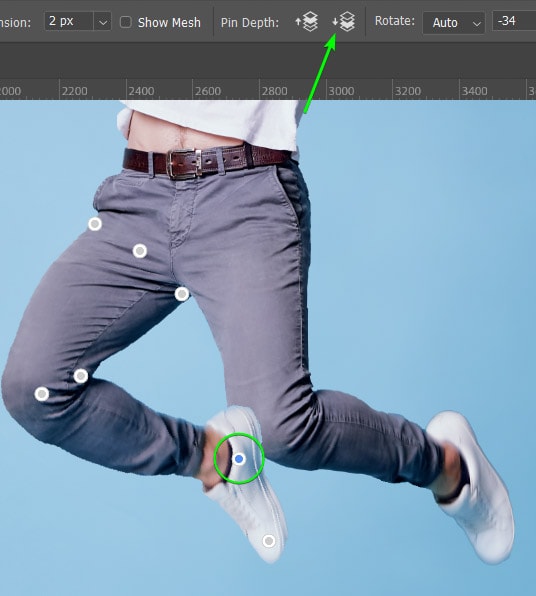
The bent foot doesn’t look right in front of the other leg, so I will select the pin on the ankle and move it back by changing the pin depth in the Options bar.
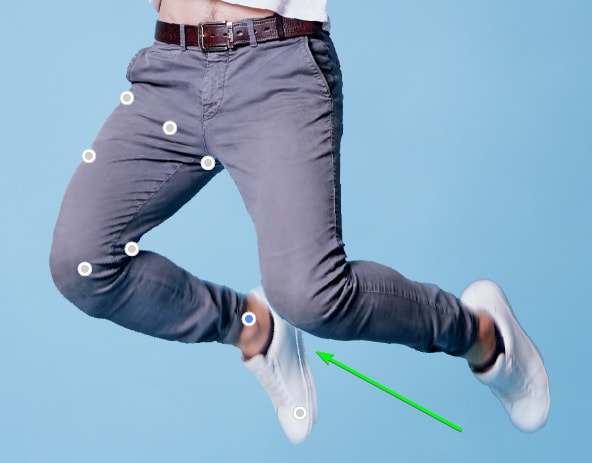
The foot now sits behind the leg.
Once you manipulate the subject, click on the checkmark in the Options bar to accept the changes and exit the tool.

Step 7: Check The Warp And Make Changes If Needed
Your subject is now in a new position. If I place the original subject behind my manipulated layer, you can see how I have moved the man’s limbs.
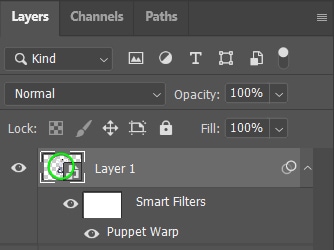
Since you converted the layer to a smart object, you can quickly re-open the Puppet Warp Tool and re-adjust the warp later on. Double-click on the Puppet Warp smart filter below the layer to edit the warp.
The Puppet Warp Tool opens, and you can see the pins you placed and adjust them as needed.

You have now successfully warped your subject to re-position the man’s limbs. You can get creative using the Puppet Warp Tool, but always ensure you keep your subject looking as natural as possible, especially when manipulating people in photos.


Step 8: Add A Shadow To The New Subject (Optional)
If you need to add a shadow to the subject, here is a quick way to do this. First, hold Control (Win) or Command (Mac) and click on your new subject’s thumbnail in the Layers panel to make a selection around the subject.
Then, press Control + C and Control + V (Win) or Command + C and Command + V (Mac) to copy the subject onto a new layer.
Make sure you select the subject on the new layer (Control/Command and click on the thumbnail), then press Shift + Backspace with your new layer selected, set Contents to Color, and use the Color Picker to choose a dark gray.
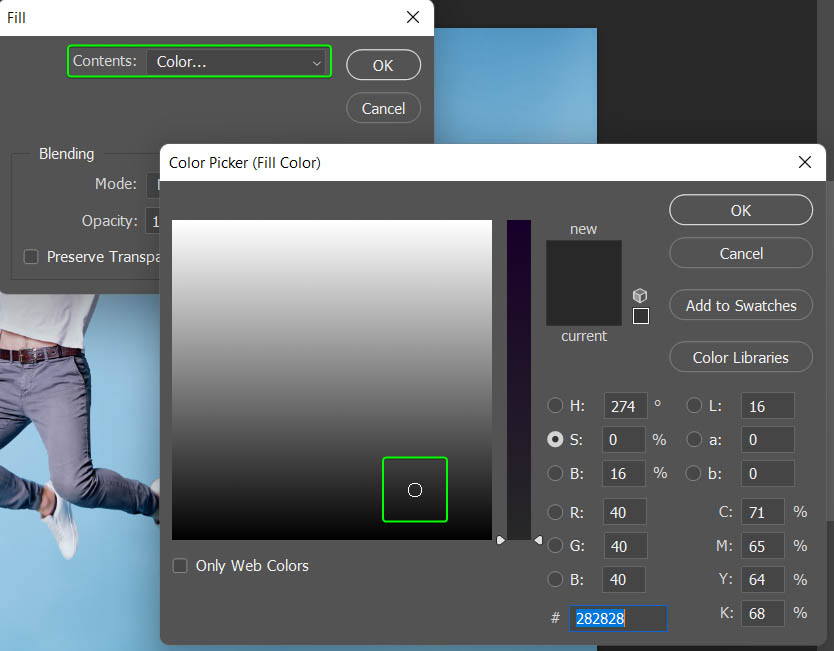
Click OK to fill the selection with the dark gray and deselect the selection by pressing Control + D (Win) or Command + D (Mac).

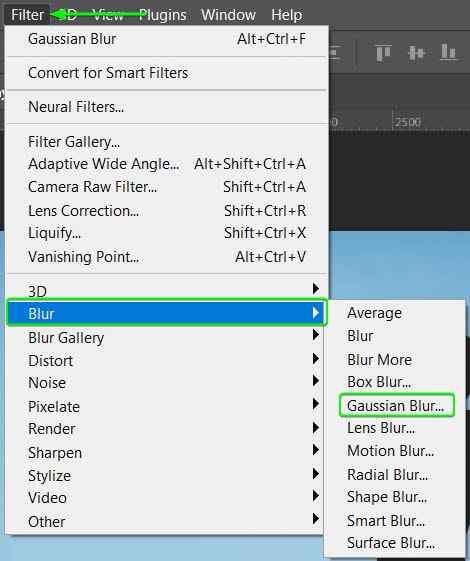
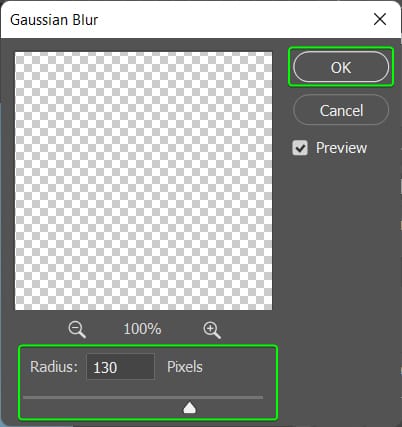
Add a Gaussian Blur to the layer by navigating to Filter > Blur > Gaussian Blur. Then, set the Radius value relatively high. I set mine to 130 pixels. Click OK to add the blur filter.
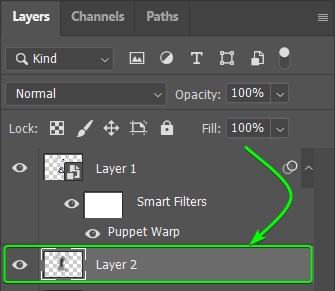
Move the blur layer below your warped layer by dragging it in the Layers panel, then select the Move Tool (V) and shift the blurred layer next to the subject, where you want the shadow to sit.
You now have a realistic shadow behind the subject.