

If you want to crop an image freely but Photoshop only allows you to do it in a fixed ratio, things can get a bit frustrating. Luckily, this isn’t as big of a problem as you might expect and it can be solved in just a few clicks! The reason you cannot crop freely in Photoshop is because of the crop preset you are using. By changing the crop preset to have no ratio values, you can freely crop your photo to any dimension! Here’s how it works.
To free crop an image in Photoshop, select the Crop Tool (C), and set the crop preset to “Ratio” or “W x H x Resolution” in the upper setting bar. Next, press “clear” to remove any constraints applied to your crop preset. Now you can freely crop your image without conforming to a certain dimension.
Although the process is pretty straightforward, there are some important details you won’t want to miss out on. In this tutorial, you’ll learn two different ways to freely crop images in Photoshop, plus gain a better understanding of crop presets.
Let’s get started!
Video Tutorial
Why Is The Crop Tool Aspect Ratio Locked In Photoshop?
The Crop Tools aspect ratio is locked due to the preset values set for the length and width options. These ratios can be changed at any time by typing new width and height values in the upper setting bar. To freely crop the aspect ratio of your photo, press “Clear” to remove the preset aspect ratio.
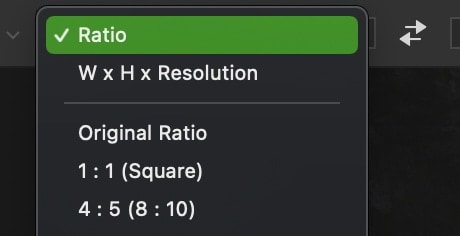
To give you a better example, let’s take a look at the crop presets in Photoshop. When you select the Crop tool, you have several cropping presets like Ratio, Original Ratio, W x H x Resolution, and other ratio and size presets.
Here’s what they all mean:
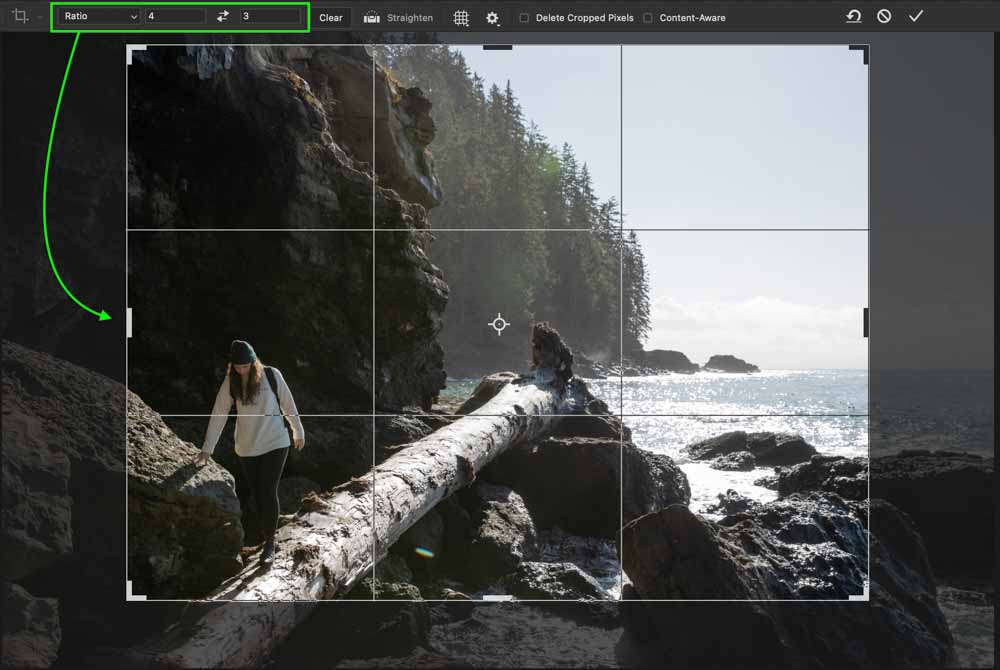
Ratio:
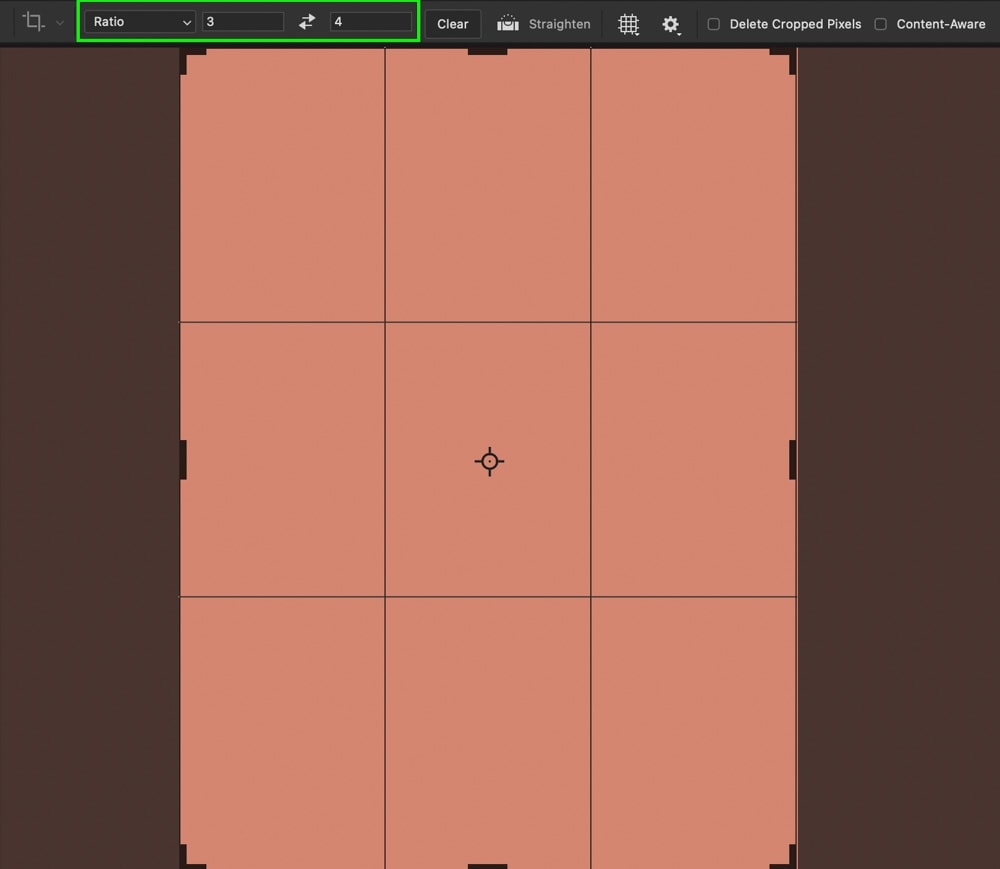
In the ‘Ratio’ preset, your crop is restricted to the custom aspect ratio you create. For example, if you entered a value of 3:4 then the crop tool will only crop the tool in that aspect ratio.
As another example, if you set 1:1 in the ratio mode, then your image will only get cropped in a 1:1 aspect ratio.
This ratio can be edited or removed at any time while the crop tool is active via the width and height options in the upper settings bar.
Original Ratio:
With this mode, Photoshop will remember the original aspect ratio of the image you are editing and only allow you to crop your image in that ratio.
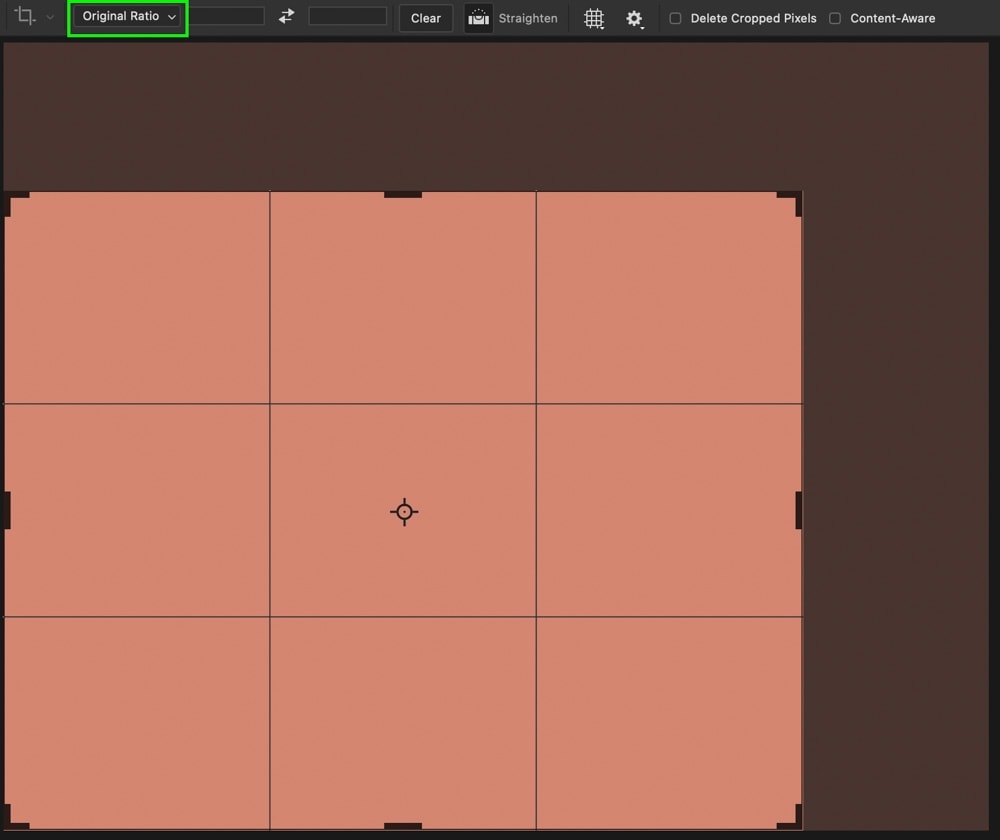
For example, if you are editing a 16:9 image, then the crop overlay will have a 16:9 ratio and you will only be able to crop in that ratio. This crop preset is helpful if you want your image to stay in its original shape after cropping.
W x H x Resolution:
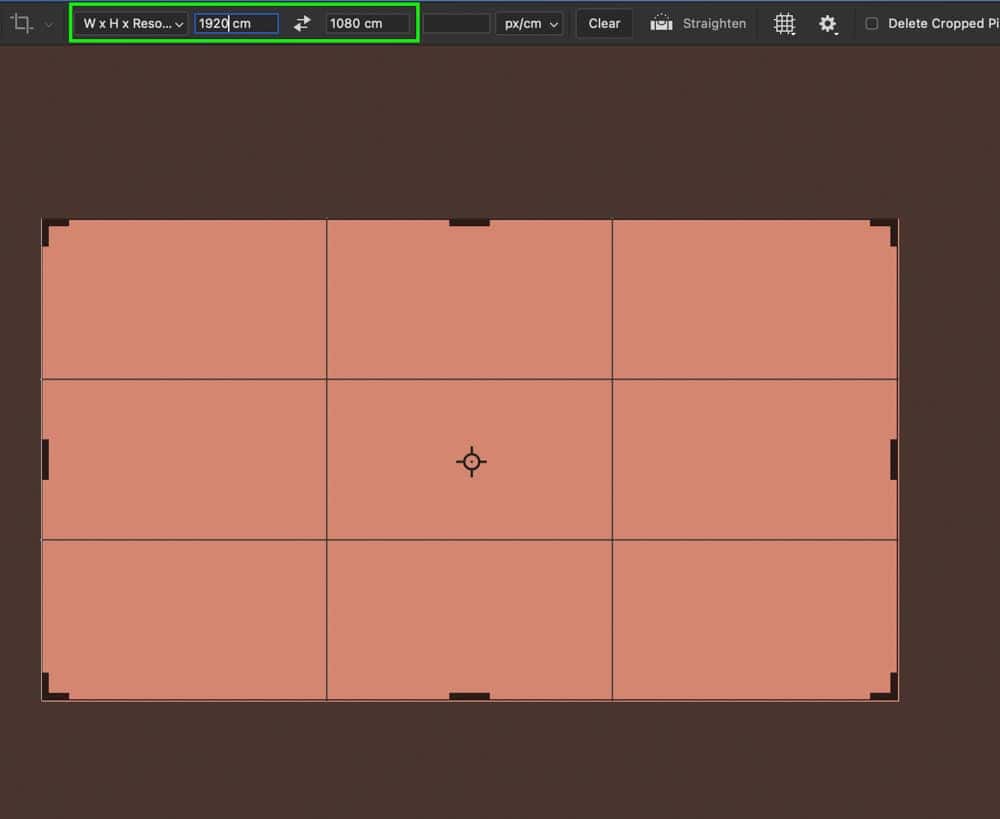
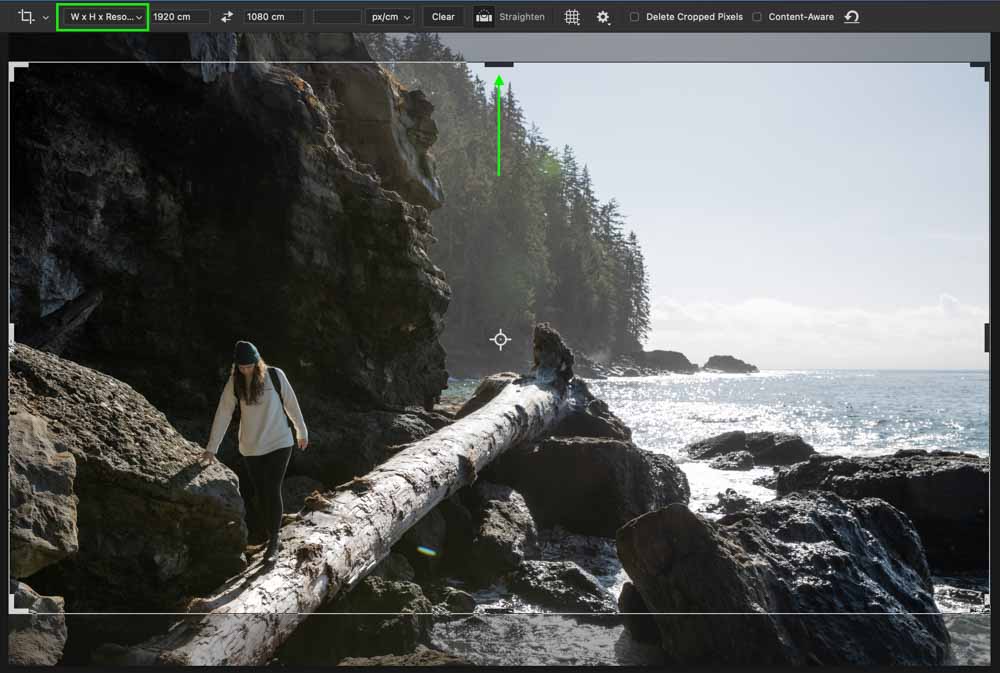
This crop preset allows you to set the cropping dimensions based on the dimensions of your image in pixels, and or the resolution. If, for example, you wanted a 1920x1080cm crop, you could add in those dimensions to change the size of your crop overlay.
Unlike the other crop presets, the W x H x Resolution preset allows for simple cropping adjustments based purely on image dimensions.
Premade Ratio and Dimension Presets:
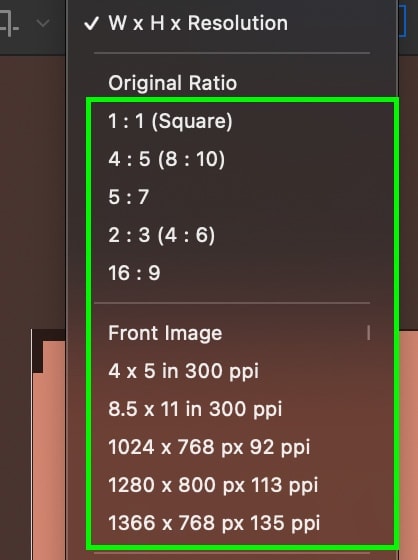
As the name suggests, these are common cropping ratios used which you can use on your image. Each preset displays exactly what aspect ratio or dimensions it will apply for your crop overlay. These can offer a great way of getting a certain crop without having to manually add in your desired aspect ratio.
All of these presets can be very helpful if you want a fixed crop and you don’t want to mess with the aspect ratio of an image. If you are cropping a photo for a YouTube thumbnail then you would want your image to crop in a 16:9 ratio for the correct dimensions. Similarly, for Instagram, you would want a 1:1 or a 4:5 ratio.
Knowing your presets and what they offer you is useful, but they can be limiting if you want to freely crop a photo. Let’s dive into the exact steps to do unconstrained cropping in Photoshop so you can have total manual control!
How To Free Crop In Photoshop with W x H x Resolution
The easiest way to free crop in Photoshop is with the W x H x Resolution preset. With the steps below, you can quickly enable free cropping in Photoshop.
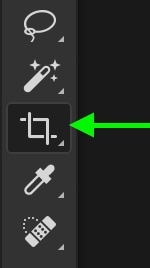
Step 1: Access The Crop Tool
To access the crop tool simply press on the crop icon in the Photoshop left menu bar or press C on your keyboard.
Step 2: Set The Crop Preset To W x H x Resolution
To set the crop preset as W x H x Resolution, make sure your crop tool is selected, then go to the top setting bar and from that click on the cropping preset option.
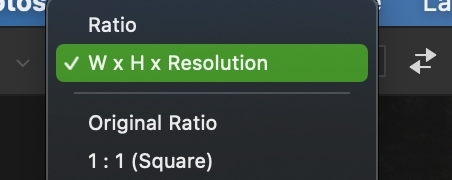
Now from this drop-down menu select the W x H x Resolution preset.
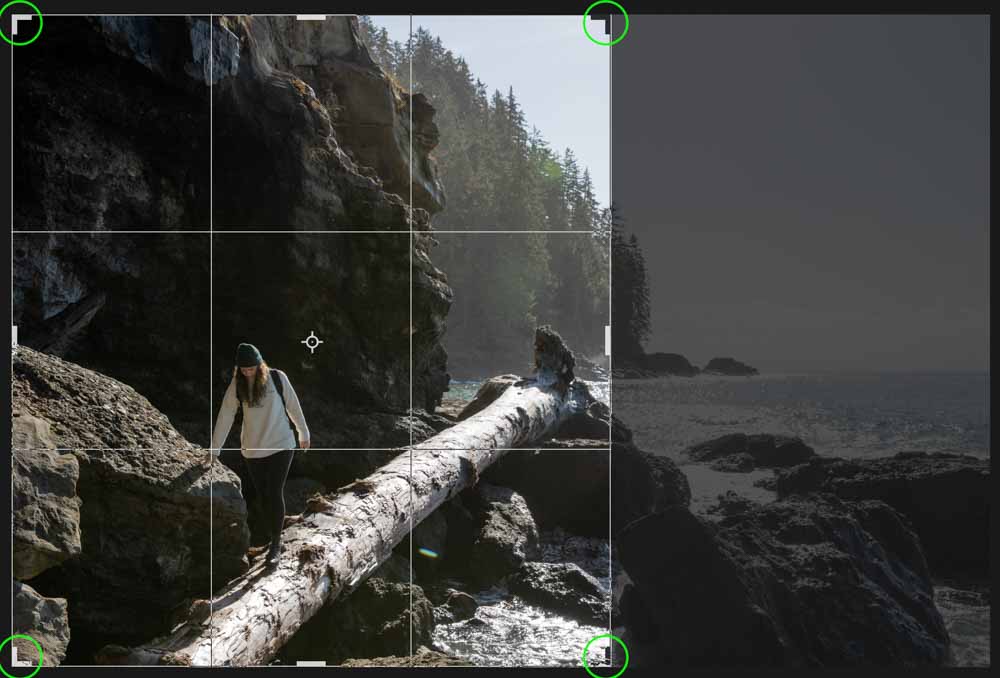
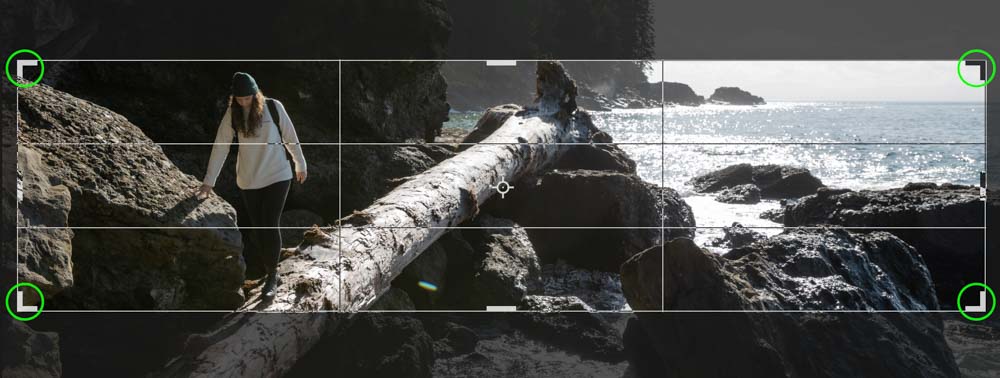
Step 3: Adjust the Crop On Your Image
Once you have selected the tool from the dropdown menu, make sure that there are no values set in the boxes beside the dropdown.
If there are, you can quickly clear those values by clicking on the ‘Clear’ button in the upper setting bar.

And that’s it! Now you can use the crop tool and you’ll find that there are no more restrictions anymore. You can freely adjust the width and height of your crop to perfectly suit your image!
Now if later on, you want to crop to a fixed width or height, then you can enter the dimensions in the two boxes for width and height. You can enter your values in pixels, inches, centimeters, etc. To top things off, the W x H x Resolution preset also allows you to set a specific resolution for your crop as well. That’s why this one crop preset is so handy since it can truly do it all!
Although this is a great option for free cropping in Photoshop, it’s always worth having backup options. Let’s dive into an alternative method of unconstrained cropping in Photoshop!
How To Free Crop In Photoshop Using The Ratio Preset
You read the heading right. We’ll use the ratio tool now. I told you before that the ratio tool only crops in a fixed ratio, but there is a very easy workaround. Here’s what you need to do:
Step 1: Access the Ratio Preset
After selecting the Crop Tool (C) go to your upper settings bar and look for the crop preset option. From the options provided in the dropdown menu, select ‘Ratio’.
Step 2: Clear The Ratio Values
Similar to the last method, all you need to do is clear the ratio values from the width and height boxes. The easiest way to do this is by pressing the ‘Clear’ button.

Step 3: Enjoy Freely Cropping Your Images!
That’s it! Now you will be able to free crop your images.
With no ratio values set, you can freely adjust the width and height of your crop overlay and nail down the perfect crop. This option is another handy way to free crop in Photoshop with a totally different crop preset.
Although unconstrained cropping in Photoshop may not be immediately obvious, it’s luckily very simple to do. As long as you have no width or height values specified for your crop preset, then you can free crop your image with ease. If you notice that you’re stuck cropping with a certain aspect ratio, just remember to clear those crop preset values!
Happy Cropping!


Thank you this was driving me crazy!
You are welcome!