

When working between programs like Photoshop and Illustrator, sometimes you need to change the format of certain elements to work with them on the other program. One such instance is working in Illustrator with text created in Photoshop. To adjust the text without affecting the quality, you need to know how to convert text into a vector in Photoshop.
Unfortunately, there is no straightforward way to convert text to a vector, but luckily there is a workaround. Follow these steps to create a vector text layer to use in Illustrator or other vector-based graphics programs.
Step 1: Create Your Text Layer In Photoshop
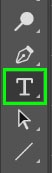
You first need to have a text layer to convert your text to a vector. Create text in your document by selecting the Text Tool (T) from the toolbar.
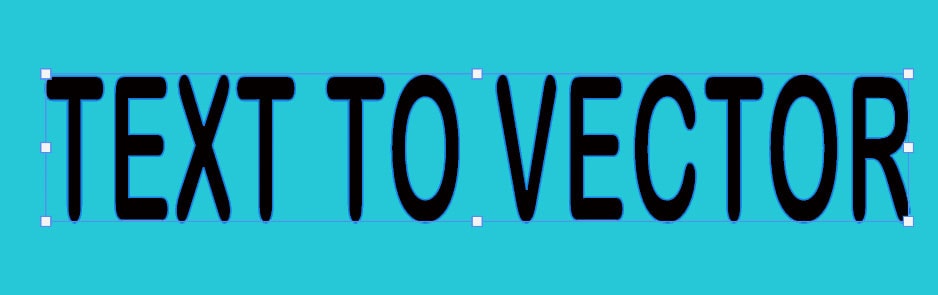
Then, create a text box on the document and type in your text. Use the settings in the Options bar to change the font, the text size, color, and any other settings you want. It’s essential to correctly format your text in this step because once you convert the text to a vector, you can’t edit it anymore other than resizing the entire text.

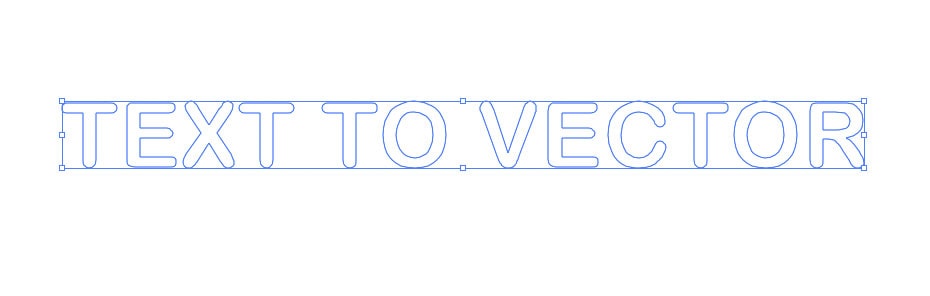
Your text should look something like this in the workspace, depending on the font you have used.

Step 2: Go To Type > Create Work Path
Next, with your text layer selected, convert it to a work path by navigating to Type > Create Work Path.
Once you select Create Work Path, you will notice that the text is surrounded by blue anchor points, indicating that the text has now created a separate path.

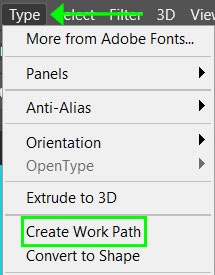
Step 3: Go To File > Export > Paths To Illustrator
Keeping the path selected, meaning the blue anchor points are still visible, navigate to File > Export > Paths to Illustrator to save the file.
A window will open, letting you select which path to export. In this case, leave it as the Work Path and click OK.
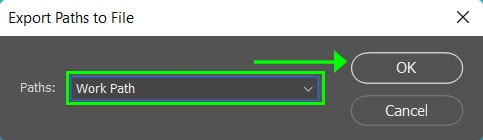
Then save the file on your computer. You will notice the file type is automatically set to AI format, ready for you to use in Illustrator.

Step 4: Fill The Text And Convert It To RGB Within Illustrator
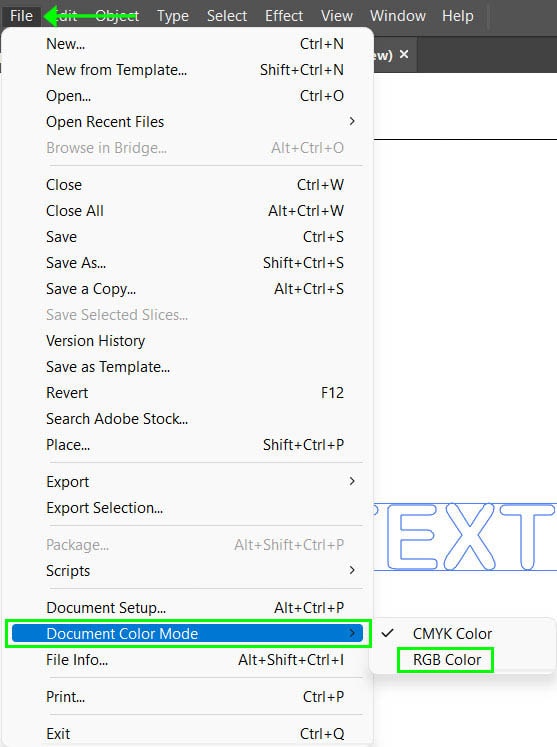
Once the path is open in Illustrator, you will notice that there is no fill or outline. The text has also been converted to CMYK. To fill the text, select it by clicking and dragging around the text.
Then, change the color mode to RBG by navigating to File > Document Color Mode > RGB Color.
Next, select the Fill block in the Properties panel and choose the color you want the text to be.
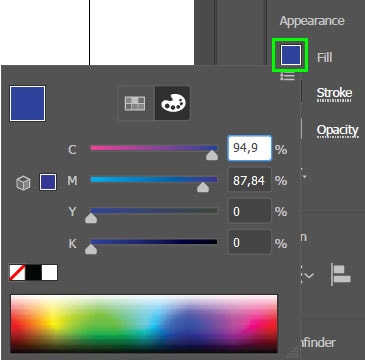
The text will now be filled with the selected color.

Now you can stretch and resize the text in Illustrator without losing quality.

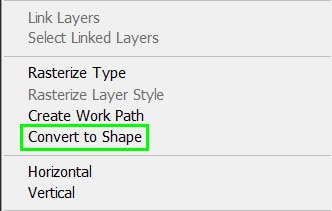
How To Convert Text To A Shape In Photoshop
Another way to vectorize text in Photoshop is to convert the text layer to a shape layer. The shape layer allows you to work with the text as a vector in Photoshop without opening it in another program.
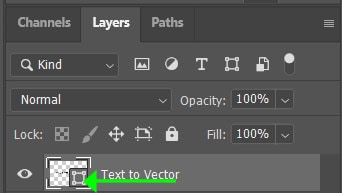
To convert the text, right-click or control + click the text layer and select Convert to Shape.
You will notice that the layer has changed to a shape layer, as indicated by the icon in the layer’s thumbnail.
You can resize the converted text without losing quality, but you won’t be able to edit the font or fix any spelling errors.
However, you can change the color of the text by double-clicking on the layer thumbnail.
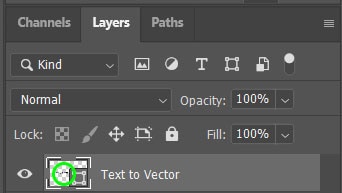
Once the Color Picker window opens, select the new color and press OK.
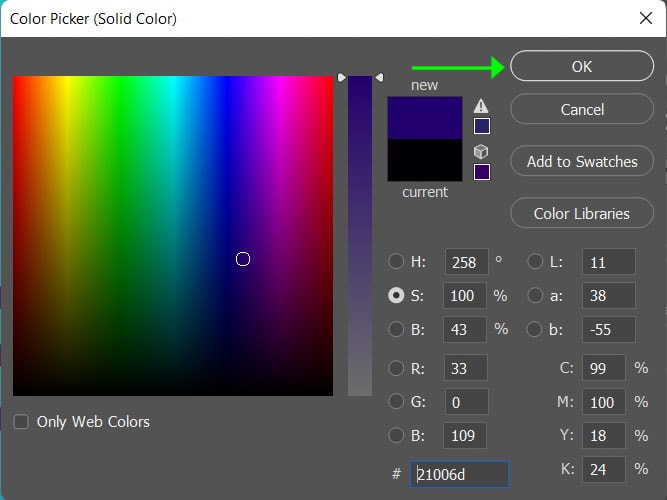
The text shape is now the new color you picked.

When To Convert Your Text Into A Vector
Photoshop is not a vector-based program, and it’s very seldom that anyone will use Photoshop to create vectors. Illustrator is the go-to Adobe product to use when working with or creating vector elements. However, there are times when you may need to convert the text in Photoshop into a vector element.
Usually, the text is vectorized in Photoshop to be used in Illustrator. Vectorizing the text may be necessary when there are large amounts of text in Photoshop that need to be moved across to Illustrator to be resized and added to the artwork. Vectorizing the text is much quicker than retyping or re-creating the text in Illustrator.
In other cases, you may not have Illustrator on your computer but need to send a vectorized text to a team member who is using Illustrator. This method allows you to convert the text into a path that can be sent and opened in Illustrator or other graphics programs.
You may also need to vectorize text in Photoshop when sending artwork to the printer without affecting the quality. You can resize the vectorized text without destroying the quality of the text. Preserving the text quality is especially important when sending artwork to be printed on a large scale and when you only have Photoshop on your laptop.
Converting the text to a vector is also useful if you design a logo in Photoshop. The vectorized text allows you to create the logo in a resizable format that won’t affect the quality when printed in various sizes. Again, you would usually use this method if you don’t have access to Illustrator or other vector-based programs.
