You can easily learn how to make a logo in Photoshop since shapes are added as vectors. You can also convert text to vectors. Ultimately, Photoshop offers several ways to create an eye-catching logo for your business.
Since Photoshop offers almost endless possibilities for logo design, it’s impossible for me to include everything you can do in Photoshop. However, this article will give you the basics of creating a logo and inspire you to start on your own design.


Note: Remember to take the techniques you learn here and design a logo that matches your brand’s essence and purpose by customizing the design process to suit your needs.
How To Design A Logo In Photoshop
Step 1: Click On New File To Create A New Document
Create a document by clicking on the New File button in the start-up window of Photoshop. In the New Document window, set the size of your document. I recommend 1200 x 1200 pixels for web use or 5400 x 7200 pixels for print.
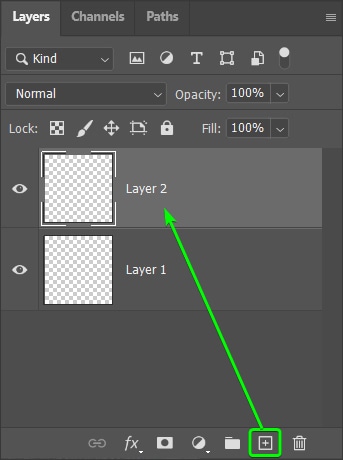
Then, set the background to Transparent so you can export the logo with a transparent background. Once you have chosen the correct settings for your needs, click Create. Add a white background while designing to see the elements by clicking the plus sign icon at the bottom of the Layers Panel.
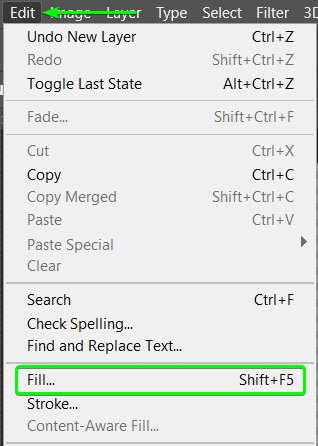
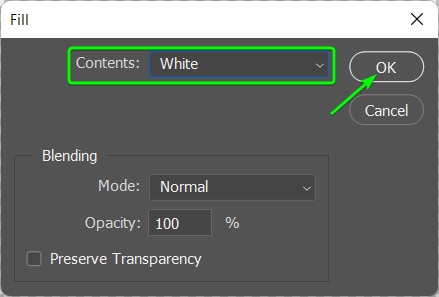
Then, fill the layer with white by going to Edit > Fill or pressing Shift + F5 (Win & Mac). Then select White from the Contents drop-down menu and click OK to accept it.
Step 2: Select The Type Tool And Add Text To Your Logo
You should always add text to a logo, especially when designing one for a new company. Adding the name allows potential customers to get to know the brand. Once the brand is established, the business can drop the text and just use the emblem from the logo, as you see in big companies such as Apple, McDonald’s, Twitter, and Nike.
To add text, select the Type Tool (T) and choose the font, size, and color in the Options Bar.


Then, click on the canvas to add a point text box, then type in the company name. You can take this step further and distort the text in Photoshop in various ways.

Step 3: Select Any Shape Tool To Add Shapes To The Logo
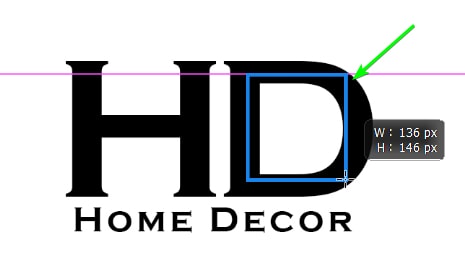
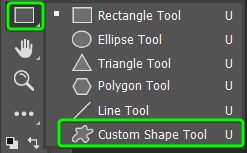
You can add simple shapes to the logo found in Photoshop. These shapes can be added to the logo or used as the main element. For my home decor logo, I want to block out the middle of the D to add a more customized shape. To do this, I can select the Rectangle Tool (U) and draw a block over the space.

Next, I want to add a custom shape to the space. For this, I select the Custom Shape Tool (U) from the Toolbar. Then, I use the Shape drop-down menu in the Options Bar to select the shape I want, such as the flower I have chosen. I also set the Fill color to White in the Options Bar.
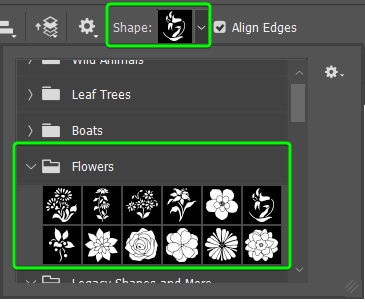
Now, I can click and drag to add the shape over the D. The Home Decor Logo is complete.

Note: It’s good practice to design a logo in black and white and then add color once the design is complete. If a logo looks complete in black and white, it will be good in color, too.
Step 4: Right Click And Select Convert To Shape To Convert The Text To Vectors
To convert the text to a vector, ensure that you select the text layer(s), right-click (Win) or Control + click (Mac) on the layers in the Layers Panel, and select Convert to Shape.
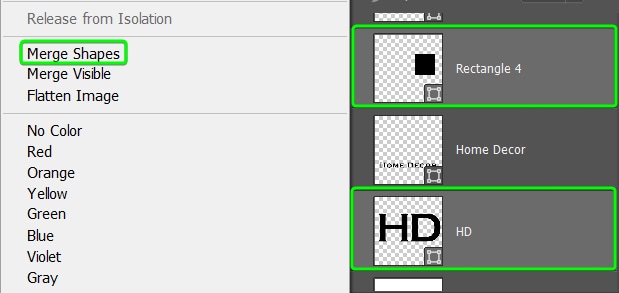
After converting the HD text to a vector, merge the layers to create one element. To do this, select both layers in the Layers Panel, then right-click (Win) or Control + click (Mac) and select Merge Shapes.
Step 5: Use Fill And Stroke In The Options Bar To Add Color To The Logo Elements
You can use artboards to create variations of the artwork. Select each element and add the colors you want. To change the colors, select the element on the canvas and then the tool that created it (remember, once the text is converted, it’s now a shape, so you need to select the Shape Tool).
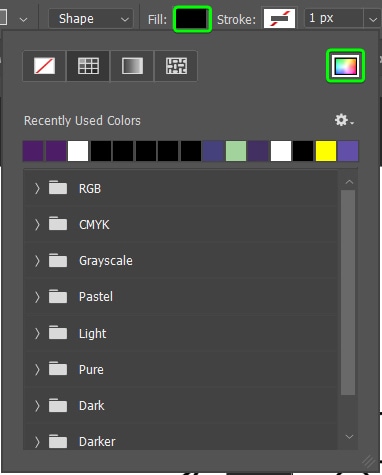
Once those two are activated, you can change the Fill or Stroke color in the Options Bar.

To change the fill, open the Fill menu and click on the Color block to open the Color Picker. Once you’ve selected the Color from the Picker, click OK.
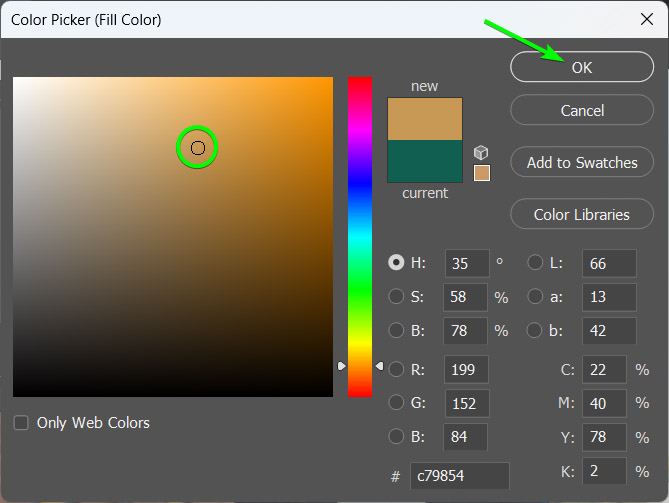
I now have a completed color Home Decor logo.

Step 6: Duplicate The Logo & Create Different Variations
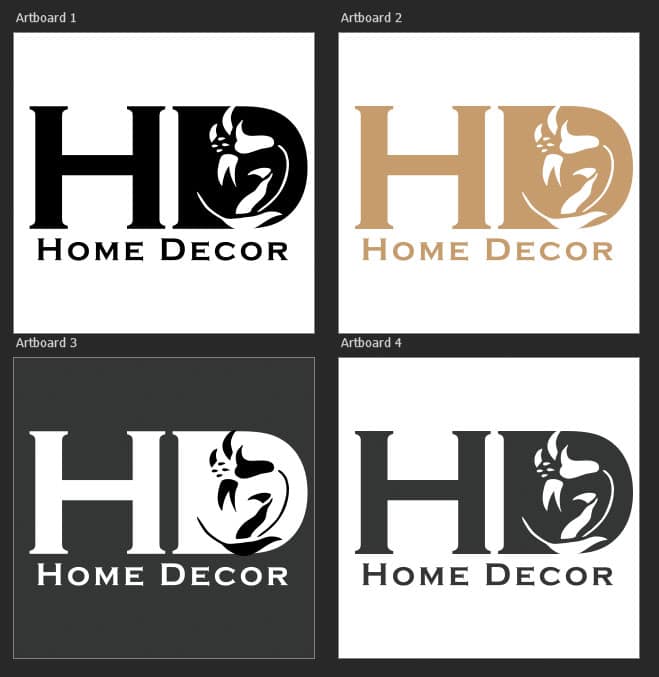
You should be able to vary each logo you create for different platforms. For example, if you need to add a white logo to a website with a dark background, you should have a white variation ready.
You can duplicate the artboards and change the colors to ensure that your logo is in full black, full color, full white, or grayscale.
Step 7: Export Your Logo As A PNG
If you added a white background layer, delete it before exporting. To do this, select the layer in the Layers Panel and click on the bin icon at the bottom. Once you delete the background layers, the artboards will have transparent backgrounds.
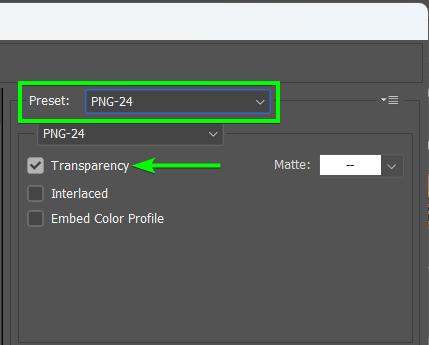
If you created a single canvas, you could export the logo by going to File > Export > Save for Web (Legacy) or pressing Shift + Alt + Control + S (Win) or Shift + Option + Command + S (Mac). In the Export window, select PNG-24 from the Preset drop-down menu, then ensure the Transparency box is enabled. Once the settings are in, you can click Save.
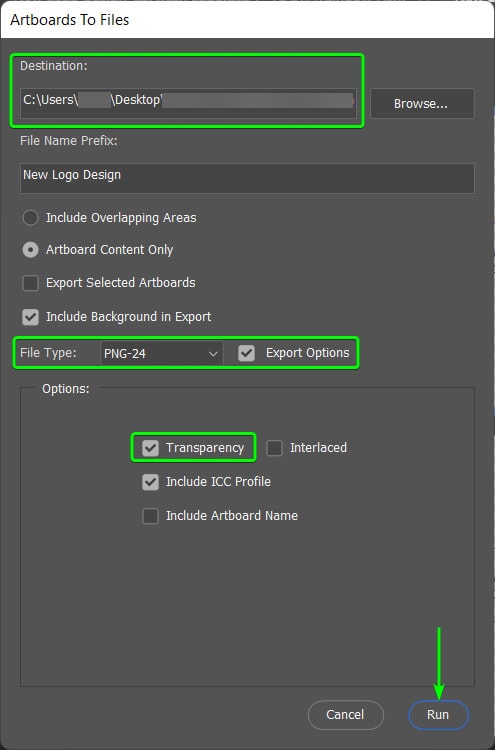
If you have artboards and want to save them all as separate PNGS, go to File > Export > Artboards to Files. Choose the save destination at the top. Then, select PNG-24 from the File Type drop-down menu. Next, check the box next to Export Options to open up more options and ensure that Transparency is checked. Click Run to save the artboards as PNGs.
You have now created different versions of your logo that you can easily add to your proposal document, website, or other images.
A logo is the brand’s first impression it makes to customers, so it needs to be visibly appealing, memorable, and portray exactly what the brand is about. This is quite a lot to put into a logo, but if you understand the true essence of the business before designing the logo, you can’t go wrong.
Once you know the company, use the various elements and techniques that Photoshop offers to create a stunning logo.


