

There will likely come a time when working in Photoshop that you’ll need to alter the dimensions of your canvas, whether it is at the beginning, middle, or end of a project. Luckily, it’s easy to learn how to change the canvas size in Photoshop.
Here are three of my favorite ways to resize the canvas during the project and when exporting.
Method 1: How To Change The Canvas Size In Photoshop Using The Canvas Size Menu
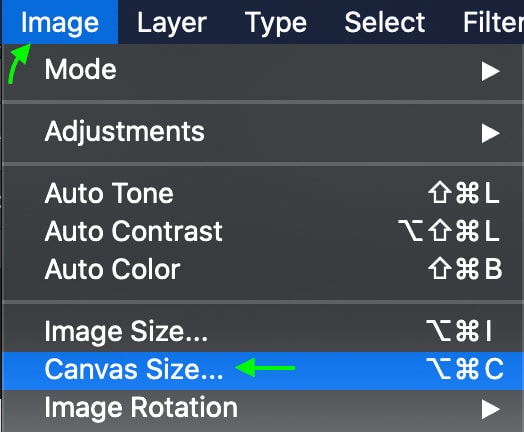
Step 1: Go To Image > Canvas Size
To change the size while working, head to Image > Canvas Size. The Canvas Size window will appear.
Note: The following process is to change the canvas size. You can also resize an image in Photoshop by clicking on the linked tutorial.
Step 2: Set The Unit Of Measurement Using The Drop-Down Menu
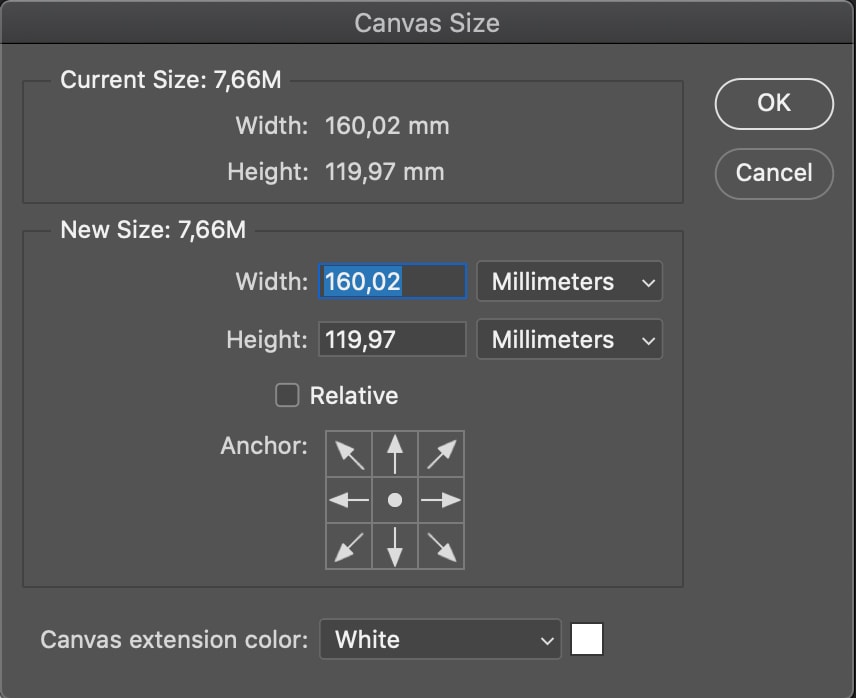
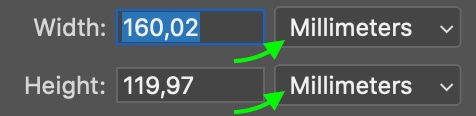
Here, you’ll see the current dimensions of your canvas in the Current Size area. Under New Size, select the unit of measurement you want. Changing the unit for width will also change the unit for height, and vice versa, to ensure you’re working in the same unit for both.
Step 3: Set The New Width And Height Values In The Width And Height Boxes
Once you’ve selected the correct unit of measurement, enter the number you’d like your Width and Height to be in the boxes.
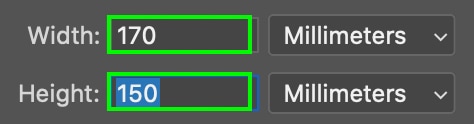
Check Relative, and you can enter relative values in these boxes — meaning, you can enter 3 next to Width, and the size will increase by 3 units of your chosen measurement. Enter a negative number to decrease the size.
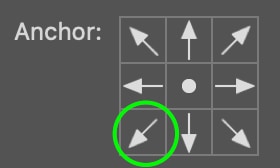
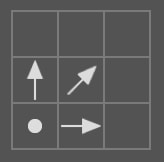
Step 4: Set The Anchor Position
The Anchor settings determine in which direction the new dimensions will be applied. If you keep the default center selection, the changes will be applied equally on all four sides. However, if you select the bottom left, for example, the changes in size will be only applied to the top right of the canvas.
Once you’re satisfied, click OK. You will see your canvas change according to the new dimensions you’ve set.
Method 2: Change The Canvas Size In Photoshop Using The Crop Tool
Step 1: Select The Crop Tool (C)
First, select the Crop Tool (C) from the Toolbar.

Step 2: Set The Ratio To W x H x Resolution
In the Options Bar, set the Ratio Preset to W x H x Resolution to free crop without any constraints. However, you can also choose a set ratio preset if you want to resize the canvas to a specific aspect ratio. Ensure that Delete Cropped Pixels is enabled.

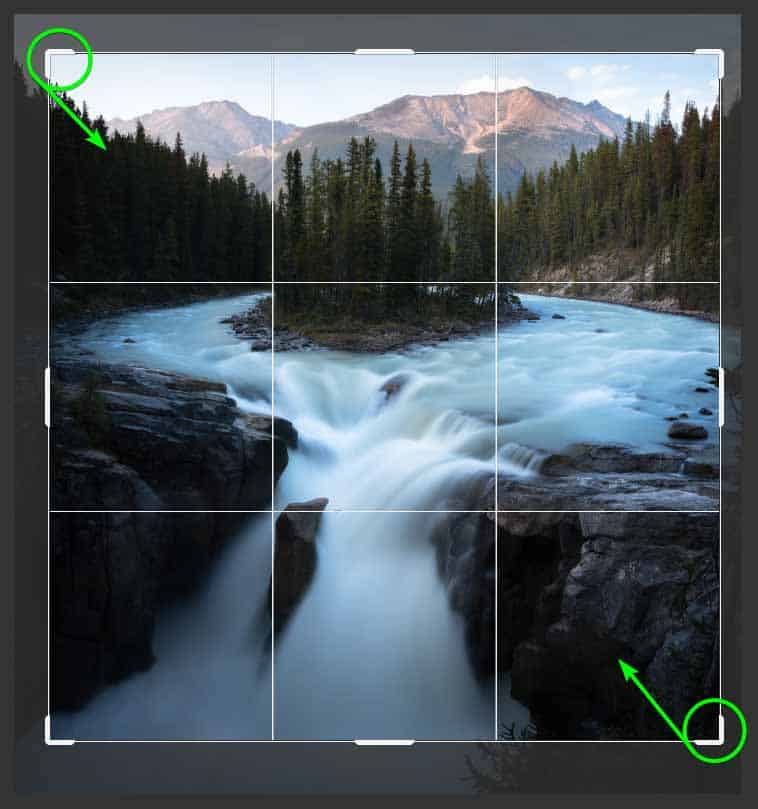
Step 3: Drag The Crop Handles To Resize The Canvas
You can now use any of the crop handles around the image to resize it. Once you are happy with the crop, press Enter to confirm the crop. The canvas size will be resized to the new crop.
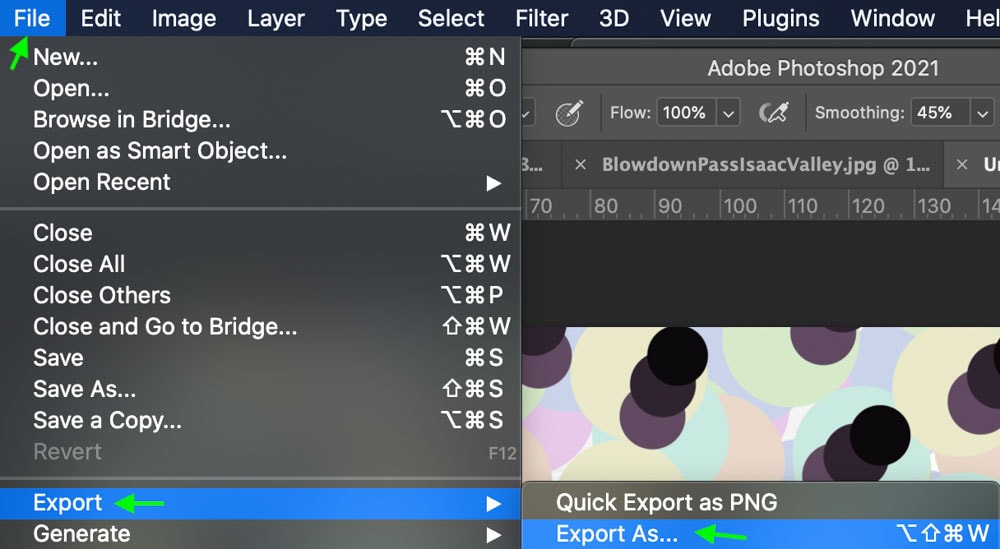
Method 3: Change The Canvas Size In Photoshop On Export
Step 1: Go To File > Export > Export As
When you’re ready to export your project, head to File > Export > Export As. The Export As window will come up.
Step 2: Set New Width And Height Values Under Canvas Size
Head to the Canvas Size area and type in a new width and height for your project in the boxes. The unit of measurement will stay in pixels; you won’t be able to change it. You’ll also have to enter both Width and Height values, and they won’t be linked, so you’ll have to enter them separately.
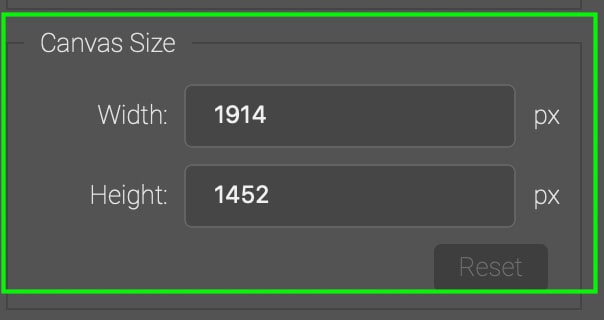
Step 3: Check The Preview And Click Export
You will, however, see the preview change as you enter the values so you can see when it looks correct. You will notice that changing these values will only change the size of the canvas around your image or elements and won’t affect the actual size of the image or artwork.
Click on Export when you have the new canvas size set.
Happy Editing!


(I am a beginner) If I change the image size after I created a new document, the size of a new document that I created is also changed. Although there is no image on the new document(Canvas?), why is the canvas size changed? Does a new document(Canvas?) have an image filled with background color? Thank you for your tutorials.
Think of it like this:
Image size will expand the size of the layers in your project and resize the document to fit the new dimensions.
Canvas Size will adjust the only document you are working on, without affecting the size of the images or layers in your project.
The background contents of a new document will be set based on what you choose within the New Document window. For example, fill background contents with White will create a white background on your new document by default.
Hope that helps.