


So you’ve finished editing your photos in Lightroom, but now you aren’t sure whether or not they’ve been saved. Before exiting the program, you might feel worried that all your hard work will be lost. After all, you didn’t press any “save” button or see a progress bar. Unlike other editing programs such as Photoshop, Lightroom saves photos automatically. Here’s how it works.
After editing a photo in Lightroom, the changes are saved to your Lightroom catalog. You do not need to save your work manually in Lightroom as it does so automatically. Whether you add flags, keywords, ratings, editing adjustments, and more, all that data is saved within the Lightroom catalog.
To give you a better picture of how Lightroom saves your photos, let’s break it down even further.
Does Lightroom Save Your Photos Automatically?
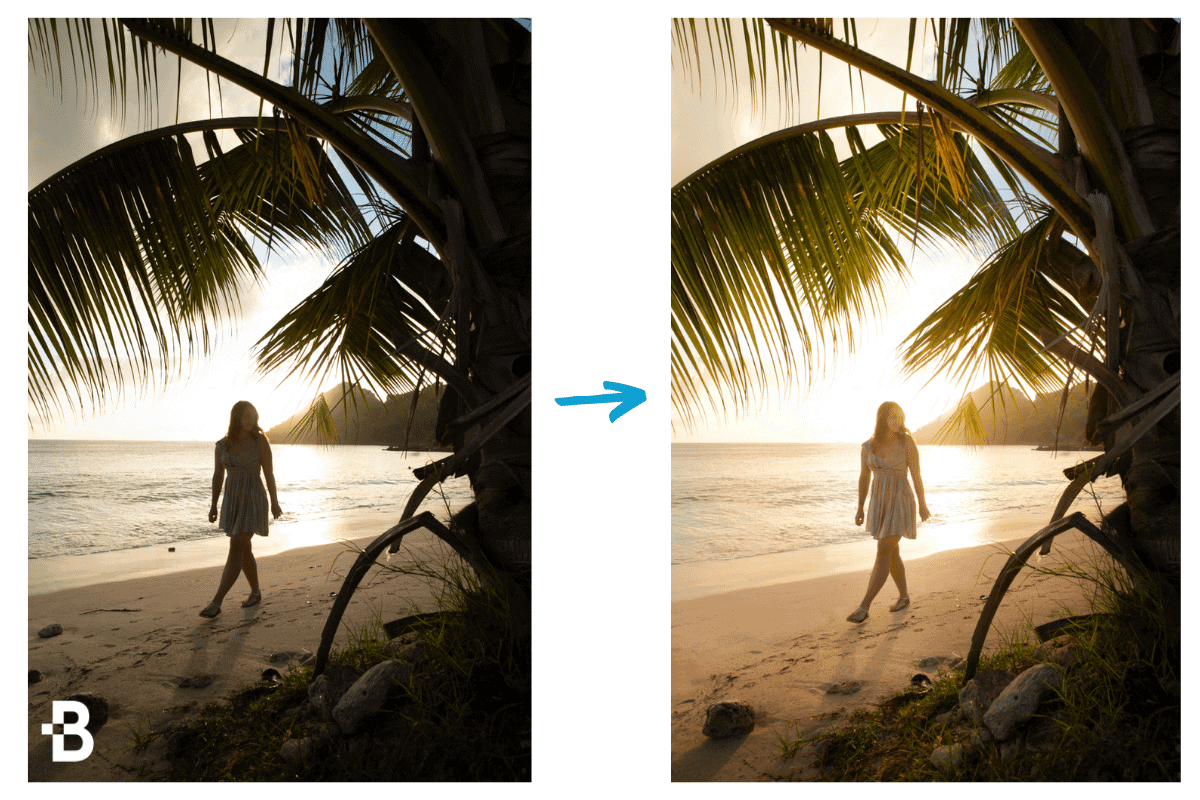
Lightroom saves your edits automatically to the Lightroom Catalog as changes are made. The program does not edit your image files directly. Instead, your adjustments are saved in the Catalog and appear over your image previews. When exported, the edit and image become merged as a new file.
It’s important to note what non-destructive editing actually is. In Lightroom, this means that your original image remains untouched while you apply adjustments. Instead, your adjustments are being saved to the Lightroom Catalog and appear over your image previews inside.
That’s why when you go to look at your original files on the computer, none of them appear edited despite how they look in Lightroom.
By working non-destructively, Lightroom saves all your edits without you having to do so manually. Whether you’re applying flags, ratings, organizing, or editing, all of these changes are constantly updated in your active catalog.
Inside of a catalog is all the editing details saved to a particular set of imported images. If you edited a photo in one catalog but then imported that same image into a separate catalog, the edit would not transfer over. All of the changes made in a specific catalog are also stored within that same file.
An easier way to think of this is as Lightroom giving your images “instructions” on how they appear. As you make changes to your edits, you’re updating the instructions in that Lightroom catalog related to specific images.
All of this is done automatically, so you do not have to worry about saving your photos.
Where Are My Lightroom Edits Stored?
By default, Lightroom edits are stored within your Lightroom Catalog. The catalog serves as a database for all the editing adjustments made to your images. Alternatively, you can save edits as XMP files by going Lightroom > Catalog Settings and check the “Automatically Write Changes To XMP” option.
The most simple option is to leave your edits saved inside of your Lightroom Catalog. Rather than having individual adjustment files (XMP) beside each imported photo, a Lightroom Catalog keeps everything in one place. By opening up a particular catalog, all the accompanying adjustment information will appear over your images as well.
You may feel nervous about all of your adjustments being saved to a single file, but luckily Lightroom makes it easy to back everything up. I’ll share how to do that in the next section.
If you want to save your editing adjustments as individual files, you can do so by going to Lightroom > Catalog settings > Automatically write changes to XMP.
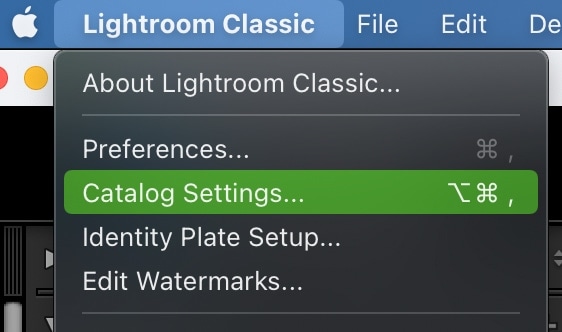
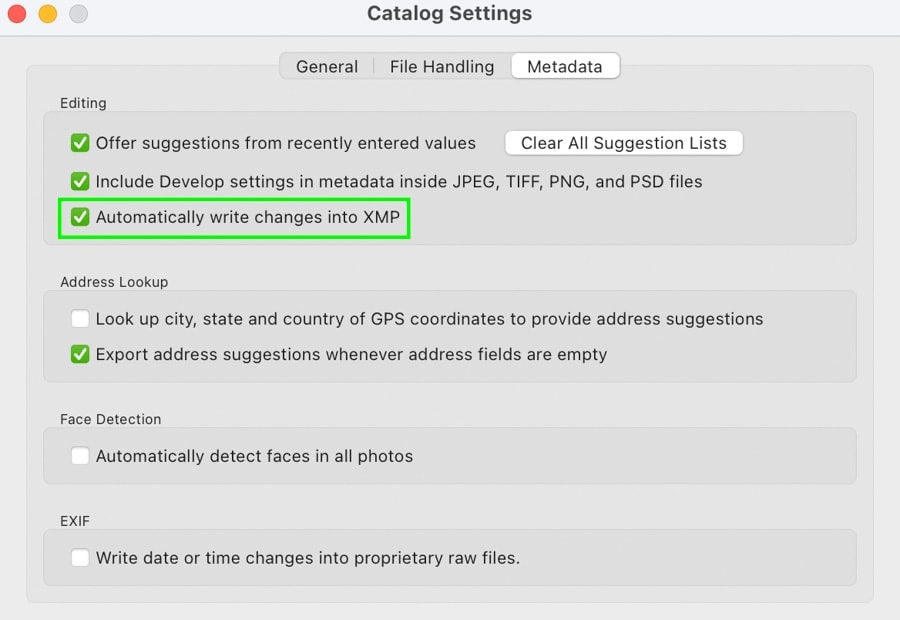
On Windows, this will be Edit > Catalog settings > Automatically write changes to XMP.
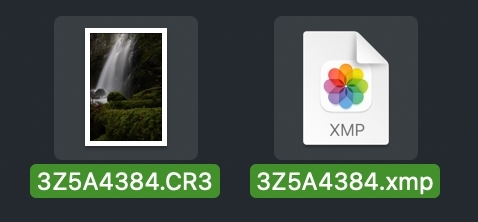
With this setting checked off, an adjustment file will appear beside each of your images in their home directory. For example, if you have a photo stored on your desktop, the XMP file would appear on your desktop as well. If your images are imported from a specific folder, the XMP file will appear beside the original RAW file.
This option isn’t necessary for most people but is handy to know about. If you wanted to send a file and edit information to someone without sending an entire catalog, this would be a valid solution. This also helps if you want your edits to be visible in other editing programs.
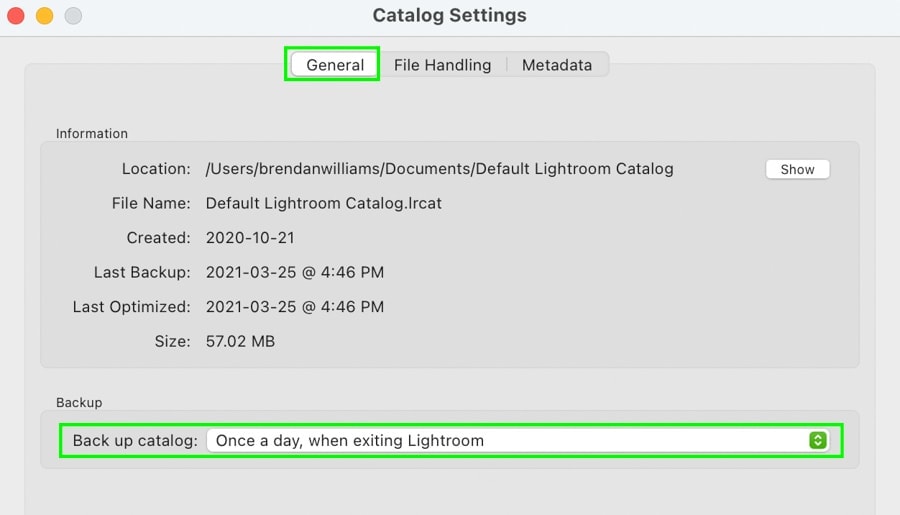
How To Backup Your Lightroom Catalog
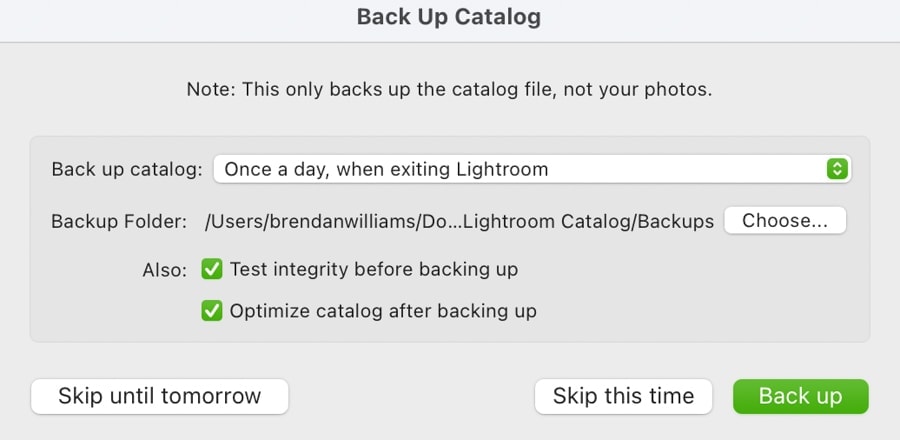
To backup a Lightroom Catalog go to Lightroom > Catalog Settings > General > Backup. From the provided options, you can choose to automatically backup the catalog daily, weekly, monthly, or never. Depending on this setting, Lightroom will update your catalog information in a backup file accordingly.
Having a backup of your Lightroom Catalog can really save your bacon if something happens to your original catalog file. In some cases, your catalog can become broken, fail to open or get accidentally deleted. With a backup in place, you have a direct solution to this problem.
By going to Lightroom (Mac) or Edit (PC) > Catalog Settings > General > Backup you can choose your catalogs backup frequency. I leave my backup set to “Once a day when Lightroom exits,” so everything is saved once I finish working in the program.
With this setting, you will be prompted whether or not you want to back up the catalog once you exit Lightroom, but only once a day. Since the reminders are automatic, you don’t need to manually go and backup your Lightroom Catalog. Lightroom will remind you when it’s time to do so!
If you want to locate your backup Lightroom catalogs, they are saved in the following locations by default:
- Windows: \Users\[user name]\Pictures\Lightroom\[catalog name]\Backups\
- Mac OS: /Users/[user name]/Pictures/Lightroom/[catalog name]/Backups\
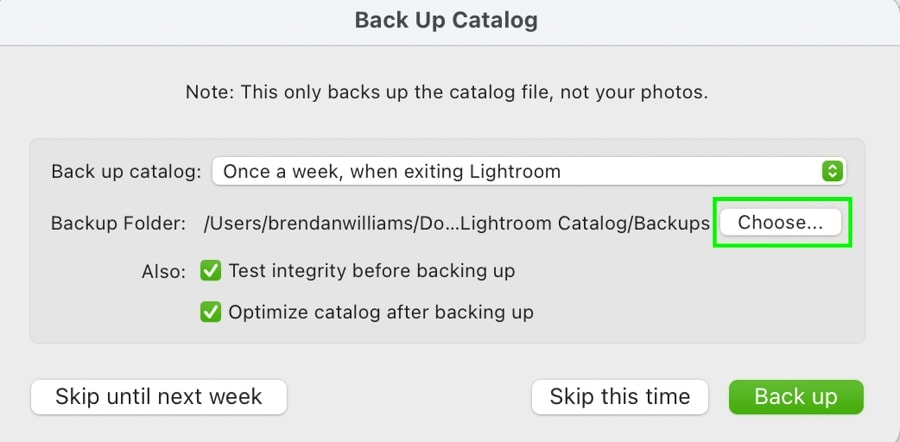
You can change the backup location in the backup catalog dialogue box simply by pressing “Choose.”
For additional information on catalog backups, see Adobe’s help page.
The Difference Between Exporting & Saving Your Work
It’s easy to get confused between “saving” and “exporting” in Lightroom. So far, you’ve learned that Lightroom saves your photos automatically, but this does not mean your edits are exported.
Saving a file means that your adjustments are remembered within the Lightroom catalog and can be viewed or adjusted later on in Lightroom. This does not mean you have an edited image that you can upload to social media.
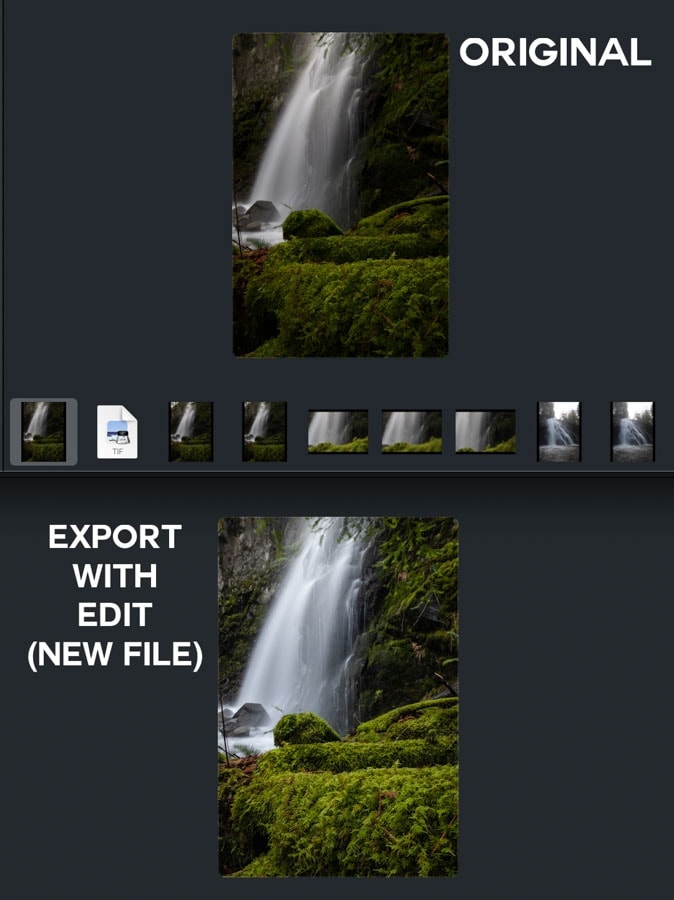
Exporting a file means that Lightroom takes the original RAW image, combines it with your Lightroom adjustments, and creates a completely new file. In Lightroom, you can export as JPEG, TIFF, PNG, PSD, or DNG. This exported image will have your editing adjustments applied directly to it.
Since Lightroom works non-destructively, exporting allows you to create a new file separate from your original. That way, there’s always an edited version and an untouched original.
How To Export Edits In Lightroom
If you are looking to export your photos from Lightroom, the process is very simple.
Go to File > Export, then set your export location and file type. For a shareable file to publish online, save your export as a JPEG.
With all your settings in order, click Export. Now your image will be saved with the Lightroom adjustments applied directly to the photo. As you can see on my computer, the export is a completely separate file from the original RAW photo.

There are a lot of subtle details that go into the exporting process in Lightroom. What you learned here is just the very basics of how to do it. If you want to know the best export settings to maintain top-notch image quality, check out this guide to exporting photos in Lightroom.
Happy Editing!
Brendan 🙂
