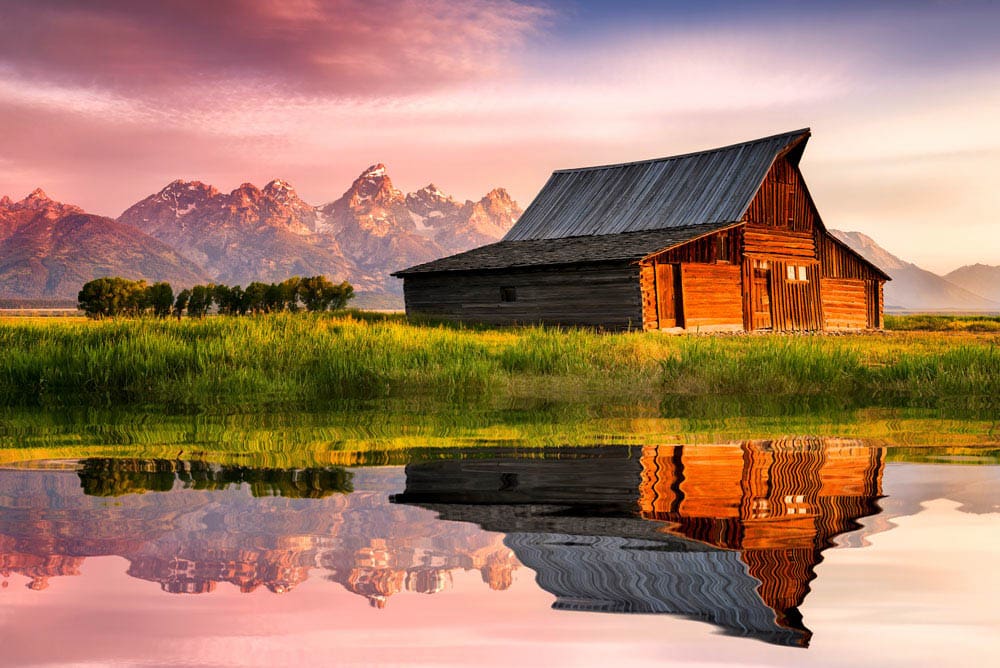
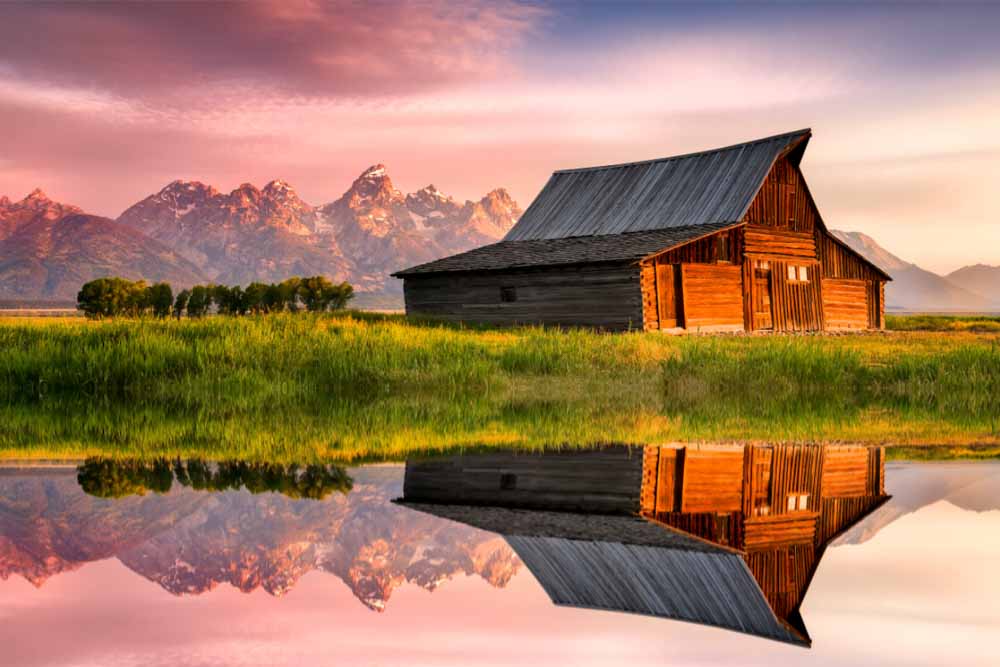
Capturing a reflection of your subject in a body of water always creates a stunning composition. However, if there isn’t any water where you are taking your photo, you can easily add a reflection in Photoshop.
It may seem difficult to add an entire body of water to your image with realistic ripples, shadows, highlights, and reflections. Yet, you will be surprised at how simple the process is and that you don’t need to add any water to the image.


How To Add A Reflection In Photoshop
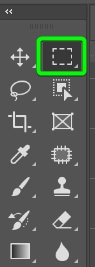
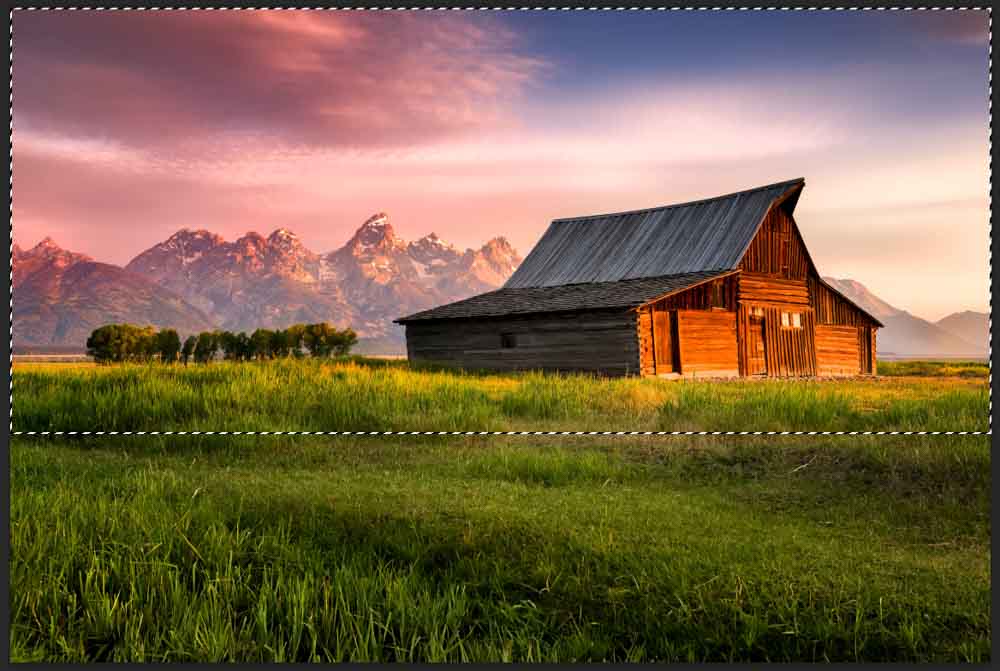
Step 1: Create A Marquee Selection Of The Top Half Of The Image
Once you have your image open in Photoshop, activate the Rectangular Marquee Tool (M). Click and drag out to select the area you want to add as the reflection from the top half of the image. Remember that anything not selected will be hidden in the final image.
Step 2: Press Control/Command + J To Copy The Selection Onto A New Layer
This copied version will act as the reflection. Press Control + J (Win) or Command + J (Mac) to copy the selection. The selection is added to a new layer in the Layers Panel.

Next, prepare your layers by renaming them to keep them organized so you don’t get confused about which layer to edit. You can also unlock the background layer by clicking on the lock icon, as you will need to move this layer to the next step.
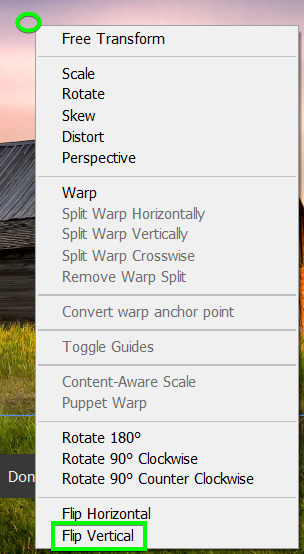
Step 3: Press Control/Command + T, Then Right-Click And Select Flip Vertical
Select your Reflection layer and press Control + T (Win) or Command + T (Mac) to activate the Transform Tool so that you can flip the reflection section. Then, right-click or Control + click and select Flip Vertical.
The reflection will flip upside down at the top of the canvas. Keep the Transform Tool active to click and drag the Reflection layer down. Line the two images together as best as possible so it looks like a reflection. Your reflection may sit off the canvas a bit.
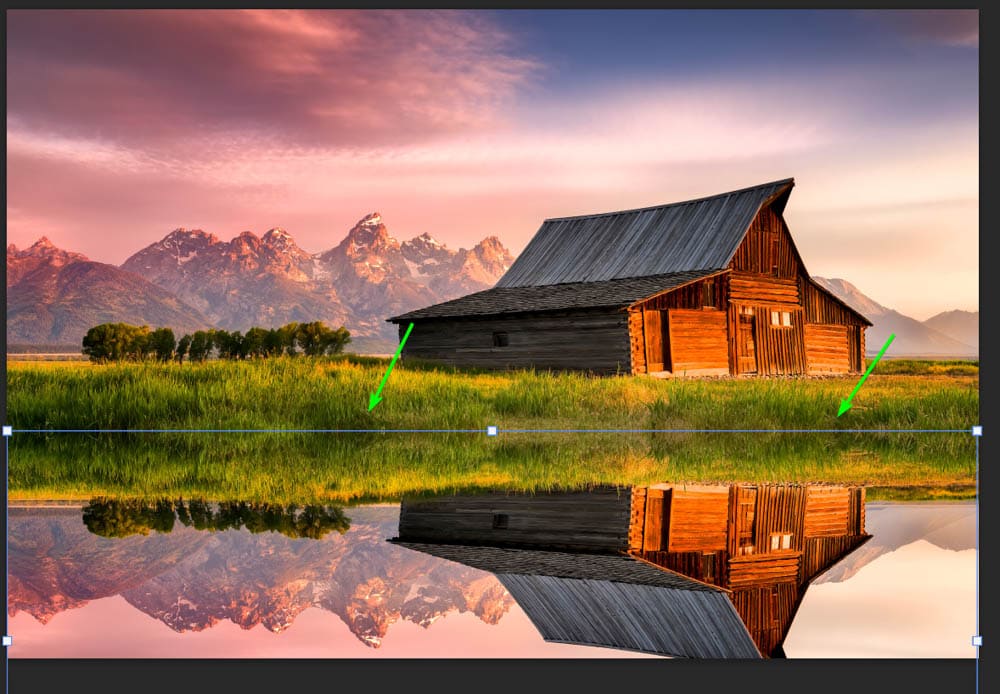
Press Enter to confirm the move. Then, select both the original and reflection layers by holding in Shift and clicking both layers. Activate the Transform Tool again by pressing Control + T (Win) or Command + T (Mac) and move the two layers up.
You can decide how much of the reflection you want visible on your page and resize the canvas if you’d like. However, I don’t need as much sky in my image, so I will move the layers up until I can see the entire house in the reflection.
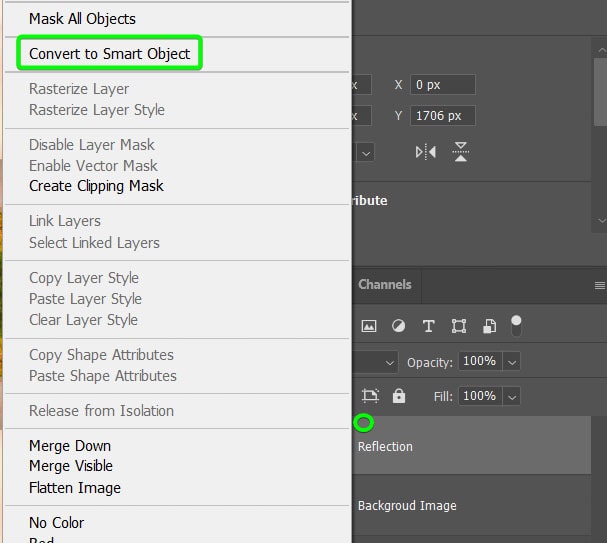
Step 4: Right-Click The Reflection Layer And Select Convert To Smart Object
To convert the Reflection layer to a smart object, right-click or Control + click on it and select Convert to Smart Object.
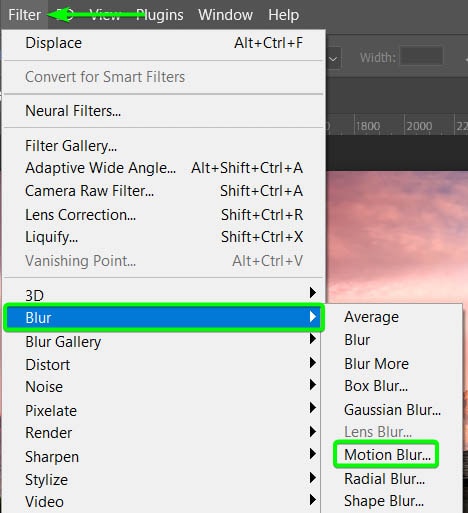
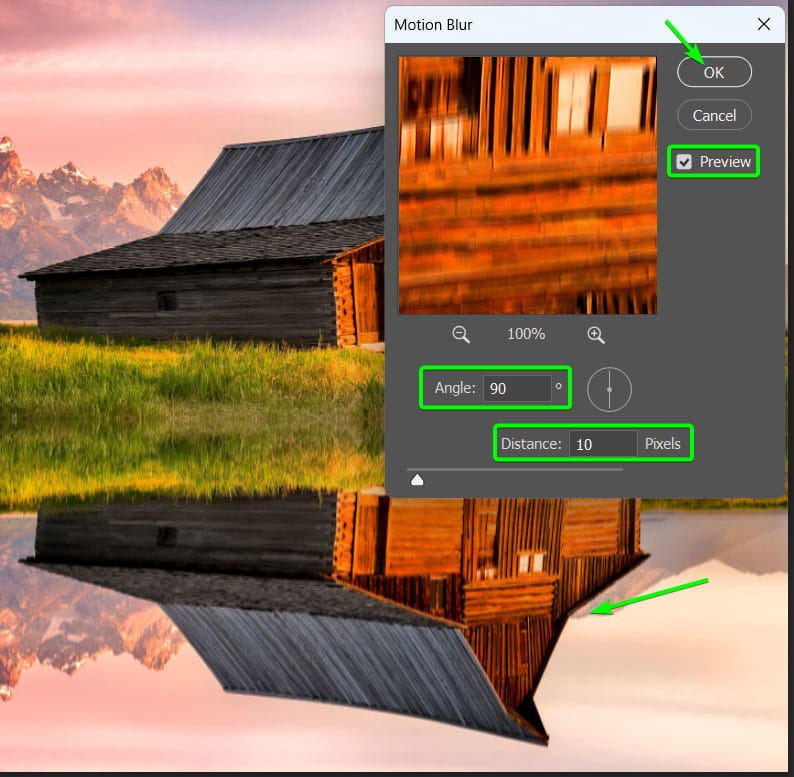
Step 5: Go To Filter > Blur > Motion Blur
Now, you can add a motion blur to the reflection as a smart filter. This will create a slight blur over the bottom half so it looks more like a body of water. To do this, go to Filter > Blur > Motion Blur.
As a guide, set the Angle to 90 degrees and the Distance to 10 pixels. However, you can watch the live preview on your image and adjust these settings to something that works better for your photo. Click OK to apply the effect.
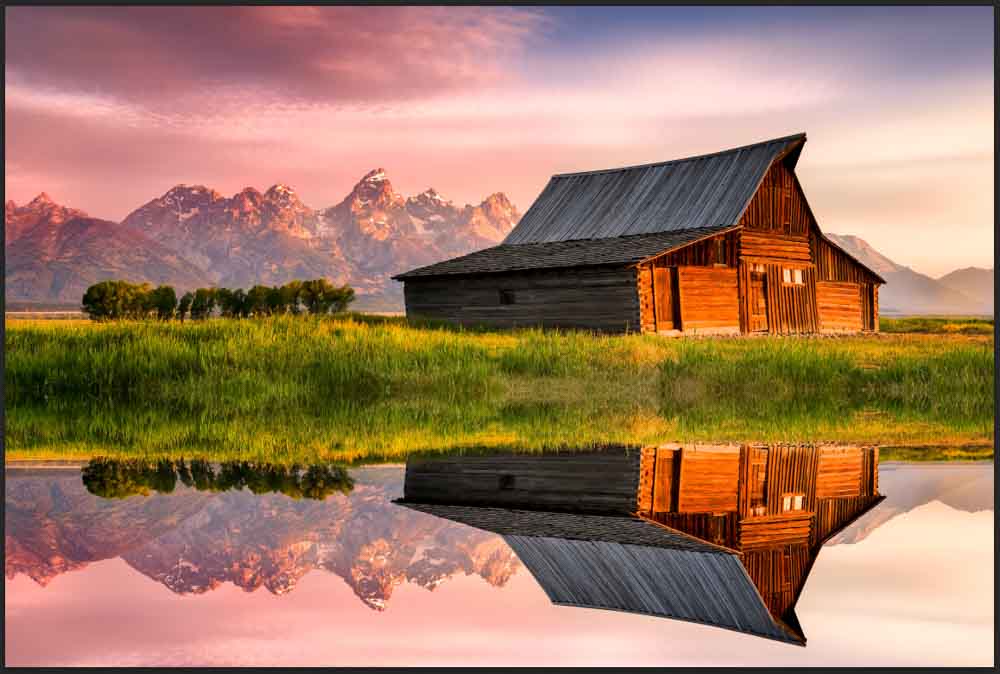
You will have now added a basic reflection to your image. If you want to make it more realistic follow the next section to add ripples and gradients.
Add Ripples And Gradients For A More Realistic Reflection In Photoshop
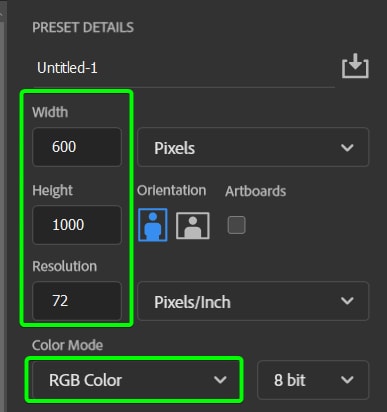
Step 1: Create A New Document For The Ripples
To further the water effect, you can add ripples over the reflection using a displacement map. Create a new document with a vertical orientation. Set the Resolution to 72 pixels per inch and the Color Mode to RGB. Lastly, set the Background Contents to Black and then click Create.
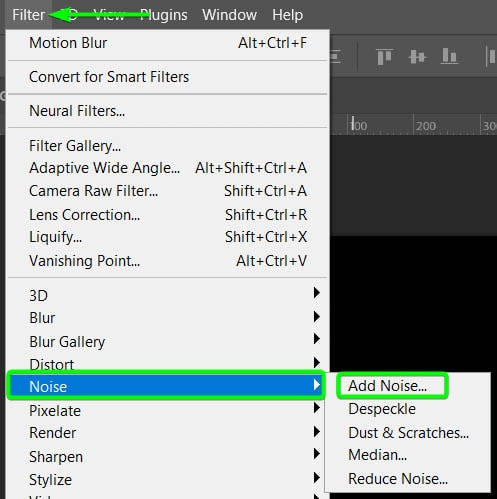
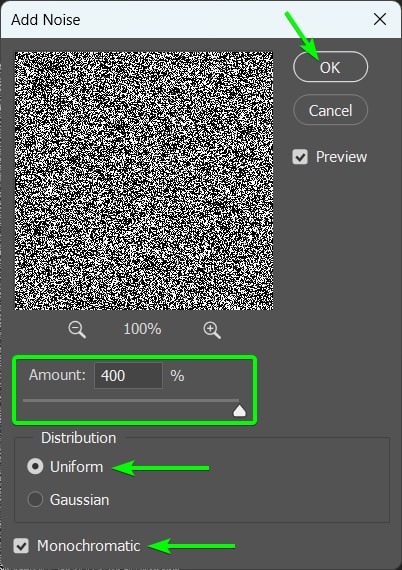
Step 2: Go To Filter > Noise > Add Noise
Add noise to the canvas by going to Filter > Noise > Add Noise. In the Add Noise panel, set the Amount to the highest value, 400%. Then ensure Uniform and Monochromatic are checked and click OK to apply the effect. Your canvas should now have black-and-white fuzz all over it.
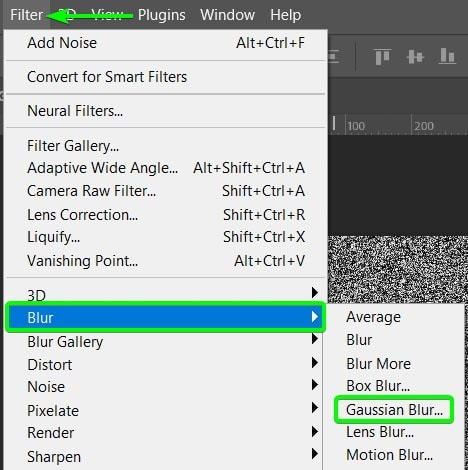
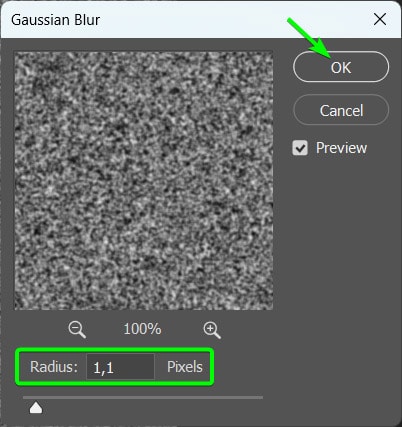
Step 3: Go To Filter > Blur > Gaussian Blur
Next, you can blur the noise effect by going to Filter > Blur > Gaussian Blur. Set a low Radius, somewhere between 1 and 2 pixels. Click OK to apply the blur.
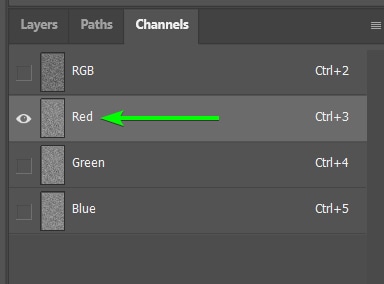
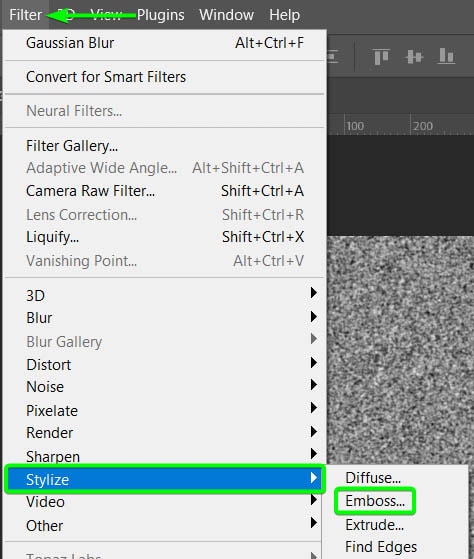
Step 4: Add An Emboss Effect To The Red And Green Channels
You can now add an Emboss effect to the Red and Green Channels on the image. To do this, open the Channels Panel. If you can’t see the panel, go to Window > Channels to open it. Once the Channels Panel is open, click on the Red channel to select it.
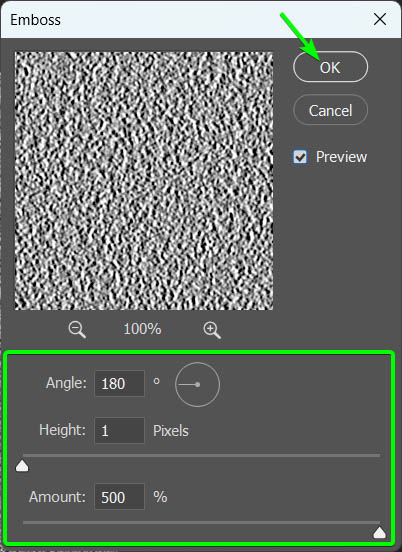
Then, go to Filter > Stylize > Emboss. Set the Angle to 180 degrees, the Height to 1 pixel, and the Amount to 500%. Click OK to apply the effect.
Next, select the Green channel by clicking on it. Then add an Emboss effect by going to Filter > Stylize > Emboss. For the Green channel, change the Angle to 90 degrees, leave the Height at 1 pixel, and the Amount at 500%. Click OK to apply the effect.
Turn the RGB channel back on by clicking on it in the Channels Panel. Your canvas should now have Red, Green, and Gray noise over it.
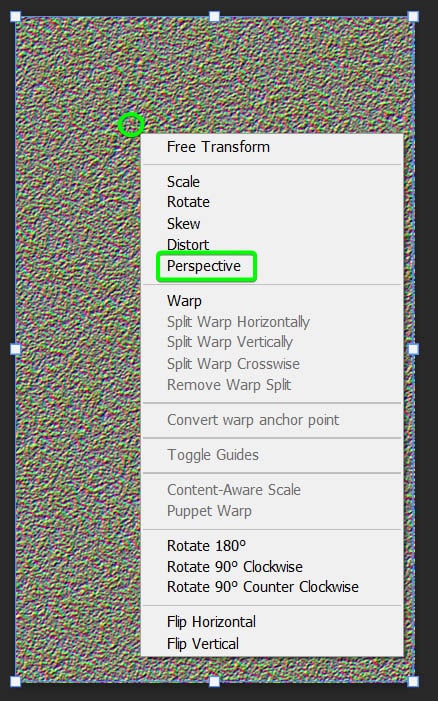
Step 5: Adjust The Perspective Of The Document To Create Ripples
You can now change the perspective of the layer to create the ripples. Open the Layers Panel again and unlock the background layer by clicking the lock icon. Then activate the Free Transform Tool by pressing Control + T (Win) or Command + T (Mac). Then, right-click or Control + click on the canvas and select Perspective.
Now, click on one of the bottom corner handles and drag it out off the canvas. You will notice the other bottom handle moves in the opposite direction. Drag the handle out as far as you can.
Zoom out by pressing Control + – (Win) or Command + – (Mac) a few times until there is more space around the canvas. Continue dragging out the corner handle as far as you want. The amount you drag out determines how the ripples will look, so it may take some trial and error to get it how you want it.
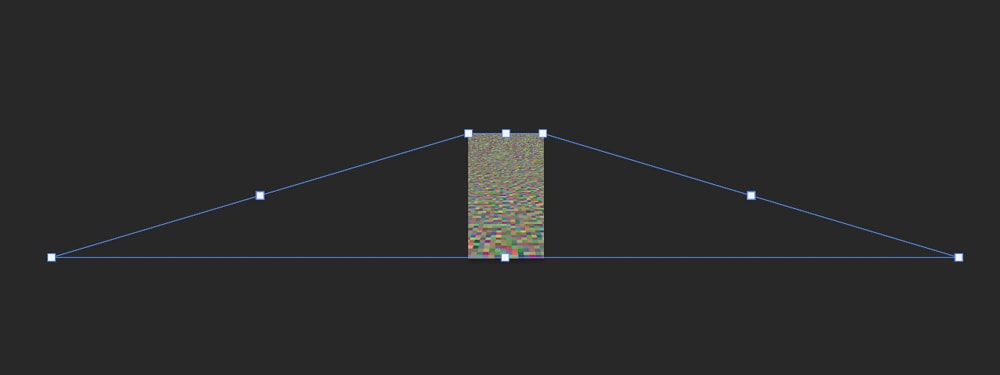
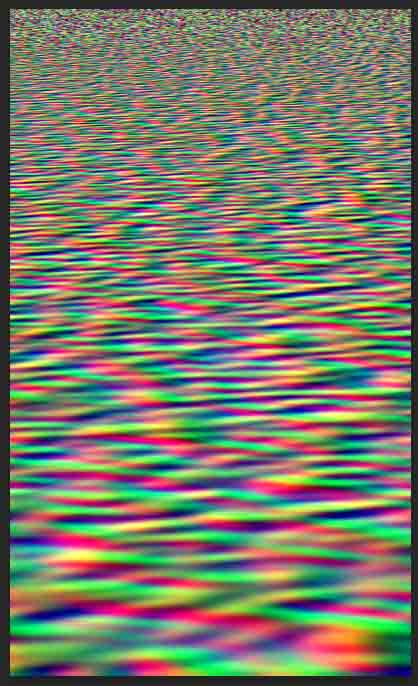
Zoom in again using Control + + (Win) or Command + + (Mac) to view the canvas again. This will give you an idea of how the ripples will look. Press Enter or click the checkmark in the Options bar. The canvas should look something like this. However, you can play around with the perspective to create the type of ripples you want.
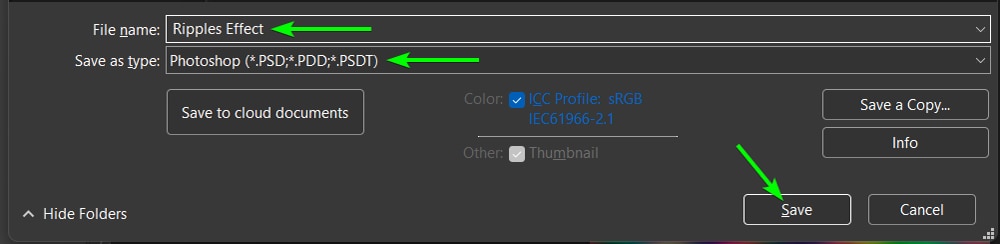
Step 6: Save The Ripples Document As A PSD File
Next, save the Ripples document as a PSD file by going to File > Save As or pressing Shift + Control + S (Win) or Shift + Command + S (Mac).
Name the file Ripples Effect or something similar and set the File Type to PSD. Save the file in the same folder as the Reflection document to find it easily.
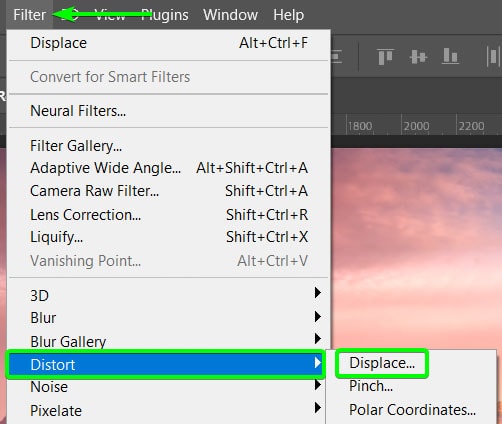
Step 7: Add The Ripples File As A Displacement Map
You can close the Ripples Effect document and open the Reflection document again to add the effect as a displacement map. This effect will add realistic ripples to the reflection. Select the Reflection layer. Then, go to Filter > Distort > Displace.
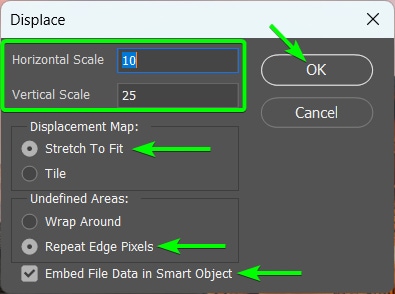
Set the Horizontal Scale to 10 and the Vertical Scale between 20 and 40. Adjust these figures based on your image, but somewhere around those values should work well. The higher the vertical scale, the more distorted the ripples will look.
Then, keep the rest of the settings as follows:
- Stretch to Fit
- Repeat Edge Pixels
- Embed File Data in Smart Object
Click OK to confirm the settings.
Your Windows Explorer or Finder will open, so you can locate and select the Ripple Effect PSD file you saved. Select it and click Open. Wait a few moments, and Photoshop will add the effect to the reflection layer.
Note: If you don’t like how the ripples came out, undo the action by pressing Control + Z (Win) or Command + Z (Mac). You can then re-edit the perspective in the Ripples Effect document, re-add the Displace filter, and adjust the Horizontal or Vertical Scale.
Step 8: Darken The Line Where The Land And Water Meet Using A Reflective Gradient
To darken the area, add a new layer by pressing the Create a new layer icon at the bottom of the Layers Panel. Select the Gradient Tool (G) in the Toolbar and set the foreground color to white and the background color to black.
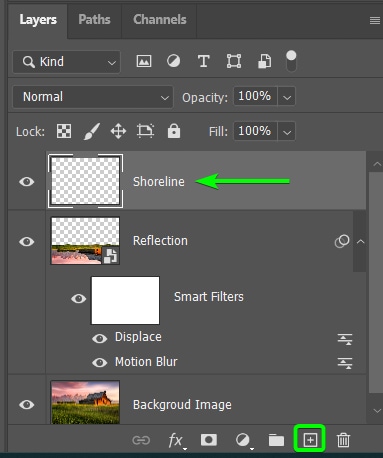

Set the gradient to background-to-foreground and select the Reflective gradient.

Draw a small gradient where the water meets the land, dragging the gradient upwards.
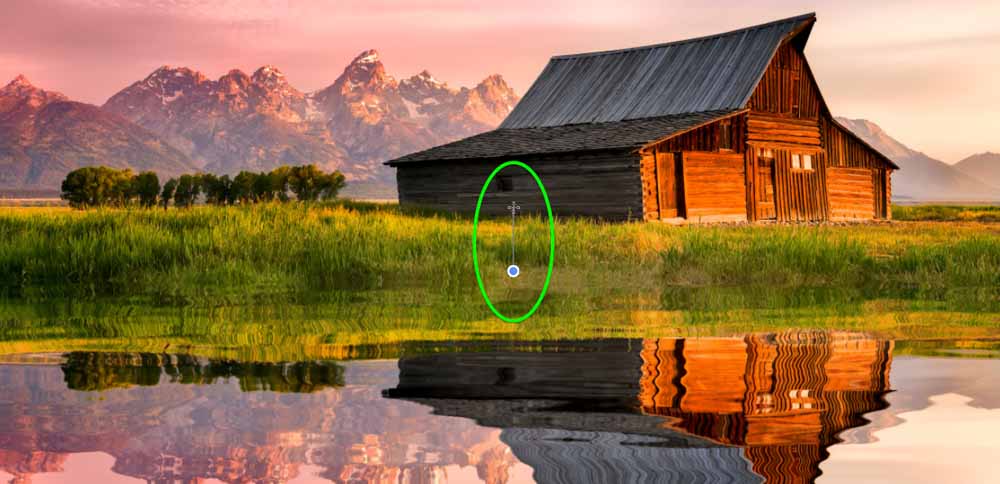
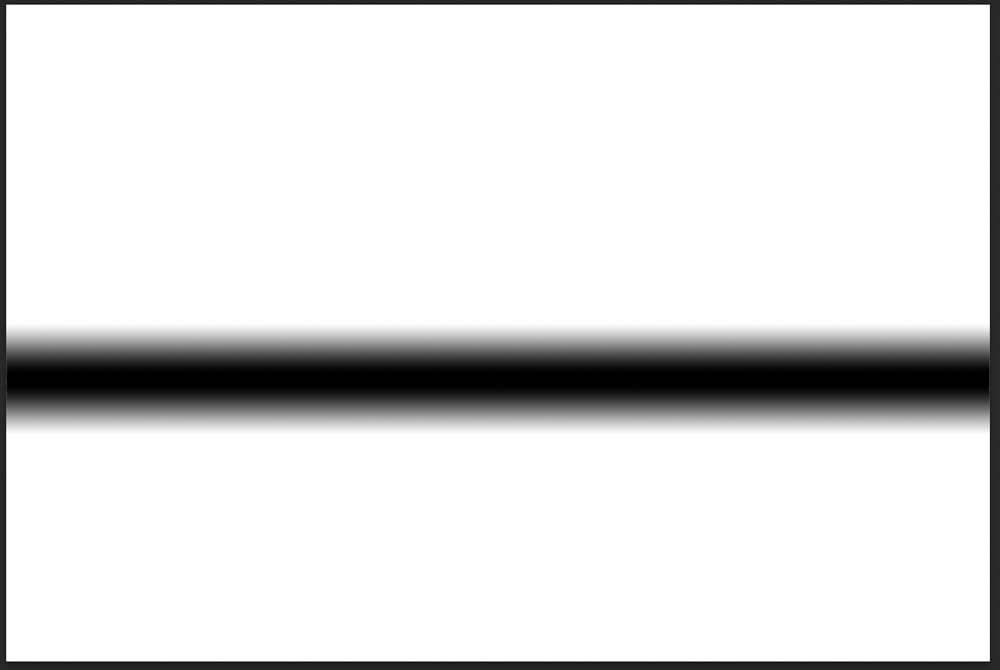
You should have a black line around the shoreline, and the rest of the canvas should be white. Re-do the gradient line until you have something similar. Then, change the layer’s blend mode to Multiple and reduce the Opacity to about 25%.
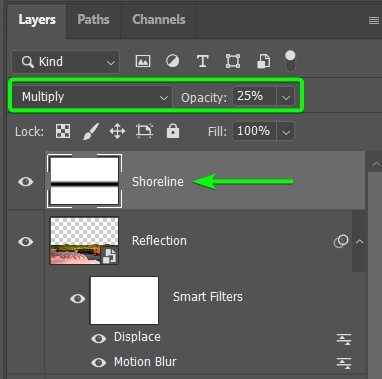
You should now have a darker area around the shoreline. You can use the Move Tool (V) to move it around or adjust the Opacity as needed.