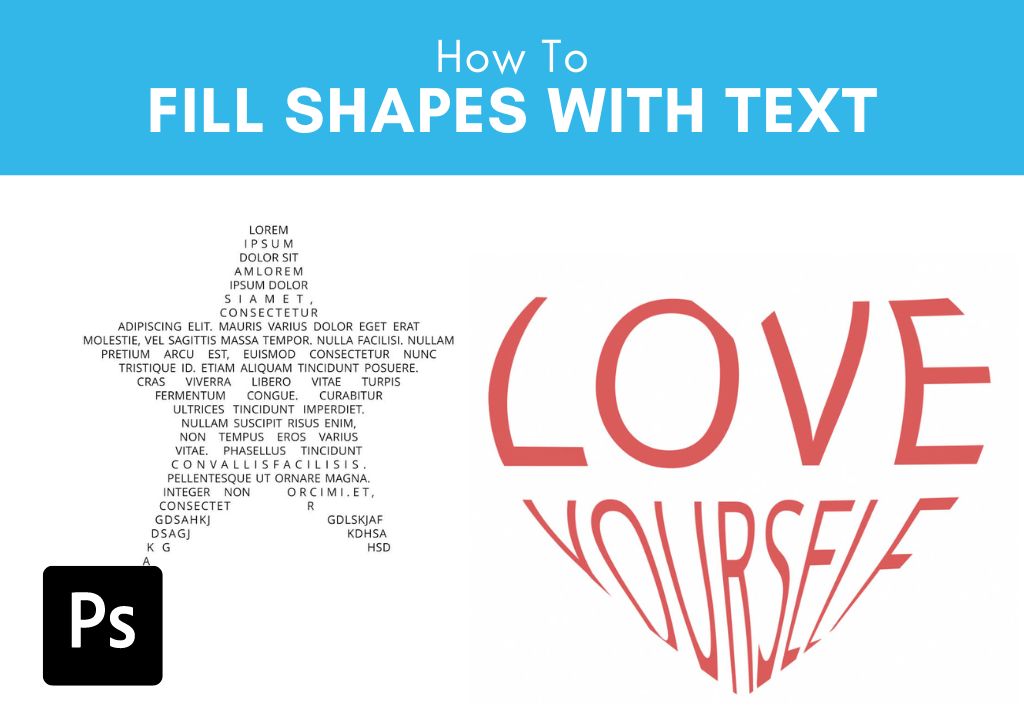

Rather than painstakingly trying to format your text into a specific shape manually, you can easily fill any shape layer with text in Photoshop. From basic shapes like squares or circles to more complex shapes like stars or other custom shapes, it’s all possible with a couple of clicks. So let’s break down the step-by-step process of filling shapes with text in a variety of styles!
How To Fill Shapes With Text In Photoshop
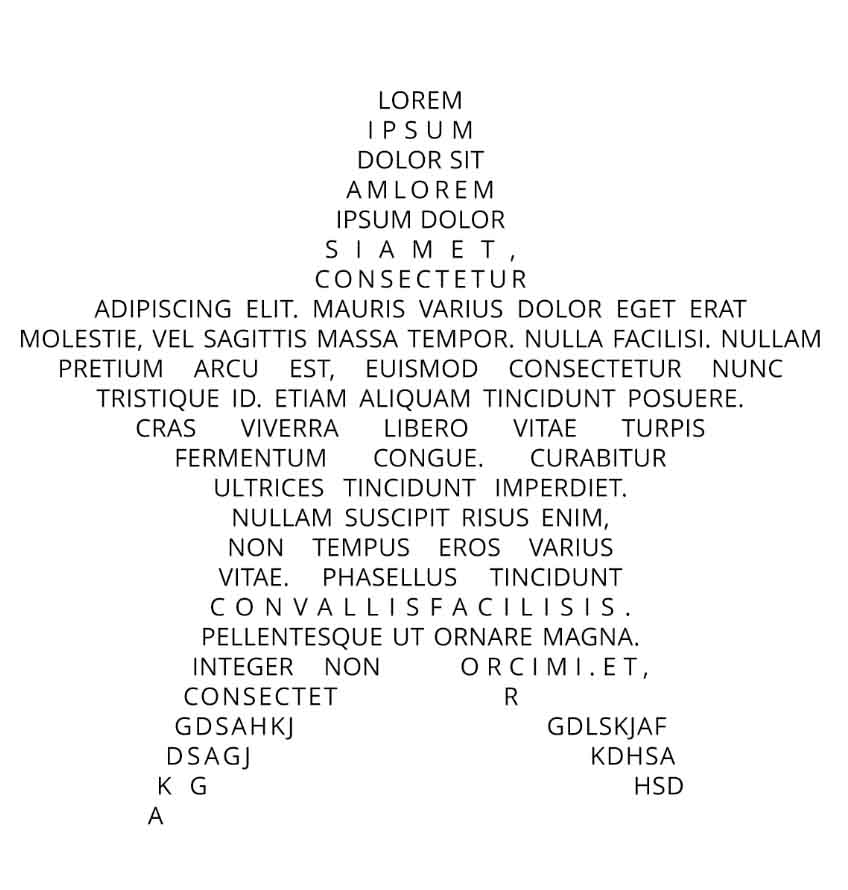
The first method is quite simple and allows you to fill any shape with text in a few quick steps. This method is best for a long block of text, as the more text you have, the more you can see the shape.
Step 1: Create Any Shape
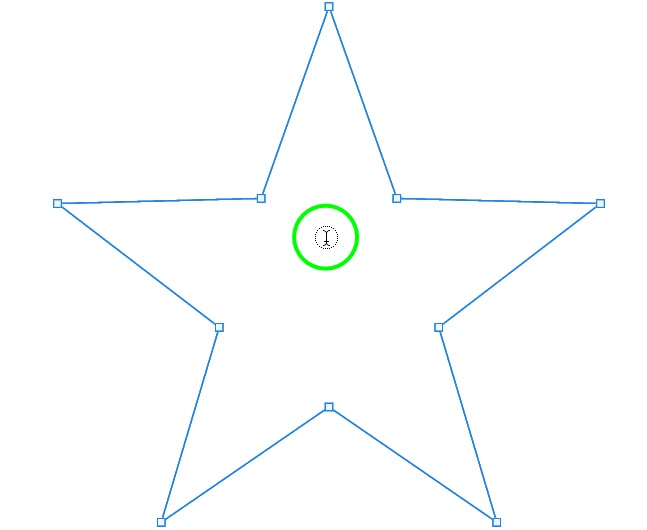
The first thing you’ll need to do is create your shape. With a new document open, head to the Shape Tool (U). Click and hold to see the different options for shapes you can make.
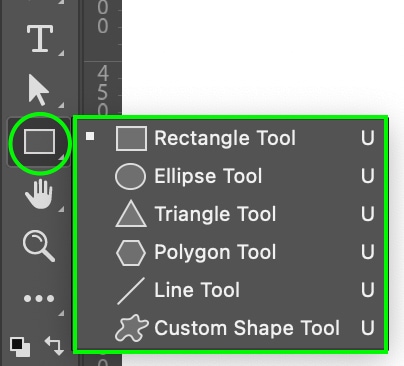
This method will work with any shape. You can select one of the available shape tools or view the other shapes that come with Photoshop. You can use a unique shape with the Custom Shape Tool or make your own custom shape.
Once you’ve selected your shape, click and drag on the document to create it.
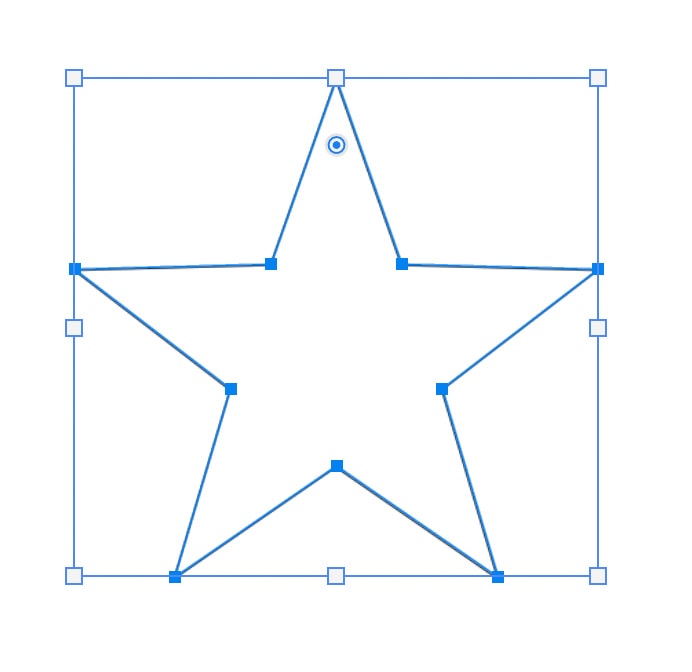
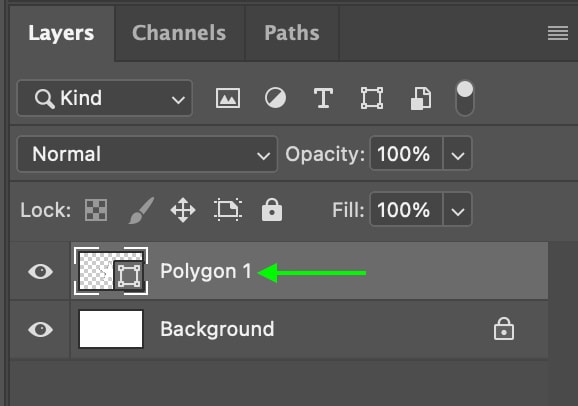
In the Layers Panel, you’ll see the new Shape Layer.
Step 2: Add The Text Using The Type Tool
Next, using the Type Tool (T), you can add a text box inside the shape. First, make sure the Shape Layer is selected in the Layers Panel.
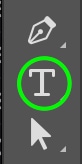
Now, click the Type Tool (T).

When you hover over the shape on your document, you’ll notice that your cursor will turn into a type icon surrounded by a circle.
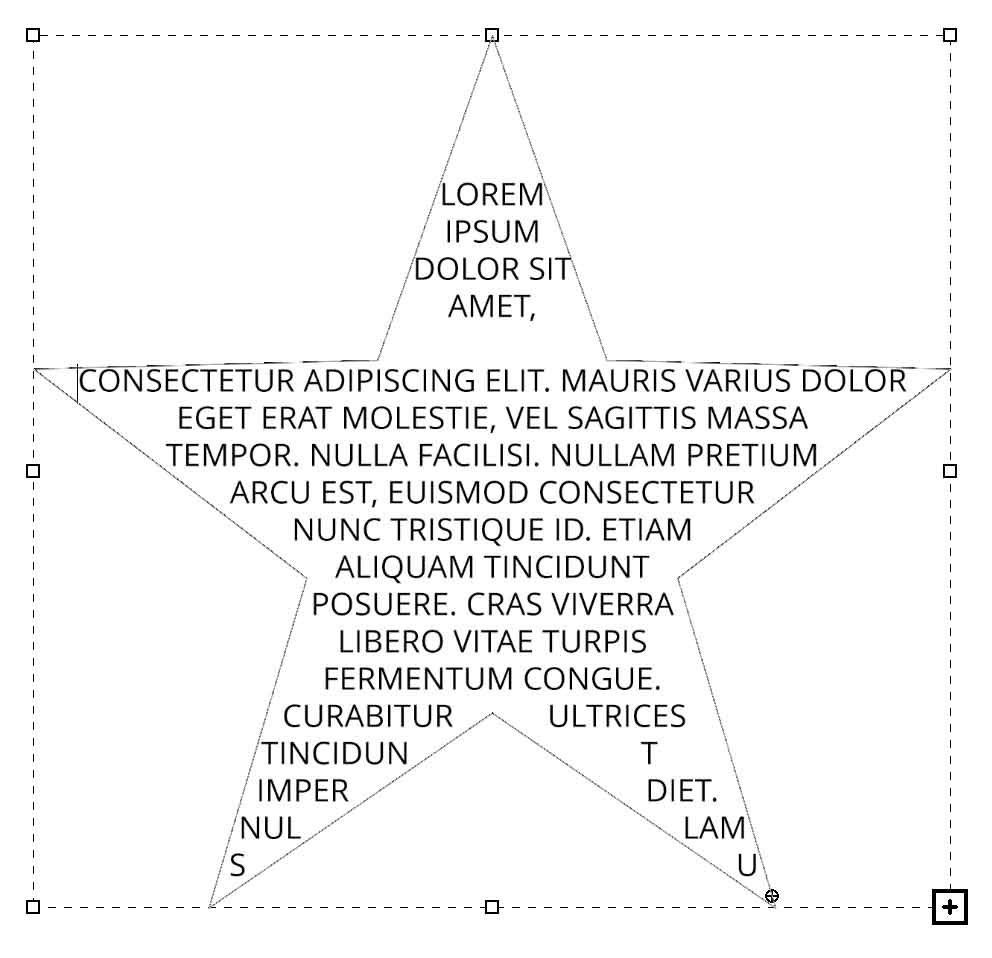
Click inside the shape to create your text box, and it will apply to fit the confines of the shape. Type whatever you’d like. I’ll leave the example with the placeholder text.
If you need to edit the appearance of your text, you can use the settings in the Options Bar.

Step 3: Set The Text Formatting
You may notice that, in some areas, there are spaces or gaps in the text, or the text doesn’t fully align with the edges of the shape. To ensure the text fills the blank spaces, you must set the correct Paragraph style.
You can show the Paragraph Panel by clicking the icon to the right in the Options Bar.

Click the paragraph style called Justified Last Centered from the options in the Paragraph Panel.
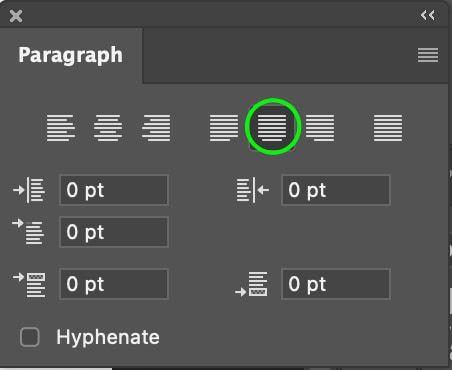
If you’re unsure which one it is, hover your cursor over the options to see the names. Once you click this, the text will change to fit the shape’s outlines better.
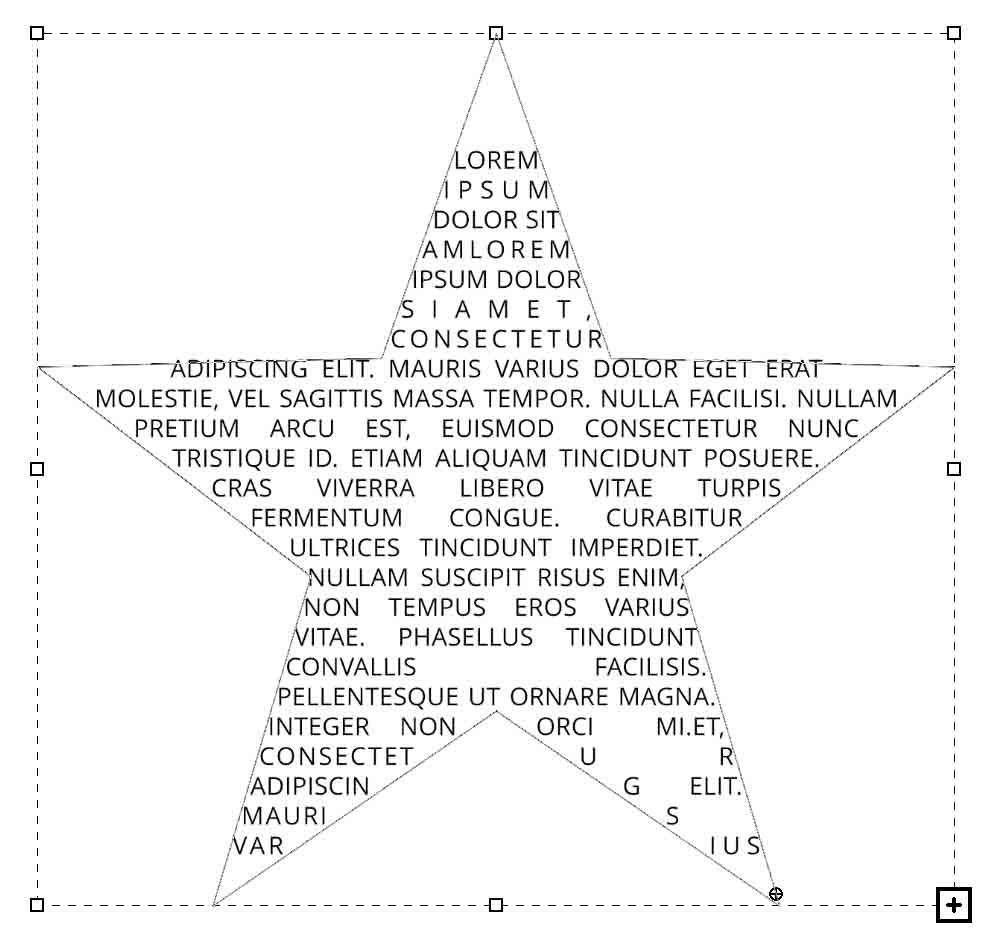
You can make further adjustments to the text’s size and layout if you’d like.
(Optional) Step 4: Delete The Shape Layer
If you want the text to appear without the shape behind it, you can delete the Shape Layer in the Layers Panel by right-clicking or Control + clicking the Shape Layer and selecting Delete Layer.
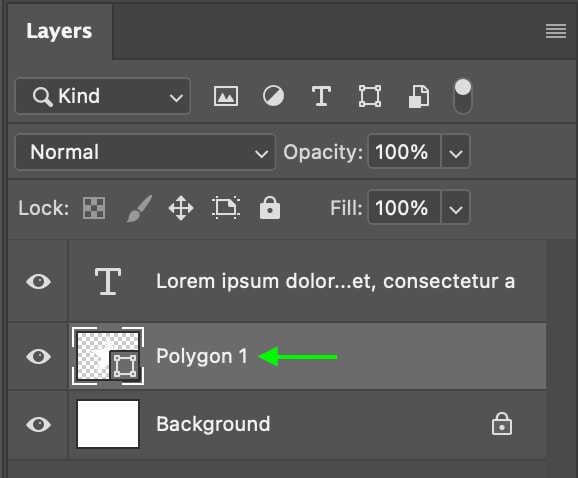
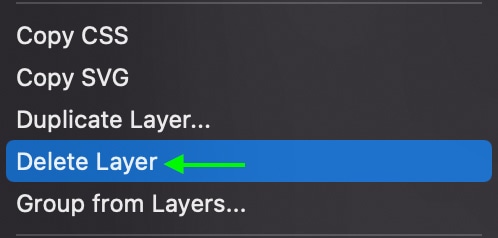
The layer will be deleted, and you’ll see the text by itself in the shape you chose.
How To Fill Shapes With Warped Text In Photoshop
This next option allows you to fill the shape with text, then warp it so that the letters look like the shape. For this example, the two words I use to fill the shape will be on separate layers.
Step 1: Create A Shape
Like the previous method, you can create a shape using the Shape Tool (U). You can click and hold to see the different shape options.
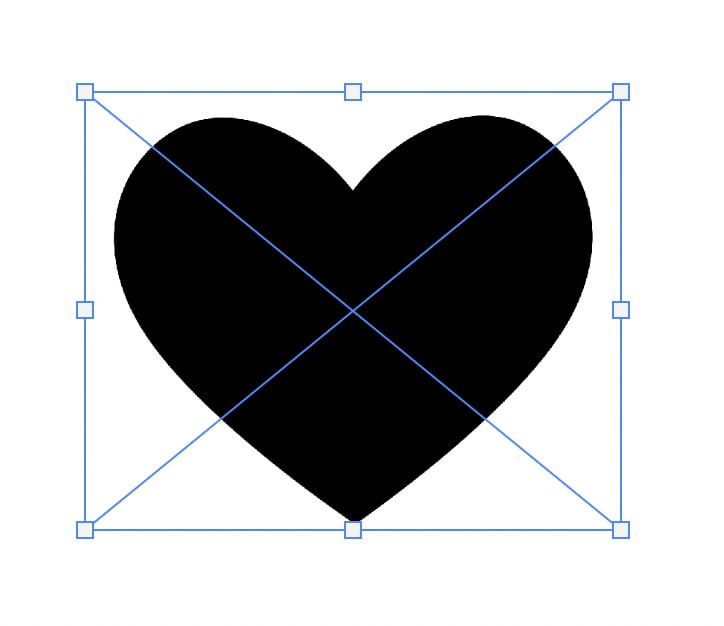
Click and drag to create your shape. The method we’ll use to warp the text doesn’t require a shape made using the shape tool, so you can also use a shape or outline you’ve found online and downloaded.
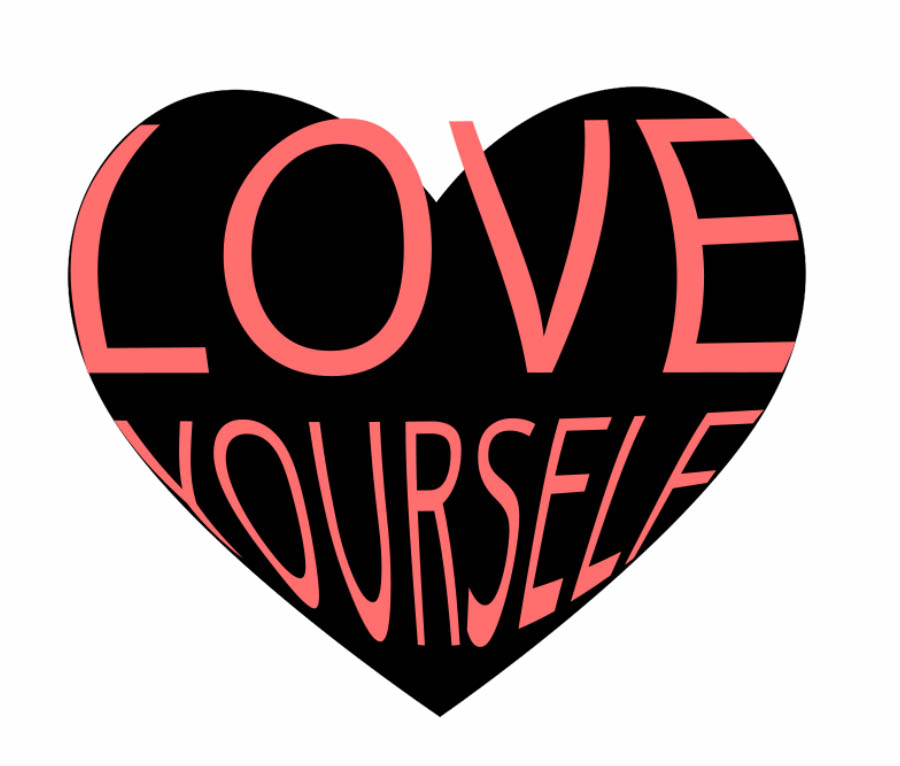
Just drag the file from your computer’s folder to the Photoshop document. The shape I’ll be using today is this free heart PNG shape I sourced from Vecteezy.
Step 2: Add Text Using The Type Tool (T)
I’m using two words of text to fill the shape, and for the effect to work, I’ll have to warp each word separately. I’ll start by adding a text box for the first word by going to the Type Tool (T) and clicking inside the shape to add my text box.
If you are using a shape you created in Photoshop, click outside the shape to create the text box, then use the Move Tool (V) to move it on top of the shape.
Now, I’ll write the word “Love”.
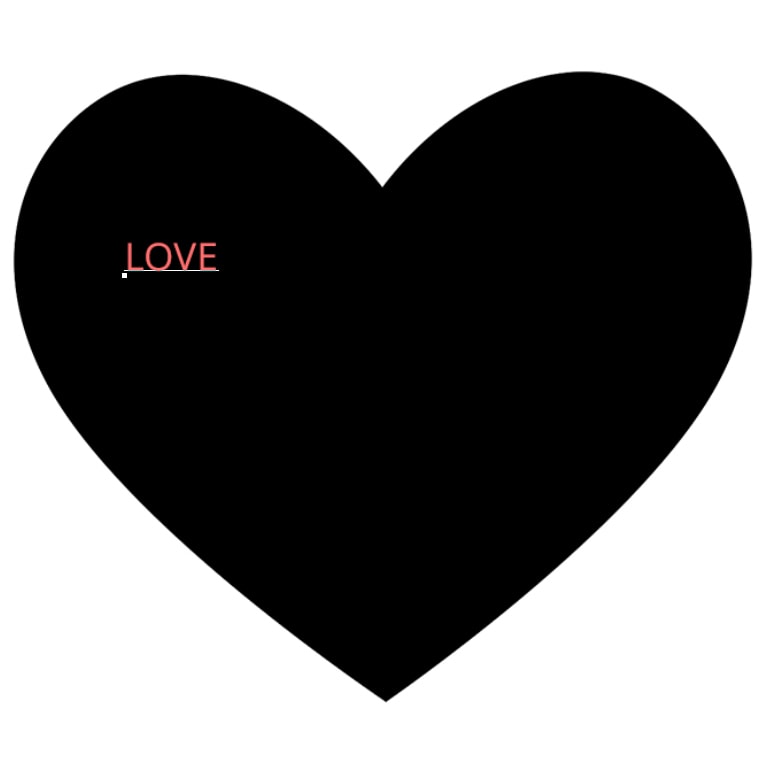
You can resize the text by holding Control (Win) or Command (Mac) while clicking and dragging the toggles around the text box. You want the edges of your text’s first and last letter to match the shape’s edges as closely as possible.
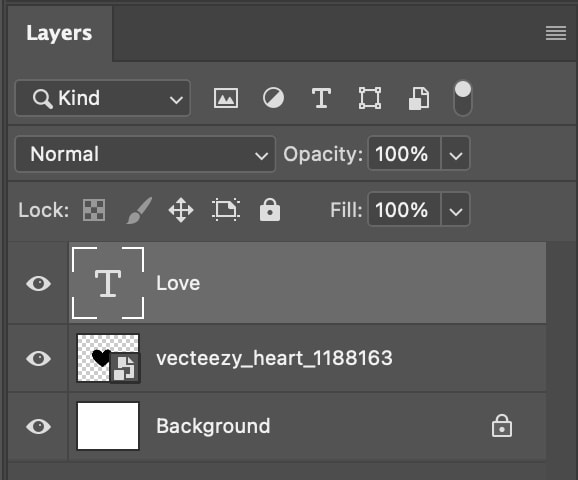
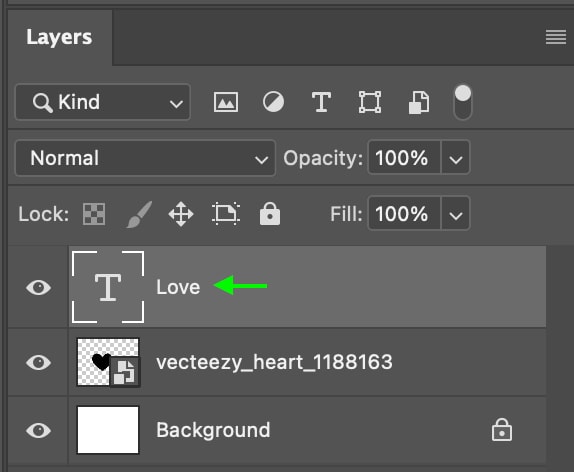
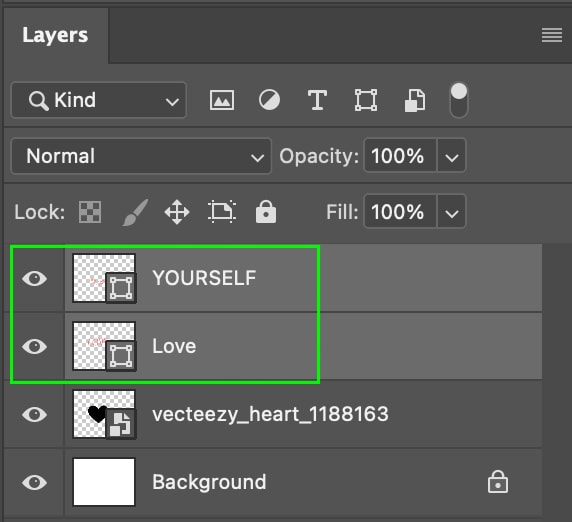
You’ll see the new Text Layer above the Shape or Image Layer in the Layers Panel.
Step 3: Convert The Text To A Shape
Next, you’ll need to convert the text to a shape so that you can warp it. To do this, head to the Layers Panel and right-click or Control + click the Text Layer.
Scroll through the options and select Convert To Shape.
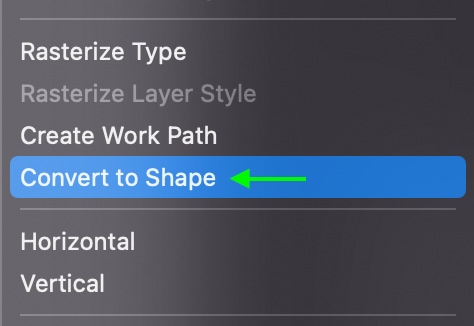
In the Layers Panel, you’ll see the Text Layer has converted to a Shape Layer, shown by the Shape Layer icon at the bottom right of the thumbnail.

Step 4: Warp The Text Using The Transform Tool
Press Control + T (Win) or Command + T (Mac) to activate the Transform Tool.
Ensure the Text Layer (now a shape layer) is still selected in the Layers Panel.

Now, right-click the text on your document and select Warp.
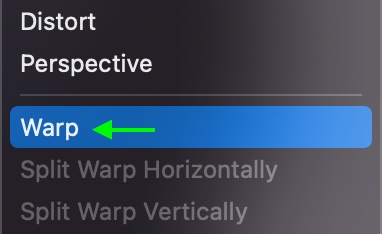
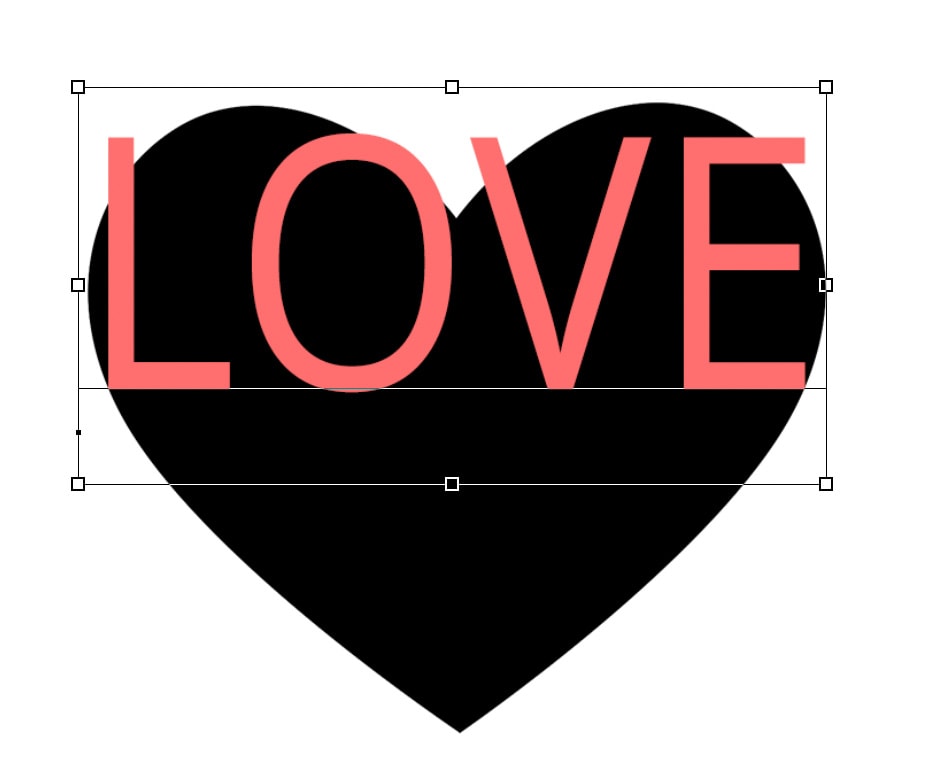
Click the toggles around the text and drag them until the text lines up with the Shape’s edges.
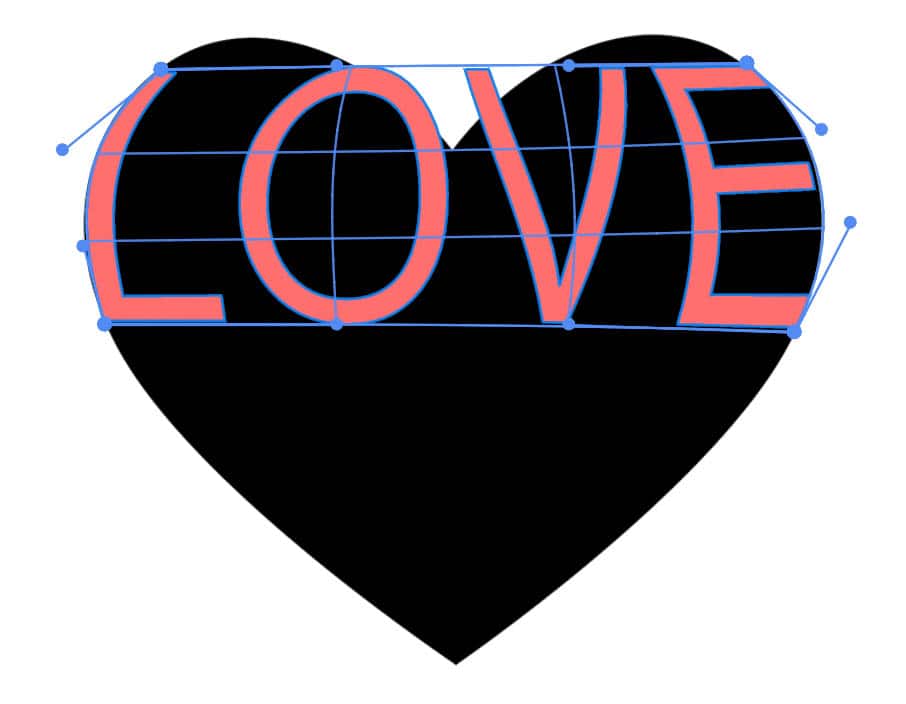
In the heart shape I’m using, I can fit the first and last letters to the shape’s sides, but I won’t be able to perfectly align the middle letters to the top of the heart.
Instead, I’ll add a layer mask, later on to clip those letters and complete the effect. But first, I must finish warping all the text I want to display on the shape.
Step 5: Add The Rest Of Your Text And Repeat
Now, I’ll add the second word of my text and repeat steps 2-4 from above: convert the Text Layer to a Shape Layer, turn on the Transform Tool, and Warp the text to meet the edges of the shape as closely as possible.
It’s okay if it isn’t perfect because we will clean it up in the next steps!
Step 6: Add All Text Layers Into A Group
Now, head to the Layers Panel and hold Control (Win) or Command (Mac) while clicking all of the Text Layers you’ve created (which should now be Shape Layers!)
Then, press Control + G (Win) or Command + G (Mac) to group these layers into a Layer Group.
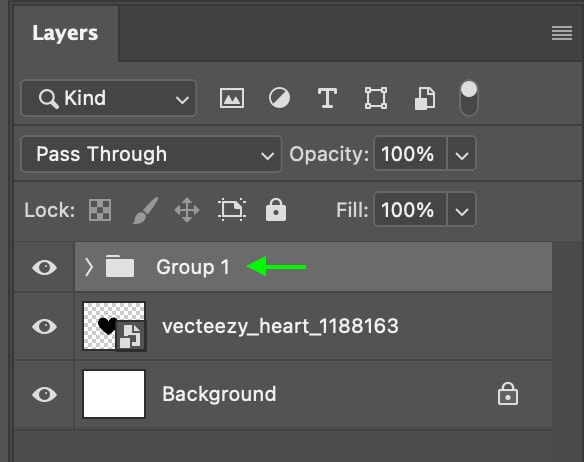
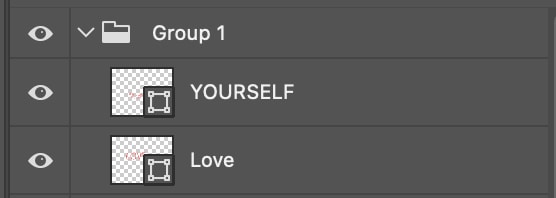
The layers will now be grouped in the Layers Panel under Group 1. Press the arrow icon to the left of the layer to view all the layers in the group.
Step 7: Select The Shape Graphic
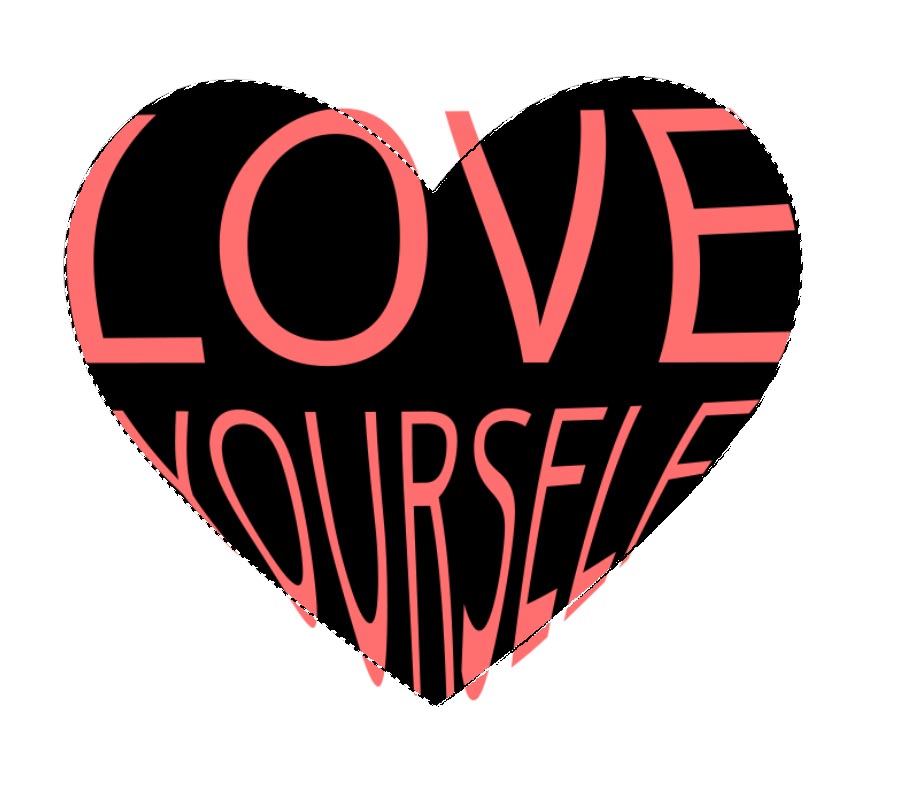
Now, head to the Layers Panel, hold Control (Win) or Command (Mac) and click the Thumbnail for the shape graphic. You can go back and adjust the warp anytime you’d like, as I needed to do to pull the bottom letters a bit further down before making the selection.
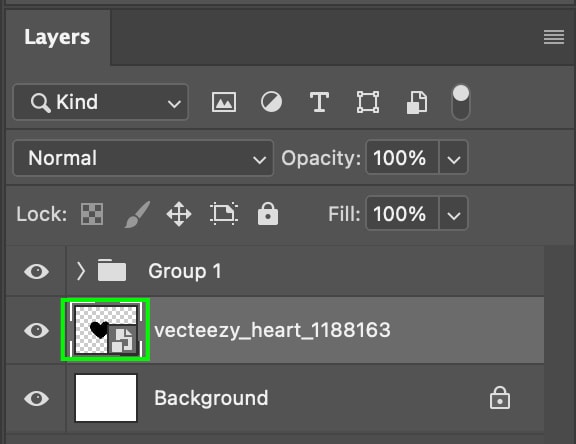
This will turn the shape into a selection, and you’ll see the moving selection line around the shape on your document.
Step 8: Add A Layer Mask
Now that you’ve selected the shape, it’s time to apply the layer mask. First, click on Group 1 in the Layers Panel.
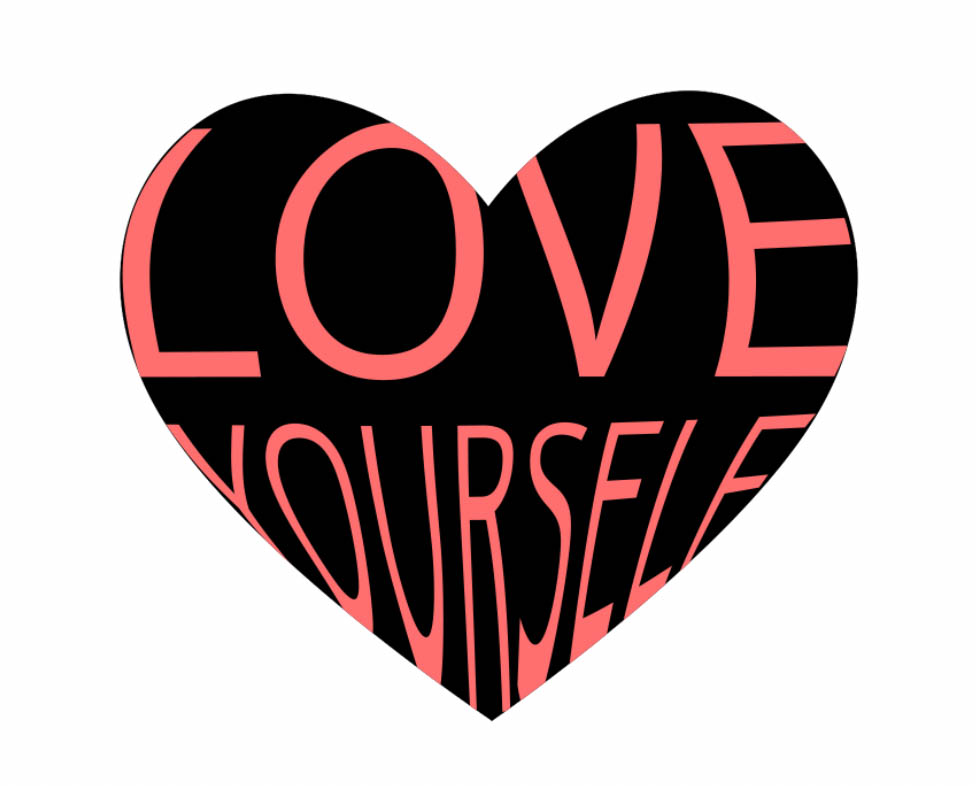
Now you can apply a Layer Mask by clicking the Layer Mask icon at the bottom of the Layers Panel.

You’ll see the text clipped to the confines of the shape.
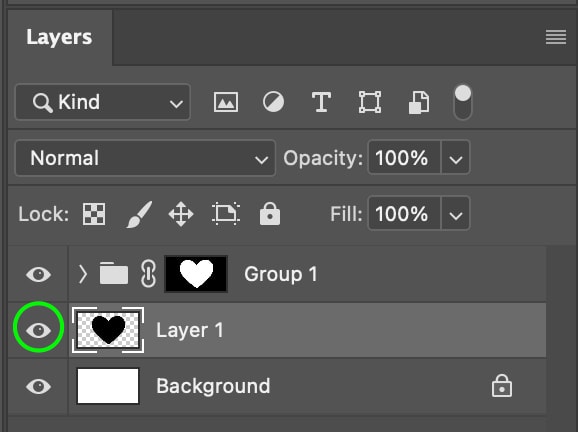
(Optional) Step 9: Delete The Shape Layer
Finally, you can remove the Shape from your project so that only the letters remain if you’d like. To do this, head to the Layers Panel and right-click or Control + click the shape layer.
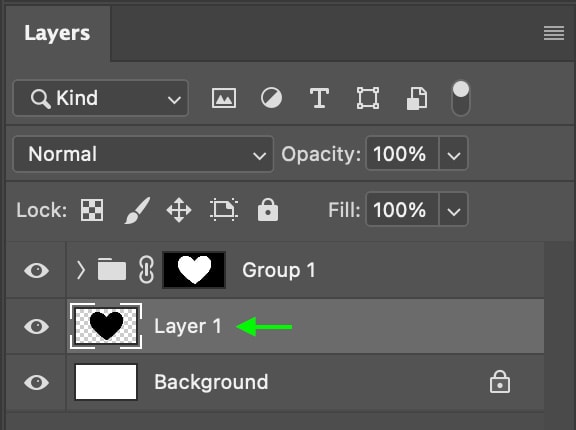
From the options, click Delete Layer.
The layer will be deleted from the project. Otherwise, if you’d only like to hide the shape layer but keep it in the project, you can click the Eye icon to the left of the shape layer. The layer will be hidden, so you’ll only see the text.

So with either of these methods, you can fill the text with a shape to suit different styles. The first works best when you have many lines of text to fill a shape with, while the second warping technique works best with fewer words inside basic shapes.
Happy editing!


