
Photoshop has many features and tools that you can use to add creative elements to your images, such as creating a neon effect on your text. This effect can be added to any text or shape and makes them pop by adding a glow through lighting effects.
Adding the neon effect to your text may seem difficult at first, mostly because of the numerous steps it takes to apply the effect. However, the process is fairly simple and I have broken it down into easy-to-understand steps to help you nail this effect!
How To Make The Neon Text Effect In Photoshop
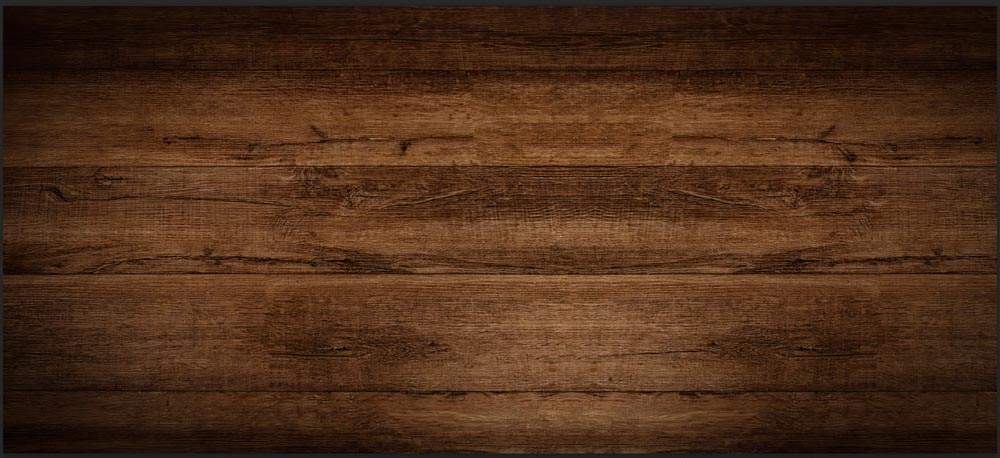
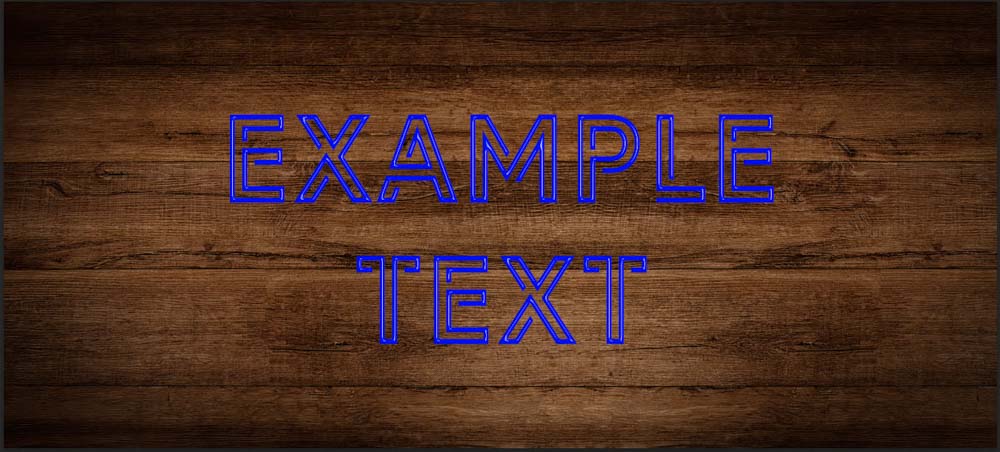
When making neon text, you need to start with a dark background to allow the text to stand out. The neon effect will get lost if done on a light background.
So to begin, open an image for your background in Photoshop as the base to create the neon text.
Step 1: Add Your Text
To create neon text, you first need to choose a suitable text for your project. Try to avoid bold fonts as these fonts don’t work well when adding the lighting effects. For this example, I am using the free font, Library 3 AM but you can also use fonts such as Mexcellent, Hello Denver Display, or Foglihten.
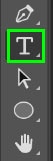
Start by adding text in the middle of your canvas by selecting the Text tool from the toolbar or pressing T.
Click on your canvas and drag to create a text box and type your text in capital letters. Then change the settings in the Options bar to:
- Font: Library 3 AM
- Font size: 150pt (or as needed)
- Font color: Blue (R0 G15 B255 or #000FFF)

Select the checkmark once you have changed the text settings. You will now have the text on the image in the correct size and color.


Step 2: Prepare Your Layers
Next, prepare the text layer for the effects that will create the neon glow. To do this, duplicate the text layer by dragging the layer to the New Layer icon at the bottom of the Layers panel or press Control + J (Win) or Command + J (Mac).
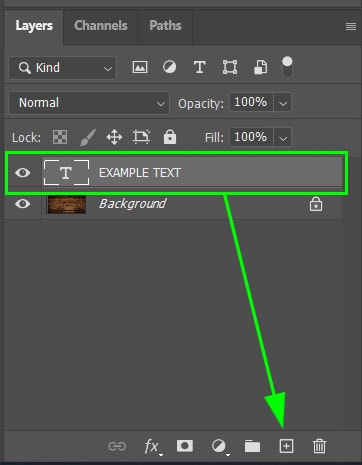

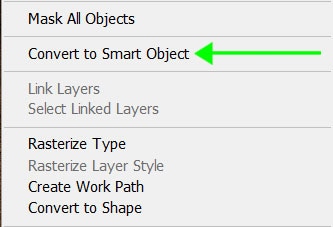
Now working on the copied layer, right-click (Win) or Control + click (Mac) your text layer and select Convert to Smart Object in the menu that appears. The layer will now have the Smart Object icon on the thumbnail.
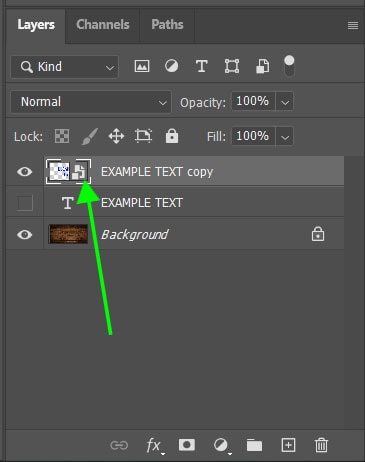
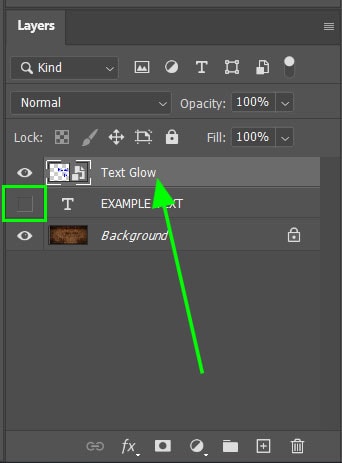
The last step to preparing your layers is to hide the original text layer by unchecking the box with the eye icon. Rename the copied layer to something like Text Glow by double-clicking on the layer name. Then, make sure the Text Glow layer is selected before moving on.
Step 3: Add A Bevel & Emboss Layer Style
To create the glow, the text should look like bulbs or tubes that the glow is coming from. To create this look, you need to add dimension to the text. Then you can add the glow and the gradient around the text.
This will all be done by adding several layer styles to the text, starting with the Bevel & Emboss layer style to round out the text.
To add the Bevel & Emboss effect, select the Layer Style icon at the bottom of the Layers panel and choose Bevel & Emboss from the menu.
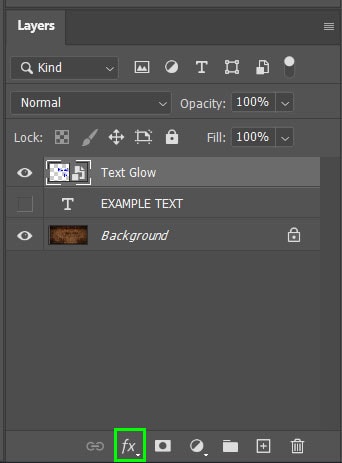

You can also double-click on the text layer to open the Layer Style panel and select Bevel & Emboss from the left panel.
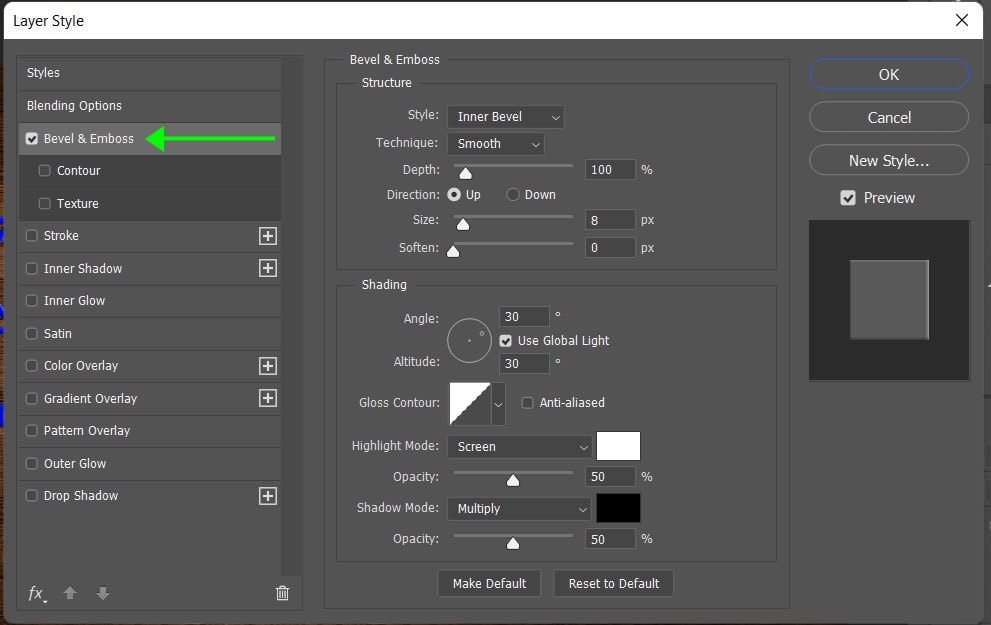
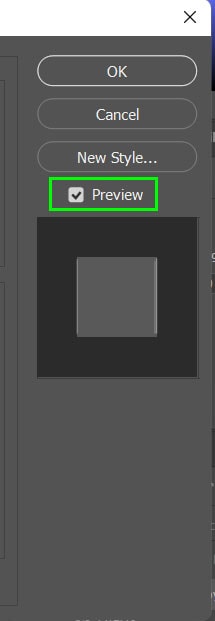
In the Bevel & Emboss panel, adjust the settings to create the right effect for your text. Check the box next to preview to see how the settings affect the image, so you can see how the effect works with your text.
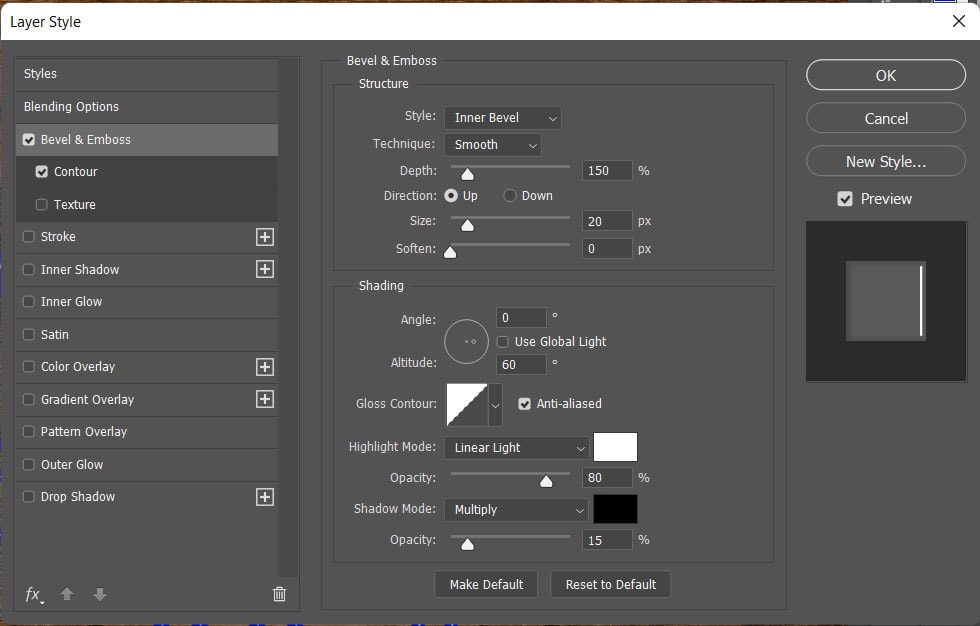
You can tweak these settings as needed, but use the following settings as a starting point:
- Style: Inner Bevel
- Technique: Smooth
- Depth: 150%
- Direction: Up
- Size: 20px
- Soften: 0px
- Angle: 0°
- Global Light: Uncheck
- Altitude: 60°
- Gloss Contour: Linear
- Anti-aliased: Check
- Highlight Mode: Linear Light with 80% Opacity
- Shadow Mode: Multiply with 15% Opacity
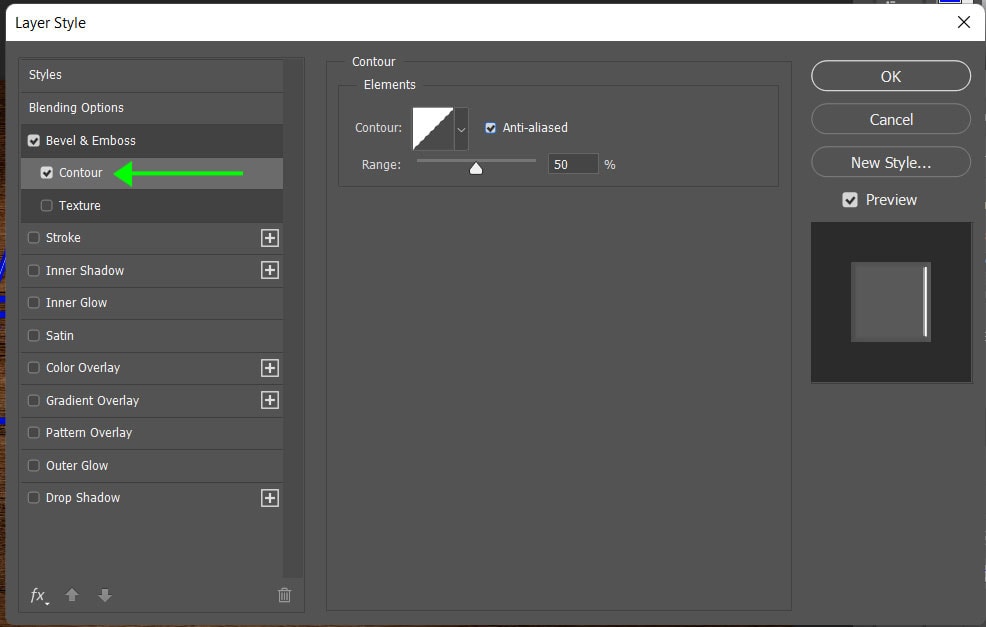
Next, add a Contour to the text by checking the box next to Contour on the left panel and checking the anti-aliased box. You can level the Range at 50% or adjust it as needed.
Once you have changed the settings, your text should have a rounded look with areas of white creating a highlighted look on areas of the text.
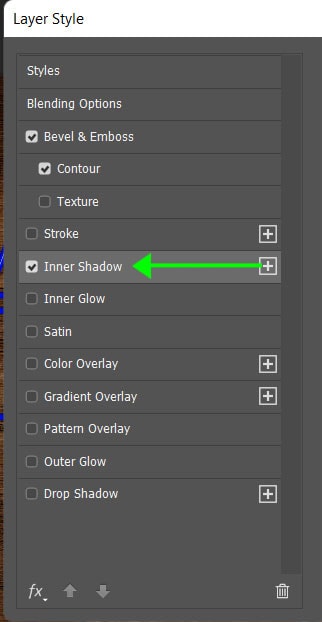
Step 4: Add An Inner Shadow Layer Style
Keep the Layer Style window open, or if you have closed it, you can double-click on the text layer to open the window again. Then select the Inner Shadow option on the left-hand side of the panel.
This Inner Shadow layer style gives the inside of the text a bit of depth to create the bulb-like look.
Now use the settings below as a guide. Adjust them based on your text and the effect you want to create if needed.
- Blend Mode: Screen
- Color: A variation of your first color, in my case, I used #2F3BFF
- Opacity: 100%
- Angle: 20°
- Use Global Light: Check the box
- Distance: 30px
- Choke: 52%
- Size: 15px
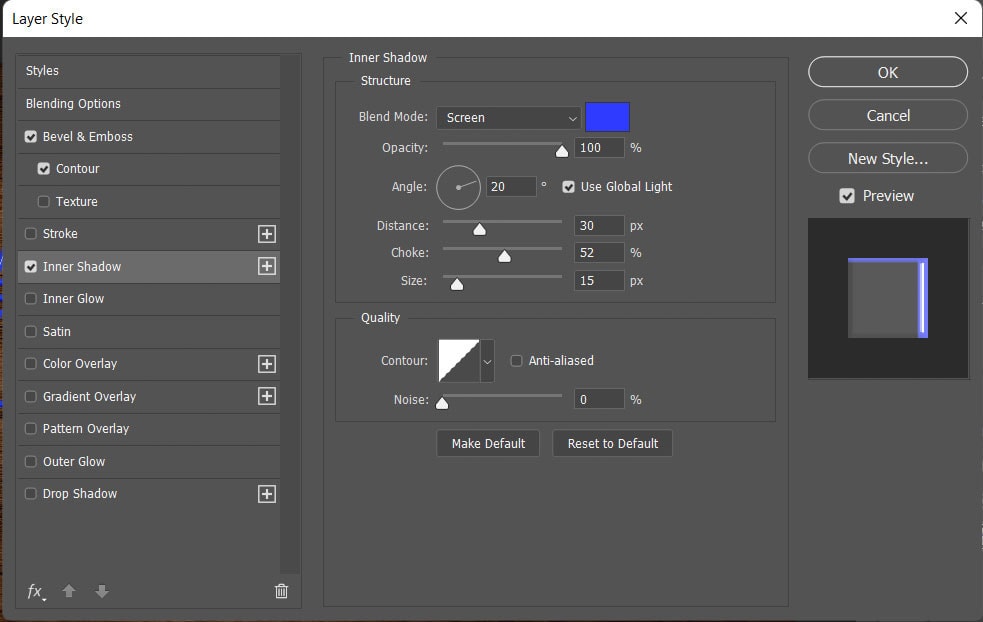
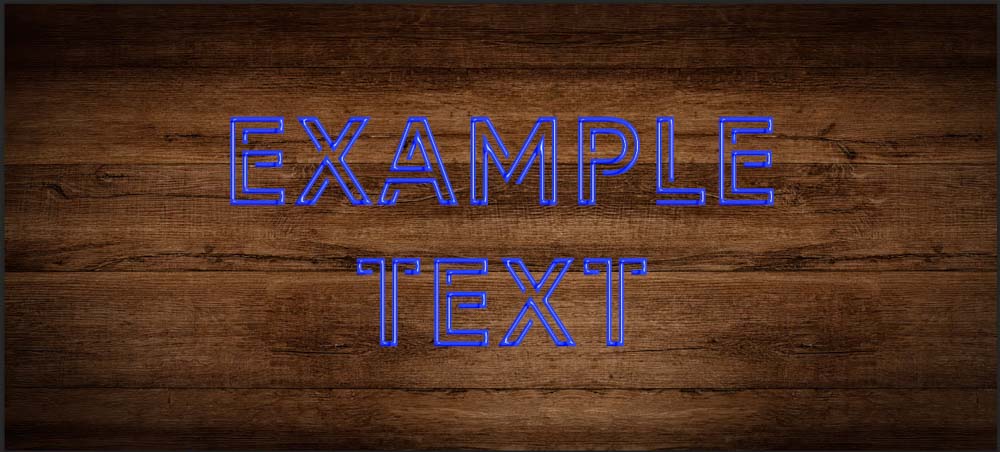
Your text should have a lighter look to it with more areas of the text highlighted. Your text may vary slightly based on the settings you use to make your unique neon sign.
Step 5: Add An Inner Glow Layer Style
The next layer style to add is the Inner Glow. Keeping the Layer Style panel open, select the Inner Glow from the left menu. The Inner Glow will highlight the inside of the text slightly.
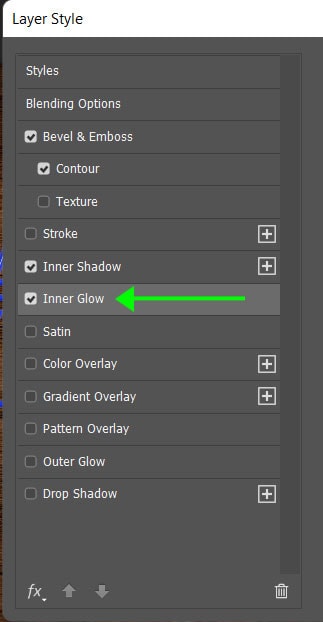
Change the following settings in the panel with your own adjustments as you would like.
- Blend Mode: Screen
- Opacity: 75%
- Color: A lighter version of the inner shadow color, here I used #6770FF
- Technique: Softer
- Source: Center
- Size: 15px
- Range: 50%

The text should start having a glowing look with the lighter colors you have now added.
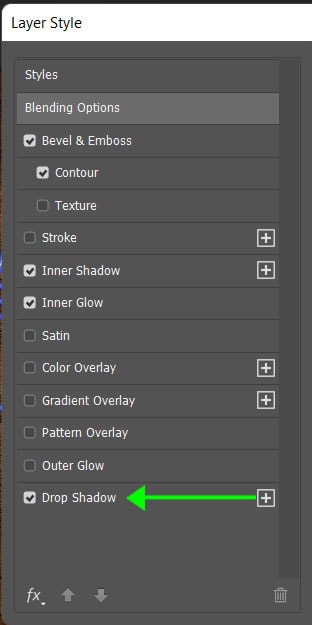
Step 6: Add A Drop Shadow Layer Style
The next Layer Style to add to the text layer is the Drop Shadow which will separate the text from the wall, to make it look as though the neon sign was placed on the wall. To add the Drop Shadow, select the last option at the bottom of the Layer Style menu on the left.
Then add the following settings to create the shadow behind the text. Adjust the angle to best suit your text so it stands out slightly from the wall.
- Blend Mode: Multiply
- Color: Black
- Opacity: 55%
- Angle: 20°
- Use Global Light: Check the box
- Distance: 25
- Size: 15
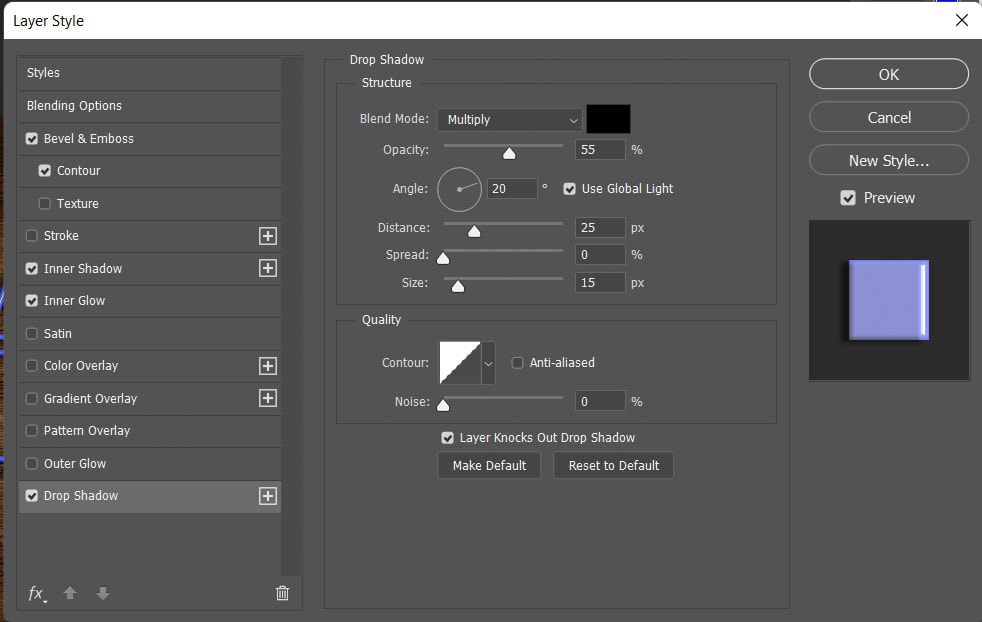
Your text should now look separate from the wall and have more depth. This is done by creating the subtle shadow behind the text.
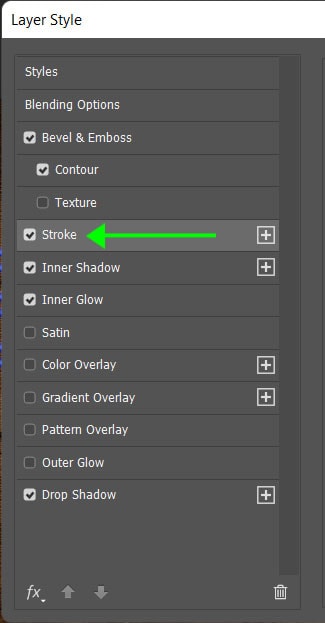
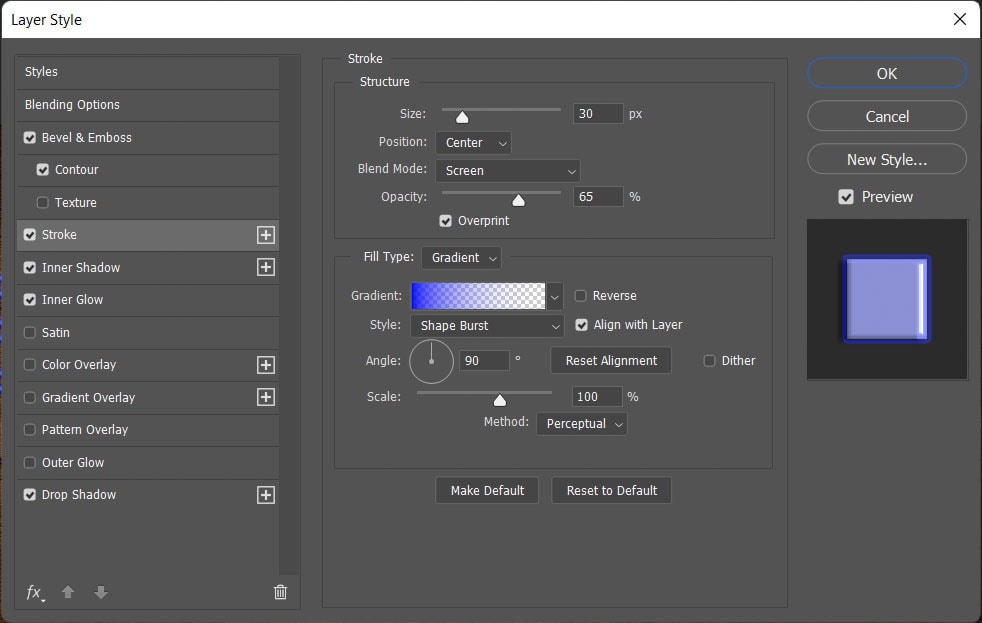
Step 7: Add A Stroke Layer Style
Next, add a Stroke Layer Style to the text to add an extra glow around the text. To do this, select the Stroke option from the left-hand menu in the Layer Style panel.
Change the Stroke settings as follows, keep an eye on your own text to make adjustments as you need.
- Size: 30px
- Position: Center
- Blend Mode: Screen
- Opacity: 65%
- Overprint: Check the box
- Fill Type: Gradient
- Gradient: Basic
- Style: Shape Burst
- Align with Layer: Check the box
- Angle: 90°
- Scale: 100%
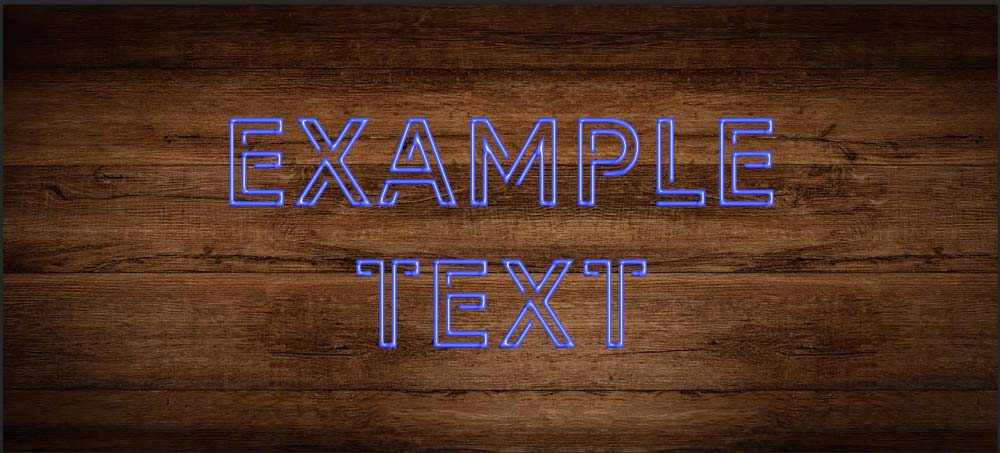
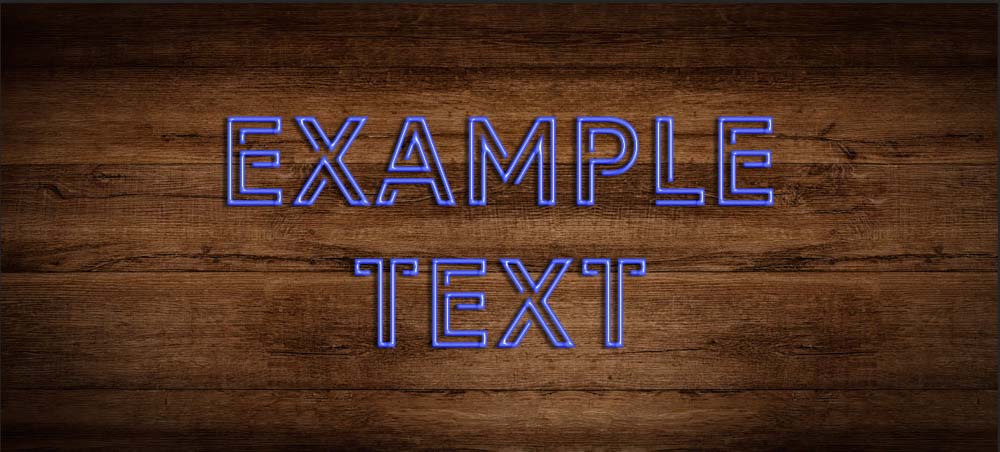
The text will now have a glow surrounding it to create the lighting effect that makes up the neon glow. Your text should look something like this.

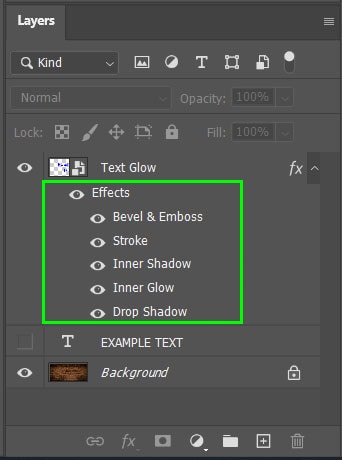
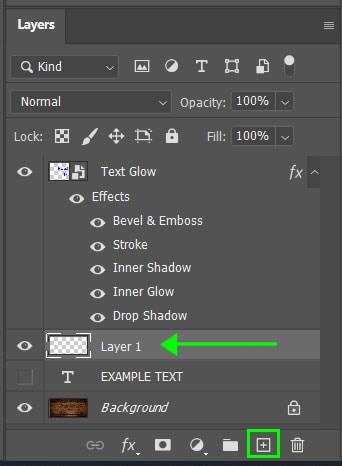
The text layer is now complete and all the Layer Styles added to the layer are visible in the Layers panel. You can go back to adjust and re-edit these elements at any stage by double-clicking on the effect you want to adjust.
Step 8: Add The Gradient Lights Surrounding The Text
To complete the neon glow effect, we need to add a glow around the text to mimic the light that would fall on the wall around the lit sign. This will finish off the effect.
To add the gradient glow, create a new layer by selecting the New Layer icon at the bottom of the Layers panel and placing it underneath the Text Glow layer.
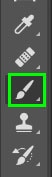
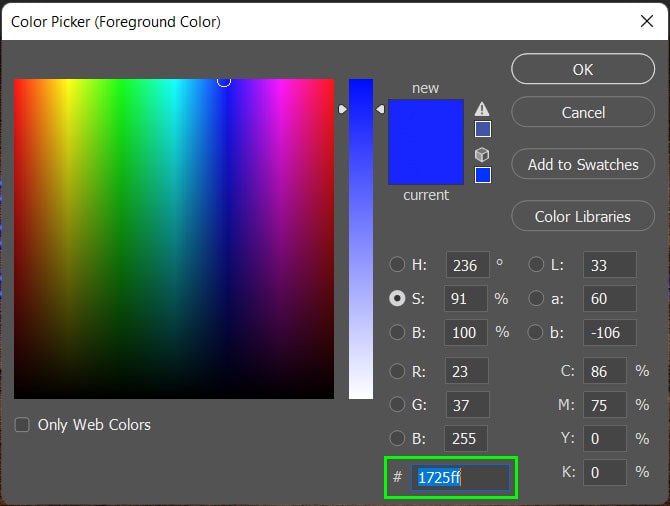
Then, select the Brush tool from the toolbar or press B. Next, set the foreground color to a slightly lighter shade than your original text color, by double-clicking on the Foreground color block. In this instance, I am using #1725FF.
Adjust the Brush tool settings in the Options bar by changing the following settings.
- Size: 1800px (depending on your canvas size, make the brush as large as three letters of the text)
- Mode: Screen
- Opacity: 10%

Then, use the brush to paint around the text to create a glow that mimics light shining on the wall around the text. Do this by blotting the brush around rather than clicking and dragging the brush over the text area.
Then drop the Opacity even lower to paint further away from the text, in this case, I used 4% opacity.

Lastly, lower the Opacity of the brush layer to lighten the brush effect slightly. You can take it down to about 75%.

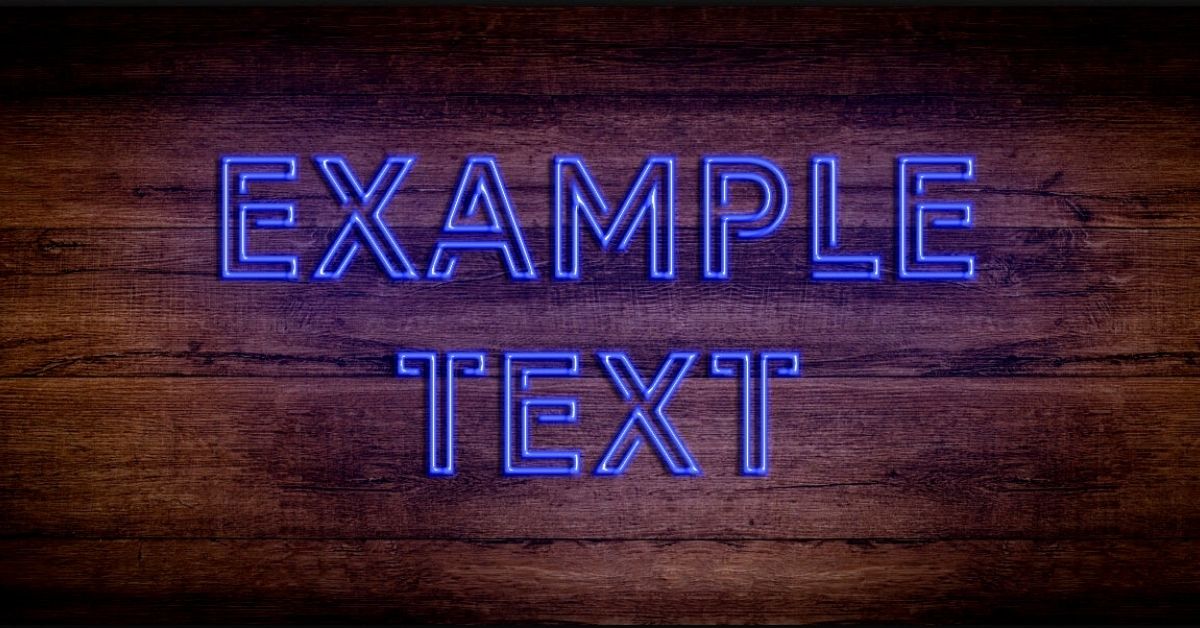
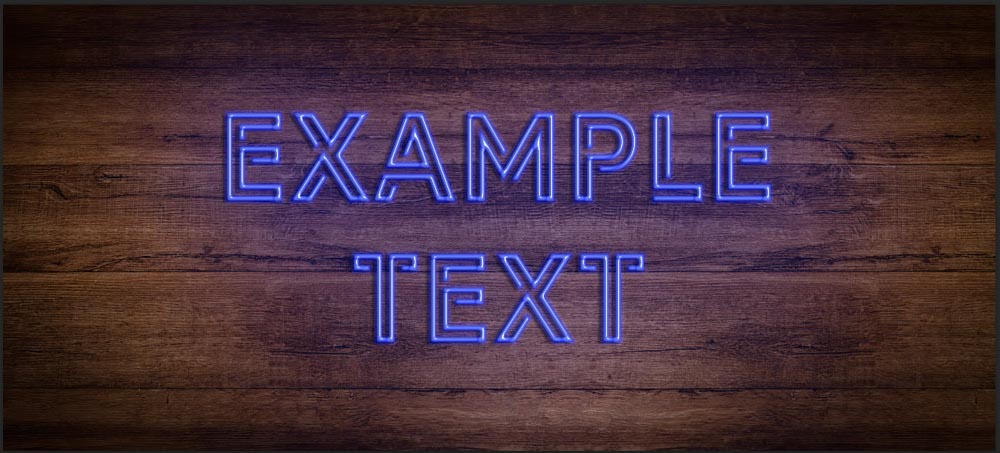
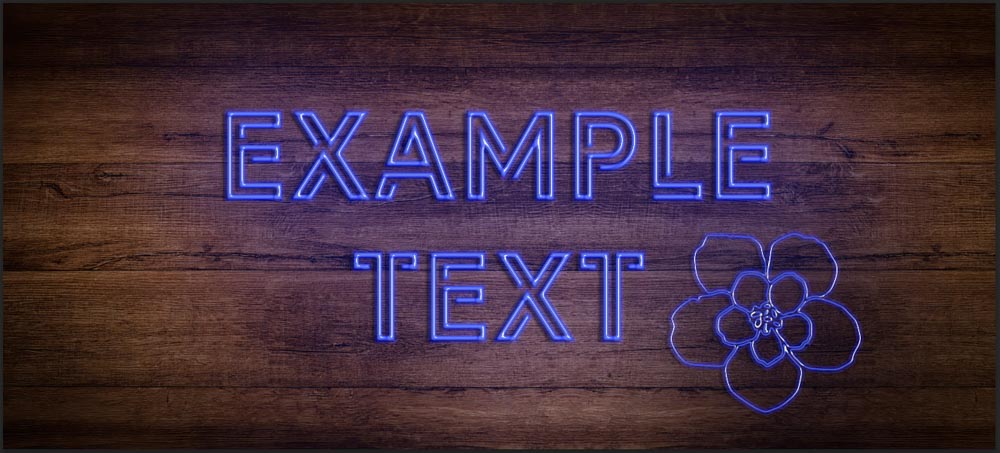
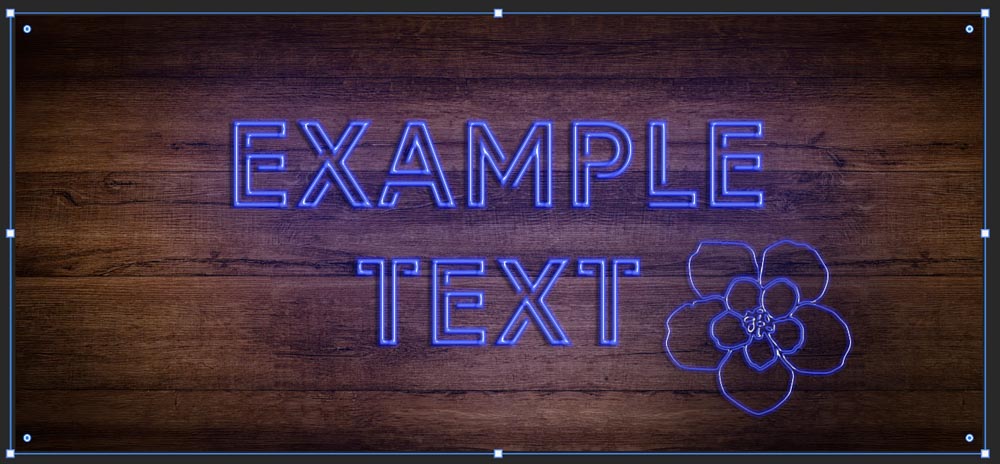
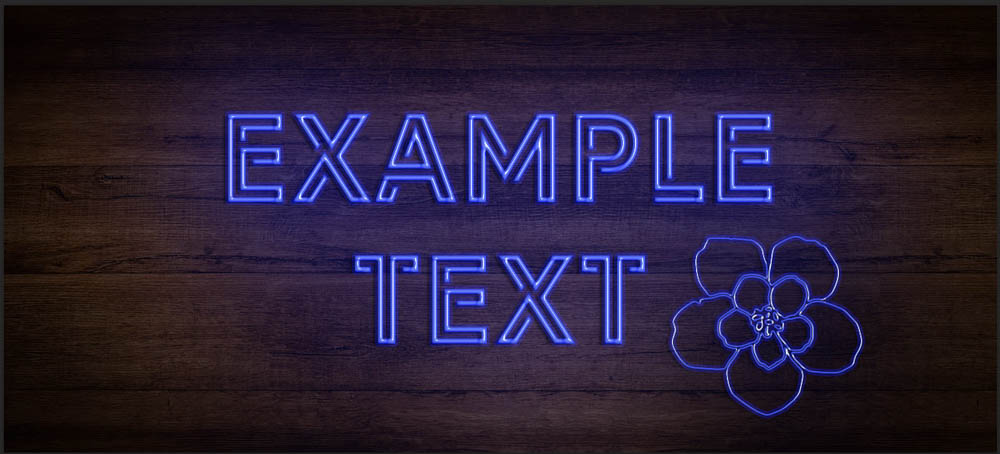
Now you have a lit neon sign effect on your text. The end result of the image should look similar to the image below based on how bright you want your text to look and how much fall-off of light you want to have on the wall.
How To Add Neon Glow Effects To Shapes In Photoshop
The neon effect can then be added to any type of shape you would like. If you are planning to add a shape to your text sign, then you can simply copy the settings across to the shape instead of re-doing each step. You can even save these settings and copy them to a new project to keep the same settings across multiple documents.
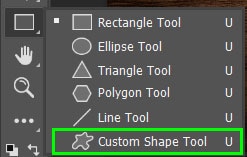
To add a neon glow to a shape, you first need to create a shape. Select the Shape tool options from the toolbar by clicking and holding on the icon. Select your shape of choice. In this case, I will select the Custom Shape tool to add something unique to the project.
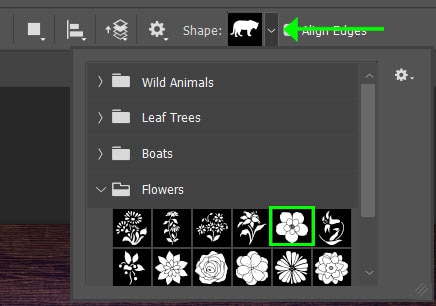
Once the Custom Shape tool is selected, choose a shape from the drop-down menu in the Options bar that offers various types of default custom shapes. I will select a flower shape from the Flowers group.
When you have the right shape selected, click and drag the shape onto your canvas wherever you would like to place the new shape.
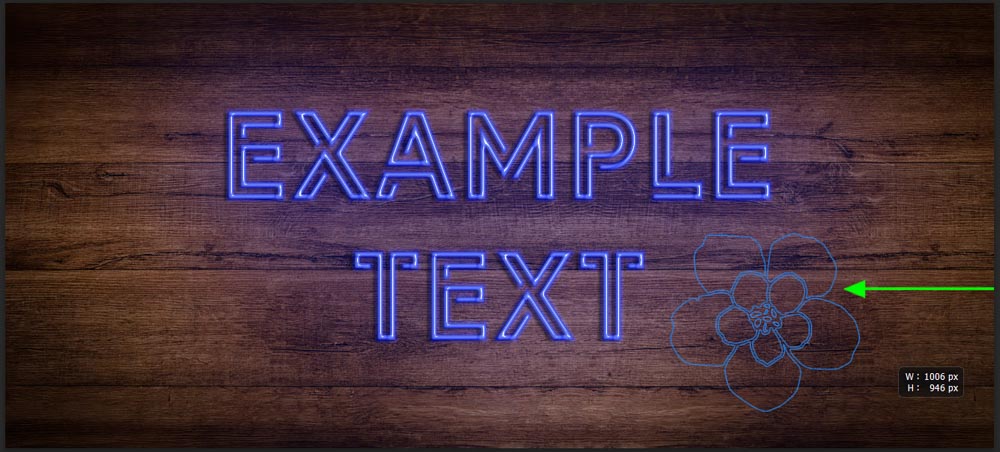
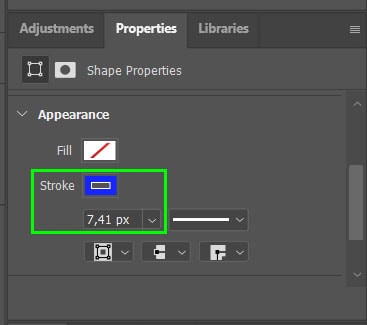
Next, adjust the stroke size and color of the shape to make it more visible on your canvas. You can change these settings in the Properties panel as long as the shape is selected. I have set the stroke size at 7.41px and changed the stroke color to the same blue I used for the text.
Once the settings for the shape are correct, you can simply copy the layer styles that created the neon effect on the text and paste them onto the shape layer.
To do this, right-click (Win) or Command + click (Mac) on the text layer in the Layers panel and select Copy Layer Style from the menu.
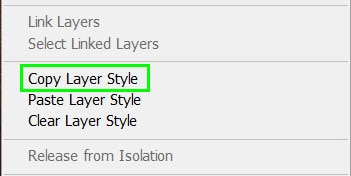
Then, right-click (Win) or Command + click (Mac) on your shape layer and select Paste Layer Style from the menu.

Once you paste the layer style onto the shape layer, you will notice that it has copied all of the layer styles from the text layer onto the shape layer.

You will also notice that the flower on your canvas has the neon glow effect added to it as well. You can then repeat Step 8 from earlier (painting a colored glow) if you want to add an extra glow around the flower.
When the layer style settings have been copied to the shape layer, you can still adjust these settings if needed. To adjust the settings, double-click on the shape layer to open the Layer Style window and adjust the various settings for the shape layer as needed.

Make The Text And Shape Stand Out
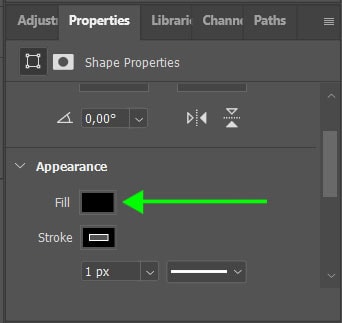
If you want your text and shape to stand out from the background, you can darken the background even more. To do this, select the Rectangle shape tool from the toolbar or press U.
Draw the rectangle around the entire canvas and set the Fill color to black in the Properties panel.
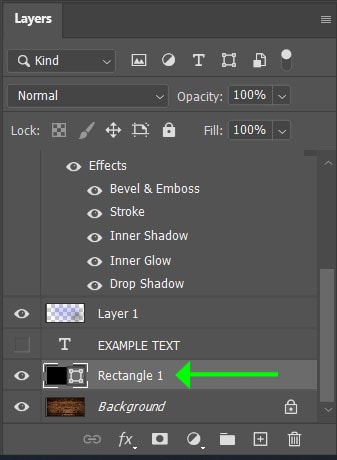
Move the rectangle layer below the text, brush, and shape layers so it’s only above the background layer in the Layers panel.
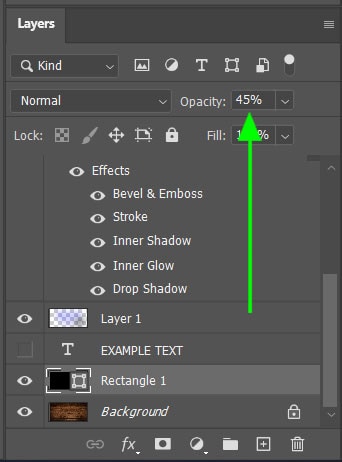
Then change the layer’s Opacity to 45% in the Layers panel.
Your text and shape will now stand out even more against the background, you can adjust the Opacity of the new fill layer as needed. Another way of doing this is to add a vignette to the background image.
So whether you want to add a neon glow effect to text or shapes in Photoshop, following these steps will make the process quick and easy!
Happy Editing!


