

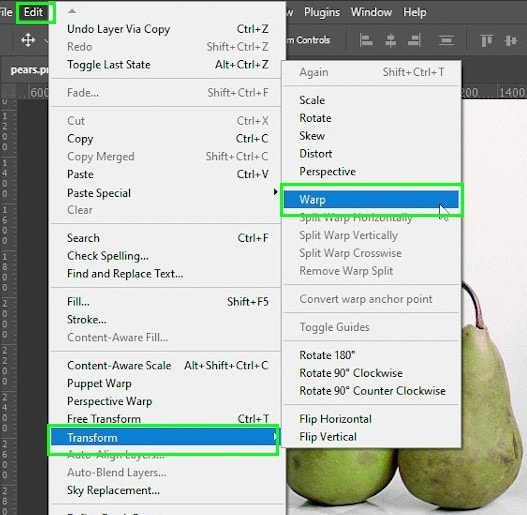
There are many ways to bend or curve images in Photoshop, but the easiest method is using the Warp Tool. Warping in Photoshop allows you to manually control where and how your layers are curved. Even if you’re completely new to the Warp Tool, it’s very simple to use with the following steps.
To bend or curve an image in Photoshop using the Warp Tool, first, click on your image layer. Then select Image > Transform > Warp to activate the Warp Tool. Now click and drag on the provided grid lines to bend and curve your image as you see fit.
Keep in mind that this only touches the surface of how you can use the Warp Tool in Photoshop to manipulate your images. Throughout this tutorial, you’ll learn a variety of other effective ways to curve your images so you can find the perfect look for your project!
How To Warp An Image In Photoshop
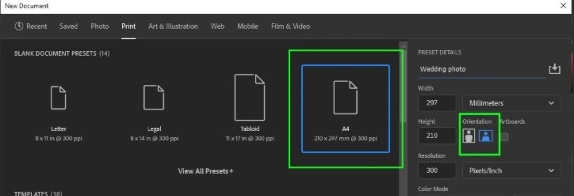
Let’s say you want to curve your image to look like a bent piece of paper. Start by creating a new document for your image to be placed on.
I will choose the A4 document preset and choose a horizontal page orientation to have enough space to curve the image. You can choose whatever project size you would like, A4 is just for example in this case.
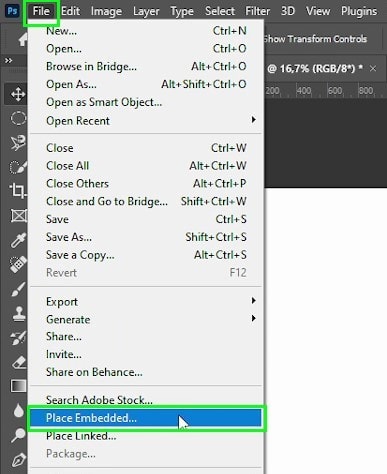
After that, add your image to the new document by going up to File > Place embedded.
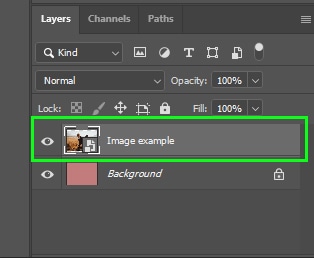
Once the image is inserted, Photoshop automatically converts it into a smart object. This is good because it allows you to edit any applied effect at any time in the future.
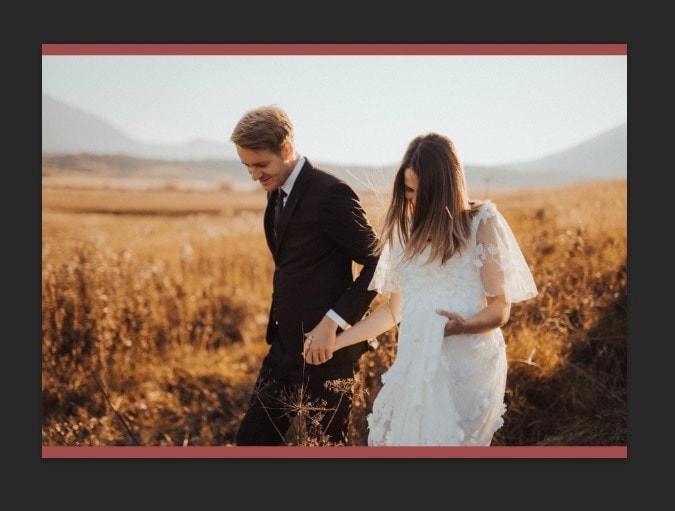
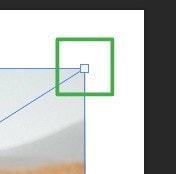
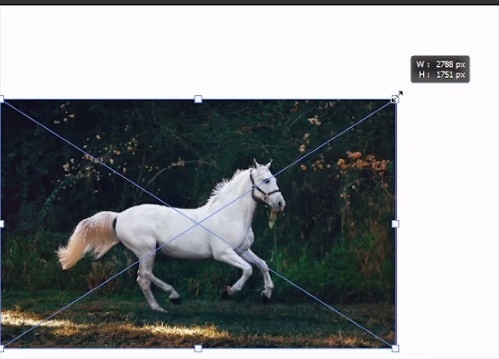
Before bending the image, you need to rescale it to fit your desired size. Since I want to add a border, I will downsize the photo. To do that, enable the free transform tool by pressing Control+T on Windows or Command +T on a Mac. Then, click and drag the upper-right handle inwards to your desired size.
Then, enable the warp tool by right-clicking the image and choosing ‘warp’.
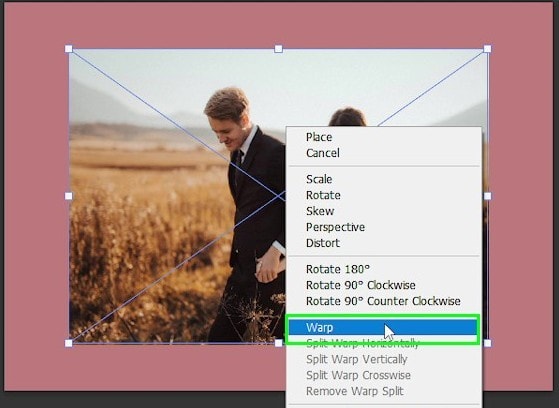
You can also activate the warp tool by clicking the warp icon from the upper options bar.

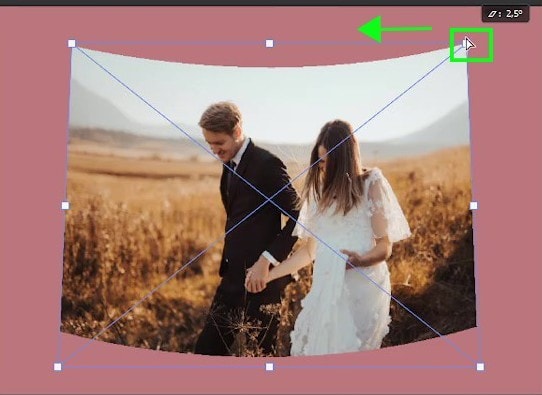
Lots of small points will appear around the image, these are called anchor points. They indicate that the warp tool is activated.
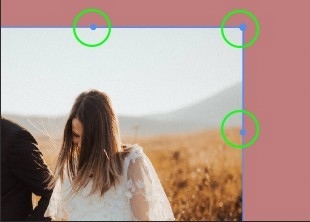
The default grid has control arms and anchors points that you can move in any direction (by clicking and dragging) to warp the image.
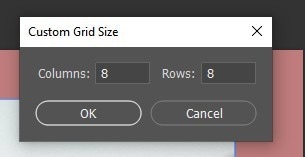
You can also change the grid settings in the grid menu located in the Options bar if you want more control of your warp adjustment.
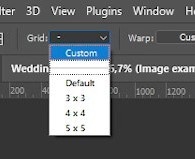
These grid options add split lines that you can also move around to warp your image. A 3×3 grid, for example, has 3 horizontal and 3 vertical split lines.
If you want a grid size not displayed in the grid drop-down menu, you can choose “custom” and enter a grid value.
For my image, I will choose a 3×3 grid. Notice the split lines on the image.
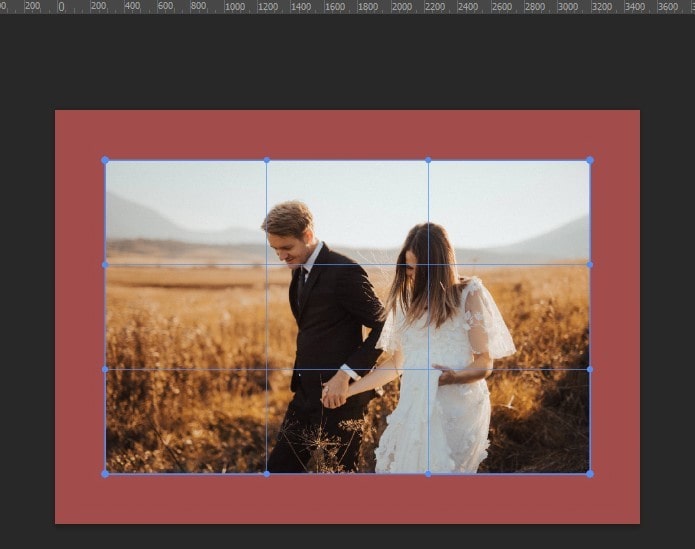
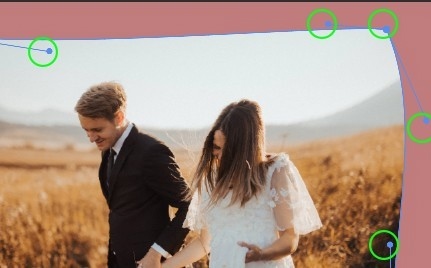
You can click and drag the lines inside the grid anywhere to distort the image. You can also click and drag in different parts of the image to distort it.

I will only move the anchor points and handles located on the corners for my image.
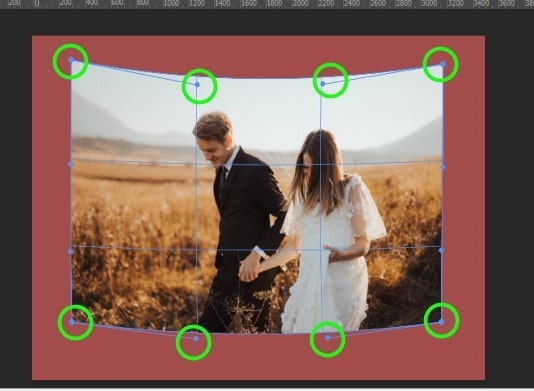
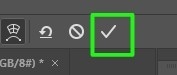
When you finish curving the image, hit ‘enter’ on your keyboard or click the checkbox in the upper bar.
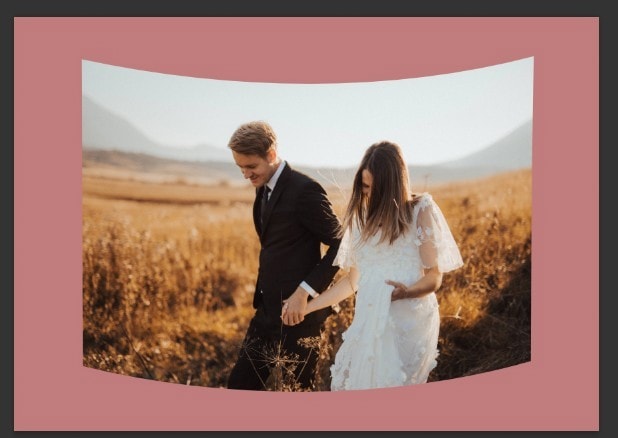
Now I want to adjust the image perspective, so I will activate the free transform tool again by pressing Control+T(On Windows)/Command+T(On Mac).

Then, I will drag the top-right anchor point to the left a little while holding Control + Shift + Alt (on Windows) or Command+ Shift + Option (on Mac).
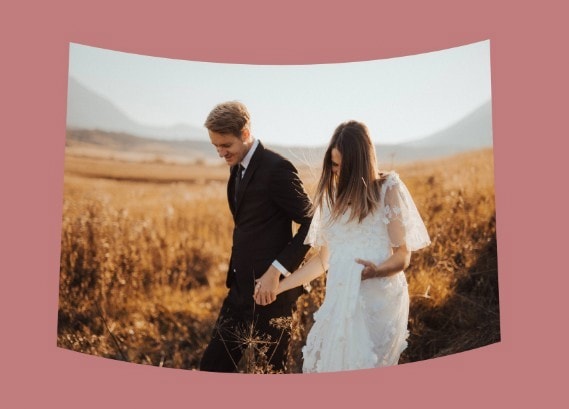
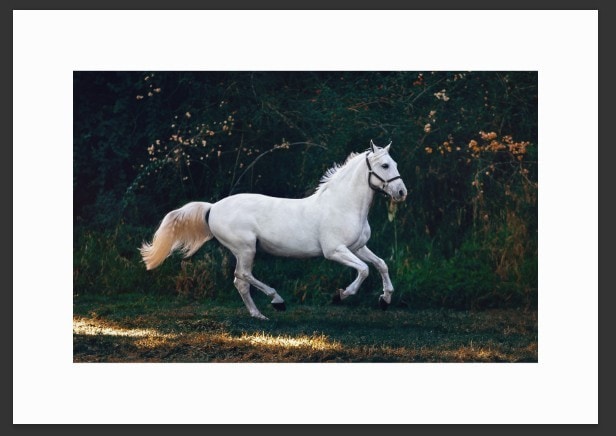
Once you finish warping, it’s a good idea to add some effects. I added a stroke and a drop shadow, so it looked more like a printed photo.

How To Warp A Portion Of An Image In Photoshop
When you use the regular warp tool, you affect the whole image as you saw in the last example. So if you need to isolate these effects, there are ways to warp only a portion of an image. Let’s discuss two easy methods of doing this.
Method 1: Manually Selecting The Portion Of The Image You Want To Warp
When you want to distort part of an image, a good option is to select around the item you want to distort and then apply the warp tool to that selection.
So let’s say you want to distort the clock pointers and numbers in the image below.

In that case, you don’t want other parts of the clock to be distorted nor the image background, right?
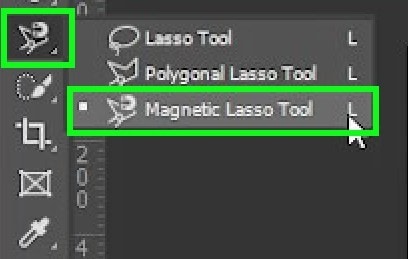
To only distort the part of the image you want, you need to make a selection. You can use any selection tool you want. For this image, I will use the magnetic lasso tool from the toolbar.

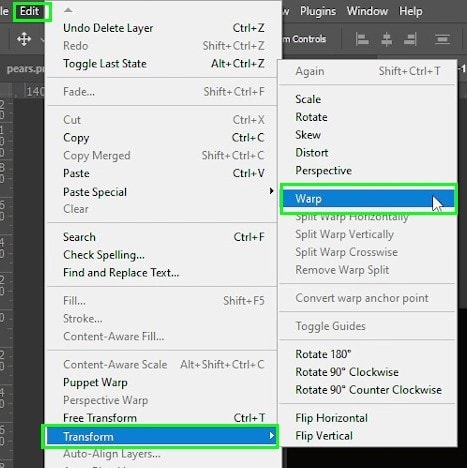
After making the selection, go to Edit > Transform > Warp.
A grid will cover the selected area.
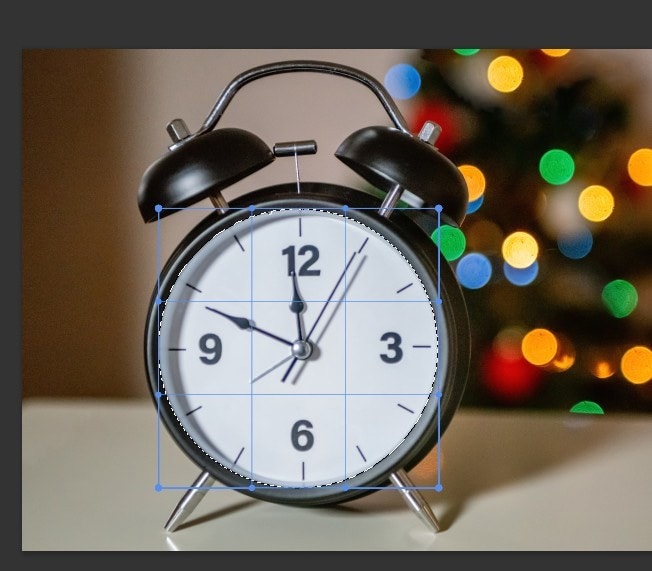
You can then change the grid type as you learned in the previous section. Since I want to warp tiny portions of the image, I will choose a 6×6 grid. Then I will start distorting the clock’s hands and numbers by moving the warp control arms in different directions.

When you finish warping, hit ‘enter’ to confirm the changes.
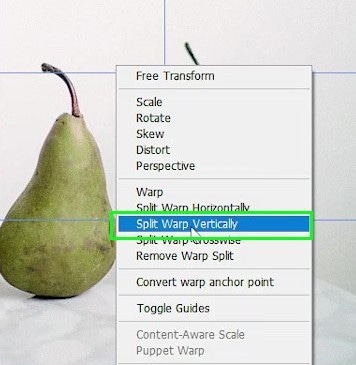
Method 2: Using The Split Warp Tool
Another way of warping a portion of an image in Photoshop is by using the split warp tool. This tool divides the image into two parts: the part you want to distort and the part that you want to keep intact.
First of all, open your image and choose Edit > Transform > Warp.
Then, choose a grid size of your choosing. I will select a 3×3 for my image.

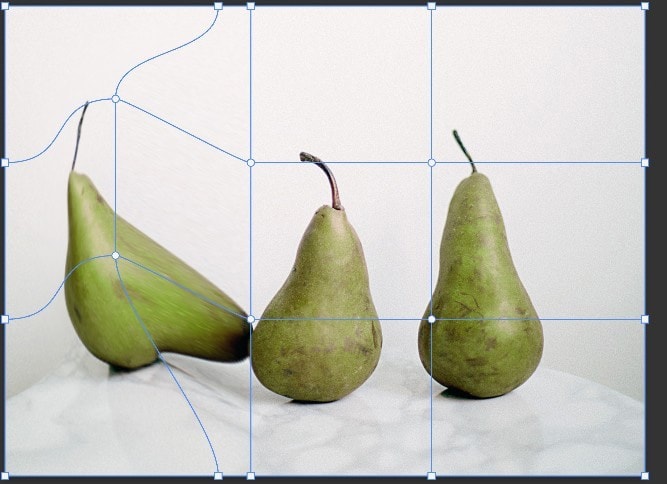
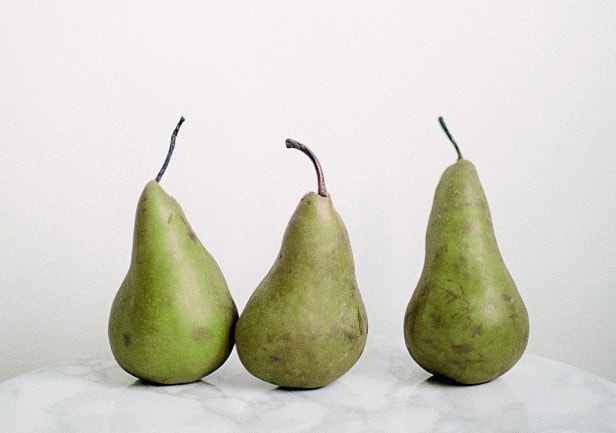
For this edit, I want to make the left pear look bigger.
To do that, I will right-click the image and choose “split warp vertically” (you can also choose “split warp horizontally” following the same step).
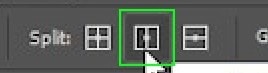
You can also activate the split lines in its menu located in the Options bar.
This will generate a split line that you can move anywhere on the canvas to split the area you will be warping.
For the image I chose, I placed the horizontal split line between the first and second pear.
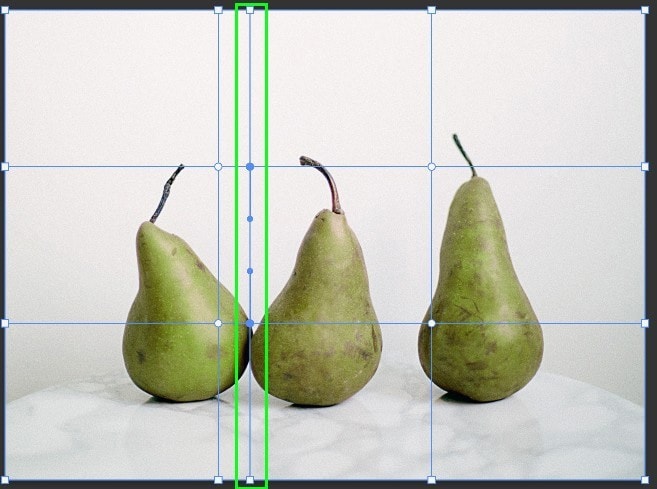
So when I warp the object I want, the other two are not affected by the distortion.
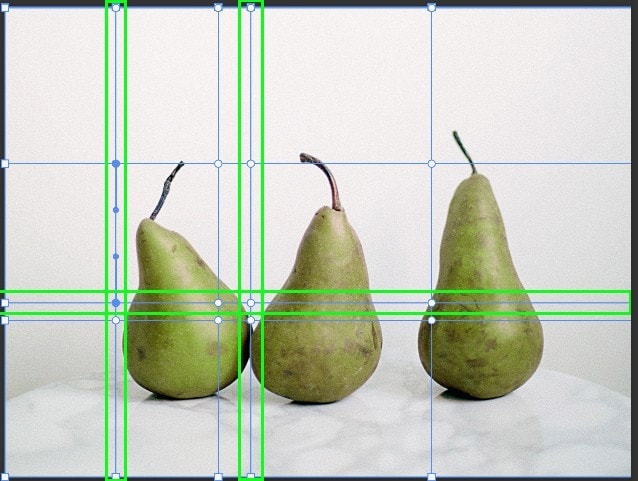
Since I only want to distort the top side of the pear and not the whole thing, I will split the image again. I will then put a horizontal split warp line in the middle of the pear and a vertical split line on its left side.
After that, I will start warping the object, pushing the target area up to make the pear look bigger and straighter.
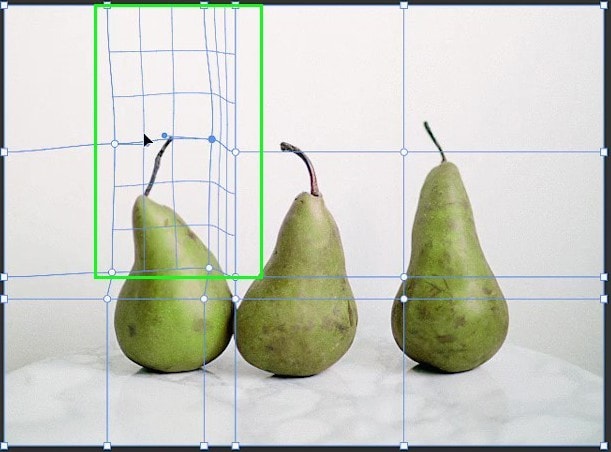
When you’re done, hit ‘enter’ so the changes can be applied.
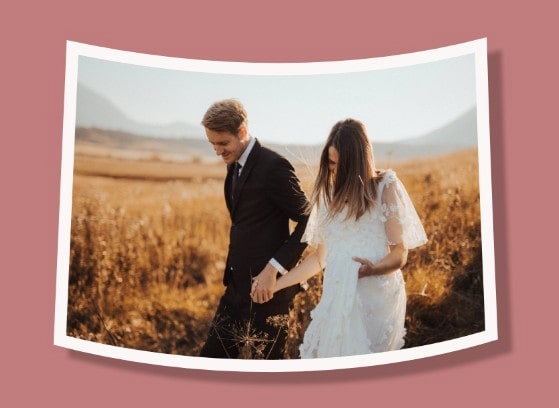
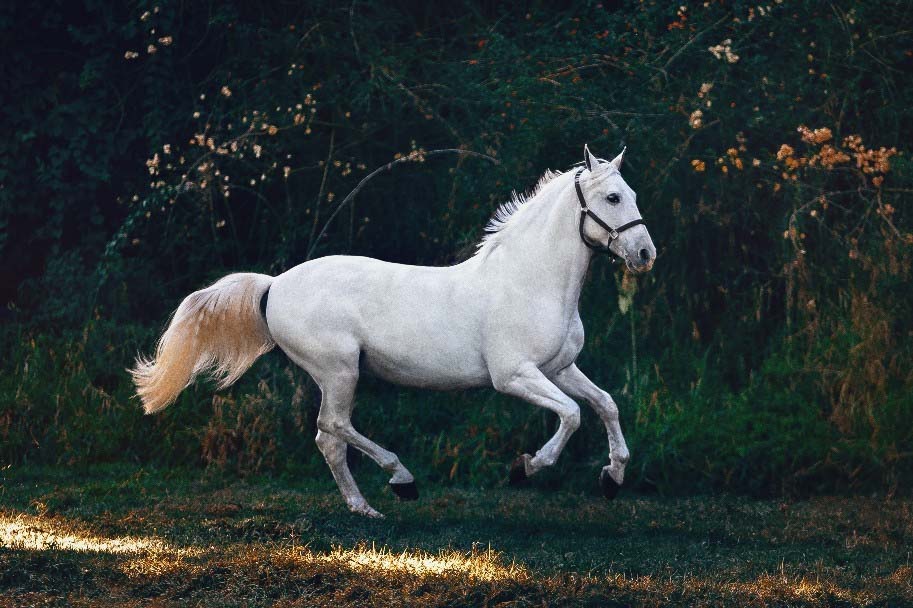
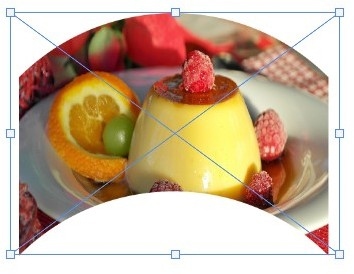
How to Curve A Photo In Photoshop
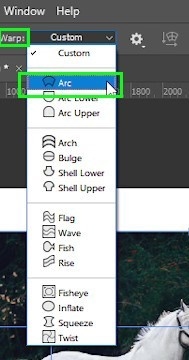
The easiest way to curve a photo in Photoshop is to select the image layer and go to Edit > Transform > Warp. In the warp presets found in the upper settings bar, select the “Arc” preset and adjust the bend percentage to suit your image.
Let’s break that down more in-depth.
First, create a new blank document of large size to have enough whitespace to curve your image. Then, insert the desired image by going up to File > Place Embedded.
If after inserting the image, you still need more space to curve it, press Control+T (on Windows)/Command+T (on Mac). Then, resize the image by bringing the upper right handle down while holding ‘shift’ on your keyboard.
When you finish resizing the image, move it to the center of the canvas.
Then, go to Edit > Transform > Warp.
Next, go to the Options bar and choose one of the presets in the warp menu. For my image, I will choose ‘Arc’.
Depending on the image you have, it may look too wide after the warp effect.
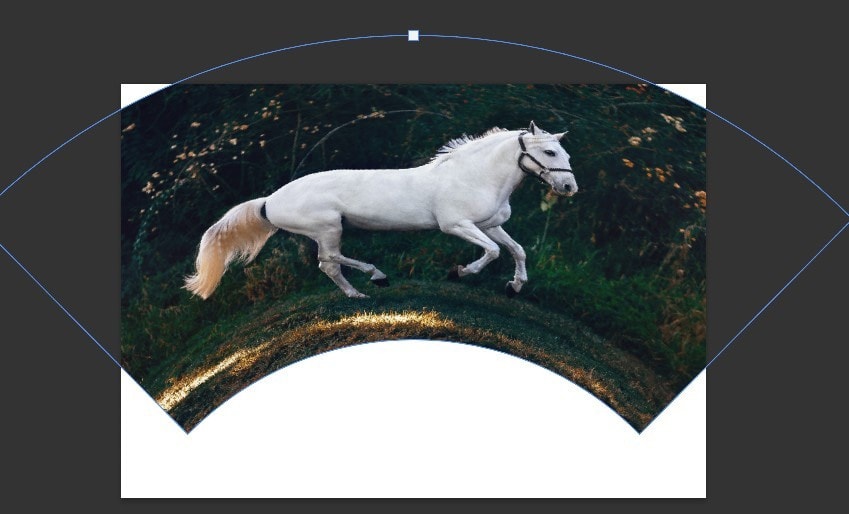
You can fix that by going to “Bend” in the Options bar and choosing a smaller bend percentage.
10% worked well for my image.
How To Add A Photo To A Curved Shape
First, go to the toolbar and pick a rectangle shape.

Then click and drag on the canvas to draw it.
After drawing the rectangle, go to Edit > Transform > Warp.
Next, go to the Options bar and choose ‘Arch’.
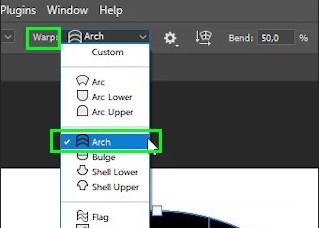
Then, press ‘Enter’ on your keyboard to confirm the changes.
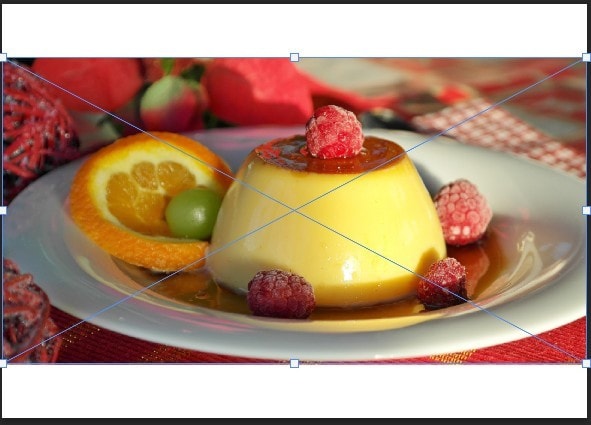
With the shape curved, go to File > Place Embedded to import the desired image.
The image will be imported in its original size, but don’t worry about adjusting its dimensions for now.
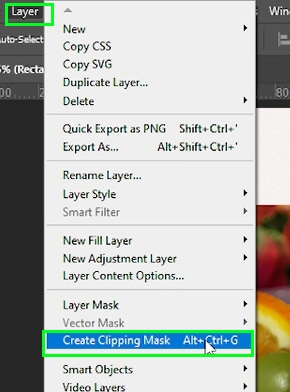
With the image layer selected and placed above the shape, go to Layer > Create Clipping Mask. You can also create a clipping mask by pressing Alt+Control+G (on Windows)/Option+Command+G (on Mac)
The image will be inserted immediately into the shape after applying that clipping mask.
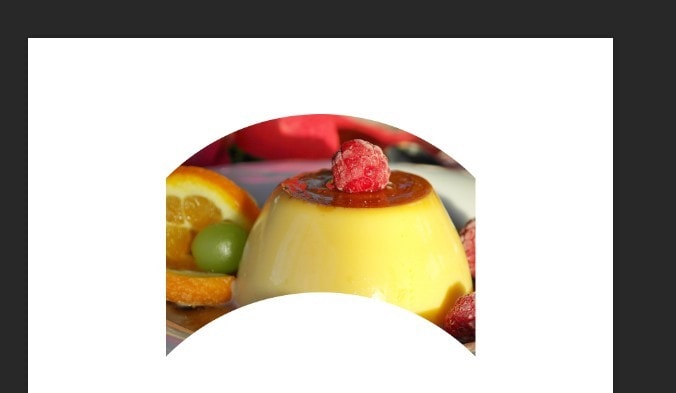
You can see that I lost some of the details of the picture after inserting it into the shapes crop. To fix this, press Control+T(on Windows)/Command+T (on Mac) to activate the free transform tool.
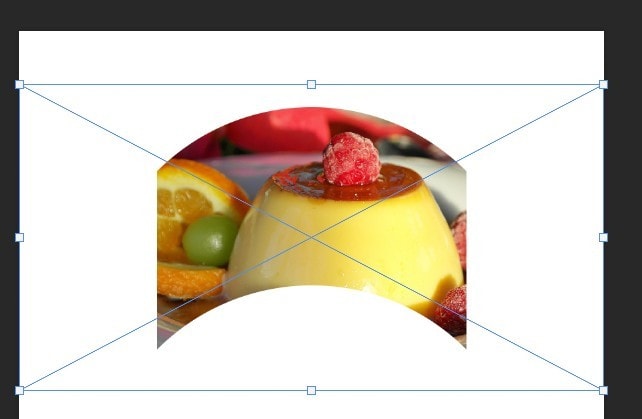
Then, click and drag the handles around the image to resize it to your taste. To reposition the entire image at once, select the Move Tool (V) and drag it into position.
When you’re finished, press ‘Enter’ on your keyboard or click the checkbox in the upper settings bar
When you are warping an image, you will often have to combine different tools and effects so the warping effect will look good. Paying attention to things like the size of your document and the objects in your picture, for example, will make your job easier. With the different techniques, you learned here, bending or curving your images in Photoshop will be a total breeze!
Happy Editing!


Thank you so much for this tutorial! I wanted to curve some text handwritten on screen but had no idea how to do it. 🙂
You are welcome!