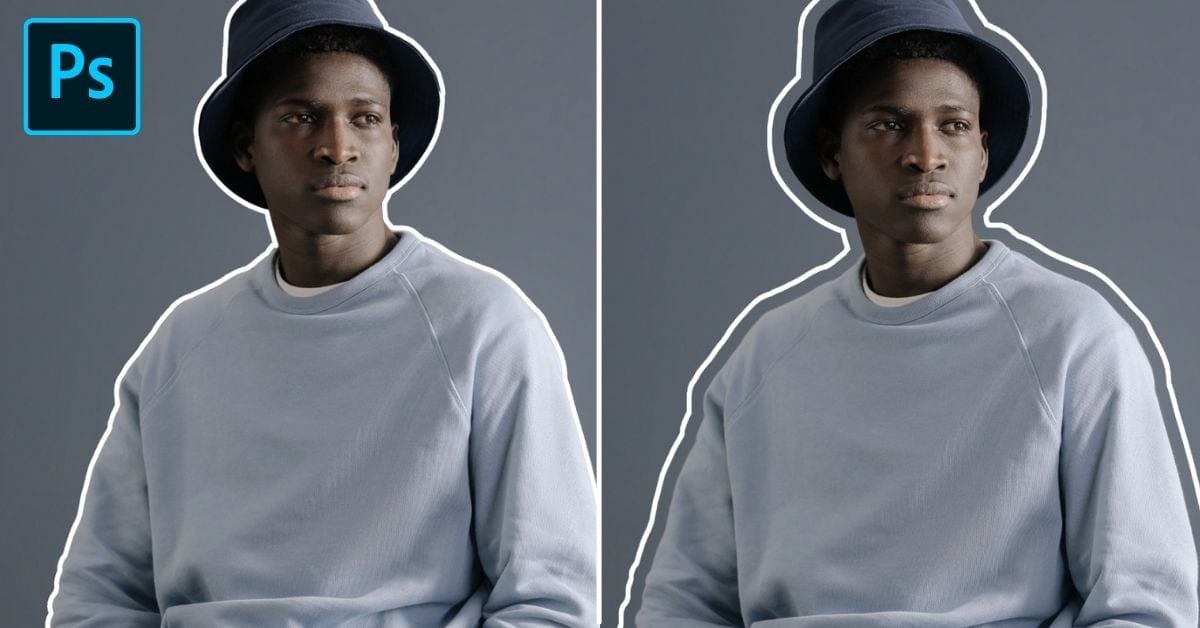

Although there are many ways to outline things in Photoshop, outlining a person may seem a bit more challenging. Luckily there is a very simple way to outline someone in Photoshop with the help of the Quick Selection Tool and layer styles.
To outline a person in Photoshop, duplicate your image layer, then use the Quick Selection Tool to create a selection around the person on the new layer. Apply the selection to a layer mask to remove the background, then double-click the layer to access the Layer Styles and select the Stroke option.
Now, this might sound a little complicated at first, but I promise it’s super easy once it’s broken down. In this post, you’ll learn how to create a basic outline around a person, but at the end, I’ll share an alternate method for adding outlines away from the edge of your subject! Let’s get started.
How To Outline Anything In Photoshop
If you prefer learning with video, this tutorial below will share everything you need to know for outlining a person in Photoshop!
How To Outline A Person In Photoshop – Step By Step
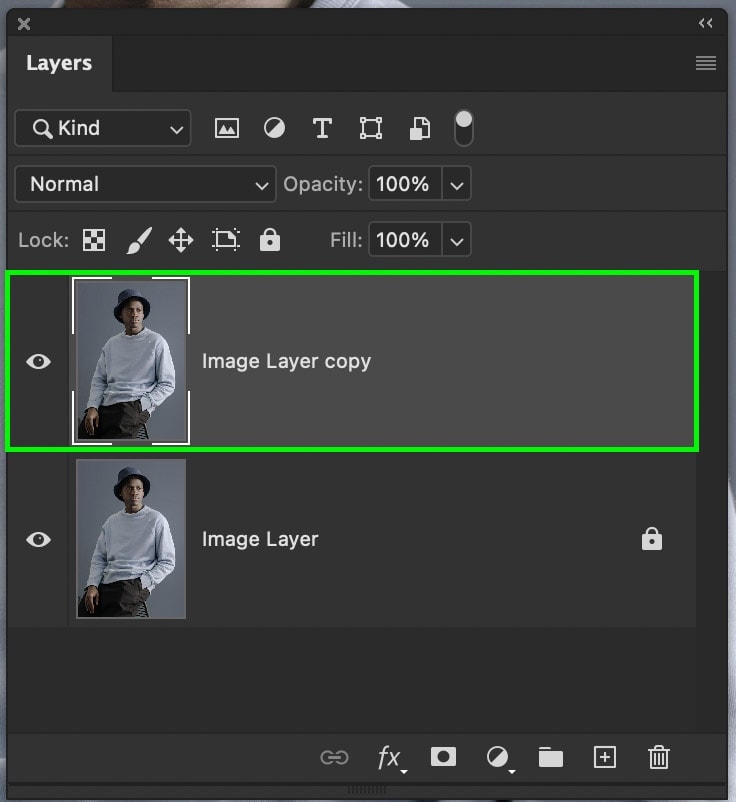
Step 1: Duplicate Your Image Layer
For this effect to work, you need to remove your background from the layer you wish to outline. By duplicating your layers, you can add an outline while keeping the original background in the image.
With your image layer selected in the Layers Panel, press Command + J (Mac) or Control + J (PC) to duplicate it.
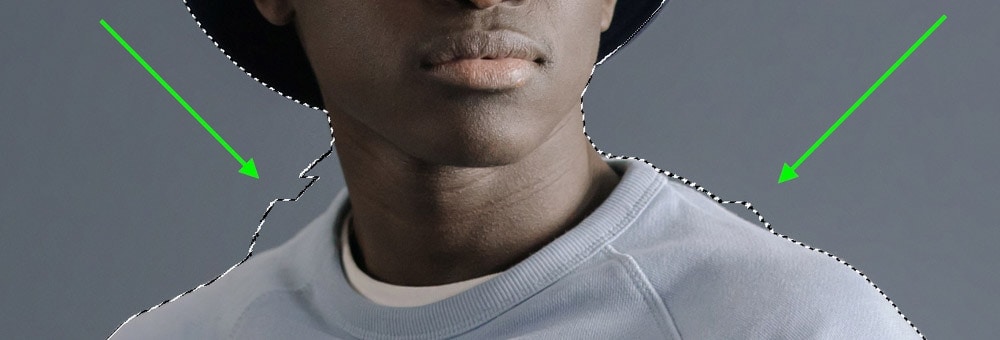
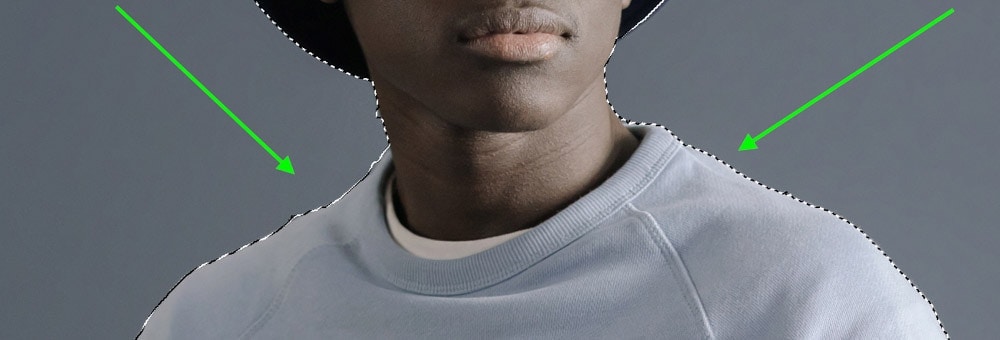
Step 2: Create A Selection Around Your Subject
With your duplicated layer selected, it’s time to create a selection. There are many great ways to do this in Photoshop, but I recommend the Quick Selection Tool for this technique.
You can find the Quick Selection Tool at the top of your toolbar or press W to access it directly.

This tool operates like the Brush Tool, except it paints selections onto the image rather than color. Since you need to select your person entirely, begin to paint over them with the Quick Selection Tool. The selection will automatically locate the edges of your person, making this tool fast and easy to use.

You can resize your Quick Selection brush by pressing the [ or ] keys. The larger your brush size, the more will get added to your selection at once.
In some cases, the Quick Selection Tool may select something you don’t want. Luckily you can easily subtract from your active selection by holding Alt or Option and painting over the unwanted selection. This will switch the mode to “Subtract” and remove any selection you paint over.
Once it comes time to add to your selection again, simply let go of the Alt or Option key and continue painting as usual.
Step 3: Add The Selection To A Layer Mask
Once you have created a selection around the entire person, it’s time to remove the background with a layer mask.
Making sure your duplicated layer is selected, click on the layer mask icon to apply the selection onto the mask. This will remove the background and leave your person on its own layer.
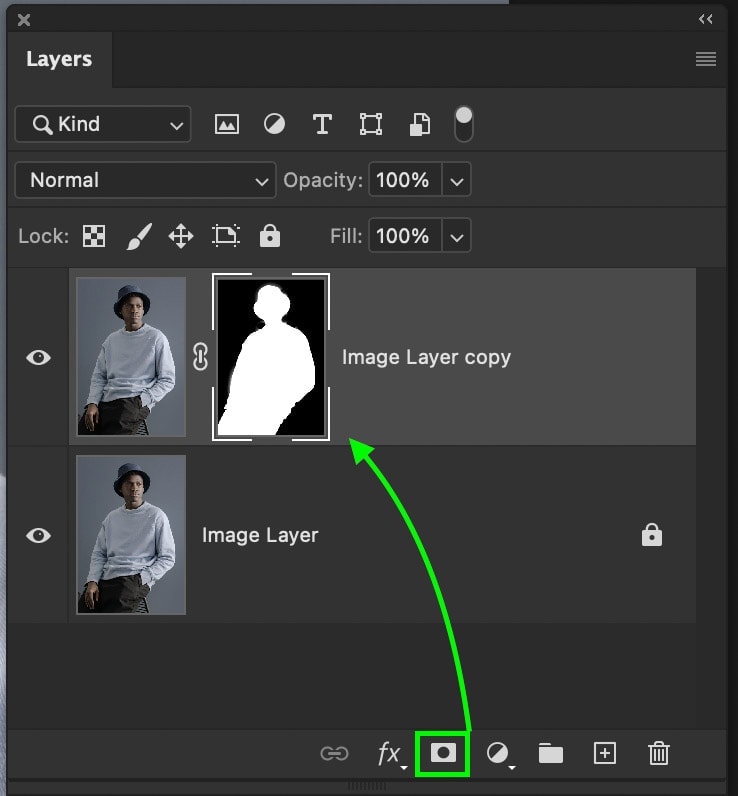
The reason it doesn’t look like the background is transparent is because of the other image layer underneath. So don’t worry, you didn’t do anything wrong here!
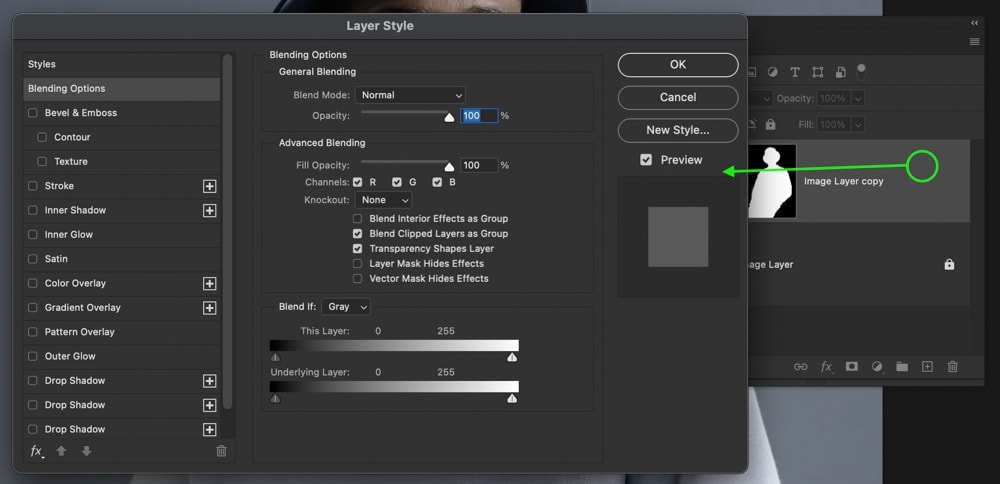
Step 4: Double-Click On The Masked Layer To Open Layer Styles
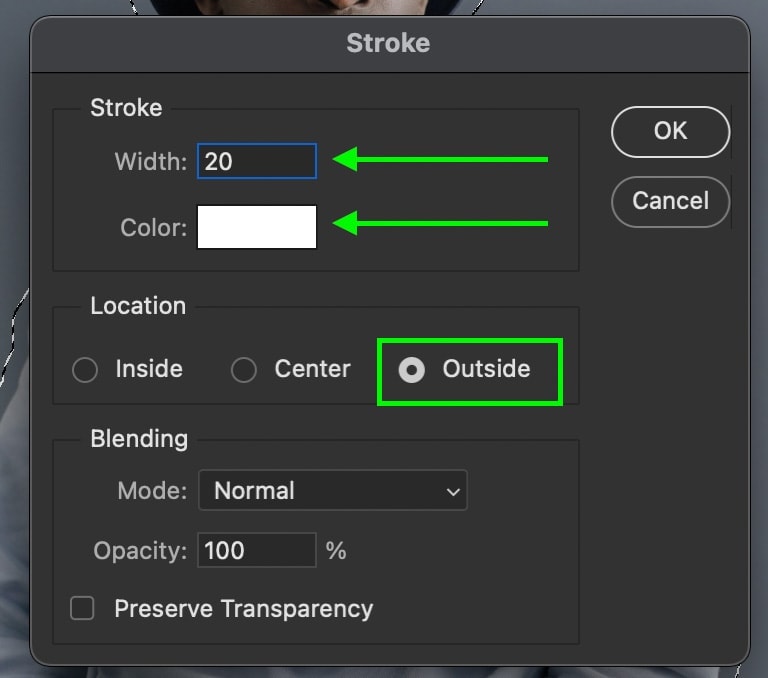
To add an outline to something in Photoshop, the stroke option is the easiest way to do so. Within the Layer Styles, there are a handful of great stroke options. To access the layer styles panel, simply double-click on your image layer with the layer mask.
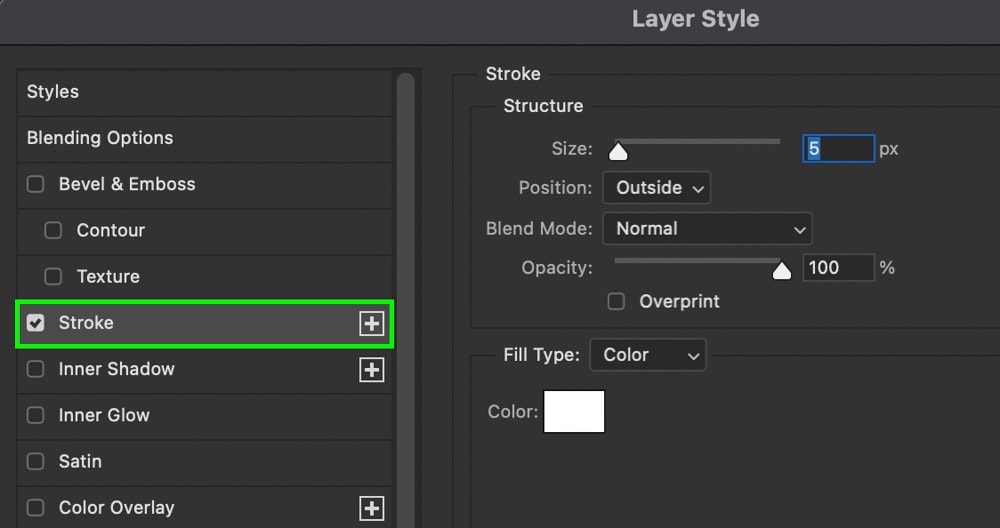
Step 5: Select The “Stroke” Option
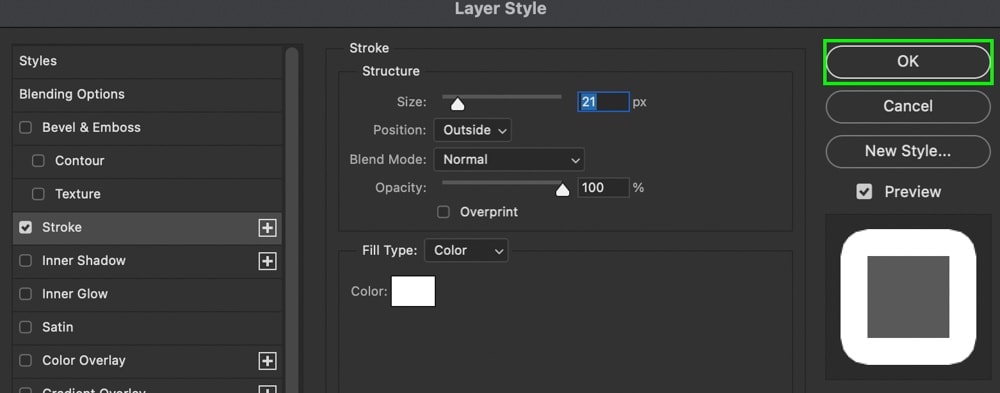
Within the Layer Styles Panel, select “Stroke” from the Styles options on the left.
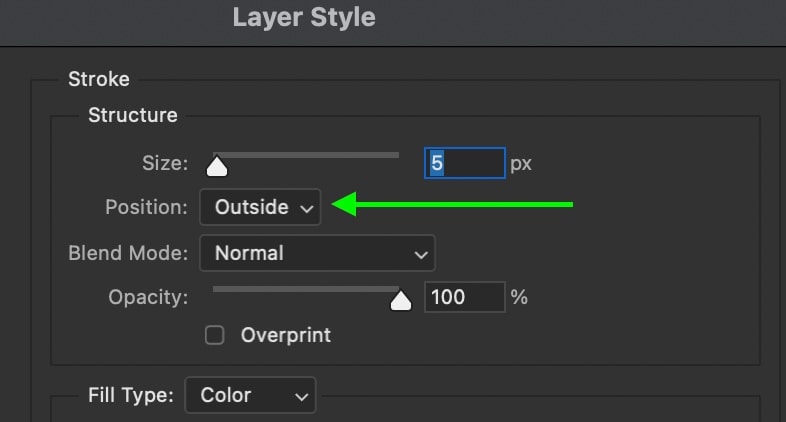
Step 6: Set The Stroke Position To “Outside”
Inside of the stroke settings, first set the position to “Outside.” This offers the best results for your outlines since it doesn’t obstruct the person in any way. Instead, it sits outside the edges, leaving the person unaffected when using a larger stroke width later on.
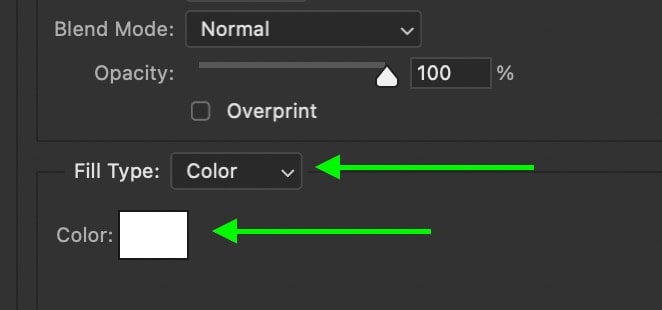
Step 7: Set The Fill Type To Solid Color
Now set the Fill Type to “Solid Color.” This will allow you to create a solid-colored outline that you can customize by clicking on the color box.
You can also choose to outline your images with gradients or patterns, which I outline in more detail here.
Step 8: Adjust The Other Stroke Settings As Needed
Lastly, work through your other stroke settings to customize the size and opacity as needed. As for the blending mode, keep this set to Normal for the best result.
Once finished with all your adjustments, click OK to exit the Layer Styles.
You’re Done!
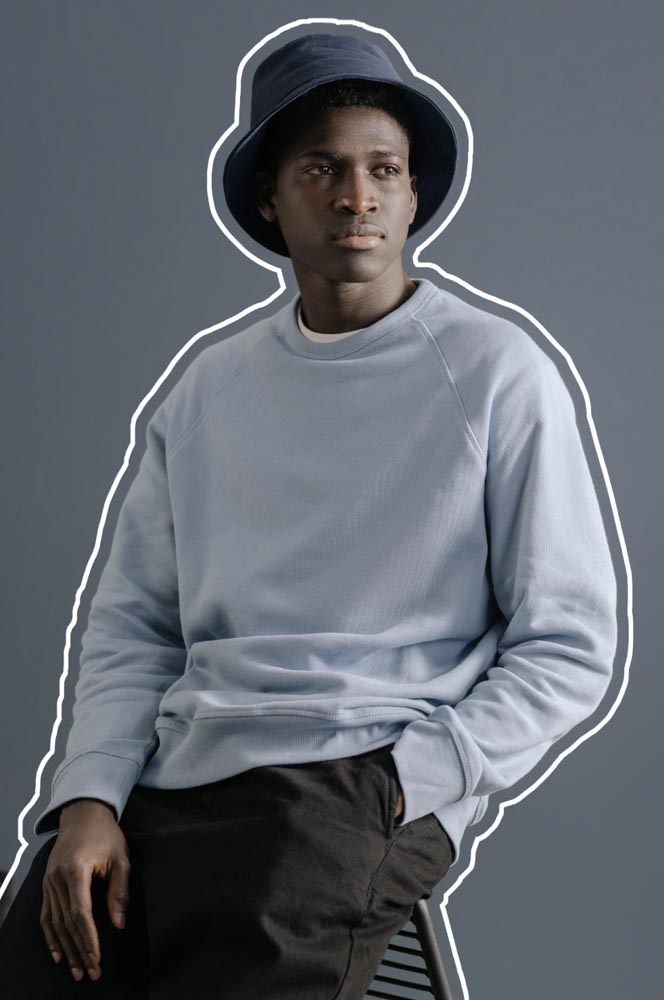
Now you have successfully outlined a person in Photoshop using a simple stroke technique in the Layer Styles. This option is great as you can add multiple stroke outlines to the same image with this method (learn how here).
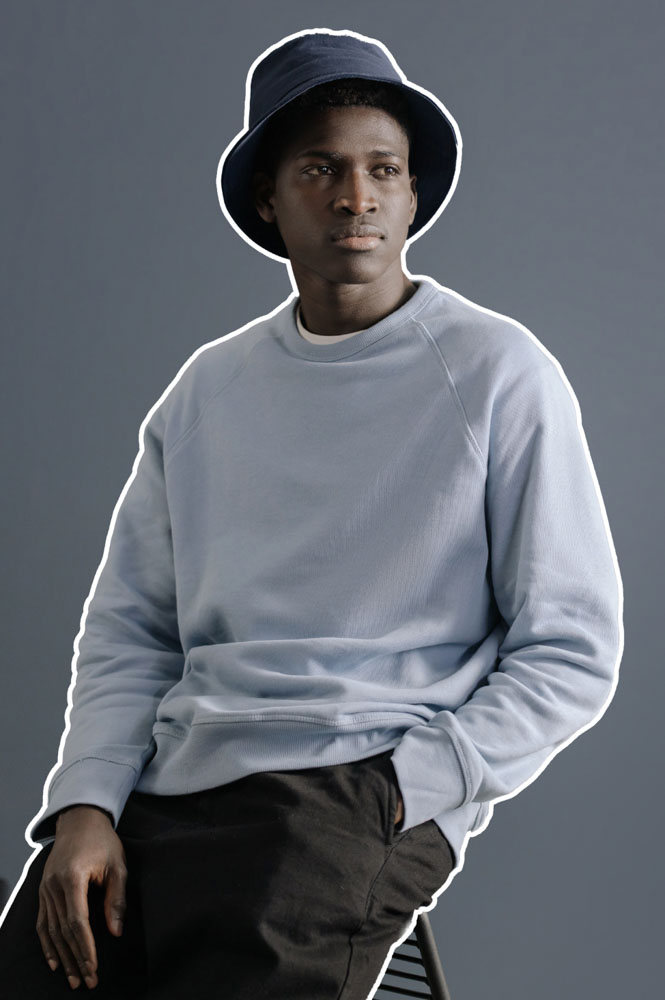
In this example, you added an outline directly around the edges of your person. Unfortunately, if you need to add a space between the outline and your person, this method won’t work as you hoped.
So in the next section, you’ll learn an alternate method for outlining a person, but this time with a space between them and the outline!
Adding A Stroke Away From The Edges Of Your Person
Just like before, create a selection around your subject with the Quick Selection Tool. This time, however, you do not need to duplicate the image layer.
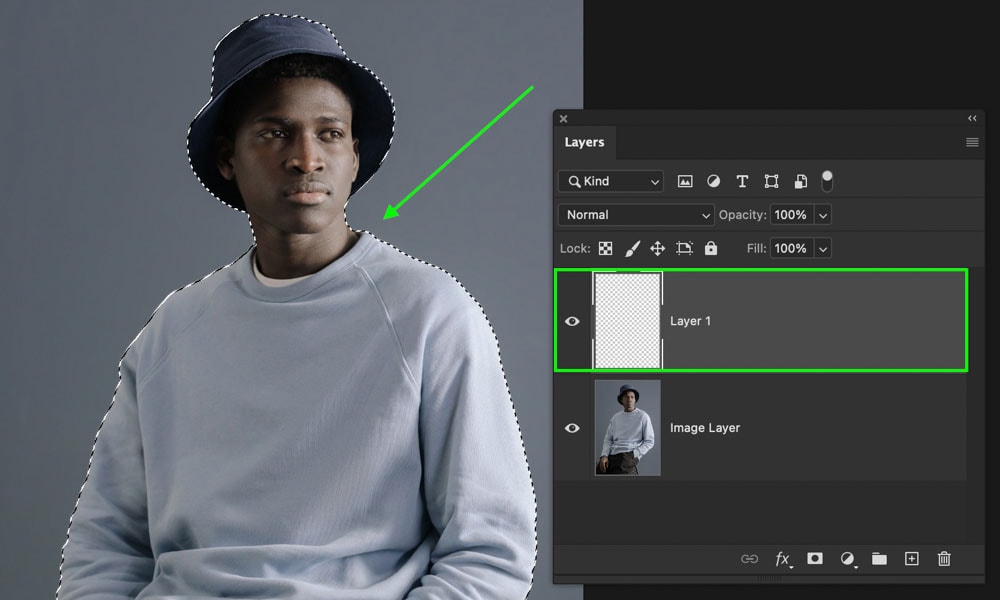
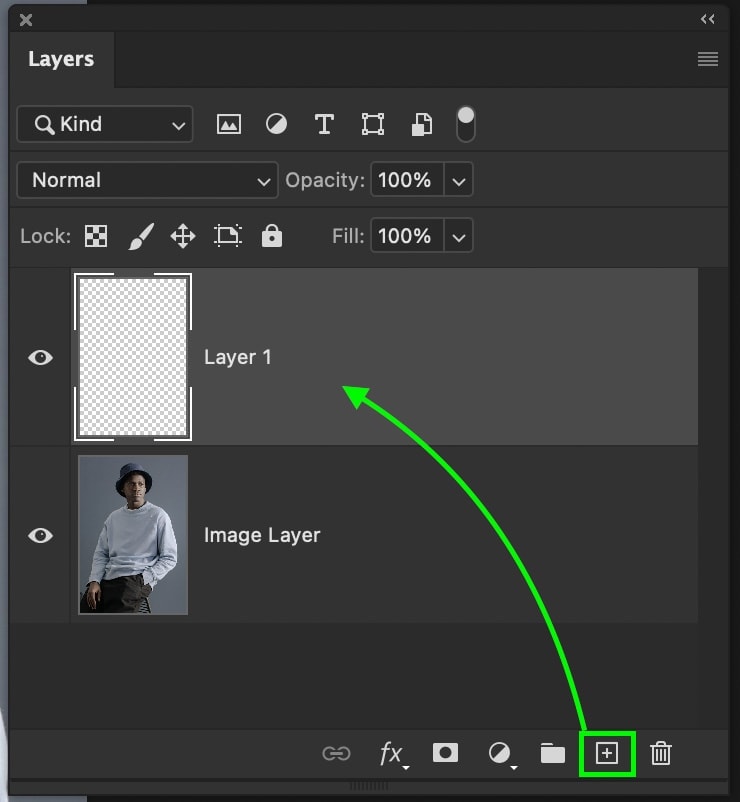
Once you select the person, click on the new layer icon to create a new layer above your image layer.
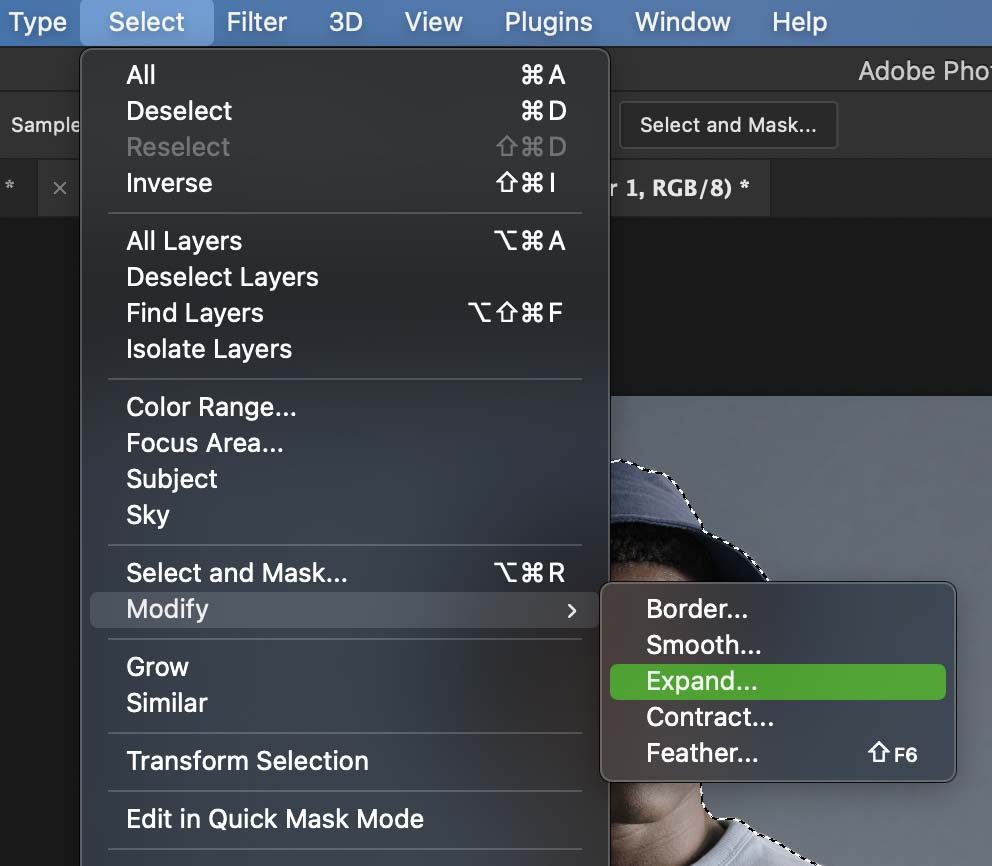
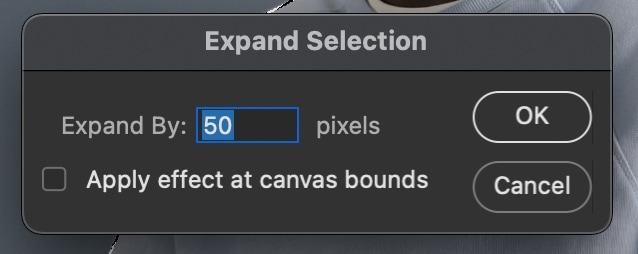
Now go to Image > Modify > Expand. This setting will move your selection area outwards by a predetermined about of pixels—type in whatever value you would like here. Just remember the bigger the number, the further the selection will move away.
I set my value to 50, and now you can see how the selection has moved away from the subject.

Next, it’s time to add a stroke. With your new transparent layer selected and the selection active, go to Edit > Stroke.

Here you can set a width (aka thickness), color, and position for your stroke. Adjust your settings as needed and click OK.
Now your active selection will have an outline added to it surround the person. Finally, to finish everything off, press Command + D (Mac) or Control + D (PC) to deselect the selection.
And now you’re left with another outline of your person, this time away from the edges. This adds a unique effect to your outlines and gives it a cool graphic design look. With either of the techniques learned here, you can now quickly outline a person in Photoshop and get some pretty awesome results! To further improve your outlining skills, check out this next tutorial on how to outline anything in Photoshop!
Happy Editing!
Brendan 🙂


