
While Canva is great for editing photos and creating social media posts, you can also use it to make professional-looking tables for your data or weekly schedules. Here’s how to make a table in Canva.
To create a table in Canva, type “/Table” and click on the Table Element Option. Then, choose the desired rows and columns for your table in the following window. You can further customize the color and border settings of the table by adjusting the settings in the Options Bar.
In this article, you’ll find all the important customizations and tips you’ll need for your table.
Lesson Summary
- Step 1: Click On Create A Design On Canva’s Homepage
- Step 2: Type In “Table” And Select Table Worksheet
- Step 3: Browse The Templates And Click On One To Select It
- Step 4: Customize The Template As Needed
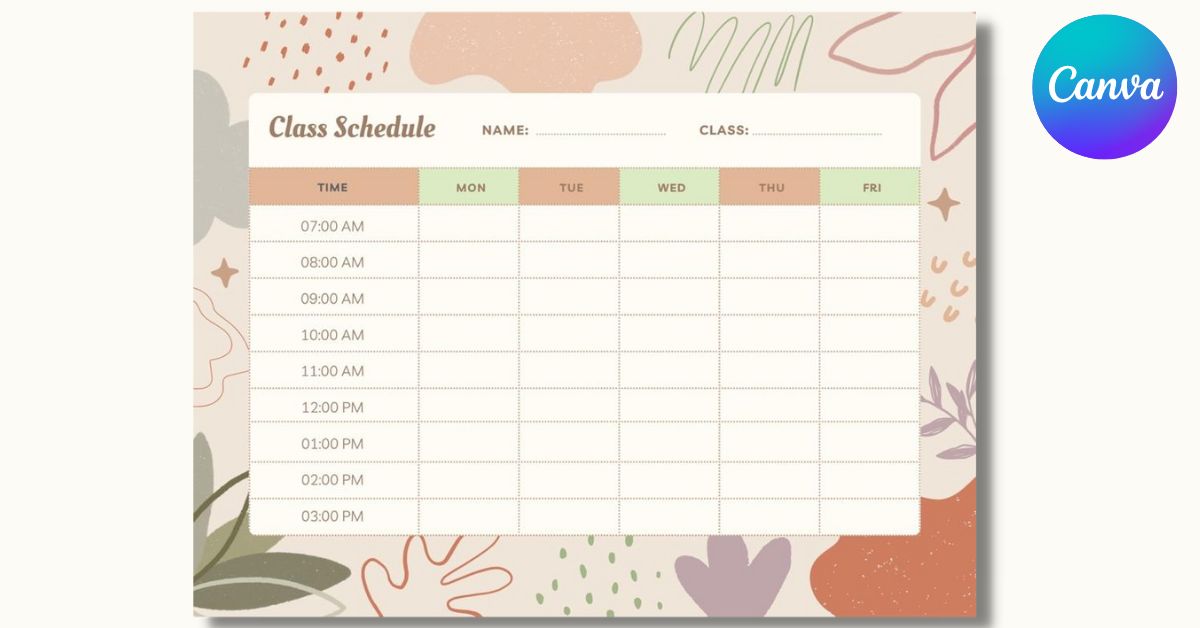
Option 1: Make A Table In Canva Using A Template
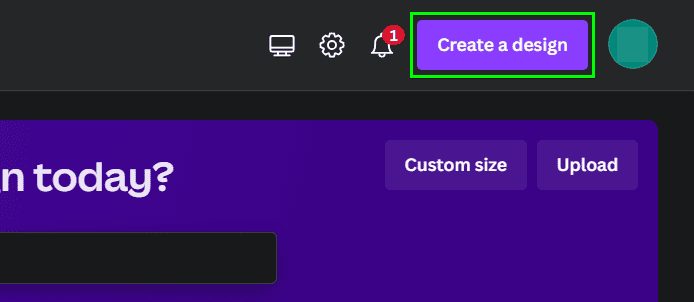
Step 1: Open Canva And Select Create A Design
Once you have the Canva homepage open in a tab, click on Create a Design in the top right-hand corner.
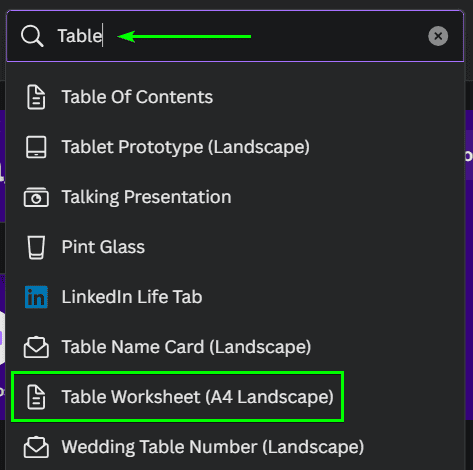
Step 2: Search For Table And Select Table Worksheet
Type “Table” into the search bar at the top and then select the Table Worksheet option.
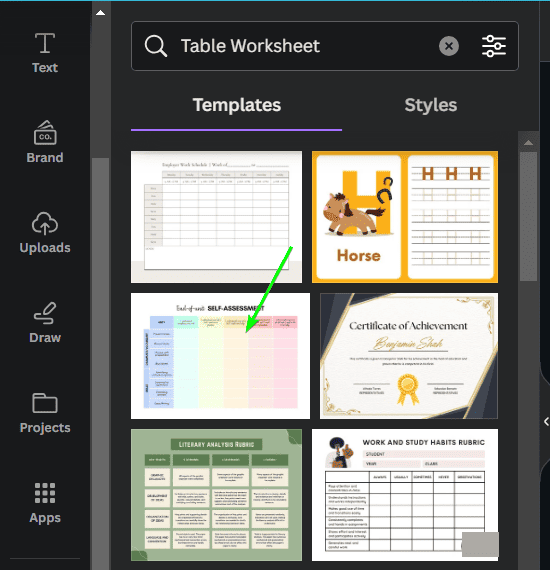
Step 3: Select A Suitable Table Template
The Canva workspace opens and offers several table templates in the left-hand window. Browse through the options and click on the table you like.
Step 4: Customize Your Table Template
You can now customize the table as needed by adding new graphics, changing colors, and editing text. Follow the last section for customization tips.
Option 2: How To Make A Table In Canva Using Elements
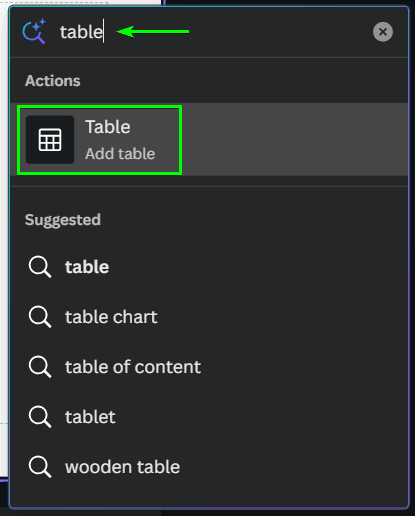
Step 1: Open A Blank Design And Type “/Table”
To start, type “/table” over your design to create a table using the Magic command function. Alternatively, click on the Elements Tab to bring up the Search Bar. To find a table to use, type in “Table.”

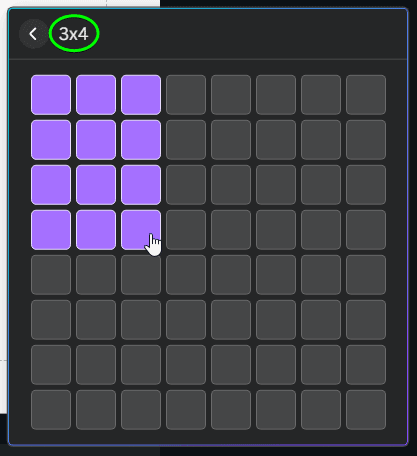
Step 2: Select The Number Of Columns And Rows Using The Blocks
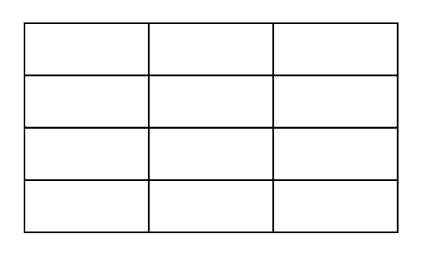
When using the magic command, use the blocks to select the number of columns and rows you want, and a basic table is automatically added to the canvas. Otherwise, when searching for an element, click on See All and then click on the table that best fits your project.
Step 3: Double-Click Inside A Cell To Add Text
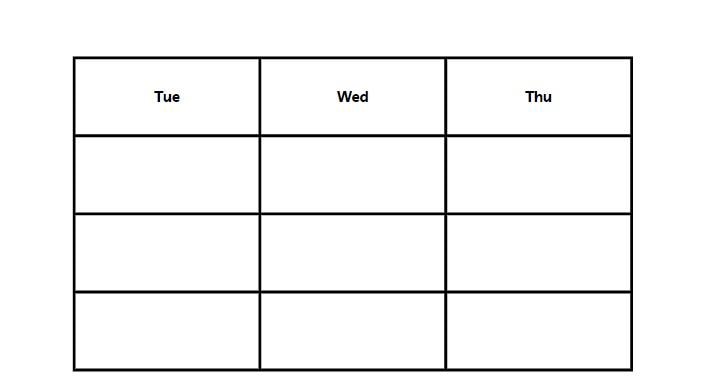
Once your table is on your canvas, you can add text to each one of the cells by double-clicking inside them.
How To Add Rows & Columns To A Table In Canva
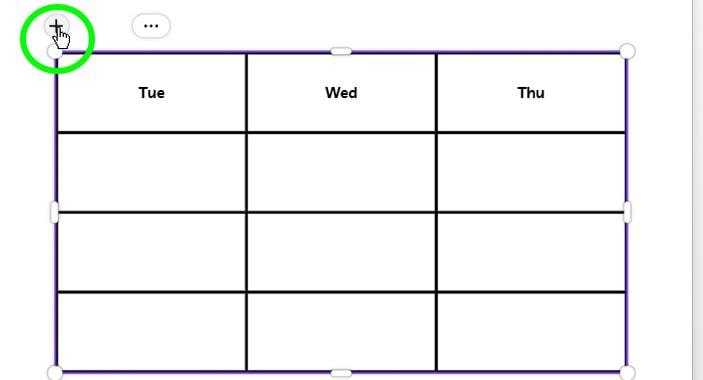
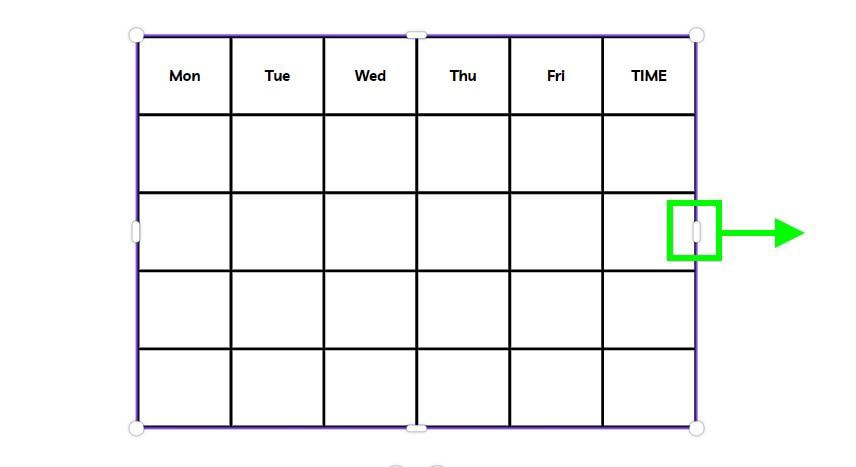
To add a column to your table, hover your mouse over the top right or top left of the table and wait for the Plus Icon to pop up. Click the icon to add a column to the side of the table the icon was on.
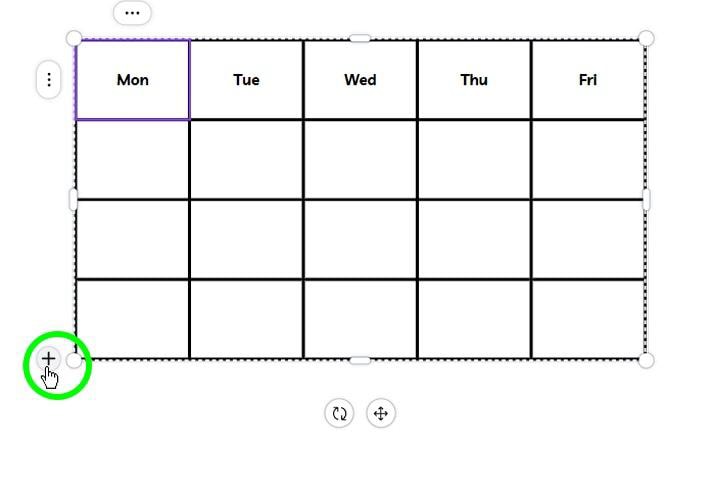
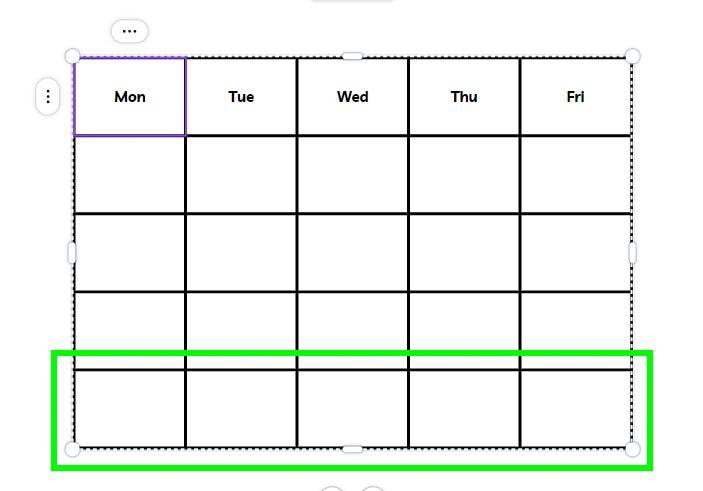
To add a row to the bottom of your table, hover your mouse over to the bottom left or bottom right corner of your table until the Plus Icon pops up.
For the top of the table, hover your mouse to the top left or top right of the table and click on the Plus Icon to the side of the table and not on the top.
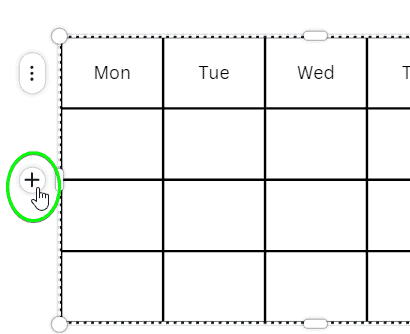
If you need a new row in the middle of your table, hover your mouse over to the left side on the line between the two rows where you want the new row to fit in. Click on the plus sign that appears to add a row.
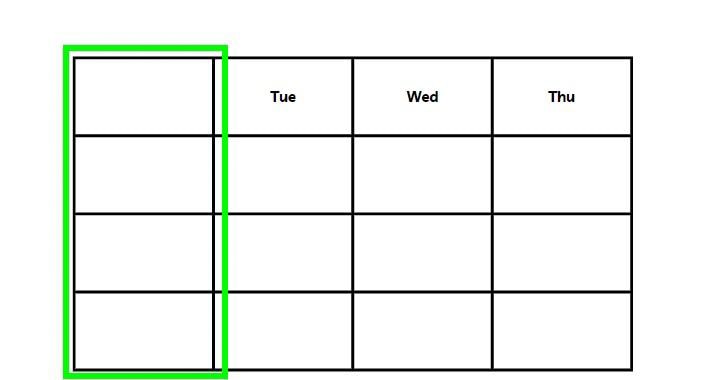
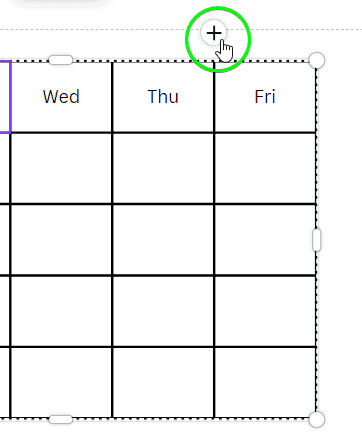
To add a new column to your table, hover your mouse next to the line above and between the two columns where you want the new one added, and click on the plus sign to add it.
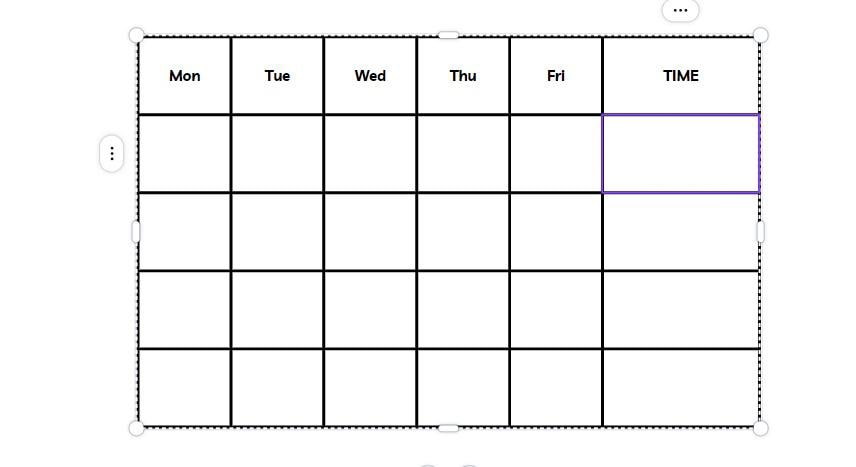
If you need to delete a row, hover over to the side of the row until the Three Dots pop up. Click on the Three Dots to open an Options Menu. Click on Delete Row to delete the row. You can do this same technique to delete columns as well.

How To Customize A Table In Canva
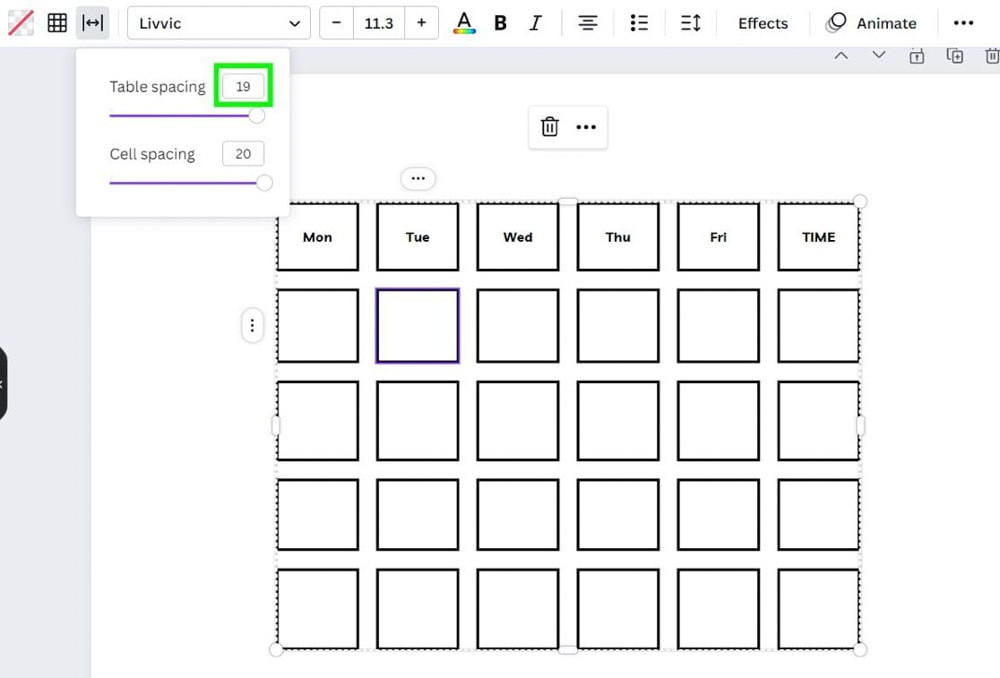
– Adjust The Table Spacing
You can change the spacing between each cell by clicking the Table Spacing button in the Options Bar. Adjust the spacing between your cells by dragging the Table Spacing Slider left or right.
– Change The Size Of Rows And Columns
To change the size of rows or columns, click and hold one handle around the table and drag it away from the table to extend the row or column or inward to reduce the size. You can also hover over any line within the table and drag it to adjust the middle rows and columns.
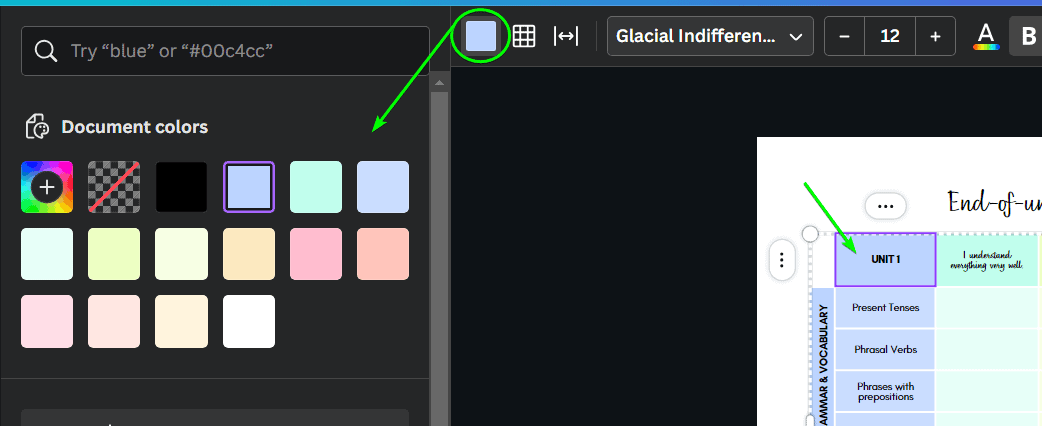
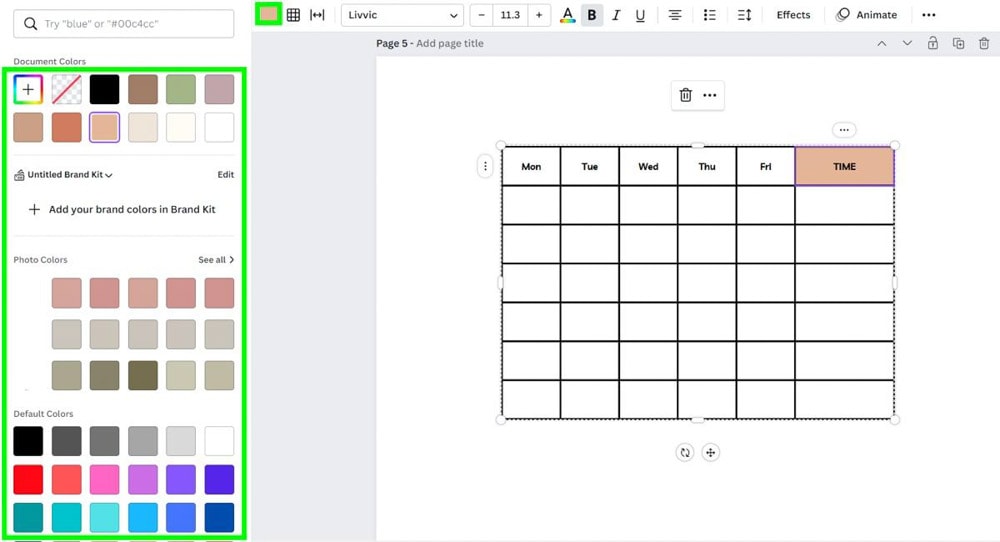
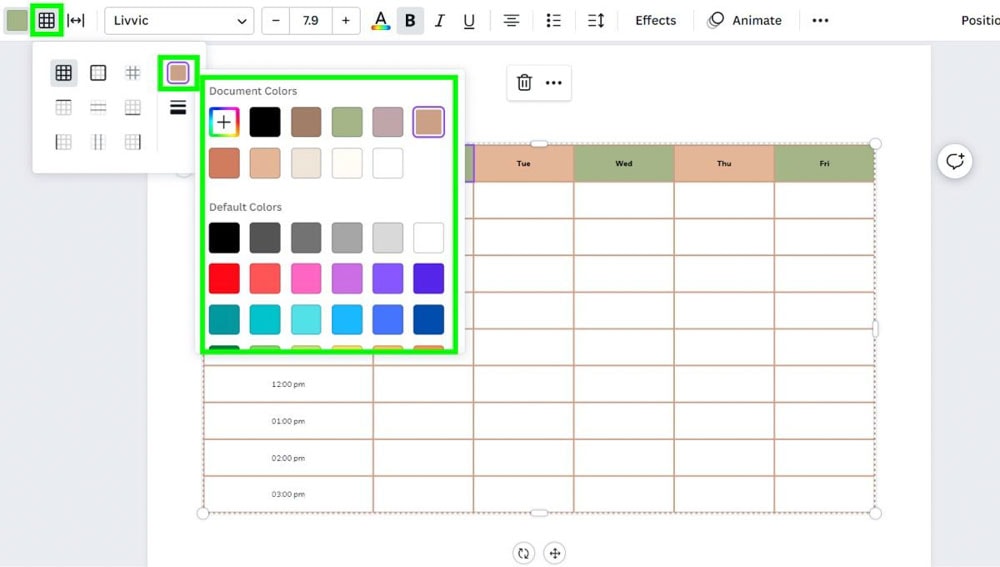
– Change Table Cell Colors In Canva
To change the color of all the cells, drag your mouse over your entire table to select it, then, click the Color button and choose the color you need for your project.
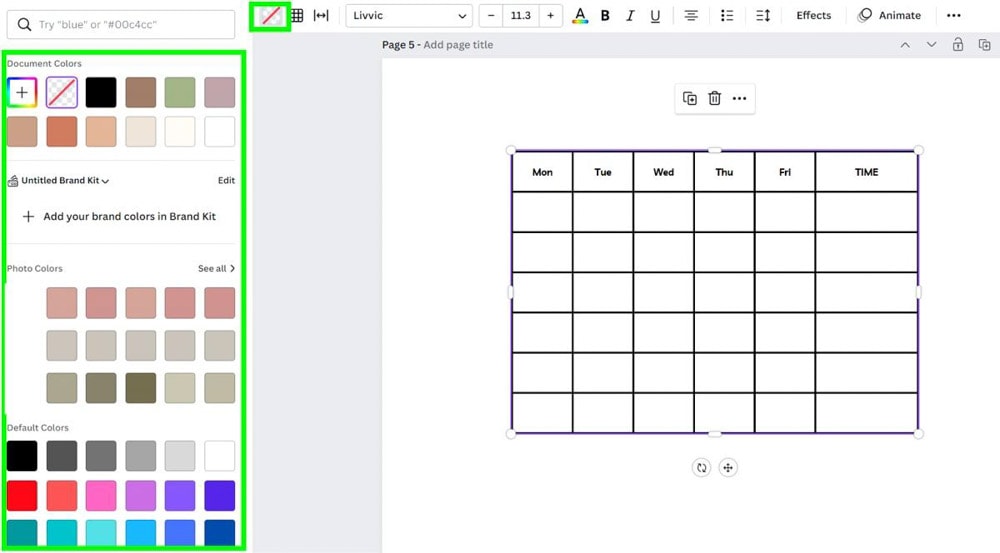
If you need to change the color of independent cells, click inside the cell you want to change to select it, then click on the Color button to change the color to whatever fits your project.
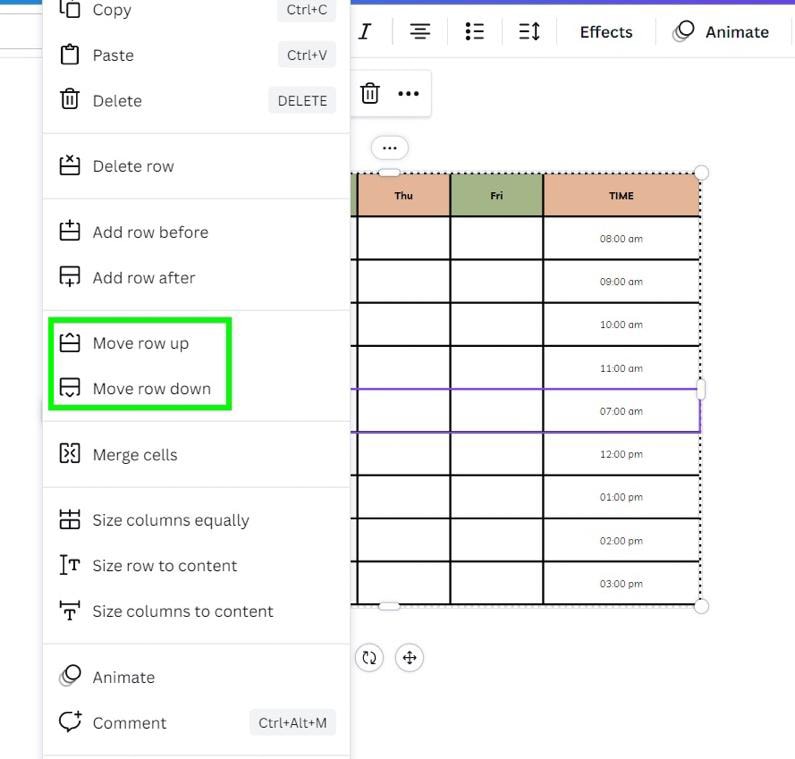
– Move Rows Within A Canva Table
To do this, hover your mouse to the left side of the row that you need to move and click on the Three Dots to open the Options Menu. Then, select Move Row Up or Move Row Down.
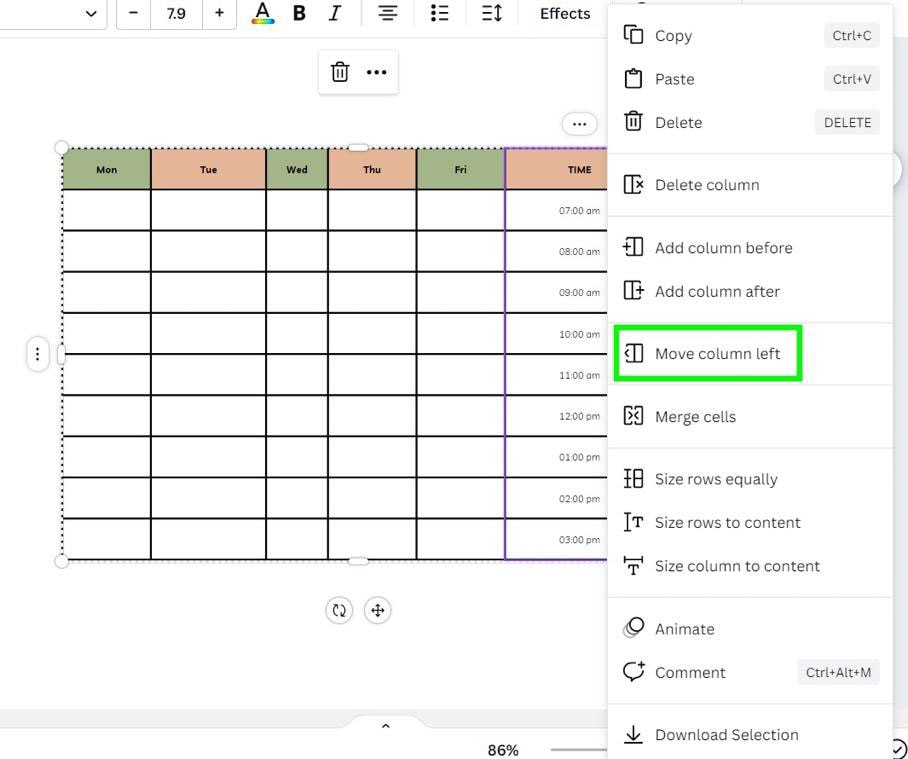
– Move Columns Within A Canva Table
To move a column within your table, hover your mouse at the top of your target column and cick on the Three Dots. Click on Move Column Left or Move Column Right to move your column where it needs to be.
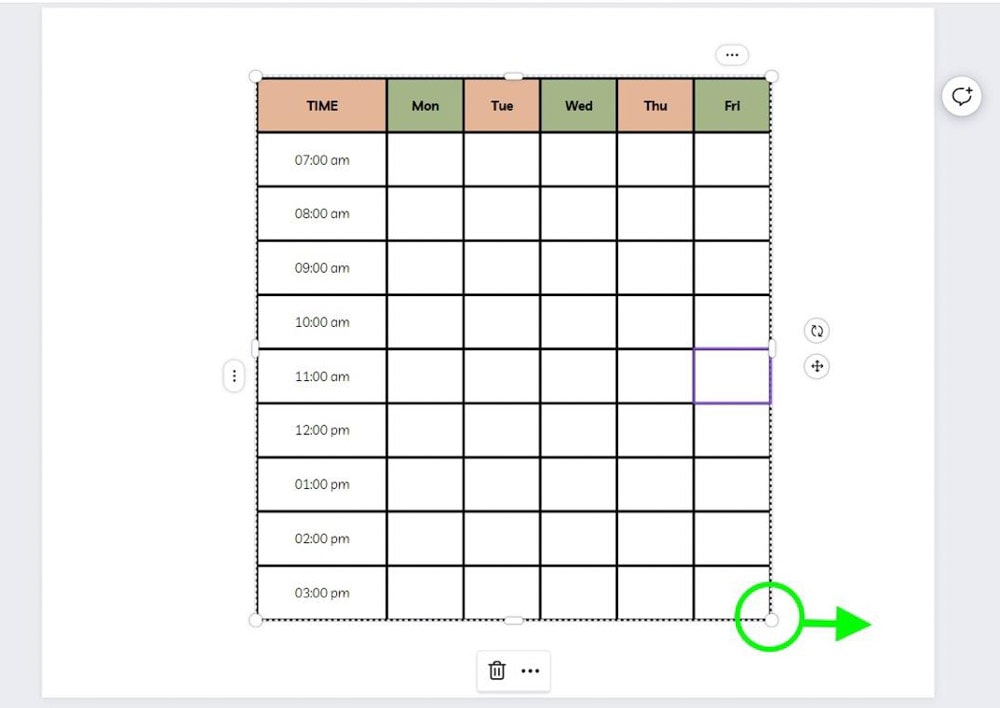
– Change The Size Of Your Table
To lengthen or shorten the entire table, click on your table to bring up the corner handles, then click and hold on one of those handles and drag outward to increase the size or inward to decrease it.
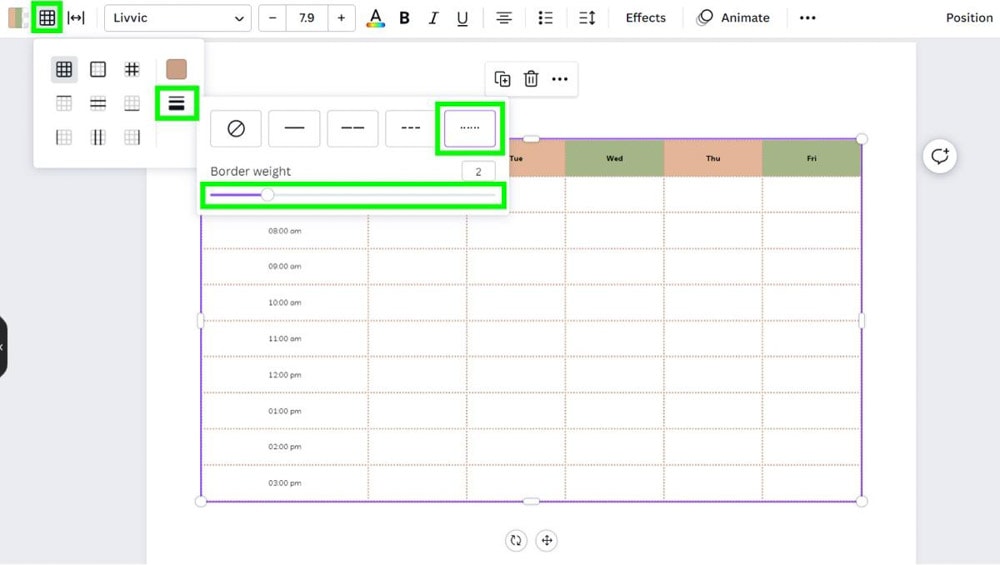
– Change The Color Of The Lines Of Your Table
To change the color of the lines of your entire table, first select it by dragging your mouse over the whole table. With your table selected, click on the Border button and the Color Picker. Pick the color that best fits your design.
– Change The Border Style Of Your Table
Select your table, then, click the Border button and the Border Style Button. From here, you can turn the straight lines of your table into two different dashed options or turn your table into dotted lines. You can also change the weight of your dashed or dotted lines with the Border Weight Slider.
You can also add extra text, lines, and graphics to customize your table and create a suitable design.
- 100+ million premium stock photos, videos, audio, and graphics
- 610,000+ premium and free templates with new designs added daily
- Up to 100 Brand Kits to establish your brand's identity online
- Remove image backgrounds instantly with Background Remover
- Resize designs without quality loss with Magic Resize
- Schedule social media content to 8 platforms
- 1TB of cloud storage
- 24/7 customer support


