
Whether you are designing a document for work or an eBook, knowing how to add page numbers in Canva is essential for a seamless workflow. The process used to be tedious, but now, for Canva Pro users, it’s a breeze.
Here are the two easiest ways to add page numbers, including the automated method for Pro users and a slightly longer method for the Canva Free users.
Method 1: How To Add Page Numbers In Canva Using The Bulk Create App
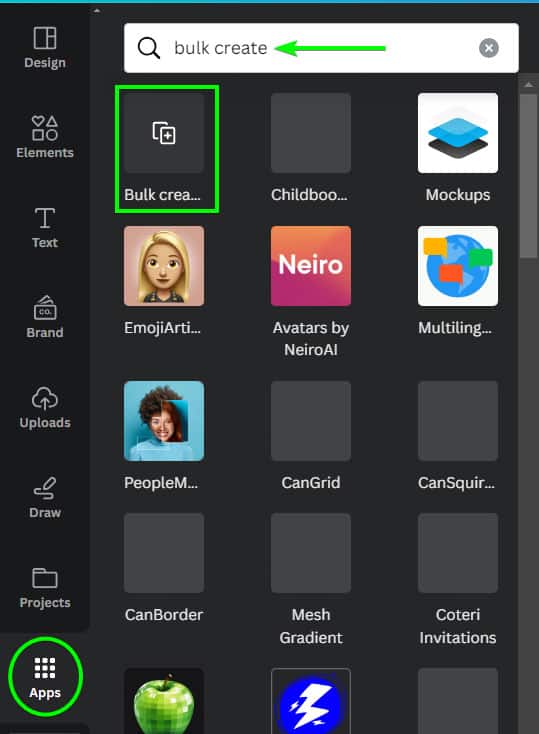
Step 1: Go To Apps And Open The Bulk Create App
First, if you are a Canva Pro user, open the Apps tab and search for Bulk Create in the search bar at the top. Click to open the Bulk Create app when the search results appear.
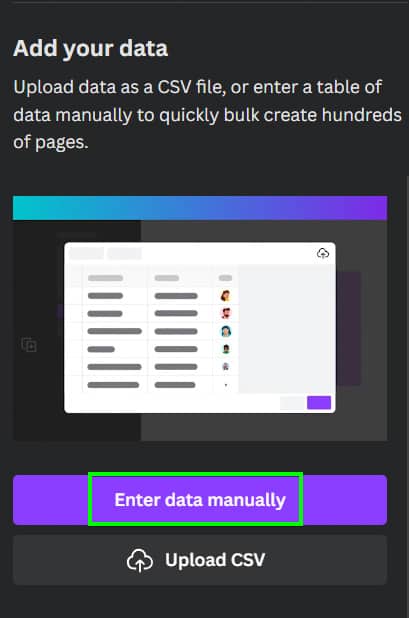
Step 2: Select Enter Data Manually
In the Bulk Create app, you can choose to enter your data manually or upload a CVS file. For adding numbers, select Enter Data Manually.
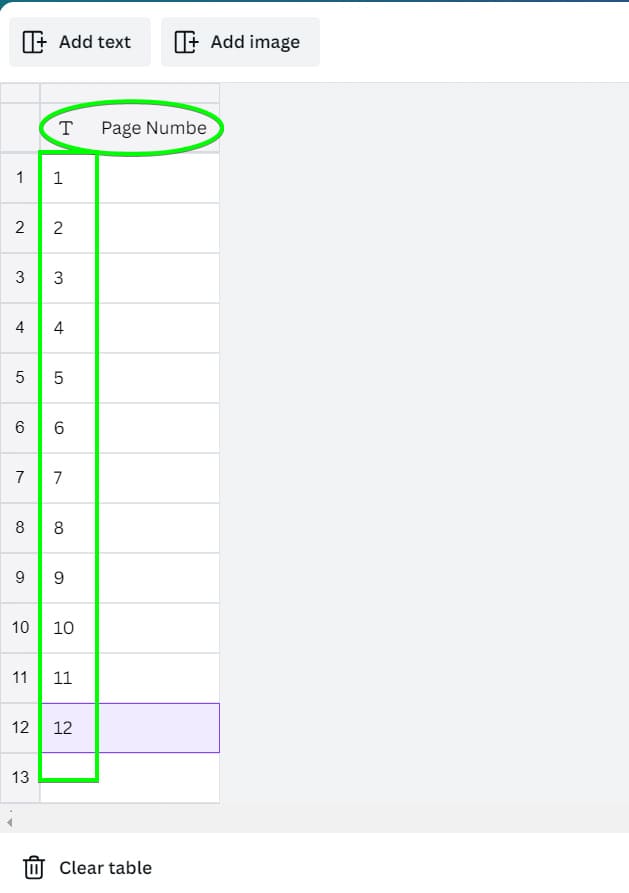
Step 3: Add Your Numbers To The Table
You will now see a table in the app. First, clear the table by clicking on Clear Table at the bottom. Next, name the column “Page Numbers”, then type in the page numbers you want in each cell in the column. Click Done when you are finished.
Note: If you have hundreds of page numbers to add, use ChatGPT or Microsoft Excel to quickly generate a table of page numbers that you can paste into the app.
Step 4: Add The First Number, Open The Context Menu, And Select Connect Data
You can now open your design and add the first-page number. Remember to design and format the page number as you’d like. The rest of the page numbers will follow this format.
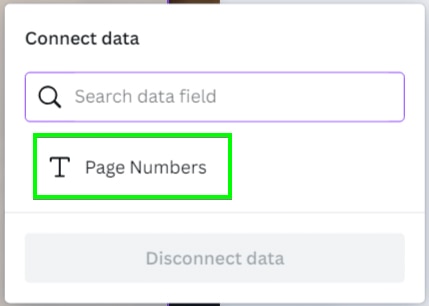
Once your first number is on the page, select it, click the three dots, and select Connect Data.


Then, select the name of the data you created, in this case, “Page Numbers”.
In the side panel, you will see the Bulk Create app settings. Click on Continue at the bottom. Then, you can select which data you want connected. Click on Generate [#] Designs, depending on the number of page numbers you created.

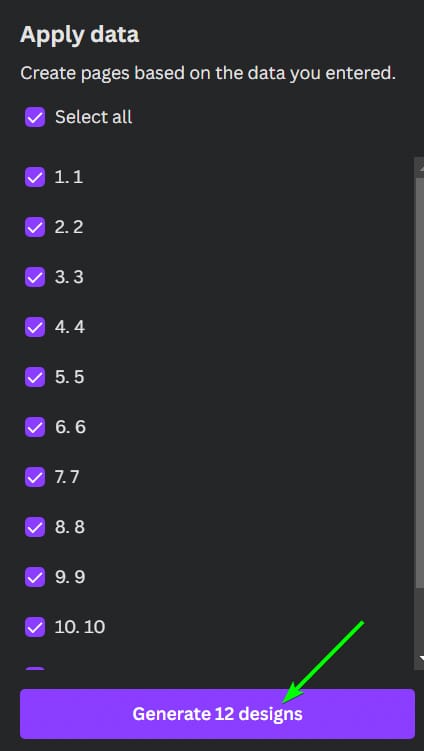
Your design will open up in a new tab with the page duplicated with as many pages as needed, each page will have a page number in the same position.

Method 2: How To Add Page Numbers In Canva Manually
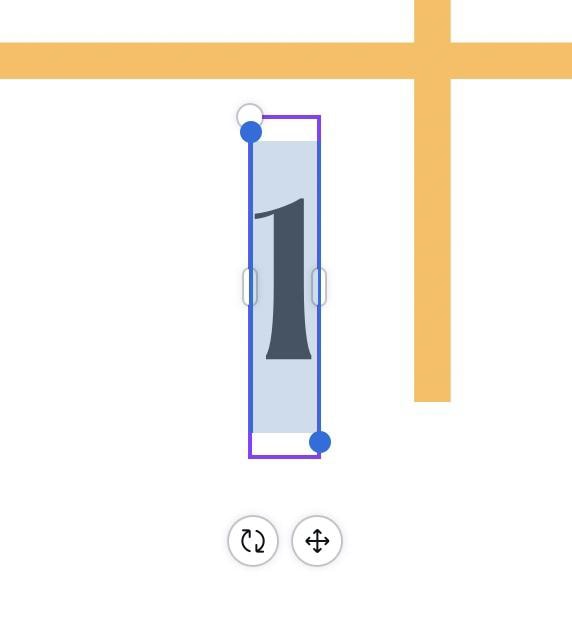
Step 1: Add Your First Page Number Using A Text Box
Open the Text Tab in the Side Menu and choose Add A Little Bit Of Body Text. A text box will appear in the middle of the page. Position it to about where you want your page number. Once you have your text box in place, type your first number.
After you type your first number, you can adjust the size of the number with the Plus and Minus Buttons in the Top Menu. If you want to change the font, you can find that option under the Font Drop Down Menu.

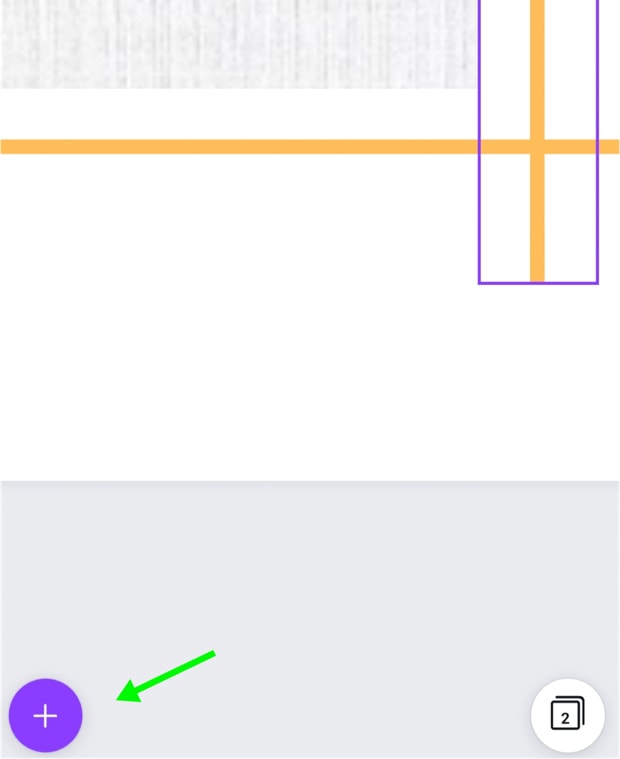
Step 2: Duplicate The Page Using The Duplicate Page Icon
To duplicate the page, click on the Duplicate Page Button. The page number on the new page will be in the exact location of the previous page, so you won’t need to worry about inconsistent positioning.
Then, double-click the page number on the new page and type the next number.

Step 3: Continue Duplicating Pages And Changing The Numbers
Then, duplicate the second page and change the page number to the next number. Repeat this process for the duration of your project.

How To Add Page Numbers In Canva Mobile
Step 1: Add The First Number Using A Text Box
At the bottom of your screen, tap the Plus Button. Tap on the Text Tab and select the size of your text.

Now, simply type in your first number.

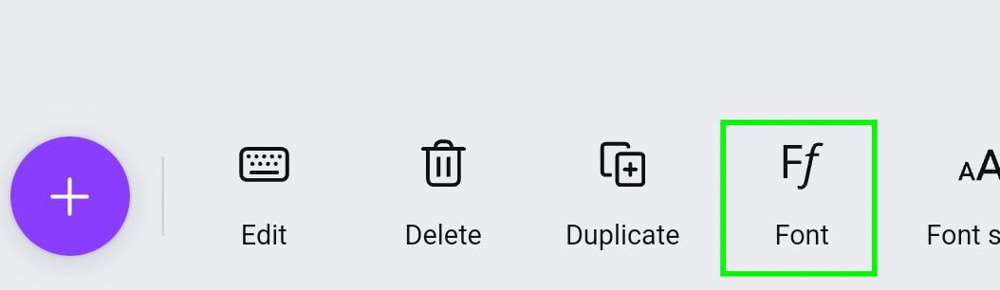
If you would like to change your font, scroll to the Font option in the Bottom Menu. You can also change the Font Size and Color in the same Bottom Menu.
Step 2: Duplicate The Page Using The Icon At The Bottom
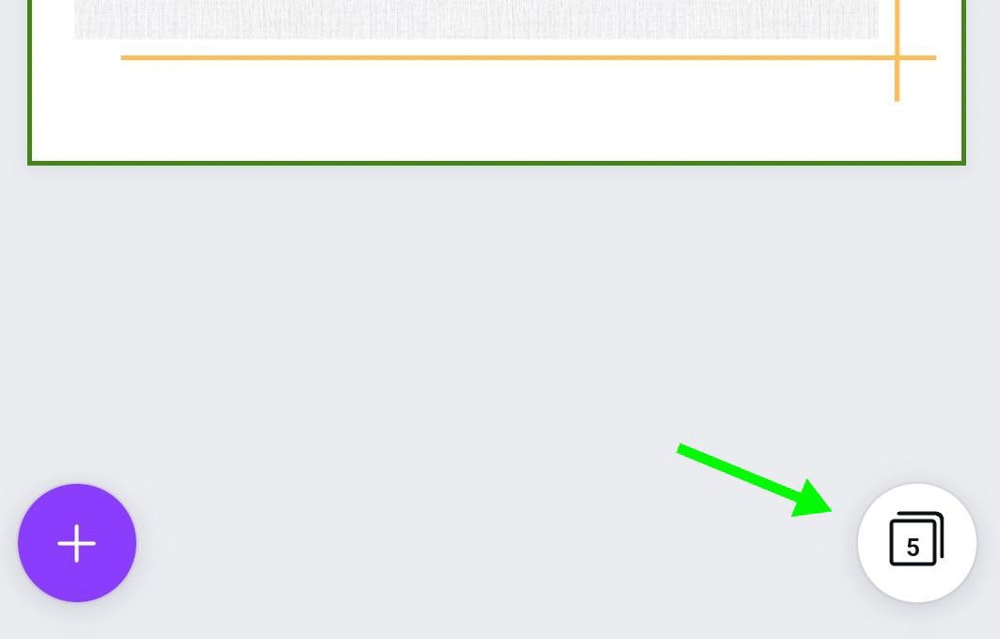
To duplicate pages with the mobile version of Canva, tap the Pages Button in the right corner of the screen.
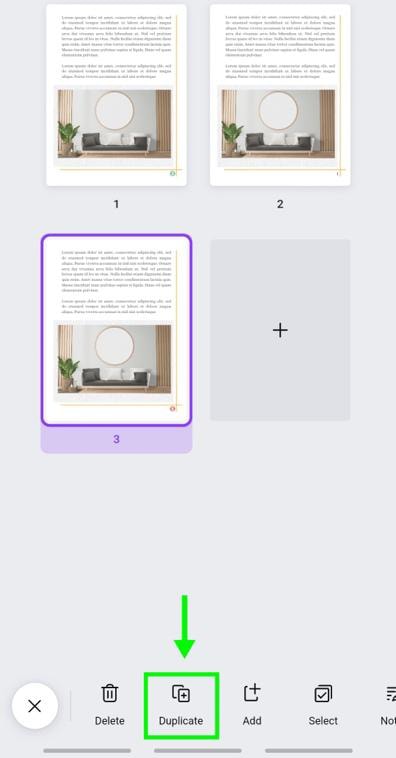
Then, select the page that you would like to duplicate and tap the Duplicate Button.
Step 3: Add New Numbers On Each Duplicated Page
To add a new number with a text layer after duplicating the page, simply tap inside the text of the previous number and type in the next number. Repeat this process for the number of pages needed.