

Whether you’re taking pictures of your friends or hiring a model, you’ll need to use the right camera settings to get professional-looking portraits. With so many incredible portrait photographers sharing images online, it’s easy to start feeling like they have a secret trick up their sleeves that you don’t. Fortunately, that’s not that case! Anybody can capture amazing portrait photos; you just need to remember a few simple techniques and camera settings. In this post, you’ll begin to better understand the best camera settings for portrait photography and how you can implement them into your photos.
The Best Camera Settings For Portraits Are:
- Mode: Manual Mode (M)
- Shutter Speed: 1/100 or faster
- Aperture: F/1.8 – F/4
- ISO: 100
- Focus: Auto (AF)
- Focus Type: Continuous/Servo
- White Balance: AWB
- Drive Mode: Single Shot
- File Type: RAW
With this framework in mind, let’s dive deeper into the importance of certain key camera settings!
How To Pick The Right Camera Settings
Portrait photography is one genre that heavily relies on the use of proper camera settings. Whether you’re more experienced or a complete beginner, these camera settings are simple to remember. It all comes down to the three pillars of exposure called shutter speed, aperture, and ISO. Although I’ve covered the value of each of these settings in this post on how to teach yourself photography, let’s go through each one in relation to portraits.
The Best Shutter Speed For Portraits

Shutter speed of one of the most important camera settings that makes sure your subject stays sharp. Especially if you’re giving a model an action like walking or turning their head, it’s important you capture this movement properly. With a faster shutter speed, you can ensure that your subject stays sharp. A shutter speed of 1/100 or faster is a great place to begin working from.
If you’re new to this camera setting, shutter speed controls how long light can expose on your sensor and how motion is captured. The shutter is like a small door that opens and closes in front of your sensor. When it’s open, light can land on your sensor to record an image. The longer the shutter stays open, the more light can land on the sensor. That’s why when you use a slower shutter speed; you get a brighter image.
Now the opposite happens with a faster shutter speed. Since the shutter is open for a shorter amount of time, light doesn’t have as much time to expose on the sensor. That means you’ll end up with a darker exposure.
Pretty simple right?
Where things start to change is when there’s motion in your photo. If you’re taking portraits of someone who’s flowing through different poses or doing an activity, you need to make sure they’re sharp. While adjusting your camera settings, you might use a slower shutter speed to brighten your photo. The problem is, with a slower shutter speed, movement can become blurred.
For example, if you were to use a shutter speed of 1/60 of someone quickly turning their head, their face would be blurred. Since they moved positions before the shutter closed, any moving parts become a blurry streak. Now, this isn’t to say that your model needs to always stay perfectly still. It just means you need to use a faster shutter speed!
With a shutter speed of 1/100 of a second or faster, this is more than enough to capture the movements of your subject. That way, you have the flexibility to give your subject actions to try or reposition your camera as you shoot. There’s no worry about accidentally getting motion blur in your photo where you don’t want it! If you want to have a sharp photo, choosing the right shutter speed for portraits will be essential.
Learn More: How To Use Shutter Speed For Better Photos
The Best Aperture For Portraits
Aperture is what portrait photography is all about. By controlling this setting, you can control the background blur in your photos. As tempting as it might be, it’s not always the best idea to use the widest aperture possible for portraiture. For the best results, try to stay in the range of F/1.8 to F/4, depending on your lens capabilities. Now let’s discuss aperture more in-depth with its unique role in portrait photography settings.
– The Aperture Setting Explained
The aperture is a donut-shaped hole inside your lens that can change size to allow more or less light into your camera. With a smaller aperture (smaller hole) like F/22, there’s only a small area for light to pass through. Similar to how a dam controls the flow of water, your aperture controls how much light can reach your sensor. By adjusting your aperture size to be bigger or smaller, you can easily control your image exposure.
As you change the size of your aperture, you’re also changing the depth of field. In short, this is how much of your photo can be in focus at once. With a wide aperture, you have a shallow depth of field. This means less is in focus at once. With a smaller aperture, you have a larger depth of field, allowing more to be in focus. For portrait photography, background blur has become a staple in the genre. By blurring the background, it makes the subject stand out while creating a more professional looking image.
– Aperture And Focal Lengths
When you first start experimenting with the aperture setting, you might be tempted to use the widest aperture possible. Perhaps you have a fast F/1.4 lens that you shoot wide open with. The problem is, with ultra-wide apertures, your depth of field can become too shallow. With an aperture this wide, it’s possible for certain parts of your models face to be in focus while others are blurry. Ultimately it’s your choice whether this look is appealing to you or not, but from a professional sense, you want your subject to be sharp. Especially when printing your photos, these differences in focus on a model’s face can be pretty distracting.
To give your focus a fighting chance, try to stick in the range of F/1.8 to F/4. With these aperture settings, you can still get fantastic looking background blur without worrying about whether your models face is in full focus.
For the best results, use wider apertures like F/1.8 or F/2.8 when you’re shooting slightly wider, like 35mm, for example. Since you don’t have as much lens compression, it will be much easier to keep your entire subject in focus.
When you’re shooting portraits with a longer lens like 85mm, opt for an aperture slightly smaller like F/4. With a longer lens, you’ll end up with more background blur from the lens compression. Since you don’t need to use as wide of an aperture with a longer lens, stopping down will create a blurred background while keeping your subject in full focus.
Learn More: The Ultimate Guide To Aperture In Photography
The Best ISO For Portraits

The last exposure setting that’s crucial for portrait photography is ISO. This camera setting is relatively simple compared to aperture and shutter speed. Rather than being a mechanical part of your camera, the ISO setting electronically controls how sensitive your camera sensor is to light. With more sensitivity comes a brighter photo.
The ISO setting is perfect for filling in the gaps between your shutter speed and aperture settings. Rather than having to adjust these settings, you can alter the ISO to balance out the exposure. The problem is, with a higher ISO setting comes a more grainy photo.
Grain looks like a static that appears in your image at higher ISO’s. Although the amount of grain will vary between camera models, it still can make subtle details in your photos hard to distinguish. Especially with portrait photography, it’s always best to keep your ISO setting as low as possible. Whenever taking portraits, start with ISO 100 and only increase it if necessary. Unfortunately, you won’t always be able to keep a low ISO, especially when shooting in low light.
Now, this isn’t to say that by increasing your ISO, your image quality suddenly plummets. The amount of grain slowly builds as you increase the setting, so it’s good to be aware of it. If you need to increase your ISO, try to keep it under ISO1000 as a general rule of thumb. Most entry-level cameras still perform decently at this point, and the grain won’t be too noticeable.
With portrait photography, you want to make the model look as good as possible. With less grain in your photo, it’s going to make their skin look nicer and make your entire image look more clear.
Learn More: How To Use ISO In Photography
What Camera Mode Should You Take Portraits With?
With a solid understanding of your exposure settings and their role in portrait photography, the next question becomes which camera mode is best? Depending on your comfort level, there are two fantastic camera modes for portraits. The first one is called Aperture Priority, while the other is called Manual Mode.
– Aperture Priority (A or Av)
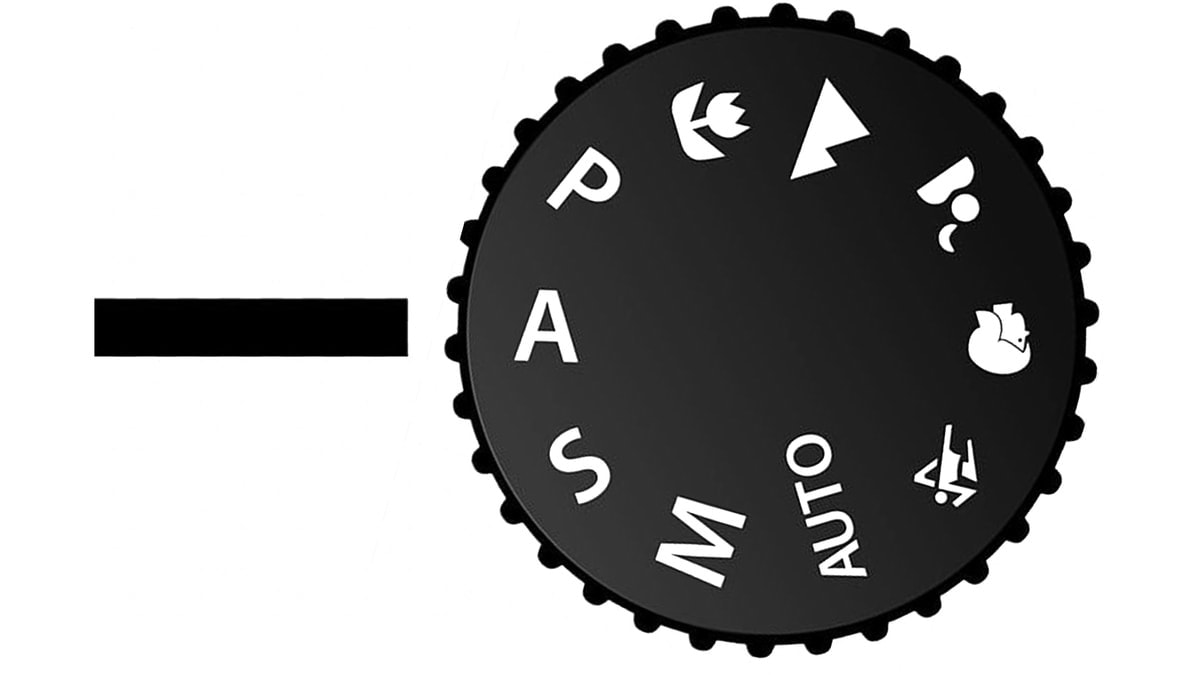
Aperture priority is perfect for beginner to intermediate-level portrait photographers who want a professional image without all the work. This camera mode is semi-automatic, which means it still chooses certain settings automatically while still giving you some manual control. For Aperture Priority, you get manual control over the aperture setting, while your camera automatically takes care of the rest.
For portrait photography, this mode makes life easy. Rather than balancing all your exposure settings, you can just pick the aperture you want and start shooting. Especially if you’re all about getting a nice background blur in your photo, this is the easiest way to do it. By choosing a wider aperture like F/2.8, for example, you’ll know you will capture background blur without the hassle of dealing with other settings.
Now it’s worth noting that this camera mode isn’t reserved for beginner level photographers. These semi-automatic camera modes are constantly used by professional shooters who need to work faster. Since your other camera settings are taken care of by your camera, it’s a lot easier to get lots of great shots without as much thought. All you need to do is focus on the aperture setting and start snapping away!
– Manual Mode (M)
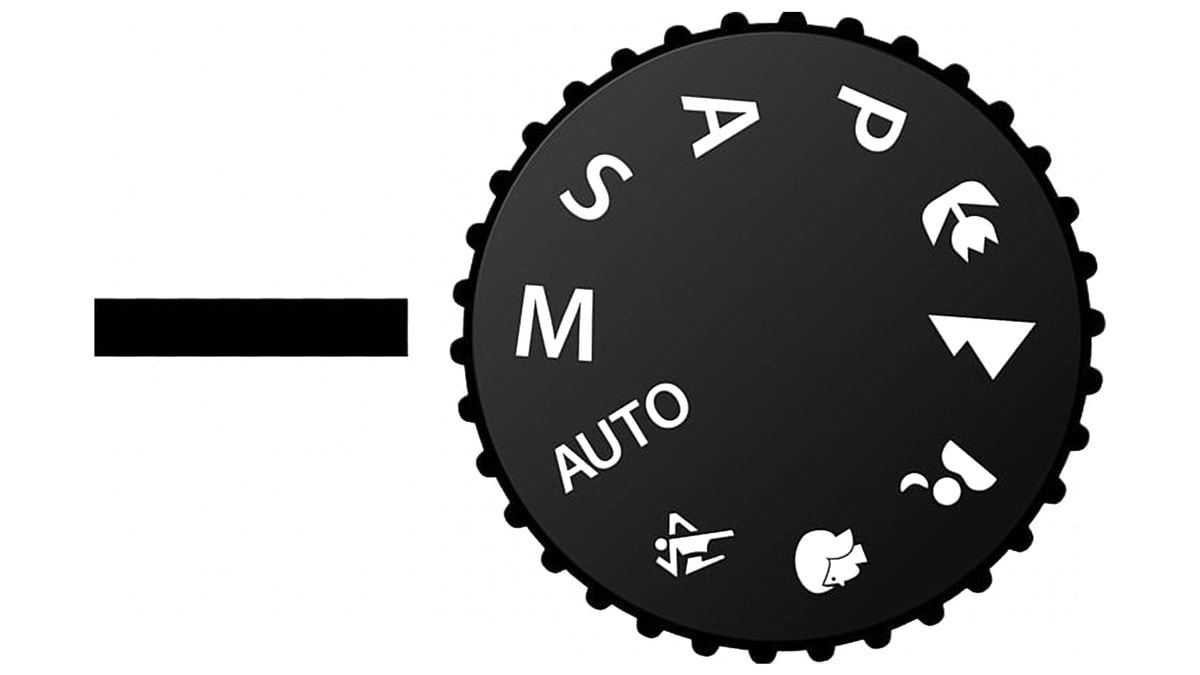
The other camera mode for portraits is called Manual Mode. In this mode, all the automatic functions are off, and everything is left up to you. From your shutter speed, aperture, ISO, and other settings, you’ll need to manually choose which ones to use. As a beginner, this camera mode can feel overwhelming, but with some practice, it’s the best way to take control of your photography.
With Manual Mode, you can guarantee your photo looks exactly as you planned. Since you’re in charge of everything, your camera won’t crank the ISO setting or make your shutter speed too slow for portraits. In terms of translating your creative vision into your images, Manual Mode is the best way to do it. Rather than your camera guessing how you want your photo to look, Manual Mode lets you capture a photo exactly as intended.
If you’re new to manual mode or have felt overwhelmed by it in the past, be sure to check out my photography ebook called Goodbye Automatic. This book breaks down a simple workflow you can use to choose the perfect camera settings, no matter the situation!
The Best White Balance For Portrait Photography
As I went over in my guide to white balance for photographers, this camera setting plays a crucial role in the “feel” of your pictures. By controlling how warm or cool an image looks, you can completely transform how a portrait looks. Although it is a great tool to use creatively, it’s an important way to ensure your subject’s skin tones look natural. The last thing you want is to have your model look like a ghost because your white balance was off!
The correct white balance will differ depending on the lighting conditions you’re in. To give you a practical example, consider the light color outside as opposed to the light coming from a light bulb in your house. By comparing the two, you can see how light outside appears more white while your light bulb appears more yellow. By adjusting your white balance, you can help your camera see colors more naturally.
Luckily Auto White Balance (AWB) does a great job on any modern digital camera. This mode lets your camera self adjust to different colors of light to make your photos look as natural as possible. In terms of portrait photography, this is an easy way to capture natural-looking skin tones.
To learn more about how to use white balance as a creative tool, check out this post.
What Drive Mode Should You Use?
The drive mode on your camera is how a photo is taken when you hit the capture button. With options to have a shutter delay, capture a burst of images, or take one photo at a time, drive modes are an extremely helpful camera setting. For portrait photography, the best drive mode to use is Single-Shot, which will take one photo each time you press the capture button.
Many photographers will use burst mode when taking portraits to ensure they never miss a shot. With burst, you can hold down the button to capture a rapid succession of photos at once. Although this can be useful to capture more options, it’s an easy way to intimidate your subject. Especially when you’re working with regular people shooting an engagement or family portrait session, the sound of a rattling shutter can be uncomfortable. To help put your subjects at ease, it’s better to use Single-Shot and only capture photos when the time is right.
Capturing great portrait photos isn’t just about the perfect camera settings; it’s about capturing the best version of your subjects. By making people feel more comfortable in front of the lens, they’re more likely to appear more naturally in photos. By avoiding burst mode and using Singe-Shot, you can help put your subjects at ease.
Do Your Camera Settings Change When Shooting Full Body Portraits?
Portraits don’t necessarily have to be of someone’s face. They can also capture someone’s entire body or even a group of people. So how might your camera settings change when you’re shooting full body portraits?
For the most part, the camera settings we’ve gone over will still apply no matter how much of your subject is in the frame. Just remember that with a wider angle, you won’t have as much background blur, even with a wider aperture. If you want a heavily blurred background with a full-body portrait, you’ll have to use a longer focal length.
The one difference comes down to the aperture you choose. Especially in group photos, using a smaller aperture like F/5.6 or F/8 will ensure that all your subjects are in focus. The last thing you want is for some people to look in focus while others are slightly blurry. By stopping down and giving yourself a wider depth of field, it gives you more to work with.
Besides having a slightly smaller aperture, your camera settings will remain the same no matter what angle you’re shooting.
How To Improve Your Portrait Photos
Now that you have a better understanding of the best camera settings for portraits let’s start talking about how to improve your photos. After all, even with perfect camera settings, you aren’t guaranteed a perfect picture. By implementing these ten tips below, you’ll have a much easier time leveling up your portrait images.
1. Remember Your Composition
In a nutshell, your composition is how everything in your frame is positioned. With good composition, you can make your photos look more appealing and draw your viewer’s attention. For portrait photography, composition plays a crucial role in how good your subject looks in the photo. By taking into account little changes such as the height of your camera, the angle of their body, or what background they’re placed against, you will transform your images.
There is a long list of different rules of composition, but I share some of the most important ones in this post. After actively thinking about and improving the composition of your portraits, you’ve got a surefire way to improve your photos.
2. Don’t Use Too Shallow Of A Depth Of Field
As we went over earlier, many beginner portrait photographers will open their aperture as wide as possible and start shooting. The problem is that with a very shallow depth of field, parts of your subject’s face may be out of focus. For example, one eye could be in focus while the other is totally blurry. This isn’t ideal to have when shooting portraits, so it’s important not to get carried away with aperture. By sticking to apertures like F/1.8, F/2.8, or F/4, you can still capture blurry backgrounds without losing focus of your subject. I always like to double-check as I’m taking photos to ensure the model’s entire face is in focus. That way, there are no surprises when you begin photo editing!
3. Be Aware Of The Light On Your Subjects Face
Light is an important part of photography, but especially so with portraits. The wrong angle of light can cast unflattering shadows or make certain facial features look larger than they actually are. I’m willing to bet that anyone you’re shooting doesn’t want that to happen! Before you even take a photo, take a look at the light around you and how it’s landing on your subject. Especially when you’re shooting outdoor portraits with natural lighting, you don’t have the luxury to move lights or adjust intensities. Instead, you have to work around it by positioning your subject accordingly. After some adjustments or location changes, you can find amazing lighting for portraits in any situation!
4. Use More Flattering Focal Lengths

The lens you use can completely change how someone looks in a photo. With a wider lens, you can distort parts of someone’s face or make them appear stretched in a photo. To make life easy, try to only shoot portraits at 35mm of tighter. That way, you can easily avoid any weird lens distortions that could ruin your portrait.
The most popular lens sizes for portrait photography are 50mm and 85mm since these focal lengths have a similar compression to your eyes. By capturing a more natural perspective (what our eyes see), your portrait is sure to be more flattering.
5. Shoot In RAW
Shooting in RAW is essential if you plan to edit your portraits. This file type is uncompressed and contains far more information than a JPEG file does. The advantage of this is that you can make more drastic photo adjustments without losing image quality. When you’re retouching skin or adjusting colors, this is a huge advantage you don’t want to pass up.
Photo editing is one of the best ways to add a unique look to your portraits without any technical in-camera tricks. To get the most out of your files, shooting in RAW will give you the most flexibility in post. With that said, only shoot in RAW if you intend to edit your photos. Otherwise, it will be an unnecessary waste of time trying to convert all your images in JPEG just so you can share them online. The only advantages to shooting in RAW are when you’re actually editing an image, not taking the photo.
To get started with photo editing, check out my guides on editing in Lightroom or Photoshop!
6. Make Your Subjects Feel Comfortable In Front Of The Lens
If you want to capture great portraits of people, you need to make them feel comfortable with you. Not everyone has experience in front of a camera, and many people can start to feel camera shy when the lens is pointed their way. To help put your subjects to ease and make them look as natural as possible, you need to make them feel comfortable from the moment the shoot begins.
One of the easiest ways to ease tension is to keep a conversation going with your subject. Before the shoot, talk to them and get to know them more. Share information about yourself but most importantly, find out something they’re interested in. This will only make it easier to come up with relevant conversation ideas to talk about between shots.
As for when the camera is out, try to do things that distract your subject from the pressure of your camera pointing at them. Say something that might make them laugh, compliment them on how they look, or even say how amazing the pictures look. Since most people’s biggest fear is looking “bad” on camera, that little bit of reassurance can go a long way. By building your relationship and helping your subject to feel more confident, you’re guaranteed to capture better portraits!
7. Don’t Be Afraid To Capture Candid Moments
When you first start shooting portraits, you might think that every image needs to be planned out and posed. This is not only extremely challenging to make look good but can be awkward for an untrained model. Rather than feeling pressured to take perfectly posed images, try your hand at shooting candid portraits. These types of portraits require you to just take pictures of your subjects being themselves. Whether that be parents playing with their kids, a couple enjoying a beautiful view, or a person breaking into genuine laughter, these all make great shots.
Candid portraits can be a bit more challenging since you never know when the perfect moment will strike. However, the payoff of capturing those authentic moments is always worthwhile. After all, people always look best when they’re just being themselves!
8. Use Autofocus
Rather than wasting time futzing around with manual focus, use autofocus to make life easier. When shooting portraits, use Continuous Focus/AF-C (Nikon, Sony) or AI-Servo (Canon). With this focus mode, your camera will track focus as you or your subject moves. This gives you a lot more flexibility to be more mobile while you shoot and go with the flow of things.
Since portrait photography is all about making your subject feel more comfortable, it’s best to spend as little time messing with your camera as possible. By constantly shooting and keeping the shoot moving along, there won’t be any awkward pauses while you play with your settings.
9. Choose The Right Background
The background you choose can make or break a portrait. In an ideal world, the background will suit the style and aesthetic of the person you’re shooting. Before you even meet up for a shoot, get to know who you’re about to photograph and understand their interest. Get to know what types of photos they like and what they want to get out of the portrait photos. This provides an easy place to begin when choosing a background for your portraits.
Ideally, the background you choose should match the purpose of the image with the subject’s character. For example, you might photograph a business headshot in front of a unique building to indicate professionalism and authority. On the other hand, you might photograph a family doing one of their favorite activities or visiting a place close to their hearts. These choices in location and background will make all the difference in the “feel” of your portraits.
10. Blur The Background To Make Your Subject Stand Out

Portrait photography should be all about the person you’re photographing. Whenever possible, you’ll want to limit the number of distractions that are leftover around your photo. One of the easiest ways to do this is with background blur. Like we discussed earlier, using a wide aperture will help to create a shallow depth of field and blur the background. Since only your subject is in focus, your eyes will be drawn to them. This is one of the easiest ways to make your portraits look more professional and help make your subject stand out in the photo.
Using these camera settings and portrait photography tips, you’re well on your way to improving your portraits. Just like any style of photography, portraits take time to learn but only get easier with practice. To help build your experience, start by reaching out to friends or family members, and ask to shoot portraits of them. After you have a few example photos to work with, try your hand at reaching out to models to photograph. Slowly you can build your portfolio of portraits, and you’ll have tons of people wanting to shoot with you regularly. Just have fun, keep your portrait sessions care-free, and enjoy the process. Soon enough, you’ll look back and won’t believe how much your portrait photography has improved!
Happy Shooting!
– Brendan 🙂
