
After importing your RAW photos into Lightroom, converting them into JPEG is a quick and painless process. There are many reasons why you would want to convert these files into JPEG, the main one being so you can actually upload and share your photos online! So how exactly can you get started in this RAW to JPEG conversion process?
To convert a RAW file to JPEG in Lightroom, select the RAW file in your Library and go to File > Export. In the File Settings, set the Image Format to JPEG and move the quality slider to 100 for the best export quality. Click Export to convert the RAW file to JPEG and save it to your computer.
See, how easy is that?
To give you a more in-depth view of this process, let’s break everything down step by step. Later on in this post, I’ll also share some helpful tips to improve and speed up your file exporting process!
How To Convert RAW To JPEG In Lightroom
1. Select Your Desired RAW File
Before you can convert anything into a different file type, you need to select it. You can select files in your filmstrip or the Library Module, depending on your style.
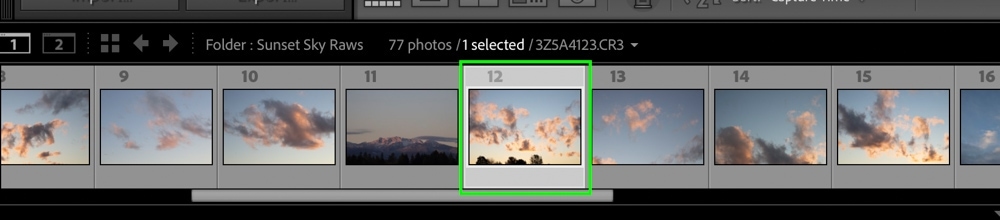
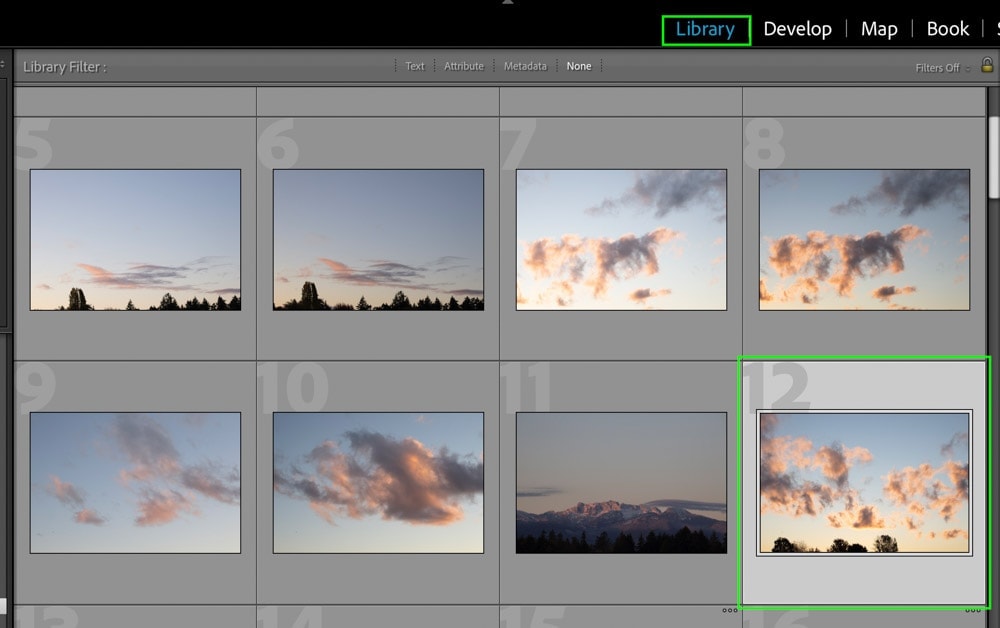
In this example, I will select a RAW File from the Library Module.
You can tell that an image is selected based on the highlight around it. If you want to select multiple files at once, hold the Command or Control key and click between your desired images.
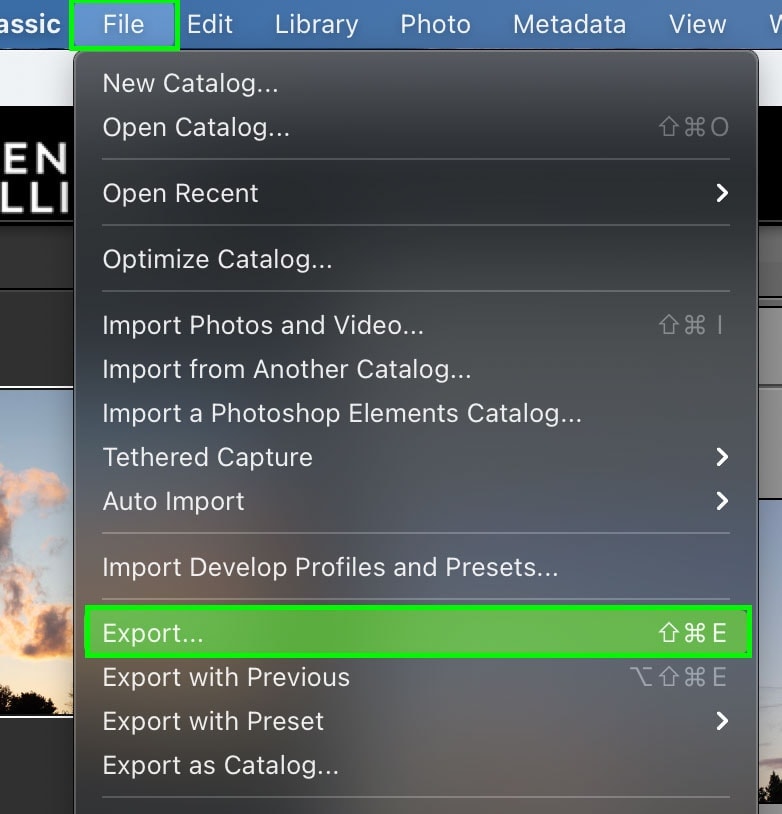
2. Go To File > Export
To convert a RAW file to JPEG, you actually have to export your image from Lightroom. There is no way to convert your files entirely inside the program. Instead, you need to export your file to a new location where it will be converted.
Going up to your menu bar, select File > Export to bring up the export dialogue box.
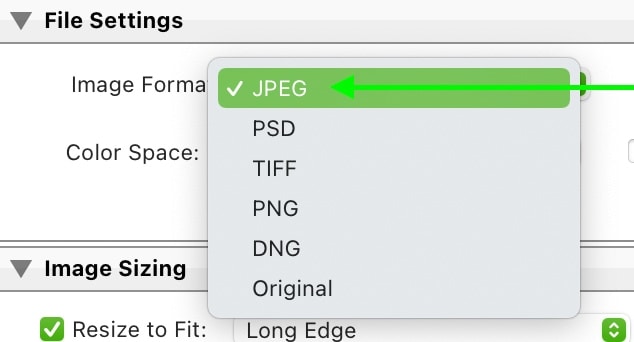
3. Set The Image Format To JPEG
Your starting image format will be the same file type that’s already imported into Lightroom. In this case, the file is a RAW file; therefore, I will be converting RAW into JPEG. This same process would apply for TIFF, DNG, PSD, and more.
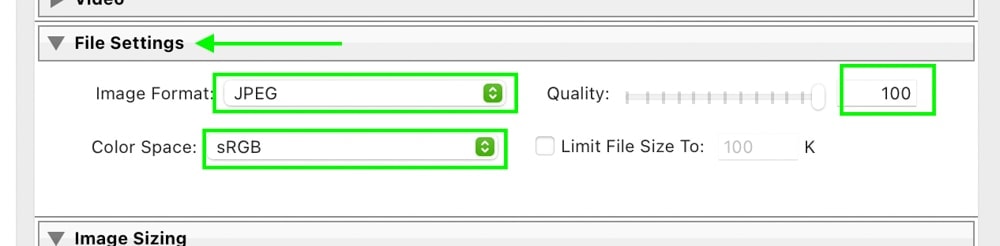
In the many panels of the export window, look for the File Settings panel.
Inside this panel, you’ll notice an Image Format option. Clicking on the drop-down arrow, select JPEG from the list of file types.
Now make sure your quality slider is set to 100 for the best export quality.
As for the Color Space option, make sure this is set to sRGB (Standard Red Green Blue). This color space is the most widely recognized and will ensure your photo’s colors look the same across multiple displays.
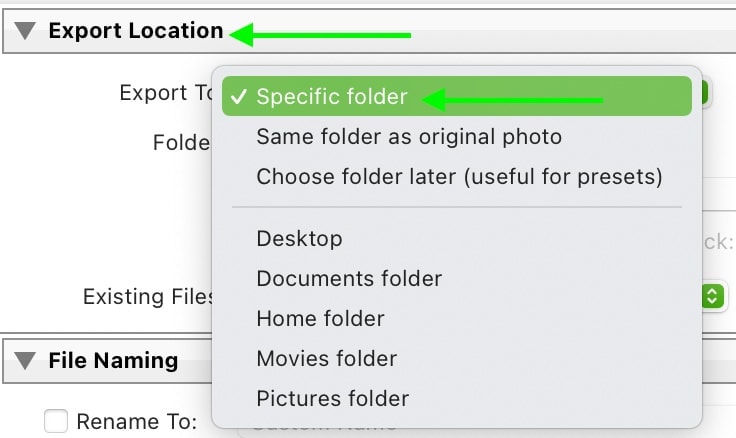
4. Choose An Export Destination
Now that your file settings are in order, you need to tell Lightroom where you want your converted JPEG file to go. At the top of the export window, find the Export Location panel.
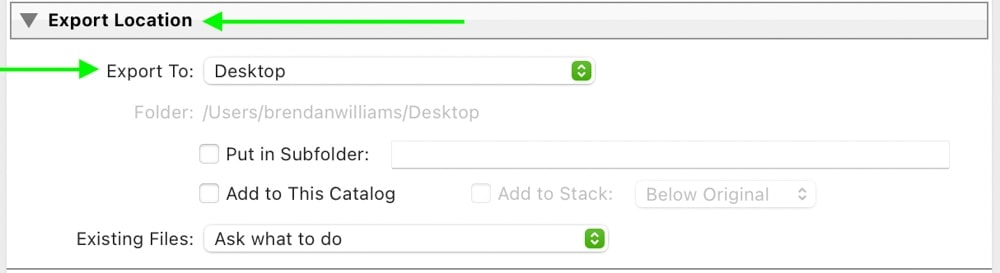
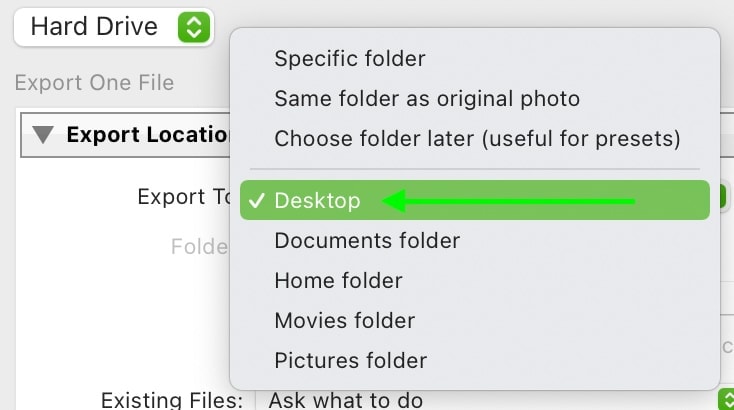
In the Export To option, click the drop-down menu and pick between the different options. In this case, I will make life easy and select Desktop as my export location.
Now you can decide whether you want your file to export into a subfolder or just appear as a file outside of a folder. To keep me organized, I will save my photo into a subfolder by checking off the “Put In Subfolder” option.
Then you can give your subfolder a name by typing it in the provided text box.
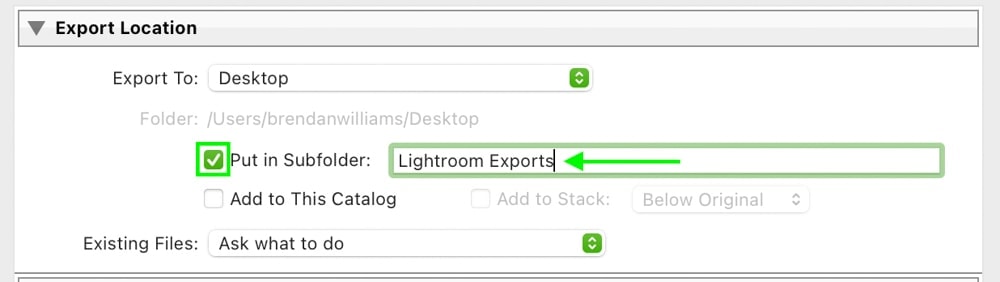
Now you have an export location set and a subfolder created specifically for your converted JPEG file.
5. Click Export
With your export settings in order, click the Export button to convert your RAW file to JPEG.
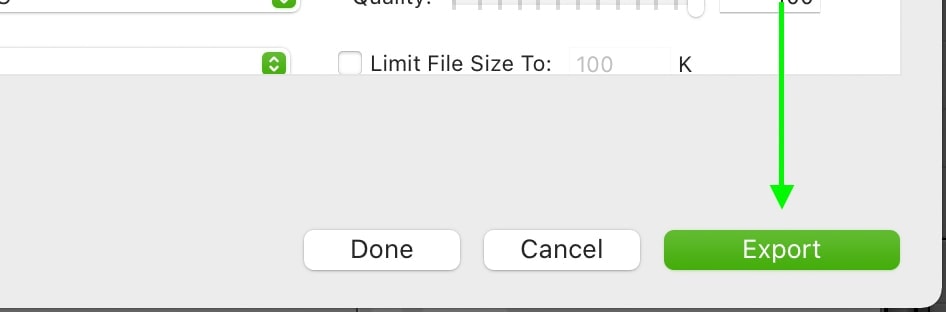
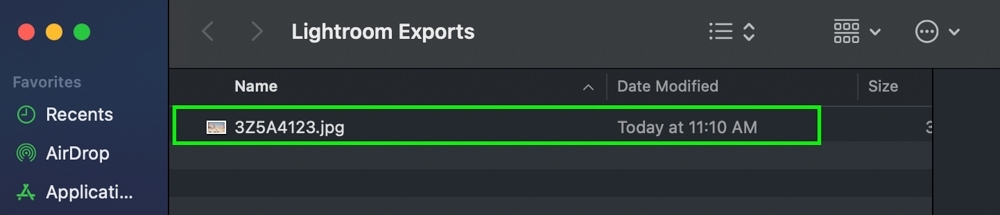
Once the process is complete, you will find your converted file saved in your specified export destination!
As you probably noticed, there are a lot of other export options available during this process. Since we are focusing on converting RAW to JPEG, I wanted to share only the essentials to keep things as clear as possible. If you want a complete guide for the best export settings in Lightroom, check out this post.
Does Converting RAW To JPEG Lose Quality?
After converting a RAW file to JPEG, you will not notice any visible quality loss in your photos. RAW photos are 16-bit, while JPEG is an 8-bit file making it a more compressed version of your image. The JPEG format will retain the sharpness and detail that you started with but in a smaller file.
The caveat to this is that you cannot continually re-export a JPEG file or edit a JPEG file without sustaining quality loss. With an 8-bit image, there is simply less information to work with. While photo editing, this means you cannot adjust the exposure or colors without noticing issues such as banding or colors breaking up.
This is simply because your editing pushes the JPEG file information further than it can handle, causing it to lose quality.
That’s why you should only edit RAW files when possible while saving your JPEGs as shareable exports to upload online. RAW files have more color information to display, allowing you to easily adjust them without any quality loss. Once your files are edited, exporting them to JPEG will maintain their initial quality but in a smaller file size.
For example, a RAW file is option 30MB+ per photo, while a JPEG export of that same file is around 12MB a photo. You can start to see why JPEGs are much easier to upload and share.

What’s The Fastest Way To Convert RAW To JPEG?
The fastest way to convert RAW to JPEG in Lightroom is with an export preset. First set the File Format to JPEG, the quality slider to 100, then set a location for future exports. In the Preset panel, click Add to create an export preset. Now click on the preset to convert RAW to JPEG in the future.
Let’s break this down a bit more in-depth, but first, what exactly is an Export Preset?
An export preset allows you to save certain export settings to later access in a single click. In the case of converting RAW to JPEG, you can create an export preset that will choose all the proper settings for you. That way, you don’t need to go through all of the steps individually, as you learned earlier in this post.
To create an export preset, first, open the export panel by going to File > Export.
Now you need to create the settings that you want to save in your export preset. Since these same settings will be applied to your future exports, it’s worthwhile to keep your export location as general as possible.
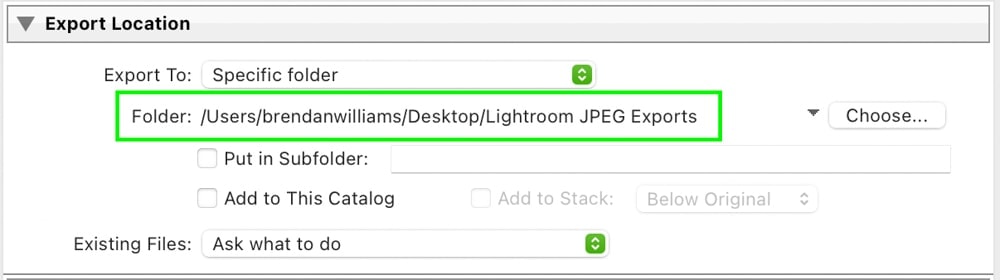
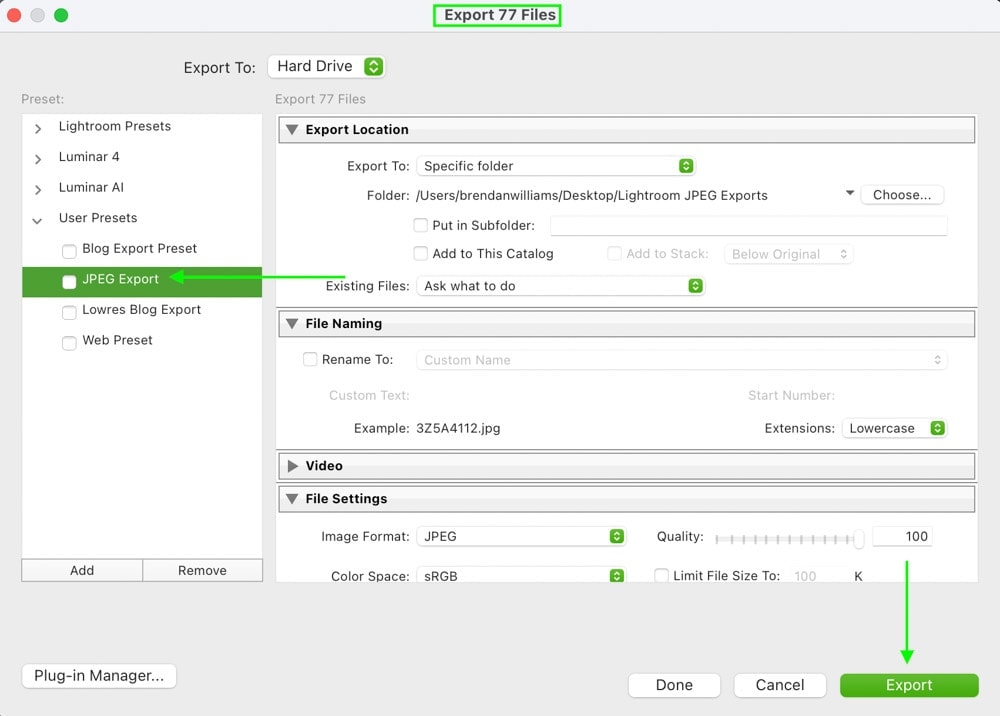
Starting with the Export Location panel, pick a general place for your current and future exports to go. In this example, I’ll set the destination “Specific Folder,” click “Choose,” and create a new folder on my computer for the exports to go.

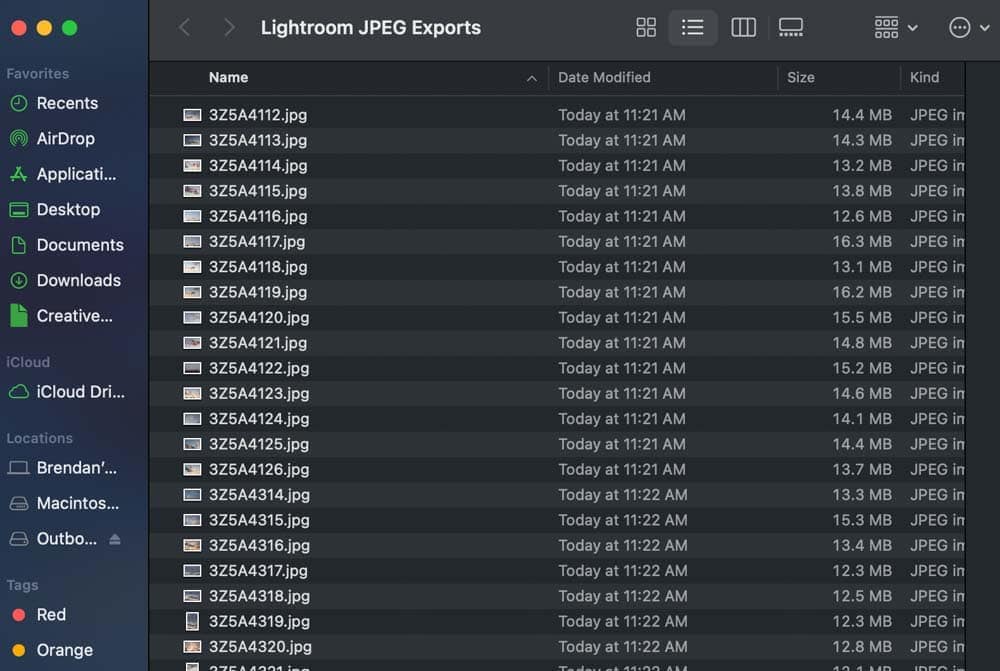
As you can see in the file path, my export location is set to Desktop > Lightroom JPEG Exports.
With the location set, go to the File Settings panel. Set the Image Format to JPEG, the Color Space to sRGB, and the Quality to 100.
In the Image Sizing panel, make sure the Resize To Fit option is unchecked and your resolution is between 200 and 300 pixels per inch.

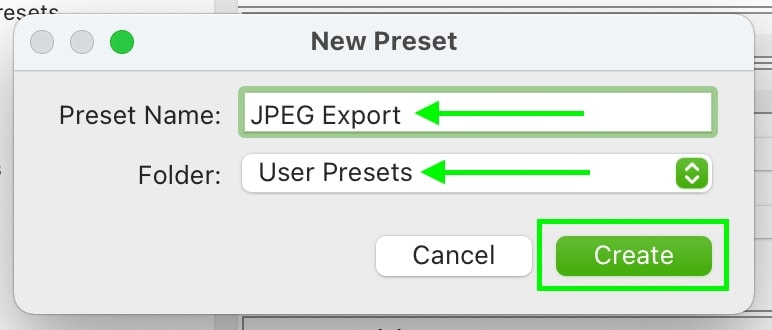
With your export settings in order, let’s create a new preset by clicking on the “Add” option beneath the preset window.
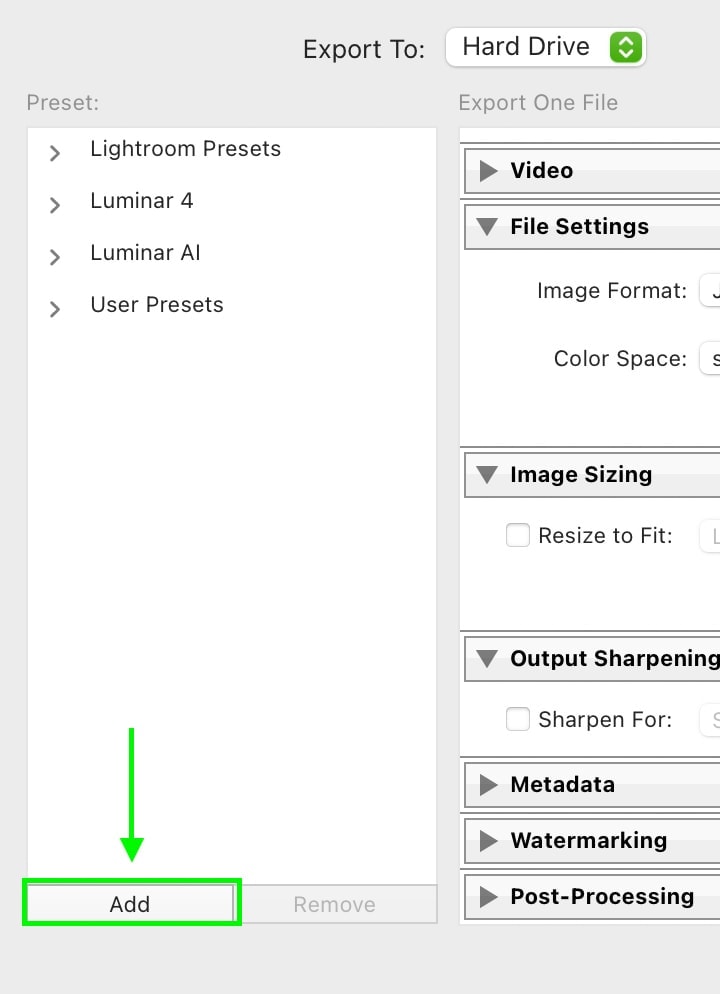
A new dialogue box will appear to add a name and export group for your new export preset. I’ll call this preset JPEG Export.
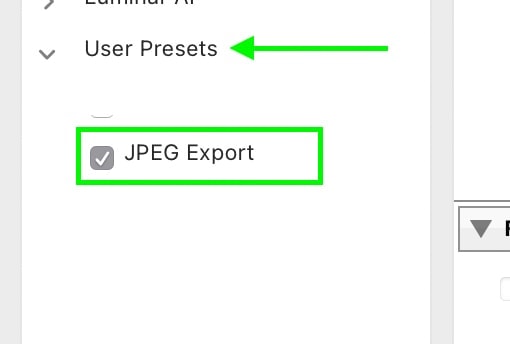
Now you have a new export preset in the preset window. By clicking on this preset, you will automatically apply these JPEG export settings to any future exports without going through the entire process manually!
This is by far the fastest way to convert RAW to JPEG in Lightroom since you don’t need to do any manual settings each time you export.
How To Batch Export RAW Files To JPEG
To batch export RAW files to JPEG, hold Command or Control and click between the files you wish to export in the Library Module. Then go to File > Export, choose an export destination, and set the image format to JPEG. Finally, click Export, and all your selected RAW files will be exported to JPEG.
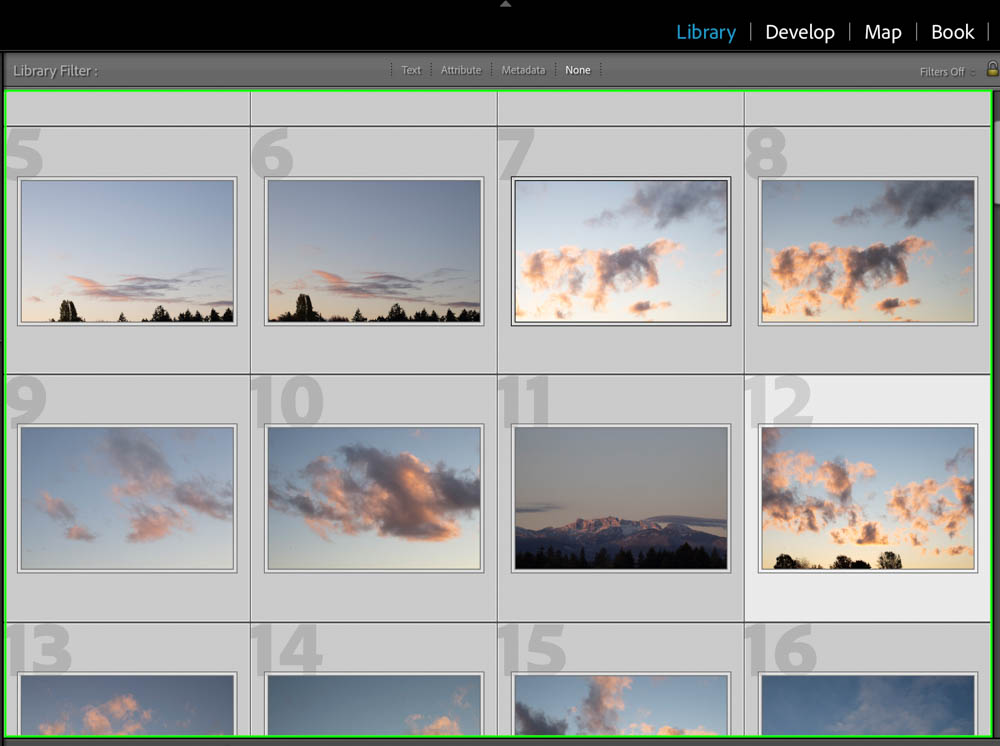
You can select multiple files individually by holding Command or Control and clicking between the images you want.

But if you want to batch export an entire folder of images, it’s much faster to press Command + A (Mac) or Control + A (PC) while in the Library Module. This will select all of the images in your folder to be included in your export.
Then go up to File > Export, and follow the same steps as you learned previously. The most important step is the image format set to JPEG!
If you created an export preset in the last section, this will significantly speed up the entire process.
Now to batch export all your RAW files into JPEG, just hit the Export button.
All of your files will export to your specified destination folder. When batch exporting, it’s a really good idea to export to a subfolder. Otherwise, you’ll end up with hundreds of loose images that are difficult to keep track of!
How To Export RAW Photos In Lightroom
Now that you know how to convert RAW into JPEG in Lightroom let’s quickly talk about exporting RAW files as RAW files. In some cases, you may want to just export your RAW image without converting it into a different file type. In that case, there’s a quick solution.
Just like before, select your desired images and go to File > Export. Follow the same steps as previously, except this time, set your image format to Original.
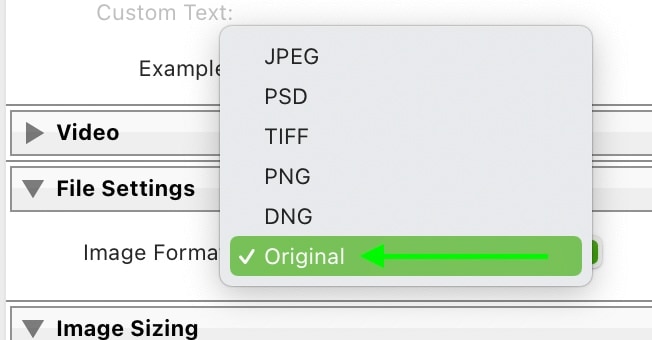
This will export your photo to the same file type that it is currently. For example, a RAW photo will export to RAW. A JPEG file would export to JPEG.
You get the idea.
With this slight adjustment to your export settings, you can have the option to export your RAW photos from Lightroom without converting them into a different file type.
Just remember that RAW photos aren’t shareable and cannot be viewed on most devices. This would only be worthwhile if you wanted to send a duplicate RAW file with your edits to another person or save your RAW file and edits to a new location. If you want to share your photos, converting RAW to JPEG is the best solution.
With the know-how to convert your RAW files to JPEG, it’s helpful to know how to edit your RAW files before you export! Check out some of these tutorials below to help you stylize your RAW images before you convert them to JPEGS:
- How To Edit Brown Tones In Lightroom
- How To Make Photos Look Cinematic In Lightroom
- How To Edit Sunset Photos In Lightroom
- A Complete Guide To Photo Editing In Lightroom
Happy Editing!
– Brendan 🙂


