
As you may know, Adobe is all about progression and bringing the latest technology to your fingertips, so let’s see what’s new in the Photoshop 2024 update. The latest version, released in September 2023, offers groundbreaking new capabilities to further your creativity and streamline your workflow.
From the highly anticipated Generative Fill capabilities powered by Adobe Firefly to the minor updates to the Remove Tool and Gradient Tool, here are the top new features you can experience in Photoshop version 25.0.
The Top New Features In Photoshop 2024
Adobe has been working hard with the latest updates, bringing AI to your fingertips. Here are the top tools and features that have been added, with a quick breakdown to show you what each feature offers, including my own opinions on these functions.
Note: This update installs a new Photoshop on your system, meaning you will have two programs, Photoshop 2023 and 2024. You can ensure all your presets are saved, and everything runs smoothly before deleting the old version.
1. Generative Fill
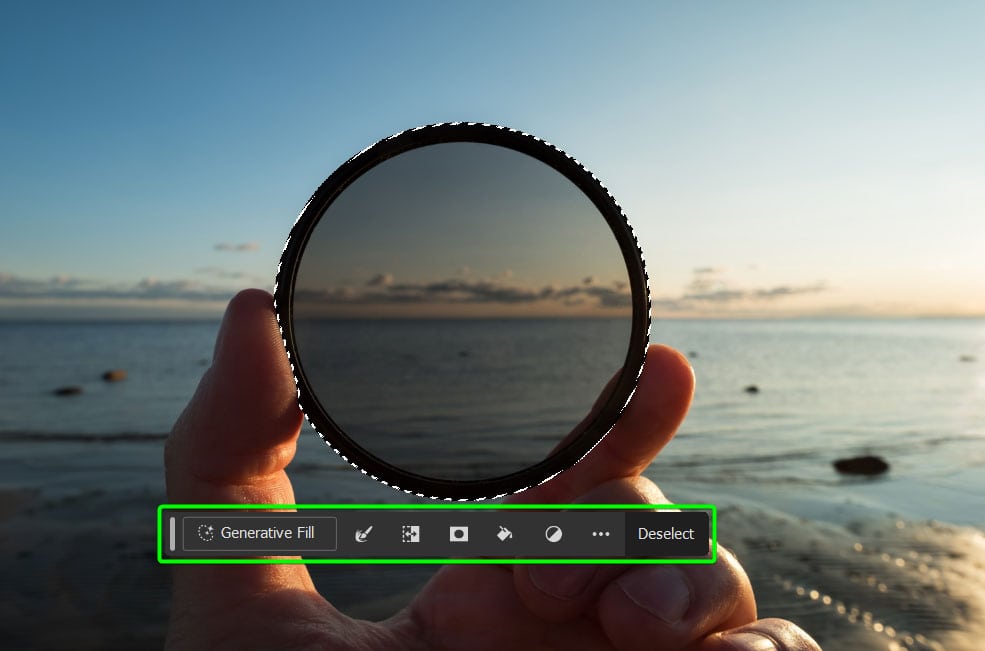
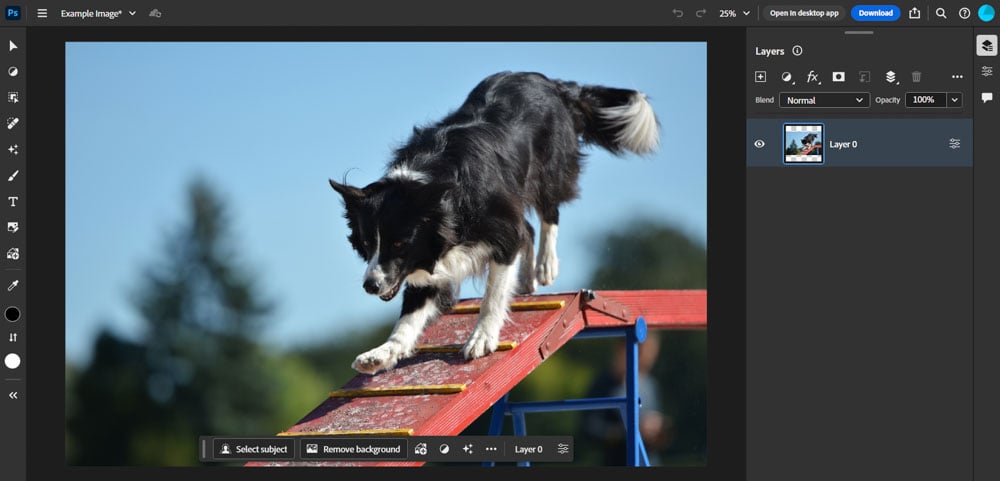
Let’s get into the most prominent and progressive AI feature of the Photoshop 2024 update, which is Generative Fill. This feature is powered by Adobe’s Firefly AI and Machine Learning models and allows users to non-destructively fill, replace, and delete areas of an image with ease.
Generative Fill is similar to Content-Aware Fill, although using AI, Photoshop creates entirely new pixels that aren’t taken from your image. Instead, the pixels are sourced from the extensive Adobe Stock library, which means the results are safe for commercial use.
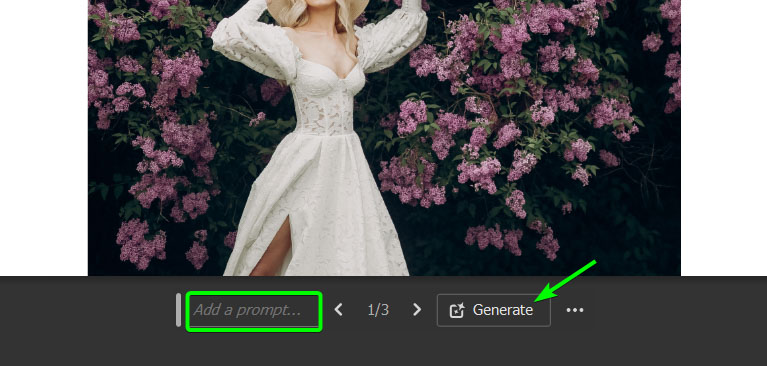
The feature works with prompts written in over 100 supported languages.
To access Generative Fill, you need to make a selection around the area you want to fill. You can use any selection tool for this. Then, click on Generative Fill in the Contextual Task Bar.
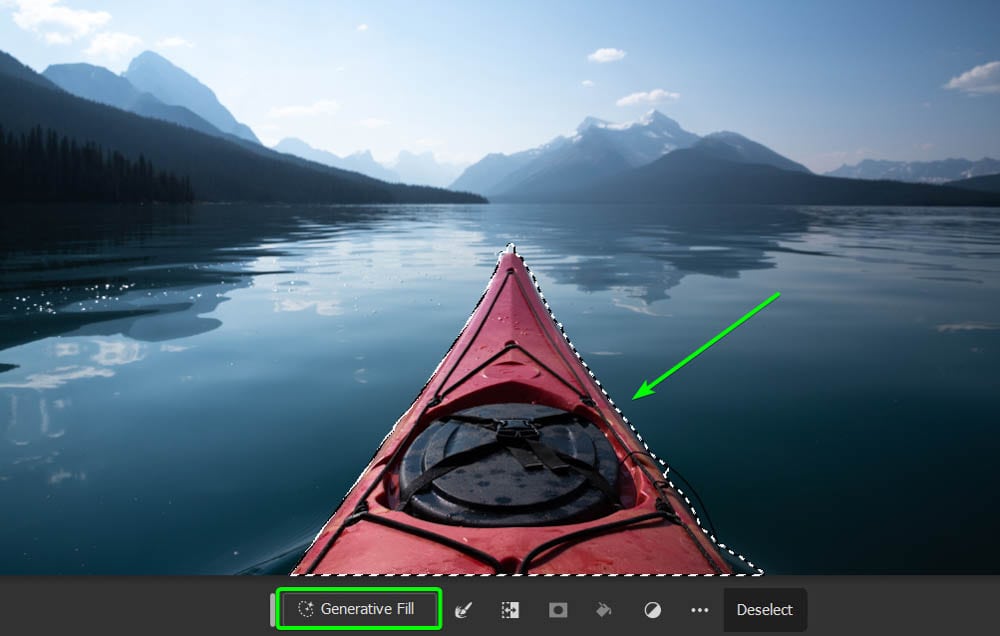
When using the feature to remove and replace an object, you don’t need to type anything into the prompt box. To fill the selection with something specific, type a prompt into the box and click Generate.
Note: You only need to explain what you want the AI to generate in the prompt box. You don’t need to use words like “replace,” “fill,” “add,” etc.

While the feature doesn’t always give you your desired result, you will often end up with the result you’re after. For instance, I prompted the Generative Fill to replace the background of my image with an icy lake scene.


In my opinion, this feature is a game changer in Photoshop, and it opens up a world of creativity for beginner and expert photo editors. However, the tool can easily be overdone and should be used sparingly to enhance your creativity rather than replace it.
Note: Any images edited with Generative Fill have an embedded attribution that states the image was enhanced using the feature, even when saved as PNGs and JPEGs.
2. Generative Expand
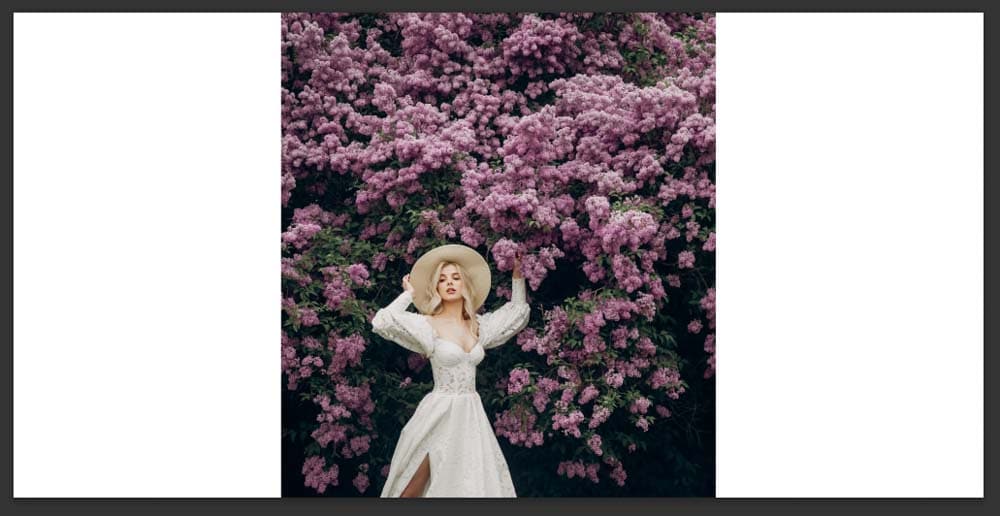
The next big update is Generative Expand, which is the same as Generative Fill, except you can use it slightly differently. This feature extends images and adds realistic elements to the extra space added. This is useful to enlarge a picture or create a more zoomed-out appearance.
Using Generative Expand is similar to the fill method. However, you must first extend your canvas using the Crop Tool (C).
Then, find the Generative Expand option in the Contextual Task Bar. Once you click the Expand button, you can leave the prompt box blank, and the AI will create new pixels that match your image.
I used the feature to extend the image below, so it will work better as a header image or a website banner.


I think this feature is best used in the same manner as Generative Fill, sparingly and to extend your vision rather than replace it. As with all AI, this feature is not perfect and works better on specific images than others.
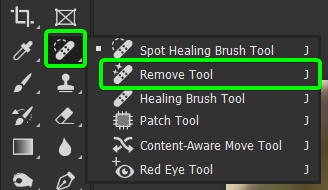
3. Remove Tool Updates
The Remove Tool isn’t new in this version, as it was released in the previous update, but there has been an update to the tool. You can learn how to use the Remove Tool in this article, but in short, the tool allows you to remove objects by simply brushing over them, and Photoshop’s AI expertly fills in the missing pixels.
In the latest update, instead of painting over the entire object you want to be removed, you can simply paint a rough line around the object, much like the Lasso Tool (L).
You can access the Remove Tool (J) from the toolbar.
Then, paint a rough outline around the object, and Photoshop will fill in everything inside the outline.
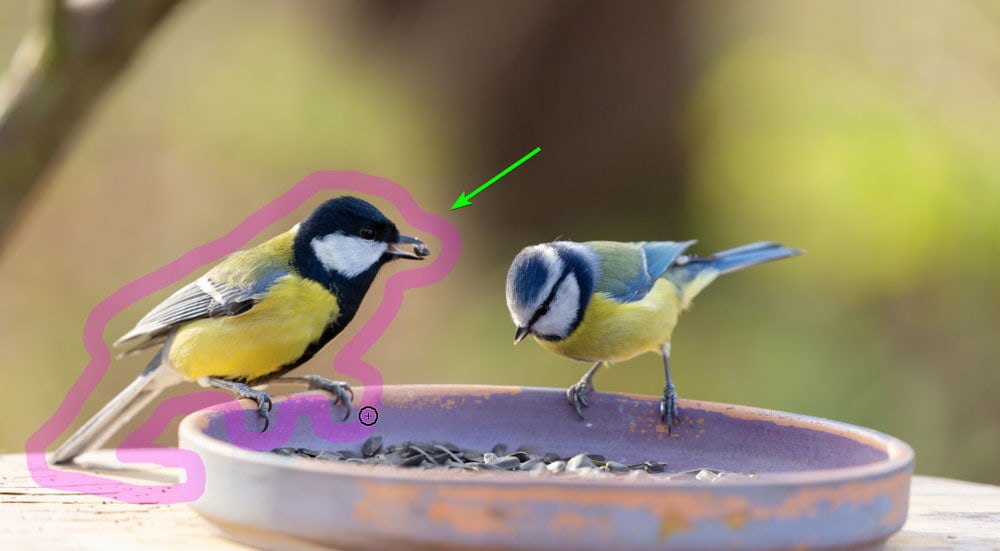
The object is often seamlessly removed from the image, and the replaced pixels match your picture.

This minor update is a vast improvement and speeds up the removal process. Rather than trying to hold your mouse or stylus down to color in the entire object, you can streamline the process with a simple lasso—definitely a helpful update, in my opinion.
4. Contextual Task Bar Update
Another feature added in the previous update is the Contextual Task Bar. This is a small menu that floats around the workspace, offering you Quick Actions and anticipated next steps. An immediate flaw of this menu is that it moves around the workspace, often covering your image and getting in the way of your editing.
In the 2024 update, you now have the option to pin the Contextual Menu to an area of the workspace, and Photoshop remembers this placement even when closing and re-opening the program.
Drag the menu to a spot you want it, then click on the three dots on the right of the menu and select Pin bar position. The menu will remain in place until you follow the same steps and uncheck the option.
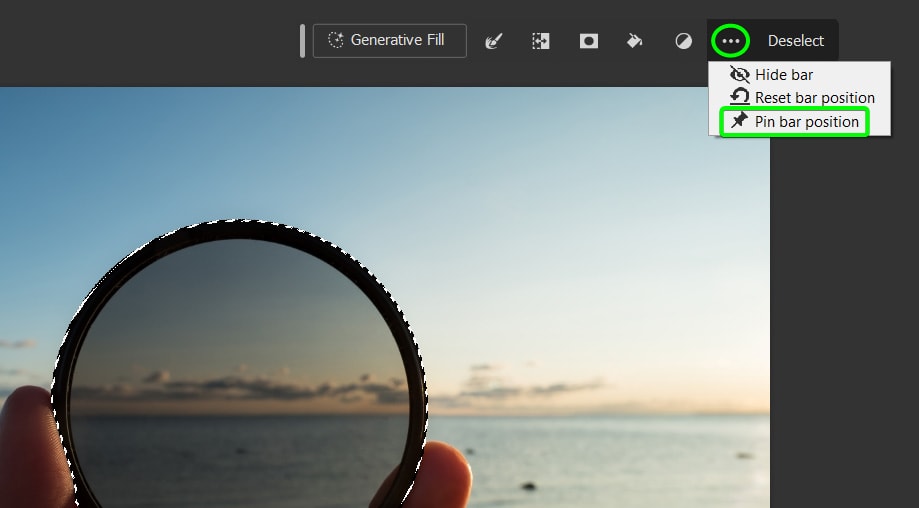
The menu also now includes more masking and Generative AI features to improve your workflow.
5. Photoshop On The Web
Photoshop on the Web has finally been released after being in beta for almost two years. All users with a paid subscription to Photoshop can access and use the web version. Photoshop on the Web offers the most commonly used tools from the desktop version (new tools and features are continuously being added), including the latest Adobe Firefly-powered AI Generative Fill and Expand features.
In addition to streamlining your favorite processes on the web, you can share, edit, and offer comments on projects between team members. You can also easily open your current project in the desktop app to add more in-depth edits.
Accessing the web version can be tricky, so I suggest bookmarking this link to Photoshop on the web for easy access.
Note: you need an active Creative Cloud subscription on any Photoshop plan to use this feature.
Once you open the program in your browser and upload an image, you can quickly edit, share, and design your projects.
Photoshop needed to release a web version to keep up with competitors, and creating a streamlined version was a good idea, in my view. Photographers can now easily edit and design on the go. While the web version won’t replace the full desktop version, it’s an excellent addition to the perks of having a Photoshop subscription.
6. Improved Gradient Tool
The Gradient Tool (G) was also updated recently to provide users with a non-destructive workflow when using the tool. This update was introduced before version 25.0, but many users may have missed it.
When accessing the Gradient Tool, you can now switch between the Gradient or Classic Gradient mode. The classic version is the old tool, while the Gradient mode adds the gradient as a new gradient fill layer, allowing users to edit or delete gradients easily.

7. Other Enhancements
Since Adobe has added many resource-intensive features in the Photoshop 2024 update, the system requirements have changed. You can check the new Photoshop system requirements for Windows and Mac in this article to ensure your system can handle the updated version.
In addition to the above updates, a few other enhancements were added to the new version.
Preset Sync Removed
The Preset Sync function has been removed, which is important to note if you create, save, and use custom presets. This feature is no longer available, and any presets you synced before the update should still be available in all locations. However, if you are missing presets, follow Adobe’s instructions to retrieve your presets.
Improved Startup Performance
The latest version has an improved startup performance, which you can customize to optimize the loading behavior.
Newly Added Cameras And Lenses In Supported Profiles
Adobe has also added more supported cameras and lenses in Camera RAW. You can view the complete lists by following the links below:
Understanding The Future Of Generative AI Credits In Photoshop
The new Generative AI features require intensive computational resources beyond your own system requirements. To ensure all users enjoy a seamless experience when using the AI features, Adobe will introduce a limit on the AI features in your Photoshop, known as Generative AI credits.
Starting November 1, 2023, Generative credit limits will apply to all Photoshop users. The credit provides priority use of the AI features in the applications you are subscribed to, and these credit counts reset each month.
Whenever you use one of the Generative features, it will cost you a certain amount of credits based on the amount of computer power it takes to carry out the feature. Most features in Photoshop will cost one credit at this stage.
The amount of credits you get each month depends on which Creative Cloud plan you are subscribed to (see the complete list here), and these credits apply to all the programs you have that offer AI features, such as Photoshop, Illustrator, and Firefly.
- The all-apps plan offers 1,000 credits
- A single-app plan offers 500 credits
- The Photography plan offers 250 credits for subscribers signed up before November 1, 2023, and 100 credits for subscribers after that date
- Free Adobe users get 25 credits
Once you have used your credits, you can still use the Generative AI features. However, they will be much slower as you no longer have priority over the resources. Your credits will then reset at the end of the month. Credits do not roll over to the next month.
Adobe does plan to offer subscriptions to buy additional credits, but at the time of writing, this is not available yet.
Note: The number of credits you receive and the amount certain features use are subject to change according to Adobe, and as higher resolution features and capabilities are released, the credits are expected to change.
Upcoming Photoshop Features
As always, Adobe is already on to the next update, and the beta version has some new key features. Here is what’s to come in future Photoshop updates, which you can try in the beta version if you’d like.
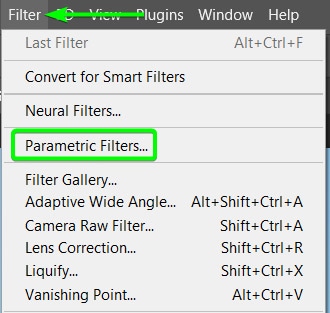
Parametric Filters
Parametric filters are now available in the beta version, which is an upgraded version of the filter gallery. The filters are created with more advanced coding and offer more customization options.
To access the filters, you don’t need to convert your layer to a smart object. Simply go to Filters > Parametric Filters.
The parametric filters offer new filters such as Filter Glitch, Duotone Filter, and Rain Filter.
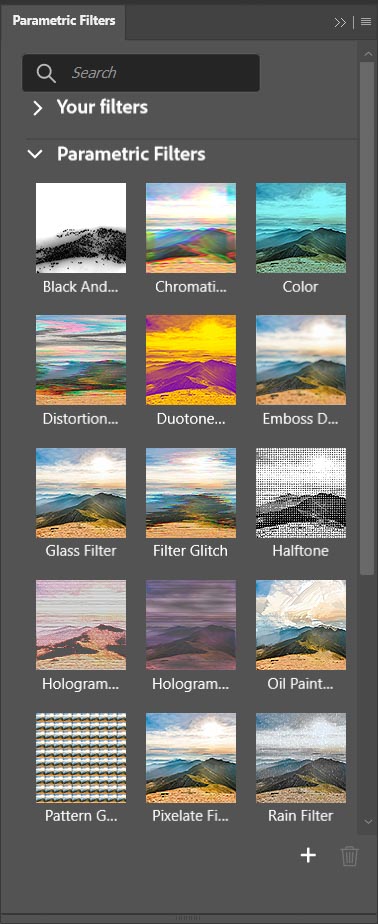
Each filter has more controls and properties to customize the filter to your liking.
For example, you can add a realistic rain filter to your image and customize it to get the desired result.

If you want more information about these filters, there’s a helpful breakdown in this video.
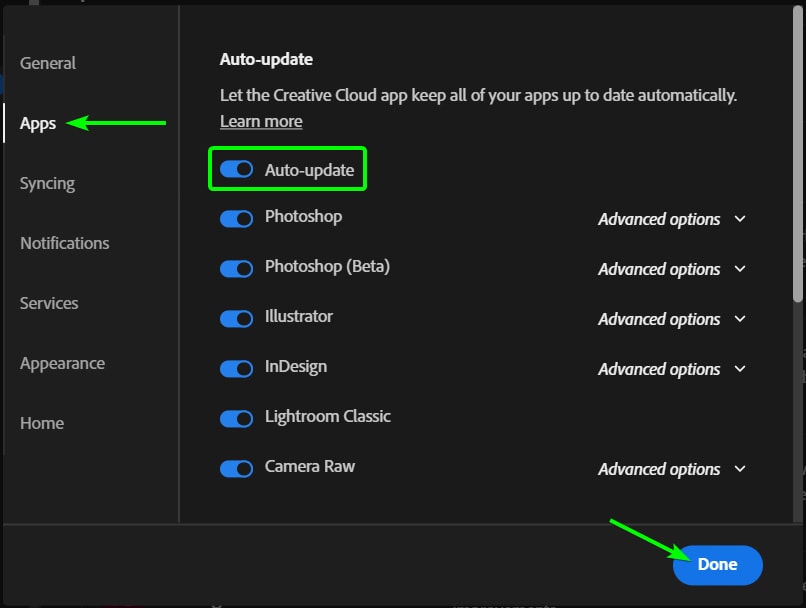
How To Make Sure Your Version Of Photoshop Stays Up To Date
If all these new updates sound amazing and you want to ensure you always have the latest version of Photoshop on your desktop, you can easily set the program to auto-update whenever a new version is available. These auto-updates also include minor updates with bug fixes, so enabling auto-update is helpful to ensure your Photoshop is always running optimally.
You can follow this complete guide to update Photoshop, but here is a quick breakdown.
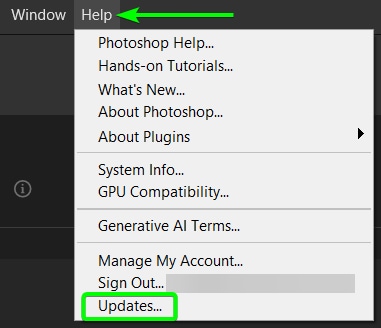
Open Creative Cloud from your desktop or app folder. You can also follow the menu path in Photoshop by going to Help > Updates.
Then, open the Apps tab on the left-hand side and click on Updates.
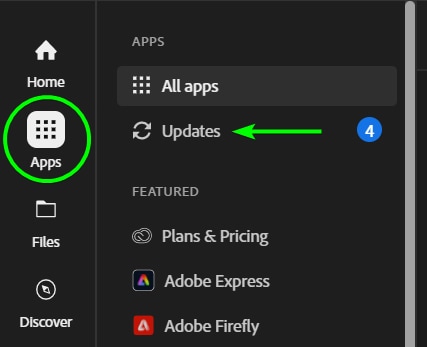
You will see a list of your apps and those with an update available. You can click on Update to individually update an app. I recommend you click on Enable Auto-Update at the top of the window.

Then, ensure Auto-Update is turned on, and you can turn on the programs you want to auto-update.