

Photoshop actions and Lightroom presets are both useful tools for photographers when editing images. These two tools offer similar functions that can be used together at times and help to speed up your workflow. So what’s the difference between a Photoshop action and a Lightroom preset?
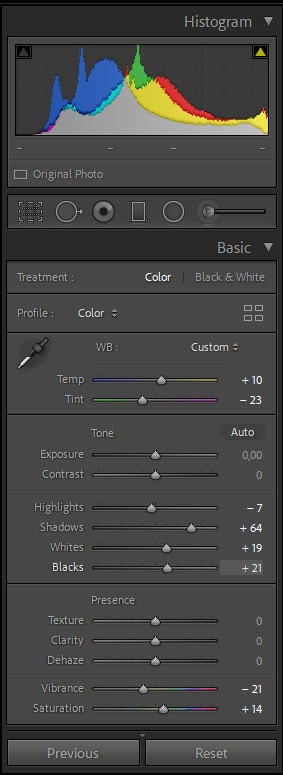
The difference between Photoshop Actions and Lightroom Presets is mainly editing capabilities. A Photoshop Action uses scripts to apply potentially complex steps like creating selections or blending images. Lightroom Presets are limited to the functions of Lightroom, only editing color and exposure.
Both actions and presets are highly useful for photographers, but it still can feel confusing which one you should use. To simplify the differences, it’s easiest to think of the uses of Lightroom vs Photoshop. Lightroom is a great tool for bulk editing images in a non-destructive manner while Photoshop is a great tool for more in-depth editing and graphic design.
So to help you better understand the differences between these two tools, let’s break it down. Here is all you need to know about lightroom presets, photoshop actions, and how to convert a preset to an action!
What Is A Photoshop Action?
A Photoshop action is a series of tasks including tools and menu commands that you record to later play back on another image or batch of images. This will allow you to apply the same effects and editing tools on multiple images without re-editing each step.
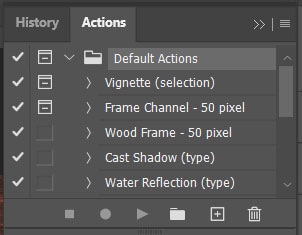
Photoshop comes with pre-installed actions which include common edits such as vignetting a selection or adding a shadow. You can also record your own actions.
You can record a series of tasks such as cropping the image, adding a filter, and then saving the file. You can then play this recording on other images to apply the same effects.
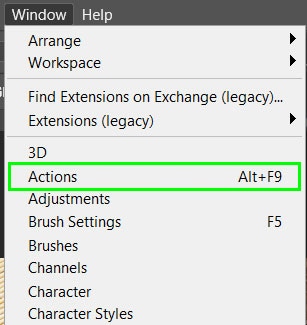
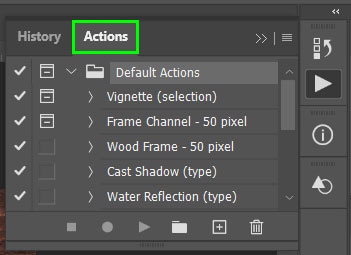
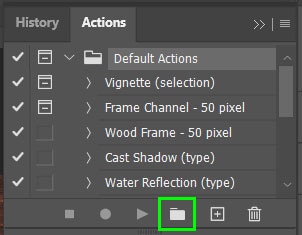
To record a new action navigate to the actions panel by selecting Windows > Actions. You can also use the shortcut by pressing Alt + F9 (Windows) or Option + F9 (Mac). The panel will appear on the right-hand side of the workspace next to the History panel.
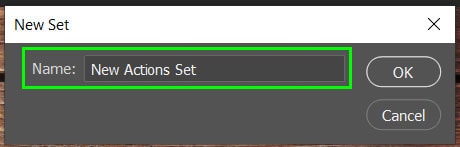
You can create sets to keep your actions organized. To do this select the New Set icon at the bottom of the panel and name the set before creating it.
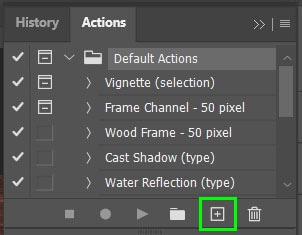
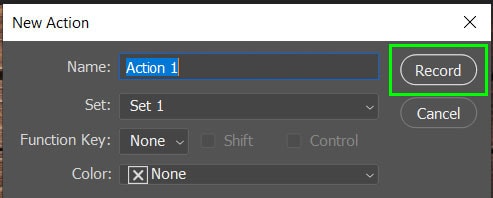
In your new set, you can create a new action. To do this select the Create new action icon at the bottom of the panel. A window will pop up where you can name your action and select the set to add it to. You can also add a function key and color to the action.
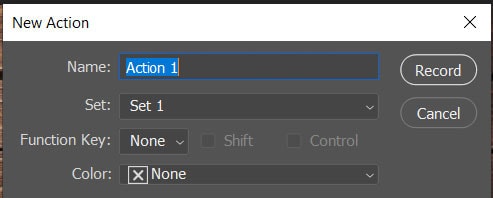
Select Record when you are ready to start your action. You will then need to carry out the desired edits that you want to be recorded. When you are finished select the Stop icon at the bottom of the Actions panel.
Photoshop actions allow you to have full control over each step in the editing process. They also give you the ability to save complex editing tasks to use later on. When the action is played over another image, the layers will appear in the layer panel for you to tweak if necessary.
This gives you a wider range of editing options with the ability to fix elements of the editing process for each image.
Photoshop actions may cause problems if they are not constructed correctly. If one element of the editing process is incorrect or cannot be applied to an image, it will stop the entire process. Photoshop actions may be harder to implement for beginner editors if they are making them from scratch. Luckily there are tons of great pre-made Photoshop actions online you can take advantage of.
What Is A Lightroom Preset?
Lightroom presets are similar to Photoshop actions in that they can be applied to batches of images. A Lightroom preset is used to apply saved settings to a pre-determined amount of images. The main difference is that Lightroom presets do not follow a series of specific tasks.
Lightroom contains pre-installed presets for you to choose from. You can also create new presets yourself or buy professional presets to enhance your editing abilities.
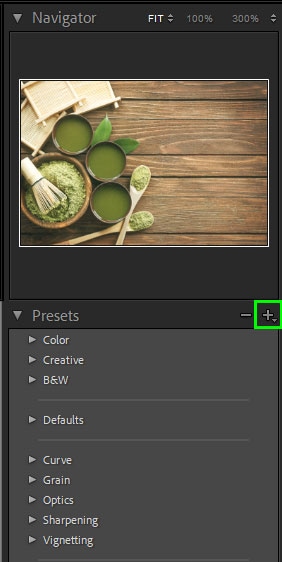
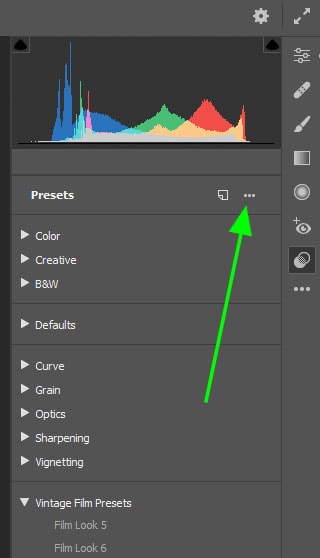
To use a preset in Lightroom, navigate to the Develop module and find a selection of presets in the left hand panel under Presets.

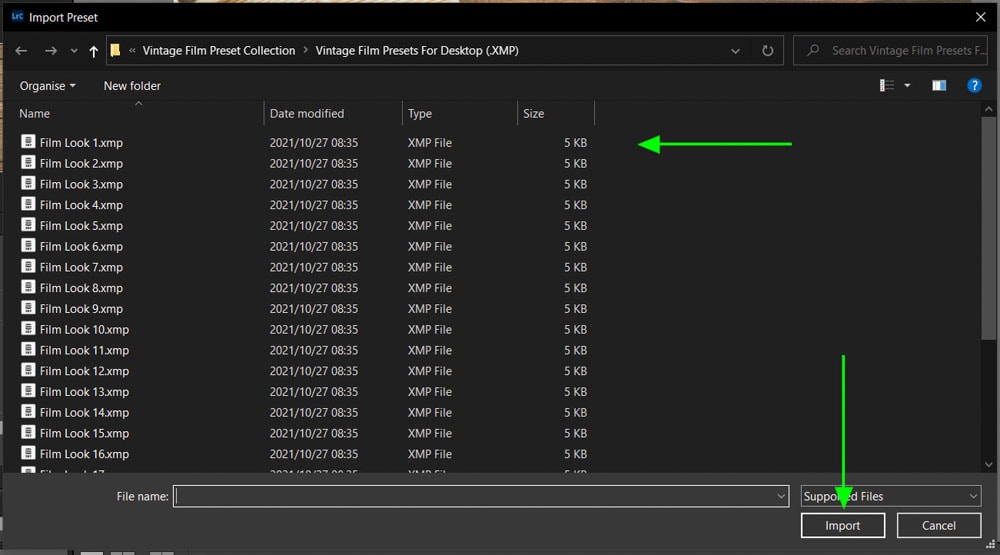
To install a new preset, click on the “+” icon at the top of the Presets panel and select “Import Presets”.
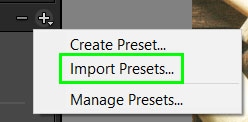
You can then select the presets you want to install, make sure they are XMP files, and select Import.
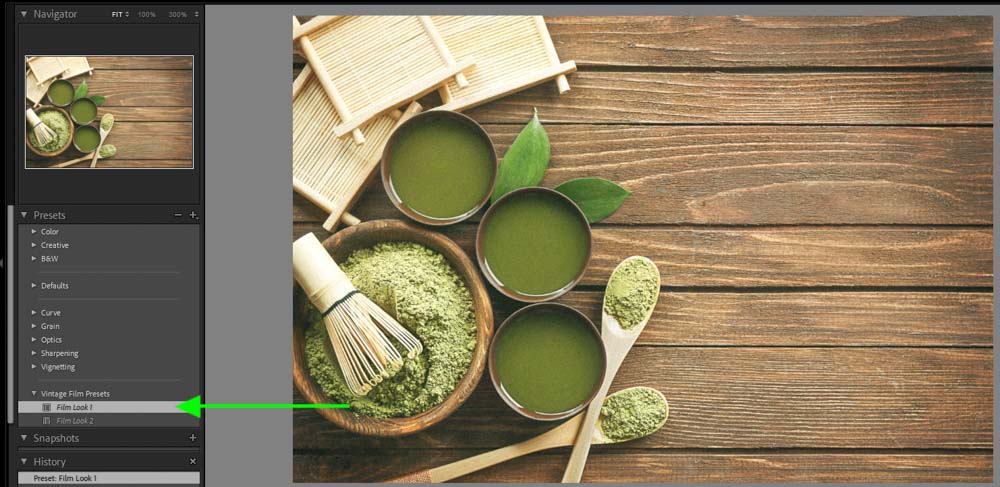
You can then click on your chosen preset in the panel and it will be applied to the image.
Lightroom presets can be applied to hundreds or thousands of images at a time. Since the preset does not use a script with various steps, the preset is applied instantly to your images. If you are working with large quantities of images then a preset is better than a Photoshop action.
Once you have applied a preset, you can tweak the image to ensure the editing is correct. This can be done a lot quicker on Lightroom, especially if it is for large batches of images.
Lightroom presets do not allow you to carry out complex editing tasks on your images as you are still limited to the capabilities of Lightroom.
The Difference Between Photoshop Actions And Lightroom Presets
While Photoshop actions and Lightroom presets are very similar they can be used to achieve different results. When choosing between the two there are a few factors to consider due to the differences in these processes.
Photoshop actions work by carrying out each process in the recording. This will take time as each task will be applied to the image individually. These actions will be added as layers to your image which you can manipulate further.
When running an action on a batch of images it may slow down your workflow.
Lightroom presets add pre-determined adjustments to the images in one go. This means the edits are applied immediately. Lightroom presets are best used when editing large amounts of images.
Photoshop actions allow more complex editing to be done on images. Due to the application of the edits done through Photoshop actions, the process will take longer.
Lightroom presets do not add layers, but the image can be further manipulated with the usual Lightroom functions.
Since Photoshop actions may contain complex editing processes they cannot be used in Lightroom as the program may not support the processes. For example, you cannot create a selection in Lightroom to remove a background, but you can do that with Photoshop actions. With that said, lightroom presets can be converted to Photoshop actions.
How To Convert Lightroom Presets Into Photoshop Actions
Lightroom presets can be brought across to Photoshop and converted to a Photoshop action. This will allow you to process the images with additional editing through Photoshop. It will also allow you to download Lightroom presets and use them within Photoshop if it is the only program you work with.
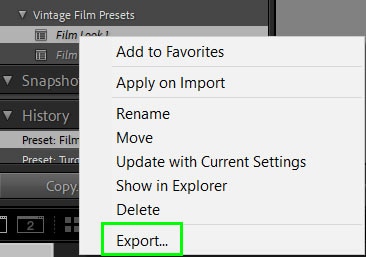
To convert a preset to an action, you will need the preset to be saved on your computer as an XMP file. If you are using a downloaded preset that is already in this format, you can skip ahead. Otherwise open Lightroom to find and save the preset.
Once Lightroom is open, export the preset as an XMP file. To do this, right-click on the preset and select “Export…”. Be sure to save the preset as an XMP file. You can check this by looking at the “Save as type” box in the pop-up save window.
Save the preset(s) in a .zip folder to allow them to be imported into Photoshop.

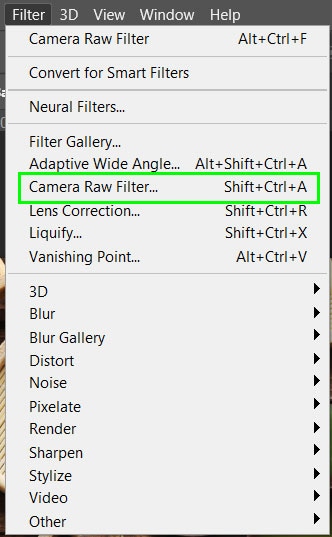
Next, open Photoshop and navigate to Filter > Camera Raw Filter. You can also use the shortcut Shift + Control + A (Windows) or Shift + Command + A (Mac).
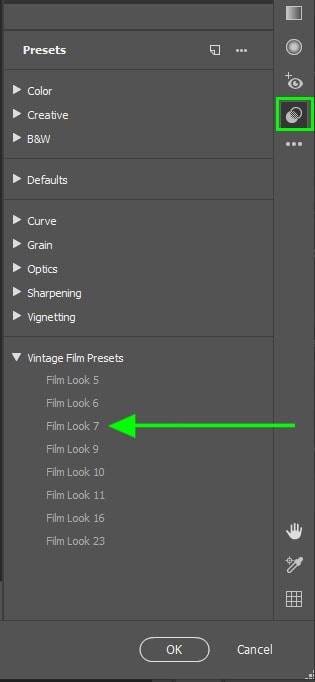
Navigate to the Presets tab by selecting the preset icon on the right-hand side of the window or using the shortcut Shift + P.
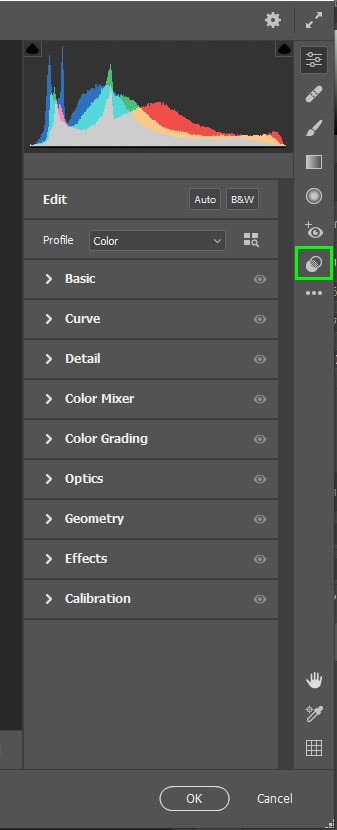
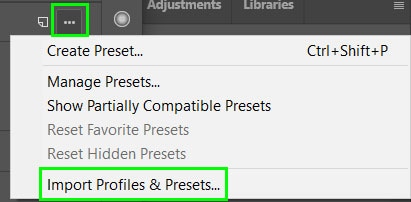
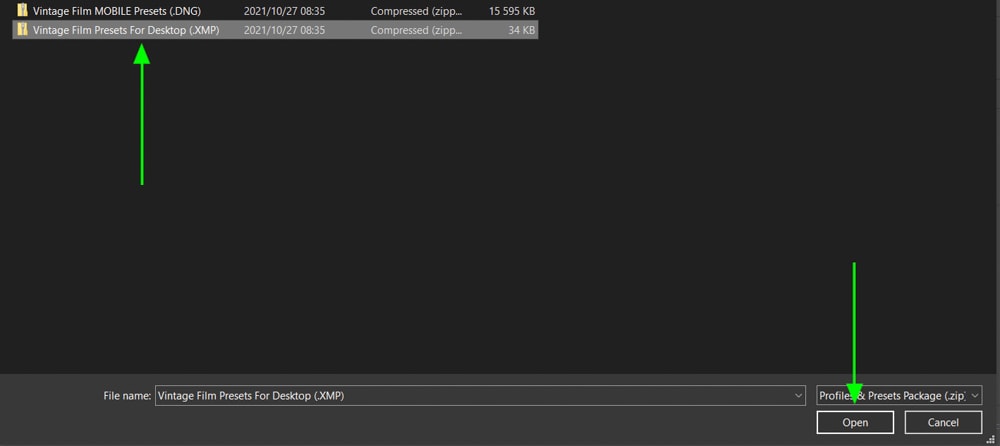
To import the saved preset, select the three dots toward the top of the panel and select “Import Profiles and Presets…”.
Choose your .zip folder and select OK. The preset folder will appear at the bottom list of presets.
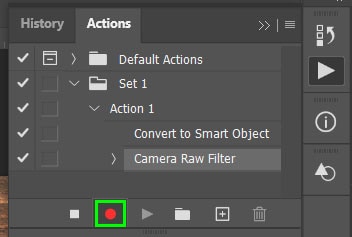
Now you can create the action by starting a new recording. Select the Create new action icon in the Action panel. Then press Record to begin the action.
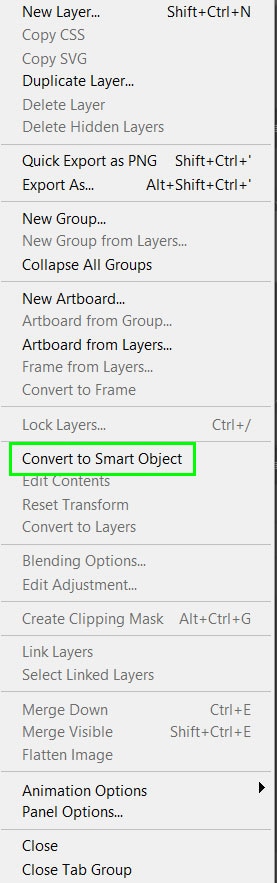
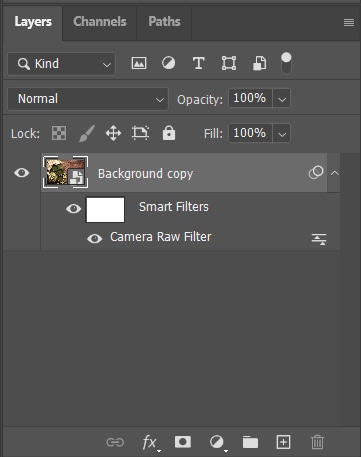
Select the image layer in the Layers panel and convert it to a smart object. To do this, right-click and select “Convert to Smart Object”.
Next open Camera Raw again by navigating to Filters > Camera Raw Filter or use the shortcut Shift + Control + A (Windows) or Shift + Command + A (Mac).
Select the Preset icon or press Shift + P and then select your chosen preset. Click OK to apply the preset on your image.
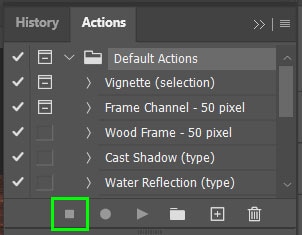
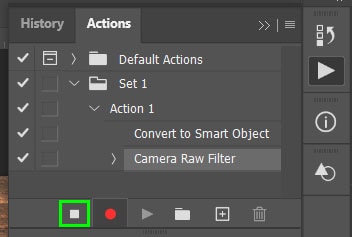
To finish the action, navigate to the Actions panel and select the Stop icon to stop the recording. Once the action is stopped, you can view the various steps taken during the action in the Actions panel.
You can modify the action at any stage. You can either add to the action or remove steps from the action.
To add to the action, select the step that will precede the new task you want to add. Then press Record, complete the additional step, and then press Stop. In this example below, since the Camera Raw Filter is highlighted, the extra edits will be added after that step.
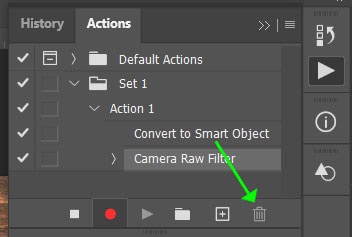
To delete a step, click and drag the step to the bin icon at the bottom of the Actions panel. You can do this for entire actions and sets if needed.
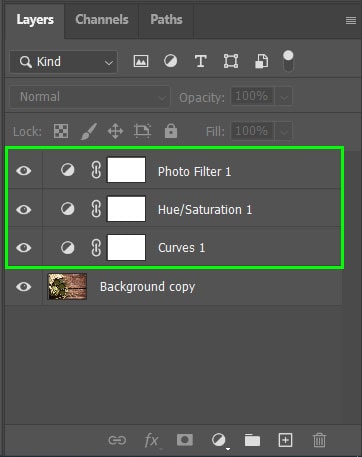
Once the action has been applied to the image, you will see the changes to your image added as smart filters in the Layers panel.
So in a nutshell, the difference between Photoshop actions and Lightroom presets comes down to what each program is capable of. Photoshop actions can offer a more extensive range of adjustments simply because Photoshop is a more advanced editing program. With that said, Lightroom presets are faster to apply, especially to a large batch of images. Since both of these tools provide a ton of value, it’s best to take advantage of both in your workflow whenever you can!
Happy Editing!
