

Have you ever heard of an XMP file? You may have seen this file type while working with Adobe programs such as Photoshop and Lightroom. If you’ve ever opened one, you might be confused by the massive block of text, but XMP files are much simpler than they seem – and very important to understand as a photographer. Read on to learn about XMP files and how they can change your photos in a major way.
What Is An XMP File?
XMP Files (Extensible Metadata Platform files) hold the image metadata of your photo. When you make any changes to your photo in Lightroom or Photoshop, they are written into the XMP file. These files are used to remember image adjustments and save the editing information applied to a photo.
An XMP file is Adobe’s standard file form for metadata used by Adobe systems. In simple terms, an XMP file is the plain text format file of a preset. The file contains a big bundle of your photo’s metadata, including all the edits you’ve made to a raw file (.NEF, for instance) as well as descriptive properties. This means you can find the title, keywords, copyright, exposure, contrast, saturation, tint, sharpness, and temperature.
XMP files are automatically generated by the Adobe program you’re using to edit, and automatically saved in the same location as the photo’s corresponding raw file. Their plain text format allows applications that are compatible with XMP files to read them easily, making them a useful standardized file when working with Adobe programs (as well as some third-party applications).
How To Open XMP Files In Photoshop
To open XMP files in Adobe programs, you must first understand that you will be using them as presets. After all, the primary purpose of these files is to remember file information, such as editing adjustments.
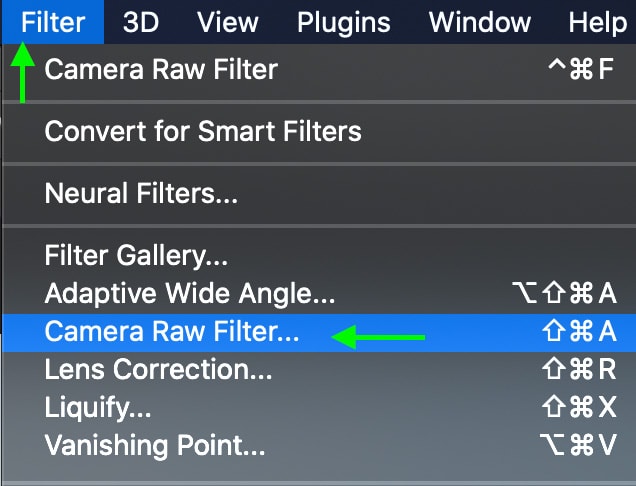
First, find the presets you like and download them. There are some great options here. Once you’ve got your presets downloaded, head over to Photoshop and open up a project. With your project open, head to the top toolbar and click Filter > Camera Raw Filter (or press Shift + Command + A on a Mac, or Shift + Control + A on a PC).
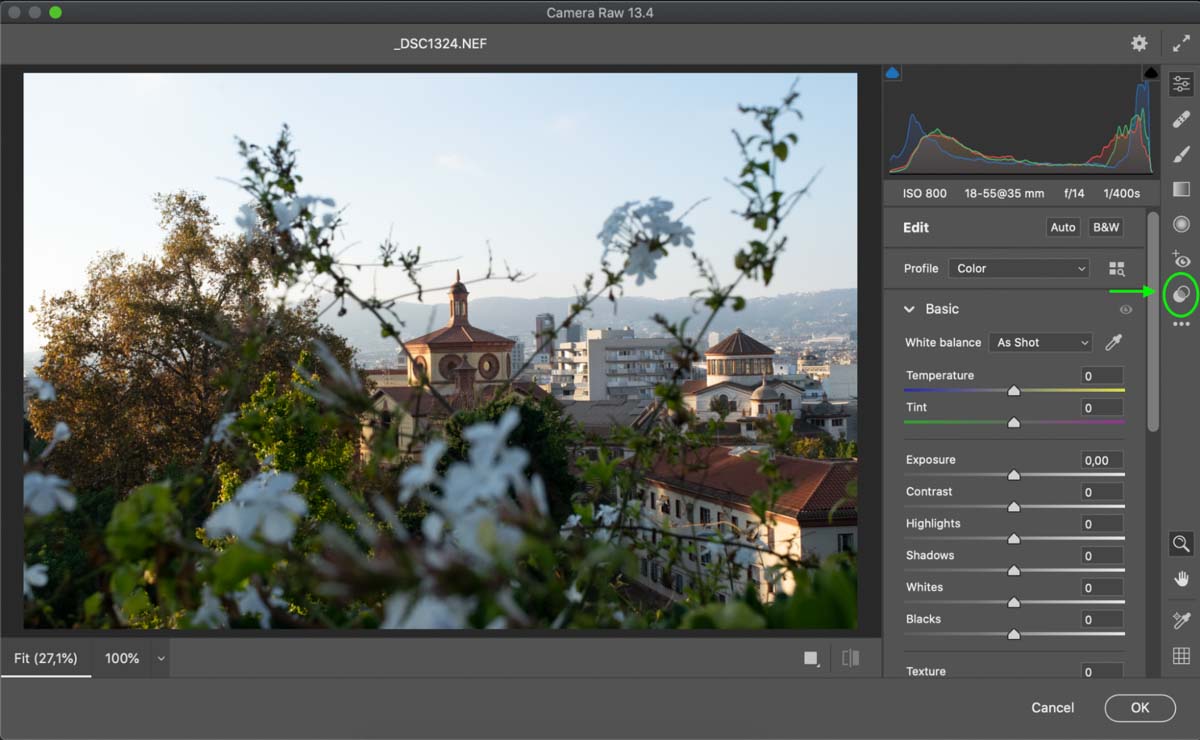
From there, the Camera Raw edit window will pop up. Here, you can make a variety of edits to the raw photo. To add a new XMP file, click the Preset icon on the toolbar on the right (second from the bottom).

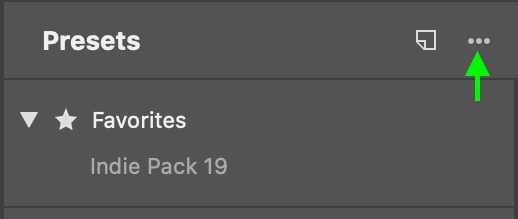
Here, you can add your preset by clicking the ellipsis icon on the far right, and selecting Import Profiles & Presets at the very bottom.

Select the preset you’ve downloaded, click open, and you’ll see your presets in the list.
How To Use XMP Files In Photoshop
There are several ways you can use XMP files in Photoshop. Let’s look at the two most important: using presets and editing metadata.
Using XMP Files As Presets
You can find your XMP files as presets in Photoshop by heading to the same place as above: Filter > Camera Raw Filter. In the Camera Raw window, click the presets icon, second from the bottom on the toolbar on the right. Here, you’ll find all of the presets you’ve added to Photoshop (or created), as well as the presets that come with the software.
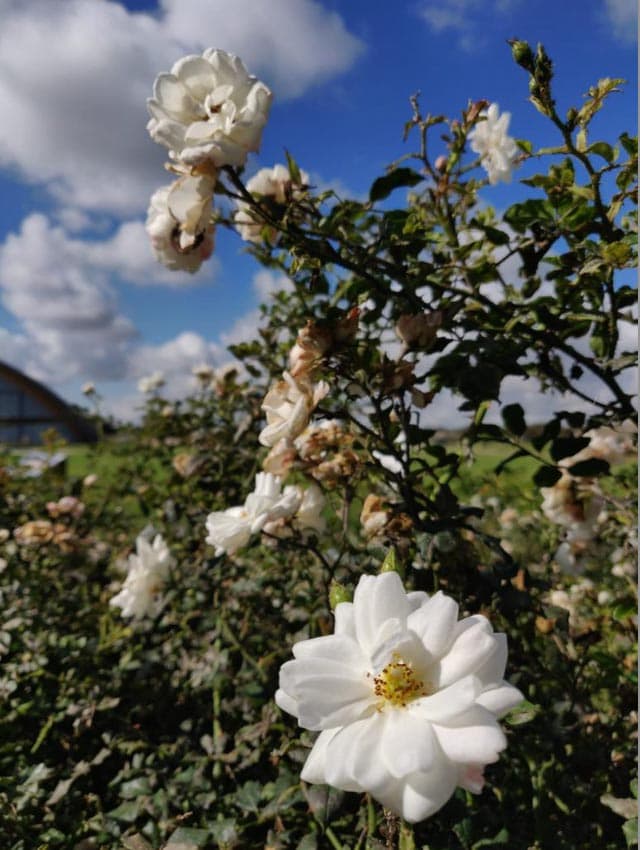
To apply a preset to your project, simply click the preset you’d like. I’ll go with an Indie aesthetic.
You’ll notice your photo has changed to reflect the edits that come with the preset. This is the power of an XMP file at work. With saved editing adjustments (a preset) applied to your photo, you don’t have to manually add these adjustments yourself.

Before 
After


To change the preset, just click a different one. Save your changes by clicking OK, on the bottom right.
Editing Metadata with XMP files
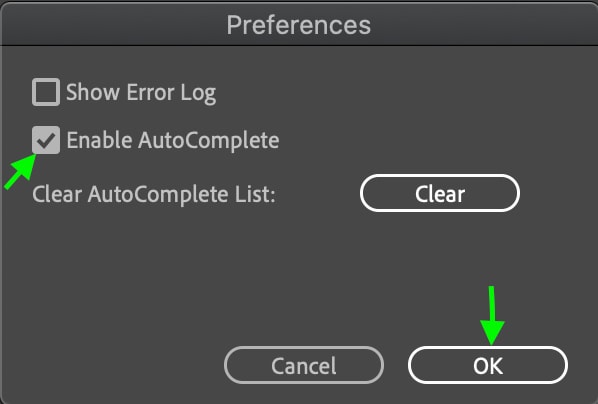
The other way you can take advantage of XMP files is to edit metadata. Metadata is automatically recorded by Photoshop for each raw file. However, you can change the metadata of any photo by heading to File > File Info.

In this window, you can see information about whatever file you currently have open in Photoshop. Edit the data to your liking. To turn autocomplete on/off, head to Preferences at the bottom, and check or uncheck the box next to autocomplete. When you’re satisfied with the image’s metadata, click OK.
How To Create XMP Files In Photoshop
Did you know you can also create an XMP file while in Photoshop? To be clear, XMP files are automatically created for each photo that you edit. They can be found in the same location that your raw file was saved by Photoshop. However, let’s talk about how to make an XMP file with the intention of using it as a prest.
That means if you want to make similar edits to an entire batch of photos, you can make your own preset (in the form of an XMP file) based on edits you’ve made to a photo.
To start, open Photoshop and head to Filters > Camera Raw Filter. Here you can edit the photo the way you’d like. When you’re happy with the way the photo looks, (which is also the way the preset will make your photos appear), you can save the edits you’ve made as a new preset. For example, creating soft brown tones or a film-like edit!
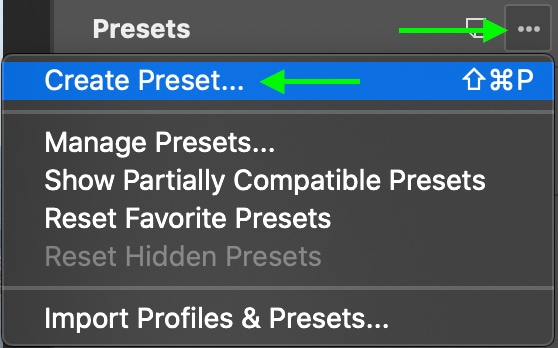
To do this, head to the Preset area by clicking the Preset icon on the toolbar.
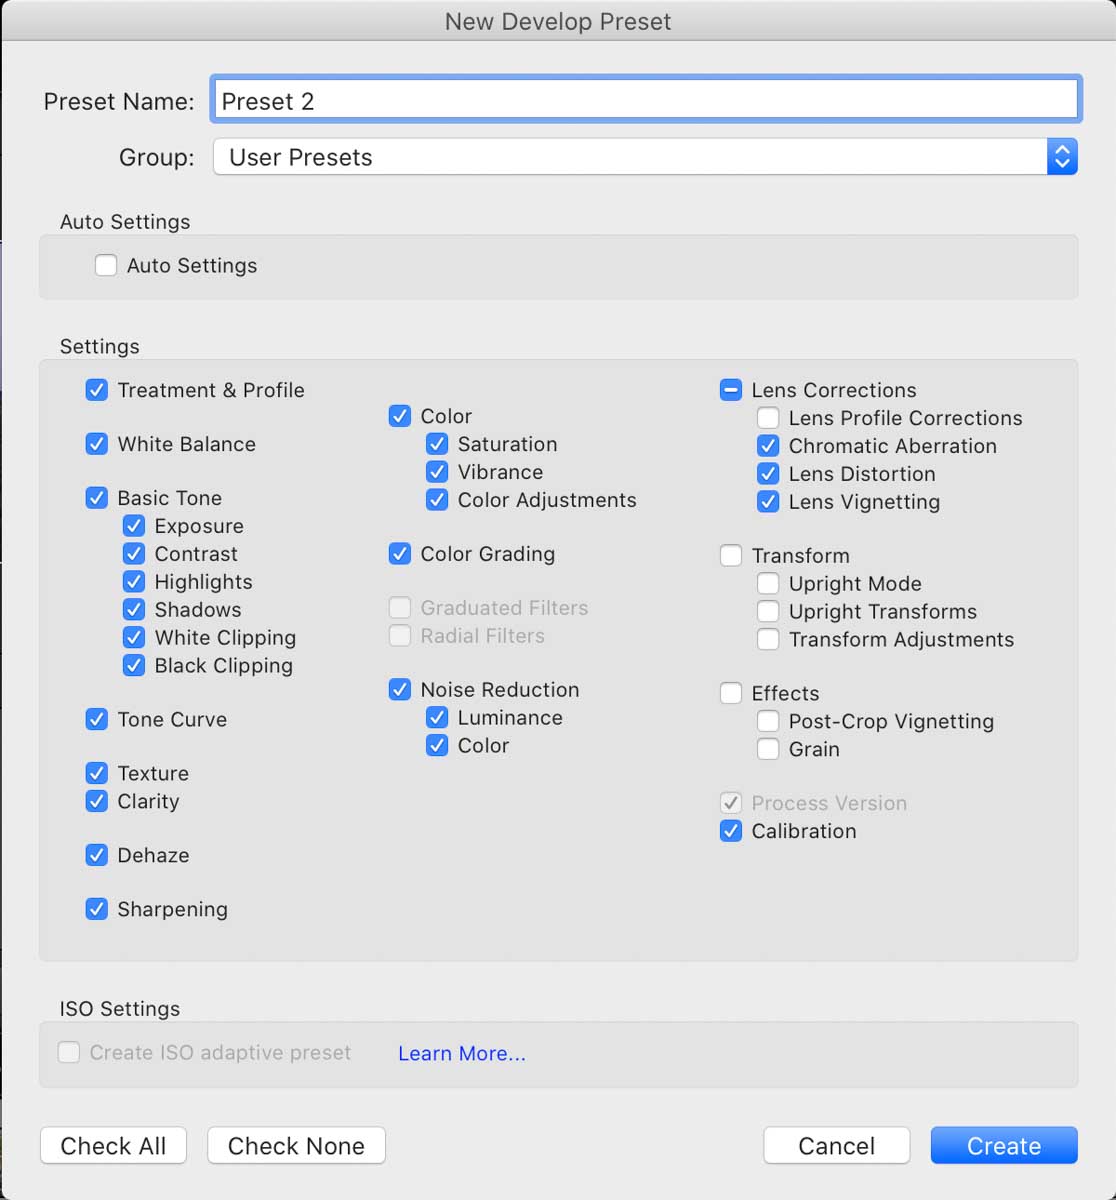
Create a new preset containing the edits you’ve made by clicking the ellipsis on the far right and selecting Create New Preset. You can also press Shift + Command + P on a Mac, or Shift + Control + P on a PC.
A window will come up, and it is here you can name your preset, select where it will save, and select all the edits you’d like to keep in your preset.
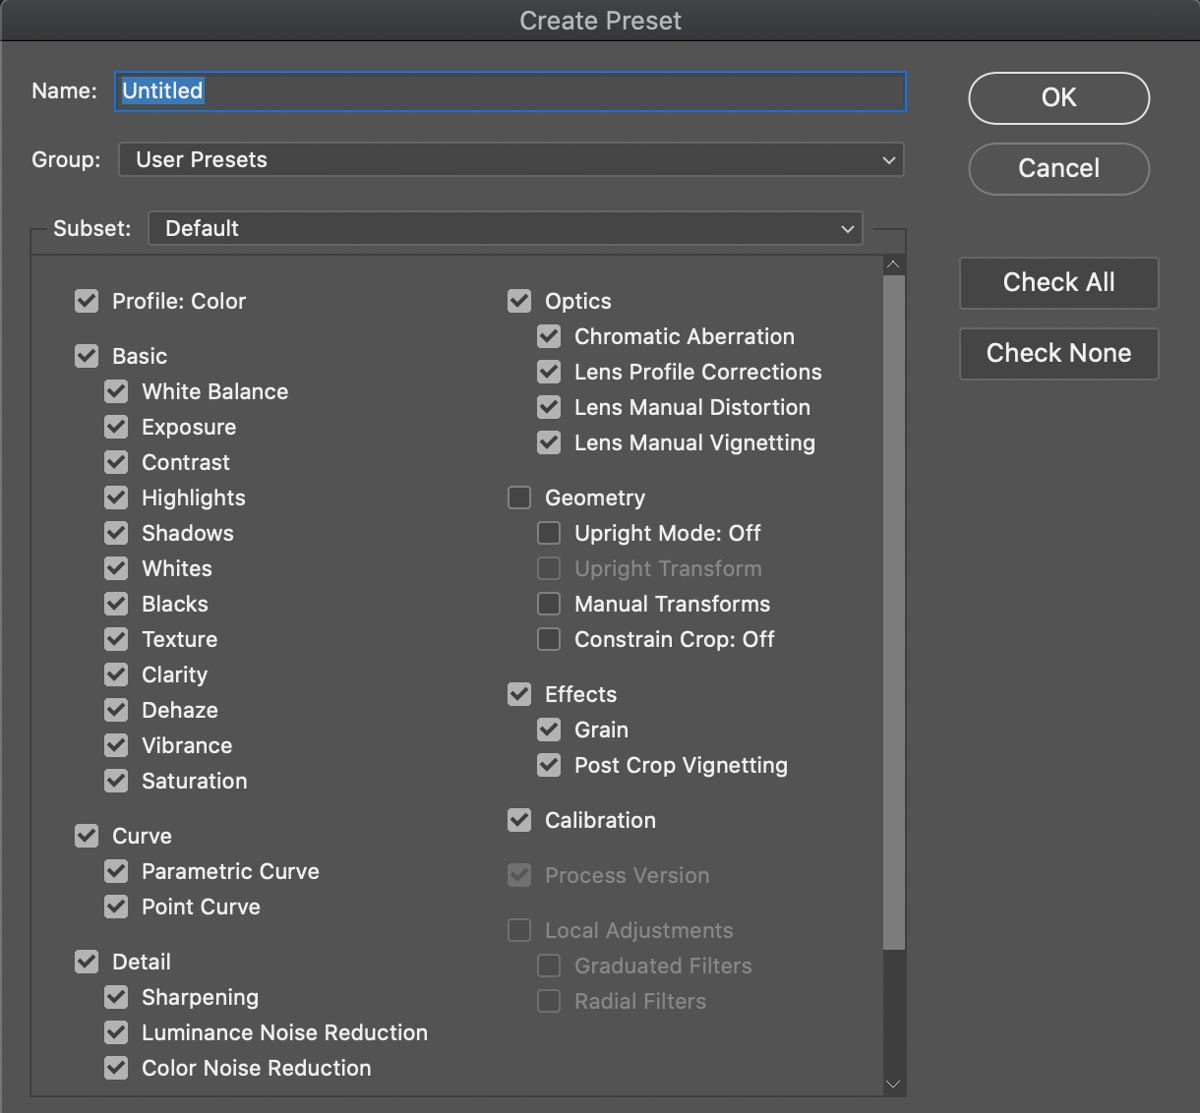
Click OK, and it will automatically be saved in the Preset area as a permanent option you can select for future photos. It will also become an XMP file on your computer alongside any raw photos you edit with the preset.
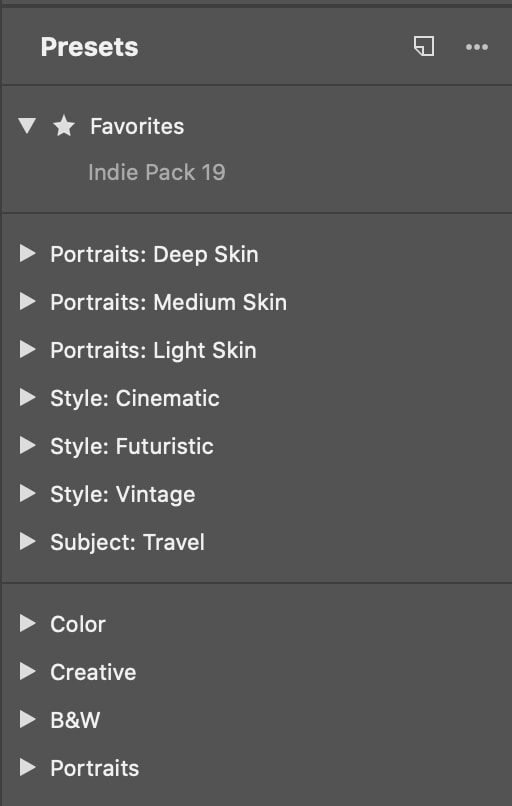
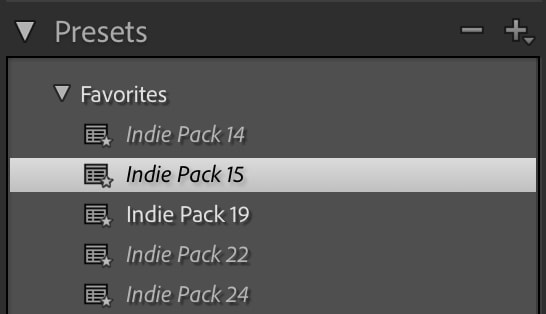
How To Use XMP Files In Lightroom
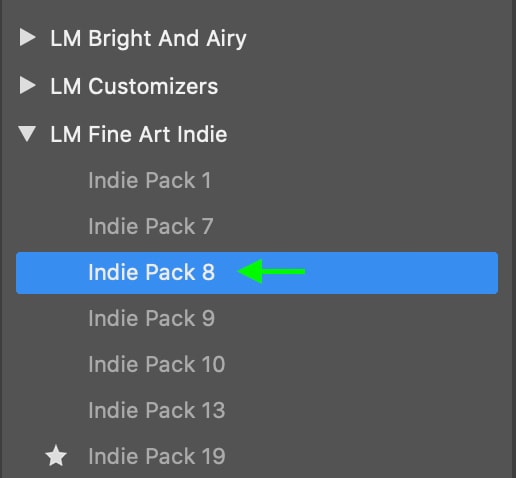
The way XMP files are utilized in Lightroom is pretty similar to Photoshop. Once in Lightroom, open up the photo you’d like to edit and head to the Develop tab. Once there, you’ll find the Presets tab on the left sidebar. Click the + sign to the right and click Import Presets.
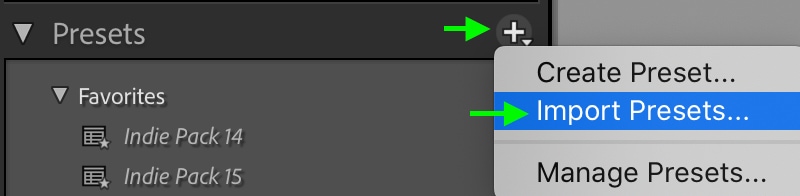
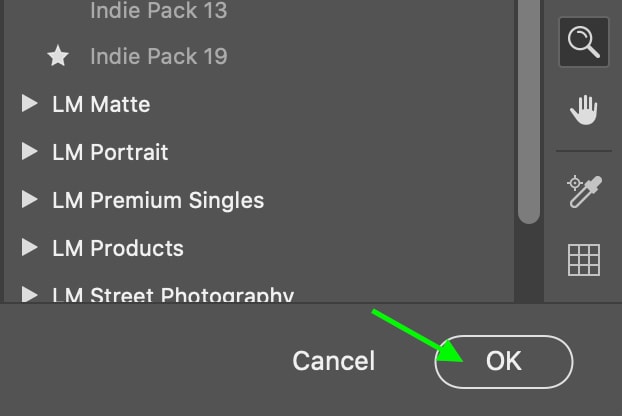
In the window that comes up, find the preset in the form of an XMP file from your files and click Import. The preset will automatically appear in your Library.
To apply your new preset to a photo, simply navigate the Presets tab in the sidebar on the left and click the preset you’d like.

Before 
After

You can also hover over each preset with the Navigator tab open to see how it will look on your photo before applying.
How To Save XMP Files In Lightroom
To automatically save XMP files in Lightroom, go to Lightroom Classic > Catalog Settings. Clicking on the Metadata tab, check off the “Automatically Write Changes Into XMP” option. Now an XMP file will be created and saved beside each original file as changes are made.
But before we talk about that process, let’s discuss how to simply create an XMP preset for batch editing.
To do this, make the edits you’d like to save as a preset. Once you’re happy with the way the photo looks, navigate to the Presets tab on the right, click the + sign, and select Create Preset.

This will open the window where you can name your preset and select which edits you’ve made that you want to carry over into your preset. Select the ones you’d like and click Create.
This will create an XMP file that will save as a preset under the Presets tab. You can now apply this preset to as many photos as you’d like.
Another easy way to save XMP files for your photos is to instruct Lightroom to automatically create an XMP file once any image is edited with a Lightroom adjustment. To do this, head to the toolbar at the top of your screen, and click Lightroom Classic > Catalog Settings.
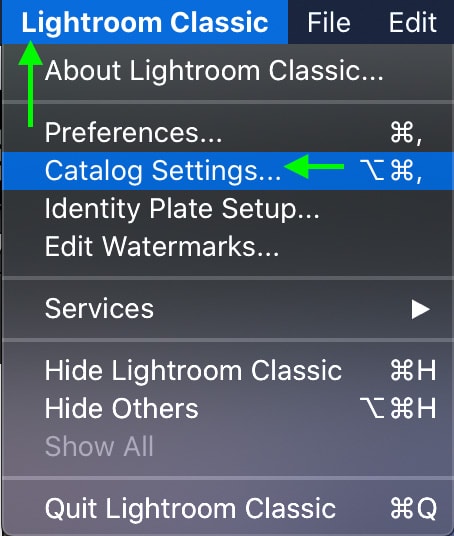
In the window that comes up, click Metadata, the third tab. You’ll see various settings for Lightroom’s metadata. Check the box next to “Automatically write changes into XMP.”

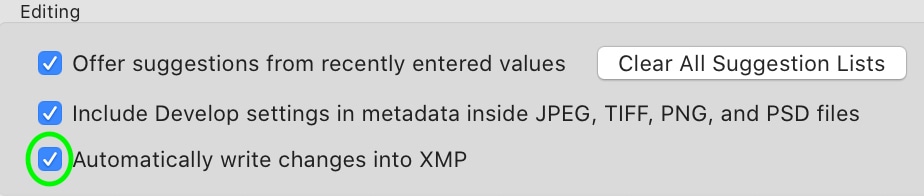
Now, an XMP file will automatically be created each time you edit a file in Lightroom.
Is It OK To Delete These Files?
Yes, it is OK to delete XMP files. However, it’s important to note that deleting these files will remove any of the adjustments made to their corresponding image file. Once an XMP file is deleted, the edited image will revert back to its original state.
When looking through your photos without knowing what an XMP file is, you might see the plain-text file and be tempted to delete it. These files are not really meant to be opened manually, but you can open them in a text-editor app to view the metadata if you need to. To be clear, it is OK if you accidentally delete an XMP file, but be aware that deleting these files will also delete any edits you have made as well as the image metadata.
There are, of course, reasons you may want to delete an XMP file. If you’ve successfully created a JPEG file of an image, you can delete the XMP file and the JPEG will not be affected. This could help you save space on your computer, but keep in mind you will no longer have your edits to the raw file.
Working with XMP files is a great way to understand how presets and metadata work. Be sure to use XMP files to your advantage and have fun playing with presets and maybe even making your own. If you’re looking for new presets to use in your editing, check out this page for all my latest preset collections!
Happy Editing!
