

When creating artwork for print or high-resolution purposes in Canva, it’s essential to take note of the export resolution, which means you need to know how to change DPI in Canva. However, unfortunately, this is not a straightforward process.
Luckily, it is possible to create artwork suitable for print in Canva. However, you may need the help of a third-party site to convert your designs to 300 DPI suitable for print. Especially when your printer requires this resolution. So, let’s get started!
Can You Change Resolution In Canva?
No matter what you do when resizing your image, you will not be able to change your DPI from within Canva. The DPI size for JPG, PNG, and PDF Standard is 96 DPI. This resolution is perfectly fine for any design that is meant to be web-based.
The DPI of PDF print is 300 DPI. Perfect for designs that are intended to be printed. Exporting your image as a JPG or PNG in 300 DPI is unavailable in Canva.
Note: You can export an image as a PNG or JPG and increase the Size slider to 3x, and you will achieve a 300 DPI image. However, if the larger size is unsuitable for the end result of your project, you will need to use the workaround below to keep the image dimensions correct.
How To Export A Canva Design To 300 DPI
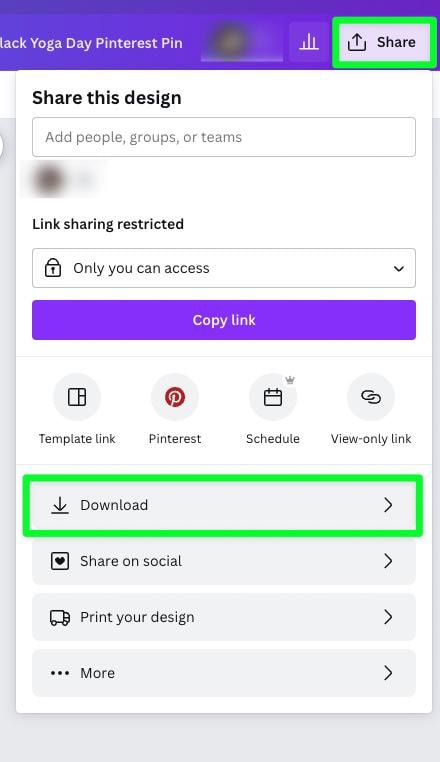
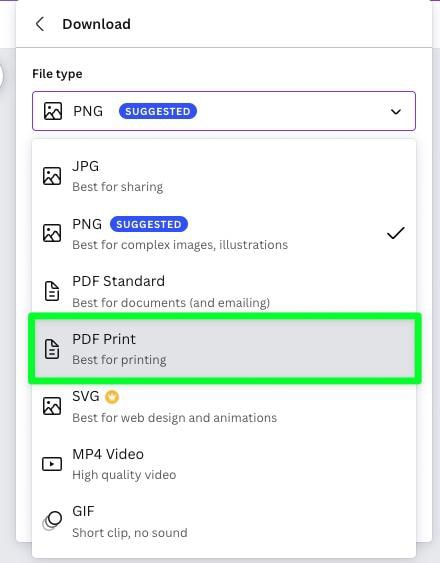
Step 1: Go To Share > Download And Set The File Type To PDF Print
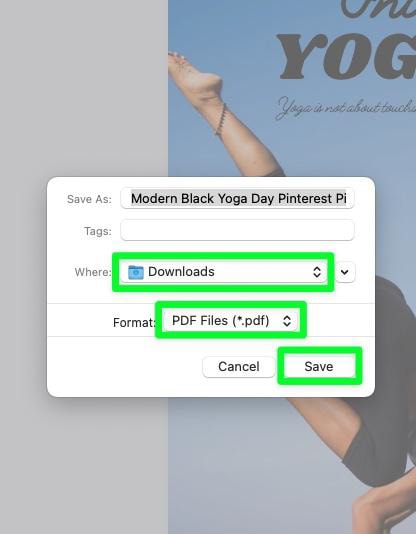
To save your image as a PDF, start by clicking on the Share button. When the share menu pops up, click on Download. Then, click on the File Type drop-down menu to reveal all your exporting choices, and select PDF Print.
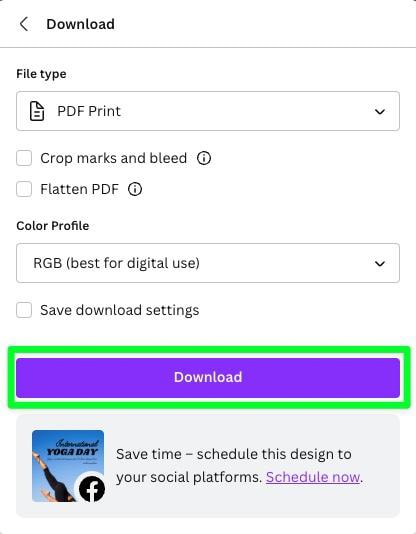
Step 2: Click On Download And Select A Save Location
When you’re done, click on Download. You will have the option to save your image where you’d like it to be saved. You can also confirm that your exported image will be a PDF. Click on Save to move to the next step.
Step 3: Open SmallPDF.com And Click On Choose Files
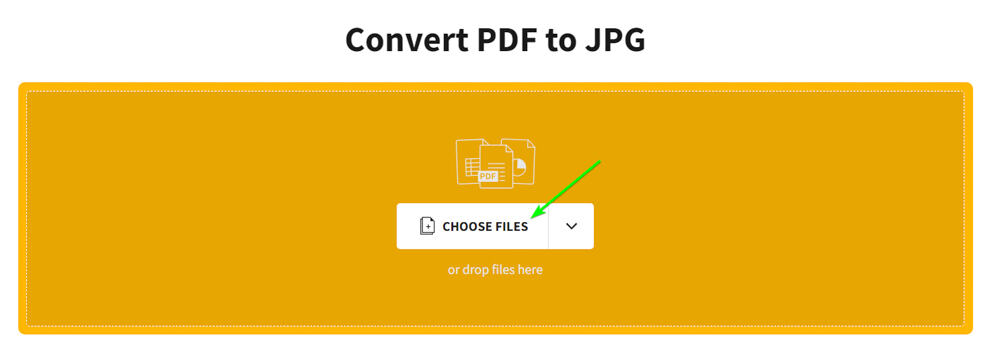
There are a ton of third-party converters out there. One of the best ones you can find is smallPDF.com. As you open the site, click on the Choose Files button to upload your downloaded PDF.
Step 4: Select Convert Entire Pages And Click Convert
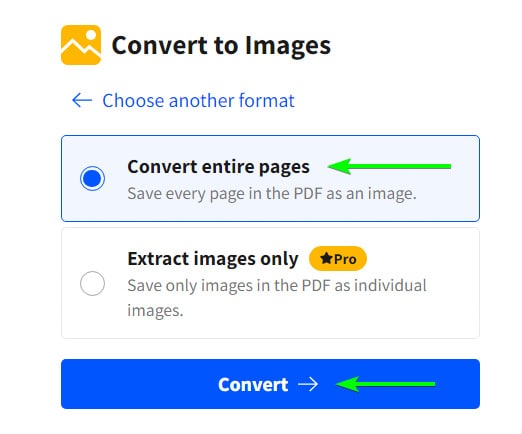
Wait for the site to upload the file. Once uploaded, you will need to select whether to Convert Entire Pages or Extract the Images only and save them separately. You will need a Pro membership for the second option. Select an option and click on Convert.
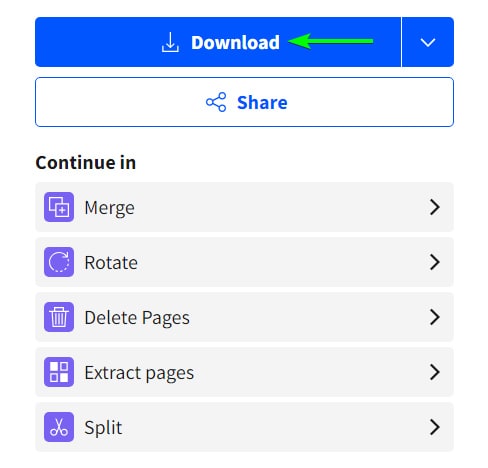
Once the PDF is converted, you will have the option to Download the file or carry out other options. Click on Download when you’re ready to save the file as a 300 DPI JPG.
How To Check Image Resolution On Mac & Windows
On Mac
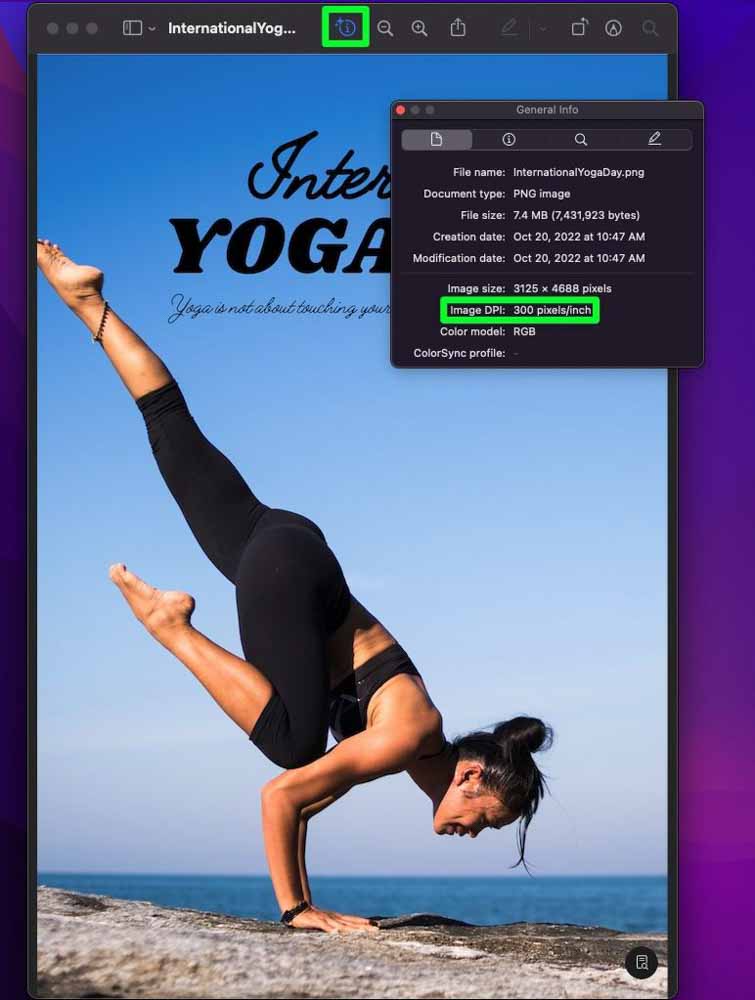
Open your image, then click on the Show The Inspector button. In the General Info tab, you will find Image DPI. This is where you will find the image’s DPI. This works for PNG and JPG.
On Windows
For Windows, finding the DPI of your image can be a little challenging. On the Windows operating system, checking the DPI is different for JPGs and PNGs.
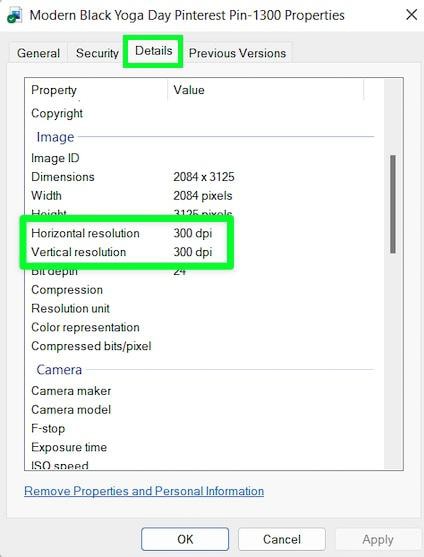
– JPG
For a JPG, find the image on your computer and right-click it. Then, click on Properties. Click on the Details tab, and you will find the Horizontal and Vertical Resolution.
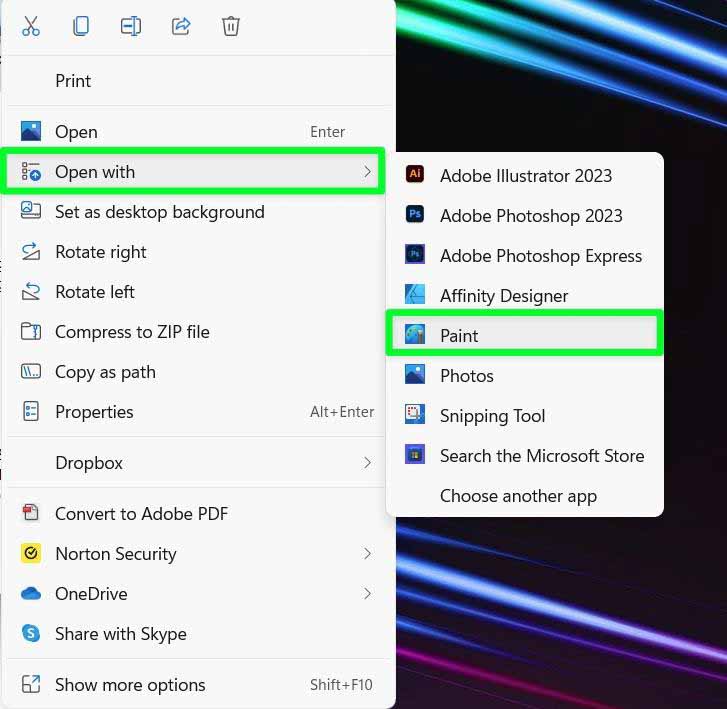
– PNG
You will have to check the DPI using the Paint app for a PNG. To do this, right-click on the image and go to Open With > Paint.
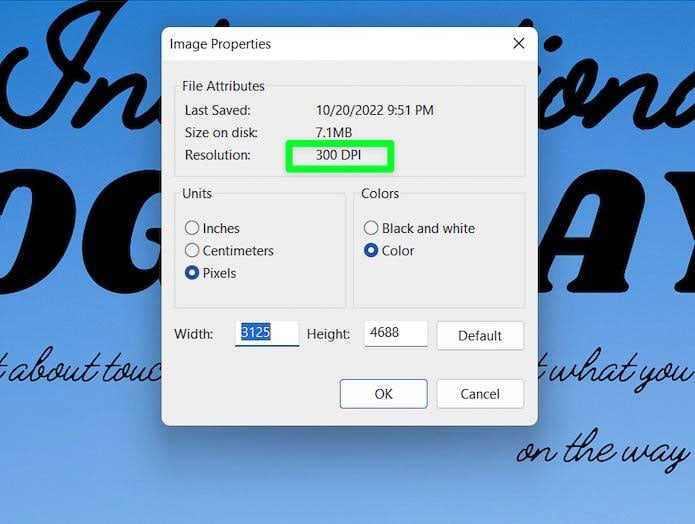
With the Paint app open, go to File > Image Properties or press Control + E to open up the Image Properties Panel.
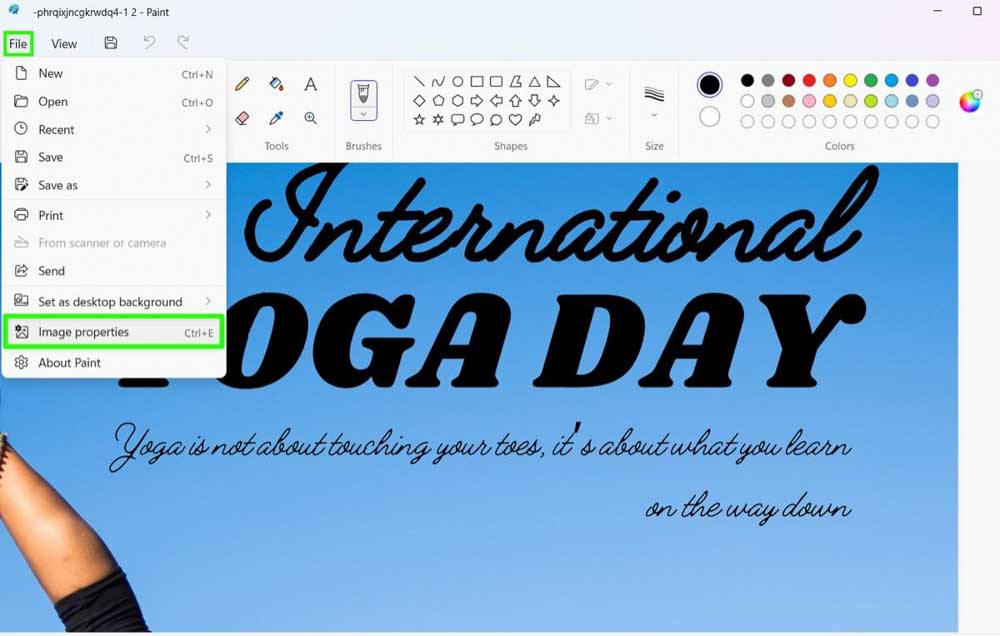
With the Image Properties panel open, the DPI will be showcased next to Resolution.
So, although you can’t change the resolution to 300 DPI directly in Canva unless exporting to PDF print or drastically enlarging the image dimensions, there are workarounds using third-party plug-ins to make JPG or PNG files 300 DPI if needed!
Happy Editing!


Thank you so much!
Your explanation was very didactic and I was able to do it perfectly following the steps you informed.
Thank you very much again!
You are welcome!
thank you, it s very helpfull for me .
You’re welcome!