
If you’re anything like me and you have a habit of hitting Control/Command + S whenever working on any project, you will want to know how to save in Canva. Luckily, Canva saves files automatically, but you can also do it manually or export the design as a backup.
So, let’s take a look at the different ways to save your designs, along with exporting them once they’re complete. Plus, I’ll explain all of the different file types you can save your designs as later in this tutorial.
Let’s get started!
How To Save In Canva (Automatic & Manual Saving)
Step 1: Allow Canva To Save Automatically
As you work on your design in Canva, every time you add an element, text block, or image to your project, Canva will automatically save your changes as long as you have a stable internet connection.
You will know if your project was successfully saved if you see a cloud icon with a check mark inside of it.

You may also briefly see “All Changes Saved” flash next to this icon. You will also see “Saving Changes” if the saving process takes longer than expected.
Step 2: Go To File > Save To Save A Project Manually
If you need to ensure that your project has been saved, you can always save your project manually.
You will find the File menu in the top left corner of the taskbar above your work area. Click File, and in the drop-down menu, choose Save. You should then see All Changes Saved right next to Save.
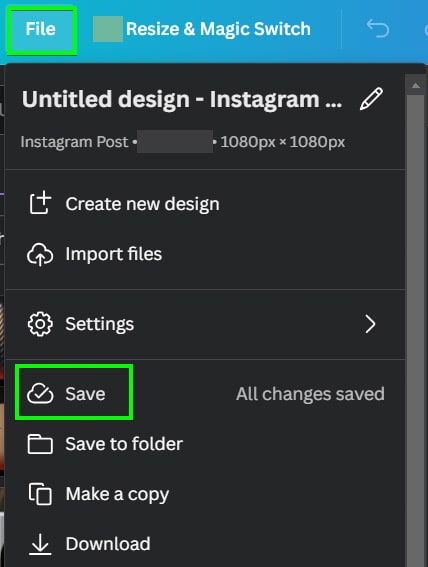
You can return to the Home page and click on your project to ensure that your design is properly saved. There’s also a second way you can save your design.
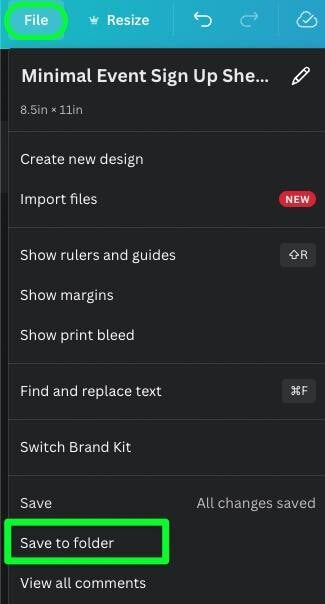
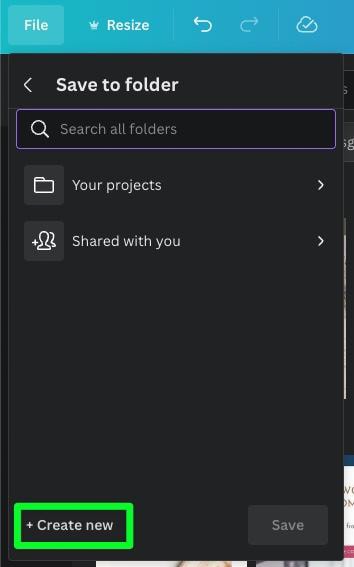
Step 3: Go To File > Save To Folder (Optional)
Click on File, then choose Save To Folder. This will prompt you to choose a folder from your Canva account to store your project. You can also add a new folder by clicking the Create New button.
How To Export In Canva To Your Device
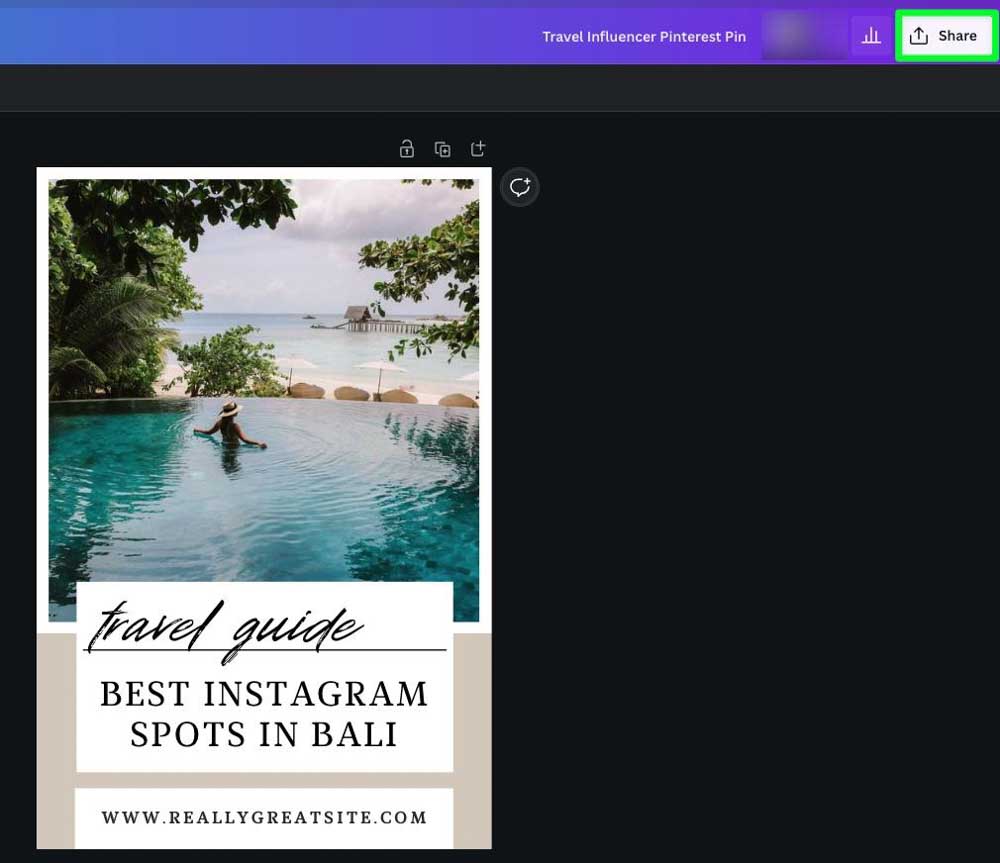
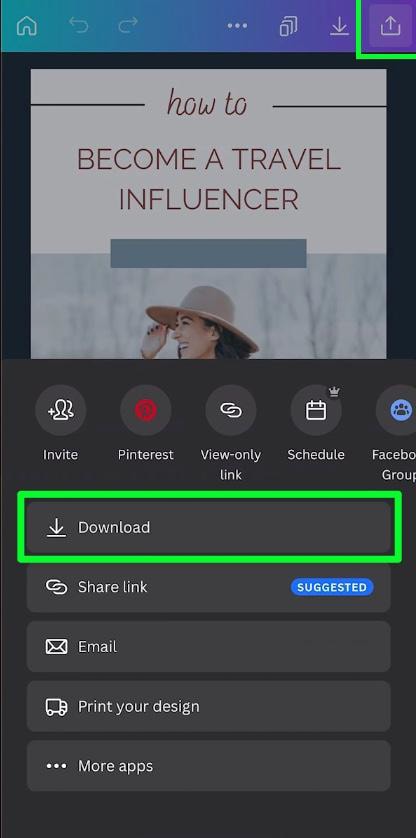
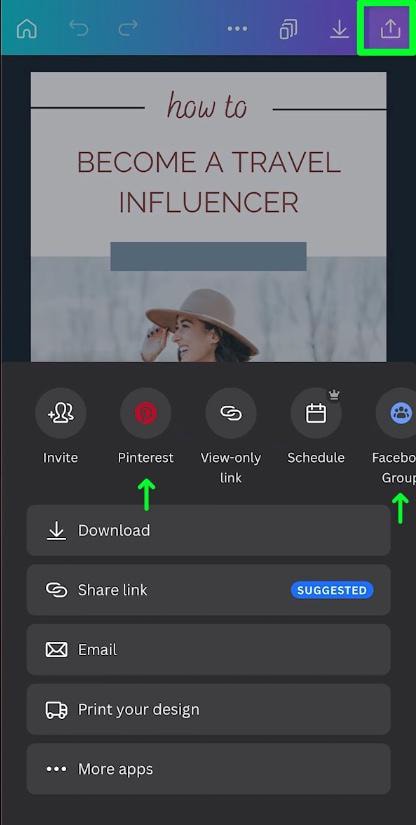
Step 1: Click The Share Button
To access the Share Menu, click Share in the top right corner of the screen.
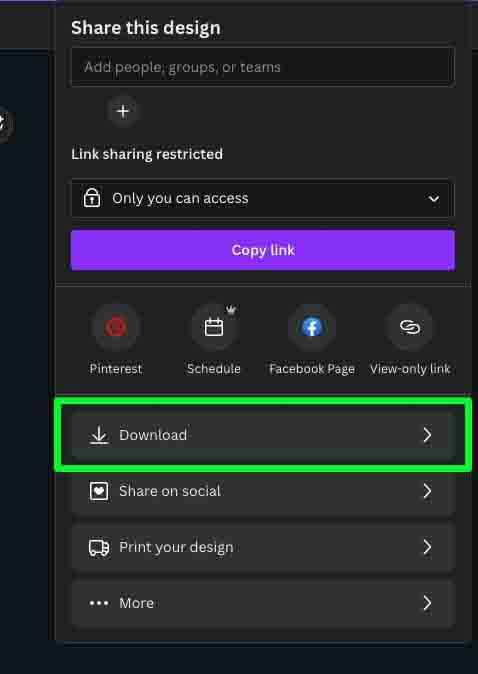
Step 2: Click Download
Downloading your design to your computer takes one extra step, and that’s clicking the Download button.
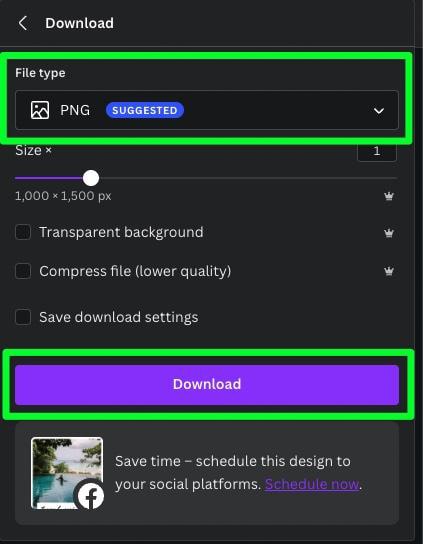
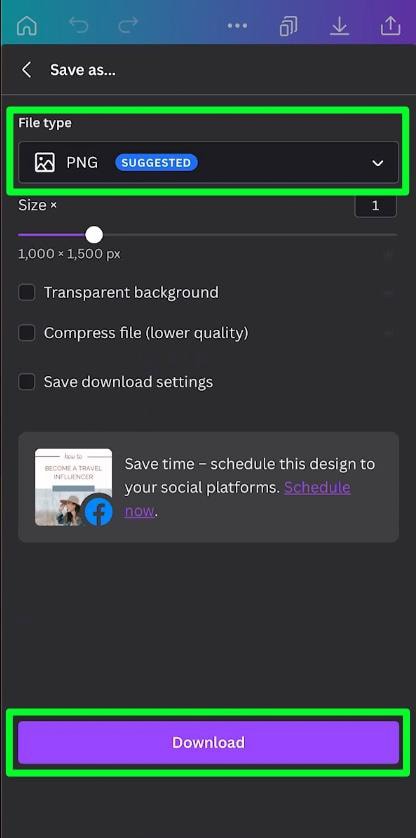
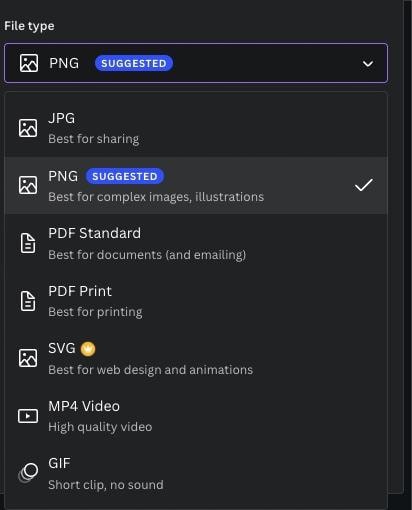
Step 3: Set Your File Type And Click Download
I will explain all the different file types later on. For now, choose JPG or leave the File Type as PNG. These are the most common file types to choose from for your design. Once you’re ready, click on Download.
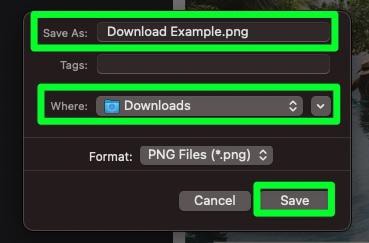
Step 4: Choose Your Save Destination
One last thing you need to do before you download your design is to pick where you want your design to be saved. The box that pops up will allow you to name your file and pick the folder on your hard drive as your destination.
Click on Save to finalize your choices. This will save your design to your computer.
Once your design is saved to your computer, navigate to the folder where you saved your design.
How To Save A Design To Your Camera Roll In Canva Mobile
Step 1: Click The Share & Download Buttons
You can find the Share button in the top right corner of your screen. Tap the Share button, then tap the Download button.
Step 2: Select Your File Type & Tap Download
Much like the Canva Desktop, you will be presented with choosing your File Type and a few more options. For File Type, choose either JPG or PNG, as these are the most well-rounded options for static images. Leave the rest of the options blank.
When you’re finished, tap Download.
Step 3: Wait For Confirmation
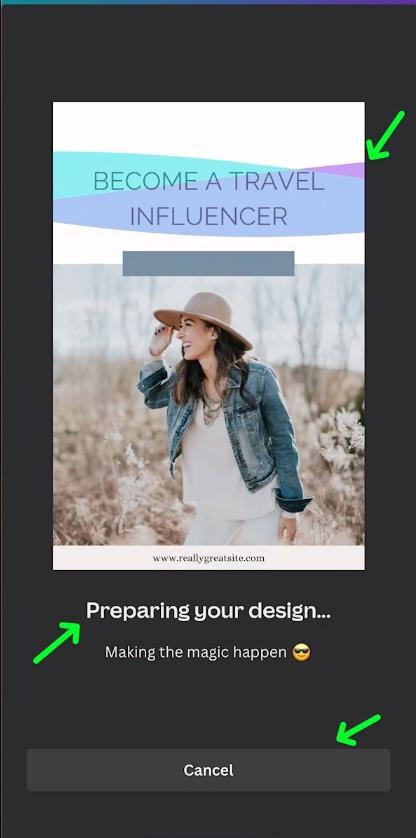
The second you tap Download, you will see an animation of your design being downloaded onto your camera roll.
You will be informed that your design is being prepared at the bottom of the screen. You will also have the opportunity to stop downloading by tapping on Cancel. When your design is finished downloading, an alert will pop up, letting you know.
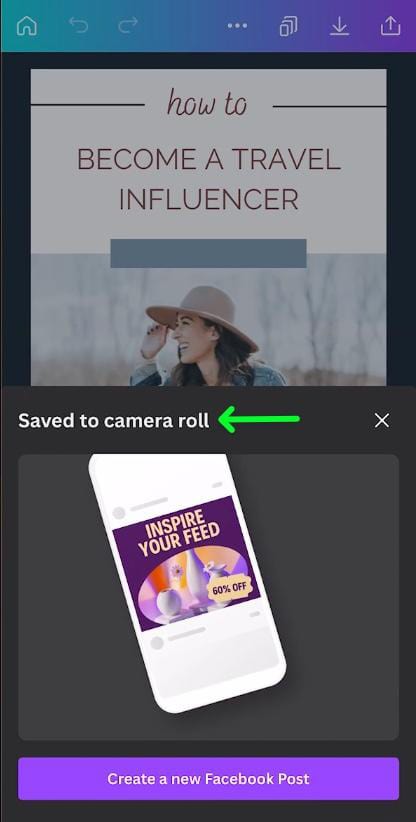
To ensure that your design has been downloaded to your device, open your camera roll to double-check. Your design should be the most recent design that is showcased.
Step 4: Share Your Project Directly To Social Media (Optional)
First, tap on the Share button. Then, above the Download button, you will find a scrollable bar with various icons on it. You can swipe from the right of your screen to find pretty much every social media site there is.
Tap on your chosen site and set up your account so that you can quickly and easily send your designs from Canva straight to your social media site of choice.
Types Of Export File Types Explained
There is a wide variety of file types available to export to with Canva. You can find these file types in the drop-down menu right before exporting your design.
Here are all the different file types you can export to in Canva and a little bit about how they work.
- JPEG: is compressed, so some non-essential data is lost, resulting in a smaller file size. JPEGs are commonly used on the internet because of their speed and size.
- PNG: is a type of image file that is used on the internet and is often used for images that have transparency, such as those you have removed the background from.
- PDF Standard: is perfect for anyone looking to save space on their hard drive as it has a comparatively lower resolution of 96 dpi than PDF Print.
- PDF Print: offers a 300 dpi resolution that is three times higher than most resolutions, which makes for a big difference in detail and clarity for printed material.
- SVG: is a type of image that can be scaled to any size without losing quality. SVG can be used to create interactive, data-driven visualizations for the web.
- MP4: is a type of video that can be watched on many devices, like phones and computers. The format is also popular for its versatility, as it can contain both video and audio in one package.
- GIFs: are stored in a compressed format and can contain up to 256 colors. They are commonly used on websites, social media, and messaging apps.
So now, with all these file types in mind and the easy exporting options you learned above, you’ll be able to save any project from Canva like a pro!


