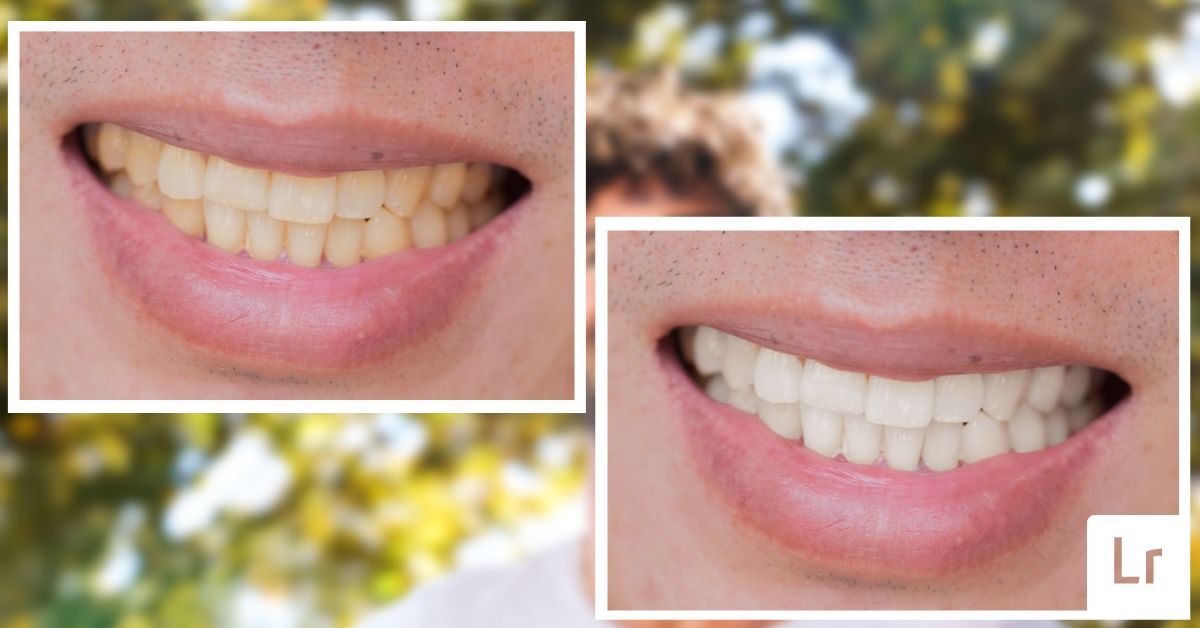

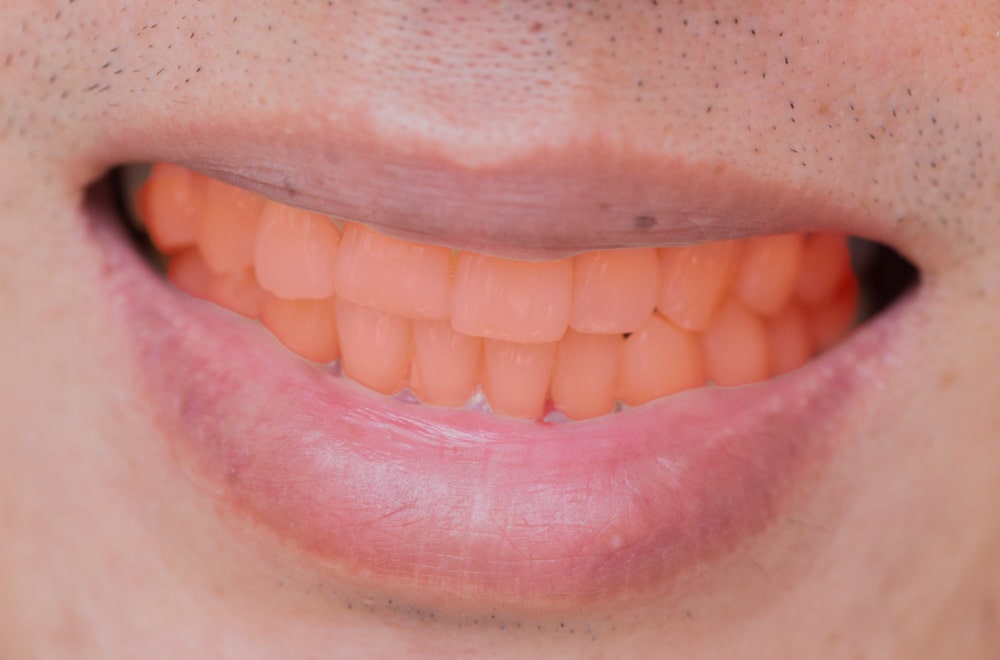
Off-white teeth can often ruin an entire shot, and it’s not always the model’s fault. In some cases, bad lighting can create a yellow tint on teeth. Luckily, you can quickly learn how to whiten teeth in Lightroom using this step-by-step guide.
Once you’ve batch-edited your photoshoot, be sure to fine-tune certain elements, and you can easily do some in Lightroom itself. Let’s get started!


How To Whiten Teeth In Lightroom
Step 1: In The Develop Module, Go To Masking > Brush
Head to the Develop Panel and click the Masking icon, which sits in the bar right above the Basic tab. From here, you’ll see the different Masking tools available in Lightroom. Click the Brush option.
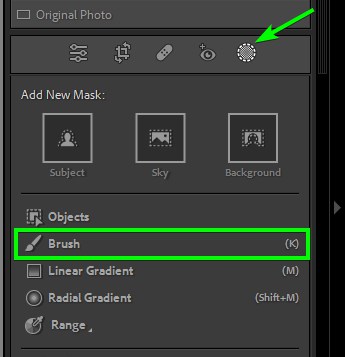
This will take you to the Brush Panel, where you’ll see most of the same settings available in the Develop module. You’ll also notice the Masks Panel appear with the New Mask you’re about to create. You’ll work in these two panels to set your brush settings and add adjustments.
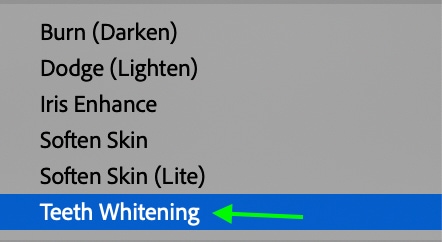
Step 2: Set The Brush Effect Preset To “Teeth Whitening”
Lightroom has several presets built into the adjustment brush that you can use to brush specific effects onto your image. One of these is called Teeth Whitening and contains the proper settings to make teeth look whiter.
To add the preset to the adjustment brush, click on Custom next to Presets.

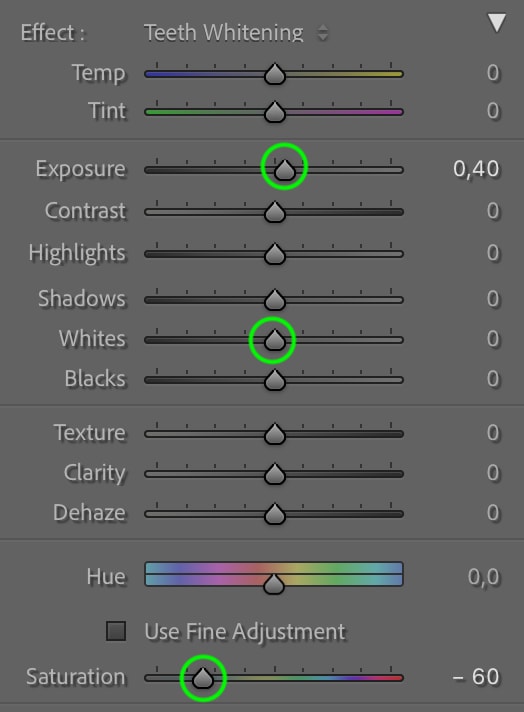
Scroll down to find and set the effect to Teeth Whitening.
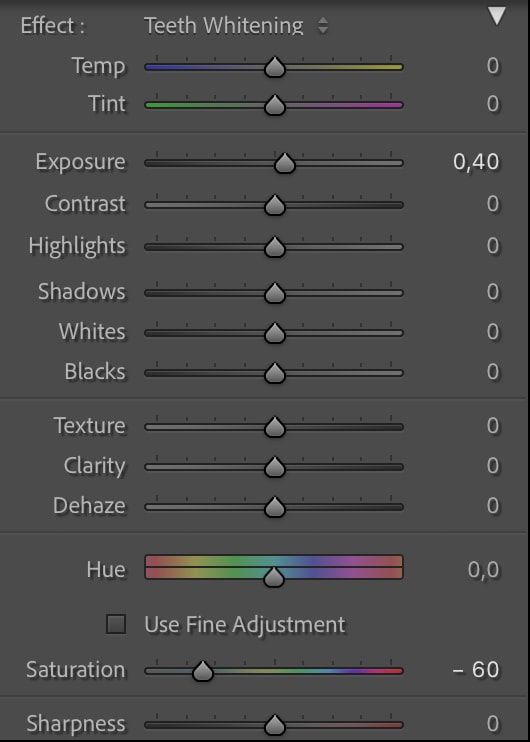
You’ll notice the Saturation and Exposure adjustments change slightly, which means the brush is correctly set. To ensure the effect works best, do not change any other adjustments for now.
Step 3: Adjust The Brush’s Size, Feather, Flow, And Density
At the top of the Brush area, you can change the Size, Feather, Flow, and Density of your brush.
Set the size depending on the area you’ll be brushing over (in this case, the teeth). You don’t want the brush size too big or too small. Feather can remain low so that the effect stays on the teeth rather than the lips. Density and Flow can stay at 100 as these do not need to be changed.
Finally, enable Auto-Mask. The Auto Mask feature will constrain the area you brush over only to pixels of a similar color and contrast. This will help prevent the mask from going beyond the teeth.
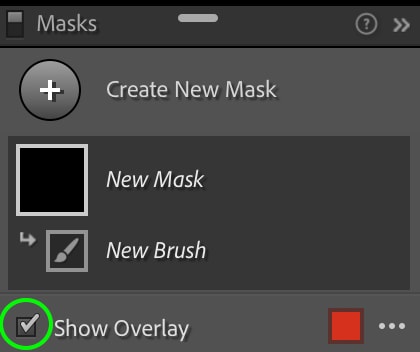
Step 4: Enable Show Overlay In The Masks Panel
To best see the mask as you brush, you’ll want to make sure the mask overlay is visible. It should automatically be checked and set to the color Red, but you can double-check that the highlight is active by heading to the Masks Panel and making sure Show Overlay is enabled.
Step 5: Brush Over The Teeth To Add The Effect
Now, just paint over the teeth with your brush. You can adjust the size of the brush as you go to cover areas that are harder to reach, but with the auto-mask turned on, the mask should remain mainly on the teeth, as you’ll see below.
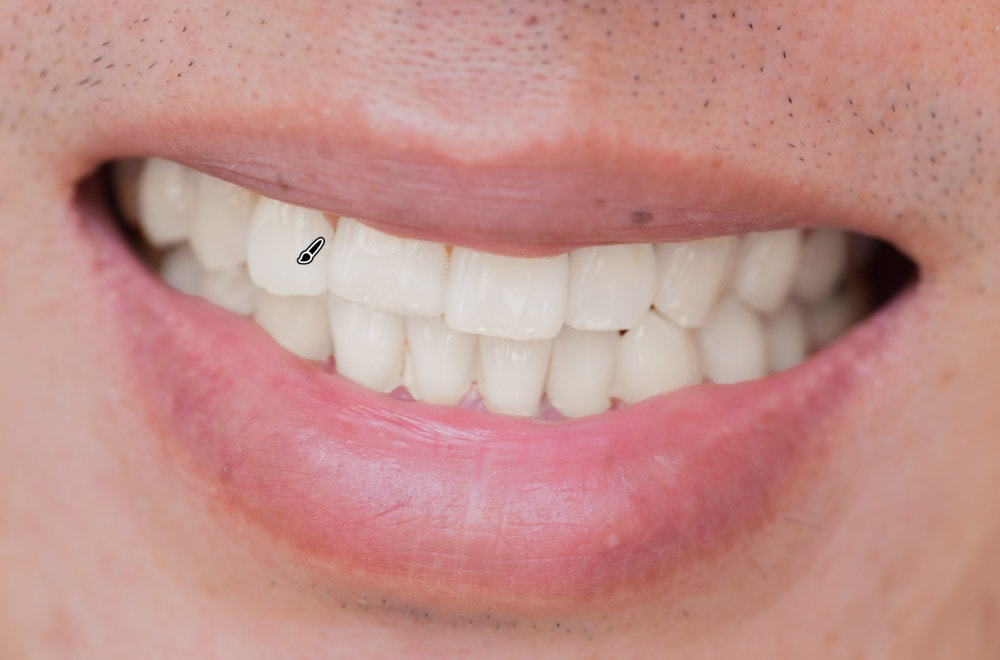
To view the final product, you can disable Show Overlay in the Masks Panel. You’ll notice the teeth in the final image have considerably whitened versus the original.
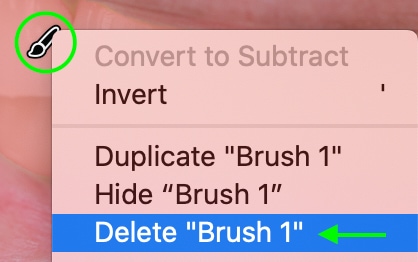
If you make a mistake, you can undo your last brush stroke using Control + Z (Win) or Command + Z (Mac). You can also delete the brush entirely by right-clicking the brush icon over the mask and selecting Delete “Brush 1”.
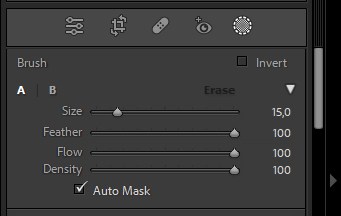
Step 6: Refine The Mask To Correct Any Unwanted Adjustments (Optional)
If you make any mistakes and would rather not start your mask over from scratch, you can switch to the Eraser Brush by heading to the Masks Panel and selecting Subtract > Brush.

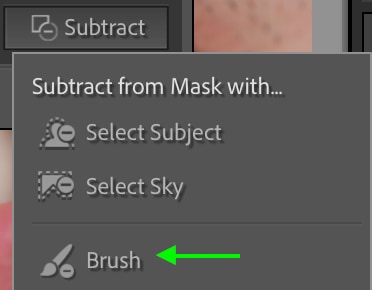
Then, set the settings of the eraser brush — the size should be enough to erase the area you need to but not so large that you erase too much. Feathering should be quite high to keep a blended appearance, with Density and Flow set to 100. Next, paint over the areas you want to remove from the adjustment.
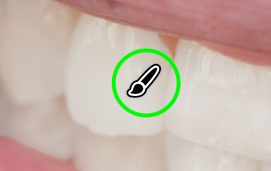
If you’d like the teeth to be even more white, you can adjust some of the settings manually – particularly the exposure, whiteness, and saturation settings. First, make sure the brush is active by clicking the brush icon on the image or Brush 1 from the Masks Panel.
Now, head to the Brush Panel, and you can adjust the sliders for the Exposure, Whites, and Saturation adjustments to increase or decrease their strength. The image will change in real time, so you can adjust it to your liking.
Now that you know how to whiten teeth in Lightroom, it’s time to retouch the rest of your portrait. Learn how in this next tutorial on how to professionally smooth skin & remove blemishes in Lightroom!
Although these types of spot adjustments can be time-consuming, editing the rest of your image doesn’t need to be. Luckily, I have 12 free Lightroom presets you can download here to help do just that!


