
If you create content for YouTube and don’t have much branding, you can create a youtube banner in Photoshop. As any content creator knows, branding is extremely important to make your brand more relatable and known by viewers. When adding content to YouTube, having a branded banner is essential.
Here I will guide you through creating the banner by explaining the different sizes and then showing you how to place elements correctly.
Plus, you can download the free template to use as the base of your banner, so you don’t have to worry about cutting off important details!
What Size Is A YouTube Banner In Photoshop?
The banner sits at the top of your YouTube page and should give viewers all the information they need to know about our channel. This doesn’t mean that the banner should be busy and full of information; instead, it should strategically offer the key bits of information.
When designing a banner for YouTube, the size of the banner and the placement of the elements are crucial because the banner displays differently on each device people view YouTube on.
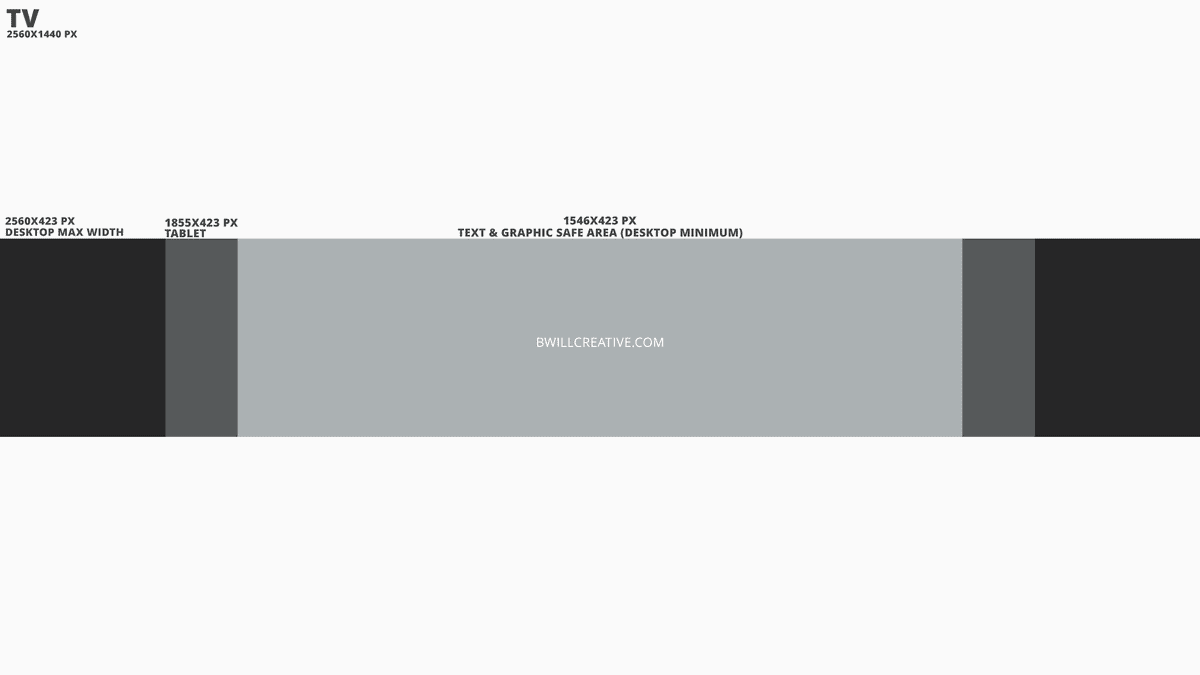
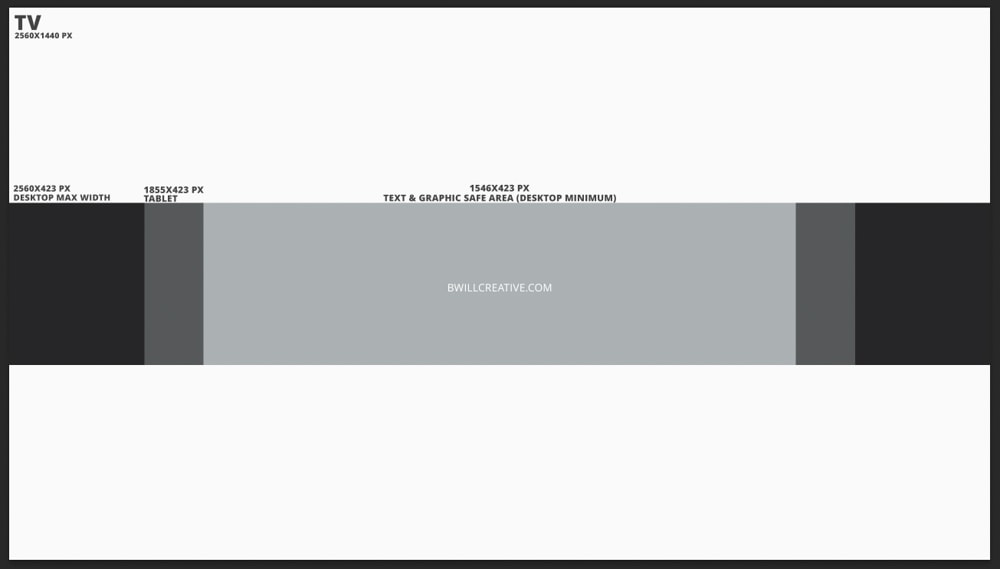
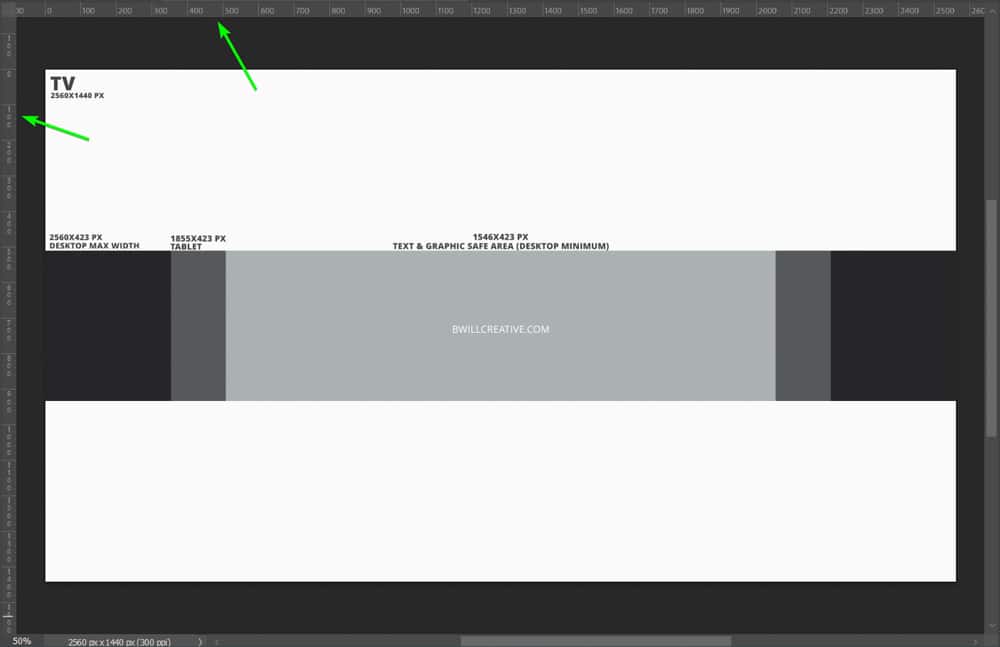
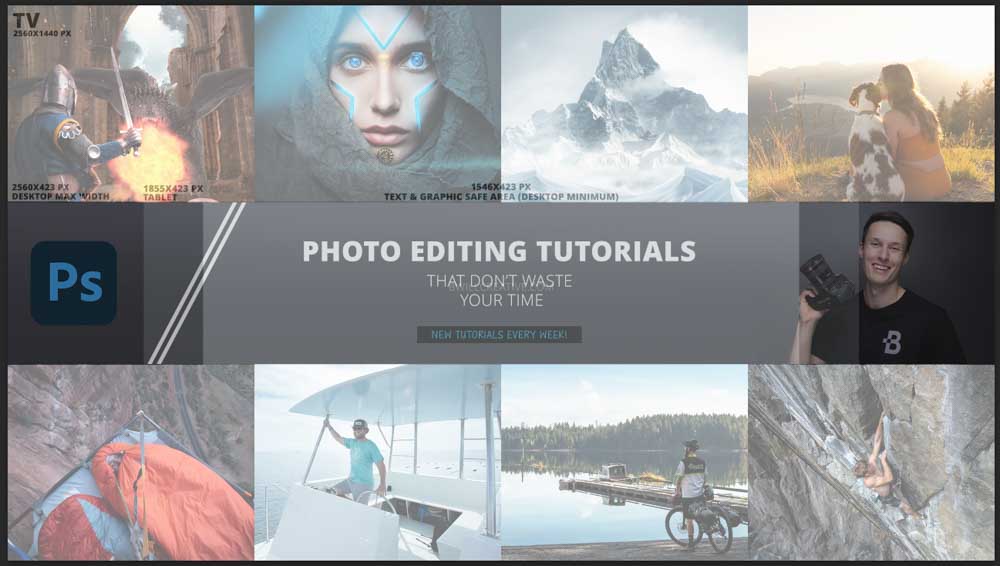
Ultimately, the overall size of a YouTube banner is 2560 x 1440 pixels with a resolution of 300ppi. This banner size displays perfectly on TV screens when the viewer uses the YouTube app.
However, only some people watch YouTube on their TV. You can open YouTube on your computer, tablet, or your smartphone. These devices won’t display the full banner you see on the TV.
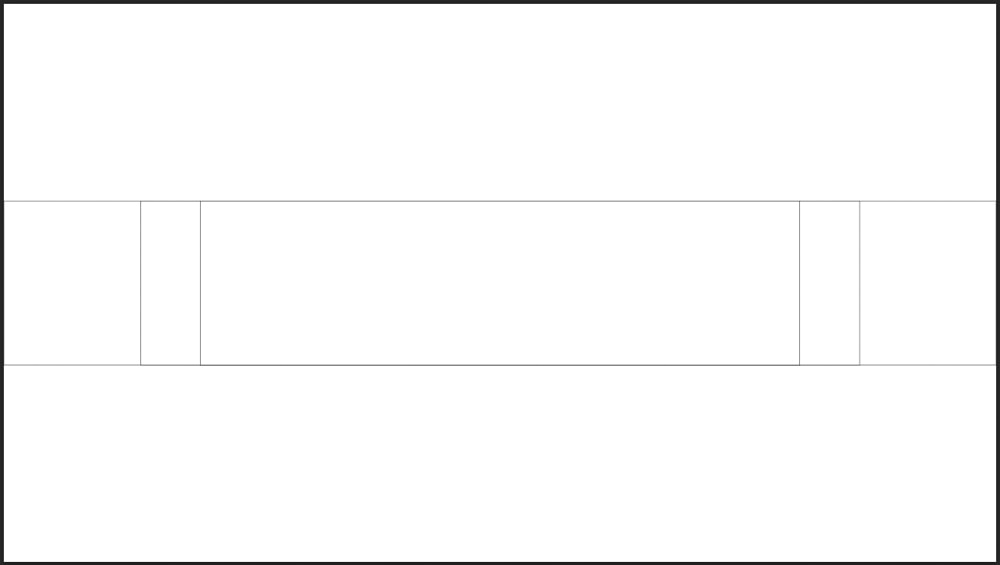
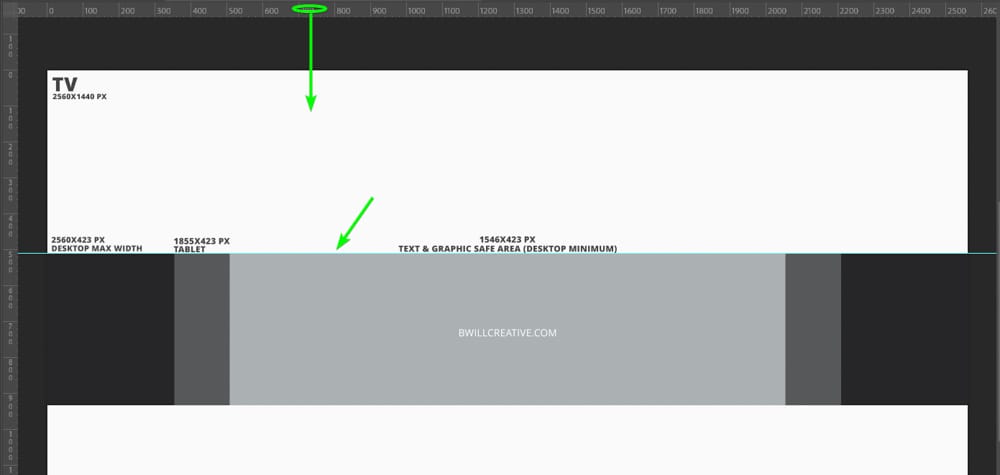
The size for a desktop at the maximum width is 2560 x 423 pixels. Then, a tablet screen displays the banner at 1855 x 423 pixels. Finally, the ultimate safe zone to add essential information, which will show on mobile phones and is the minimum width that some desktops display the banner, is 1546 x 423 pixels.
The different sizes don’t mean you need to create various banners for each device. You must create one large banner and section the areas to ensure the design isn’t cropped in odd places while keeping the vital details in the safe zone.
As long as you follow these size guidelines, your banner will display perfectly without awkwardly cropping on specific devices. To summarize, the size of a YouTube banner you create in Photoshop with designated sections for various devices is:
- Overall size for TV screens: 2560 x 1440 pixels
- Desktop maximum width: 2560 x 423 pixels
- Tablet or Ipad: 1855 x 423 pixels
- Mobile and minimum desktop width (ultimate safe zone): 1546 x 423 pixels
Use This Free YouTube Banner Template To Guide You!
When creating your YouTube banner, you can create a new document at 2560 x 1440 pixels, with a resolution of 300 PPI. Then, you can select the Rectangle Tool, click once on the page, and type in the sizes for the other viewable areas, then arrange these to mark the various design spots.
However, that’s a lot of work. Instead, you can save this free YouTube Banner Template by right-clicking and saving it to your desktop. You can then open it in Photoshop and use it as a guide for your design. In the next section, I’ll show you how to use it to create your own banner.
How To Create A YouTube Banner In Photoshop
Now that you know the size requirements and have a free template to guide you, you can start designing your banner. I will guide you through creating a banner from scratch and how you can use the template. I recommend using the template for a much faster workflow.
First, I will show you the crucial steps of setting up your document to ensure the size is correct. Then, I will show you how to add text, photos, and graphics.
However, the design is just a guide to inspire you. You must get creative and add flair to your design to match it to your channel and brand.
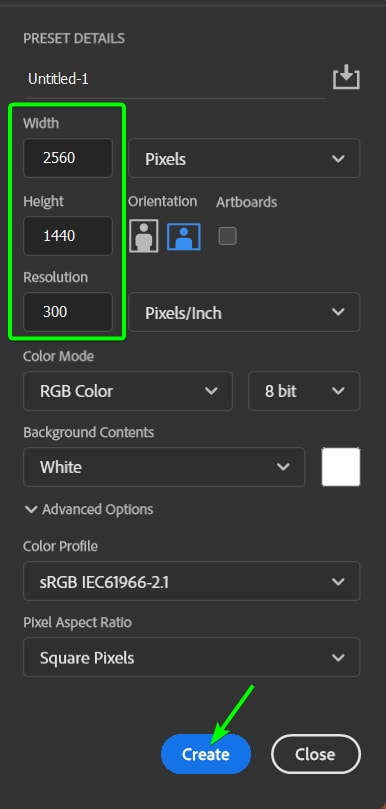
Step 1: Create A New Document At 2560 x 1440 Pixels
To start, you need to create a new document by opening Photoshop, then going to File > New or pressing Control + N (Win) or Command + N (Mac).
In the New Document Window, add 2560 pixels to the Width, 1440 pixels to the Height, and 300 Pixels/Inch to the Resolution. You can keep the background white and click Create.
If you downloaded the template, you can drag and drop it into your new document or go to File > Open or press Control + O (Win) or Command + O (Mac).
Then, open the template you downloaded. The template will open at the correct size and resolution.
Step 2: Add Shapes To The Document (If You Aren’t Using The Template)
Note: Using the template is much easier, and you can skip this step if you have opened it.
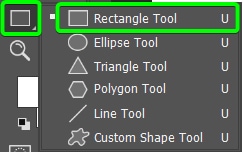
If you are starting from scratch, you must add rectangles to mark off the various areas on the page. To do this, click and hold on the Shape Tool (U) in the Toolbar and select the Rectangle Tool.
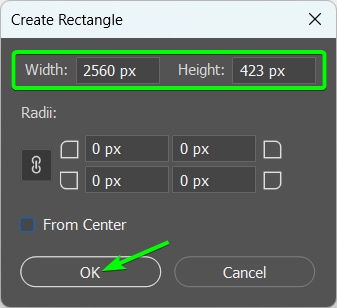
Then, click once on your canvas to open the Create Rectangle dialogue box. Add in the width and height values for the maximum desktop size, which is 2560 x 423 pixels. Then click OK.
Then, repeat that step for all the sizes. Once you have added the rectangles, select all the layers in the Layers Panel, including the background layer.
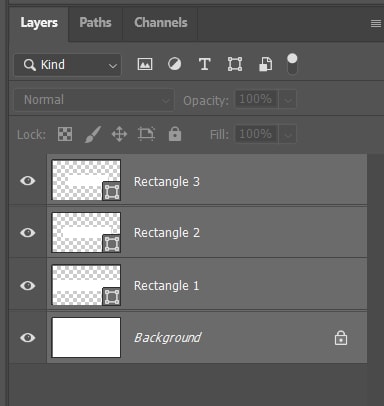
Then, select the Move Tool (V) and use the alignment settings in the Options bar to center the rectangles in the center of the document.

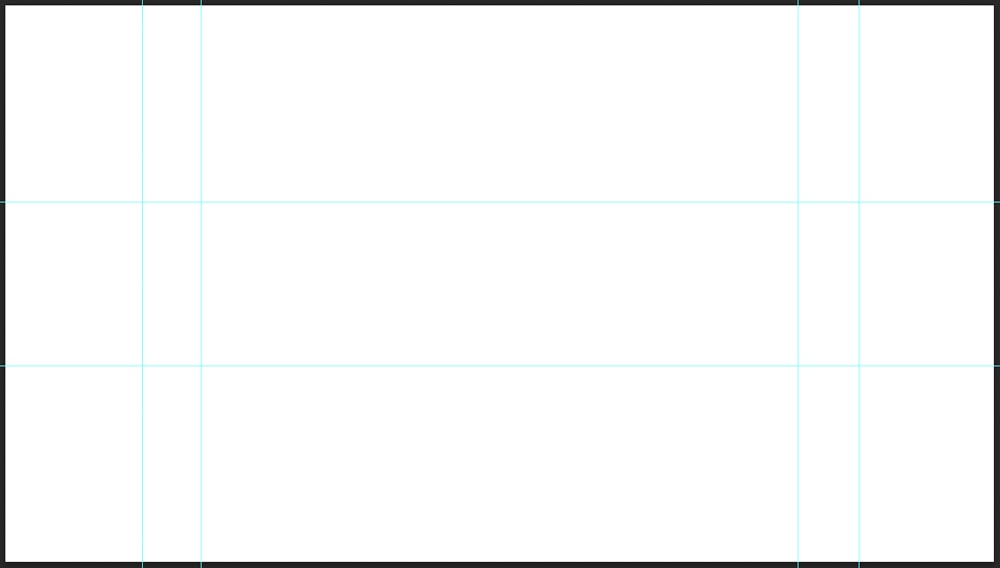
You will have a layout similar to the template to use as a base.
Step 3: Add The Guide Lines To The Canvas
Whether you created the blocks yourself or used the template, you can now add guides to the document. These guides will help you place your elements without needing to use the template or shapes as an overlay and place elements underneath them.
To add guides to the canvas, activate the Ruler Tool by pressing Control + R (Win) or Command + R (Mac). You will see the ruler on the top and left of the canvas.
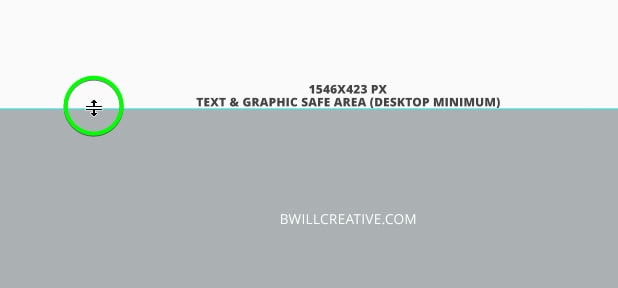
Add a new guide to the page by clicking on the top ruler and dragging it down onto the canvas. You will notice a blue line appears. Drag it down to the top of the block and let go to place the guide.
If you need to move a guide, hover over it until the ruler icon appears, and then click and drag to move it.
Add another guide at the bottom of the block by clicking and dragging the top ruler. Then, use the ruler on the left to add vertical guides to the blocks.

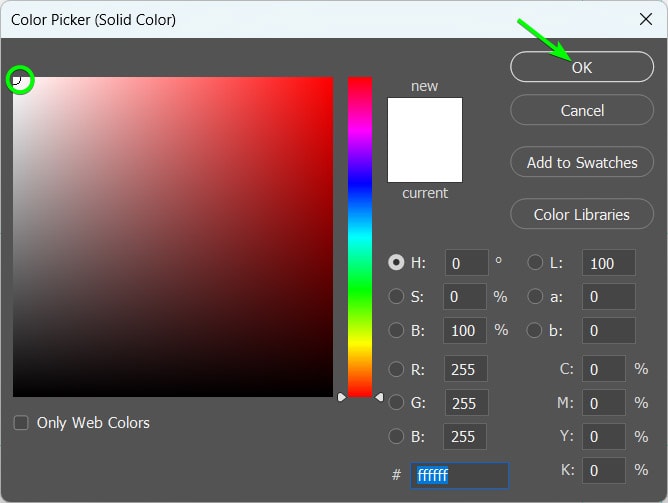
Next, you can delete the shapes if you added rectangles to the page or add a solid color fill layer to the template document. To add a fill layer, click the Create new fill or adjustment layer icon at the bottom of the Layers Panel and select Solid Color.
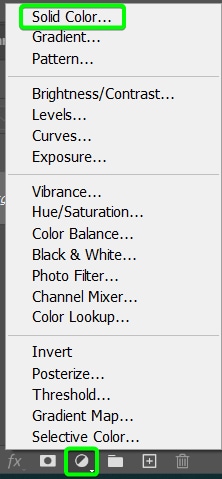
Select white (or any color) and click OK. You can always change this later or add images over it.
You now have a blank canvas with the guidelines ready to start creating your banner by adding text, images, and other elements to make it unique.
Note: If you want to temporarily hide the guides while designing to see how the design looks, you can toggle the guides off and on using Control + H (Win) or Command + H (Mac).
Step 4: Add Your Text (And Important Details) Into The Safe Zone
Some designers may like to start working on the largest banner, which is the total size, and then work down to the safe zone. I prefer starting with the safe zone to ensure the crucial details are added first and look good on their own, then working my way out to add the whole design.
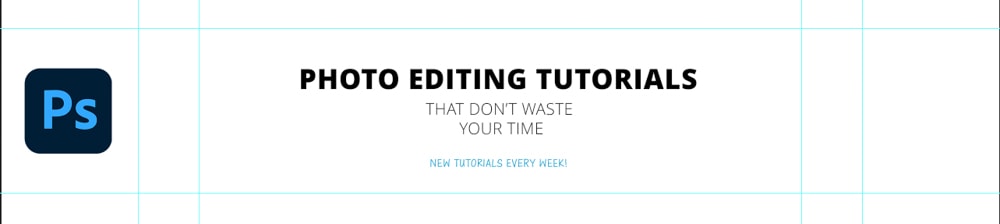
Firstly, I add text to the safe zone, which will appear on every device. Here, you need to think of what to add that portrays everything the viewer needs to know if this is all they see. You can add your channel name and logo or describe your channel in a few words.
I want to keep the safe zone simple, so I will only add text. I will leave my headshot and logo inside the maximum desktop width size so that viewers on their computers will see that information.
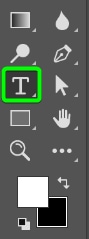
To add text, select the Type Tool (T).
Use the settings in the Options bar to select the font, size, and color for the text.

You can then type your text onto the document. There are several ways you can get creative with your text. You can add a metal effect to the text, distort the text, or just get creative when you format the text, as I did.
Note how I have kept the text in the safe zone, so none is cut off, even at the smallest banner size.

Step 5: Add A Logo Or Unique Branding
Next, I want to add the Photoshop logo to the design to portray what my channel is about. You can add your own logo and keep it within the safe zone, but I want to keep the smallest banner as clean as possible.
Open your logo or branding element in Photoshop and add it as a new layer in the document. If you don’t have a logo, you can easily make a logo in Photoshop. You can also change the color of your logo in Photoshop or in Canva to make sure it matches your banner style.
I have added the Photoshop logo to the left of the banner.
Step 6: Add A Headshot Of Yourself
Next, you can add a headshot of yourself if you’d like. If you will be in many of your videos, having a photo of yourself is a good idea. This element makes your page personable. Simply open the image in your files, then drag and drop it into the Photoshop workspace.
You can use the Move Tool (V) to place the image. Press Control + T (Win) or Command + T (Mac) and use the anchor points to resize the image.
I will place mine on the right-hand side of the banner. As you can see, I made sure the entire camera is visible for the tablet banner so it doesn’t look weirdly cropped.

Step 7: Add Other Creative Elements To Make The Design Unique
At this stage, the design is disjointed and doesn’t look very good. Here, you can add shapes, shading, colors, and other creative elements to tie the design together. I am still focusing on the desktop banner and not the entire banner just yet.
First, I sample a color from my headshot and create a rectangle using the Rectangle Tool (U), extending the width of the banner. Note that I am using the guidelines throughout.

Next, I add a layer mask to the headshot and edit the layer mask to blend the photo into the rectangle.

I’ve noticed that I have a bright spot in the headshot that looks odd with the rectangle.

To fix this, I sampled the color in the headshot and used the Brush Tool (B) to add that color across the width of the banner. I also used a clipping mask to keep it within the rectangle shape.

Since I’ve used a dark color at the back, I need to re-edit my text to make it stand out more. I can change the text color to white using the Type Tool settings in the Options Bar and add a rectangle behind the blue text.

I add two diagonal lines with the line tool to finish my desktop banner.

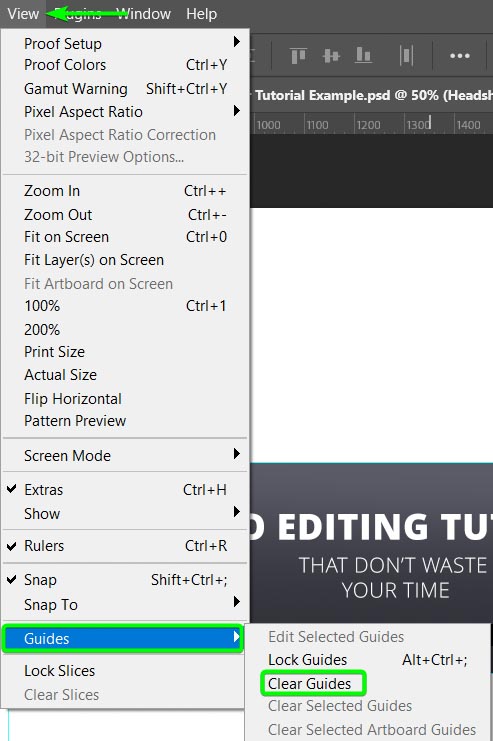
You can now hide the guides by pressing Control + H (Win) or Command + H (Mac) or delete them by going to View > Guides > Clear Guides.
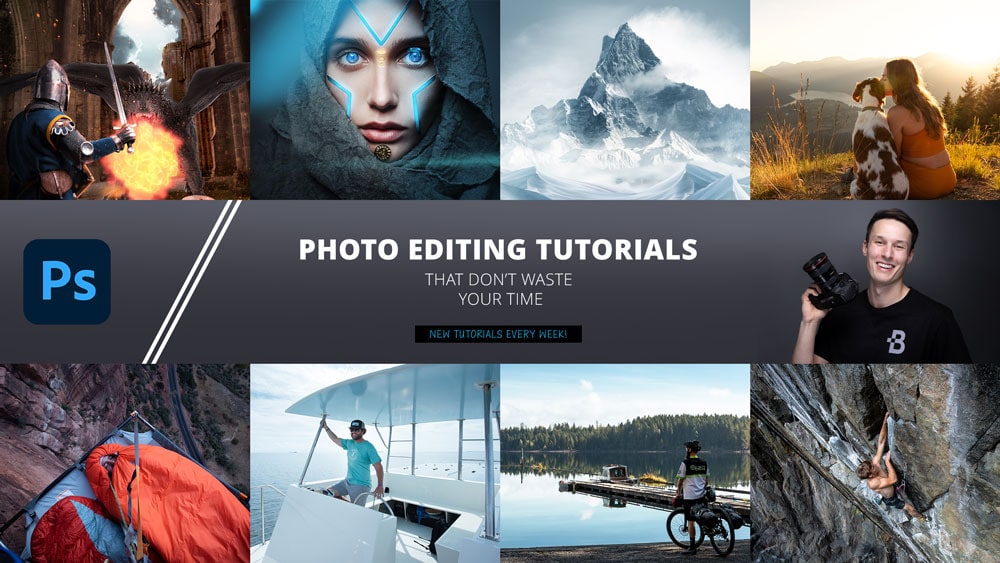
You can see how the full desktop banner will look. Ensure you are happy with this design and that all information is present.

Step 8: Add A Background And Imagery
You still have large areas of open space to add to for the full banner visible on TV screens. Here you can add color or texture as the background. You can also add an image or multiple images.
Since my channel is based on photography and photo editing, I want to add multiple images. I can drag and drop the photos from my files into the document and use the Move Tool (V) to resize and place them.
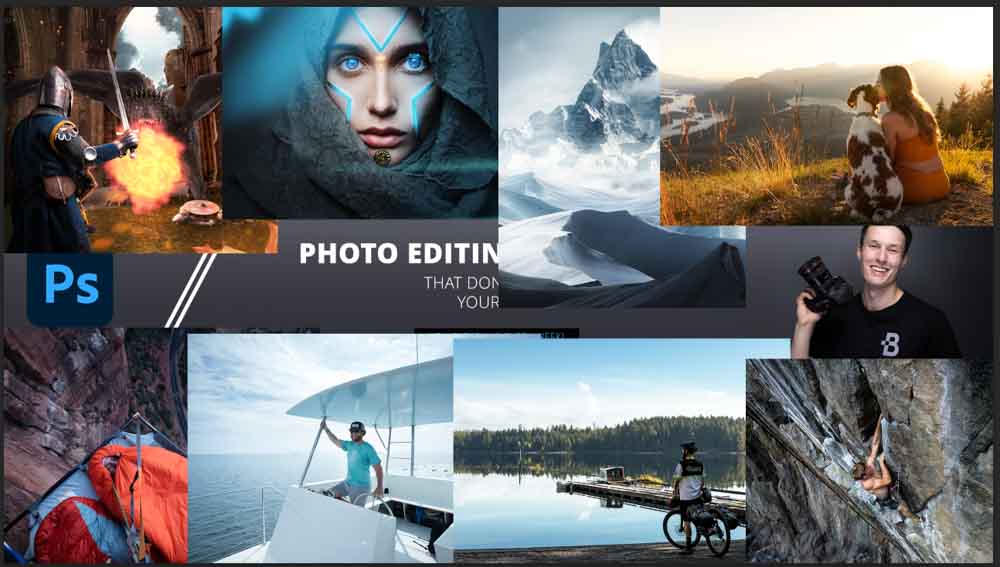
To clean up the images, I will use the Rectangle Marquee Tool (M) to select neat areas of each image and then add a layer mask to only show equal parts of each image.
You can make your own image collage and get creative here. After creating equal layer masks on each image, I finished everything I wanted to do, and this is how my banner looks.

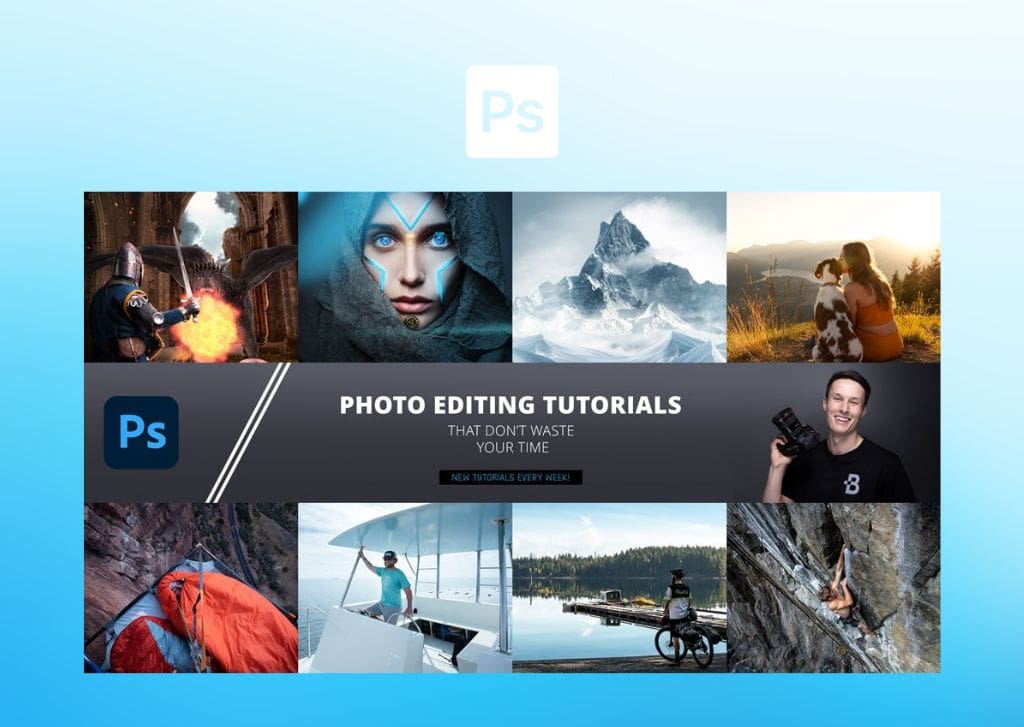
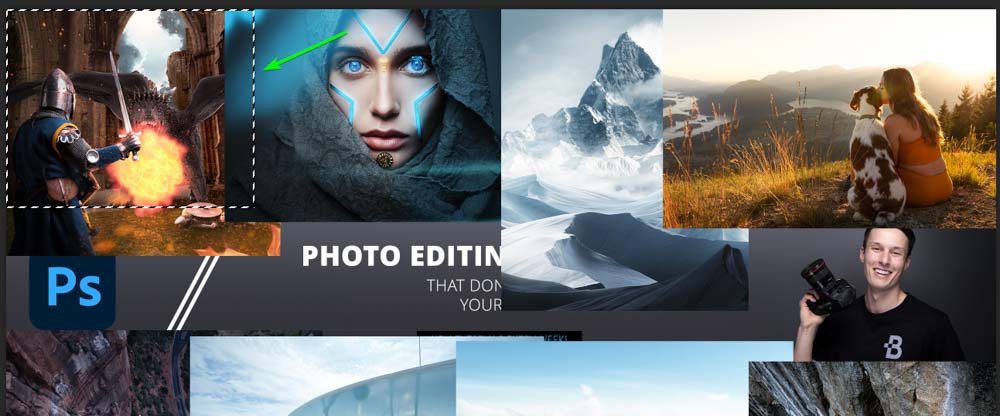
You can quickly check that the design fits onto the template by unlocking the background layer (which should be the downloadable template). Then drag it to the top of the layer stack.
Next, drop the Fill to about 45% to see the design below the template.
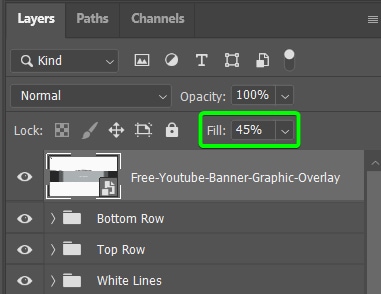
You can now see how the design lines up with the template banner sizes to ensure you won’t have any odd cropping on any device.
You can export the design using the Save for Web function and upload your banner to YouTube. Accepted file formats include PNG, JPEG, BMP, and GIF (with no animation). The file size should be smaller than 6MB. You now have a correctly sized and saved YouTube banner.