

Whether your camera just can’t shoot at the resolution you need or you saved a photo from online that looks a bit pixelated, there are a few ways Photoshop can help increase the image resolution. Additionally, you can improve your image by applying the Unsharp Mask filter, which makes your photos look even sharper. So let’s dive into how this process works and get your images to a higher resolution!
How To Increase The Resolution Of A Photo In Photoshop
The following steps will guide you through using the Image Size panel and the Unsharp Mask filter to improve the resolution of a photo and make it look as crisp as possible. Using these features, you can increase the resolution of your photo and have several options at your disposal to further enhance the resulting image.
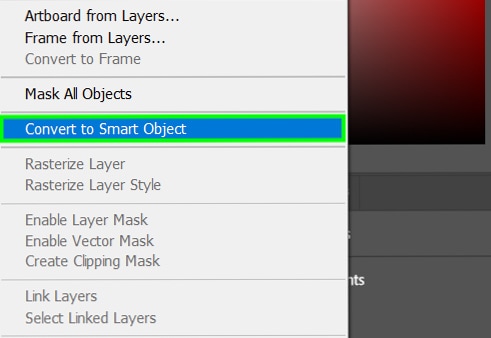
Step 1: Convert Your Photo Into A Smart Object
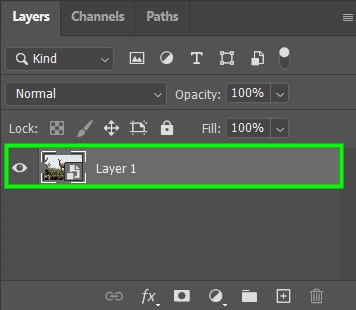
Before anything, you need to convert your image into a smart object. To do that, right-click the layer in question and choose Convert To Smart Object. That way, changes you make on the layer are reversible, allowing you to go back and edit it at any time in the future.
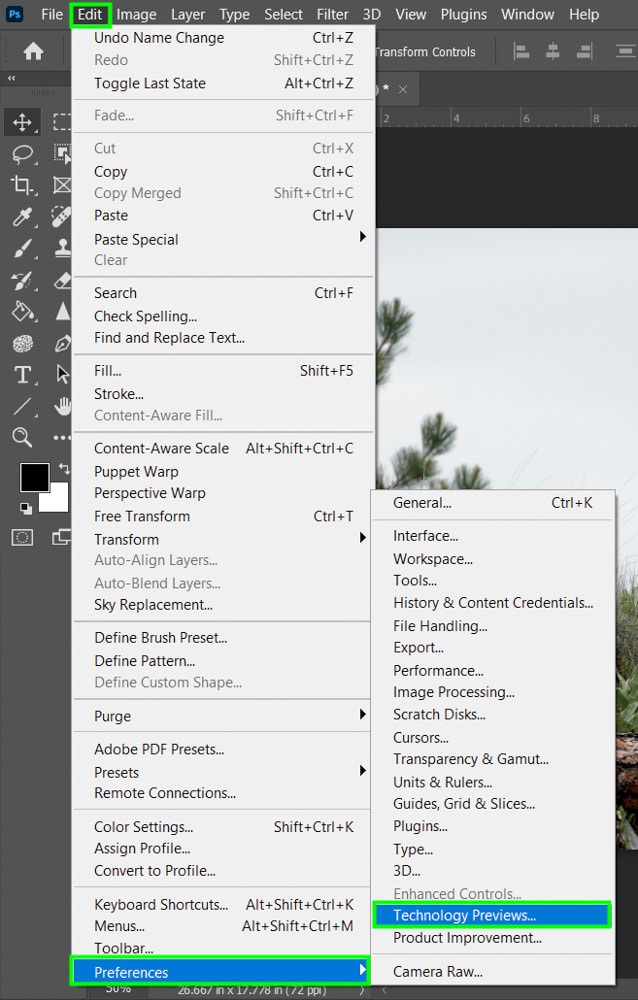
Another thing you can do before changing the resolution of your image is make sure the Technology Previews option is enabled. To access it, go to Edit > Preferences > Technology Previews (Win) or Photoshop > Preferences > Technology Previews (Mac).
Within the Preferences panel, select the Enable Preserve Details 2.0 Upscale checkbox. This will help you increase your photo’s resolution because Photoshop artificial intelligence will be integrated into the process.

Finally, click OK to confirm the action. You will need to restart Photoshop for this setting to be enabled.

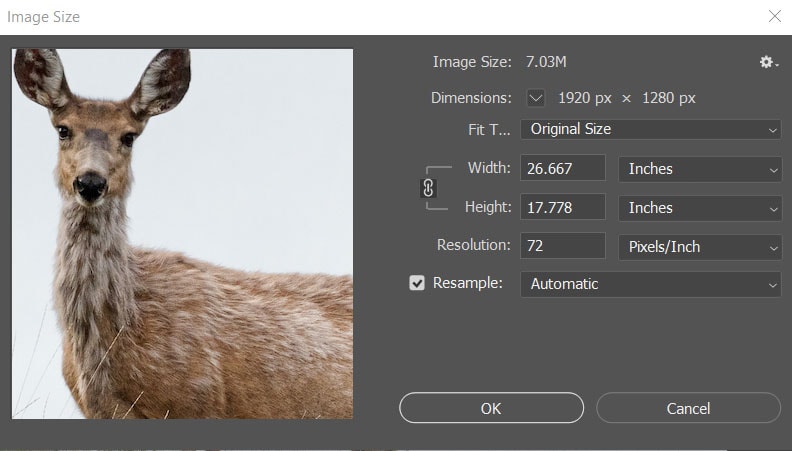
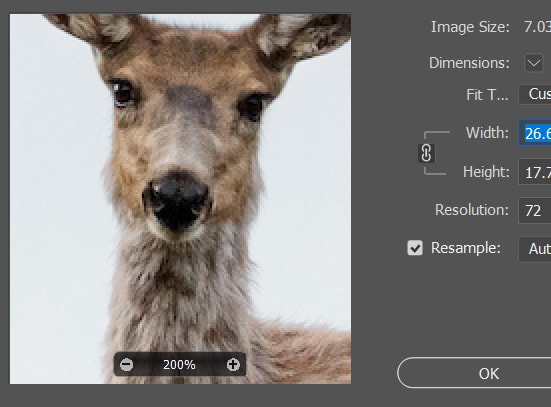
To open the Image Size panel, go to Image > Image Size.

The panel will open, showing a preview of the image and the current dimensions and resolution.
Step 2: Adjust The Preview Window
The first thing you should do in the Image Size panel is adjust the preview window. This will give you more control over the changes and give you more precision when changing the resolution of your photo.
When you hover over the Preview Window, the zoom button will appear. Click on the plus sign to zoom in on the image or the minus sign to zoom out.

Step 3: Adjust The Image Size Settings
Now let’s look at the Image Size settings on the right-hand side of the panel.
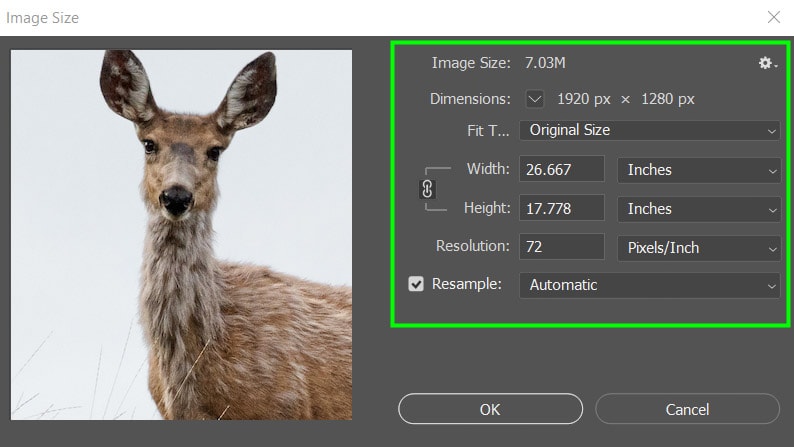
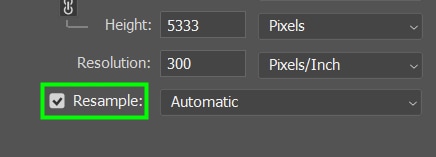
First, set the unit Dimensions to Pixels since when changing the resolution of a photo, you must alter the number of pixels in it and not something else.

Set all the other settings to Pixels as well.
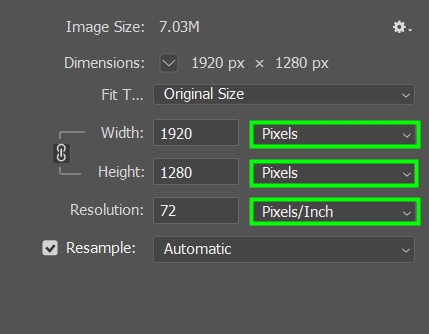
When you increase the resolution, you increase the number of pixels in the image horizontally and vertically, thus increasing the physical size of it. The photo will look less low-resolution with more pixels per inch.
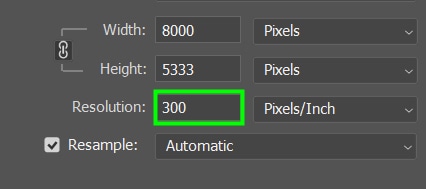
For most cases, you must set the Resolution to 300 Pixels Per Inch because images look a lot smoother and less artificial at that resolution.
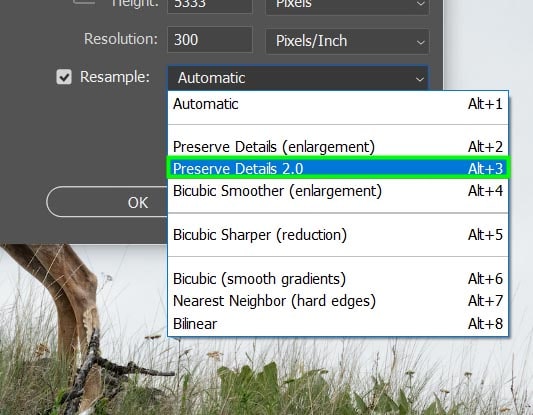
Now check off the Resample option if it isn’t already. The Resample option allows you to control how the new pixels will be added to your photo, helping you improve its quality. Some options allow you to increase the number of pixels while preserving details; others smooth out the pixels, and so on.
From the Resample drop-down, select the Preserve Details 2.0 option. Remember to see this option, you must set the Enable Preserve Details 2.0 Upscale option within the Technology Preview panel.
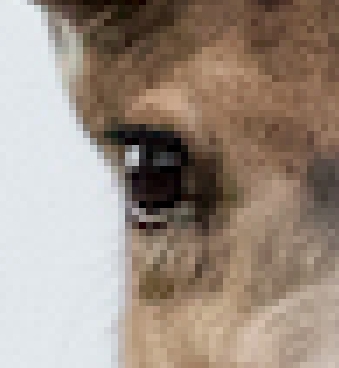
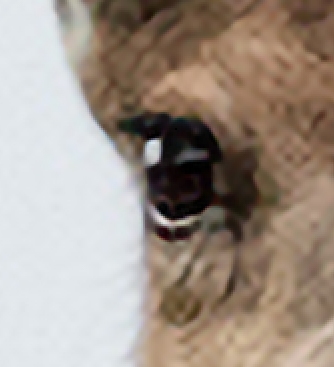
After changing the settings above, your image will look much better. To check that, you can zoom in on it. Press Control + + (Win) or Command + + (Mac) to zoom in on your image.
You will notice that your photo will be less pixelated, and hidden details will start to emerge.
Step 4: Adjust The Reduce Noise Slider
One of the advantages of the Preserve Details 2.0 resampling mode is the Reduce Noise slider. You can use it to eliminate any excess noise in the image.
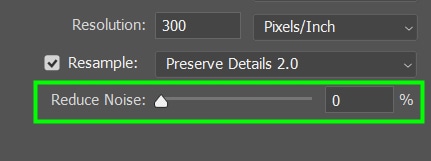
However, be careful not to reduce noise too much because if you do, your photo will look more like a drawing/painting than a photo. Generally, 50% works well for most pictures because it reduces extra noise while maintaining a little noise that makes the image look realistic.
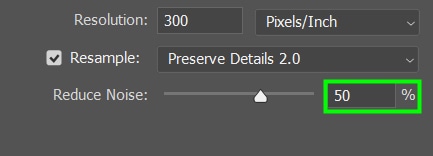

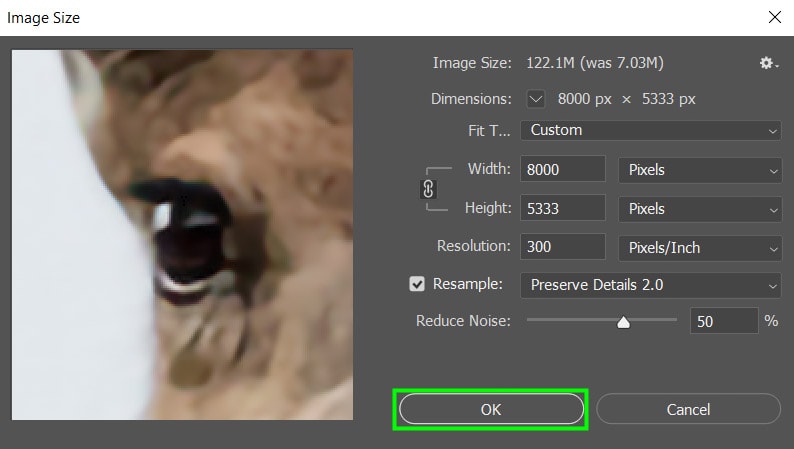
When you’re finished, click OK to apply the changes to your image.
Step 5: Apply The Unsharp Mask Filter
To open the Unsharp Mask dialog, go up to Filter > Sharpen > Unsharp Mask.
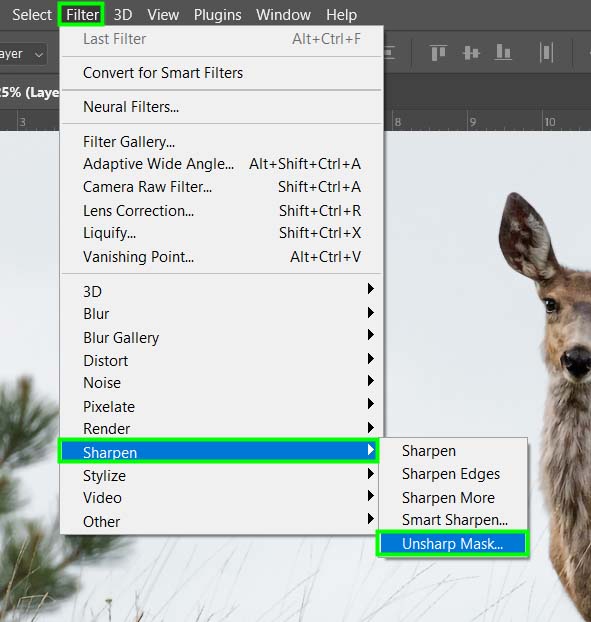
The Unsharp Mask dialog will pop up with sliders for you to adjust.
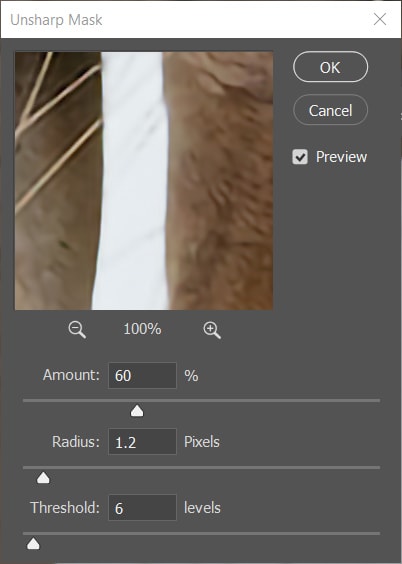
I’ll walk you through the settings and give you some tips on the values you should use. But remember that the values to use depend greatly on the resolution of your original image.
The Amount slider controls the contrast of pixel colors on the photo’s edges. That way, lighter pixels will look even lighter, and darker pixels will look darker.
I suggest going down to zero and bringing this slider up until you see a significant difference in your photo. While you do this, you can zoom in on the image to have a clearer vision of the changes.
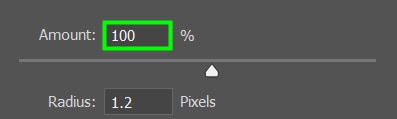
In my case, 100% worked. Increasing the Amount slider too much is generally not a good idea because, at higher values, you will see halos and even glitches along the edges of objects.


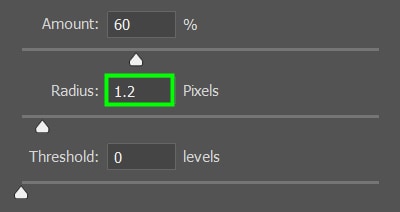
The Radius controls the thickness of the edges. Thicker edges can make your image look high-resolution because it highlights the shapes of objects.
I advise you against increasing Radius too much; otherwise, halos and random outlines will start to appear. In most cases, 1 to 1.5 Pixels is a safe range.
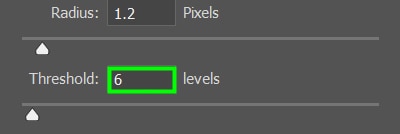
The last slider to adjust is the Threshold. It works as a denoiser in areas with excess noise or rough details.
I advise you against increasing the Threshold value too much, as it could cause the image to become blurry.
The amount depends on the quality of your photo, but generally, values under 10 work well. For my picture, I set that parameter to 6 Levels.
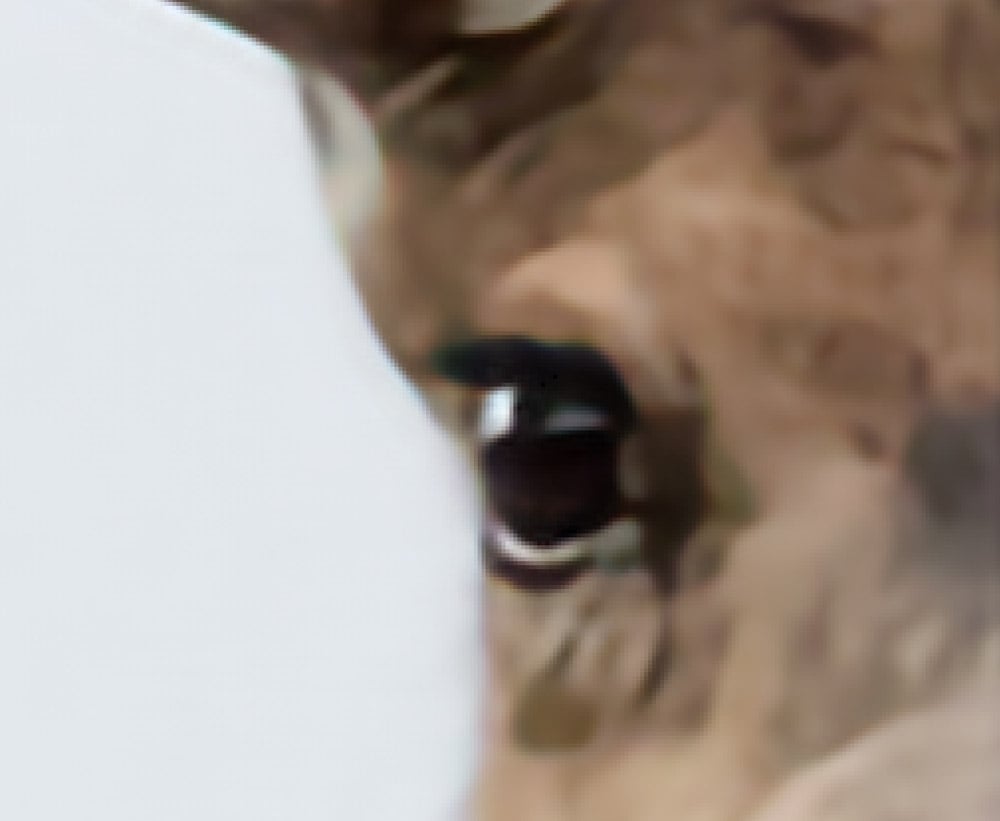
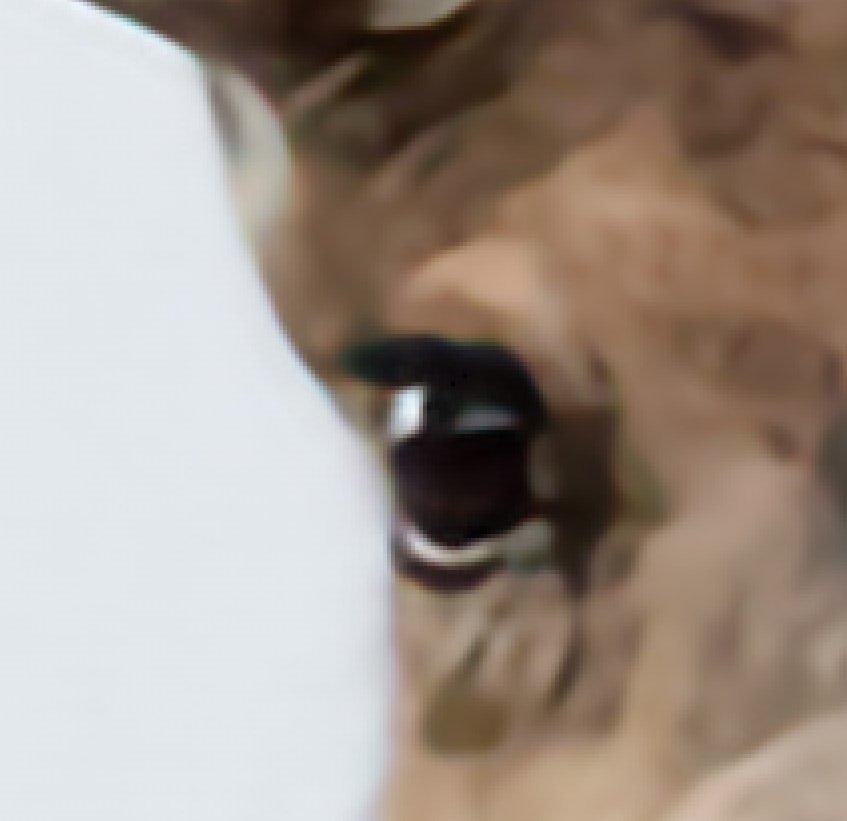
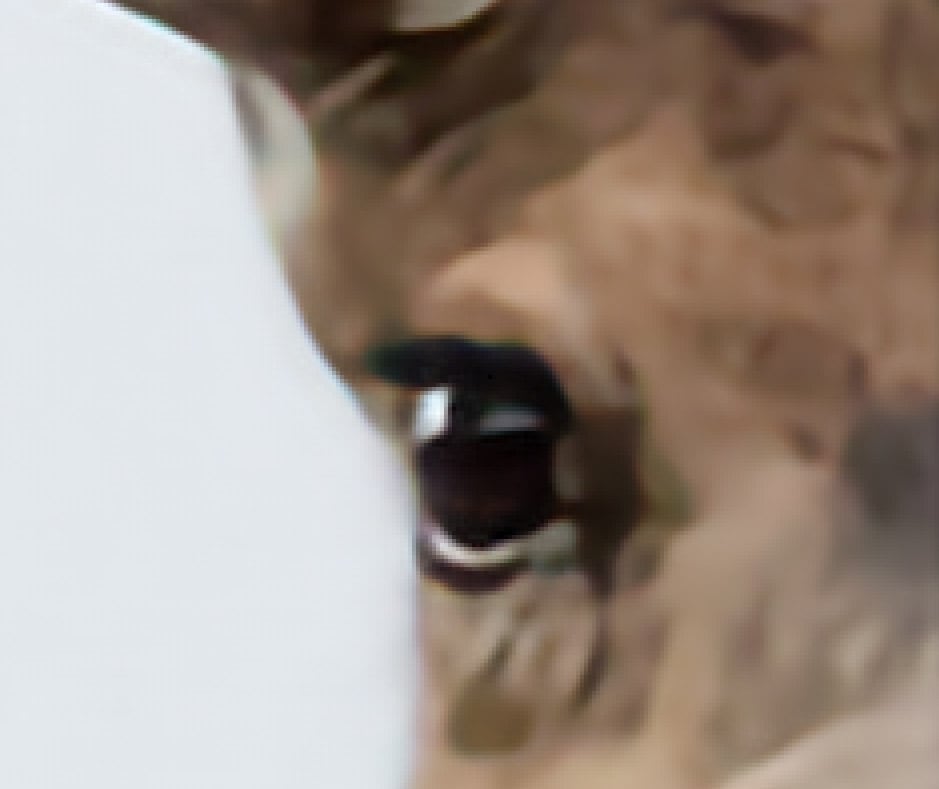
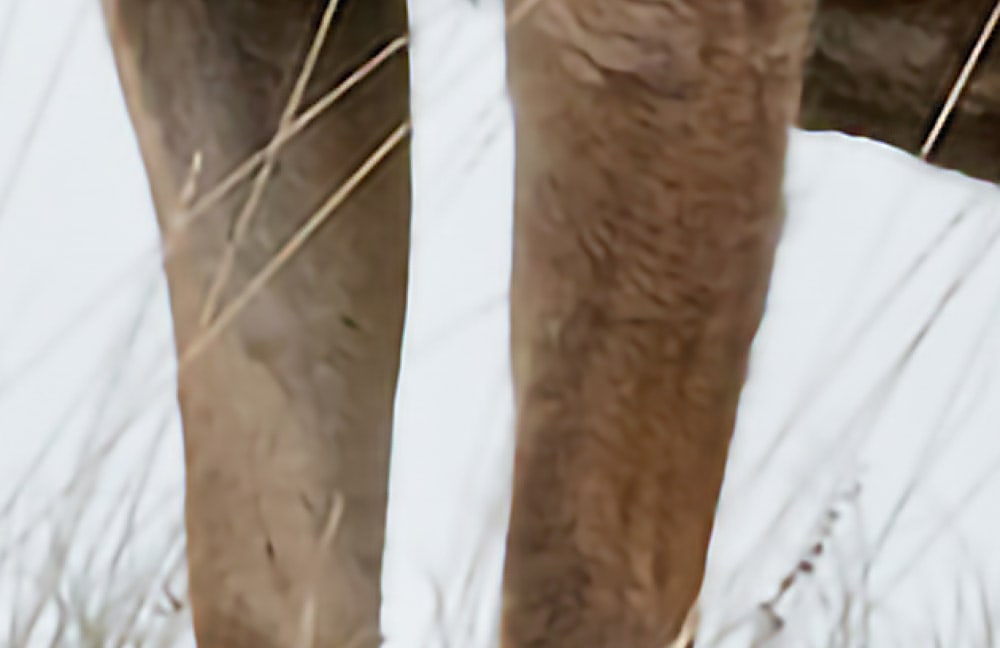
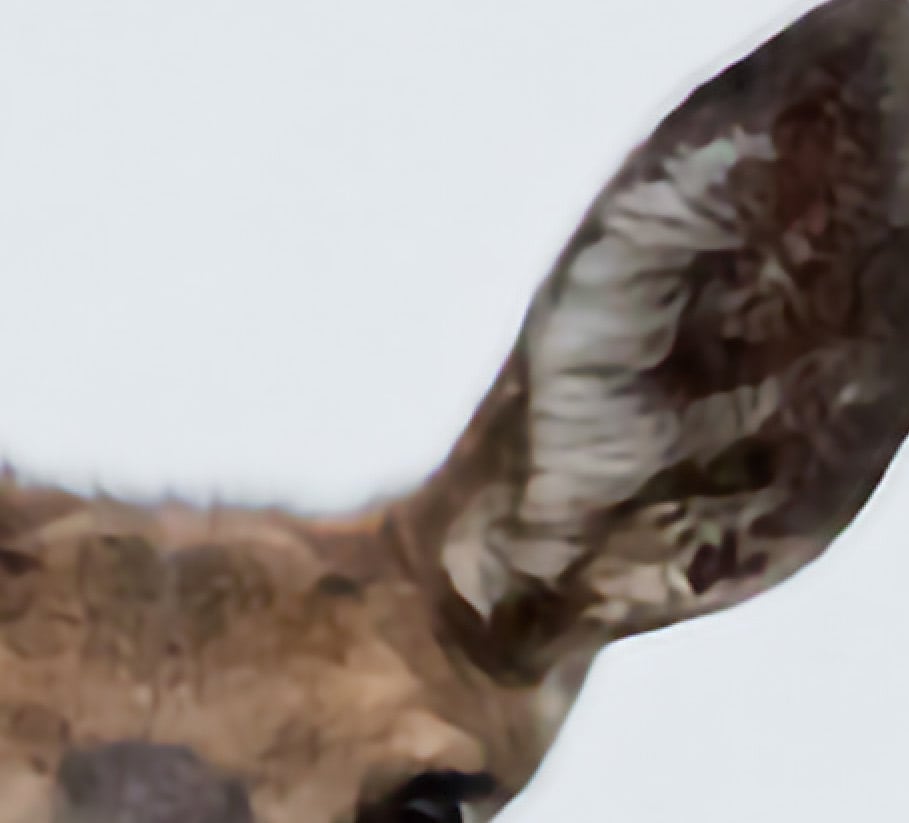
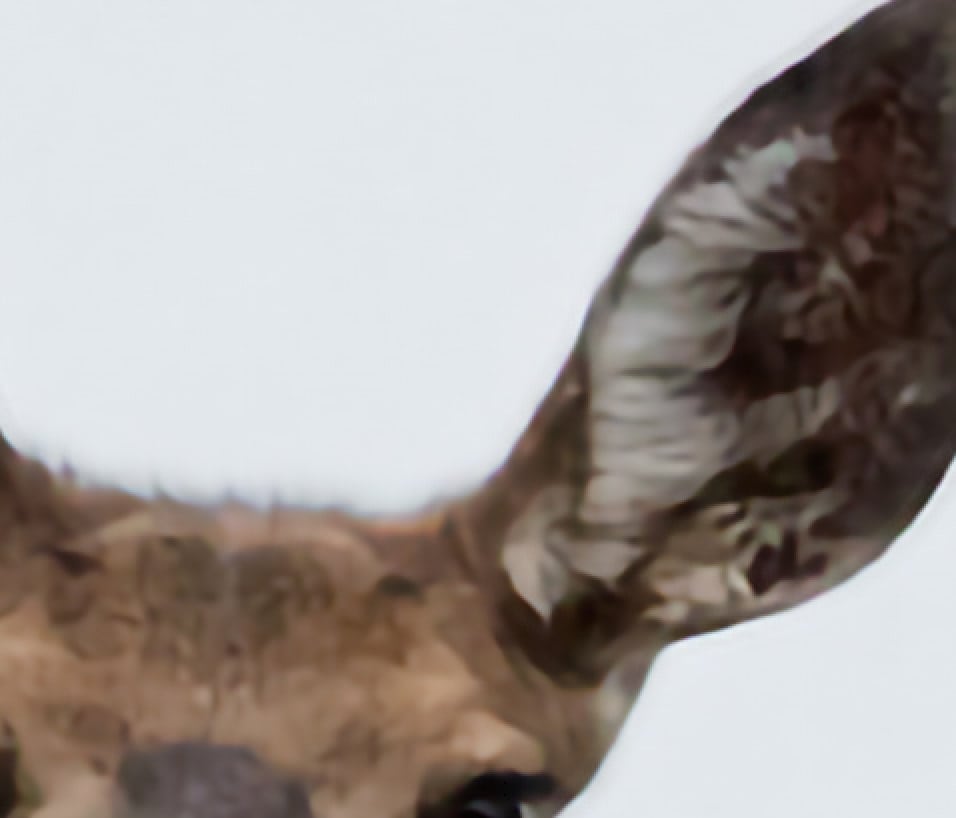
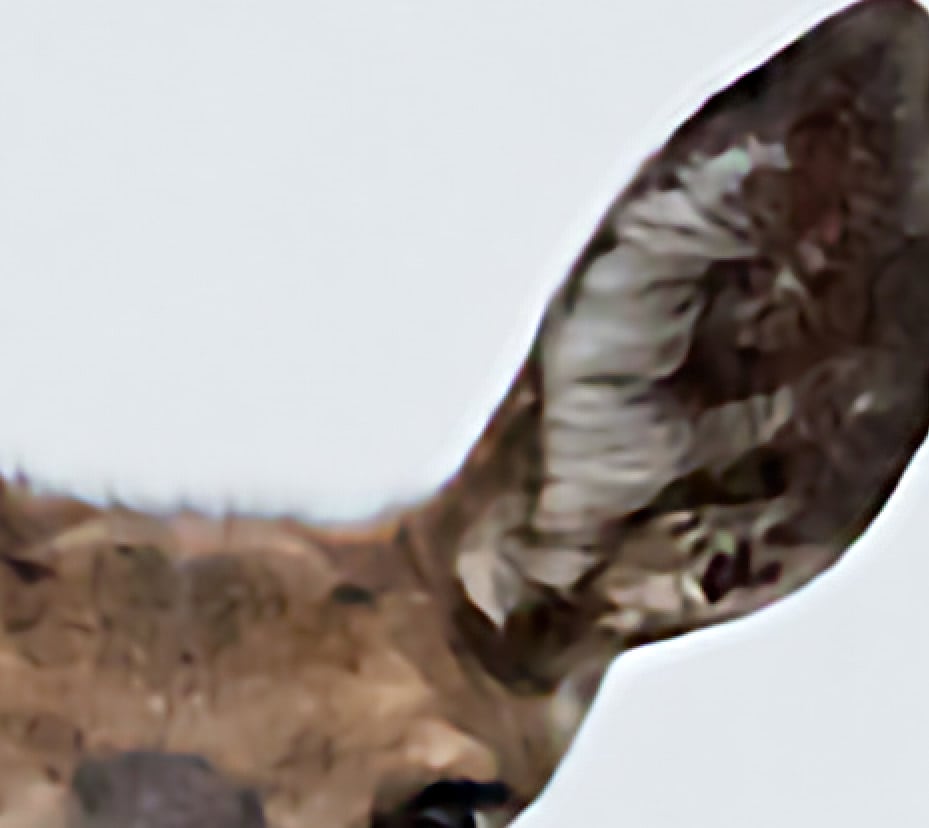
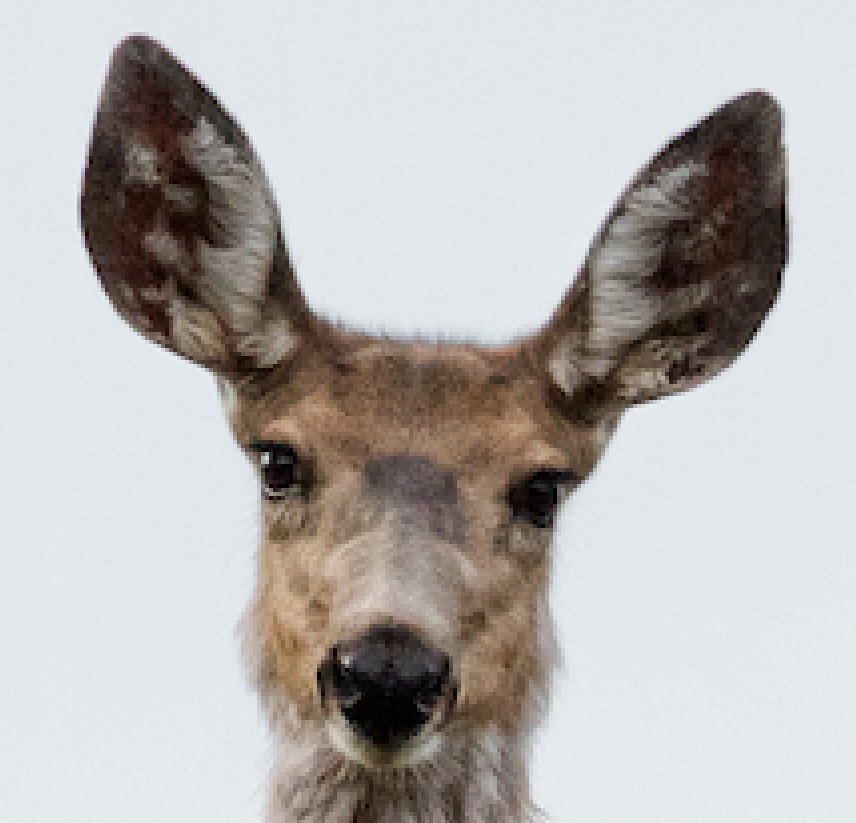
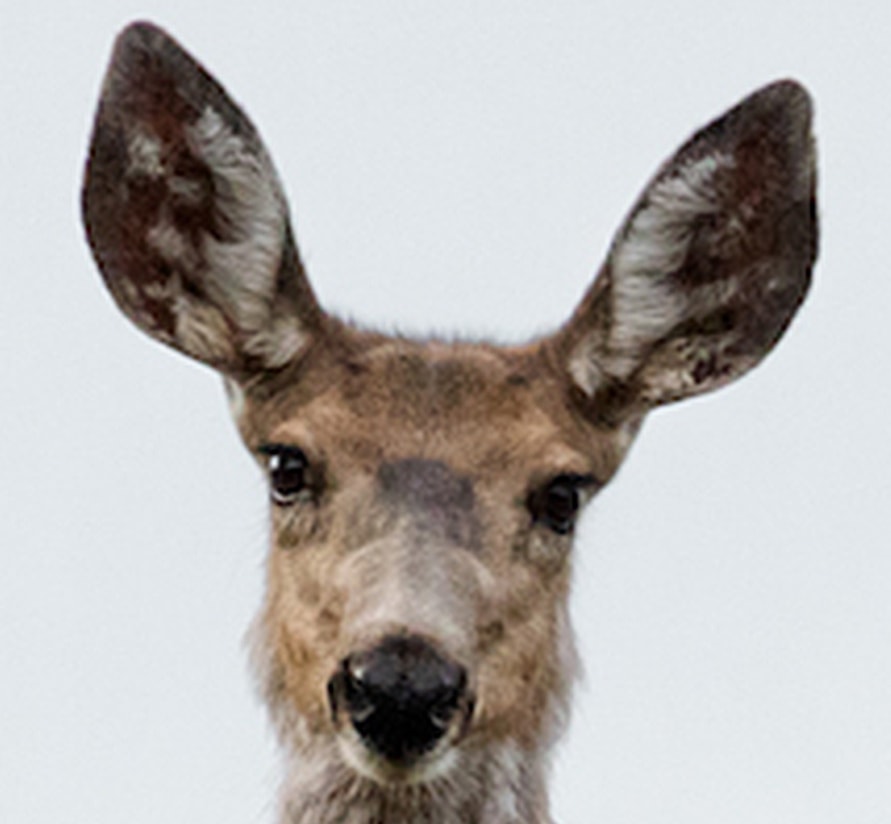
Here are the before and after results, zoomed in at different levels to demonstrate the differences.


Understanding The Limitations Of Resolution Enhancements
Using Photoshop, you can improve the resolution of photos that might otherwise become useless. However, it’s important to understand that these adjustments have a limited effect and will not enhance the photo’s quality, as it doesn’t change how much information it holds.
On that basis, the quality of your resulting image depends heavily on your initial image. The higher the resolution of your photo, the better the results. By taking this into account, it’s easy to determine if increasing a photo’s resolution is worthwhile.
Additionally, you can estimate how much the resolution of a photo can be improved. This can save you a lot of stress since you won’t expect a tiny pixelated image of a few KBs to look like a 10 MB photo.
When To Increase The Resolution Of A Photo In Photoshop
There are many situations where you will feel compelled to increase the resolution of a photo.
For example, you may need to increase the resolution for larger versions of your photos since they will appear pixelated when viewed on a large screen.
Likewise, when you try to print a low-quality photo, especially when placing it in a large document, it will likely get blurred, resulting in a low-quality copy.
In situations like this, increasing the resolution of your image in Photoshop will make it fit any given document while preserving the file details and even making them pop, thanks to the resampling options available.
By following the instructions in this tutorial, you will be able to increase the resolution of photos with excellent results. I often increase the resolution of my images when I need to retouch them, and since I often print my images or use them at larger scales, I need them to be as sharp as possible.


