Image quality is everything, and luckily, you can use Photoshop to quickly fix pixelated images when you only have access to a blurry and blocky JPEG or if you need to drastically reduce the size of a high-res picture.
So let’s take a look at the two best fixes, whether you have a large high-res photo you need to shrink or if you have a low-res picture to begin with.
How To Fix Pixelated Images In Photoshop
If you have an image that is pixelated because of its low quality, whether it was sourced online or came from an older camera, you’ll need to increase the size and the quality to fix the pixelation.
Note: This will only work on some images, as photos with extremely low quality have too little information to fix it entirely. To fix drastically unfocused and blurry photos, I recommend you use Topaz Labs Photo AI.
Step 1: Enable Preserve Details 2.0 In Technology Preview Preferences
Before you increase the resolution, you need to ensure that one setting is turned on in the preferences. This is important to ensure the quality is improved when resizing, so don’t skip this step.
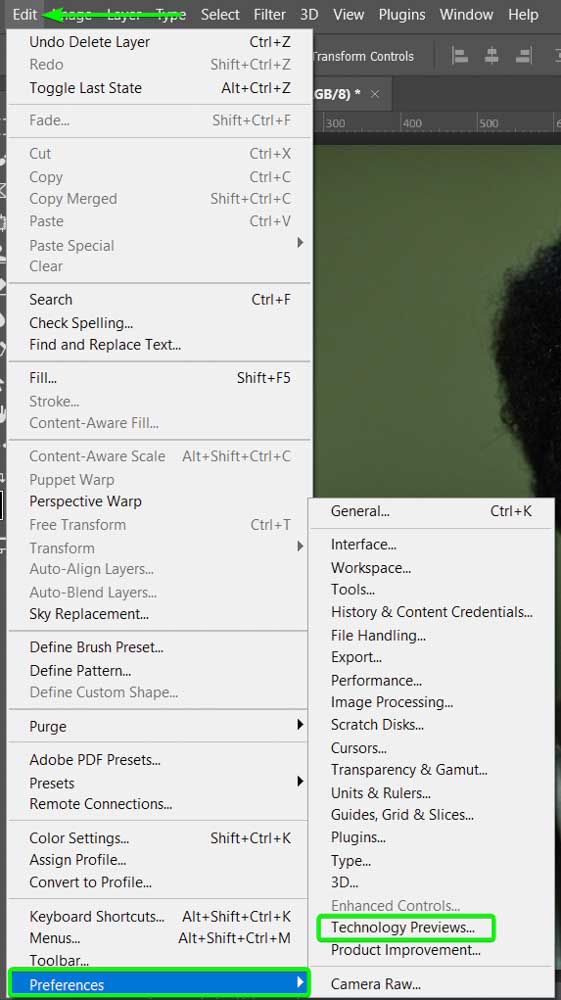
Go to Edit > Preferences > Technology Previews (Win) or Photoshop > Preferences > Technology Previews (Mac). You can also use the shortcut Control + K (Win) or Command + K (Mac), then open the Technology Preview tab on the left.
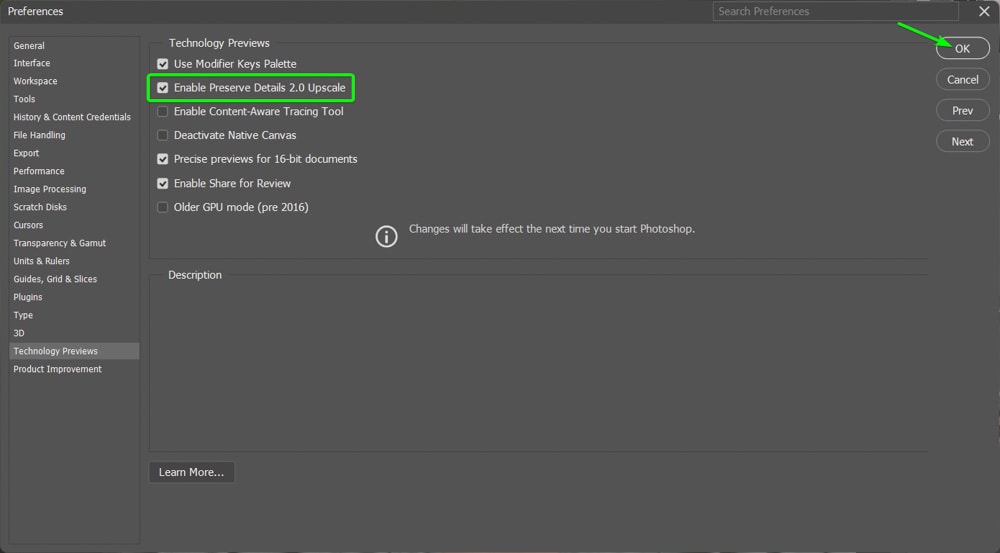
Then, ensure the box is checked next to Enable Preserve Details 2.0 Upscale. If the option isn’t turned on, turn it on, then click OK.
Note: You will need to restart Photoshop to activate the change before you follow the next steps.
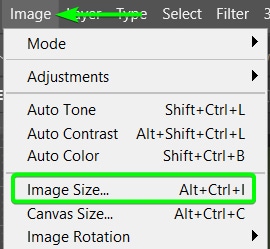
Step 2: Open The Image Size Panel By Going to Image > Image Size
You can now increase the resolution in the Image Size Panel. To access this, go to Image > Image Size or use the shortcut Alt + Control + I (Win) or Option + Command + I (Mac).
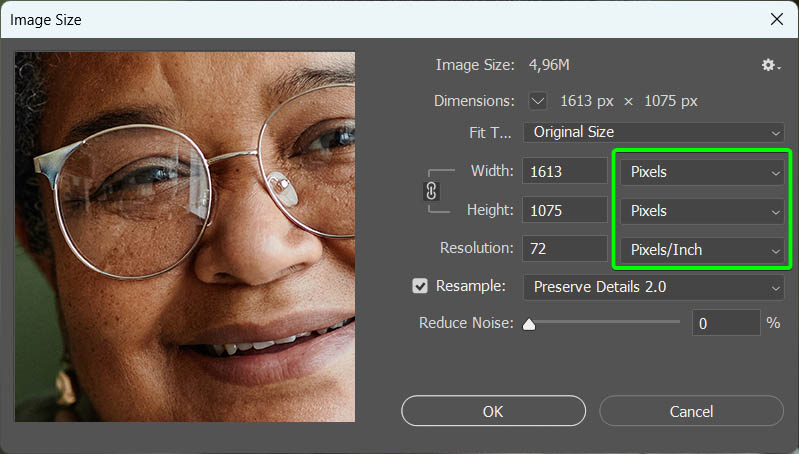
You will see the Image Size panel open, and here you can view the current width, height, and resolution values for the image, including the actual size on your hard drive.
Before you adjust anything, ensure that the units of measurement are correct using the drop-down menus to change them. I will set all the units to Pixels and the resolution to Pixels/Inch.
Step 3: Increase The Resolution Until The Longest Edge Pixels Are High Enough
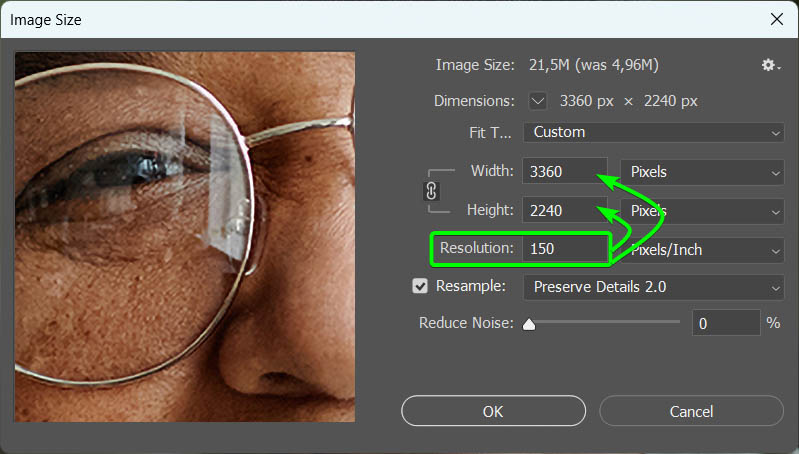
You can now increase the resolution to fix the pixelation of the image. The amount you increase it by should work for the purposes you intend to use the picture, but generally, you want the value of the longest edge to be above 3000 pixels for a high-resolution photo.
Add a new value in the Resolution box. Depending on how small your photo is, to begin with, you may need to increase it to 500 Pixels/Inch. However, 300 Pixels/Inch should work in most cases.
Once you add the new resolution, you will see the Width and Height values increase to match. Since my image wasn’t too small, I only needed to increase the resolution to 150 Pixels/Inch to get the Width value above 3000 pixels.
Step 4: Set The Resample To Preserve Details 2.0
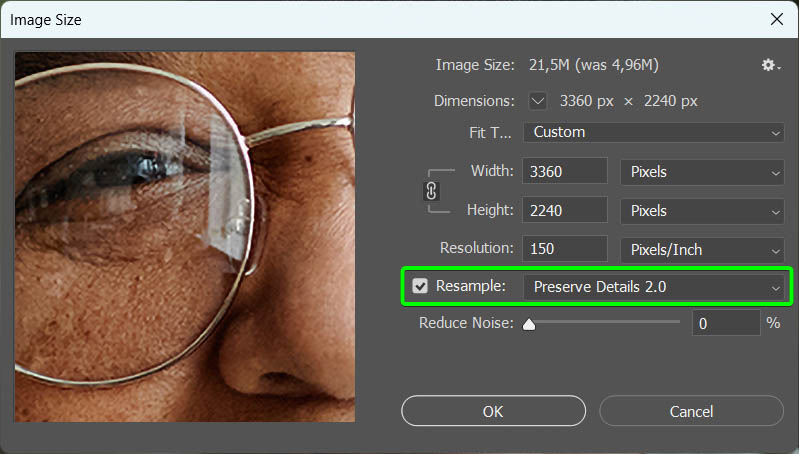
The most important step here is to check the Resample box and set the Resample type to Preserve Details 2.0. Once you check the box next to Resample, you can select the right option from the drop-down menu.
If you don’t see that option, follow the instructions in Step 1.
Step 5: Adjust The Reduce Noise Slider
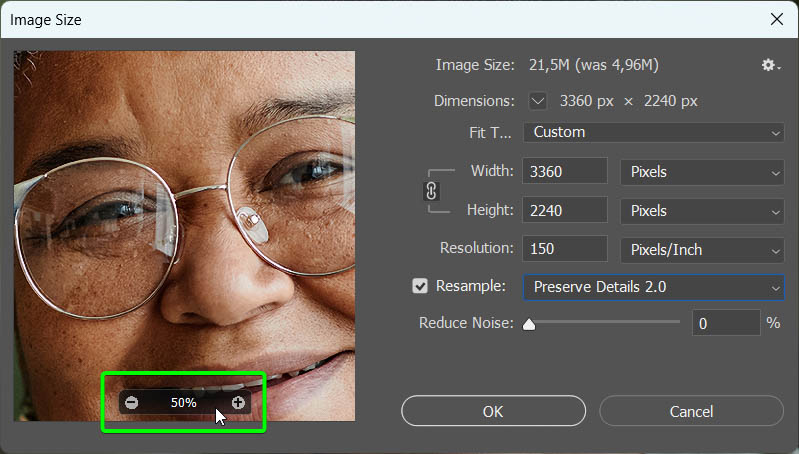
You will see the changes on your image in the Preview box on the left. Here, you will already see how the quality has improved. You can use the Zoom controls to zoom in and out to see more of the image or the finer details.
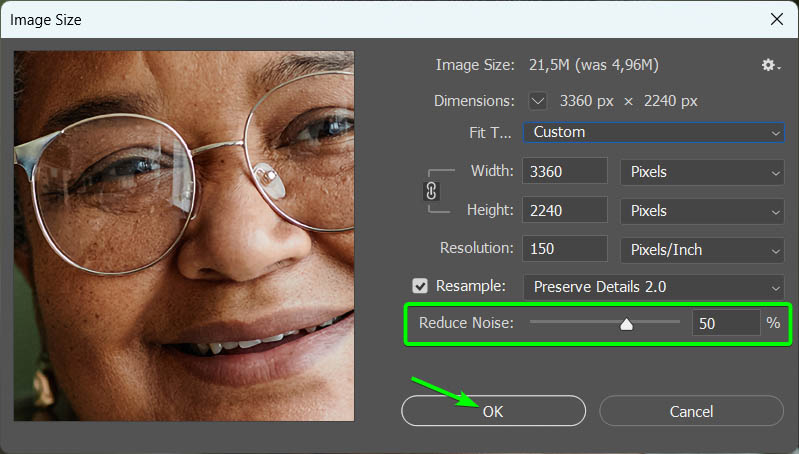
You can adjust the Reduce Noise slider using the preview as a guide if needed. In some cases, upsizing the image will increase the noise, leading to visual distortions. Move the slider to the right to reduce the noise, but don’t go to 100%, as this will smooth the image out too much. Usually, a value of around 50% works well.
Click OK to confirm the resize.
Your image will likely be zoomed in once you resize it. You can zoom out using Control + – (Win) or Command + – (Mac).
Step 6: Add A High Pass Filter For Extra Sharpening (Optional)
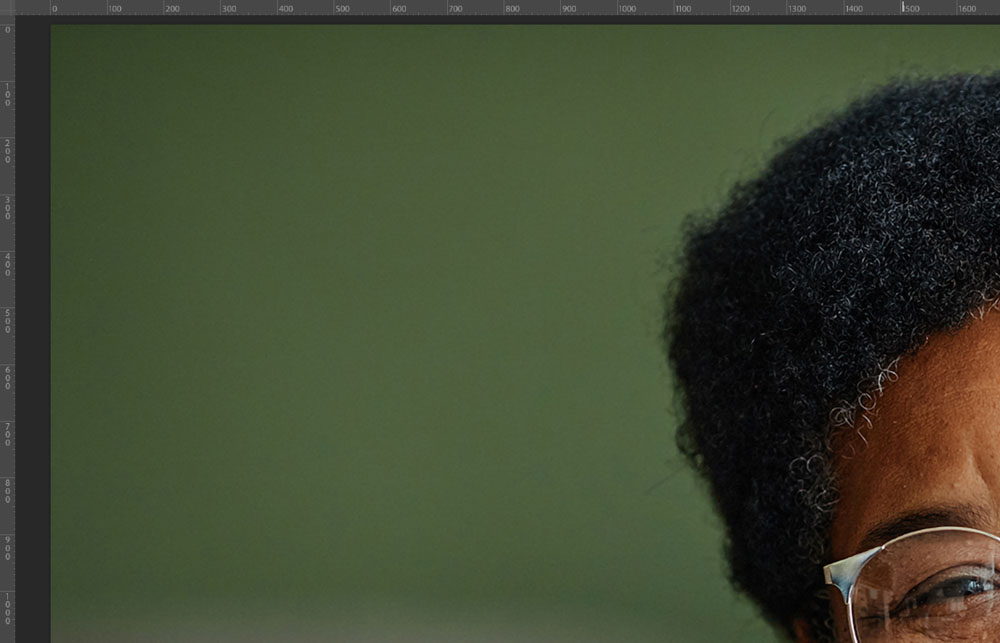
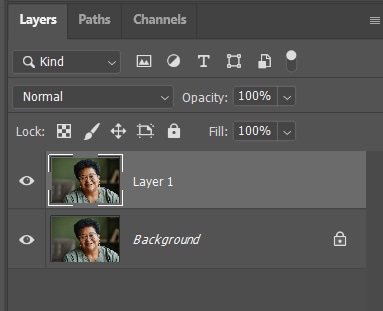
Your image may already be clear enough at this stage. However, you may find it needs a bit of sharpening. To sharpen the image, duplicate the image layer by selecting it and pressing Control + J (Win) or Command + J (Mac).
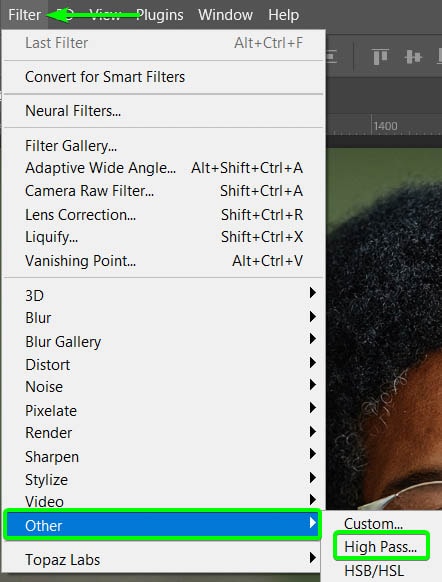
Select the duplicated layer, then go to Filter > Other > High Pass.
You will see the High Pass Filter window open, and the image will turn gray. Increase the Radius slider until you see a basic outline of your subject on the canvas. You may have to go up to 6 pixels in some cases. Click OK to apply the effect.

Then, to hide the gray on the layer, go to the Blend Mode drop-down in the Layers Panel next to Normal.
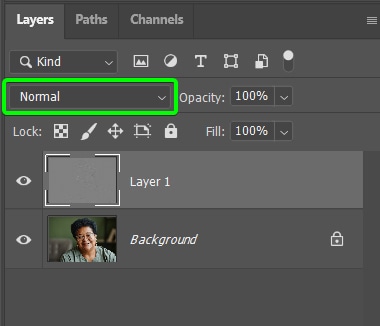
Next, select Overlay from the options.
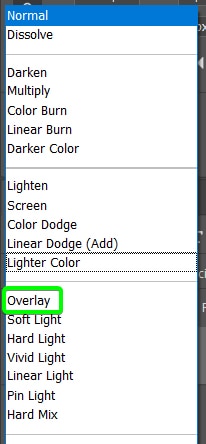
Your image will be visible again and will be sharper than before.
Step 7: Reduce The Fill Of The High Pass Layer (Optional)
If the sharpening effect is too intense, you can reduce this easily using the Fill slider in the Layers Panel. Drag the slider to the left to decrease the intensity of the High Pass filter and reduce the effect slightly.
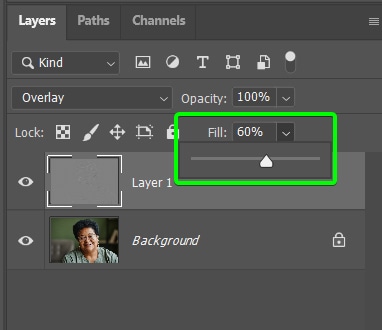
You will now have fixed the pixelation and sharpened the image without overdoing the effect.

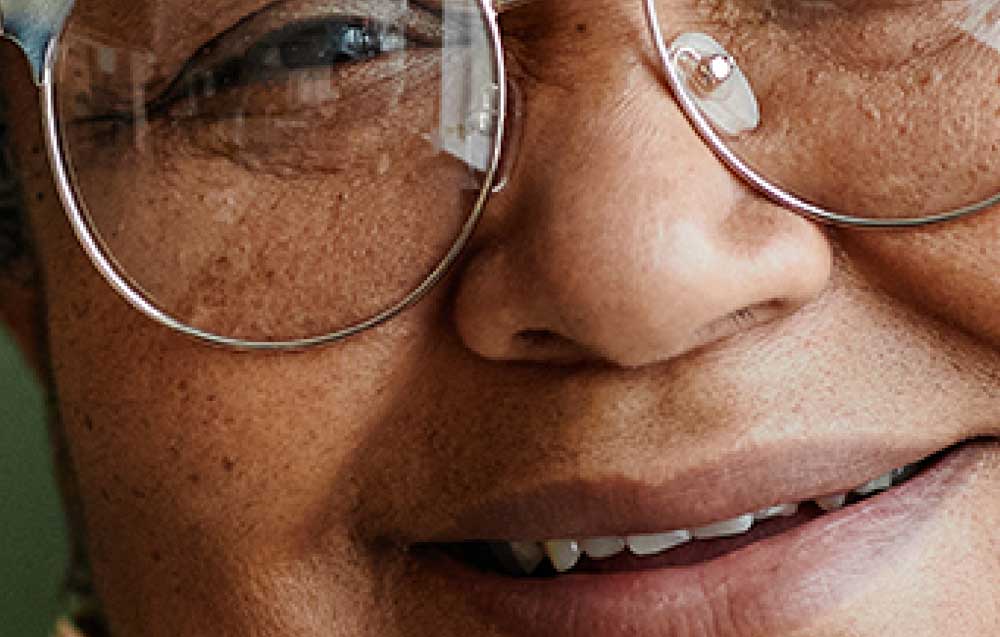
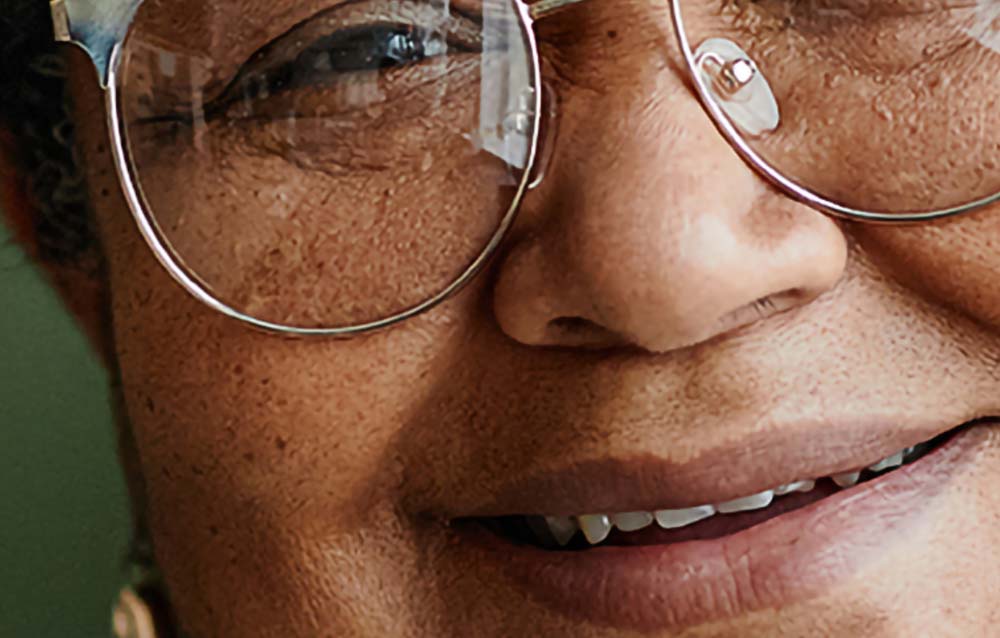
You can see the differences better when viewing the image zoomed in before and after.
How To Fix Pixelated Images In Photoshop When Shrinking Layers
If you need to scale an image up or down to fit a larger or smaller Photoshop document, you can end up with pixelation in your photo because you are scaling a rasterized layer. The solution to this is turning your layer into a smart object before you begin scaling the image layer.
For example, let’s say you have a high-quality image that you need to shrink down to a suitable size for a social media post.
Step 1: Place Your Image On A New Document
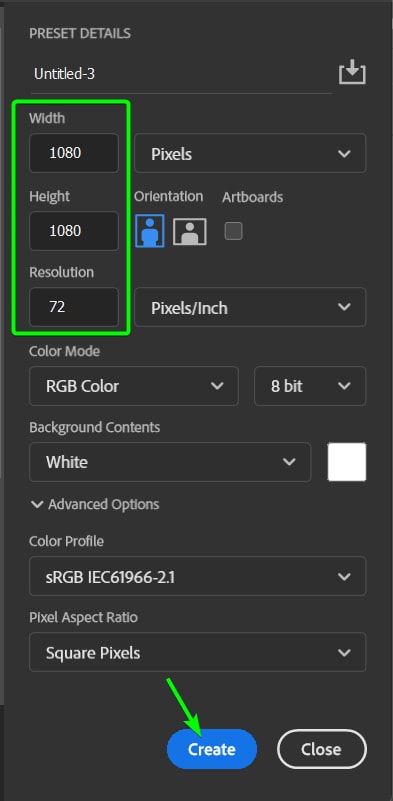
To resize your image to the new dimensions, you can create a new document by going to File > New or pressing Control + N (Win) or Command + N (Mac).

Set the Width, Height, and Resolution values depending on what you are creating the document for. Since I am creating this for Instagram, I’ll set the Width and Height to 1080 pixels and the Resolution to 72 Pixels/Inch. Click Create to make the document.
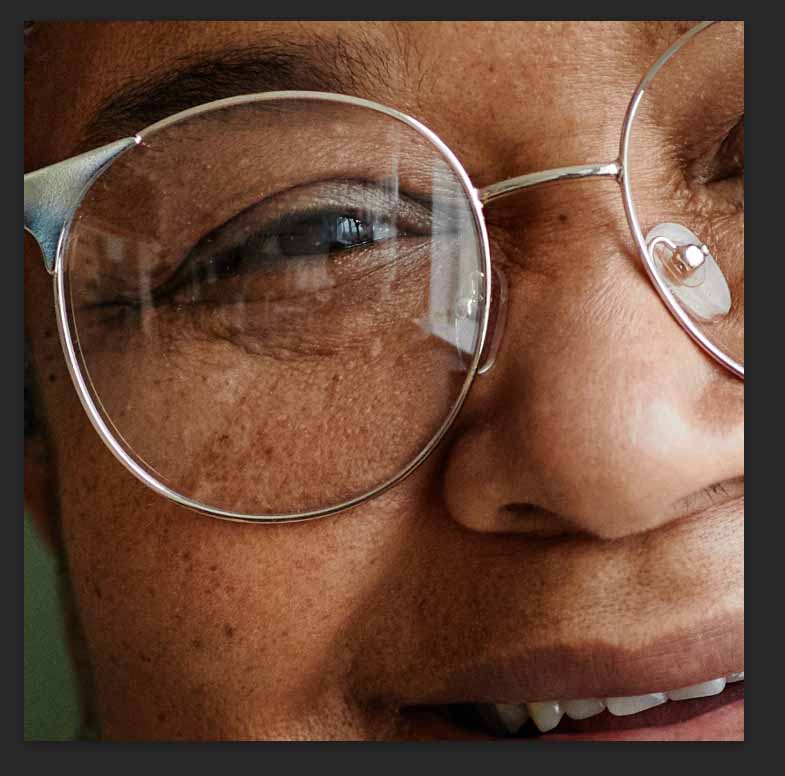
You can now select your image from the original document and drag it over to the new tab you created. You will notice that the image is much larger than the canvas.
Step 2: Convert The Image Layer To A Smart Object
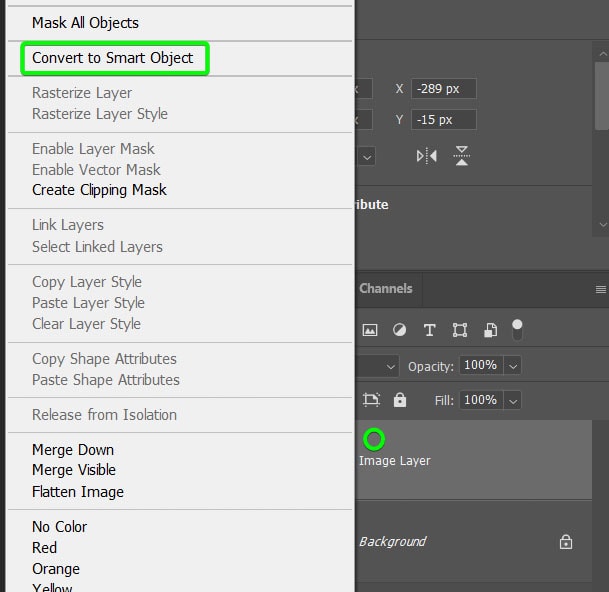
To avoid pixelation when resizing, you must convert the image layer to a smart object before resizing it.
Once you have placed the image onto the new document, right-click or Control + click on the image layer in the Layers Panel and select Convert to Smart Object.
You will know the image layer is a smart object by the icon in the thumbnail.
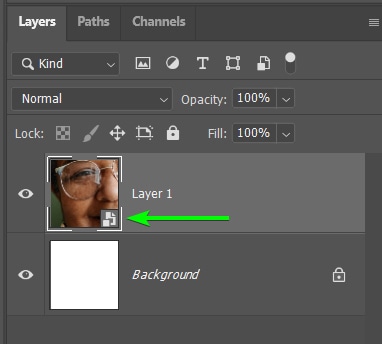
The Smart Object acts as a container that holds the image, so now, when you reduce the size or edit the image layer, you are applying the edits to the container and not the photo. This is a non-destructing editing technique and prevents pixelation.
This method is also beneficial in case you need to increase the size of the image layer after reducing the size without affecting the quality. This can be necessary if your project brief changes later on.
Note: If you create a new document and then drag and drop the image from your computer files into the document, it will automatically be added as a smart object, so you won’t need to worry about converting it before resizing.
Step 3: Resize The Image Using The Transform Tool
To reduce the image to fit the canvas, you can activate the Transform Tool by pressing Control + T (Win) or Command + T (Mac). Then, drag a corner handle inwards until the photo fits on the canvas.
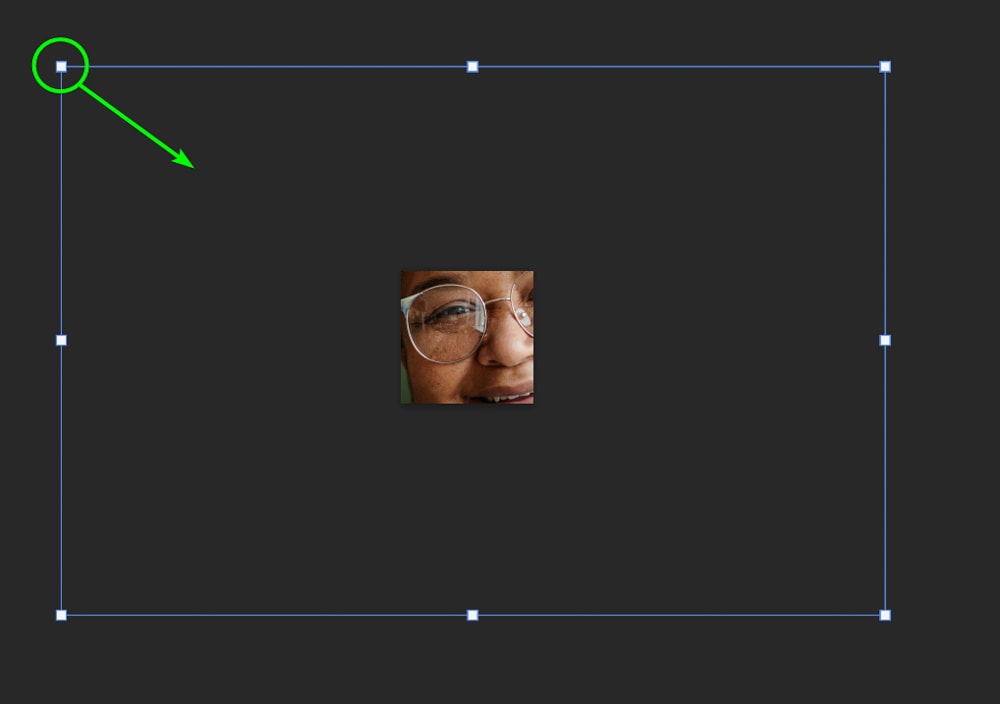
The image at full size will look similar to one that was resized without a smart object, but when you zoom into the photo, you will notice the quality is much clearer than when it was resized without a smart object.
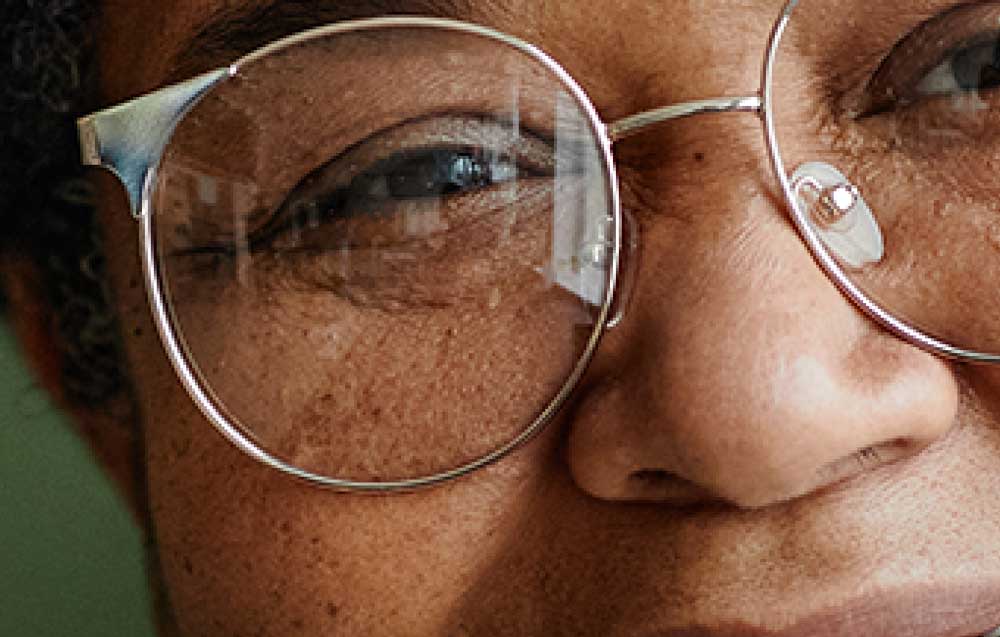
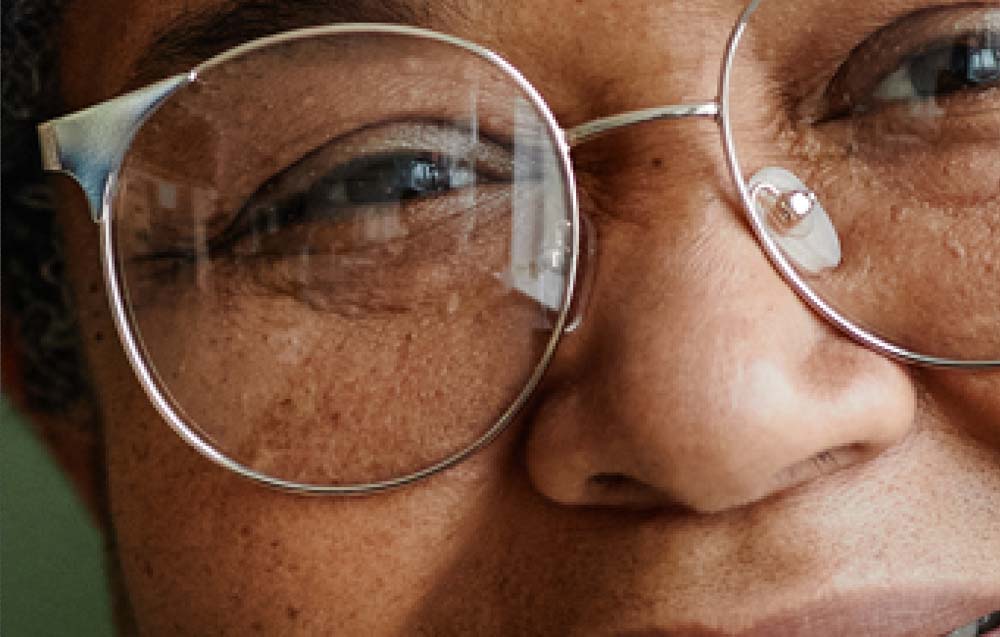

While the differences may not be too noticeable, the larger the original image and the smaller the new size, the more noticeable the pixelation is.


Note for when drastically reducing the size of an image:
Another example where you need to reduce the size drastically is when you are creating favicons for websites.
When viewing tiny sizes, such as favicon documents, the image will look pixelated even when using a smart object. However, this is only because of the project’s size and how much you need to zoom in to view the canvas properly in the workspace. The image will look crisp and clear at the intended size as long as you use the smart object resizing method.
Taking a low-res pixelated photo and making it look clear is possible in Photoshop, but it’s important to remember that the program is not magic. It can only improve the quality of the photo in relation to how good or bad the original image looks. With an extremely pixelated photo, you may not be able to increase the size or resolution of the image with as much success compared to if you started with a better-quality image. Either way, though, you will end up with a better version of the original, and it is definitely worth the effort!


