
Paths in Photoshop are often created by those who need precise selections, shapes, or text effects created manually. Whether you’re a photographer or a graphic designer, there are countless ways that you can use paths in your workflow to have more control over your project. But what exactly is a path?
A path is a series of vector-based line segments connected by anchor points that can be used to define selections, create custom shapes, or alter the plane of text. These lines can be straight or curved, with control arms at each anchor point to manipulate the path.
With this basic understanding in your mind, let’s expand on this with everything you need to know about paths in Photoshop and the different ways they can benefit you in the program.
Let’s get started!
What Are Paths Used For In Photoshop?
A path is a segment or a group of segments with anchor points at both of each segment’s edges.

Paths can be closed or open. However, you will need to close paths when creating shapes or complete objects.
Paths have many different uses but are typically used to help define a custom shape, selection, or mask that’s smoother and more precise than any other method.
After creating your path with the Pen Tool, you can select one of the conversion options in the Options bar. You can choose between turning your path into a selection, a mask, or a shape. Alternatively, you can right-click on your path for additional options.

Now let’s look at four common uses of paths in Photoshop.
1. Make Selections
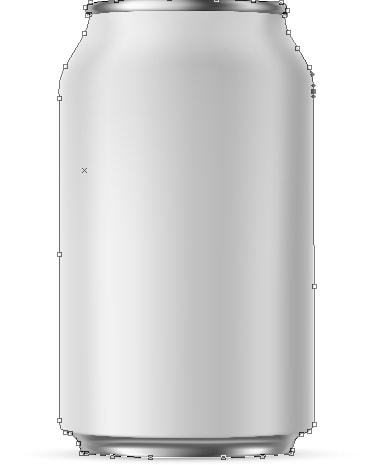
As you can create straight lines or curves with paths created by the Pen Tool, it is the perfect tool for creating selections since you can trace any object with a high degree of precision, covering all the edges of your object, whether they are made of curves or straight lines.
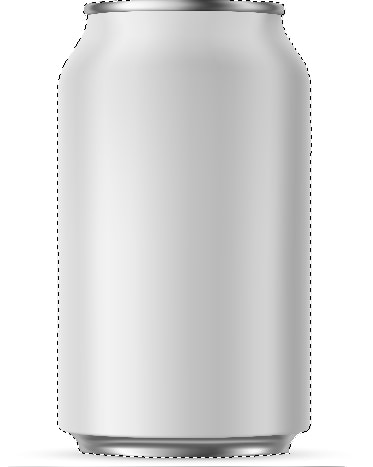
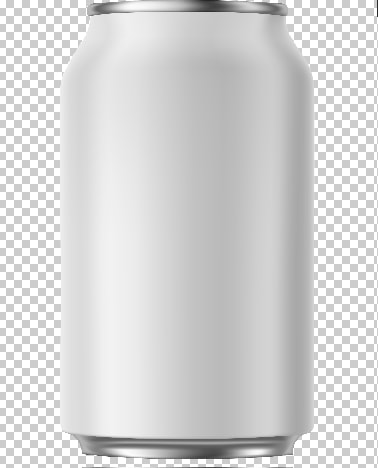
After you have traced your object and turned the path into a selection, you can fill the selection with a color, pattern, or image. You can also delete the area outside the selection to remove the background.
Knowing how to make selections in Photoshop is useful for any sort of graphic design work or image compositing.
2. Create Shapes
Photoshop has many preset shapes, but you won’t always find the one you need. Thus, having the freedom to make your own shapes is very convenient. By connecting a path segment to another, you can easily create any shape you can imagine.
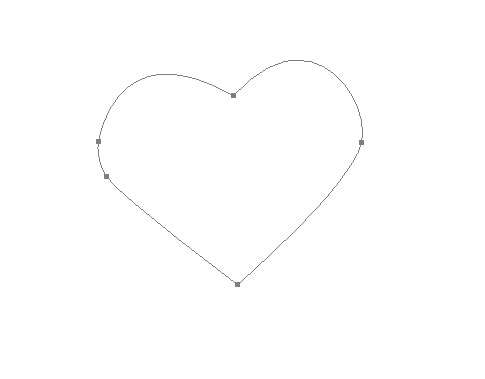
Because the shapes you create in Photoshop are vector-based elements, they can be printed or displayed anywhere digitally without losing quality.
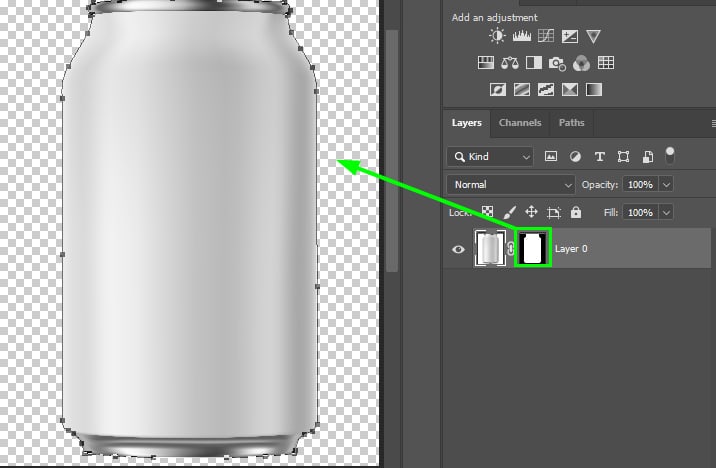
3. Create Masks
After creating a path, you can convert it into a mask. When you create a mask in Photoshop, everything outside the selection is hidden. This is useful for refining your selections and removing the background non-destructively.

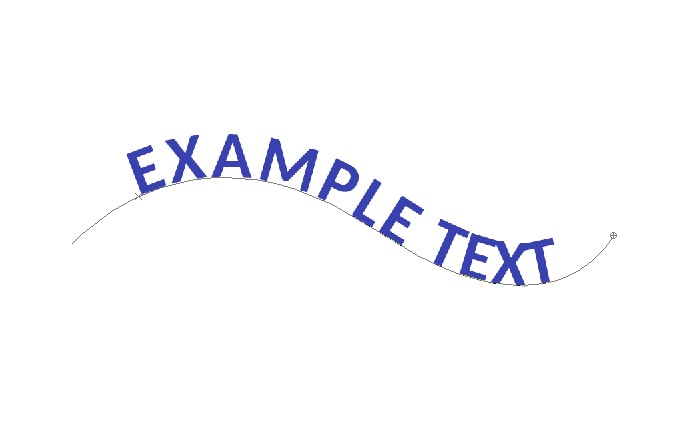
4. Create Curved Text
Paths allow you to define a new plane for text to follow beyond its usual horizontal angle. Paths help in these situations since you can create any curved path and type text on it or create text in a specific shape. Once you do this, the text will follow your curved path.
How To Create A Path In Photoshop
You can create a path in Photoshop using either the Pen Tool or the Shape Tool. The Pen Tool gives you complete control over the path’s appearance. On the other hand, the Shape Tools lets you create paths out of predefined shapes. This way, you don’t need to create anything from scratch.
Option 1: The Pen Tool
Creating a path with the Pen Tool is very easy. You just need to connect one anchor point to another. Curving a path requires a little more effort, but it’s also a simple task.
First, enable the Pen Tool (P) in the Toolbar.

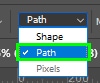
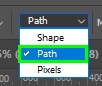
Second, change the pen mode to Path.
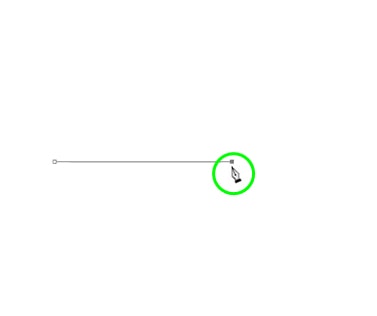
You can now create straight or curved paths. To create a straight path, click anywhere on the canvas to create the first path anchor point.

Then, hold Shift and click again in another spot on the canvas to create a second anchor point. A path will connect the two anchor points and appear as a thin line.
Holding Shift allows you to create a straight line between the two anchor points. Without holding shift, your anchor points won’t remain even, but this is not always needed depending on the path you’re trying to create.
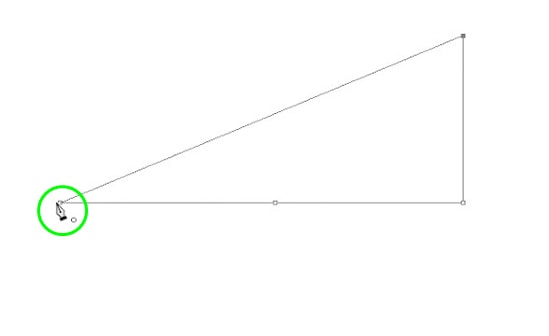
Keep clicking to continue extending the path by adding anchor points. You can click different directions to change the path orientation.
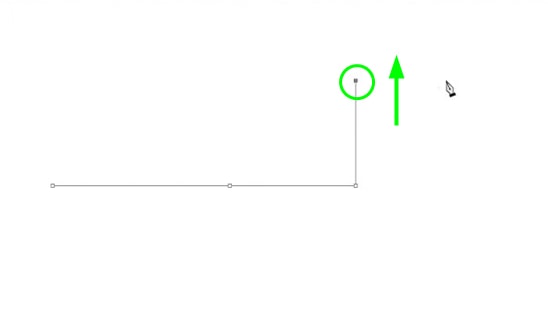
Then click the initial anchor point of the path to close it if you want to complete it and convert it to a selection, mask, or shape.
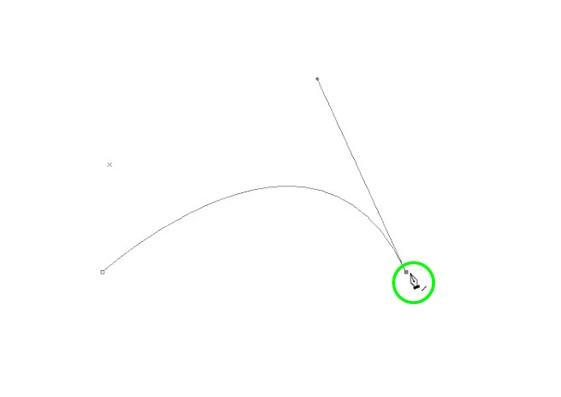
To create a curved path, click the canvas to create an initial anchor point, just like you did to make a straight path.
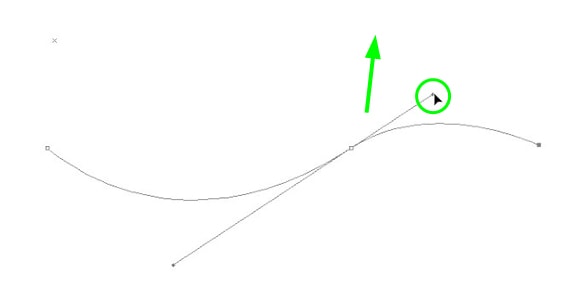
Next, click and then drag the mouse down after you’ve added the second anchor point. That will make up an upward curve.
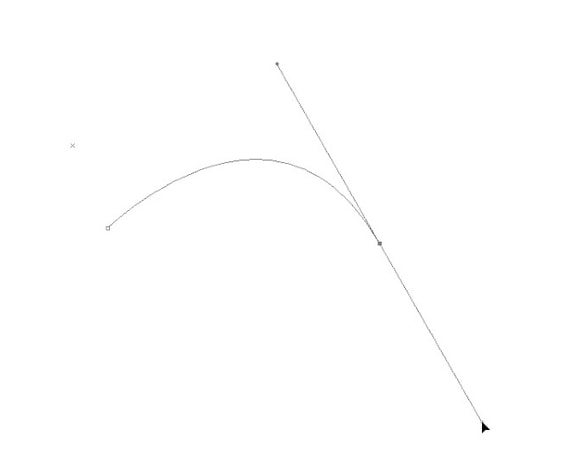
The curve will have two handles connected to one of its anchor points.
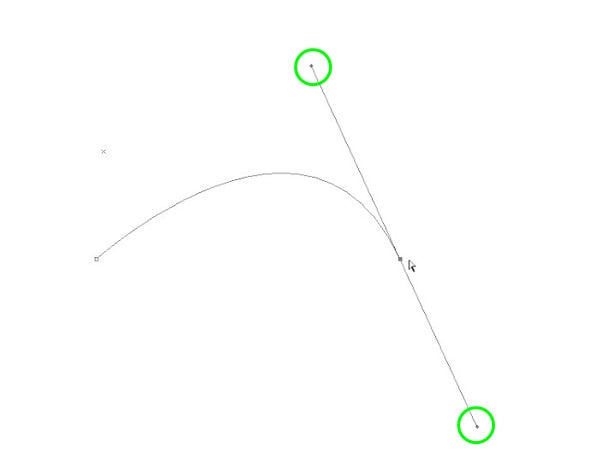
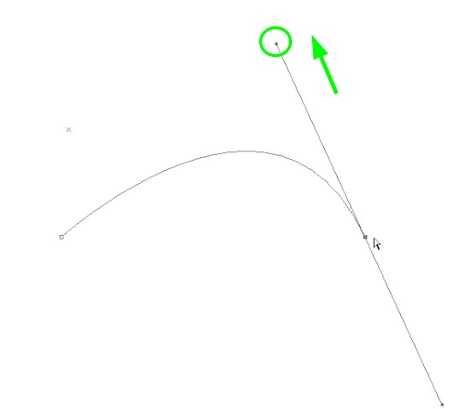
The handle on the top (or left) controls the curve size. You can make the curve smaller or bigger by dragging it up or down.
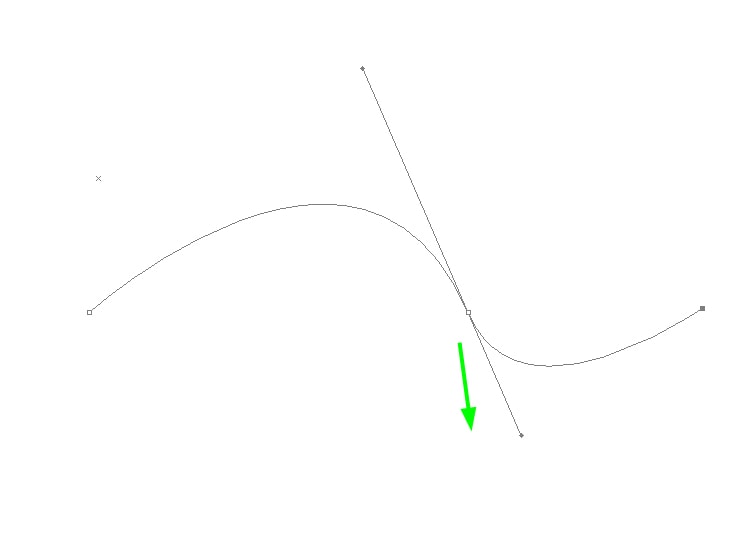
The bottom (or right) handle controls the orientation of the curve. If the right handle points down, the next curve will be downward.
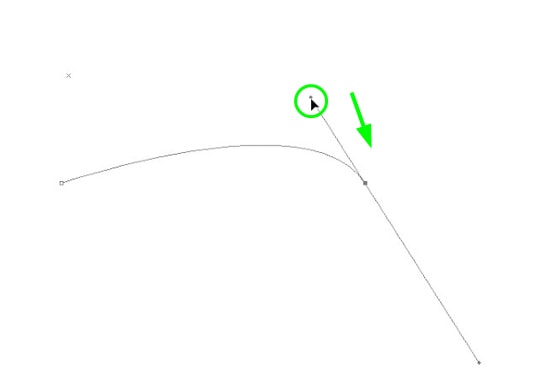
You can invert the curve orientation by holding Control (Win) or Command (Mac) and pushing the top (or left) handle up.
If you want to delete the bottom (or right) handle, hold Alt (Win) or Option (Mac) and click the anchor point connected to the curve. That way, you can manually choose the next curve’s orientation.
To begin to see how this applies to removing the background of an image accurately, see my guide to the Pen Tool in Photoshop here.
Option 2: The Shape Tool
Using one of the preset shapes in Photoshop, you can quickly and easily create your shape since you don’t need to create a path from scratch.
You can find some Photoshop preset shapes in the Toolbar.
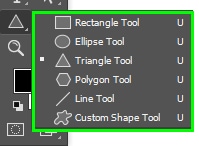
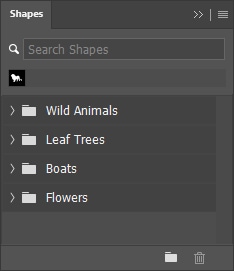
Click any shape you like or press Shift + U to cycle through the options available. Besides the shapes available in the Toolbar, you can find others in the Shapes panel by going to Window > Shapes.
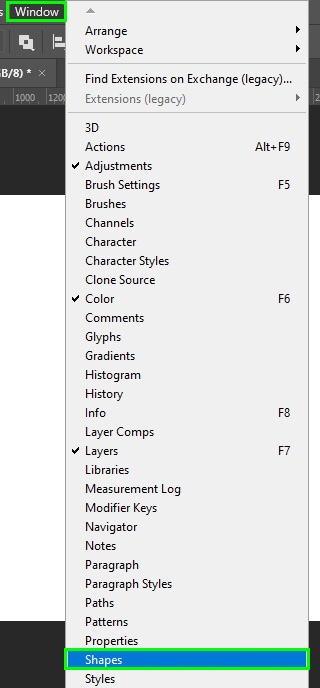
In the Shapes panel, you will find more preset shapes.
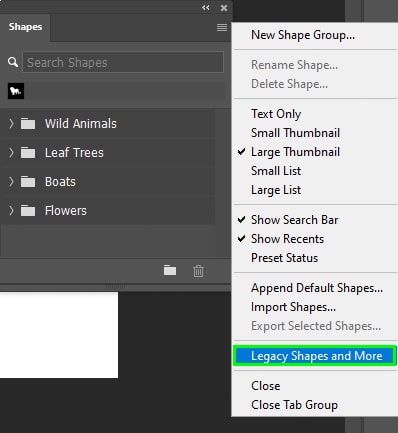
You can load even more shapes by clicking the hamburger menu in the Shapes panel and choosing Legacy Shapes And More.
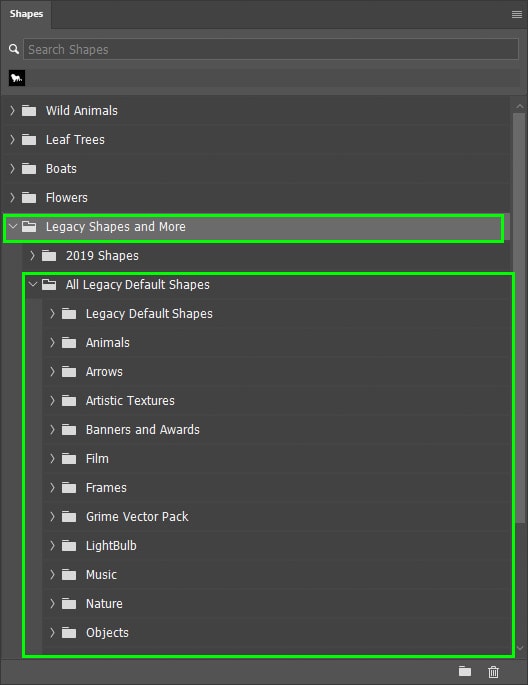
Each folder contains subfolders with various shapes. You have plenty of options to choose from.
Once you choose the desired shape from the Toolbar or the Shapes panel, go to the Options bar and change the shape mode to Path.
Then, click and drag on the canvas to create the shape.
The path you create out of shape is a path like any other path. You can manipulate its anchor points as you like using the Pen Tool (P). You can also easily turn it into a selection by clicking the Selection option found in the Options Bar using this technique.
What’s The Difference Between A Path And A Shape?
It is easy to confuse a path with a shape because they sometimes look the same. However, they have many differences.
In Photoshop, paths are the foundation for many elements but don’t function on their own. Thus, they won’t be visible if you try to insert them into a document or print it. As mentioned before, you need to convert it into a shape, a selection, or a mask.
Shapes, however, don’t need to be converted to something else. They can be inserted into any document to be printed or displayed anywhere you wish.
When you draw a path, you don’t have options to fill or stroke it. When creating a shape, on the other hand, you can easily stroke or fill your shape in both the Options bar and the Properties panel.
Although slightly confusing at first, paths in Photoshop have a ton of important uses for anyone using the program. For photography or design, paths are a tool you can call upon when you need precise selections, custom shapes, or text effects that are impossible with any other tool.
Happy editing!


