
Creating a panorama from a set of images in Lightroom may seem like a complex task. After all, how do you ensure different pictures stitch together accurately and look like one complete image by the end? Luckily, Lightroom does the bulk of the work for you making the process super easy.
To create a panorama in Lightroom, hold Command (Mac) or Control (PC) and click between the images for your panorama. Now right-click and go to Photo Merge > Panorama. Choose the projection setting appropriate for your image and click Merge to create your panorama.
While several software and apps automatically stitch together images to create a panorama, working right from Lightroom is likely easier for some photographers. Especially those who use it often for image editing, as you can make the panorama and then edit it in the same program.
You will also have more control over the final result after following these steps.
So let’s take a more in-depth look at this process with a step-by-step outline.
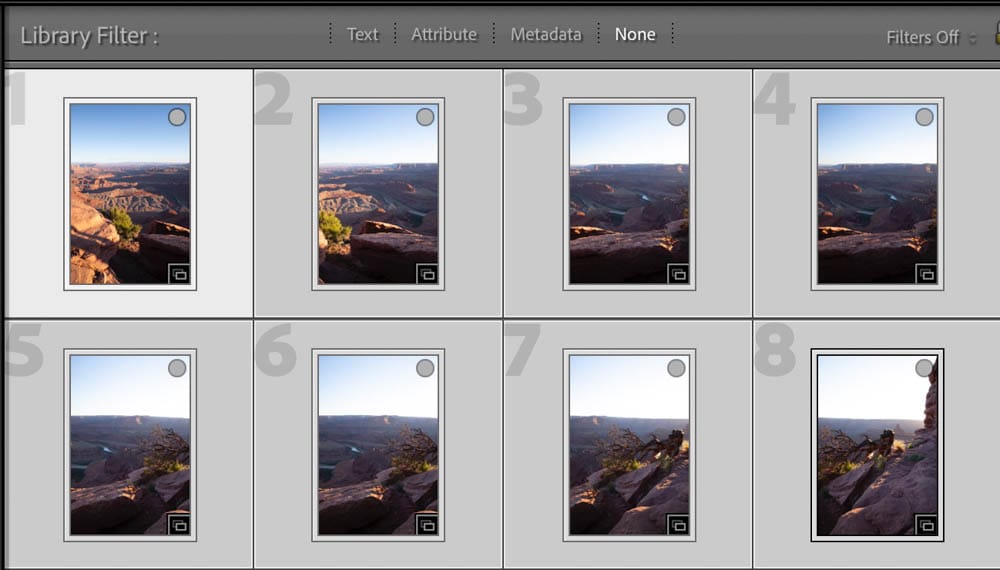
Step 1: Select All The Photos For Your Panorama
While you might assume that you should start this process by editing each image, you actually don’t want to edit your photos until after merging them into one panorama. Editing at the end of the process makes the most sense as editing them beforehand might give you differences in lighting and tone, so best to wait until the end of the process.
The first step in creating your panorama is selecting the photos you’d like to stitch together. You can do this from the Library tab.

Locate the images you’d like to use and hold Control while clicking each one to select them. They will turn light gray when selected.
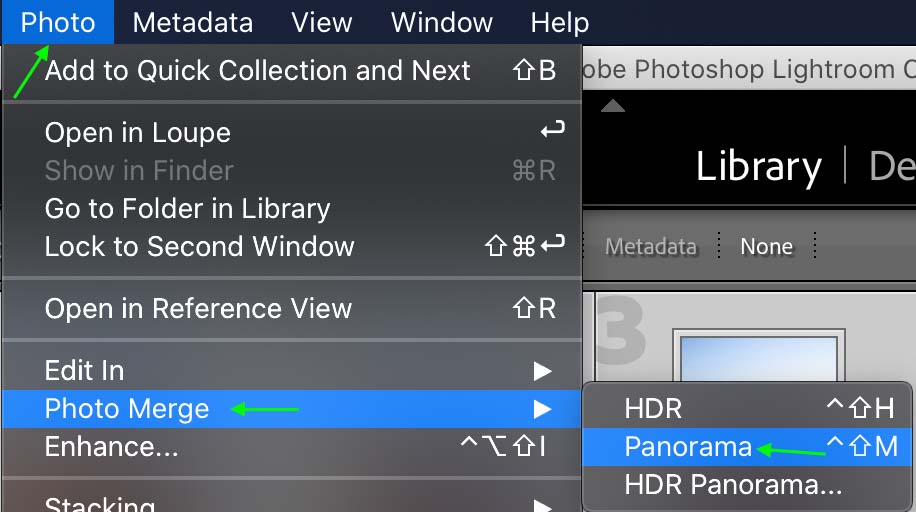
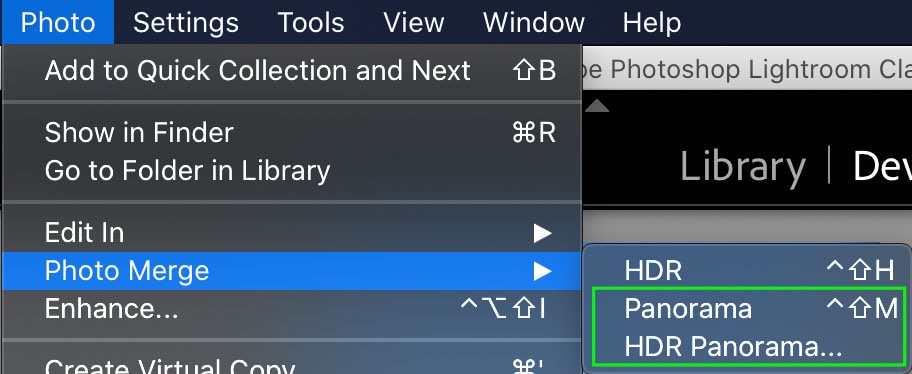
Step 2: Right Click And Choose Merge Panorama
Once you’ve selected the images to turn into a panorama, either head to Photo > Photo Merge > Panorama (or HDR Panorama if you’d prefer). Or, you can right-click or Control + click one of the selected images and choose Photo Merge > Panorama from the options.

Step 3: Select The Auto-Crop Setting
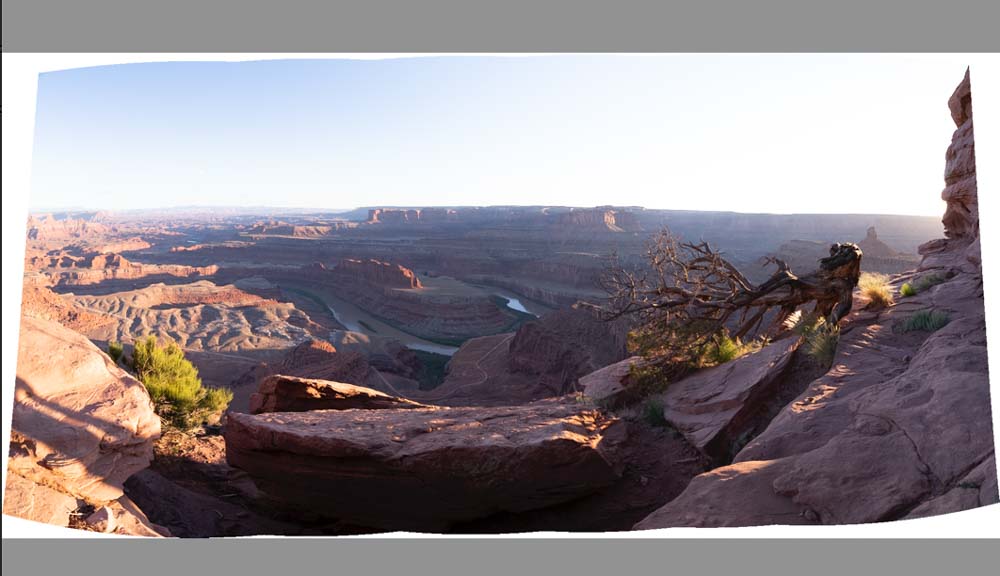
Once you’ve selected panorama, you’ll see the Panorama Merge Preview box appear.
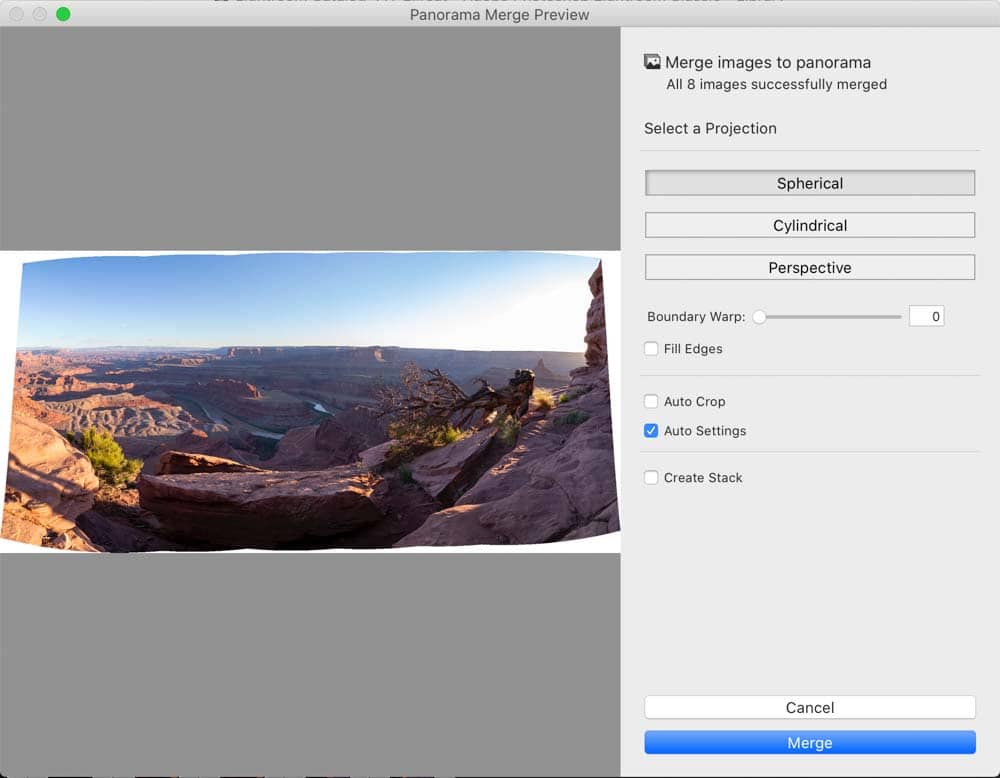
The panorama you see might not look quite right, but we can fix it fairly easily. Around the edges, there may be bits of white — these are areas that the merging process could not fill using the images you provided. There are ways to fill or crop these areas.
The Fill Edges box, for instance, will automatically fill those uneven edges using Lightroom’s content-aware technology.
You can also select the Auto Crop function to crop those uneven edges right out of the image.

This will cut off all of the white areas around the curved image, leaving a much more normal-looking image.
I suggest using Auto Crop over Fill Edges if you have enough image to crop the uneven edges and still end up with a suitable image size; as intelligent as the Fill Edges tool is, if you look closely you can occasionally tell that the edges of the image have been filled in incorrectly.
You can also check the Auto Settings box to automatically apply a few basic edits that will make the image look a bit better. These settings include auto color and auto tonal adjustment.

Step 4: Choose Your Panorama Projection
Now that you’ve quickly cleaned up the panorama, you can set the panorama projection based on your images and the type of panorama you’d like to make. In the Panorama Merge Preview box, you’ll see a few different settings for how you can merge your images. The various options will each have a different effect on the final panorama.
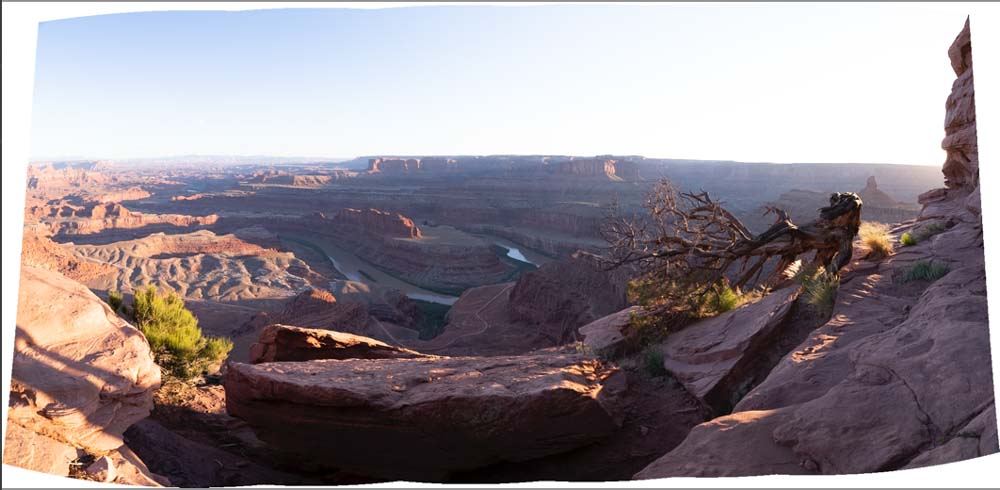
– Spherical
This projection aligns the images as if they had been mapped to the inside of a sphere. It is usually the default projection used as it works for a wide array of pictures with minimal warping.
With Auto Crop:
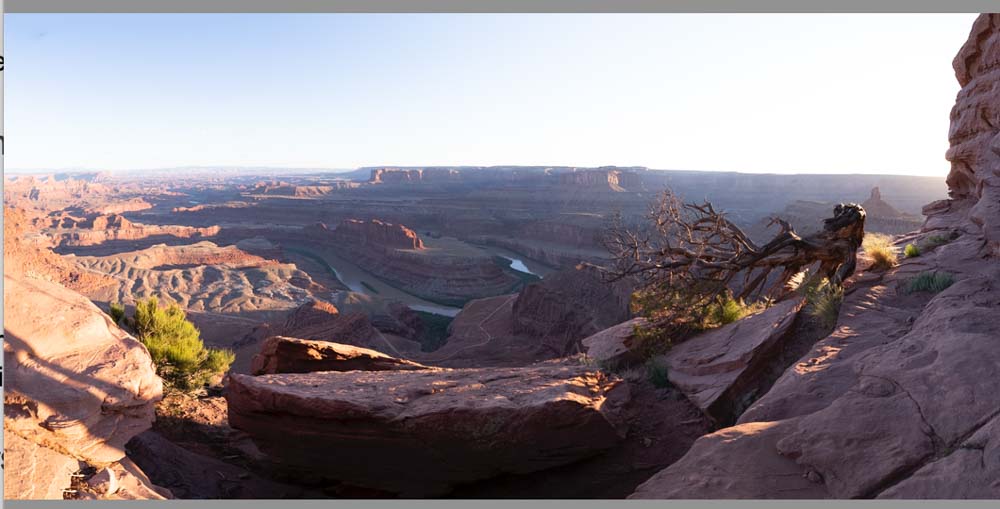
Still, a spherical projection is best for panoramas that are wider and contain more images, as well as multi-row panoramas.
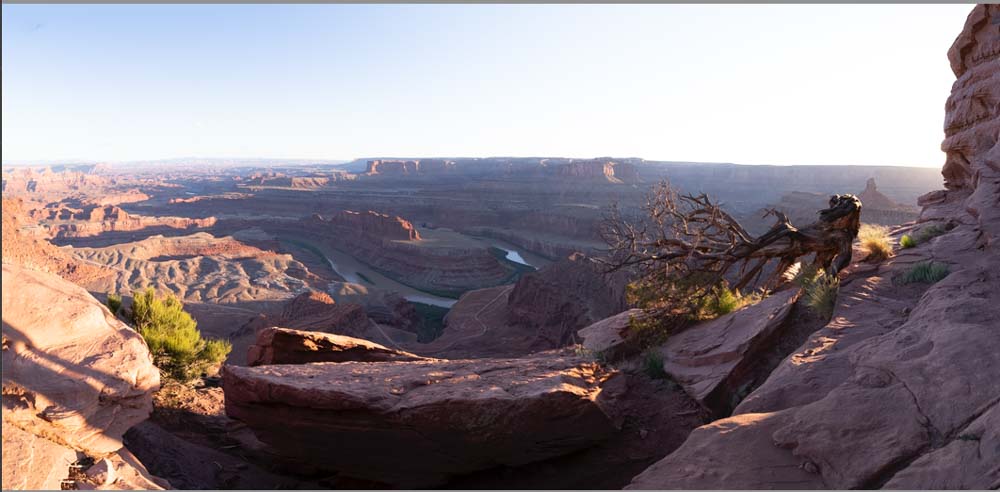
– Perspective
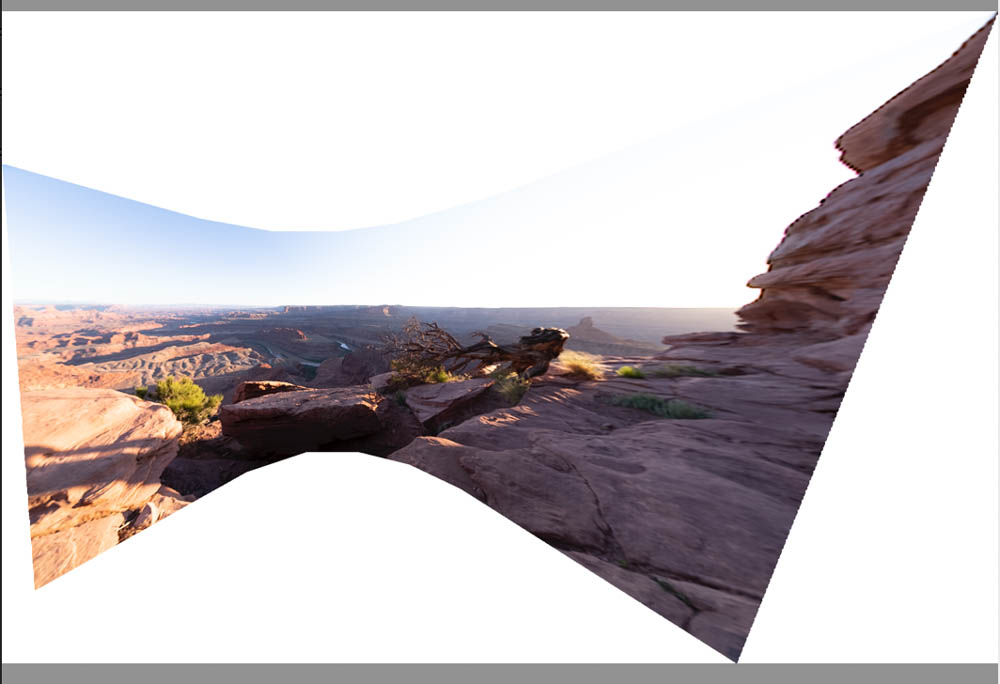
This type of projection sets the images up in a flat dimension.
With Auto Crop:
As you can see, this projection results in a lot of warping for wide panoramas, lengthening the sides awkwardly, and making the central area of the image appear much farther away than in the other panoramas. For this reason, this is the best projection to use when creating a panorama of a building or architecture. Also, use this method if your panorama isn’t too wide.
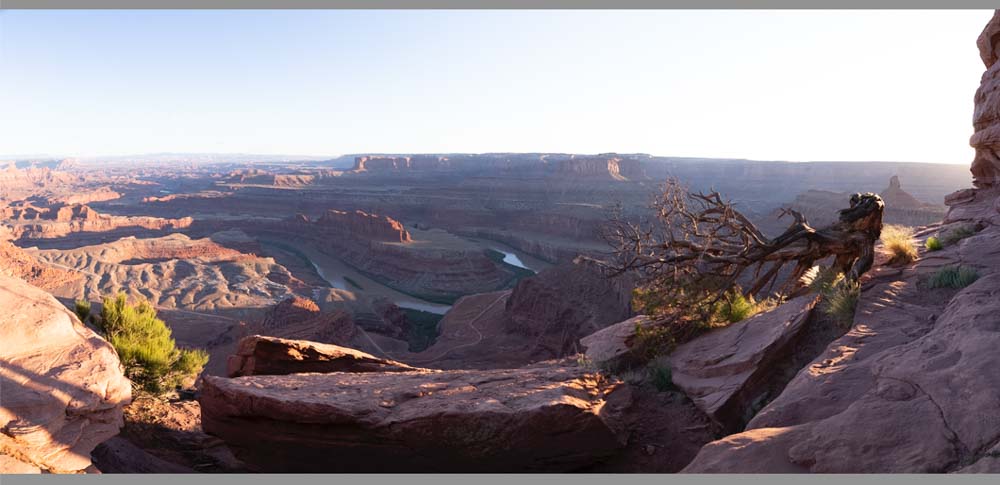
– Cylindrical
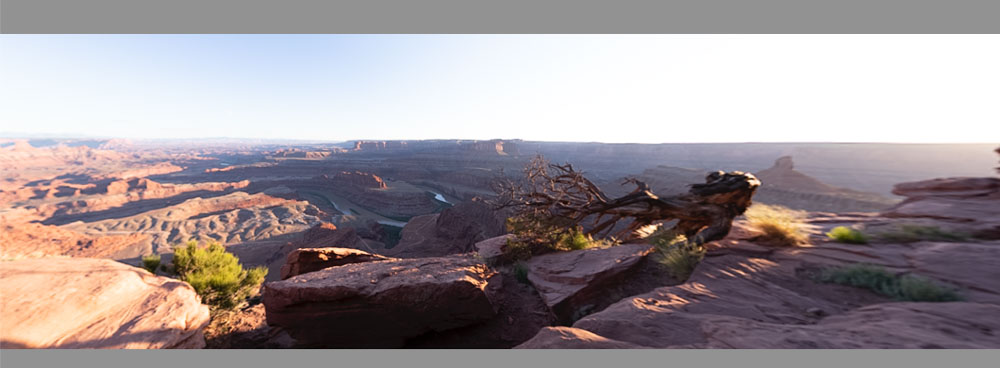
A cylindrical projection maps the images to the inside of a cylinder.

With Auto-Crop:
This projection will automatically try to maintain straight vertical lines, which may deform subjects somewhat. For this reason, a cylindrical projection works best with wide panoramas that feature straight lines.
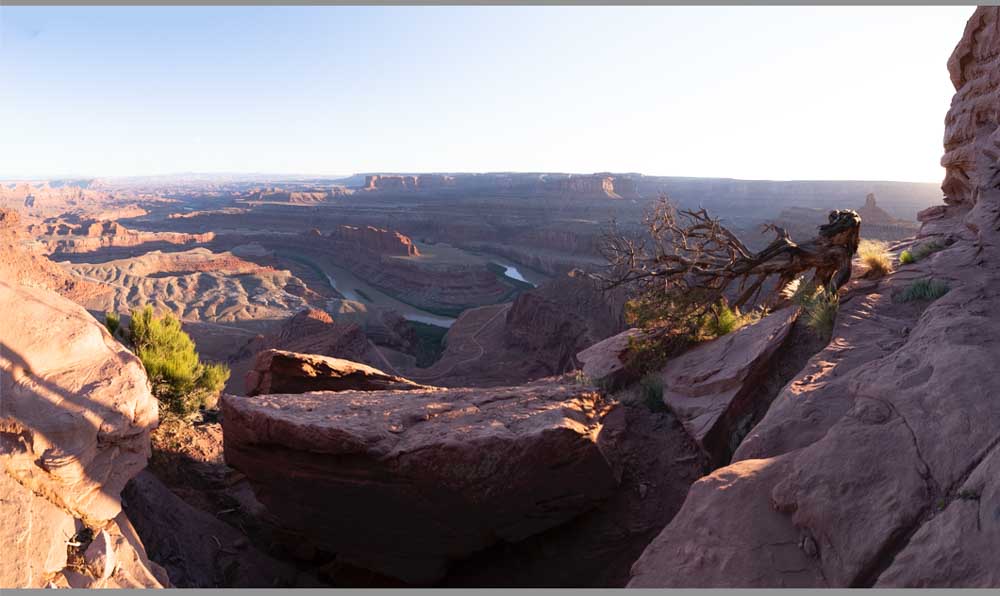
Feel free to play around to discover which projection looks best for your images and the different settings. Once you’re satisfied with the panorama, click Merge to create your panorama.

The panorama will take a few seconds, but once it is finished processing, you can move to the next step and edit your panorama.

Step 5: Edit The Final Panorama
Once you’ve set the panorama settings and merged the images, you can now edit the image as you usually would in the Develop tab.

The panorama exists in Lightroom after the merging process as a raw file, so when you save it, make sure you select the file type that works best for your purposes.
The Difference Between Panorama Vs HDR Panorama In Lightroom
When you first head to Photo > Photo Merge, you may notice you have the option to either select Panorama or HDR Panorama.
The HDR Panorama setting works with bracketed photos — a set of images with multiple exposures taken at the same angle — rather than one exposure per image in the panorama. This will often result in a more balanced exposure and color tone than the normal Panorama setting since Lightroom merges the various exposures to create a better tonal and focus range before stitching the different photos together.
The HDR panorama will only work correctly if the photos you want to stitch together are bracketed with the same exposure range and have the same number of images in a set — otherwise, Lightroom is unable to create the HDR panorama.


