

Masks are one of the most useful tools in Lightroom, allowing you to apply adjustments to a very select part of the image. A mask naturally selects everything inside of itself, but during the editing process, it may be necessary to select everything outside of that mask. That’s where inverting masks in Lightroom comes into play.
Inverting masks isn’t too difficult of a task, just a few strategic button clicks, and you’ll be able to access everything outside of the initial mask selectively.
3 Ways To Invert Masks In Lightroom
Lightroom makes inverting masks fairly simple, with three different ways to do it.
Option 1: The Invert Checkbox
This is likely the easiest way to invert a mask but also the most commonly missed! I will be working in the Develop module of Lightroom Classic.
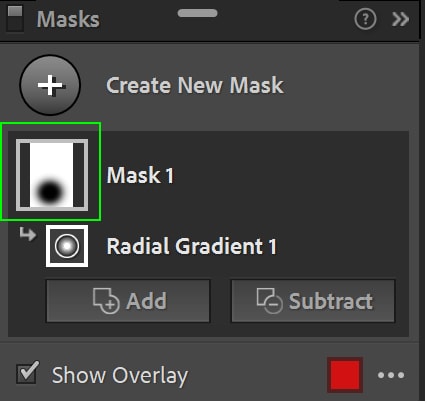
In your editing panel located on the left-hand side of the screen, go ahead and make a mask. In this case, I used the Radial Mask tool.
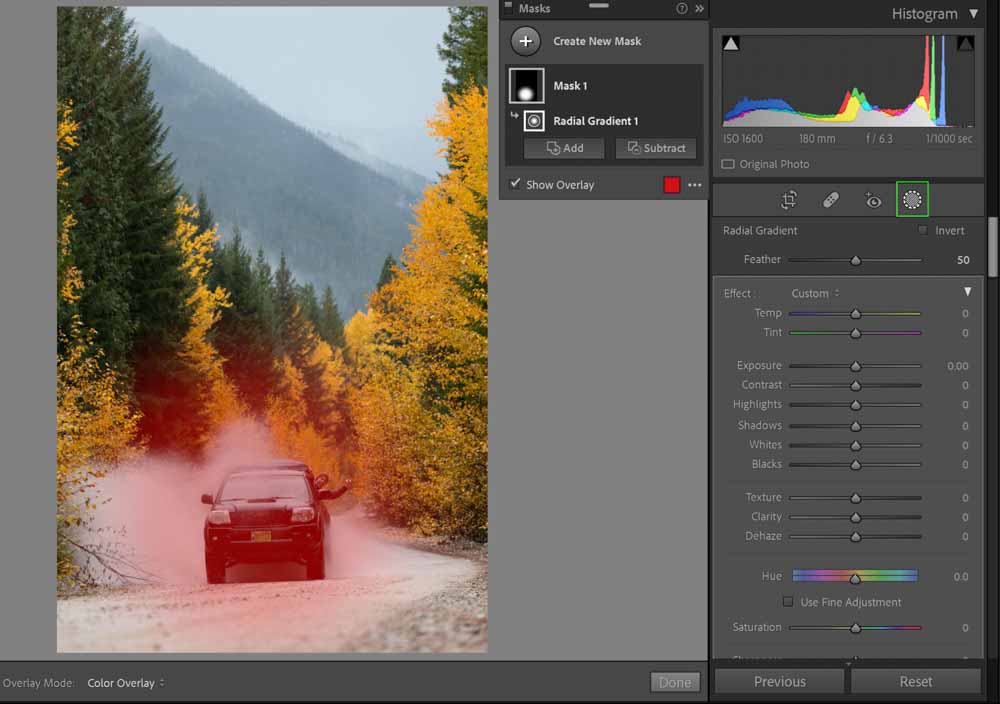
Once you see the adjustment options appear on the editing panel, at the very top of the panel, you’ll see a small Invert next to a check box. Click the checkbox to invert the mask!
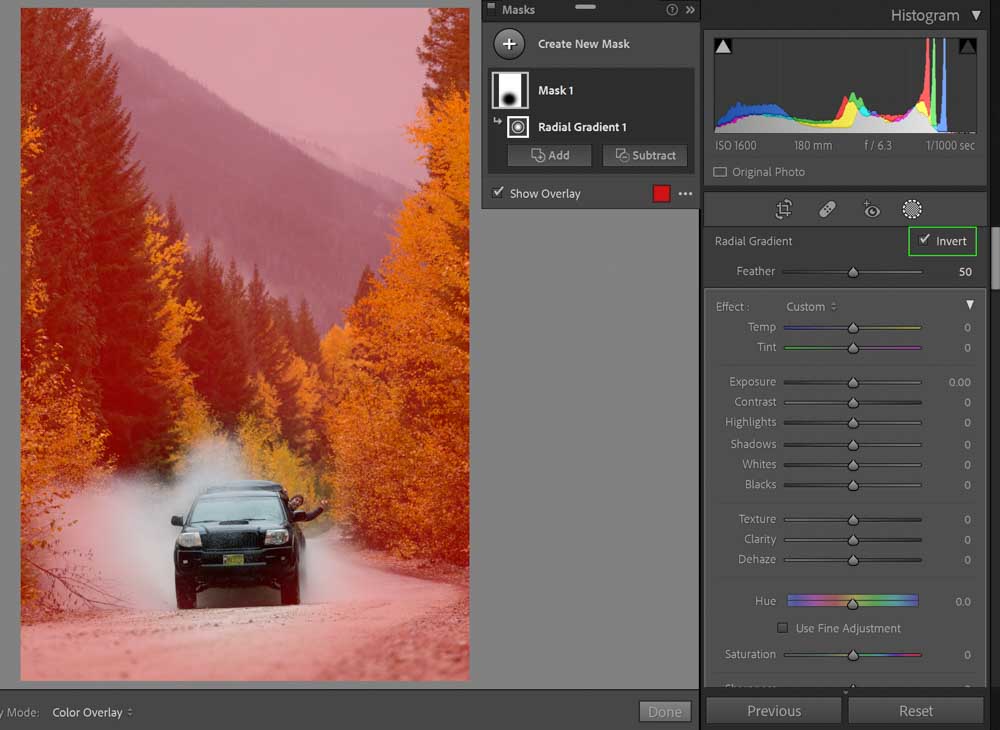
To see where your mask is applied, look at the mask panel. Photoshop users may be familiar with this already, but for those that are not, you’ll see a little black-and-white square. The black parts of this square are the unaffected areas, and the white and gray parts are the affected areas. When the mask is inverted, this will invert as well.
Option 2: Directly Invert The Mask
You can invert the mask directly as well.
To do so, go to the Mask window, where you can see the little black and white box indicating where the mask is currently on your image. Right next to the preview of your mask (the black and white box), you’ll see three horizontal dots.
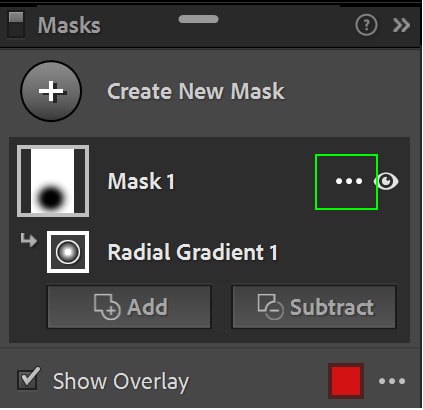
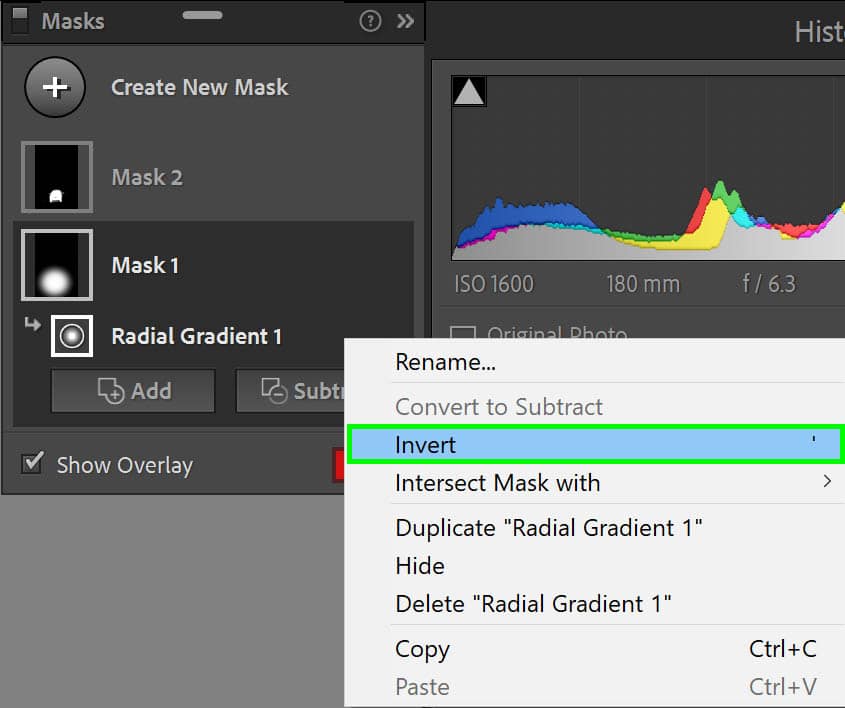
Click these horizontal dots for a dropdown menu. In the dropdown menu, click Invert.
Option 3: The Mask Invert Shortcut
For an even faster way to invert the mask, you can use the invert shortcut.
For both PC and Mac users, the shortcut is an apostrophe (‘).
Good Uses of Inverting Masks
Although there is a slew of reasons inverting a mask can come in handy, there are two primary reasons I use this invert option myself.
The first is to vignette an image easily! If you’re using the radial mask tool, you can create a soft oval around your subject, invert, and darken those edges into a beautiful vignette. This can look a lot more natural than the vignetting tool available in Lightroom already.

The second is to easily work on a background and foreground independently from your subject. If you use Lightroom Classic’s AI mask option, Select Subject, you can then invert the mask to edit the background and foreground exclusively.

Although inverting your masks is a simple task, it’s a basic technique that offers more customization options for your selective adjustments.
