
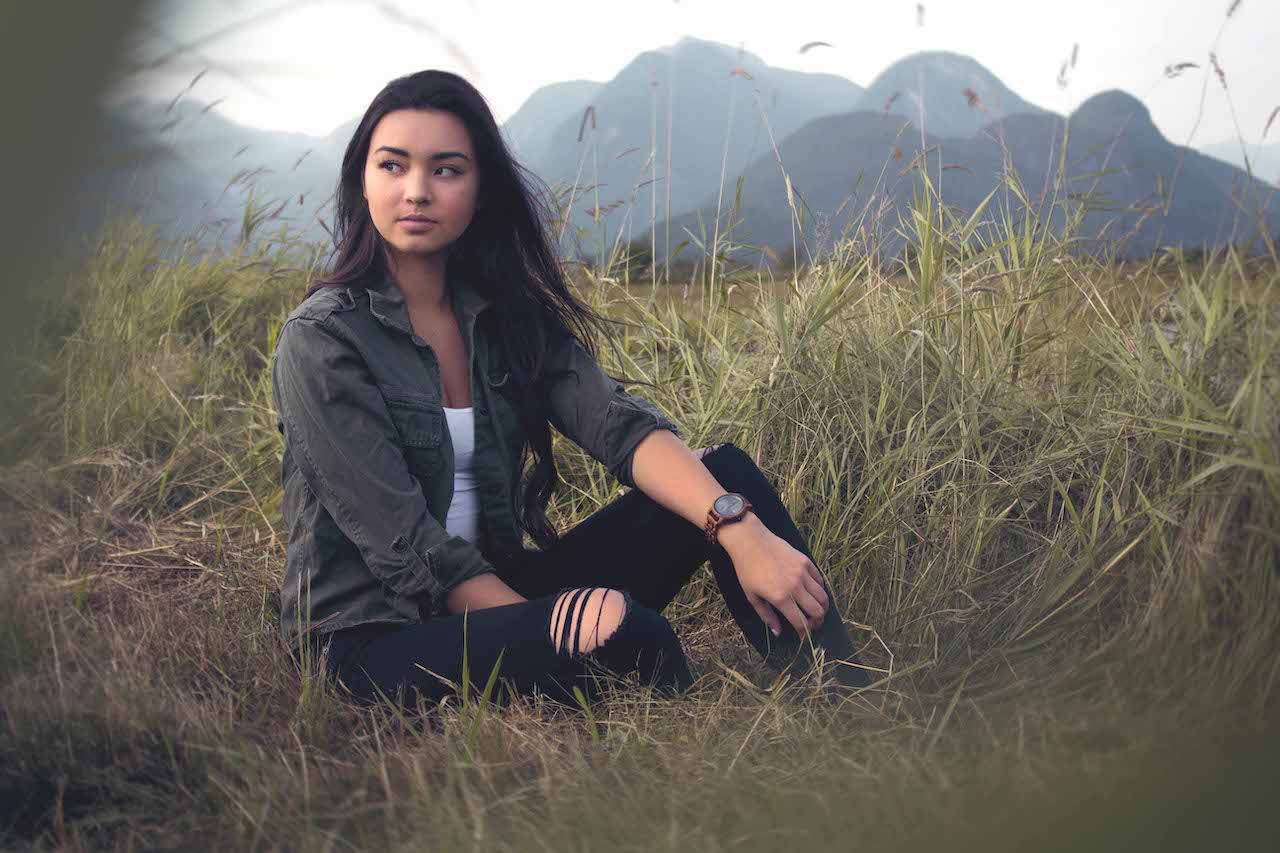
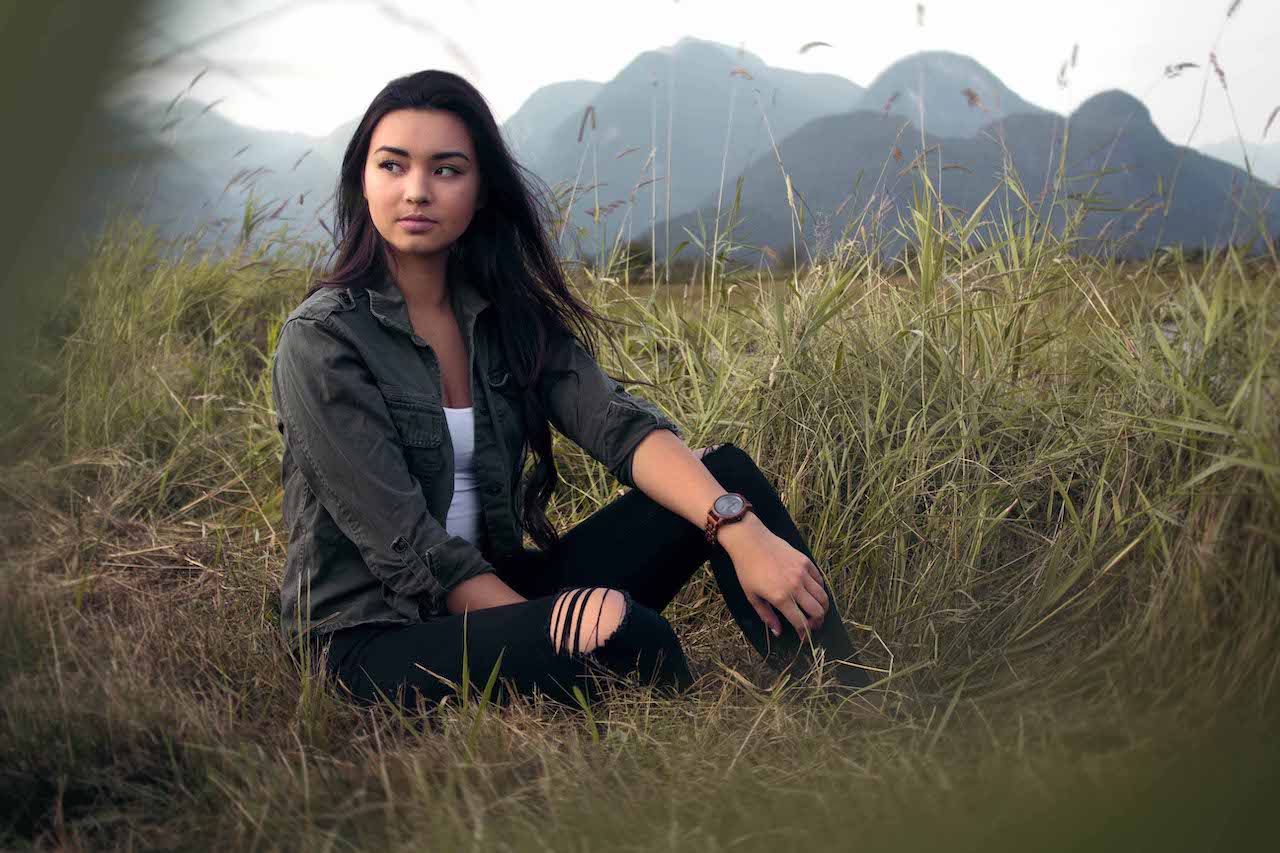
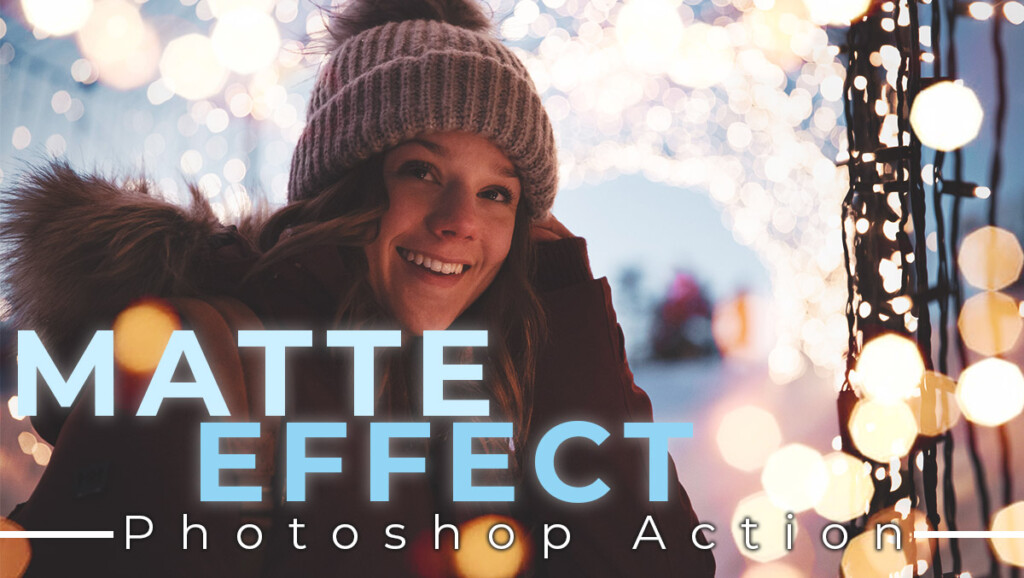
How To Create A Matte Effect In Photoshop
The matte effect adds a beautiful muted look to any photo and is a trendy image effect on social media. As you may have noticed, there’s no ‘matte’ tool in any professional photo editing program. So how the heck are you supposed to create a matte look in your photos? Luckily there are a variety of simple tools to create a matte effect in Photoshop. Even if you’re new to the program, this post will make you a master of this effect!
Before we get started, consider downloading my Free Matte Effect Photoshop Action to streamline this process!


Method #1: Creating The Matte Effect With The Curves Adjustment Tool
The first and easiest method to create the matte effect in Photoshop is with a Curves Adjustment Layer. This tool gives you the most control over the general exposure, while still creating that muted look.
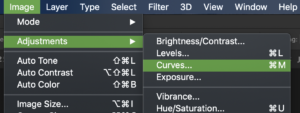
– Create A Curves Adjustment Layer
After you’ve opened your image in Photoshop, create a Curves Adjustment Layer.
You can do this by accessing your adjustments panel or going up to Image > Adjustments > Curves.
![]()
– Lift The Bottom Of The Tone Curve
Since the matte photo effect is created by boosting the shadows, this is a quick adjustment on the tone curve. Click on the bottom left corner of the curve (your shadows) and drag up.

Continue to drag up the curve depending on how intense you want the matte effect to appear.
– Add Additional Contrast To Refine Your Matte Effect
In some cases, your photo may look a little too flat. Don’t be afraid to add back more contrast by manipulating the curve adjustment.
With your shadow level set, click anywhere on your curve to add a new anchor point.

Once you’ve created a new anchor point, you can drag it up to lighten, or down to darken.
Just be sure to remember that the left side of your curve represents shadows, while the right represents the highlights.
Experiment with anchor points to see how you can better refine your matte effect for a more professional look!
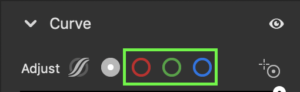
– Add Color To Your Matte Effect (Optional)
Now that you’ve successfully created the matte effect with the Curve Adjustment, you can take it one step further. Try adding a bit of color!
With your Curves Adjustment Panel open, click on the drop-down menu that reads ‘RGB.’

Select a new color channel you want to effect. Here’s a list of what colors can be created in each channel:
- Red Channel: Red + Cyan
- Green Channel: Green + Magenta
- Blue Channel: Blue + Yellow
With a specific color channel chosen, follow the same steps as above to add color to the matte look in your photo!

– The Result


And that’s it! With just a few easy steps, you have made the matte effect in Photoshop using the Curves Adjustment Layer. The Curves Adjustment is an easier way to create this photo effect since you have the most customization. With a few anchor points, you can perfectly refine the matte effect to better suit your style.
To make the process even easier, be sure to download my Matte Effect Photoshop Action For Free!
Method #2: Using The Levels Adjustment In Photoshop
The second way to create a matte effect in Photoshop is with the Levels Adjustment. This option is excellent for those who don’t want to deal with anchor points and just get right to it.
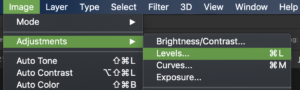
– Create A Levels Adjustment Layer
To create a Levels Adjustment Layer, click on the levels icon in your adjustment panel.
Alternatively, you can go up to Image > Adjustments > Levels
– Adjust The Output Levels
You will find the output levels at the bottom of your Levels Adjustment window.

Rather than entering specific numbers, move the slider to make it easier.
Click on the left side of the slider and drag it up. The further you move this slider, the heavier of a matte effect you will create.

– Refine Your Matte Effect
If the matte effect is looking a little too washed, play around with the other level adjustments.

Use any of these three points to refine your shadows, mid-tones, and highlights in your photo.
These are a great way to bring back life into your picture will retaining the matte look in your photo!
– Add Additional Color To Your Matte Look
Just like with the curve adjustment, you can add color into your matter effect with the Levels Adjustment too.
Click on the tab that reads ‘RGB.’

Select any color channel you wish to affect. Your options are red, green, or blue.
Once you’ve selected a color channel, follow the same steps as previous to add a matte look to your photo.
This time when you adjust your output value, your specified color will become more visible.
In this example, the matte look becomes blue since I am using the blue channel.
You can further refine this color and hue by adjusting any of the three adjustment points above the output slider.
– The Result
The Levels Adjustment is another excellent tool for creating a matte effect in Photoshop. Without any anchor points, it’s more user friendly, but slightly less customizable.
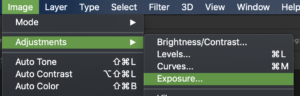
Method #3: Using An Exposure Adjustment Layer
If you just want a simple matte look without all the extra color and contrast options, this is for you. The Exposure Adjustment streamlines the process and allows you to create a matte photo effect with one slider.
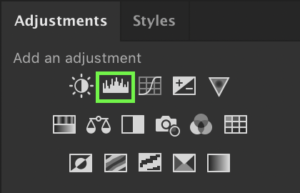
– Create An Exposure Adjustment Layer
Click on the Exposure Adjustment icon in your adjustments panel.
![]()
You can also go to Image > Adjustments > Exposure.
– Adjust The Offset Slider
With your Exposure Adjustment Layer panel open, click on the Offset Slider.
Move this slider to the right to add a matte look to your photo.

– Refine Your Effect With The Gamma Correction Slider
Gamma Correction allows you to bring more contrast back into your mid-tones.
Move the Gamma Correction slider to the right to add back more life into your mid-tones.

– The Result
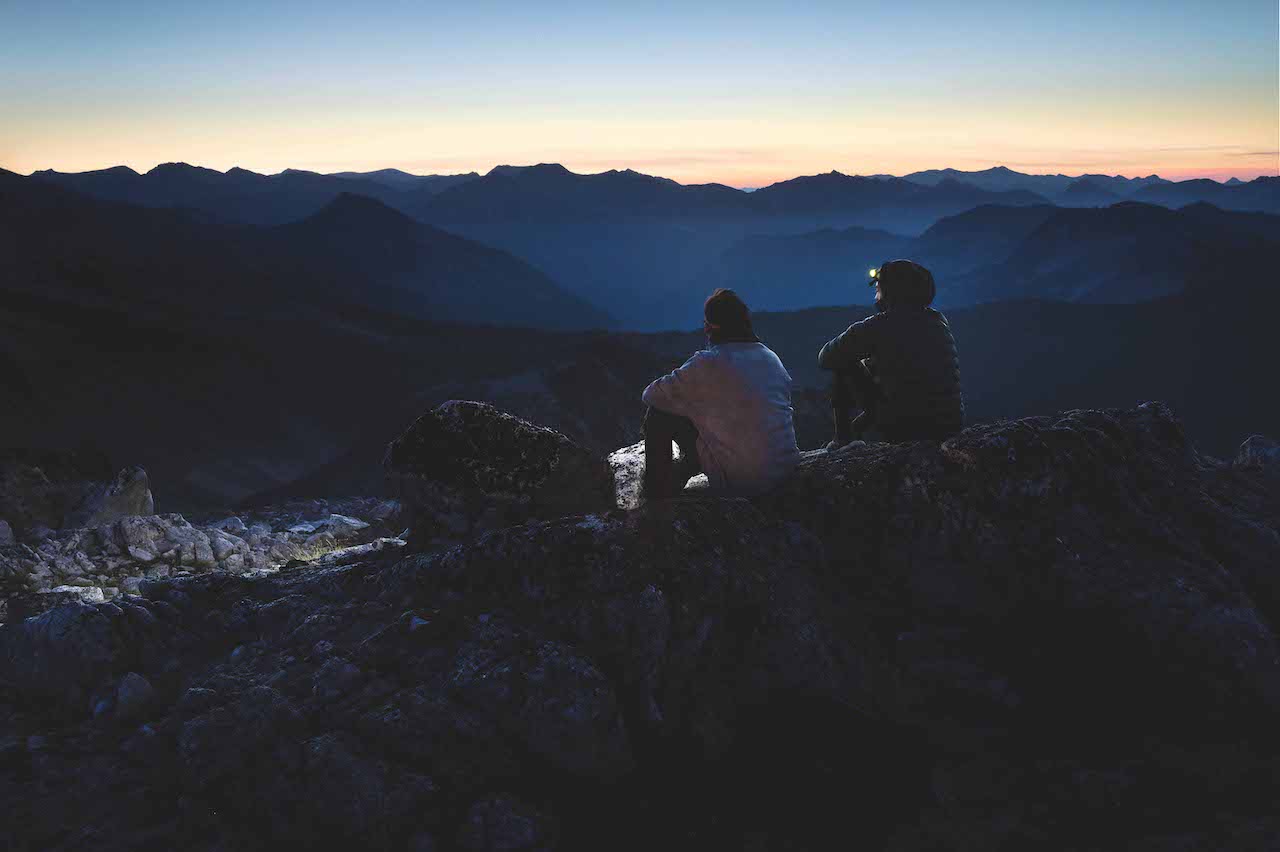
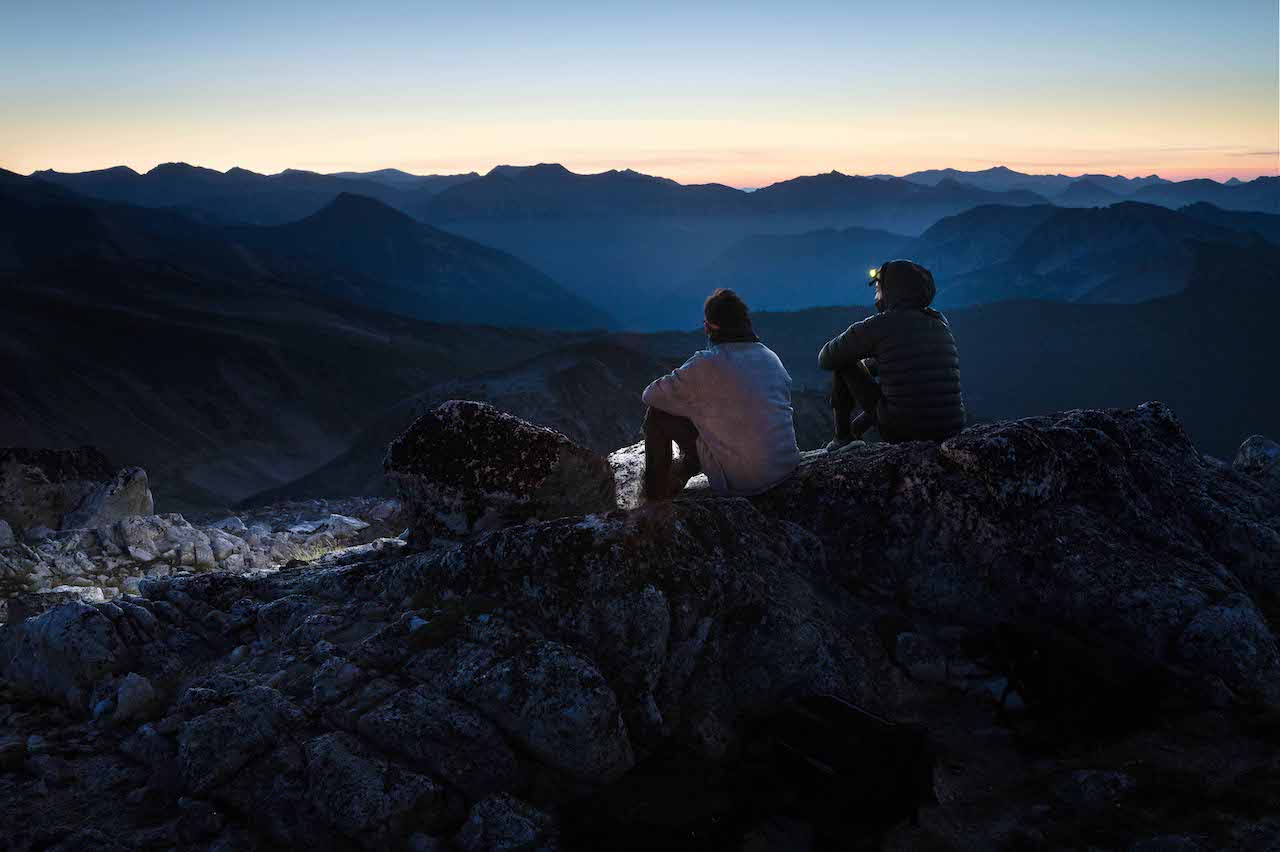
The Exposure Adjustment Layer is a fast and effective way to create the matte effect in Photoshop. If you don’t need much customization and want a global matte look, this is a great option!
How To Create A Matte Photo Effect In Camera Raw
When you open a RAW file in Photoshop, you’ll likely end up in Camera Raw. Camera Raw is like a mini Lightroom found inside on Photoshop. Here you can make any basic color and exposure corrections to your images before bringing them into Photoshop.
Although it has slightly fewer options when creating a matte look in your image, it will still do the job. Here’s how you can create a matte effect in Camera Raw.
– Open Camera Raw
If Camera Raw didn’t automatically open when you imported your RAW files to Photoshop, you can still quickly access it.
Go up to Filter > Camera Raw Filter.

– Open The Curve Tab In Camera Raw
Once Camera Raw opens, scroll past the first few adjustment options and open the Curves tab.

– Select The Point Curve
By default, you’ll be first editing the Parametric Curve. You cannot create a matte effect with this type of curve.

Instead, you must access the Point Curve.
Simply click on the white circle to access the Point Curve.

Now you can create anchor points and directly affect the curve.
– Adjust Output Value On The Point Curve
Click on the bottom left of the curve and drag it up. This will adjust the output value.
The more you increase the output, the stronger of a matte effect you will create.

– Refine Your Matte Effect With Anchor Points
With the output value set, add additional anchor points to refine the matte effect in Camera Raw.

– Add Color To Your Matte Effect In Camera Raw ( Optional)
To add some extra color your matte effect in Camera Raw, click on any of the three colored circles above the curve.
Once you’ve selected a color channel, once again, adjust the output value of the curve. This time it will add color to the matte look you’ve created.

– The Result
Learning how to create a matte effect in Camera Raw will save you time and layers. If you’re already working in Camera Raw when you open images, creating this effect ahead of time will streamline the editing process!
How To Use The Free Matte Effect Photoshop Action
If you’d like to skip the manual labor, you’ll love this free Matte Effect Photoshop Action! Here’s how it works:
– Download And Import The Matte Effect Action
To download this Photoshop action, click here!
If you aren’t sure how to import an action into Photoshop, this post will show you how.
– Open Your Actions Panel
A ‘play button’ represents the Actions Panel. Click on this to open your Photoshop Actions.
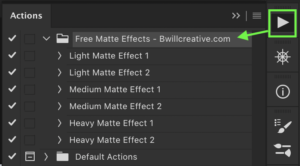
If you do not see this, go up to Window > Actions.

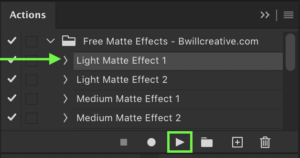
– Select The Matte Effect Action You Want And Click Play
You will see a folder called ‘Matte Effects’. Open this folder and select the action you wish to use.
With the desired Photoshop action highlighted, click the play button at the bottom of the Actions Panel.
– The Result
With just one click, you can create a variety of professional-looking matte effects in Photoshop. Click here to download this free Photoshop action!
More Photoshop Effects You’ll Love:

![]()
Conclusion
There is a wide array of tools you can use to create a matte effect in Photoshop. The beauty of each tool is that it has its advantages over the other. Whether it be less confusing, more streamlined, or boasts extra customization, there are lots for you to choose from.
Although the matte effect in Photoshop is simple to create, using a Photoshop action makes it even faster. With just one click, you can add a stunning matte look to your pictures with ease. No dealing with layers or making manual adjustments!
If you know someone who would LOVE this Photoshop effect, be sure to SHARE this post with them!
Want more posts like this one? Subscribe to my weekly newsletter for more photography, and photo editing tutorials delivered straight to your inbox!


