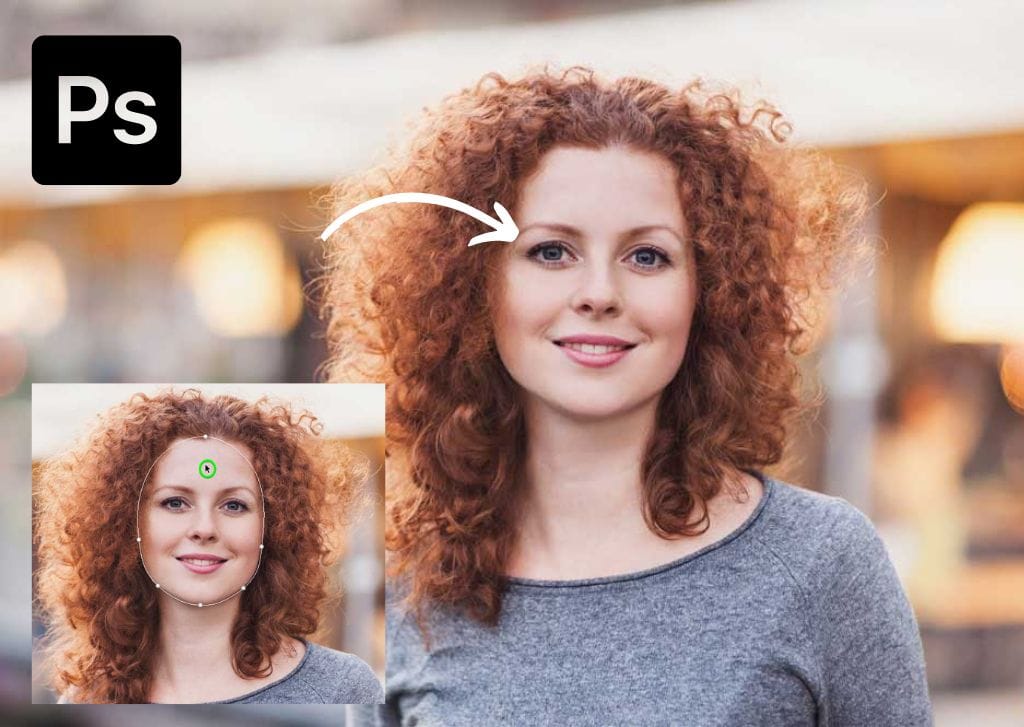

Whether it’s from a client request or to make a funny meme of yourself or a friend, you may at some point need to make eyes bigger in Photoshop. While this may seem like a daunting task at first, it’s super easy even for beginners to do with the help of the liquify adjustment.
When altering features on people in Photoshop, it is very easy to overdo the edit and end up with ridiculous results. You want to be careful only to edit the image as much as necessary to reach the desired effect without going too far unless the aim is to create a cartoon effect. Then, you can go wild.
Here is how you can make eyes larger using the Liquify Filter, complete with explanations of the important settings you should know.
How To Make Eyes Larger In Photoshop
Thanks to Photoshop’s updated Liquify Filter (Photoshop versions after 2016), you can easily adjust a person’s facial features while retaining a natural look. You can bloat or minimize different features, alter a person’s smile, and so much more, like changing the size of a person’s eyes.
These features are commonly used in portrait, glamour, and beauty photography and occasionally as a way to create cartoon-like facial expressions.
Whether your goal is to make a portrait more appealing or have some fun, these few steps will get you the result you’re looking for.
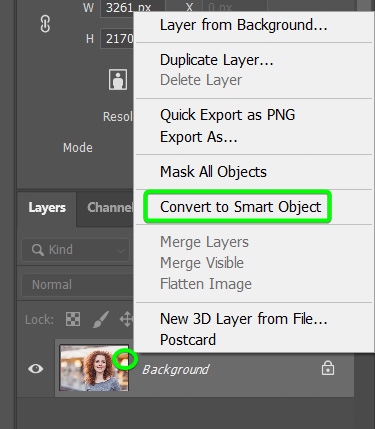
Step 1: Convert The Image Layer To A Smart Object
Before making any edits, it’s important to ensure you edit the image non-destructively. Since the Liquify Filter works directly on the layer, you should convert it to a smart object before you begin.
Converting your image layer to a Smart Object means you can go back to the Liquify workspace later during the project and alter any edits you made, easily delete the edits, or add new edits.
To convert your image to a smart object, right-click (Win) or Control + click (Mac) on the image layer, whether it’s your background layer or a standard layer, then click on Convert to Smart Object.
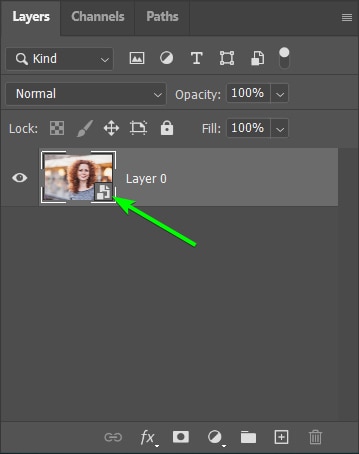
When your image layer is converted to a Smart Object, you will notice a smart object icon in the corner of the image thumbnail like the one below.
Step 2: Open The Liquify Filter And Select The Face Tool (A)
Next, you must open the Liquify workspace to find the tools to enlarge the eyes. To open this workspace go to Filter > Liquify. You can also use the shortcut Shift + Control + X (Win) or Shift + Command + X (Mac).

The Liquify Filter opens as an entire window with additional tools in the panel on the left, a preview of your image in the middle, and settings to adjust the tools in the right-hand panel.
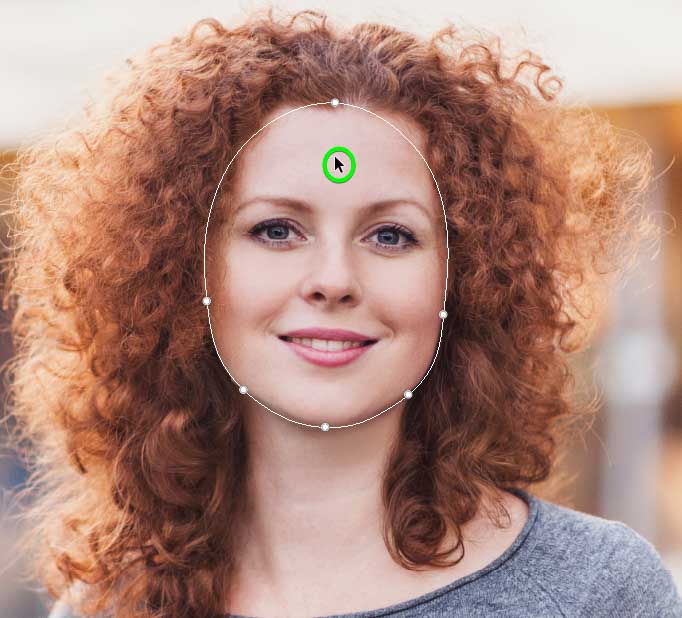
The first thing you need to do is select the Face Tool (A) from the lefthand Toolbar. Once you select the tool, you will notice white curved lines around the face in the image. These lines will appear around the other faces in the picture, too, if there is more than one face in your photo.

Step 3: Select The Face You Want To Edit (Optional)
When there is more than one face in the image, you must select which face you want to edit. If the wrong face is selected, you may enlarge the eyes incorrectly. You can only edit one face at a time in an image.
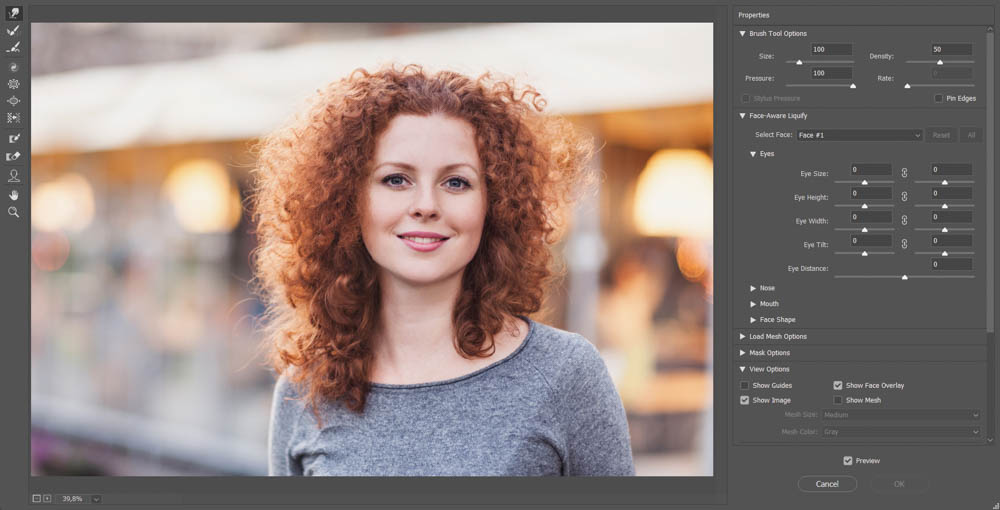
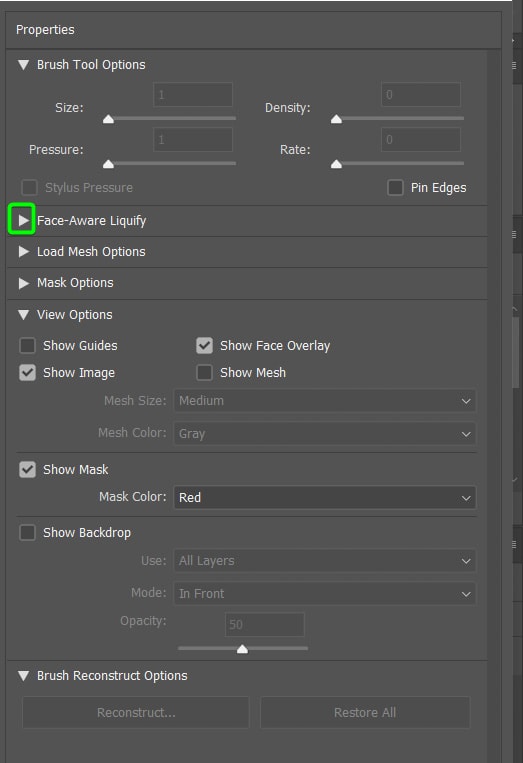
To select the face you want to edit, ensure the Face-Aware Liquify section is open in the right-hand panel by clicking on the arrow to open the tab if needed.
Use the drop-down menu of the first option in the section to Select Face. When you click on the drop-down menu, you will see “Face #1”, “Face #2”, “Face #3”, etc. Depending on how many faces are visible in the image. If you only have one face, like my image, you will only have one option.
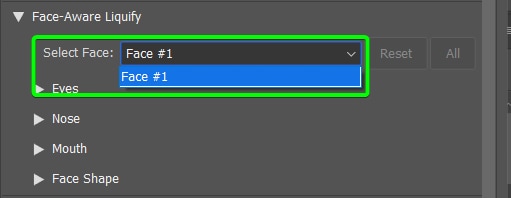
If you aren’t sure which face is the one you want to edit, you can click on it in the center preview to select it, and the option in the drop-down menu will change too.
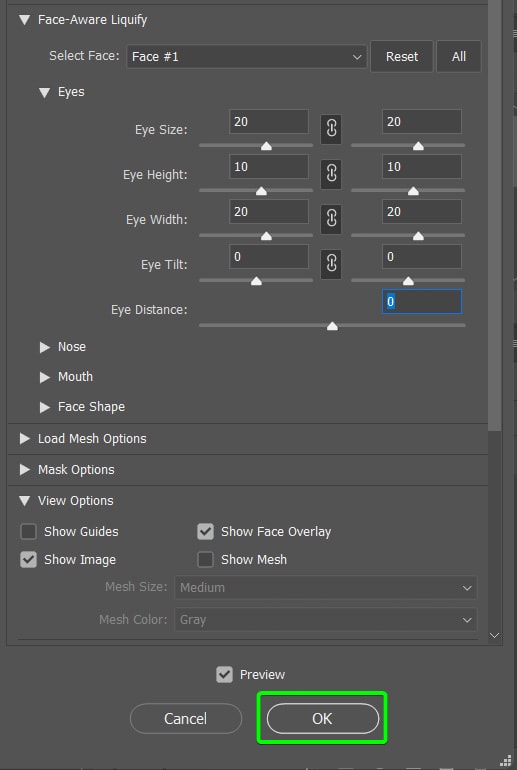
Step 4: Open The Eyes Tab And Link The Settings
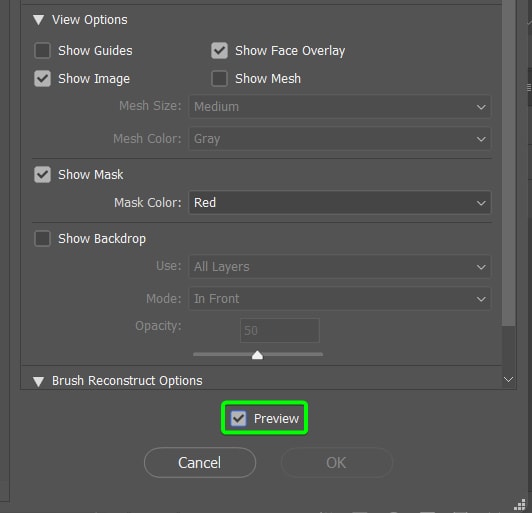
Check the box next to Preview at the bottom of the right-hand panel to ensure you see the changes you make in the center preview.
Next, open the Eyes tab underneath Face-Aware Liquify by clicking on the arrow. This opens up the various settings you can use to make eyes more prominent.
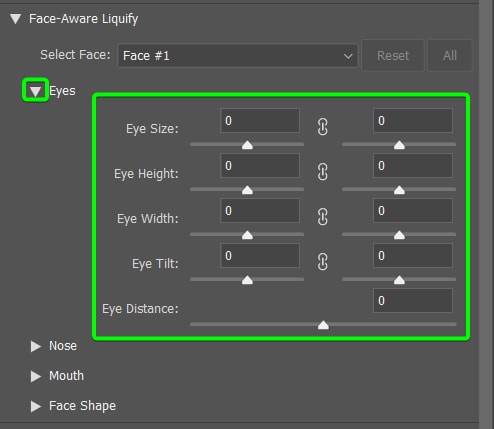
If you want to adjust both eyes at the same time to keep them looking natural, which I recommend you do, you need to link the settings to both eyes. You need to click on each link icon between the settings to link the settings. The link is active when there is a darker block around the icon.
You can see below where the first two links are active, and the bottom two aren’t linked.
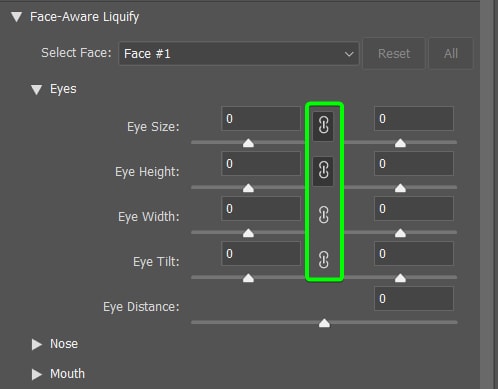
Link all the settings, and then you can move on to enlarging the eyes using the settings in the section.
Step 5: Adjust The Settings Sliders To Enlarge The Eyes
You can now use the various settings by adjusting the sliders to alter the size of the eyes. Depending on how you want to edit the eyes, you may only need to change some of the settings. Remember to practice restraint, so you don’t create an unwanted unrealistic effect.
Here is how each setting works and how it will affect your image.
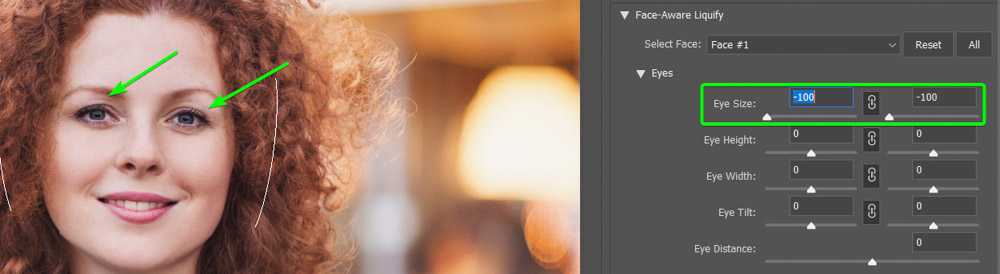
– Eye Size
The first setting is the Eye Size, which you will focus on when enlarging eyes. When the setting is linked, you only need to adjust one slider, and the other will automatically follow. If you move a slider to the right, it will enlarge the entire eye. If you move the slider to the left, it will reduce the size of the whole eye.
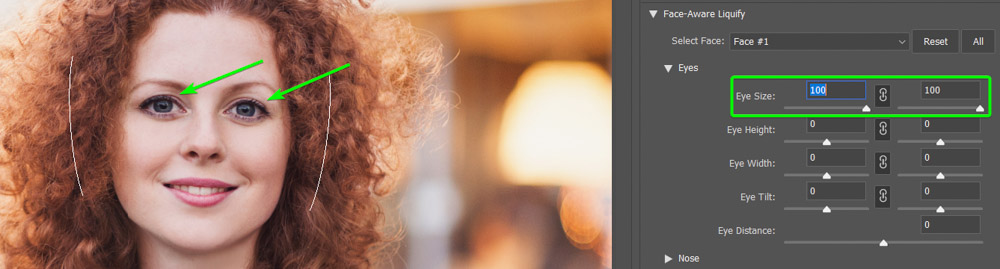
To increase the size of the eyes, you want to move the slider slightly to the right without overdoing it. The amount you need depends on your image, but for mine, I set the sliders to 20.
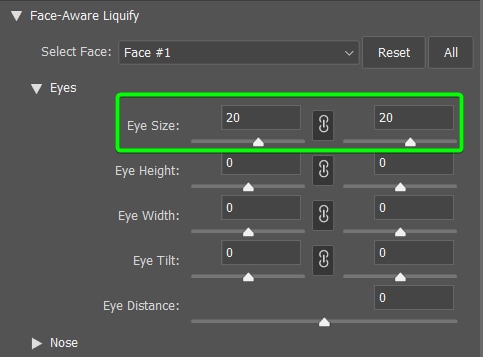
This setting alone may be all you need to increase the eyes, but if you want to change other aspects, you may need to change more settings.
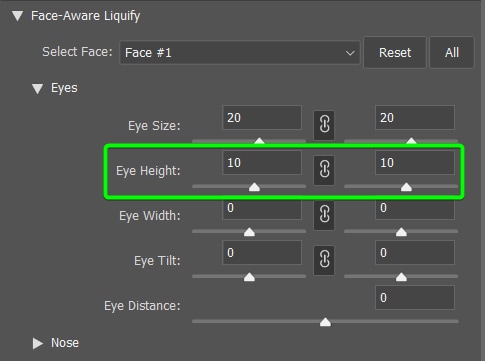
– Eye Height
The next slider is the Eye Height, which adjusts the eye’s size by only changing the height and not the width. If you want to widen the eyes without affecting the size too much, you should use this setting. Move the slider to the right to enlarge the eyes and move it to the left to decrease the eye height.
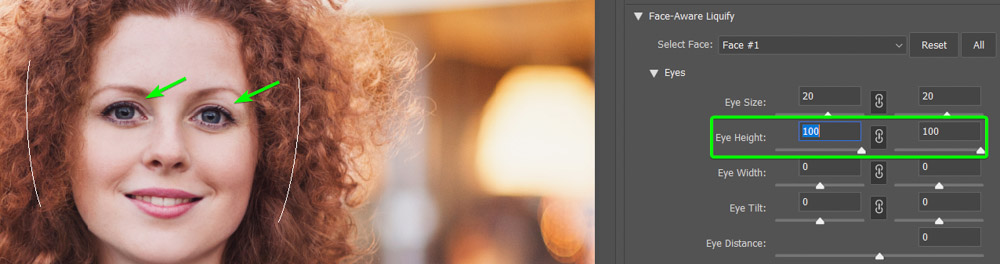
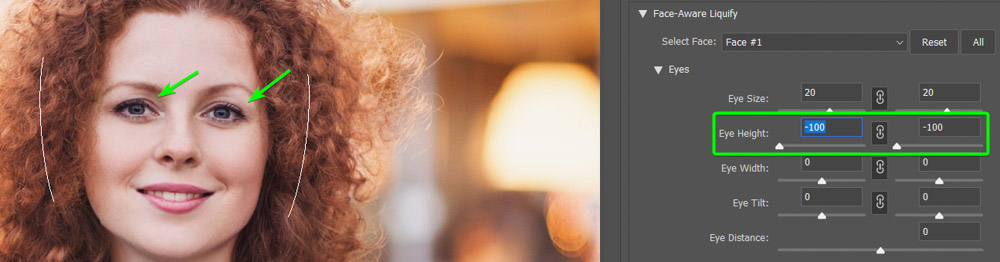
This setting is great for creating a cartoon-like look with widened eyes. I only need to increase the height a small amount for my image, so I set it to 10.
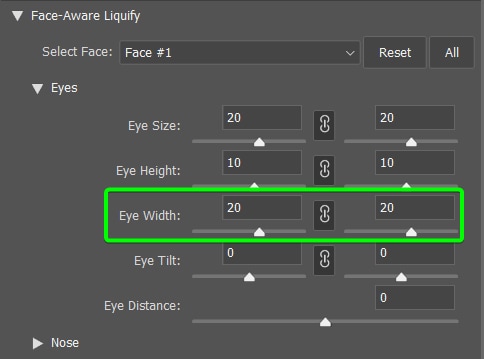
– Eye Width
Next on the list is the Eye Width. This setting works similarly to the above settings, but it isolates the width of the eyes and adjusts them without affecting the height. You can move the slider to the right to increase the width of the eyes and to the left to decrease the width.

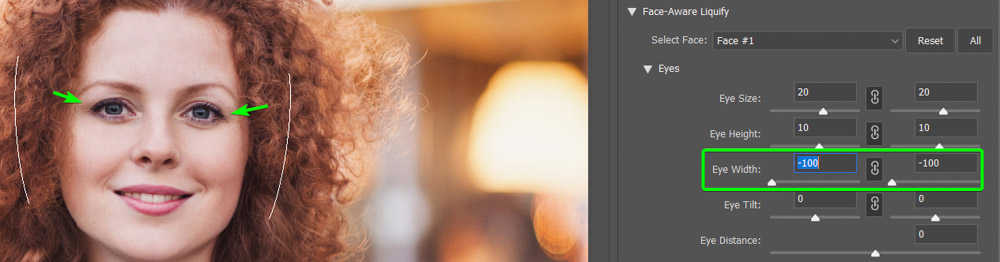
To increase the size of the eyes and minimize any potential cartoon-like effect, I set the Eye Width to 20 on my image.
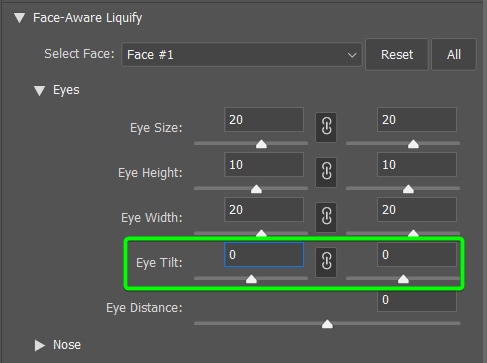
– Eye Tilt
The Eye Tilt setting is next, which rotates the eyes inwards or outwards to change the tilt of the eyes. If you want to rotate the eyes inwards, move the slider to the right, and if you want to rotate them outwards, move the slider to the left.

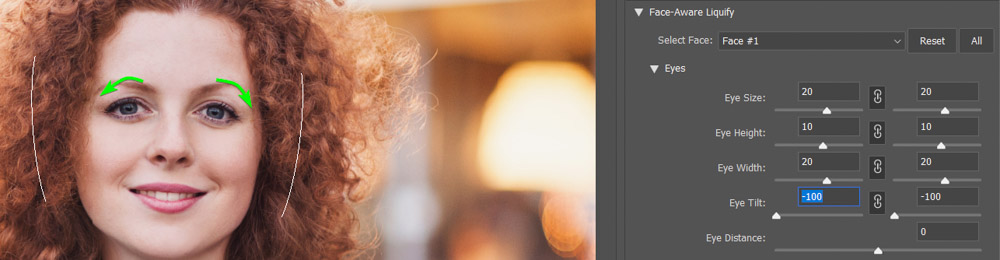
I don’t need to tilt the eyes to increase the size, so I have left the sliders at 0.
– Eye Distance
The final setting is the Eye Distance which moves the eyes closer together or farther apart. Move the slider to the right to increase the distance between the eyes and to the left to reduce the distance.
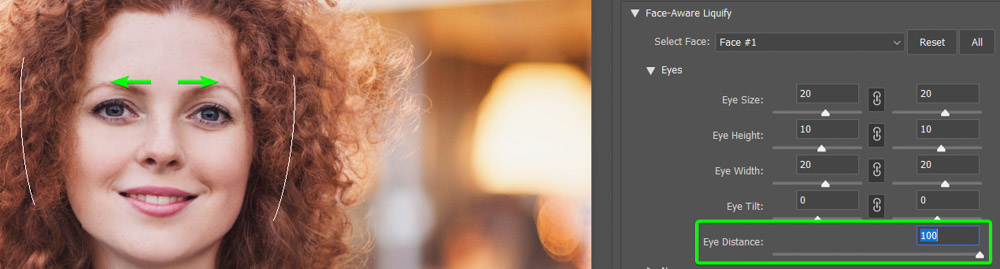
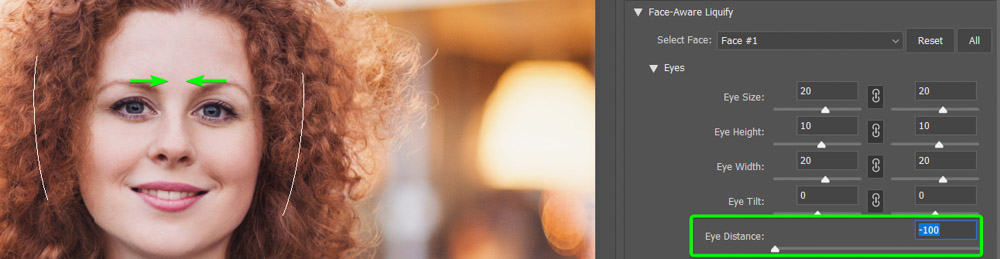
My image doesn’t need any adjustment on the eye distance, so I have left the slider at 0. This setting isn’t necessary for increasing the size of the eyes unless you have created a cartoon-like effect and need more space for the much larger eyes.

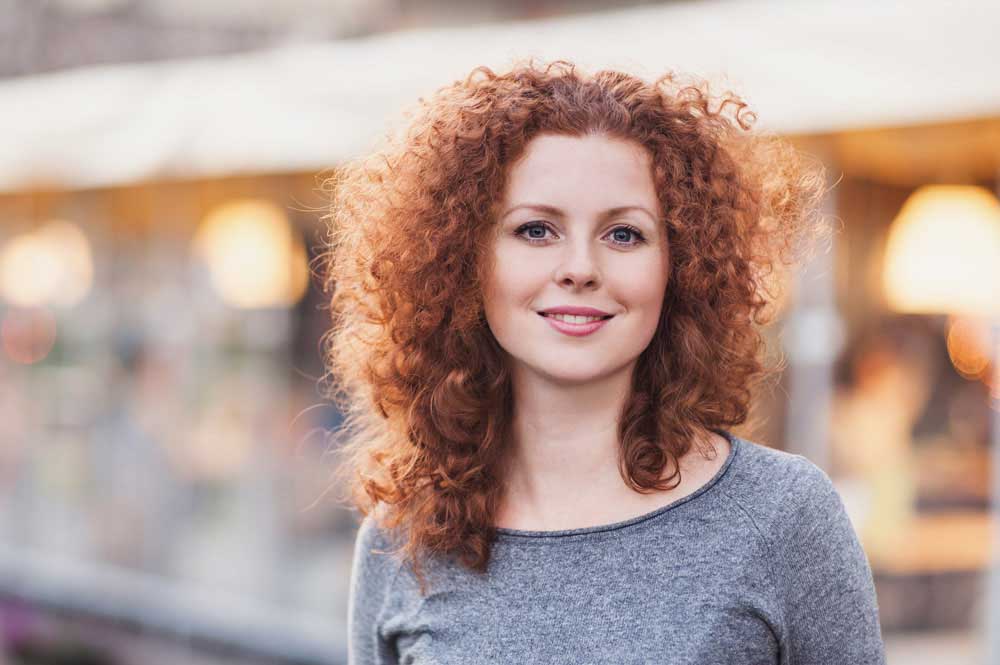
Step 6: Accept The Changes And Adjust When Needed
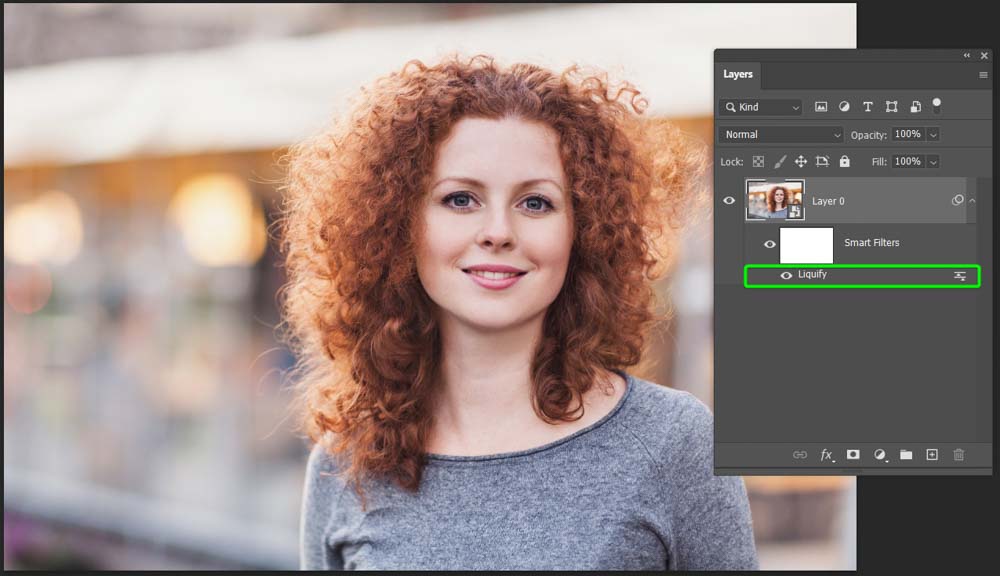
After adjusting the various settings, you have successfully increased the size of the eyes in your photo. Click OK at the bottom of the right-hand panel to accept the changes.
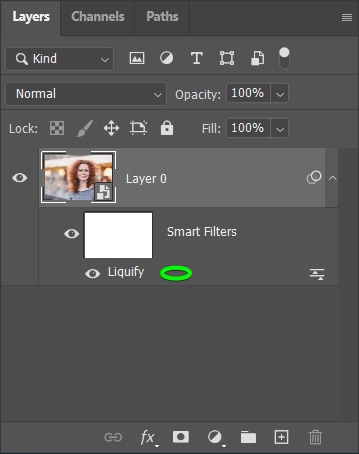
When you click OK, the Liquify workspace closes, and you can see your image with the changes in your Photoshop workspace. You will also notice a smart filter is added below your image layer in the Layers panel.
You can use the smart filter to adjust the edits at any stage. To change the edits or add more edits, for instance, if you want to adjust other facial features, you can double-click on the Liquify filter layer to re-open the Liquify workspace and add your edits.
Once you have made changes in the workspace using the previous step as a guide and clicked OK to accept the new changes, you have a photo with enlarged eyes.


