


Wrapped text is a common creative effect that alters the positioning of your text to outline a specific shape or image perfectly. Luckily, you can create this effect with just a few simple paths and your Type Tool.
Since there are a few different ways you can wrap text in Photoshop, this post will share each of these methods. The first will be to wrap text around a shape, the second will wrap text around an image, and the last method will wrap text around a custom shape. Let’s get started!
Video Tutorial
Option 1: How To Wrap Text Around A Shape
This first method will utilize the Shape Tool to create a standard shape. There are a ton of different shape options within Photoshop that can be used for this.
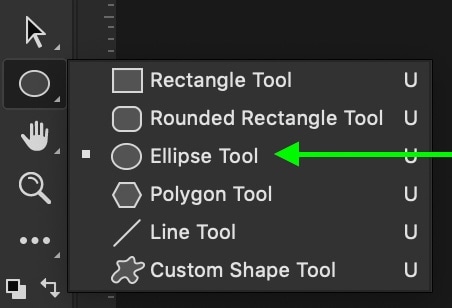
Step 1: Add A Shape Using The Shape Tool (U)
To see all the available shapes, click and hold the Shape Tool.
If you’re looking for something more unique, use the custom shape tool to explore further options. For this example, I’ll use the Ellipse Tool to create a circle.
Step 2: Set The Mode To Shape Or Path And Draw The Shape
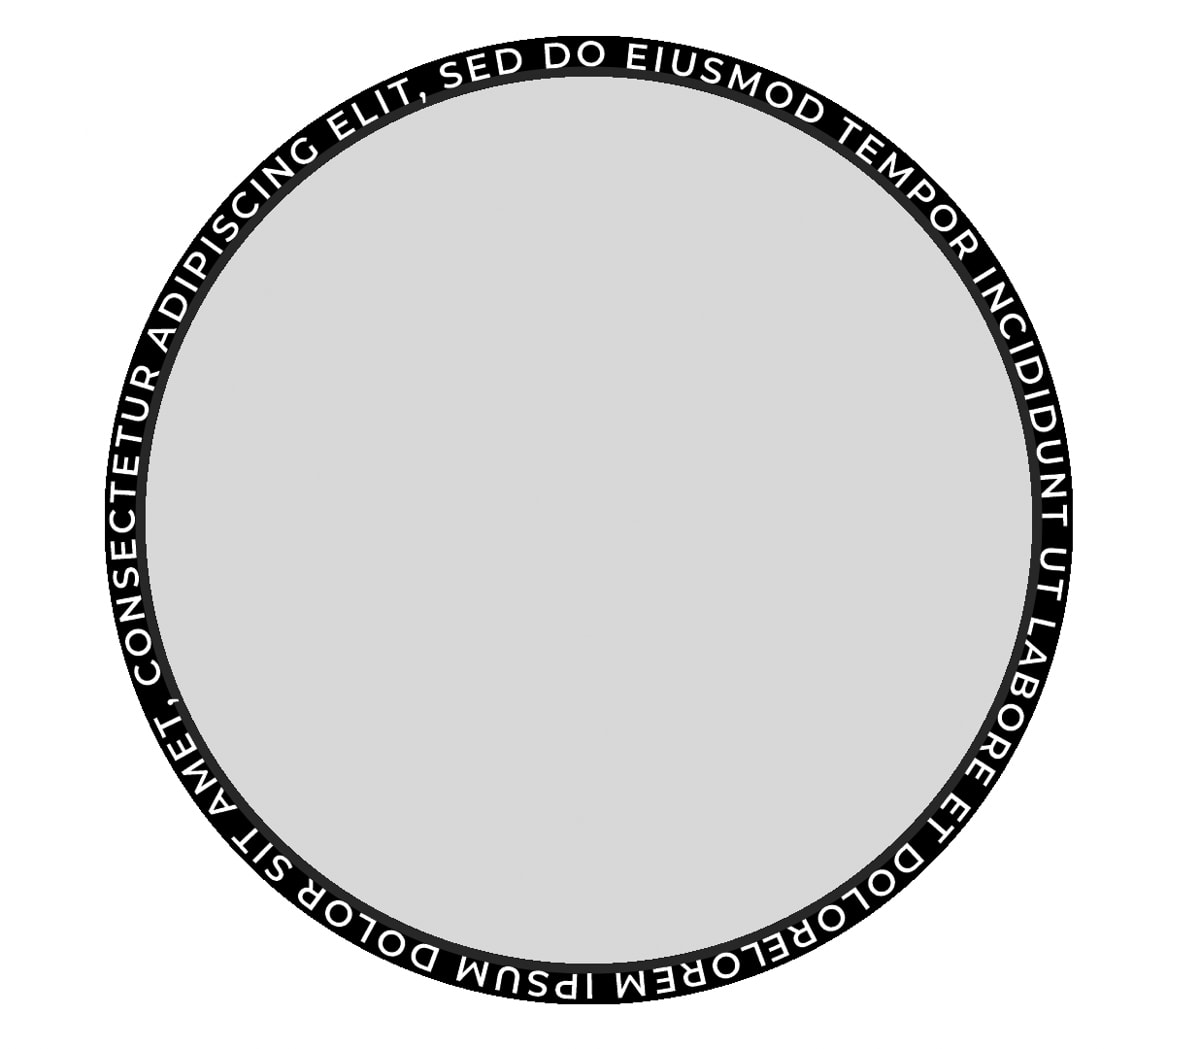
First, decide whether or not you want the shape to be visible alongside the text. If you want to see the shape with your text, select the Shape mode in the Options Bar. If you’d rather the shape be invisible and just wrap the text, choose the Path Mode.
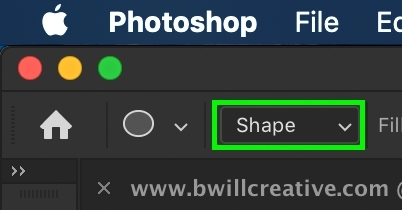

Once you’ve decided on how you want this wrap effect to look, click, and drag on your canvas to create the shape.
Step 3: Use The Type Tool (T) To Add Text To The Shape
Next, grab your Type Tool by pressing T and hover your cursor over the line of your shape path. Notice how the cursor now has a squiggly line through it. When you see this cursor, click on the shape’s edge, then type your text onto the path.

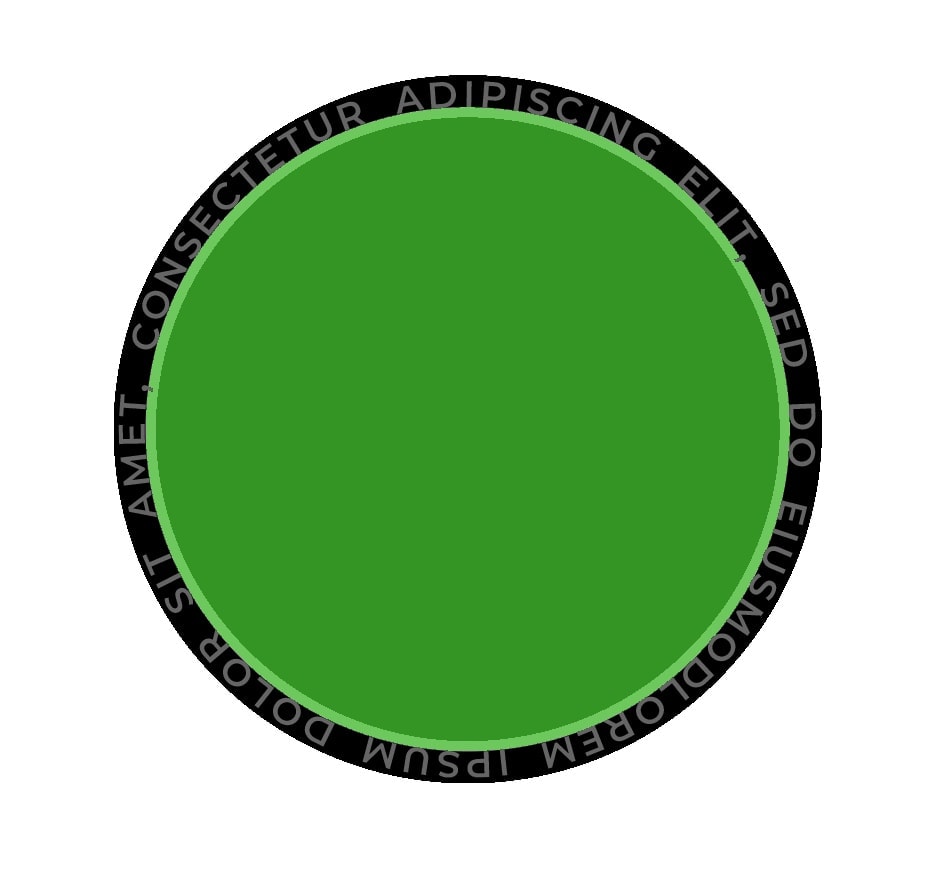
Now, your text will wrap itself to the outside edge of the shape.
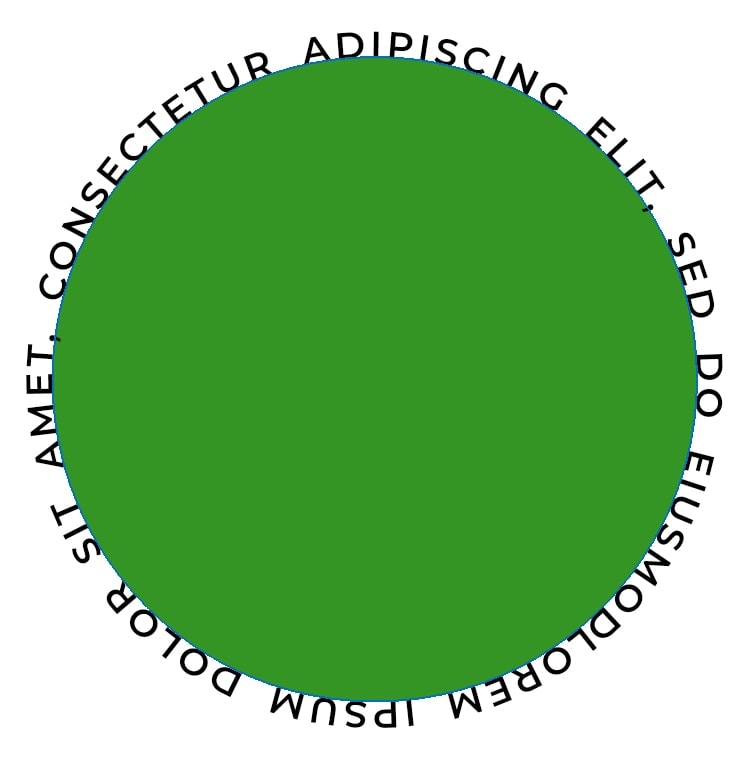
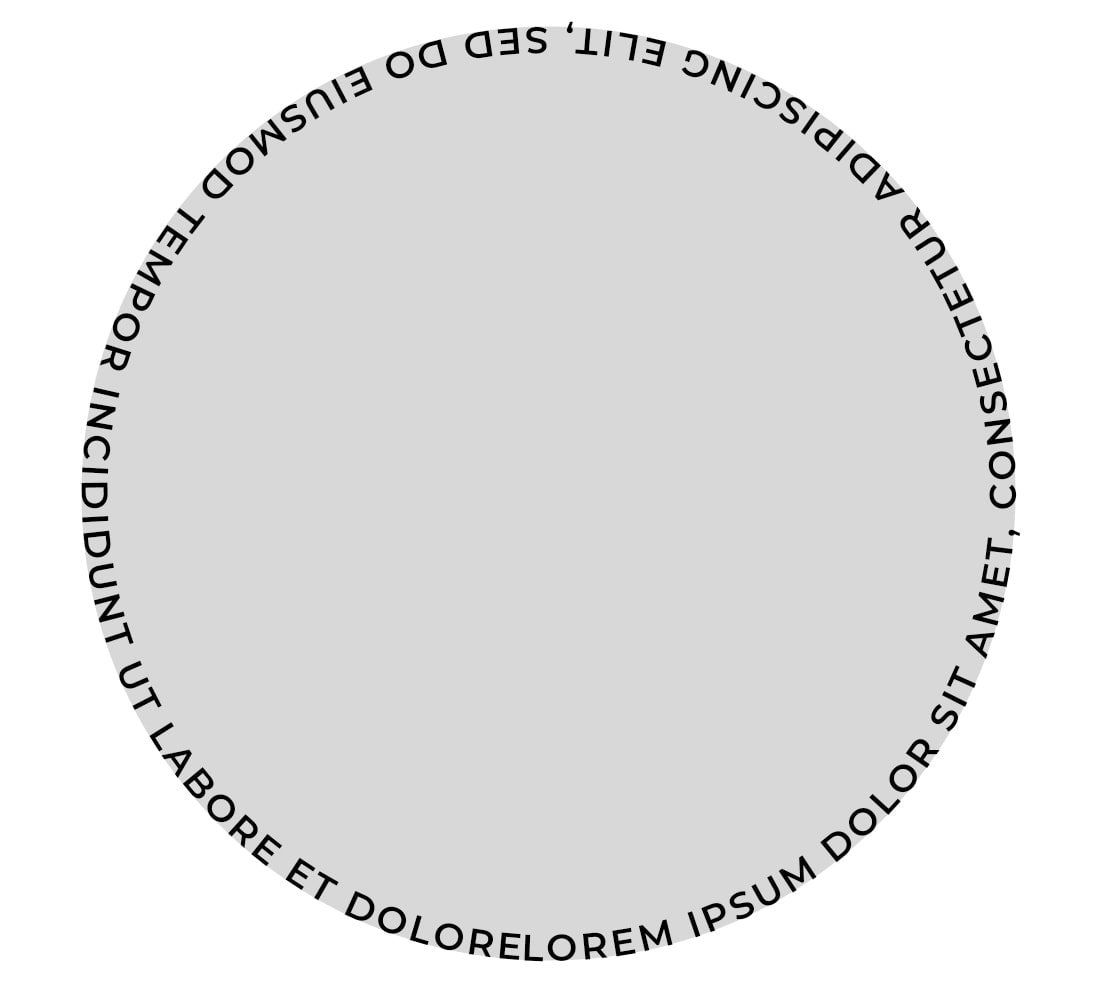
Step 4: Move The Text Inside The Shape (Optional)
If you want to have your text wrap around the inside edge of your shape, you can do this in a couple of clicks.
With your Type Tool (T), select your text and press Control + A (Win) or Command + A (Mac) to highlight all.
Hold Control/Command, and click and drag your text to the inside of your shape. This will automatically shift your text to wrap around the inside edge of your shape.
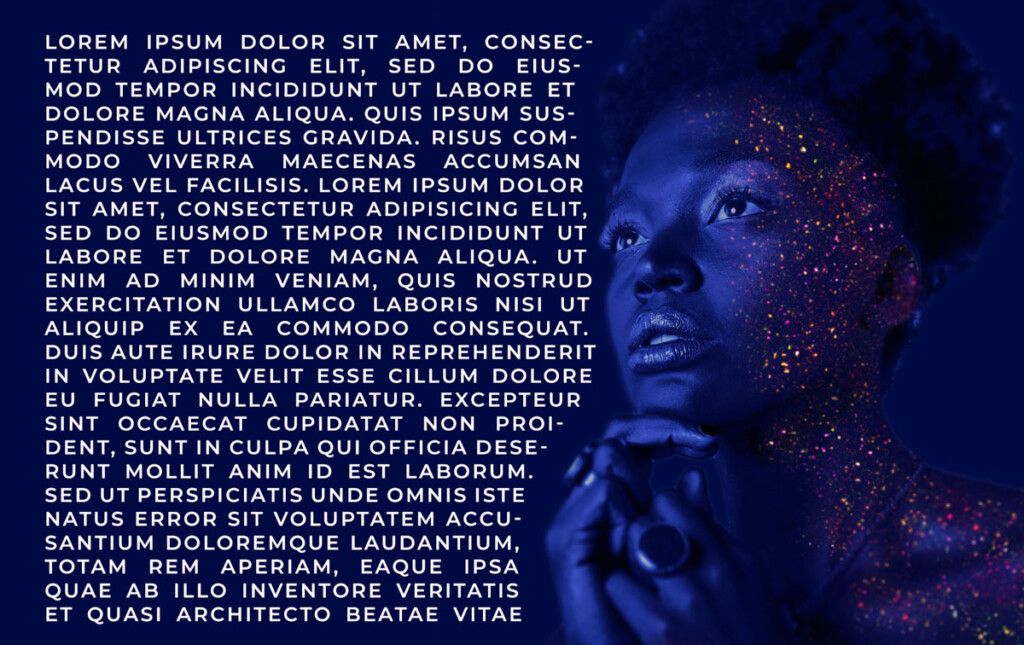
Option 2: How To Wrap Text Around An Image
This text-wrap effect is commonly seen in magazines. It makes your text wrap around the outside of your shape, creating an outline of your subject.
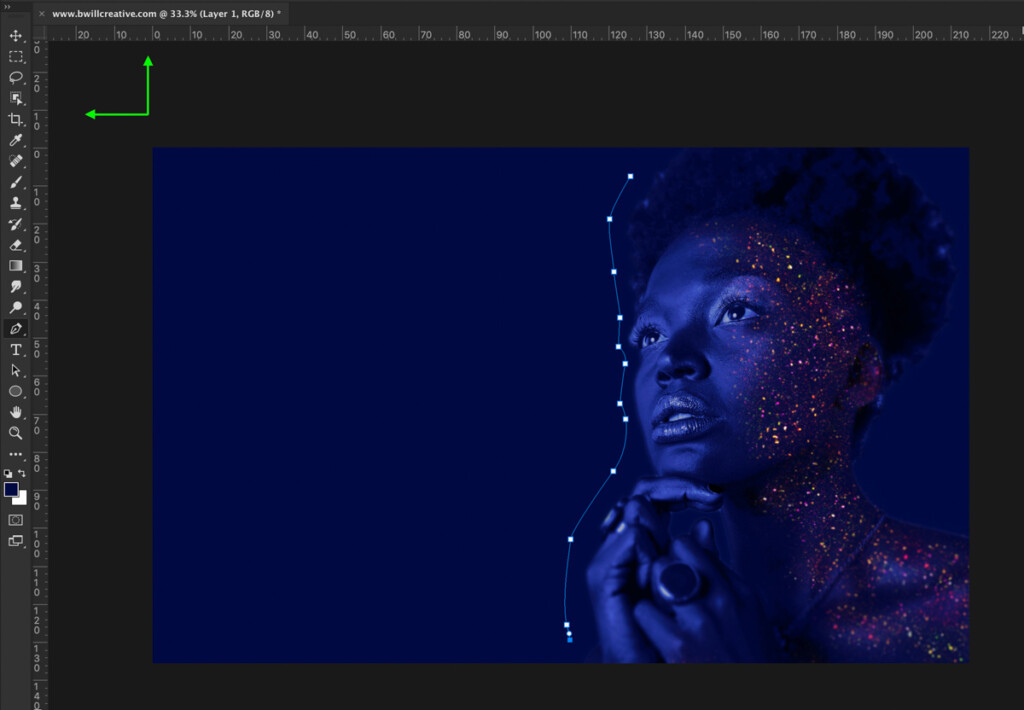
Step 1: Create A Path Around The Shape With The Pen Tool (P)
Activate the Pen Tool (P) from the Toolbar.
Now begin creating an outline of the shape or object you want the text to wrap around. In this case, I’ll create an outline of the person.
Click to add new anchor points with the Pen Tool and drag them out to curve the path. If you’re not already familiar with this tool, be sure to read our guide to using the Pen Tool in Photoshop.

Note: This outline doesn’t need to be perfect. Just a general shape to match the outline of the object will do!
Step 2: Create A Box Using The Pen And Ruler Tool
Once you’ve finished creating an outline, you need to make a box for the rest of your text to fit in. To help yourself create an evenly shaped text box, use guides to help you out.
Access your ruler by pressing Control + R (Win) or Command + R (Mac). Click on the ruler (either the horizontal or vertical one) and drag it out. A new moveable guide will be created on the image.
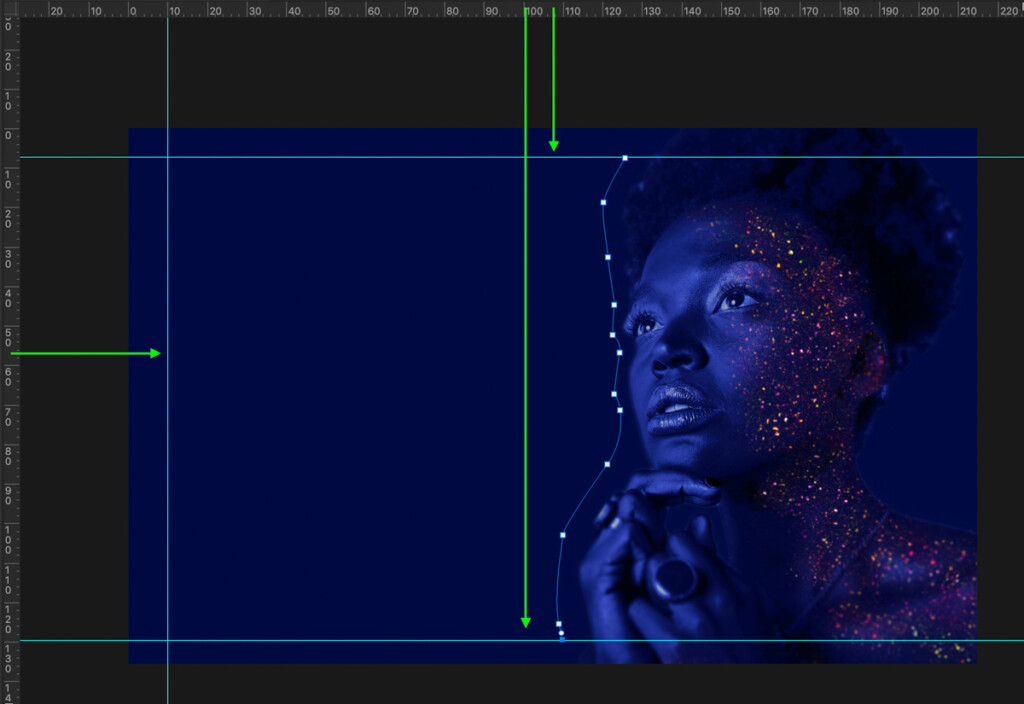
Place a vertical and horizontal guide to help outline where you want your text box to go.
Once the guides are in place, continue along with your Pen Tool, tracing the guides you just created. Continue and connect your pen path back to the starting anchor point.

Step 3: Click Inside The Path With The Type Tool (T) To Add Text
With the pen path complete, grab your Type Tool by pressing T.
Hover over the inside of your path and notice how your text icon changes to a cursor with a circle. Click inside of the path to begin writing text.

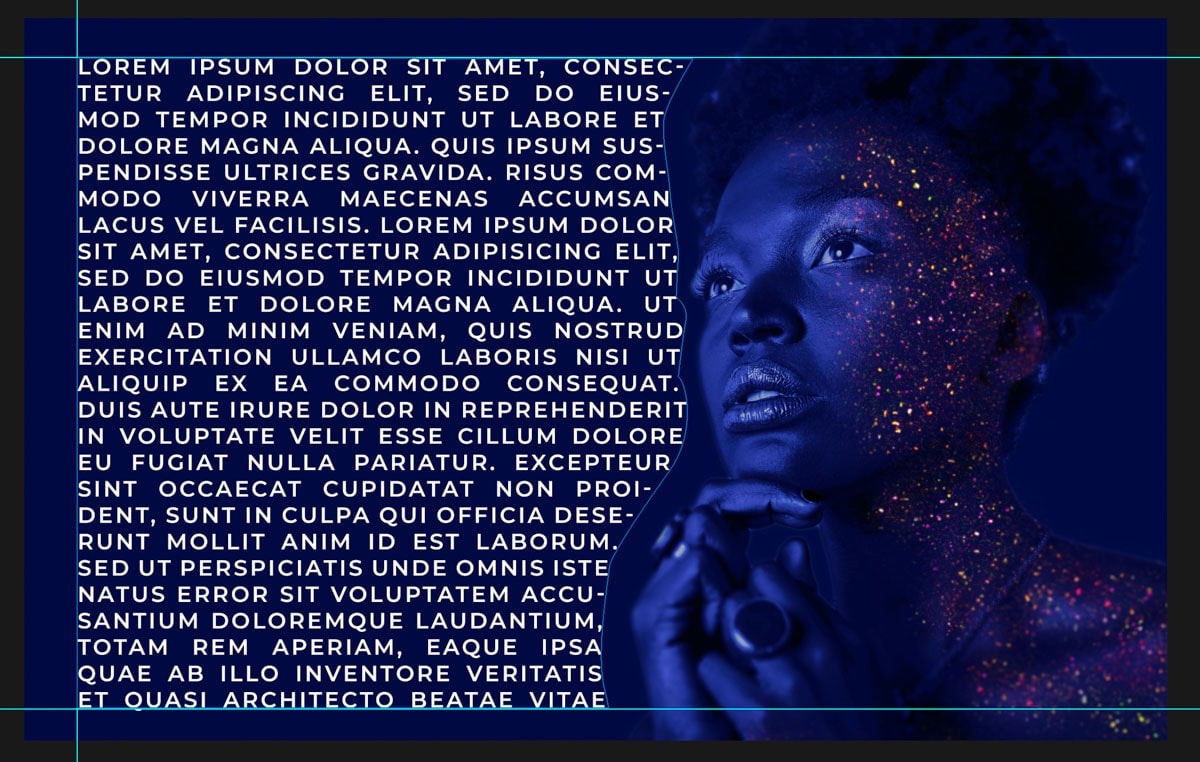
Now, your text will be confined to the edges of your path and wrap around the edges of your shape. This is one of the best ways to wrap text in Photoshop.
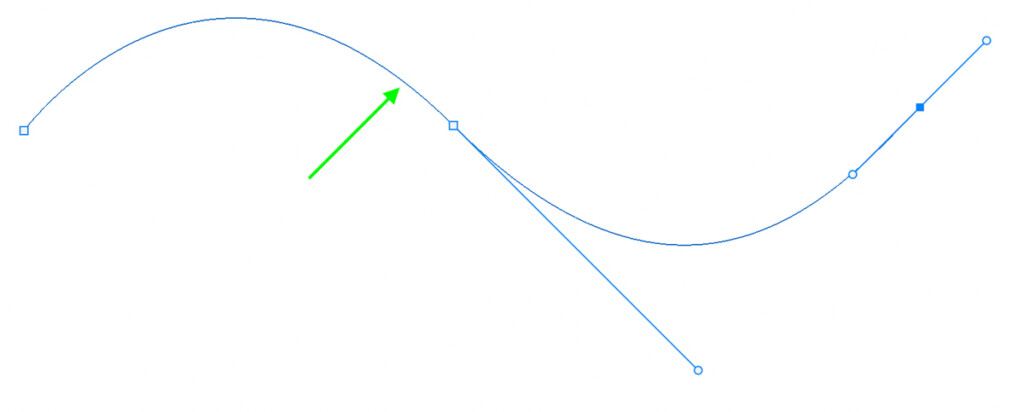
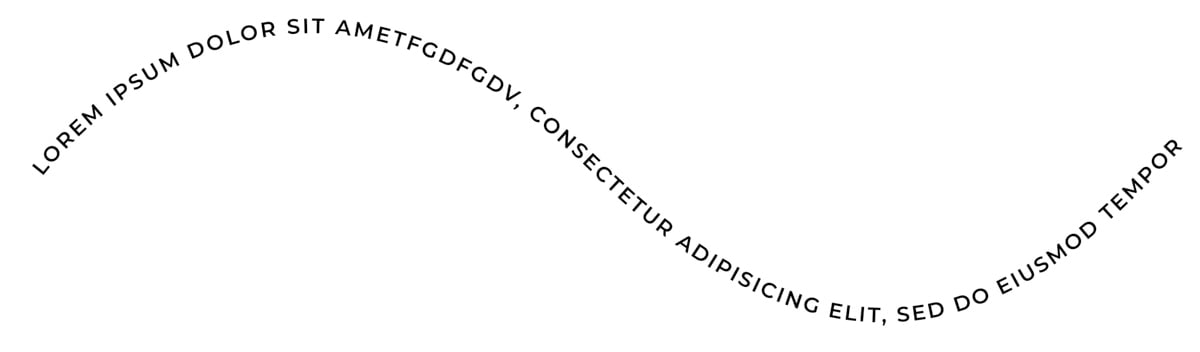
Option 3: How To Wrap Text Around A Custom Shape
This method has much more versatility since you don’t need to have a finished shape. All you need is some sort of line to get started. To prove this, I’ll create a wavy line for this example.
Step 1: Activate The Pen Tool (P)
To make a custom shape, you need to create a path. Access your Pen Tool by pressing P or find it in the Toolbar.
Step 2: Add Anchor Points To Create A Custom Path
Click anywhere on your canvas to add an anchor point and begin creating a path. Since I want to create a wavy line, I will click and drag between each anchor point to curve my path.
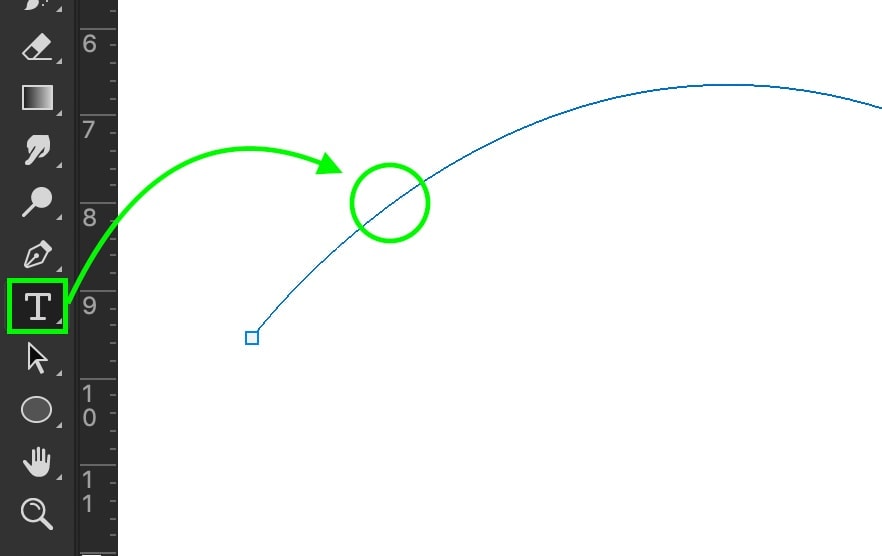
Step 3: Select The Type Tool (T) And Click On The Path
Once you’ve created the shape you want, grab your Type Tool by pressing T.
Hover over your path until you see the cursor icon with the squiggly line. Click on the path to begin typing your wrapped text.
Step 4: Type Your Text On The Path
Type your text onto the path, and your text will now wrap around the edge of the custom shape you just created.
Learning how to wrap text in Photoshop is a ton of fun, and the results are incredibly satisfying. Depending on the look you are going for, there are a few different ways you can create this effect. This tutorial shared the three best ways to wrap text to offer a wide array of choices to fit any situation. Now that you know how to wrap text in Photoshop, your options are limitless for creative text effects!
Want more tutorials like this? Subscribe to our weekly newsletter for more photography and photo editing tips delivered straight to your inbox!
– Brendan 🙂


2 thoughts on “How To Wrap Text In Photoshop (3 Easy Ways)”
Comments are closed.