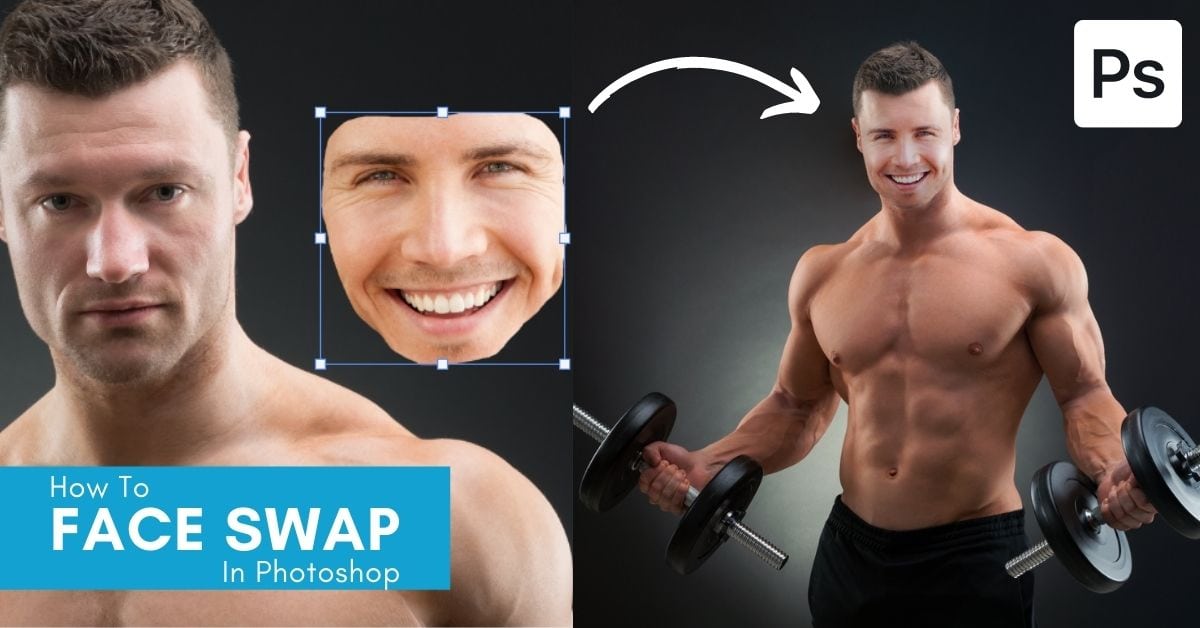

Knowing how to face swap in Photoshop can be a big asset to any portrait photographer! From fixing a nearly perfect group shot to correcting closed eyes, face swapping can be used for various useful reasons. While the process may seem difficult, I am here to show you that it’s actually quite simple.
Keep reading to learn how to do a realistic face swap in Photoshop in just a few steps.
Afterward, go to Select > Modify > Contract to contract the selection. Then, go to Edit > Auto-Blend Layers to blend the layers together. You can use the Healing Brush Tool (J) to fix any problem areas. Lastly, utilize various Adjustment Layers (such as Curves and Color) to match light and color to blend the two photos better.
Afterward, go to Select > Modify > Contract to contract the selection. Then, go to Edit > Auto-Blend Layers to blend the layers together. You can use the Healing Brush Tool (J) to fix any problem areas. Lastly, utilize various Adjustment Layers (such as Curves and Color) to match light and color to better blend the two photos together.
Video Tutorial
How To Face Swap In Photoshop
Step 1: Make A Selection Of The Face Using The Lasso Tool (L)
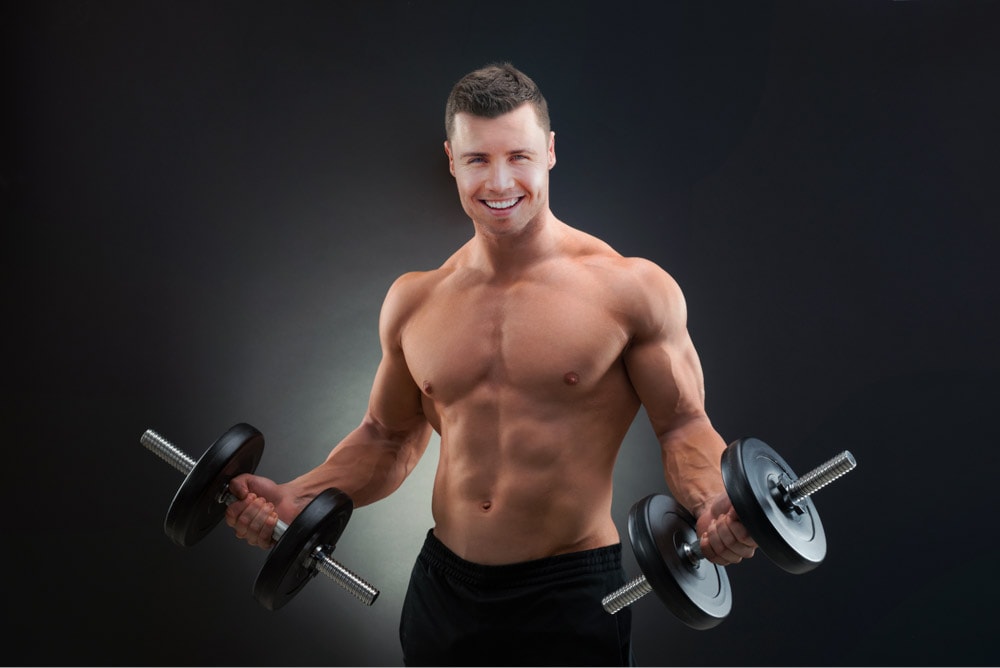
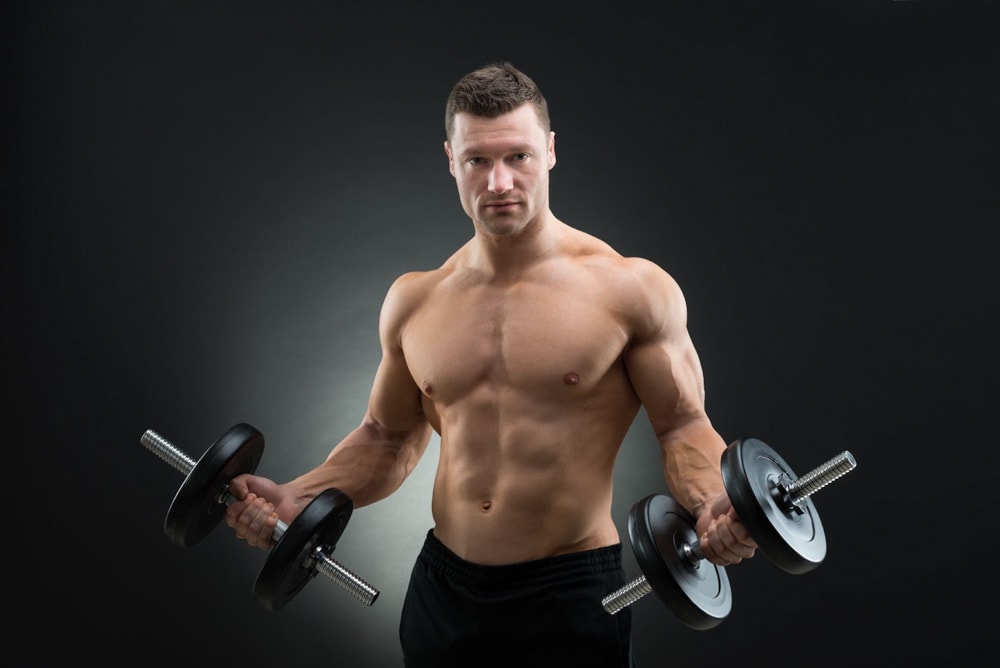
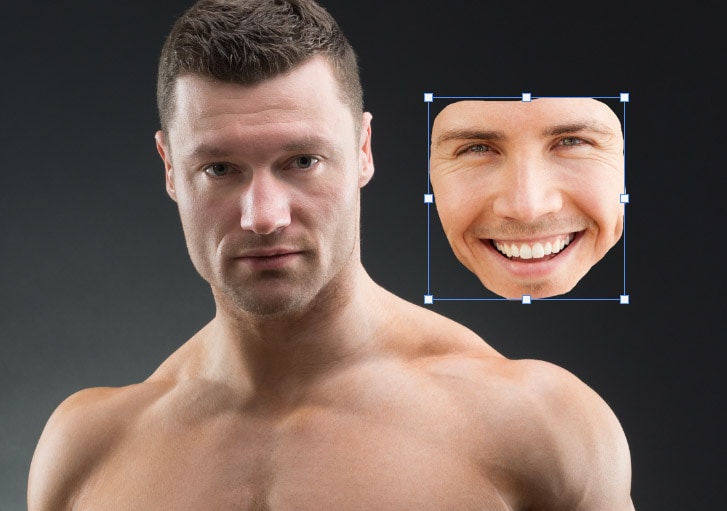
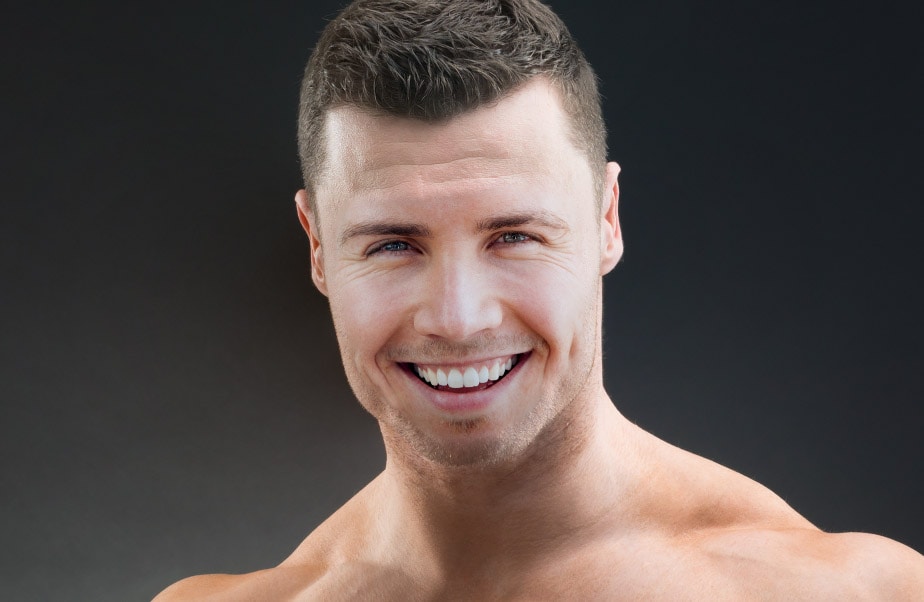
To create a face swap, you need two images: one for the body and one for the face. Once you choose both photos, open them in Photoshop in two different tabs.
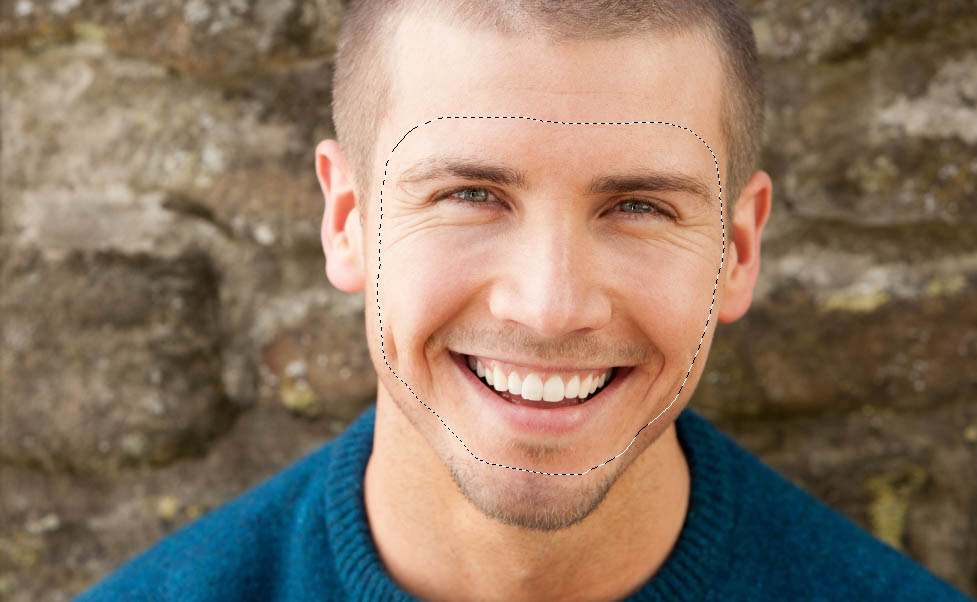
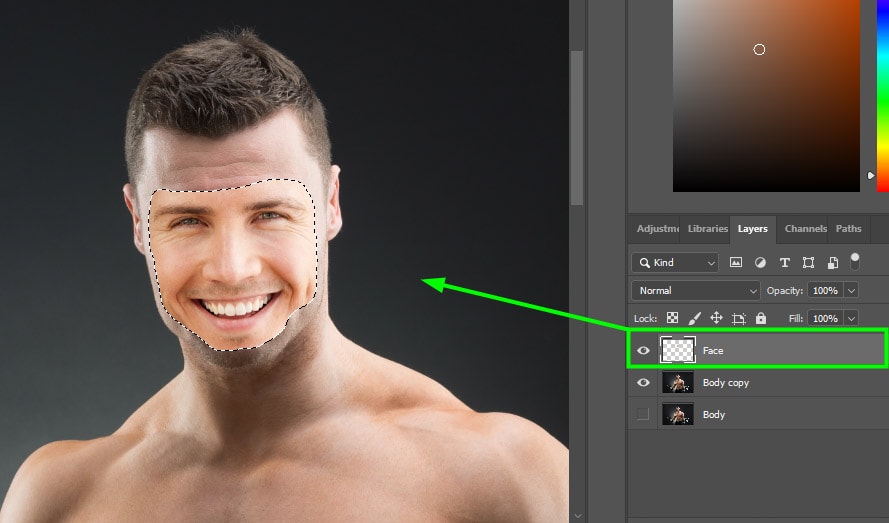
Make a selection of the face you will be using by selecting the Lasso tool (L), although you can use any selection tool that works for you. In the Options Bar, make sure the New Selection option is enabled, which is the first icon portraying a single block. Set Feather to 0. Make sure the Anti-alias box is checked.
After that, make a selection around the subject’s face with just its main features.
Step 2: Copy And Paste The Face On The Body Image And Scale The Face
After selecting the face, you need to copy it. To do this, press Control + C (Win) or Command + C (Mac). Then paste the face onto the target image — open its tab and press Control + V (Win) or Command + V (Mac). The face will appear immediately on the canvas, and there will also be a layer for it in the Layers Panel. To avoid confusion, rename the layers used in the face swap.
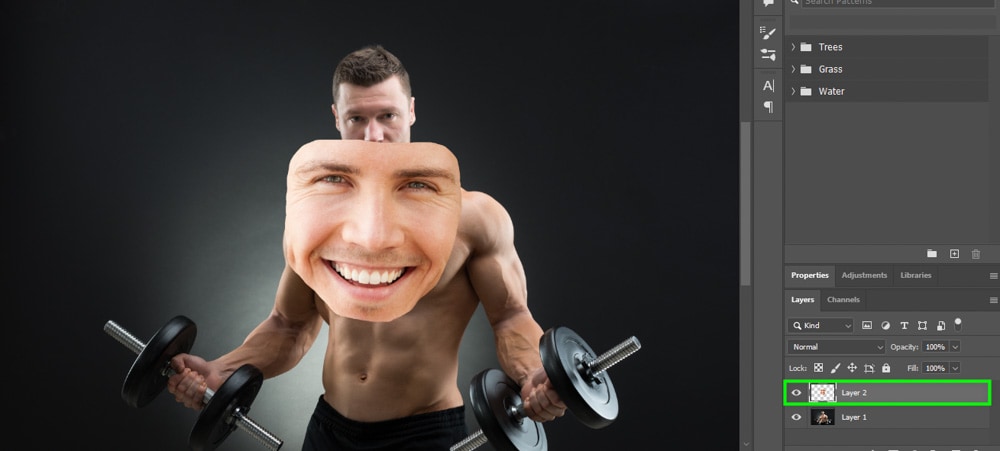
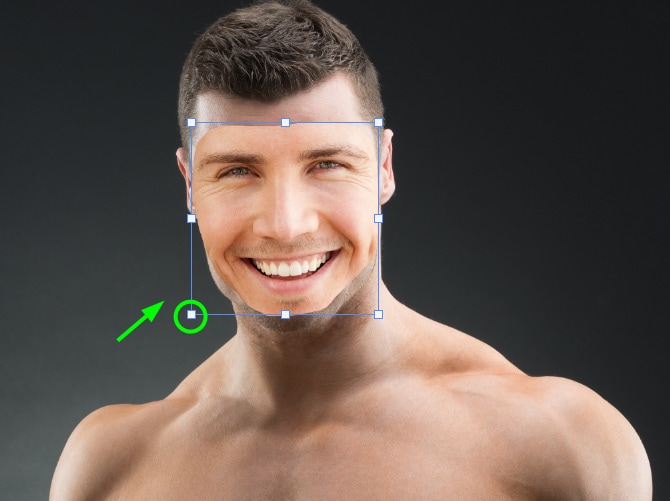
Once you put the face on the body, you have to scale the face so that it fits the new body. To do this, select the face layer. Next, enable the Move tool by pressing V. Then, go to the Options Bar and check the box next to Show Transform Controls.
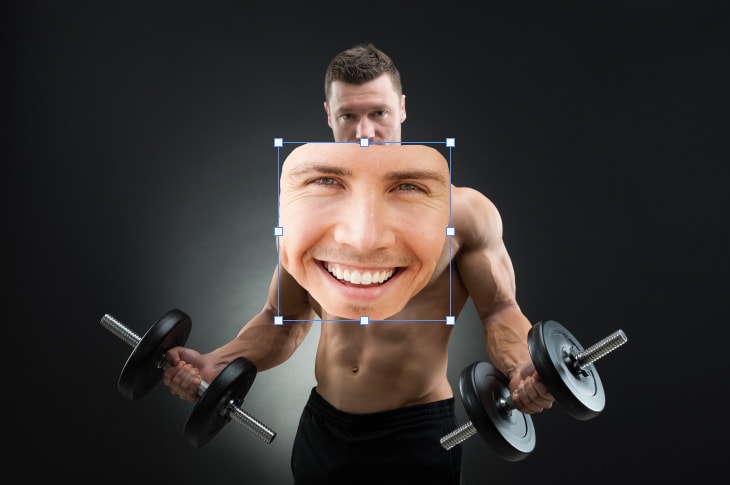
Control points will appear around the face layer. Click and drag any of the control points inward while holding Shift to scale down the face proportionally.
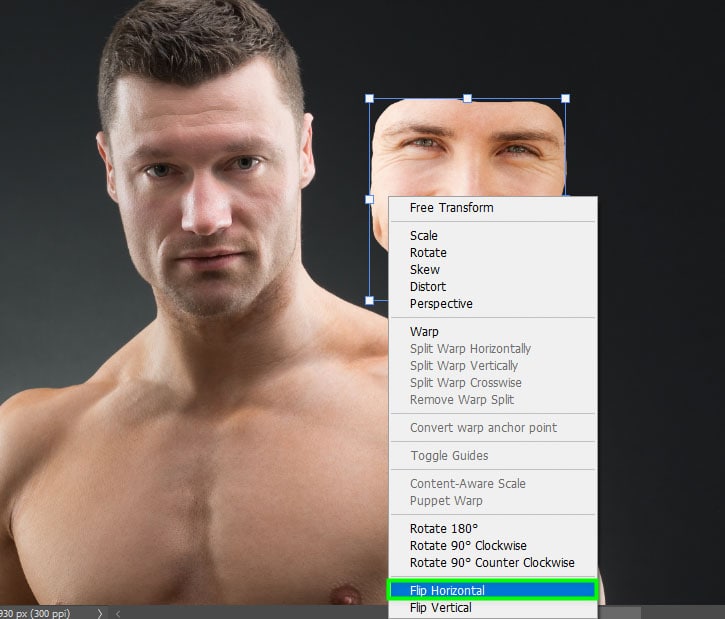
In some cases, the original face points in one direction while the new face points in another. To fix this, press Control + T (Win) or Command + T (Mac) to enable the Free Transform tool. Then, right-click the face selection and choose Flip Horizontal.
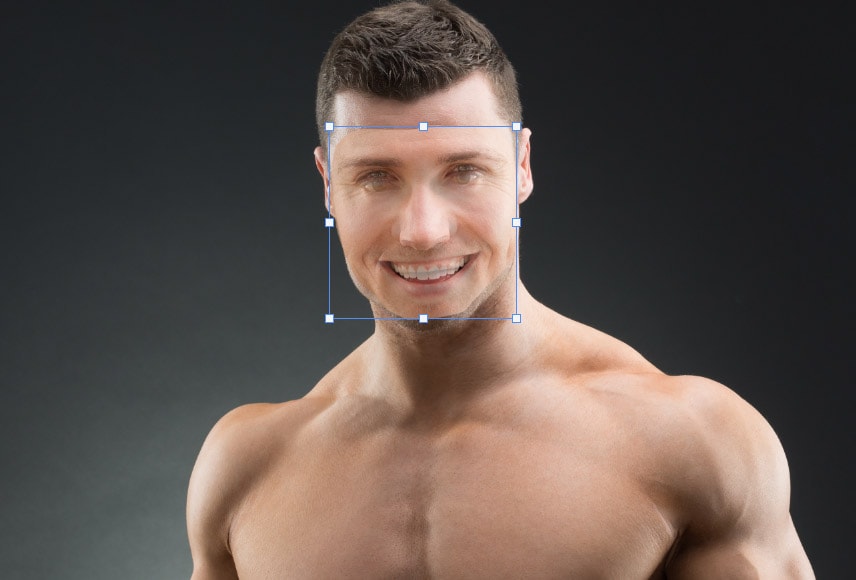
After that, use the Move tool (V) again to place the face on the body. Keep adjusting the scale until the face fits perfectly.
Step 3: Lower The Opacity To Help Align The Faces
For the face swap to look natural, you must line up both faces. You can decrease the new face layer opacity in the Layers Panel to partially see the original face. I suggest you bring it down to something around 50–60%.
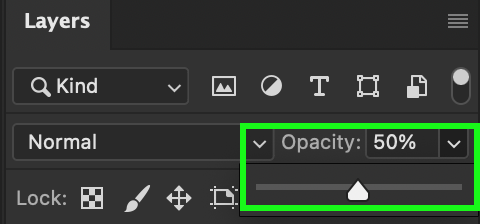
Once you reduce the opacity of the face layer, you will partially see the layer underneath it. A lower opacity will make it easier for you to align the faces. Align the subjects’ eyes first for best results. By starting with the eyes, you will achieve a more accurate alignment. For a more precise result, align the inner corners of both eyes.

After aligning the eyes of the subjects in the best way possible, you should ensure that they don’t accidentally misalign. To do this, keep the face layer selected and hit Control + T (Win) or Command + T (Mac) to enable the Free Transform Tool.

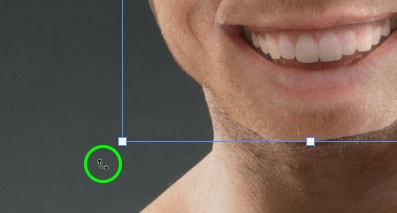
Then, go to the Options Bar and check the Reference Point checkbox. Next, once the reference point appears, click it and drag it to the corner of your subject’s eyes.
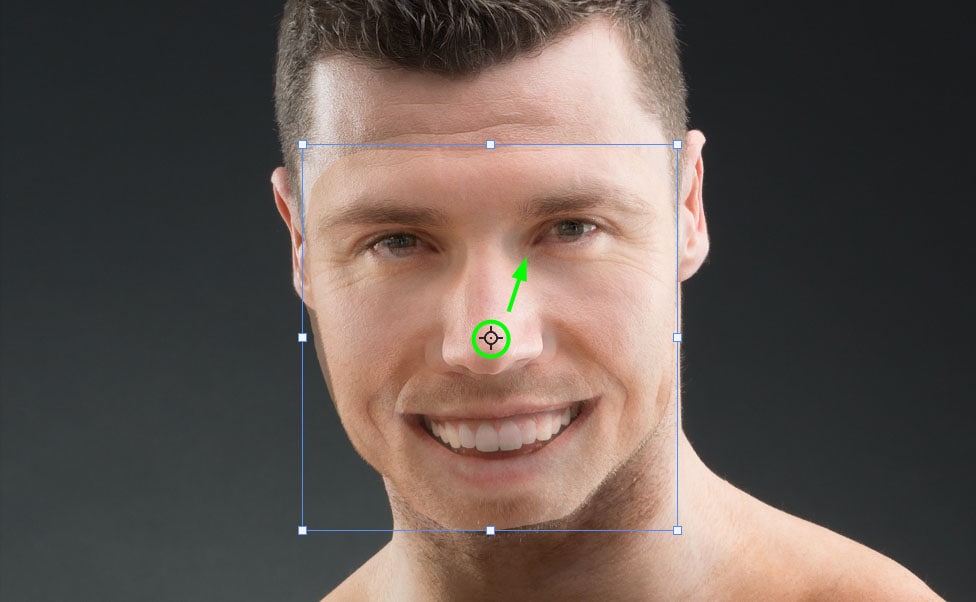
Once the reference point is in place, move the mouse outside of the transform box until a curved double arrow appears. Then, as you rotate the layer, it will pivot off the corner of the eye. The pivot allows you to line up the eyes better if necessary.
Step 4: Contract The Selection Then Auto-Blend Layers
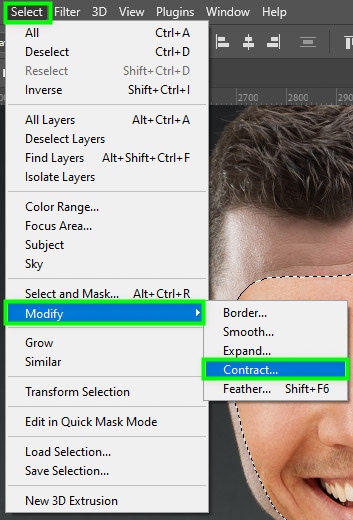
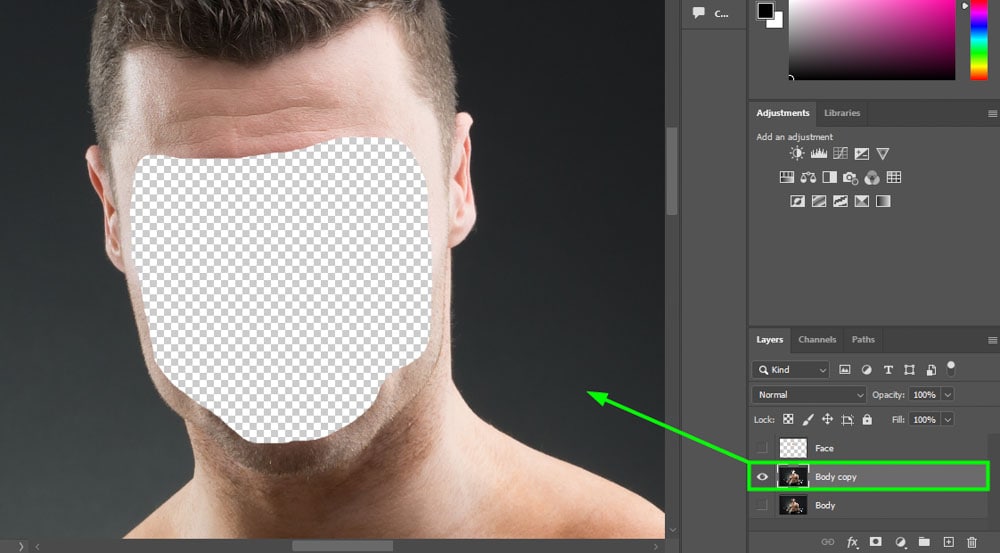
Select the face layer thumbnail while holding Control (Win) or Command (Mac) to create a selection around the face layer.
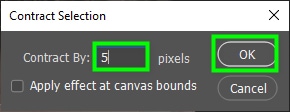
But before deleting the face, you need to contract the selection. To do this, go up to Select > Modify > Contract. Then, in the dialog box that will pop up, enter the number of pixels to determine how much the selection must contract. In my case, I set it to 5, and I advise you to do the same. Click OK when you’re done.
Now, select the Body Copy layer and press Delete on your keyboard. After that, press Control + D (Win) or Command + D (Mac) to deselect the face. This action will delete the original face.
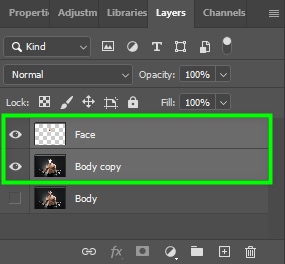
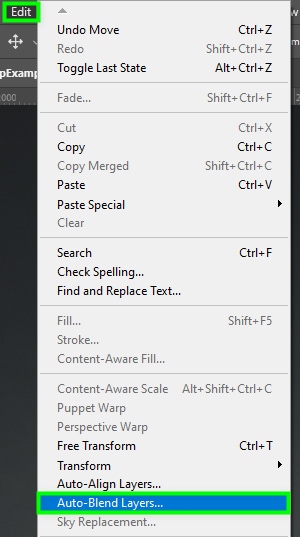
Now, you have to blend the face with the body. To do this, select the face and body copy layers by clicking one layer after another while holding Shift. After that, go to Edit > Auto-Blend Layers.
In the dialog box that appears, keep Panorama selected and the two settings at the bottom of the panel selected.
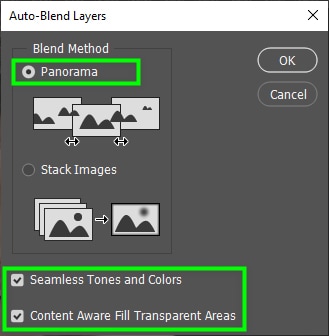
Click OK when you’re done, and wait while Photoshop AI processes the changes. This blend will be the starting point for blending the light and colors of your image.
Step 5: Use The Healing Brush Tool (J) To Fix Discrepancies
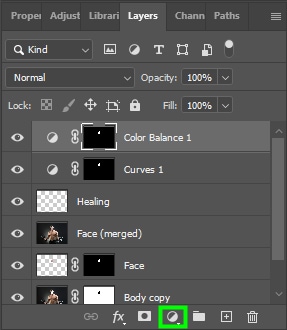
After auto-blending the layers, a new layer called “Face (merged)” appears in the Layers Panel. While the effect works quite well, you may still notice skin tones and texture differences. Luckily, you can fix this using the Healing Brush Tool (J).
To do this, click the plus sign icon at the bottom of the Layers Panel to create a new layer above all the others. Then, name it Heal to make it easier for you to identify the layer.
Next, go to the toolbar and select the Healing Brush tool (J). Go to the Options bar to adjust the healing brush settings. First, set Sample to Current And Below. Next, set Source to Sample, if it’s not already. Open the Brush Options. Set Hardness to 0% to allow you to blend the skin tones better.
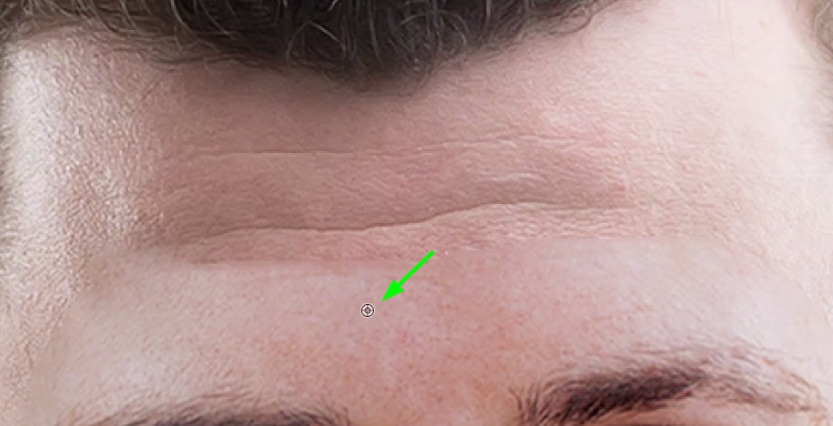
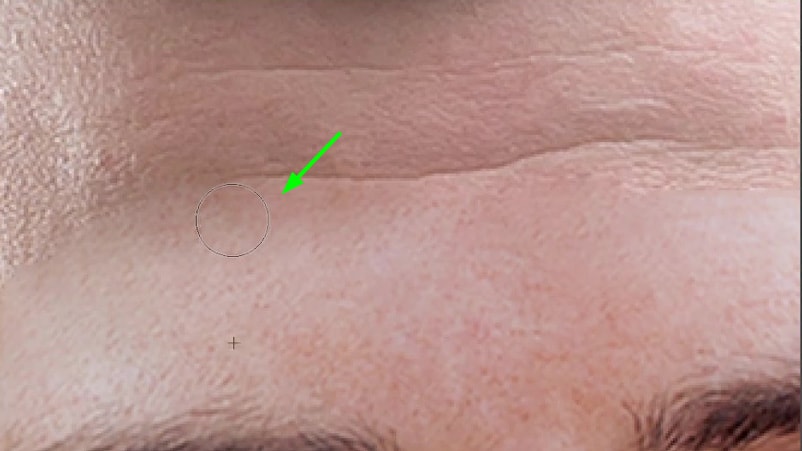
After adjusting all the necessary healing brush tool settings, keep the Heal layer selected and zoom in on the target area. Next, position your cursor on the face and hold Alt (Win) or Option (Mac). Then, drag over that area. Once you drag over the area, your cursor will turn into a target icon, indicating you are sampling pixels. Release the mouse and paint over the edges of the face so that they blend better with the original head.
Step 6: Creating Adjustment Layers To Match Light And Color For A Better Blend
To create an adjustment layer for the face, click the face layer thumbnail while holding Control (Win) or Command (Mac). You can adjust the contrast and colors to blend the face better with the head. The advantage of using adjustment layers is that you can apply effects non-destructively.
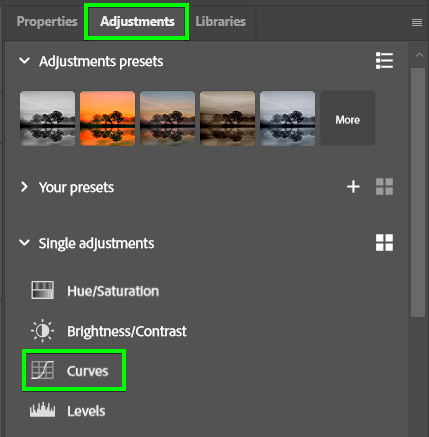
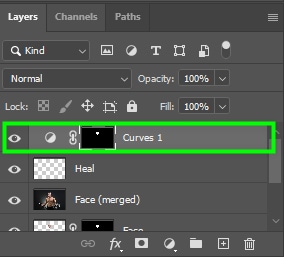
To adjust the layer’s contrast, click the Curves icon in the Adjustments Panel. This icon creates a new Curves adjustment layer with a layer mask, which ensures that the curves adjustment layer is only applied to the face.
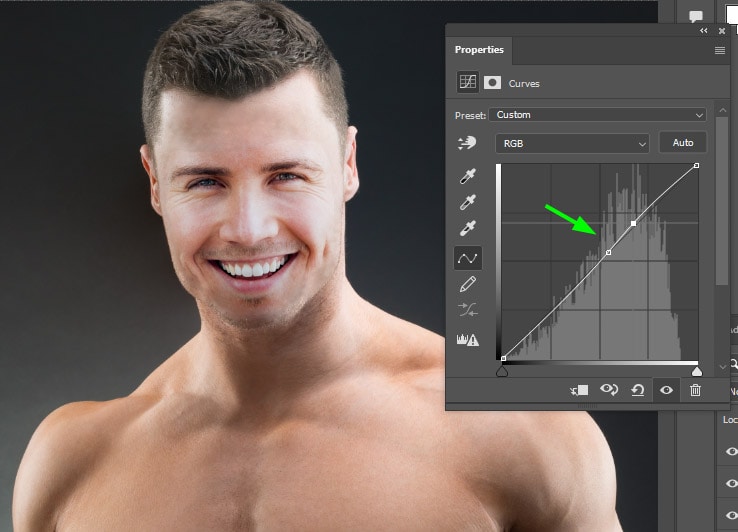
You can use the curves adjustment layer to adjust the lights and tones of the face. To do this, click the curve. A control point will appear on it. You can drag this control point up to lighten the pixels in the area or down to darken them.
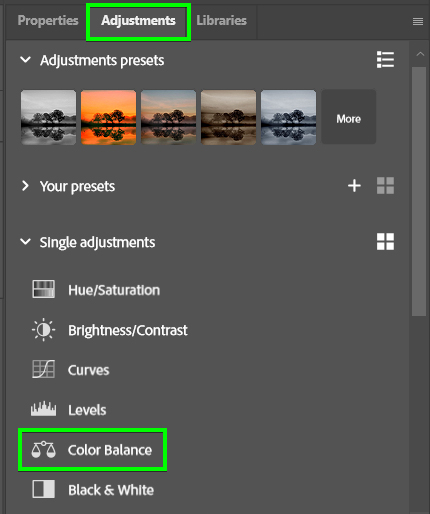
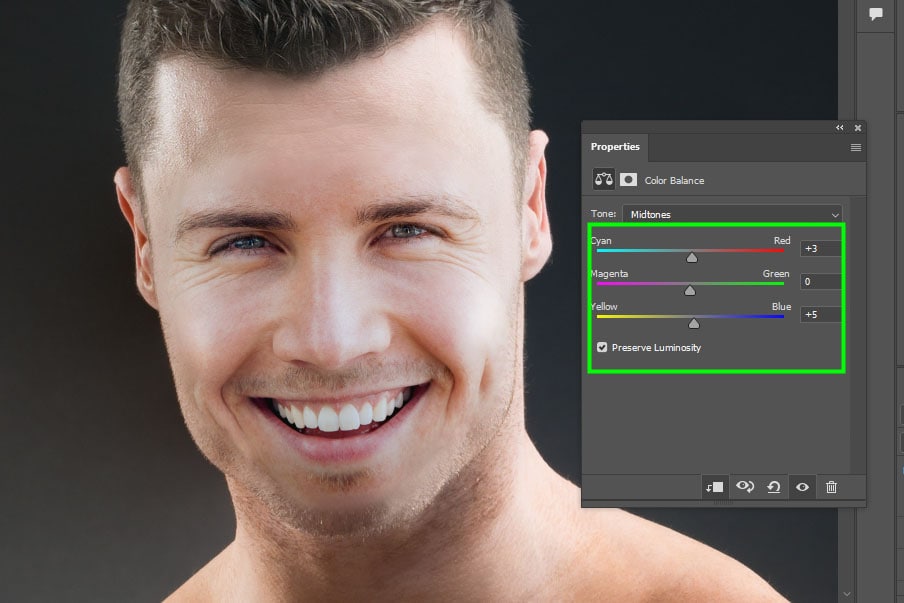
Click the Color Balance adjustment layer icon in the Adjustments Panel to adjust the layer color.
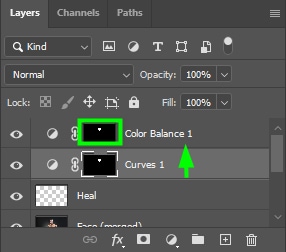
Once the color balance layer is created, click the layer mask connected to the curves layer while holding Alt (Win) or Option (Mac). Then, drag and drop the layer mask into the new color balance layer. The effect will be exclusively applied to the face area.
In the Color Balance dialog box, you can control the amount of a specific color in your image.
Step 7: Apply A Color Lookup Effect (Optional)
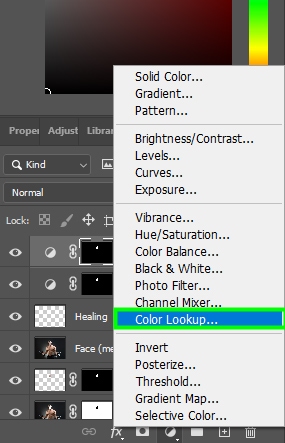
The color lookup adjustment layer applies a general color effect to your image. This adjustment usually helps in matching colors in an image entirely. To apply the color lookup effect, click the Adjustment layer icon and choose Color Lookup.
Next, use the 3DLUT File dropdown menu to choose the color profile you want. You can play around with different options until you find the one that suits your image.
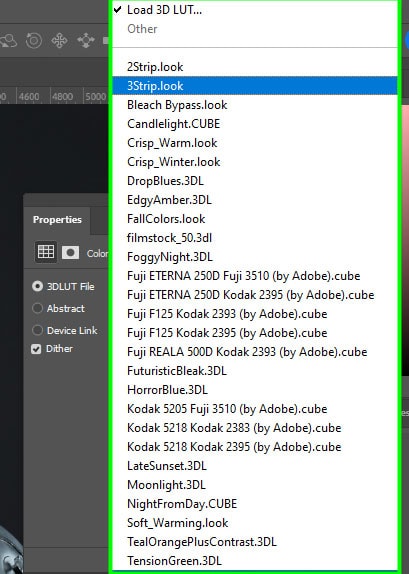
In my case, I chose 3Strip.look and reduced the effect’s opacity to 34% because otherwise, the result would look too harsh. You will have now successfully face-swapped your images.