

Unlike other selections or brushes, knowing how to feather a shape in Photoshop is a bit confusing. Although it’s simple, once you know what to do, you likely feel at a loss trying to figure out how to make it happen initially.
Luckily, in this guide, you’ll learn three ways to feather the edge of your chosen shape. Each method is easy to do, but each method also has its pros and cons, which I’ll detail below. By the end of this guide, you’ll know two ways to feather all the edges of a shape and one way to feather a single edge.
Let’s get started!
Option 1: Using A Marquee Tool With A Feather Setting
One of Photoshop’s easiest ways to feather the edge of a shape is with the Marquee Tools. However, there is a downside. This option will only add a feather in a rectangular or circular shape. So you‘ll be limited to only using this option with those two shapes.
Step 1: Create Your Shape
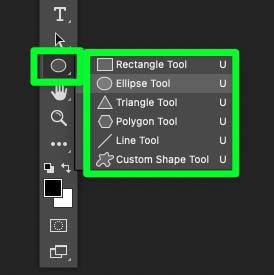
To add a shape to your canvas, hold down the Shape Tool (U) to open up the fly-out menu. Choose either the Rectangle Tool or the Ellipse Tool.
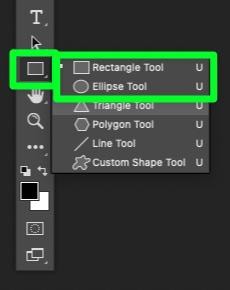
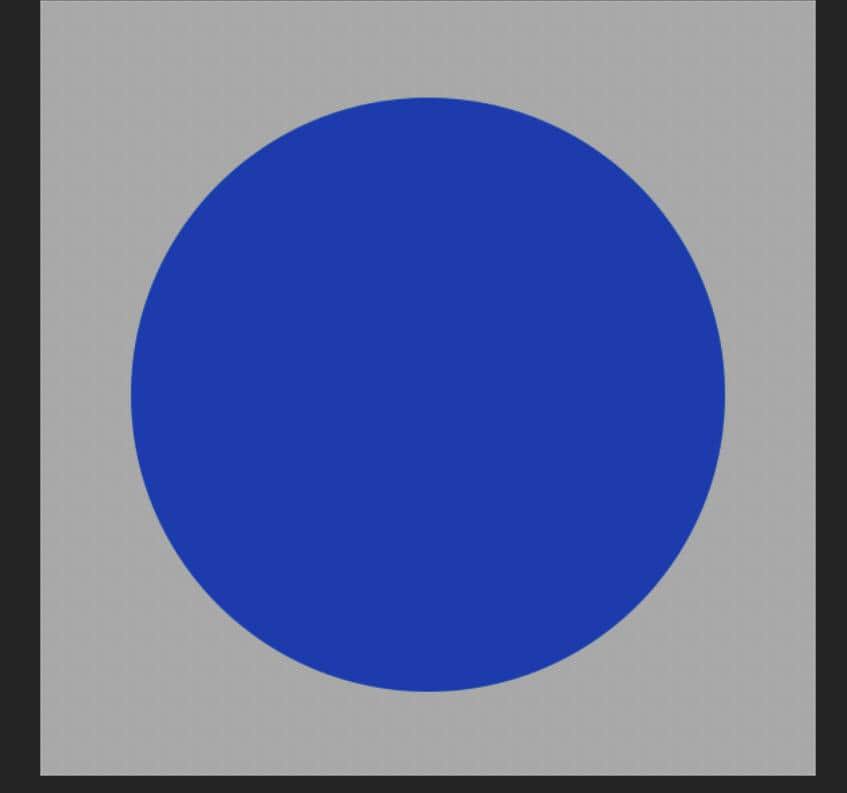
Use the Shape Tool to draw out your shape.
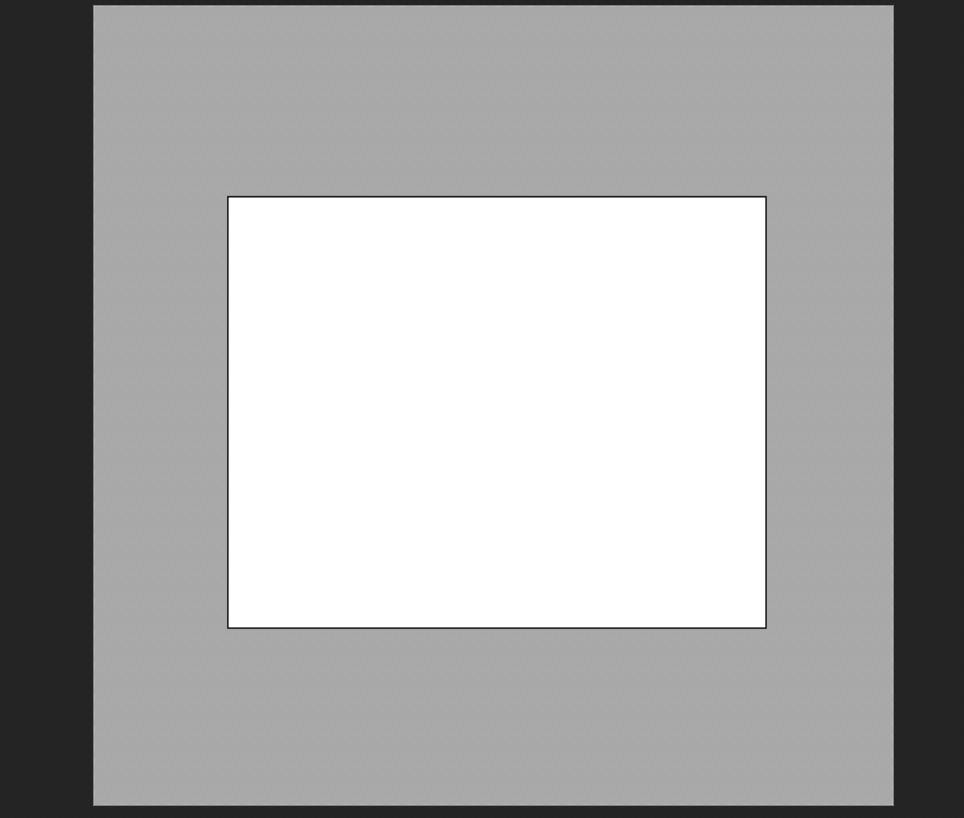

Step 2: Prepare Your Shape Before You Feather It
Before you feather the edge of your shape, you should make sure the shape looks exactly how you want it.
For example, if your shape has a stroke around it, you can easily remove it by clicking Stroke in the Options Bar, then clicking the No Color button.
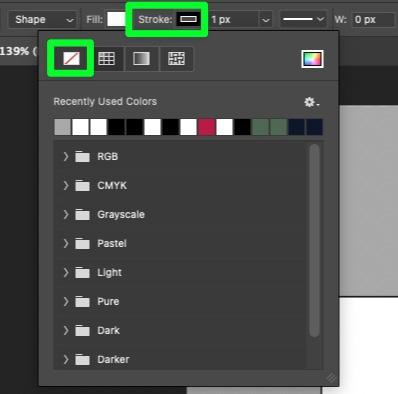
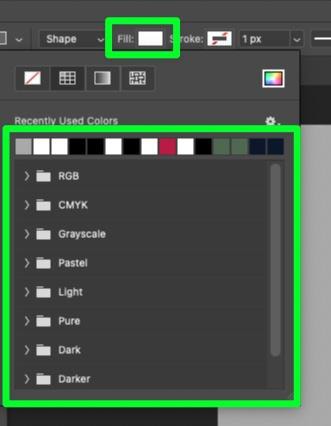
You can also change the color of your shape by clicking the Fill button, then choosing any available color.

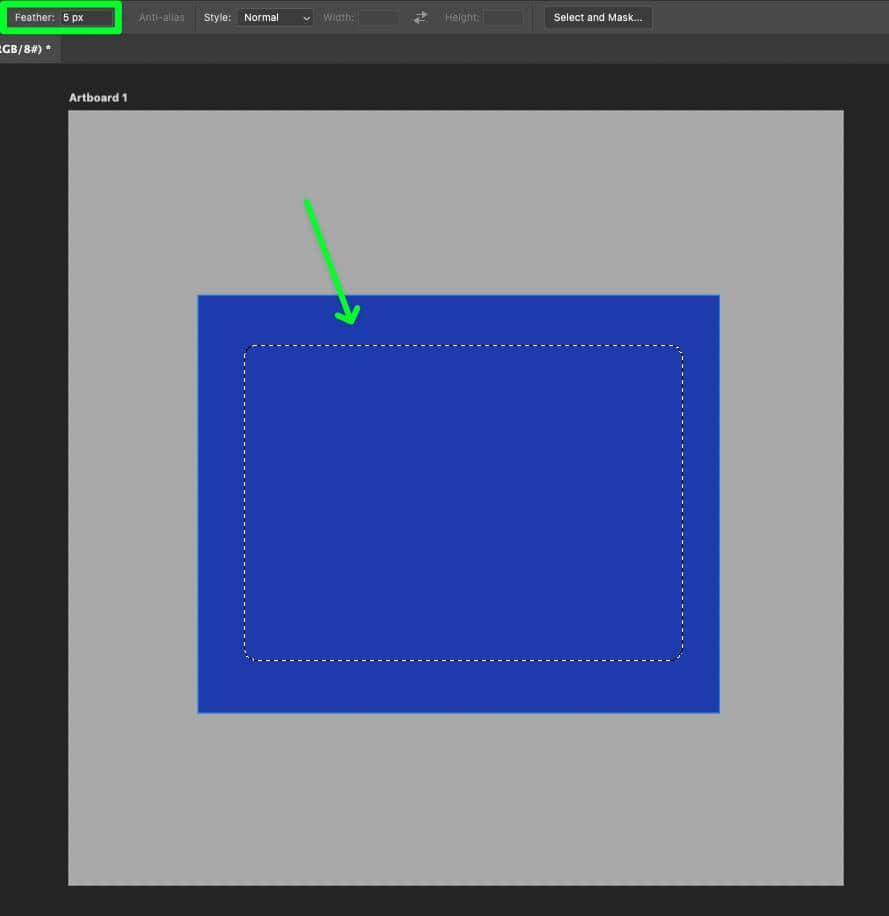
Step 3: Choose Your Marquee Tool And Adjust The Feather
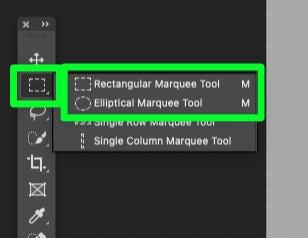
Now that your shape looks how you need it select the Marquee Tool (M). Hold down on the Marquee button and choose either the Rectangular Marquee Tool or the Elliptical Marquee Tool.
Once you’ve selected your Marquee Tool, you must adjust the feather amount before using it.
To do this, add the number of pixels you want the edge of your shape to feather out. You may not know the exact number of pixels you need, but that’s okay. For now, just make an educated guess, and you can change the amount later.
An amount between 10 and 15 pixels is usually a good amount to start with.

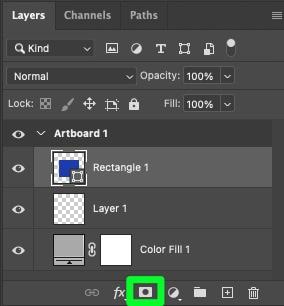
Step 4: Use The Marquee Tool & Add A Layer Mask
After setting the amount of feather needed, you can now figure out where to place your Marquee tool.
Doing this will involve some trial & error, as every project is different.
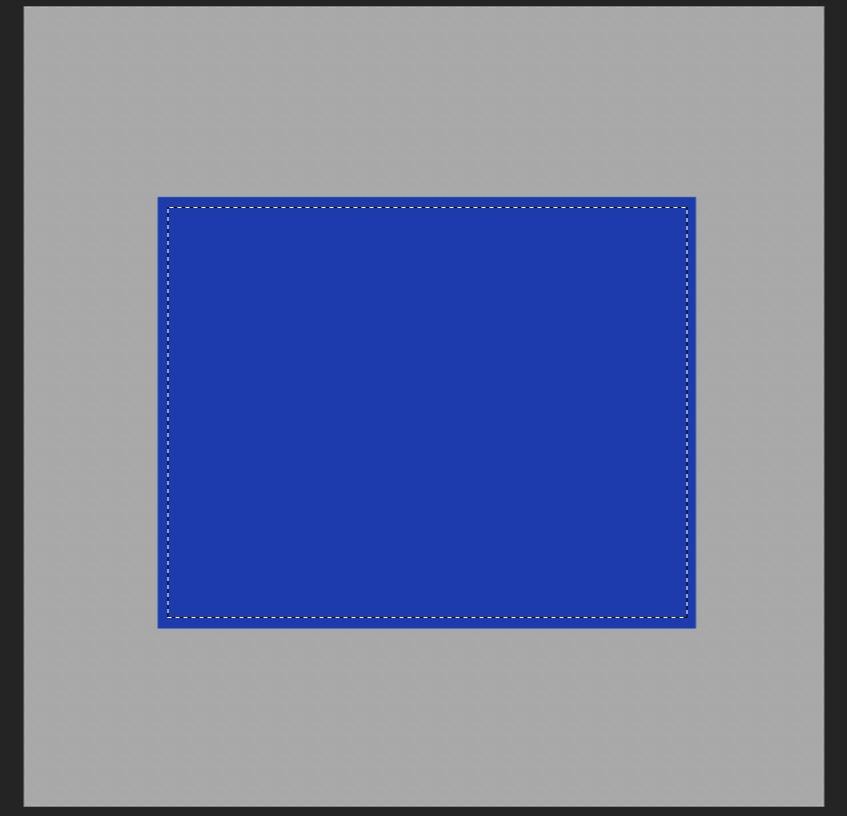
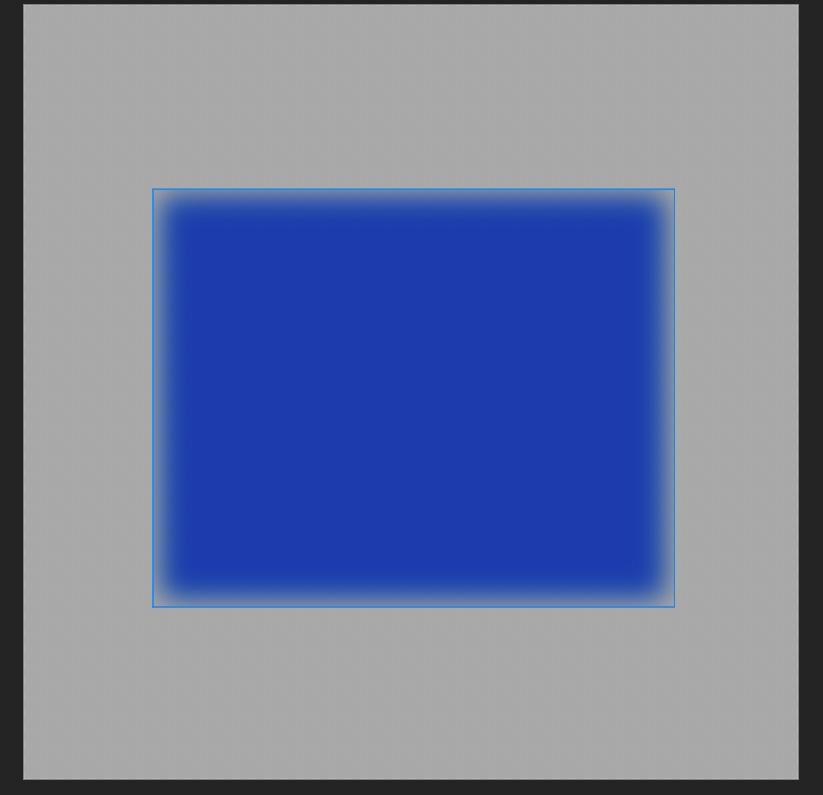
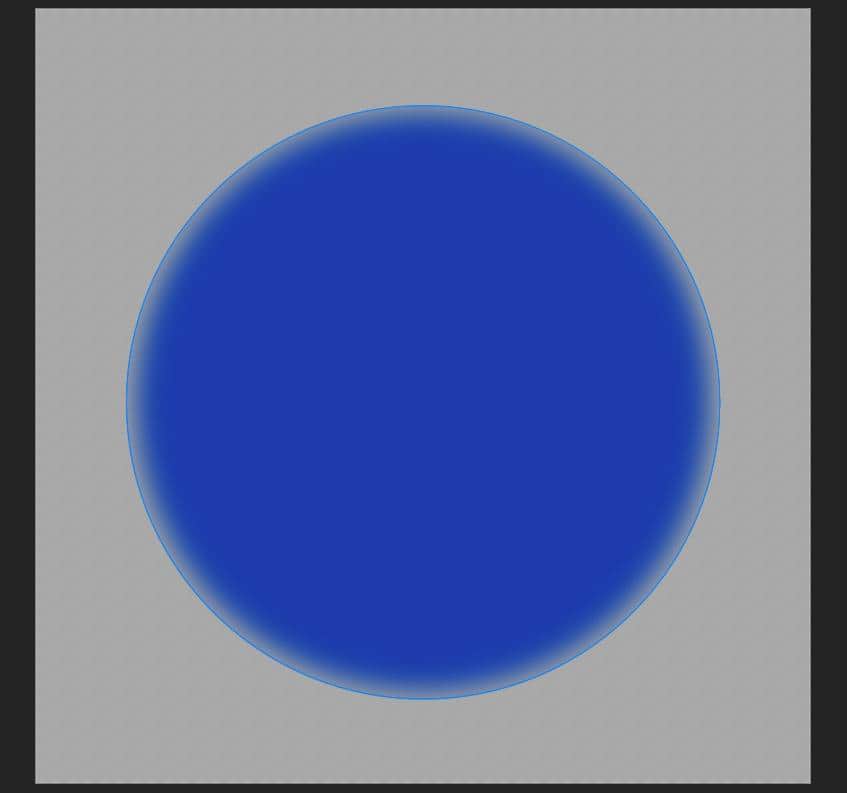
To start, click and drag out to create a marquee selection just inside the edges of your shape. You can hold the spacebar to reposition the entire selection within your shape.
Then, with your shape layer selected in the layers panel, click on the Layer Mask button in the Layers Panel. A mask will appear next to your shape layer thumbnail.
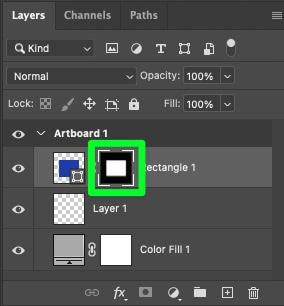
Depending on your project, you will either find that the edges of your shape are perfectly feathered or not nearly feathered at all, and you can still see the edges.
Step 5: Use Trial & Error To Adjust The Feathering
There’s a good chance that the placement of your Marquee Tool did not result in the effect that you wanted. To adjust your feathering, first press Control + Z (Win) or Command + Z (Mac) as often as you need to. Undo up until using the Marquee Tool.
Then, use the Marquee Tool again, this time using it farther into your shape, about an inch or two from the edge. You may also want to adjust the amount of feather as well.
Now all you have to do is click the Layer Mask button in the Layers Panel to see how your feathering effect will look.


If you still don’t get the desired effect, repeat this step as often as required. Just remember to adjust your Marquee Tool placement and the amount of feathering.
Option 2: Using A Gaussian Blur
This option may be the fastest way to blur the edges if you’re working with a shape with one solid color. However, this is not a good option if your shape contains patterns or an image.
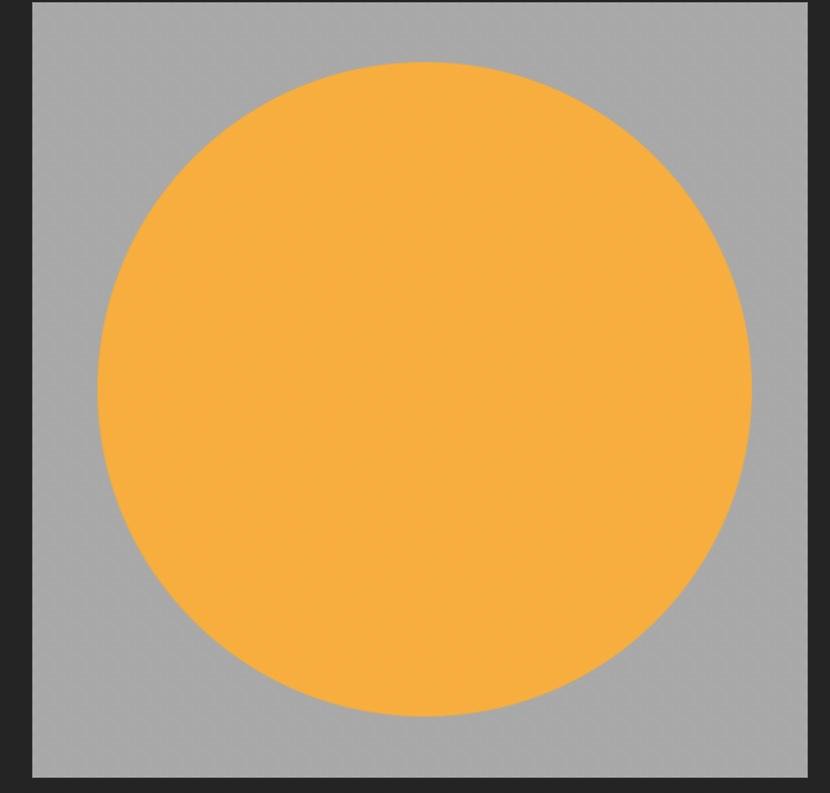
Step 1: Add Your Shape & Choose Your Color
If you don’t already have a shape on your canvas, you can add one with the Shape Tool (U).
Using this method, you can hold down on the Shape button and choose any of the shape options available.
Also, choose the color for the Stroke and Fill for your shape.

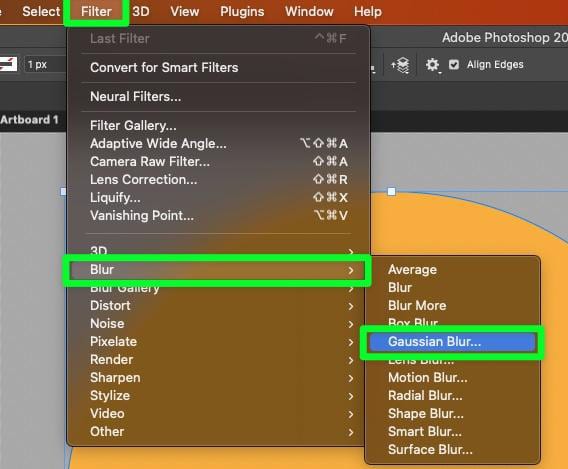
Step 2: Add A Gaussian Blur
After adding your shape to your canvas, you simply have to add a Gaussian blur.
To do this, go to Filter > Blur > Gaussian Blur.
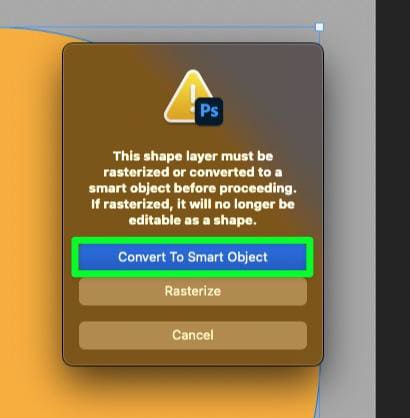
When attempting to add a Gaussian Blur to your shape, you will be prompted to either convert the shape layer to a smart object or rasterize it. Make sure to select Convert To Smart Object so that you can edit the shape at any stage.
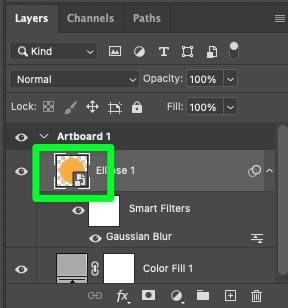
After converting your layer, you will see a smart object icon in the corner of the layer’s thumbnail.
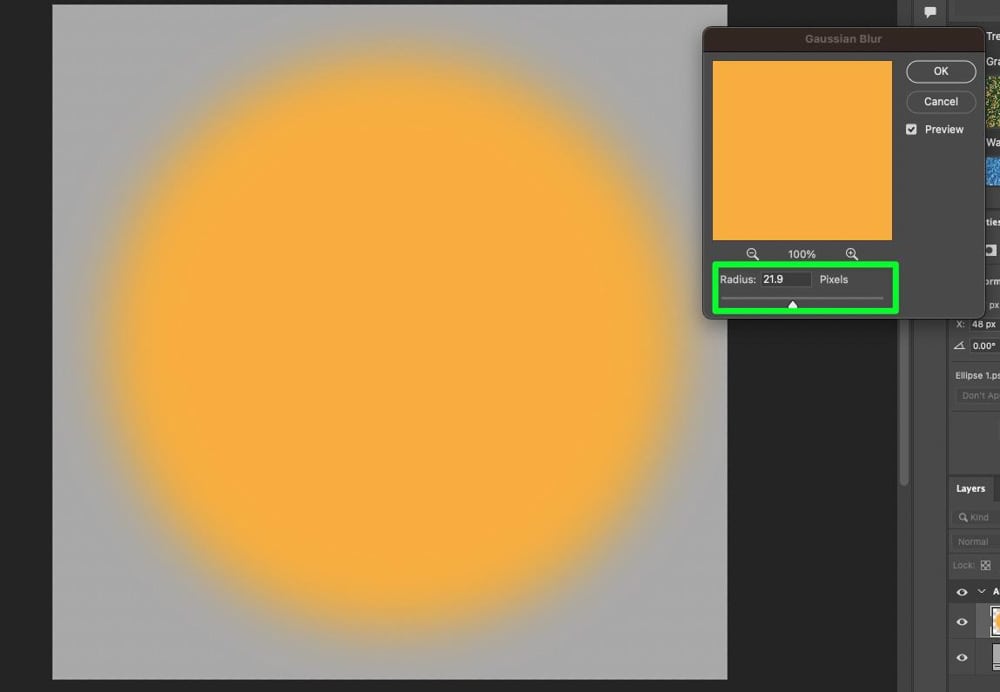
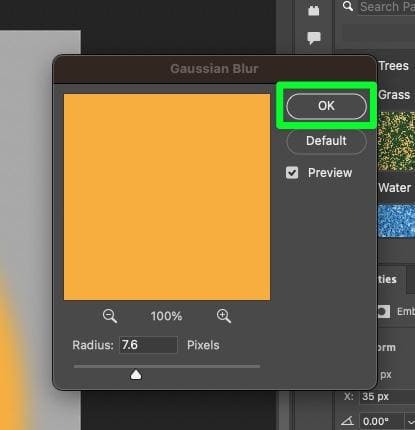
Step 3: Adjust The Radius Of The Gaussian Blur
Once you apply your gaussian blur and convert the shape layer to a smart object, you will automatically be able to adjust how strong the blur should be. You can do this by changing the Radius slider.
While adjusting the Radius slider, keep in mind that moving the slider a little goes a long way. Even a blur as small as 20 to 25 px is enough to blur out your shape completely.
Most of the time, adjusting the radius of the blur to around 5 px is enough to create a good feathering effect. It all depends on your project, of course.
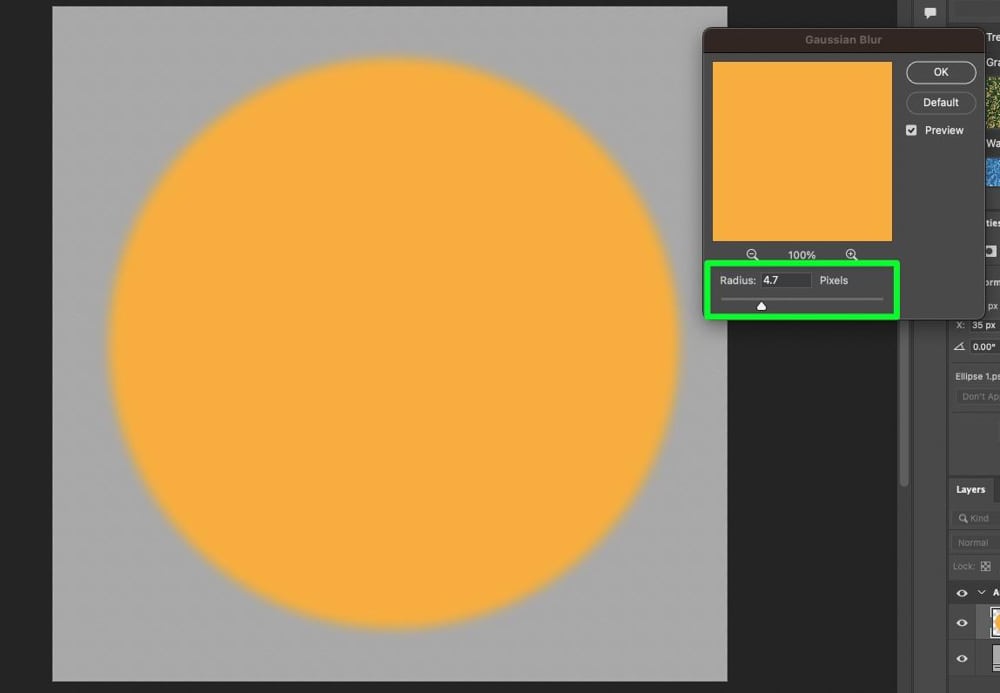
Click OK when you’re ready.

The main thing to remember when using this option is that the shape must be a solid color. If your shape has a pattern on it, the entire pattern will be blurred, not just the edges.
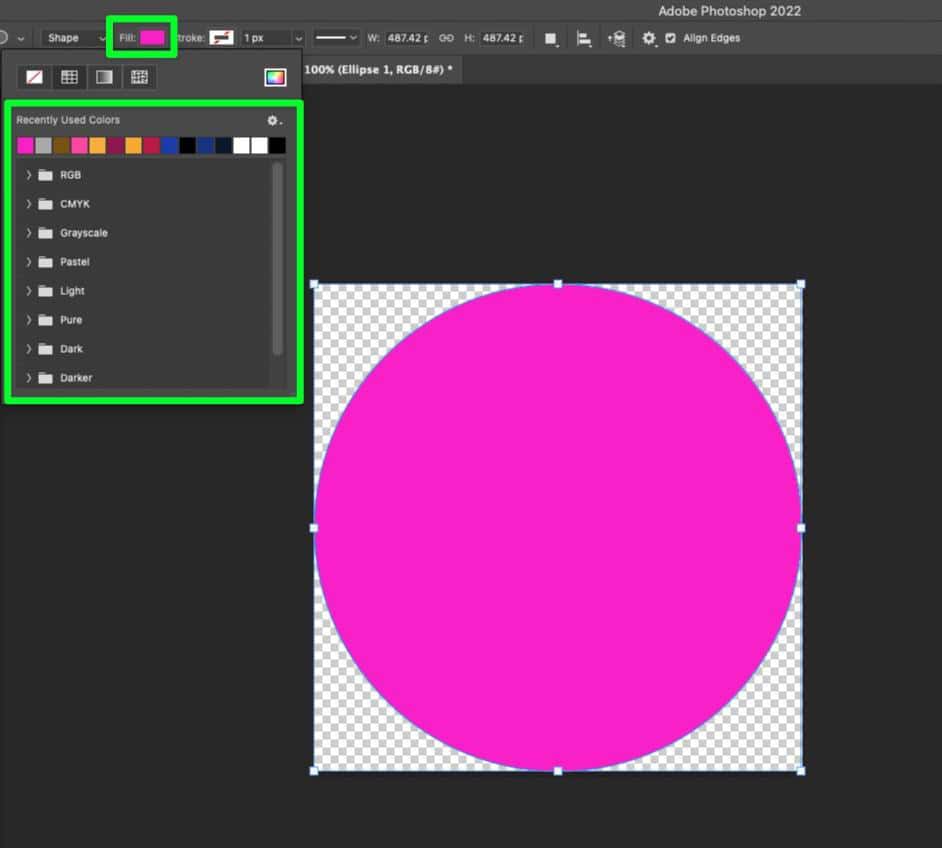
Step 4: Change The Color Of Your Shape If Needed
Now that your shape is a smart object, you won’t be able to change the color as you usually would.
To edit the smart object, double-click the thumbnail of your shape in the Layers Panel.
The layer you double clicked on will open up in a separate window. From here, you can click on the Fill button in the Options Bar and choose your new color.
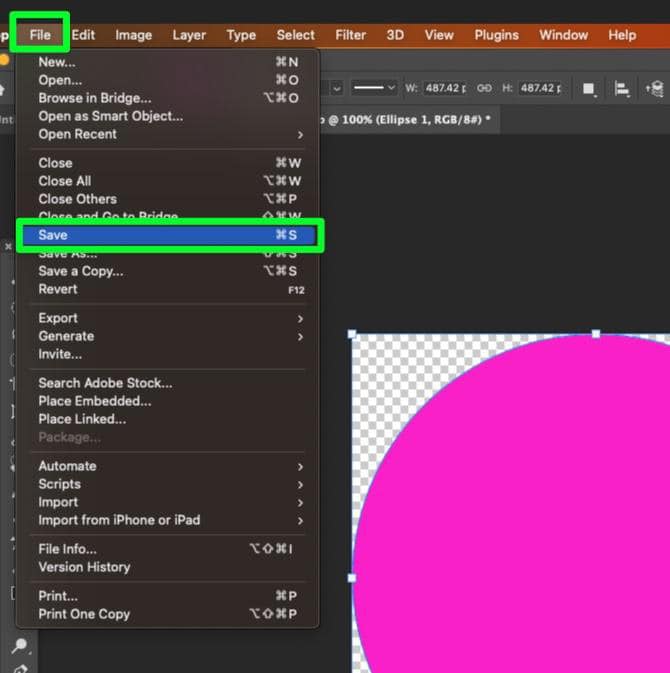
Once you have your color picked out, you need to save your changes. You can do this by going to File > Save or by pressing Control + S (Win) or Command + S (Mac).
After saving your changes, you can close out the new tab and return to the original project. Your color will be the new color you picked, and your feather effect will remain the same.

How To Feather A Single Edge Of A Shape In Photoshop
If you have a shape that only needs a single edge to be feathered, you can do this with the help of a Layer Mask and the Brush Tool.
Step 1: Add A Shape To Your Canvas
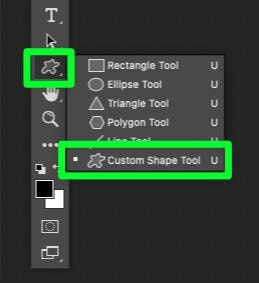
If you don’t already have your shape on your Canvas, use the Shape Tool (U). If you want to use a custom shape, pick the Custom Shape Tool and choose your shape from the Options Bar.

Step 2: Add A Layer Mask
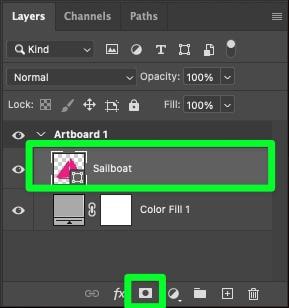
Once your shape is ready, click the Layer Mask button in the Layers Panel. The mask itself will be added right next to your shape’s thumbnail.
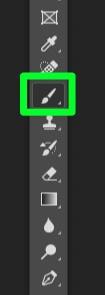
Step 3: Set Up The Brush Tool
To feather the edge of your shape, you’ll need to use the Brush Tool (B), which you can find in the Toolbar.
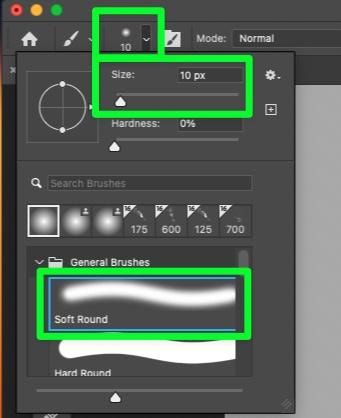
In the Options Bar, adjust the brush size where you need it, and select the Soft Round Brush.
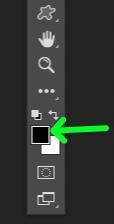
Finally, ensure that your Foreground Color is Black.
Step 4: Use The Brush Tool To Feather The Edge Of Your Shape
Now you’re ready to apply the feather effect.
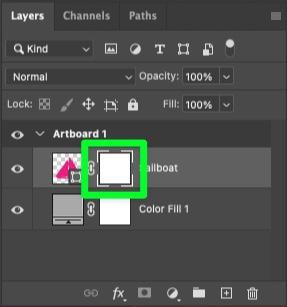
In the Layers Panel, click on the Mask thumbnail on your shape’s layer.
Now, simply paint the edge that you need to feather.
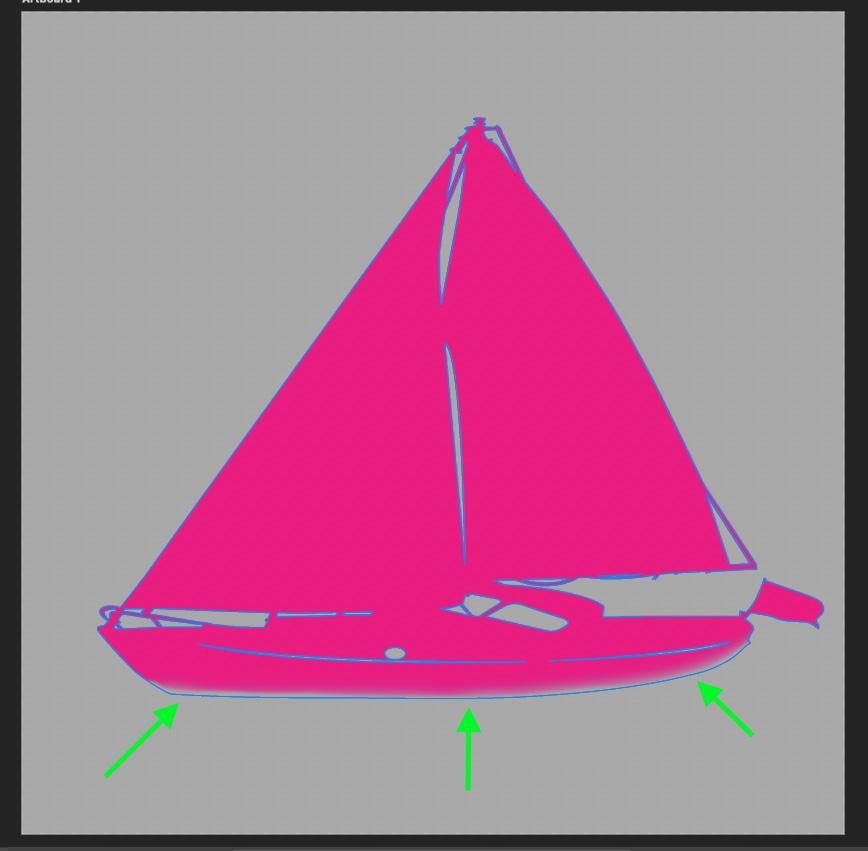
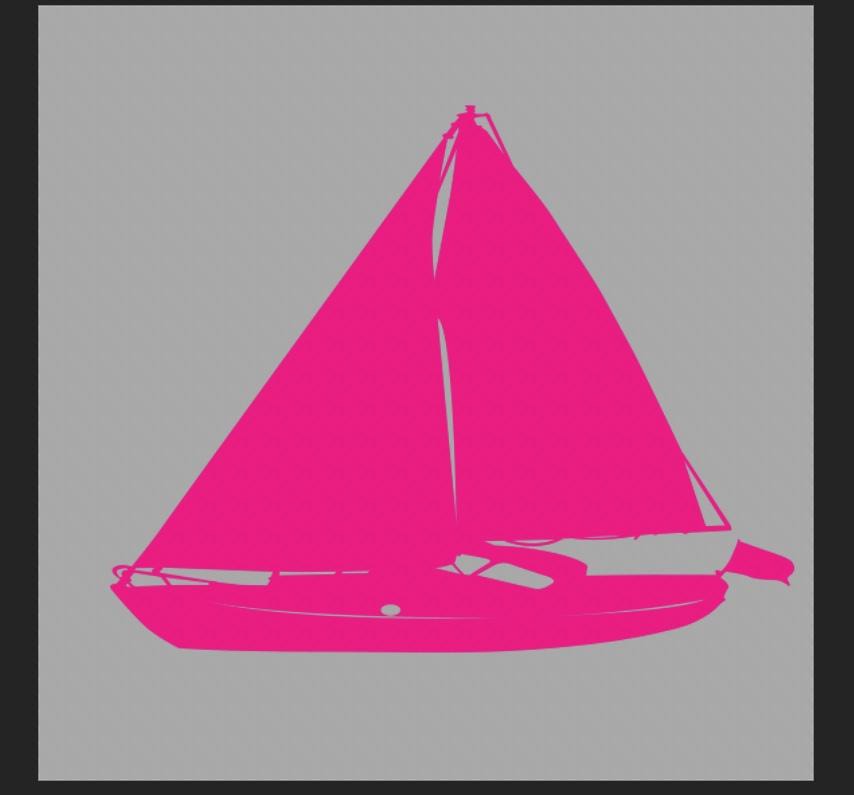
This may be difficult to do with your mouse, but if you paint slowly, you should be able to create a nice-looking feather effect, such as I have done at the bottom of the boat.


This final method is definitely more tedious than others, but gets the job done when you only need a single edge blurred from your shape. Now to take your skills further, check out this guide on blurring the edges of images in Photoshop since it follows a slightly different process!
