If you often work with logos for your business, you may at some point need to make a logo transparent in Photoshop. Depending on the appearance of your logo’s background, you can do this a few different ways.
In this guide, you’ll learn how to remove the background from your logo and export it properly, regardless of your logo’s background color.


Video Tutorial
Making A Solid-Colored Logo Background Transparent In Photoshop
Step 1: Select The Magic Wand Tool (W)
First, you’ll need to select the Magic Wand Tool by heading to the Toolbar and clicking and holding the Object Selection Tool. The Magic Wand Tool (W) is among the tools that come up.

Step 2: Set The Magic Wand Settings
Once you’ve selected the Magic Wand Tool, head to the Options Bar and change the following settings:
- Disable the Contiguous option
- Set the Sample Area (3×3 works fine for selecting a background, but you may want to try higher options like 11×11)
- Set the Tolerance between 10-40, depending on your image

If you want to keep the areas of the background inside the logo (for example, inside the infinity sign), enable the Contiguous box to select only the areas of the background connected to where you click on the image. Now, click the background of your logo, and it will become an active selection.

Step 3: Hold Alt/Option And Click The Add Layer Mask Icon
Once you’ve made the selection, add a layer mask by holding Alt (Win) or Option (Mac) and clicking the Layer Mask icon at the bottom of the Layers Panel. This will add a layer mask while inverting the mask to ensure the background is removed, not the logo.


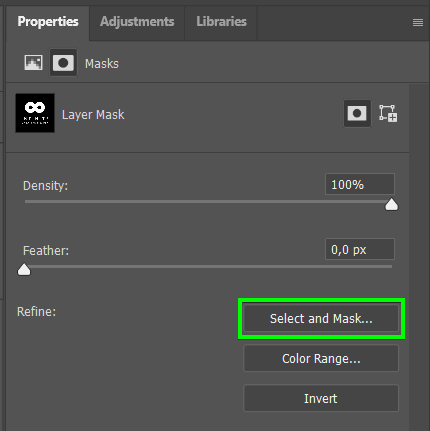
Step 4: Click On Select And Mask In The Properties Panel To Refine The Edges
To soften or sharpen the edges, go to the Layers Panel and click the Layer Mask thumbnail. In the Properties Panel, click the Select And Mask button.
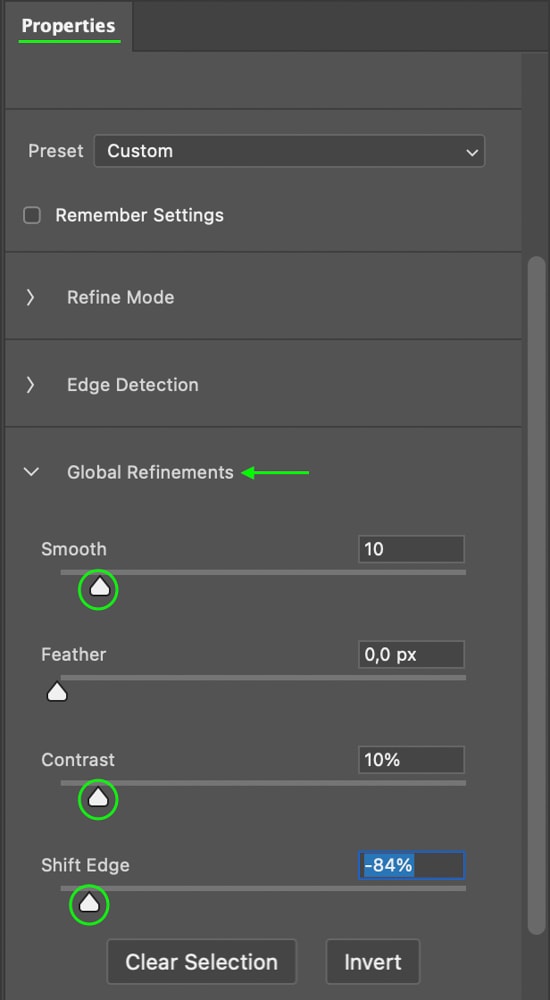
In the Global Refinements tab, you can adjust the Smooth, Contrast, and Shift Edge settings until the edges appear smooth rather than pixelated. Each logo will require something different, but subtle adjustments are usually enough.
The edges appear sharper after the adjustments than before.


Step 5: Go To File > Save A Copy And Set The Format To PNG
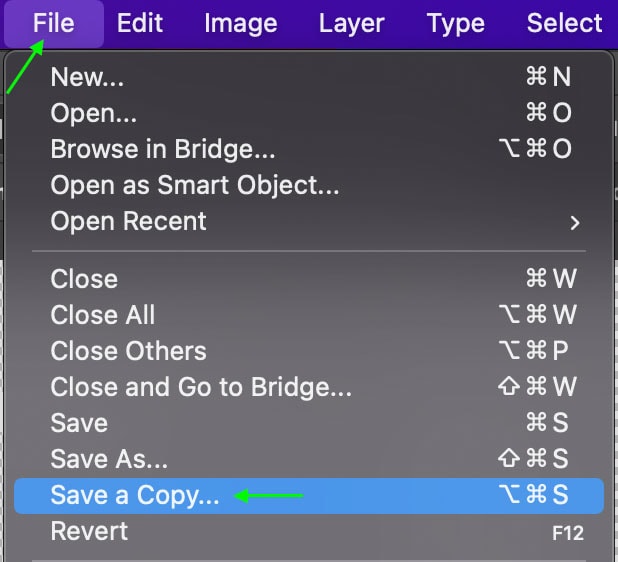
Now that you’ve removed the background and cleaned up the edges, you can save a copy of your logo with a transparent background by heading to File > Save A Copy.
In the Save As window, set the File Format to PNG.
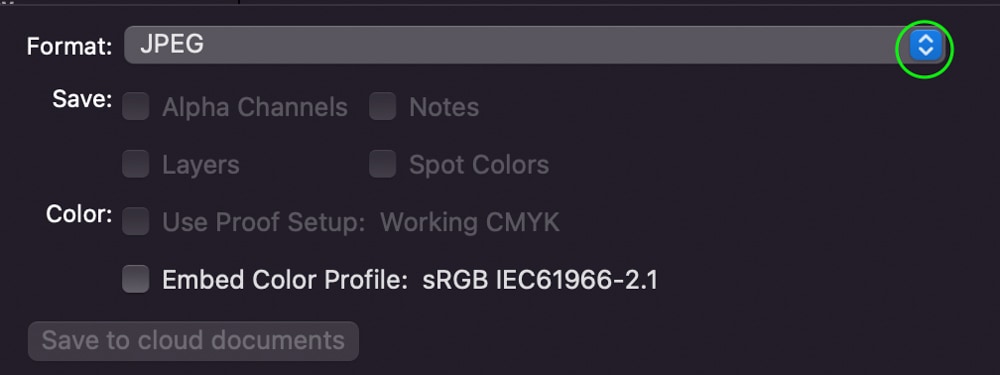

This will ensure the background is transparent rather than black or white. Click Save to save a copy of the project – the document will remain open in Photoshop, but your project will be saved as it is.
Making A Multi-Colored Logo Background Transparent In Photoshop
Step 1: Duplicate The Channel With The Most Contrast
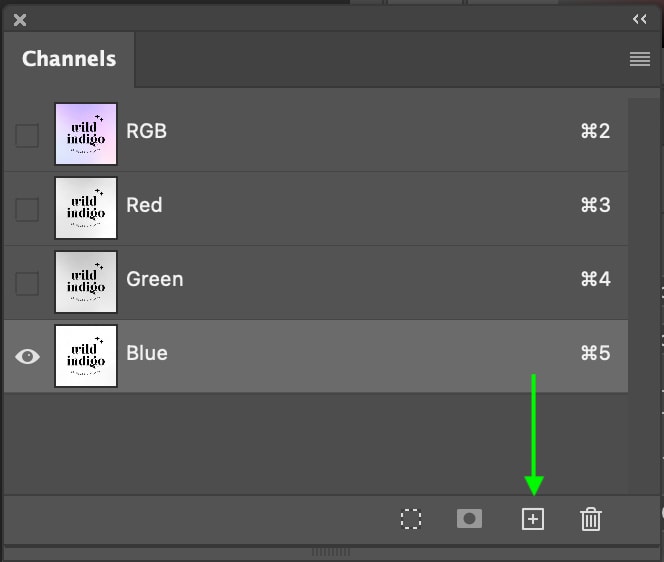
First, you’ll want to open the Channels Panel. If you can’t see the Panel, head to Window > Channels. You’ll see a few different channels to choose from, and you can see what they all look like by clicking on each one. You want to work with the channel that has the most contrast.
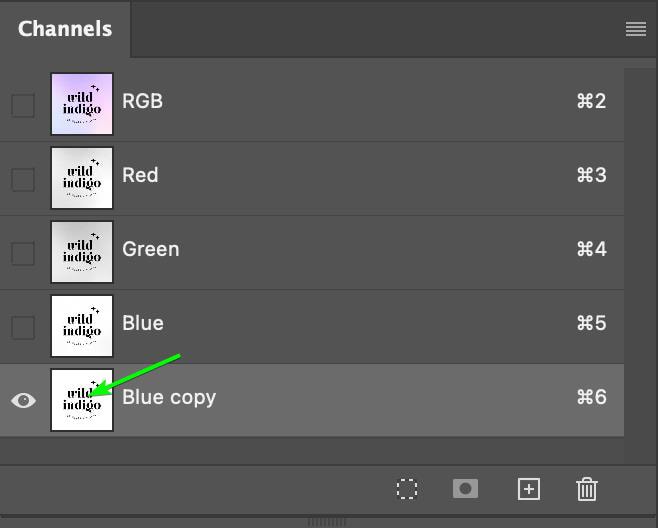
Click and drag the Channel to the New Layer icon at the bottom of the panel, which will duplicate it. You’ll see a copy of your chosen channel at the bottom of the list.
Step 2: Open The Levels Panel And Drag The Highlights And Shadows Sliders Inward
Now, you can open the Levels Panel using the shortcut Control + L (Win) or Command + L (Mac). Drag the levels in so that the darkest parts of the image are 100% black and the lightest parts become 100% white without causing the edges to go fuzzy. Click OK when you’re finished.


Step 3: Hold Control/Command And Click On The Channel’s Thumbnail
Now, in the Channels Panel, hold Control (Win) or Command (Mac) and click the thumbnail of whichever channel you copied – for me, it is the Blue Copy. This will create an active selection around the logo in the image.

Step 4: Hold Alt/Option And Click On The Add Layer Mask Icon
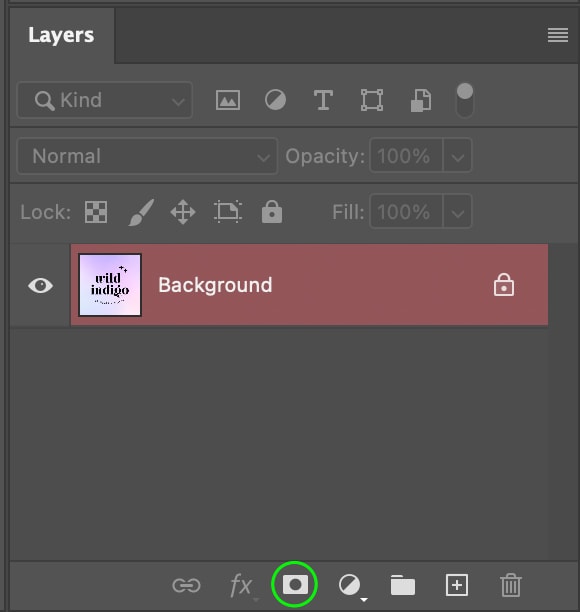
You can now return to the Layers Panel. Then, hold Alt (Win) or Option (Mac) and click the layer mask icon at the bottom of the panel. This will add a Layer Mask to the image. The document shows that the layer mask has removed the background.

Step 5: Open The Select And Mask Workspace And Refine The Edges
If the edges of the logo aren’t smooth, click the Layer Mask thumbnail in the Layers Panel. You’ll see Layer Mask settings appear in the Properties Panel. Click Select And Mask.
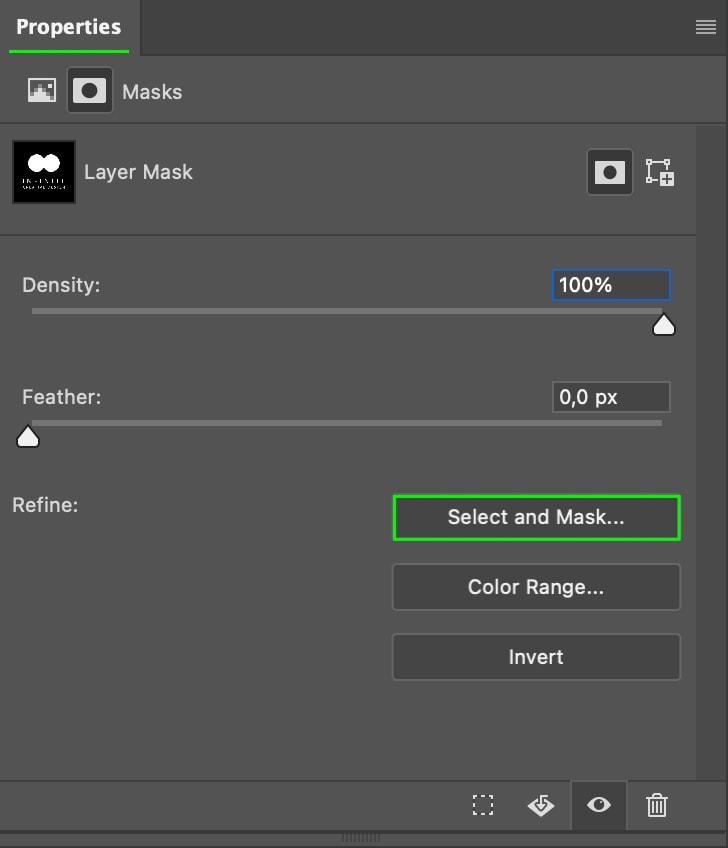
From here, scroll until you see the Global Refinements section. The settings that will help fix the edges the most are the Smooth setting, which smooths out the pixelation, and the Contrast setting, which will increase the contrast along the edge. Click OK when you’re finished.


Next, go to File > Save A Copy. In the window, click to change the Format to PNG. Click Save when you’re finished, and Photoshop will save the file for you to work on or use later.
Additional Export Options For Transparent Logos In Photoshop
It is important to save your projects as you work, but when you’re ready to export a project to your files, you can head to File > Export > Export As.
In the Export As window, you can resize your logo by entering a new Width and Height in the Image Size section. You can also resize the logo by clicking one of the preset Scale options, which will automatically adjust the Width and Height.
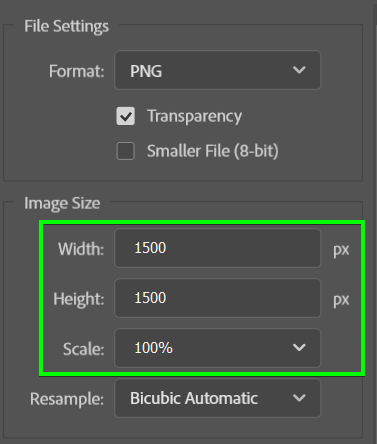
It is always risky to scale up from the image’s original size, as the quality of the image often suffers as a result. You can scale up slightly if need be, but be careful not to increase the size too much, as this leads to pixelation.
Finally, ensure the File Format is set to PNG, and the Transparency box is checked.
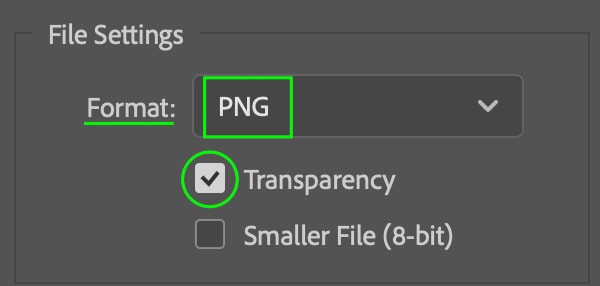
This will maintain a transparent background when the file is exported. Click Export, and you’ll have a transparent logo in your files ready to use when you need it.
Happy Editing!


