If you draw or paint in Photoshop, being able to blend colors is essential to create the shading effects you are looking for. Much like if you were to mix paint in real life, Photoshop allows you to blend two colors to create a mixture of both colors. Also, like actual paint, mixing colors in Photoshop is relatively easy.
This guide will cover three easy ways to blend colors in your projects. The first two ways involve simple-to-use tools from the Toolbar, while the third way is the fastest option to blend a new color into a large area of your image.
Option 1: Using The Smudge Tool
Of the three ways I will teach you, the Smudge Tool is the quickest. This option is great when you have a small area that needs two or more colors to be blended or if you’re in a hurry and just need to throw together a quick mock-up.
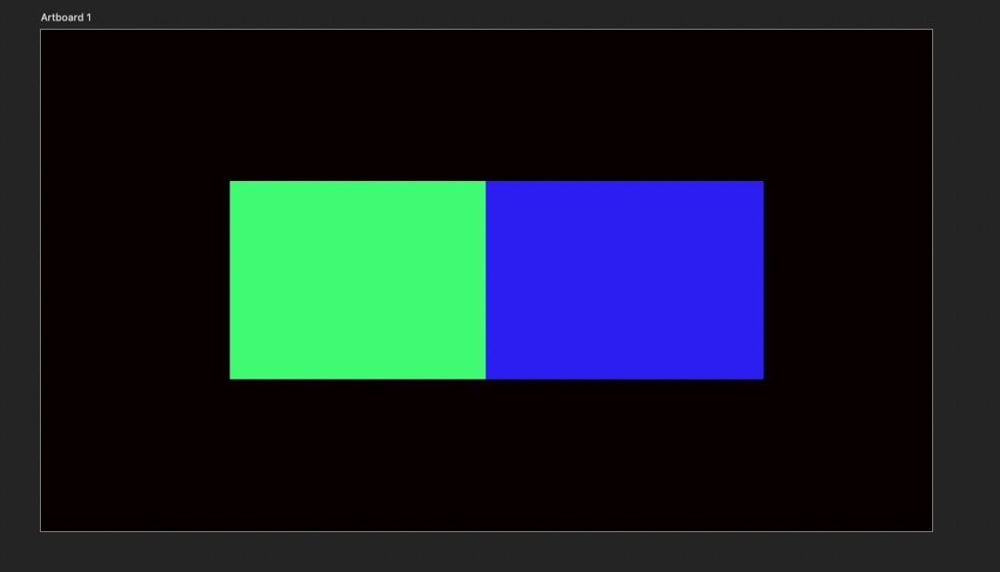
Also, this guide assumes that you already have a project you’re working on with two or more colors that need to be blended.
Just in case, here’s a quick rundown on the fastest way to get color down on the canvas:
- You can find the Main Color Picker at the bottom of the Toolbar.
- Double-click on the top color picker to pick the Foreground Color, and double-click on the bottom color picker to select the Background Color.
- For the most part, you only need to worry about the foreground color when adding color to your canvas.
- The quickest way to add color to your canvas is to use the Brush Tool (B).

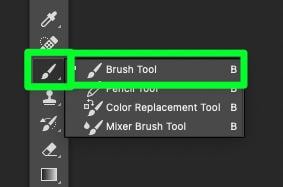
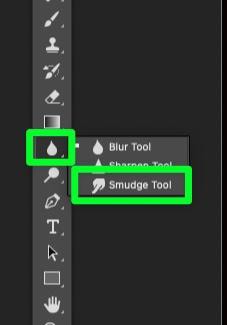
Step 1: Select The Smudge Tool From The Toolbar
To start this process, find and select the Smudge Tool in the Toolbar.
If you don’t see the Smudge Tool right away, click and hold the Blur Tool to open up the sub-menu, then select the Smudge Tool at the bottom.
Step 2: Set The Mode To Normal & The Strength To 25%
After selecting the Smudge Tool, ensure the Mode is set to Normal and adjust the tool’s Strength to 25% in the Options Bar.

If 25% is not enough strength for the tool, you can return to the options menu and adjust it anytime. As a general rule, 25% should work out well.
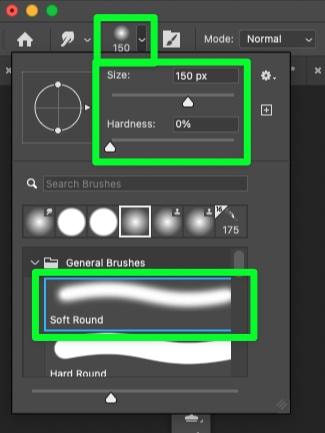
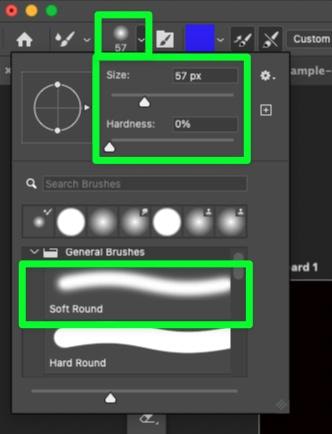
Step 3: Choose The Soft Round Brush & Adjust The General Settings
The Smudge Tool is not one set brush. You can use any brush in Photoshop (or that you downloaded), just like the Brush Tool.
Click on the Brush Preset Picker button to browse through your brush library. You can choose any brush, but choose the Soft Round Brush for the smoothest blended look.
For the settings, make sure Hardness is set at 0%. For the size, you’ll want to adjust this setting multiple times while blending your colors, so it doesn’t matter what you start with.
Just remember that the Brush Preset Picker is where you can adjust the size of the Smudge Tool or press [ or ].
Step 4: Use The Smudge Tool To Blend Your Colors
With the Smudge Tool selected, drag your mouse over the area you want to blend.
A quick swipe will appear more blurry than blended.

Keep brushing the Smudge Tool left and right until the area you need looks more blended. You may have to increase your brush strength to get the look you’re going for.


You may have to make the size of the Smudge Tool extra big to get your desired effect.
However, using an extra large brush might slow down your computer considerably, depending on your system.

Option 2: Using The Mixer Brush Tool
These two tools may seem similar at first, but both tools act very differently when used.
The Smudge Tool is used to drag and stretch pixels, making them look blurry or smudged. The Mixer Brush Tool mixes colors, creating a much more natural gradient.
Step 1: Select The Mixer Brush Tool From The Toolbar
To find the Mixer Brush Tool (B), click and hold the Brush Tool, then select the Mixer Brush at the bottom of the sub-menu.

Step 2: Adjust The Wet & Mix Settings
In the Options Bar, there are three main settings that you should worry about:
- Wet – The option increases or decreases the amount of streaking your brush strokes will make. Keep the percentage between 70% – 100% so your brush strokes streak as much as possible.
- Load – The load option determines the amount of paint that gets loaded into the reservoir well of the brush. Keep the percentage above 60% to create longer strokes. This will make it easier for the colors to mix.
- Flow – This option controls the speed of the paint flow. There should be no need to change it from 100% for color blending but feel free to adjust it if it helps.

Step 3: Choose The Soft Round Brush & Adjust The Settings
Next, click on the Brush Preset Picker, then choose the Soft Round Brush or any brush with a soft edge.
Make sure the Hardness is set to 0%.
Start with the default setting for the size, then adjust it as you use the Mixer Brush.
Step 4: Drag The Mixer Brush Between Your Colors
Now that you have selected the Mixer Brush Tool and all the options set drag it across your colors to see how it looks.
Your first few brush strokes may appear pixelated. Keep dragging the brush back and forth to mix the colors more.


The Mixer Brush is similar to the Smudge Tool. The most significant difference is the Mixer Brush Tool does a much better job sampling the colors on your canvas.
One downside with the Mixer Brush is that you may have some minor pixelation. If this happens, just drag up and down to blend the colors more until the pixelation disappears.
Using the Mixer Brush Tool requires a good amount of trial & error, but it’s worth it.


How To Blend Colors Into Images In Photoshop
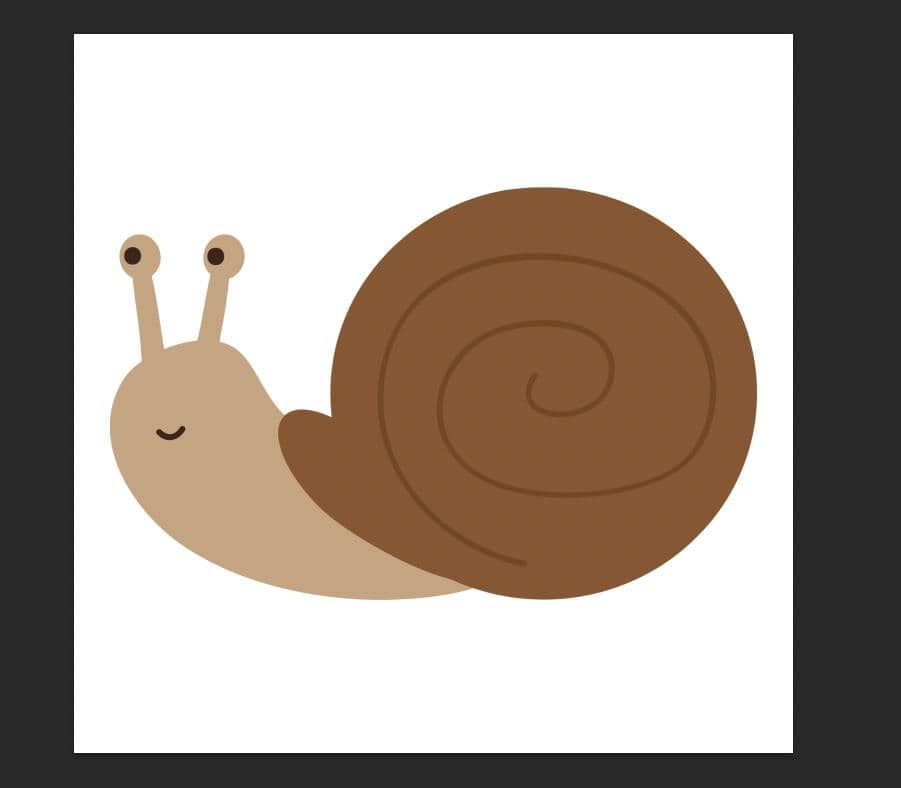
If you have an image that needs to be completely re-colored, Photoshop makes it easy to do so.
Here’s how to quickly blend colors into an image.
Step 1: Select The First Color You Want To Change
To select the first color in your image, you can use any of Photoshop’s selection tools.
The best selection tool to use in general is the Object Selection Tool (W).

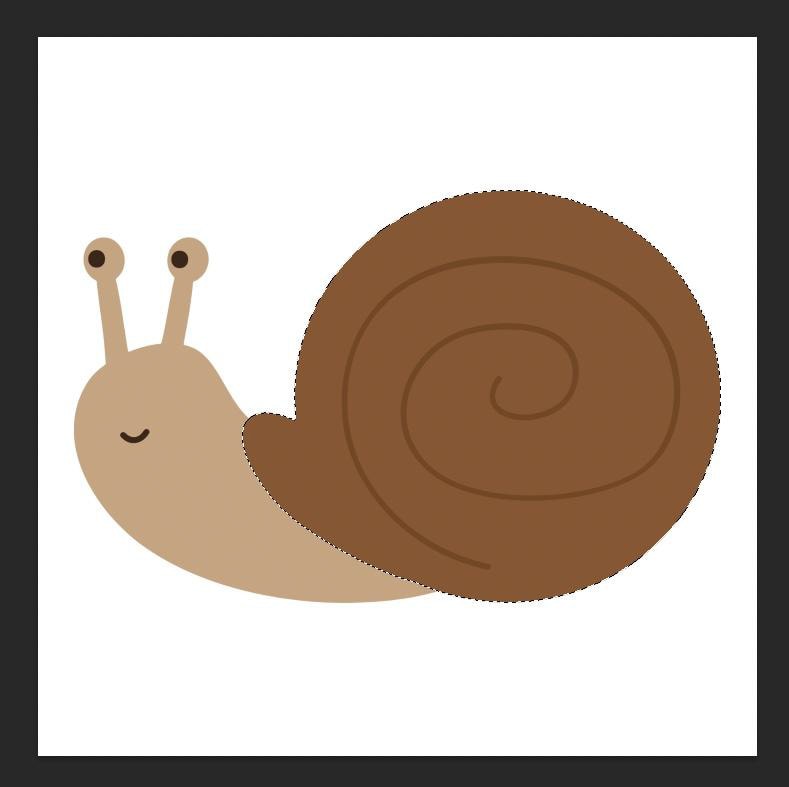
Step 2: Select Your First Color
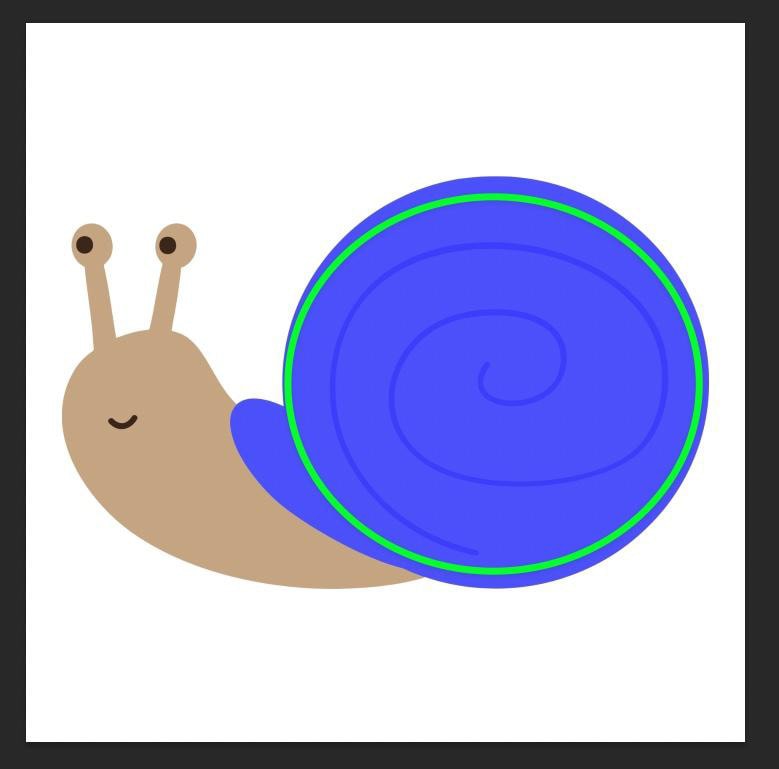
With your Selection Tool in hand, select the first color in your image. This works best with a solid color.
You will know if your color is fully selected by the marching ants around the color.
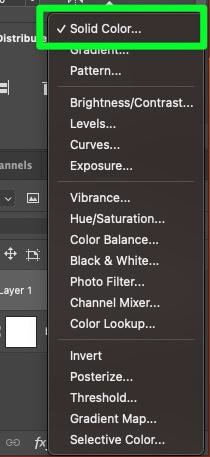
Step 3: Add Your New Color With A Color Adjustment Layer
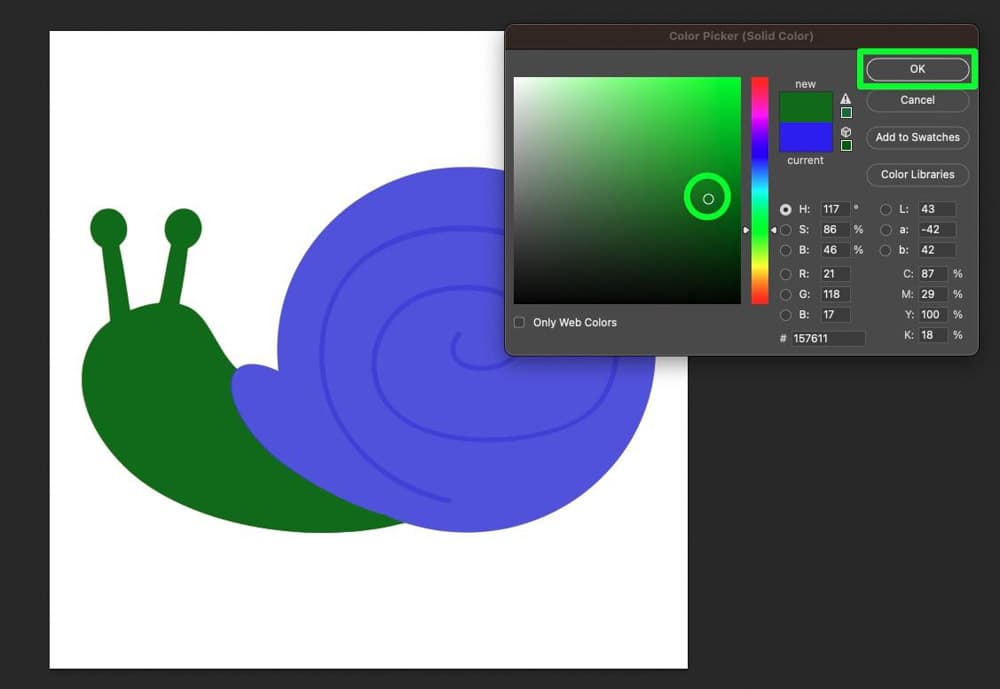
To start blending a new color into your image, click the New Adjustment Layer button, then choose Solid Color.
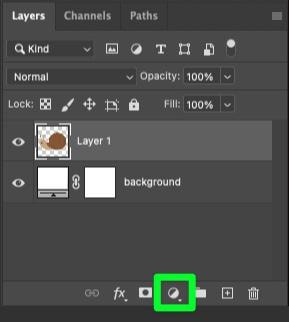
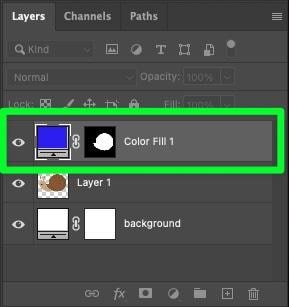
You’ll see a new layer above your original image in the Layers Panel. This layer will have a Color Picker as the thumbnail, and you’ll see a mask of the selection itself.
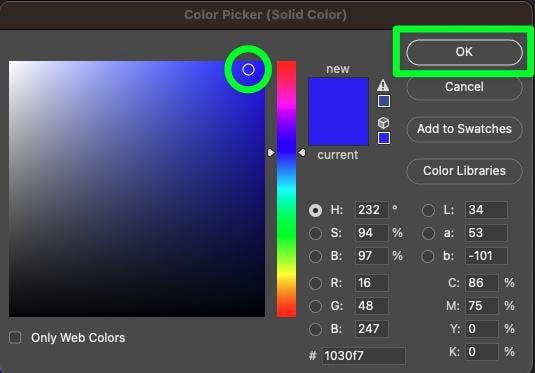
Click on the Color Picker thumbnail.
A Color Picker Properties Panel will pop up, allowing you to choose the color you want.
When you’re ready, click OK.
Back on the canvas, the selected area will now be filled in with the chosen color.

Step 4: Change The Blending Mode Of The Color Adjustment Layer To “Color”
The solid color so far will look strong. This step will help make the color look more like you imagined.
With the Color Adjustment Layer selected, open the Blending Mode drop-down menu and choose Color from the menu that pops down.
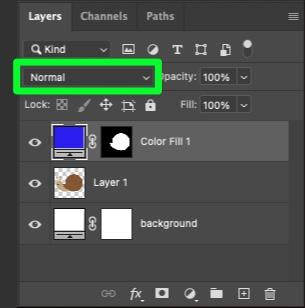

Choosing the Color blending mode will automatically blend your chosen color into the selected area of your image. You should see some of your image through the color layer.

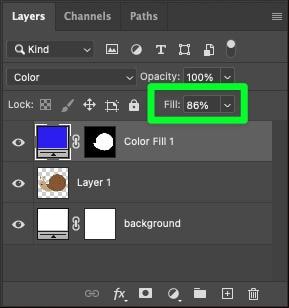
Step 5: Adjust The Fill Of The Color Adjustment Layer (Optional)
After setting the layer to Color, you should see a good amount of the image beneath the color, but it may not be enough for your liking.
If you want more of your image to come through, first select the layer, then bring down the Fill percentage until your image looks like you want it.
The percentage depends on your project, but for the most part, you need to bring down the fill by 75% to 80% to see some real change.

Step 6: Repeat Steps 1 – 5 As Many Times As Needed
Once you’re satisfied with how the first blended color looks on your image, you can repeat the last five steps for all the other colors you want to change.
Here’s a quick rundown on how to repeat these five steps:
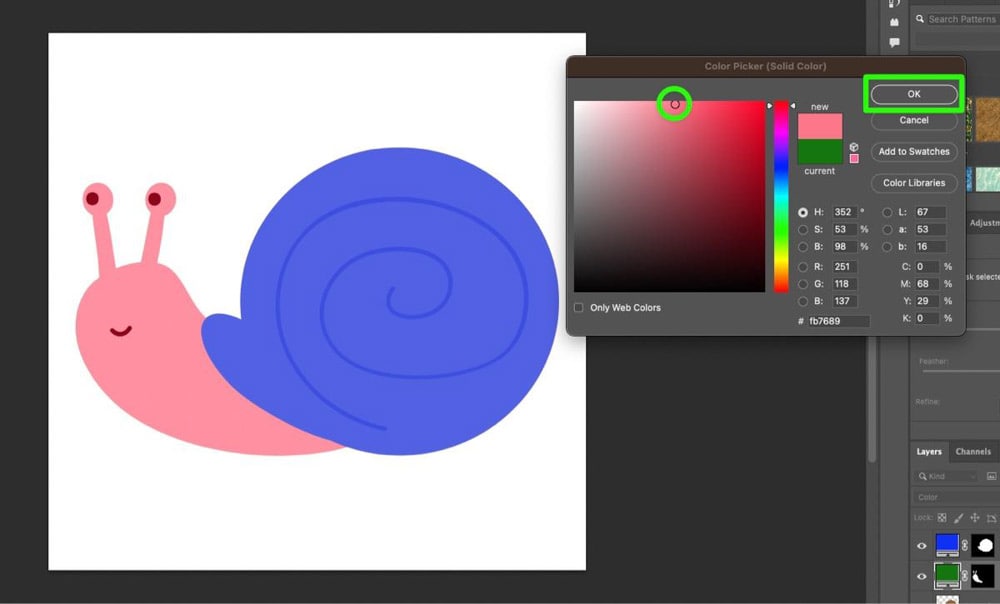
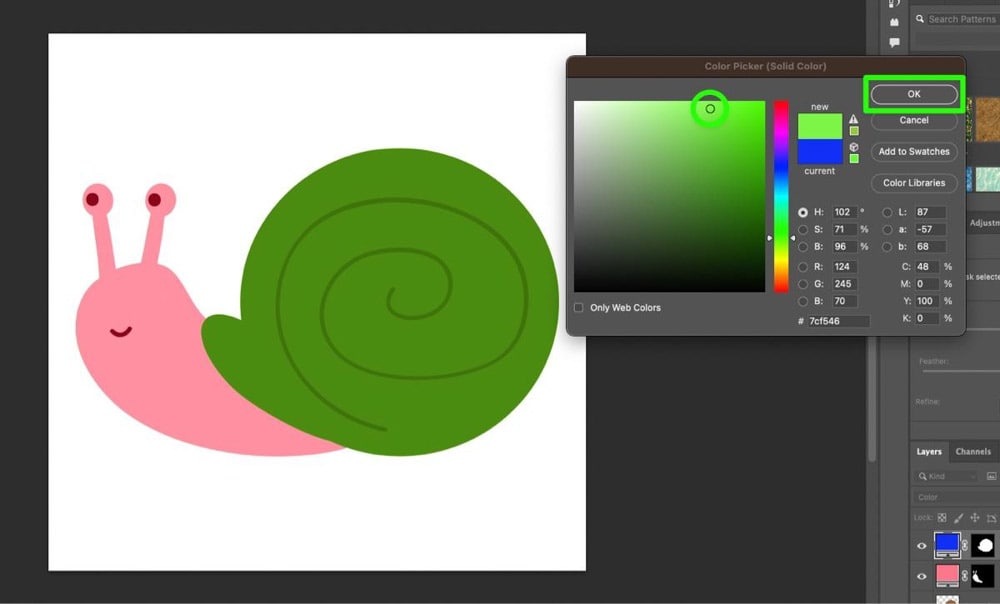
First, grab your selection tool of choice, then select the second color on your image.

With your second color selected, click the Adjustment Layer button in the Layers Panel, then choose Solid Color.
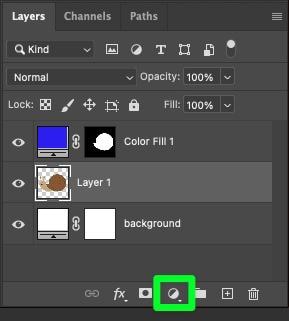

In the Layers Panel, you’re new Color Fill Adjustment Layer will appear below the first color fill adjustment layer you created.
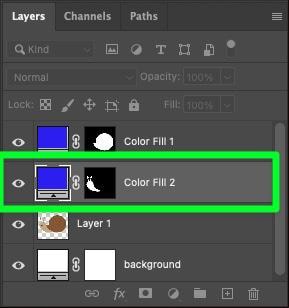
Choose the color that best fits your project, then click OK.
Change the blending mode from Normal to Color to blend the color into your image.


Repeat this process as many times as you need to for your project.


How To Quickly Change The Colors Of Your Blended Image
One of the best parts about using Color Fill Adjustment layers to blend new colors into your image is how easy it is to change the colors after you create the adjustment layers.
To do this, click on the Color Picker inside each one of your Color Fill Adjustment Layers.

You will be presented with a Color Picker Properties Panel, where you can choose your new color.
Click OK when you’re ready.
Using these color pickers, you can change the color of your original image as many times as you want. Plus, you can do this in less than 30 seconds.