
There are many reasons for needing to export layers to files in Photoshop. Unfortunately, the regular way of exporting a file from the program only merges your layers into a single document. To export all your layers to individual files, you need to use a different export process.
Throughout this post, you’ll discover all the nuances of exporting layers to files, and soon, you’ll be able to do it in seconds!
In the export window, there are several file formats you can use and a few important settings to note, which I will walk you through in the steps below.


In the export window, there are several file formats you can use and a few important settings to note, which I will walk you through in the steps below.
How To Export Layers To Files In Photoshop
Step 1: Go To File > Export > Layers To Files
Once you have your project with all the layers, go to File > Export > Layers to Files.
Step 2: Select A File Format
Now, you will see a dialogue box where you will have various export options.
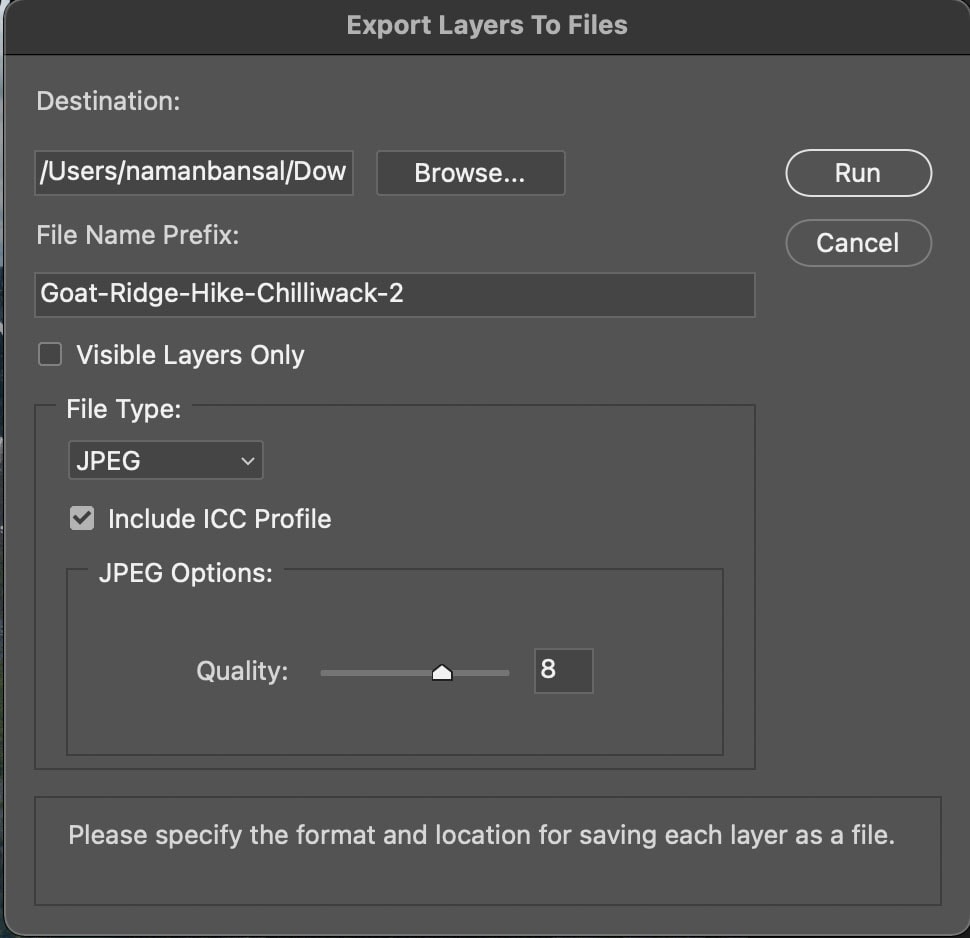
First of all, you want to select the file format you want to export the layers in via the File Type option. Photoshop has a lot of file formats available, so here’s a breakdown of the popular ones:
BMP: This file type is developed by Microsoft and contains raster graphics images. Its full form is a Bitmap Image File.
JPEG: This is probably the most common image format along with PNG, and it compresses your images slightly for lower file sizes, but it isn’t noticeable to the human eye under normal circumstances. This is your best bet for shareable image files anywhere on the web.
PDF: PDF stands for ‘Portable Document Format’, as developed by Adobe. These files are mostly used for printing and document purposes, and the best part is that these files are highly portable and do not mess with the contents of your images. These are mostly used for legal and business purposes, working well for multi-page documents.
PSD: PSD stands for “Photoshop Document,” and this is the format that is used to store Photoshop projects. These files are supported by many image editing programs and store your files in high quality while remembering layer information.
TIFF: TIFF stands for “Tag Image File Format” and is used mostly for storing high-quality graphics meant for editing. It isn’t used on the web much but helps to retain an uncompressed image after export. Exporting to TIFF is helpful after you’ve edited a RAW image file since it keeps all the file information.
PNG: This is one of the most popular file formats and is used a lot on the web and websites. This stores your images without compression and makes them high-quality. It is also used for transparency, allowing you to export graphics or cutouts with transparent backgrounds.
Something else you will notice is that in the dropdown, you will have two PNG options, PNG-8 and PNG-24. The difference is that PNG-8 means that can support 8-bit colors. In a nutshell, an 8-bit image has a smaller range of color information it can display.
On the other hand, PNG 24 supports 24-bit colors, and it has over 16 Million colors to display! It’s ultimately your choice which you want to choose, but in most cases exporting to PNG will be satisfactory.
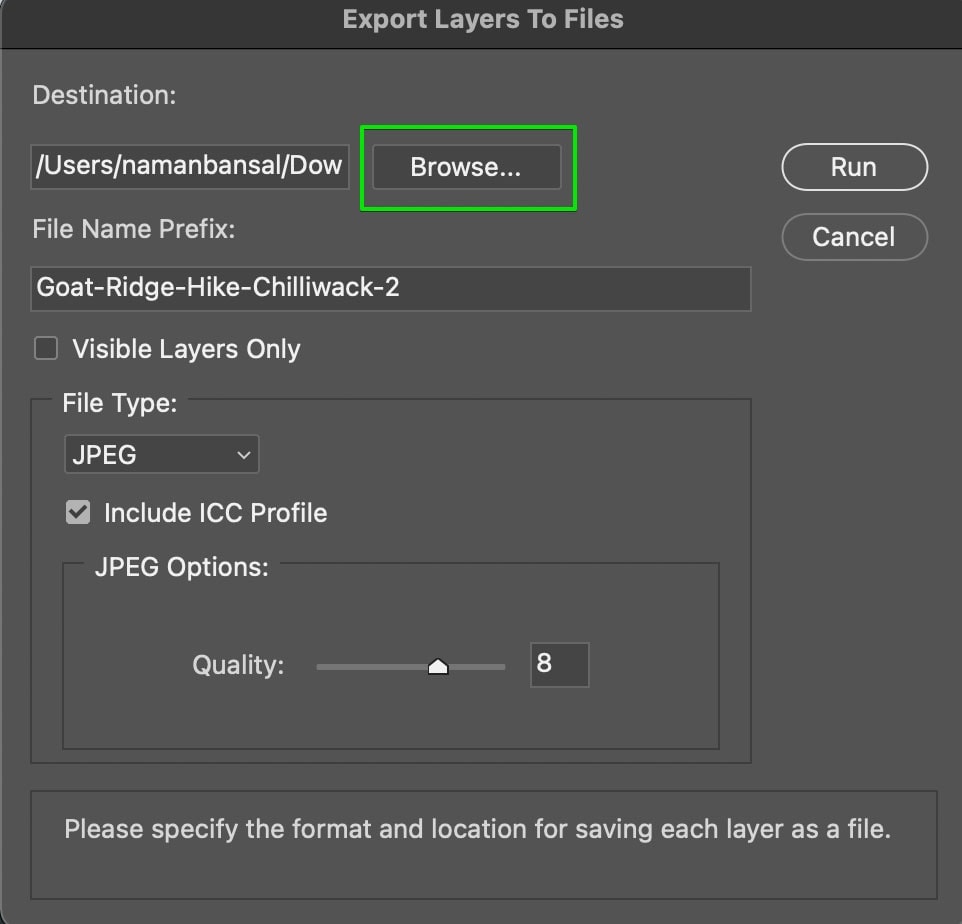
Step 3: Choose An Export Location
Now that a file type is chosen select the location where you want to save your exported layers. Click on the Browse button to select a location from your computer.
Step 4: Create A Name For The Exported Layers
Next, select the File Name Prefix to edit the name of your exported layers. This prefix will be the name for all of the layers, and Photoshop will add 1, 2, and 3 after that if there are multiple.
Step 5: Click “Run” To Export The Layers
Now, to export your layers, click on Run. Photoshop will do its work and turn all your layers into the specified file type to save in a dedicated folder on your computer.
After export, check your save location and you’ll find your files over there. Double-check that everything was properly exported, and now you’re good to go!
How To Export Only Visible Layers To Files
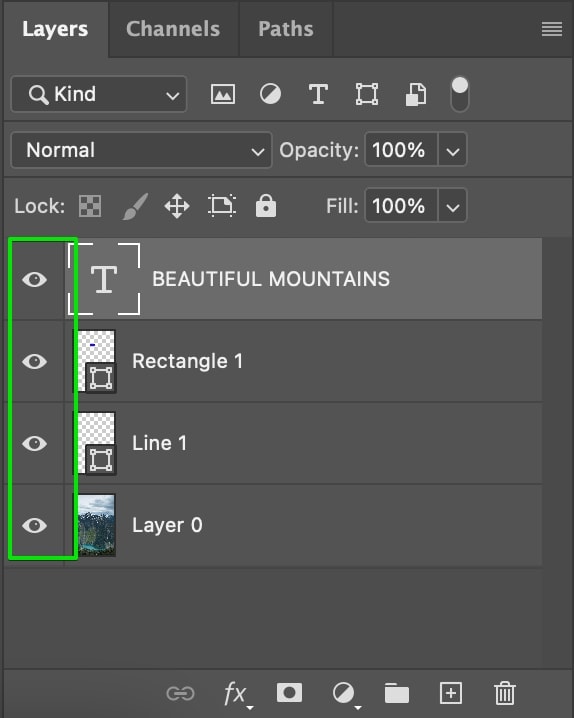
If you have many layers that are invisible in your design and you don’t want them to get exported, then you can check a box so that only visible layers are exported.
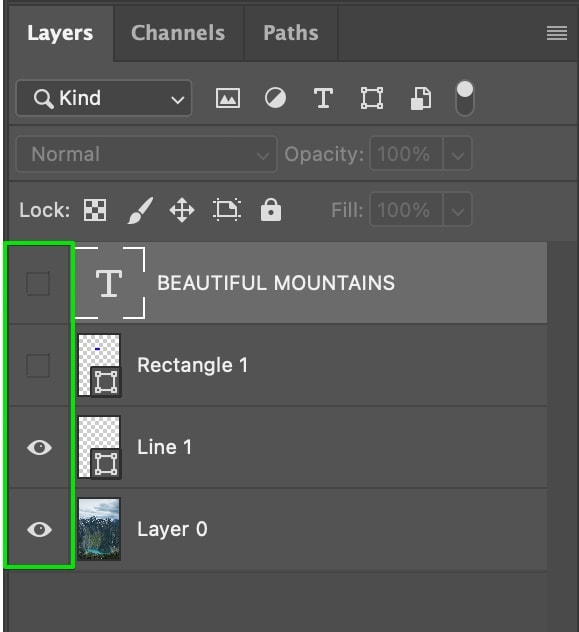
First, change the layer visibility in the Layers Panel. The eyeball icon shows that a layer is visible, and the empty box shows an invisible layer. You can easily change layer visibility by clicking inside the box beside the desired layer.
So, with that in mind, to export only visible layers, once again, go to File > Export > Layers to Files, and in the box that pops up, select the option that says Visible Layers Only.
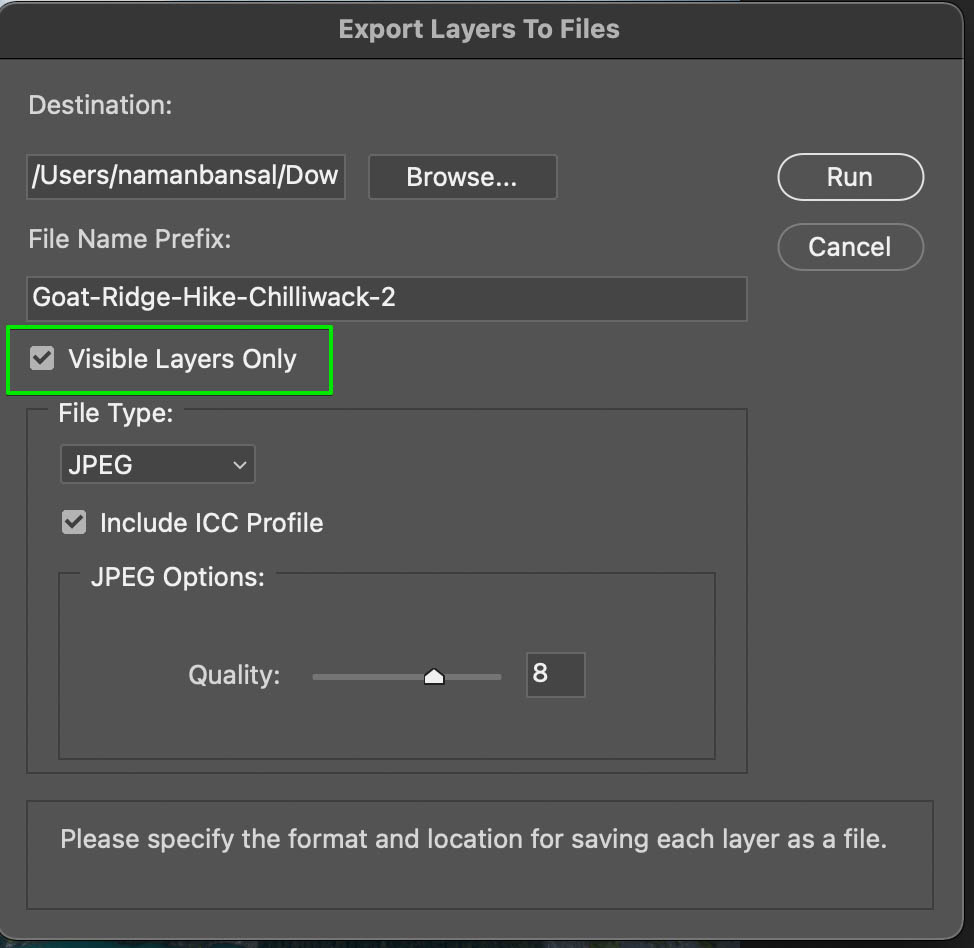
By checking off this option, Photoshop will only export your visible layers in the project while leaving the invisible layers untouched. This can save you a ton of time, so you aren’t left sorting through unwanted layers in your final export.
So now you know how to easily export your layers to individual files in Photoshop with one simple export method. This is helpful when you need to use certain layers again in future projects or you want to share a project template for someone else to create. With this new skill added to your toolbelt, let’s keep the learning going with these 10 steps for editing beautiful photos in Photoshop!
Happy Exporting!


