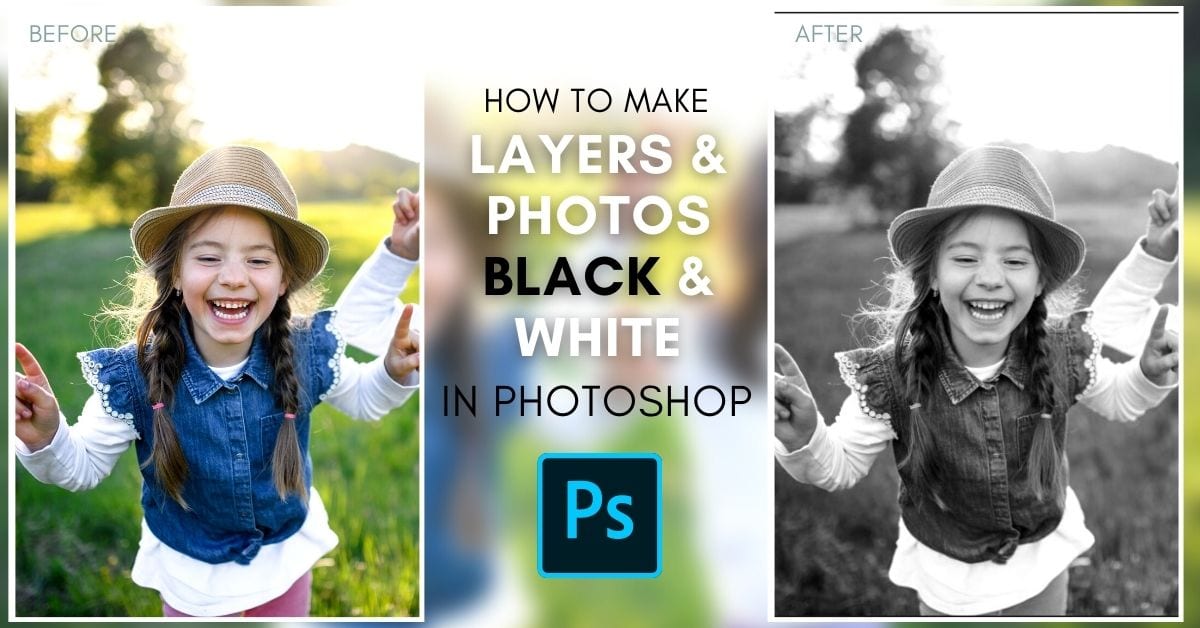

Turning a color image to black and white can be done in many ways on Photoshop. This depends on how much of the image you want to be converted, and how much control you need to adjust the conversion. Here is all you need to know about how to make a layer black and white in Photoshop.
To make a layer black and white in Photoshop, follow these steps:
- Select the layer you want to convert to black and white in the Layers Panel.
- Go to Layer > New Adjustment Layer > Black & White.
- Adjust the luminance value of each color range to change the look of your black & white adjustment.
When making a layer black and white you are either removing the saturation (color) or you are converting the colors to black and white. In Photoshop, there are a variety of ways to do this besides the regular black and white adjustment layer. The method you choose ultimately depends on how you want the effects to appear in your project.
To layout all the options on the table, let’s get into converting layers and images into black and white using a handful of beginner-friendly techniques.
How To Make A Single Layer Black And White
The best way to make an entire layer black and white is to create a new adjustment layer that converts the image to black and white. This method allows you to control the contrast of the black and white layer. You can also manipulate the image to only have certain parts in black and white.
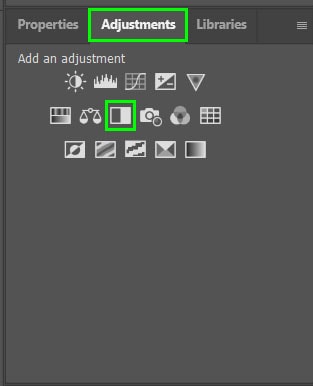
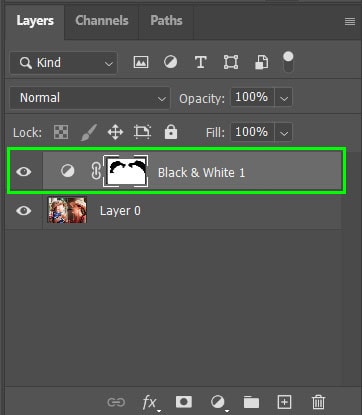
To create a black and white adjustment layer, navigate to the Adjustments panel and select the “Black & White” icon. This will create a new layer in the Layers panel.

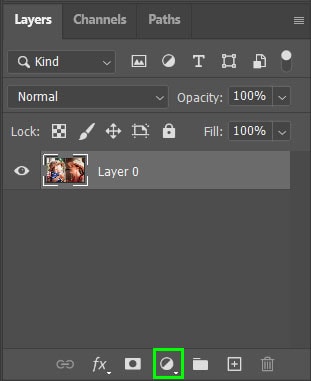
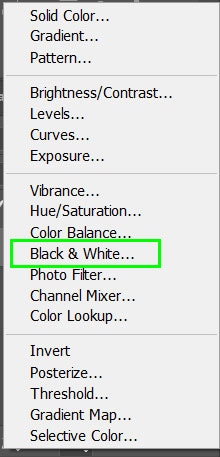
You can also use the adjustment layer icon at the bottom of the Layers panel and select “Black & White…” to create the new adjustment layer.
Once the new adjustment layer has been created the image will now be in black and white. The Properties panel will also appear above the Layers panel with options to adjust the luminance of different color ranges.
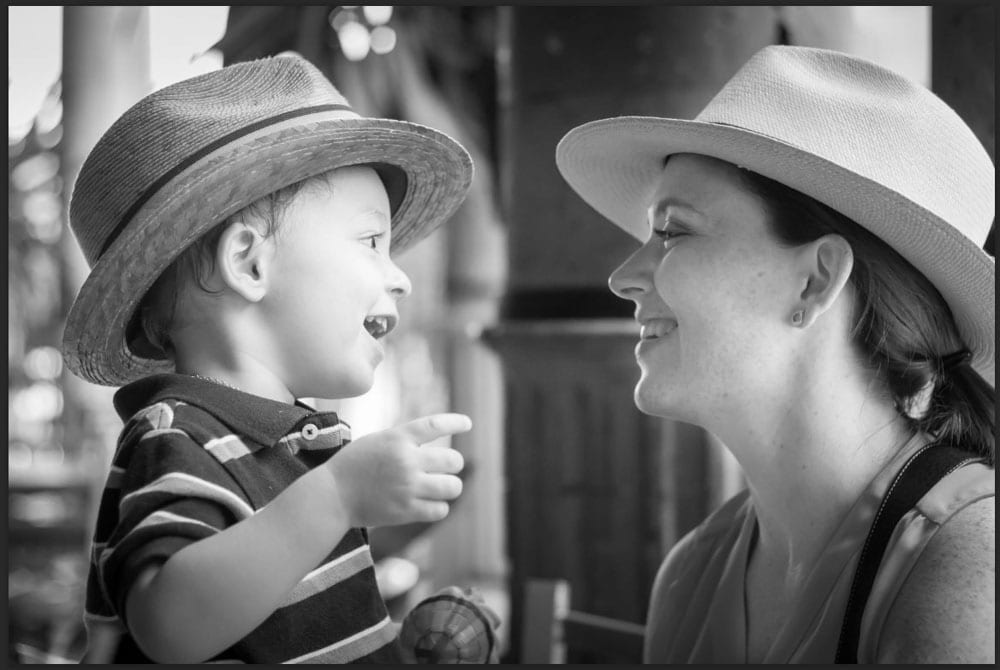
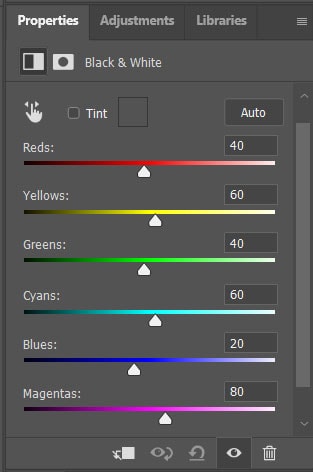
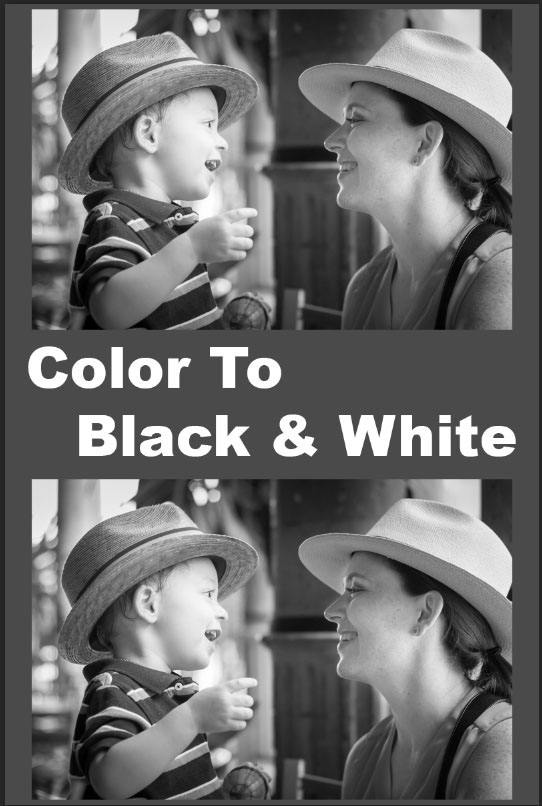
Adjusting the colors in the Properties panel will change the luminance of the image by making certain areas darker or lighter. Slide a color to the right to make it lighter on the image or to the left to make it darker. Moving the “Blues” color down to -41 makes the child’s shirt a darker shade.
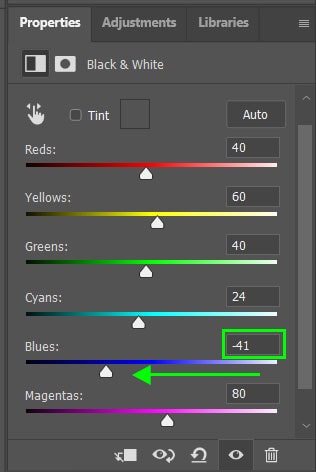

To view the changes you have made to the adjustment layer, hold in the toggle icon at the bottom of the Properties panel or hold in “\”.
If you are unhappy with your changes when adjusting the colors, you can easily revert to the default colors by selecting the “Reset to adjustment defaults” icon next to the toggle icon.

Photoshop will also automatically adjust the colors for you if you would like. Select the Auto button above the colors to create an automatic adjustment of the colors.

Using A Clipping Mask To Isolate Black & White Adjustment Layers
If you have multiple layers in your image, the new black and white adjustment layer will convert all the images below it to black and white. This can be a problem if you are only wanting to convert a single layer without affecting the rest of the project.

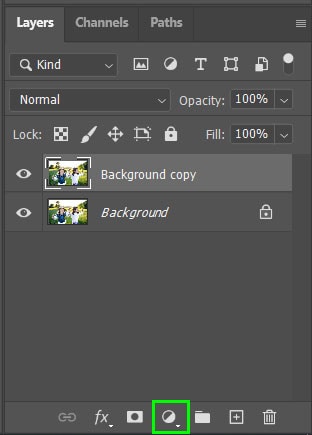
To only add black and white to one layer, add the adjustment layer on top of the other layers. Select the adjustment icon at the bottom of the Layers panel and select “Black & White…” to create the new layer. Your entire image will now be black and white.
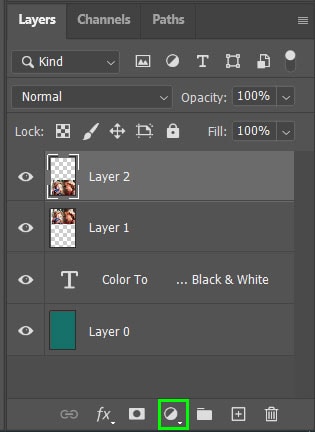
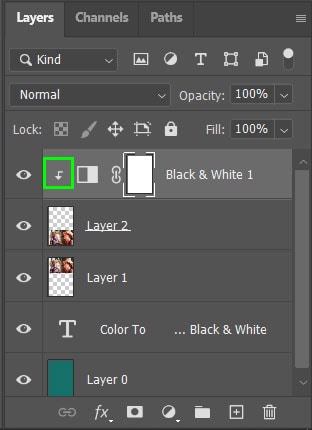
Make sure the new adjustment layer is directly above the layer you would like to keep in black and white. The other layers, even if they are below this layer, will remain in color.

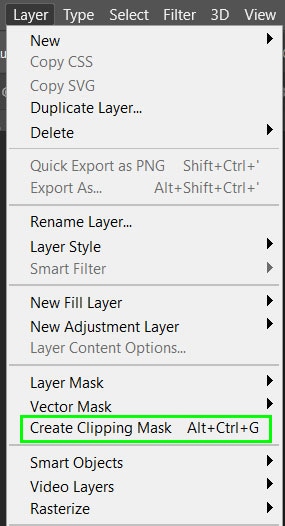
Then, select Layer > Create Clipping Mask or press Alt + Control + G (Windows) or Option + Command + G (Mac). This will add a clipping mask to the new adjustment layer which only applies the effect to the layer directly below it. The clipping mask is shown by the arrow icon on the adjustment layer.
How To Make Parts Of An Image Or Layer Black And White
The black and white adjustment layer can be used to alter certain parts of a layer without affecting the entire image when using layer masks. Here are two methods to make parts of a layer black and white.
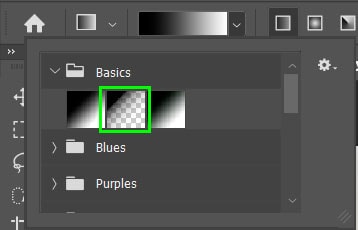
1. Using A Gradient
A gradient can be applied to the new adjustment layer to make only part of the image black and white. First, add a new adjustment layer by selecting the adjustments icon at the bottom of the Layers panel and selecting “Black and White…”.
When the new adjustment layer is added, it already has a layer mask attached to it. The layer mask is shown by the white box beside the adjustment layer. Select the layer mask by clicking on it, the selection will be shown by the white frame around the thumbnail.
When you edit the layer mask you will either reveal or hide elements of the layer below it. By adding black to the mask you will hide the adjustment, while white will make it visible.
Add a gradient by selecting the gradient tool from the toolbar. You can also press G.

Once the gradient tool is selected, change the gradient style by clicking on the dropdown menu on the options bar. Select a foreground to transparent gradient. Then click and drag across your image where you would like the gradient to be.


The image will now have a gradient effect on the black and white adjustment layer. You will see the parts of the bottom layer revealed where the black shows on the layer mask thumbnail.


The black areas in the gradient remove the black and white layer to reveal the original layer. The white areas will hide the original layer and show the new adjustment layer in those areas.
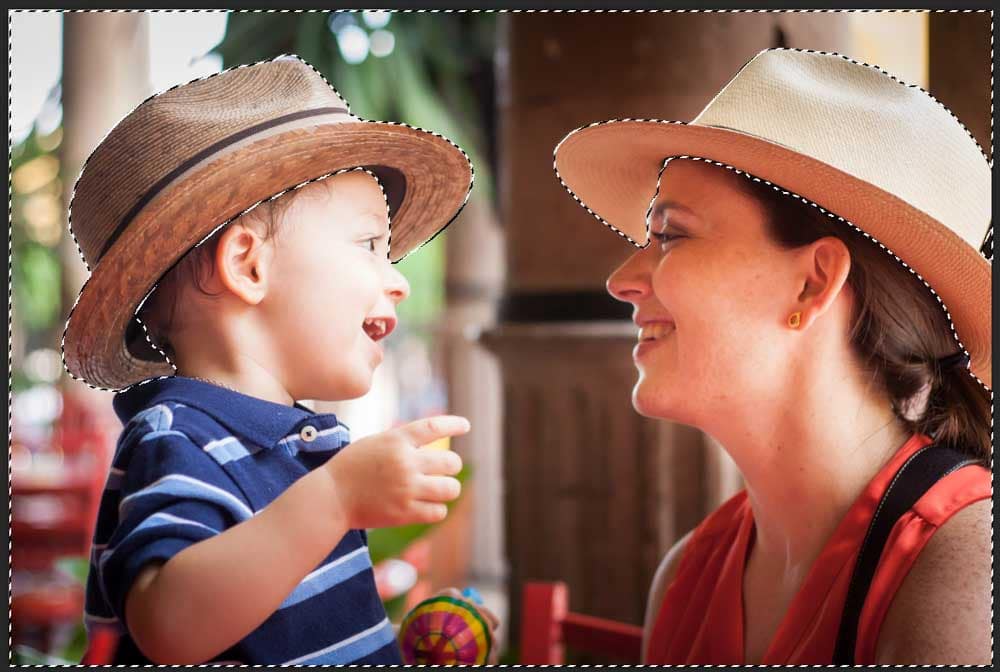
2. Using A Selection
It is also possible to select specific elements in your image to change to black and white. You can do this by selecting objects and only adding the new adjustment layer to those selections.
To convert specific selections to black and white, choose the quick selection tool from the toolbar or press W. The quick selection tool will work on complex-shaped objects.

Select the objects you want to change to black and white by clicking and dragging in the confines of the objects you want to be selected.

Now, add your black and white adjustment layer by selecting the icon at the bottom of the Layers panel and selecting “Black and White…”. Your image will now show the selected areas in black and white.

The areas that have been converted to black and white are shown on the layer mask of the Black & White layer. The white area shows where the new layer has been added and the black area is where the color layer is still visible.

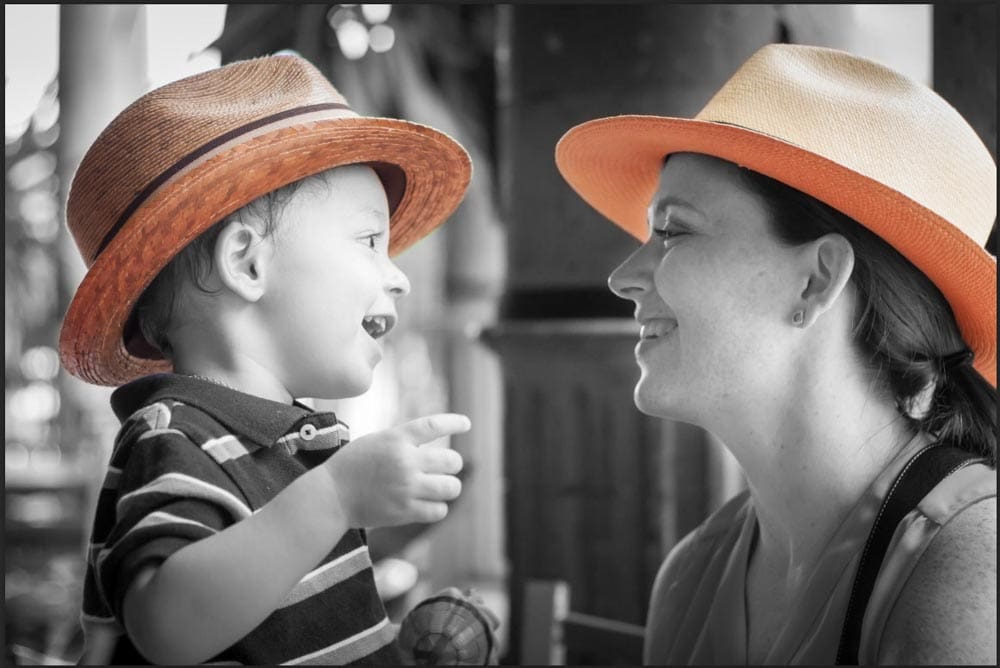
If you want to invert your selection to have the hats in color while the rest of the image is black and white, invert the selection. Once you have made the selection around the hats, navigate to Select > Inverse or press Shift + Control + I (Windows) or Shift + Command + I (Mac).
Now when you add the black and white adjustment layer, the hats will remain in color, with the rest of the image in black and white.
Another way to invert the selection is to select the layer mask. The selection is shown by the white border around the thumbnail. Then press Control + I (Windows) or Command + I (Mac) to invert the black and white areas with the color areas. You will see the change on the layer mask.

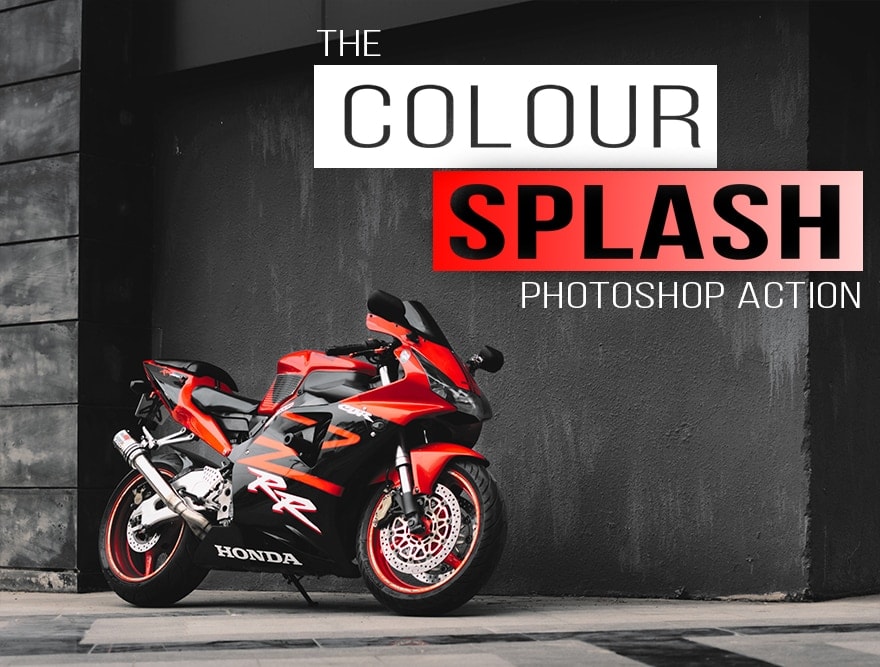
If you want to make certain colors stand out while making the rest of your photo black and white, be sure to check out this Photoshop action which allows you to do the previous steps in a single click! It’s one of the best ways to isolate colors without spending a lot of time editing.
Making Specific Colors Black And White
You can choose certain colors to remain in your image while the rest of the image turns black and white. This creates pops of color in certain places on the photo.
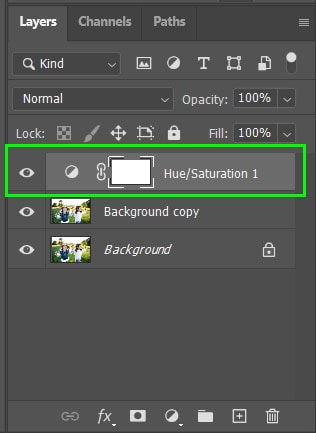
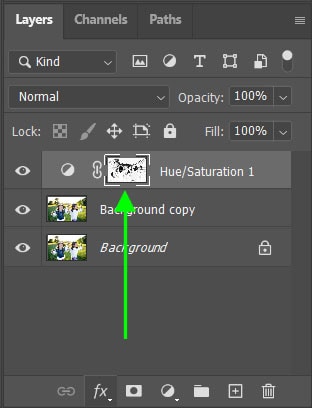
To make specific colors black and white, you need to choose which color range to keep saturated while the rest are converted. Start by adding a Hue/Saturation adjustment layer by selecting it from the Adjustments panel.

You can also select it by clicking on the adjustment icon at the bottom of the Layers panel and choosing “Hue/Saturation…”.

Once the adjustment layer is selected a new layer will appear in the Layers panel. The Properties panel above the Layers panel will show options to adjust the new layer. In this panel select the Masks icon. Then select the Color Range option.
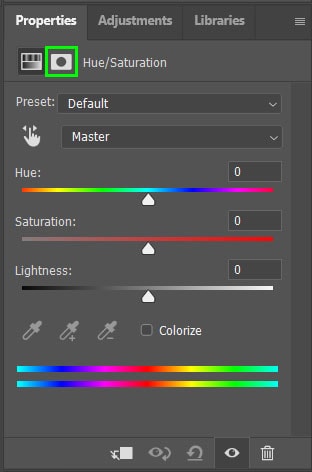
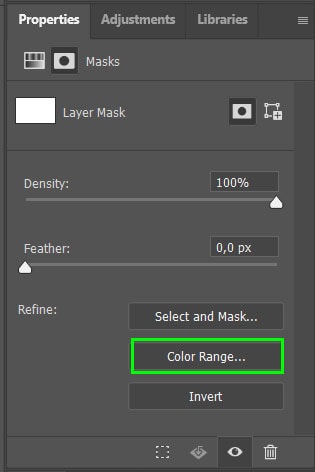
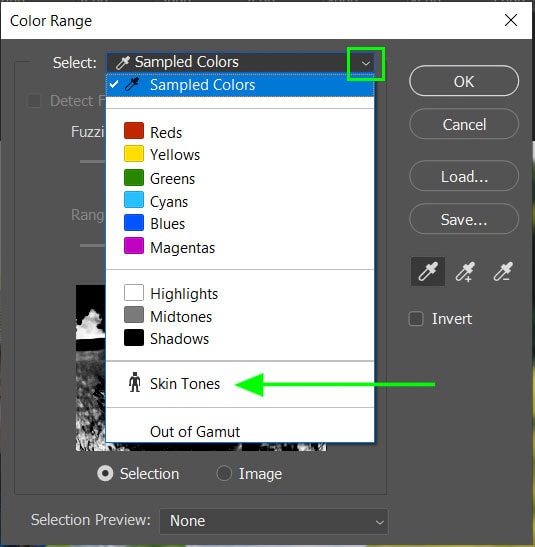
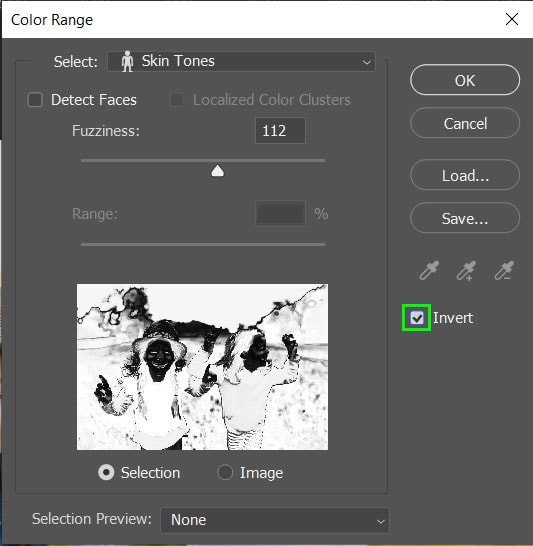
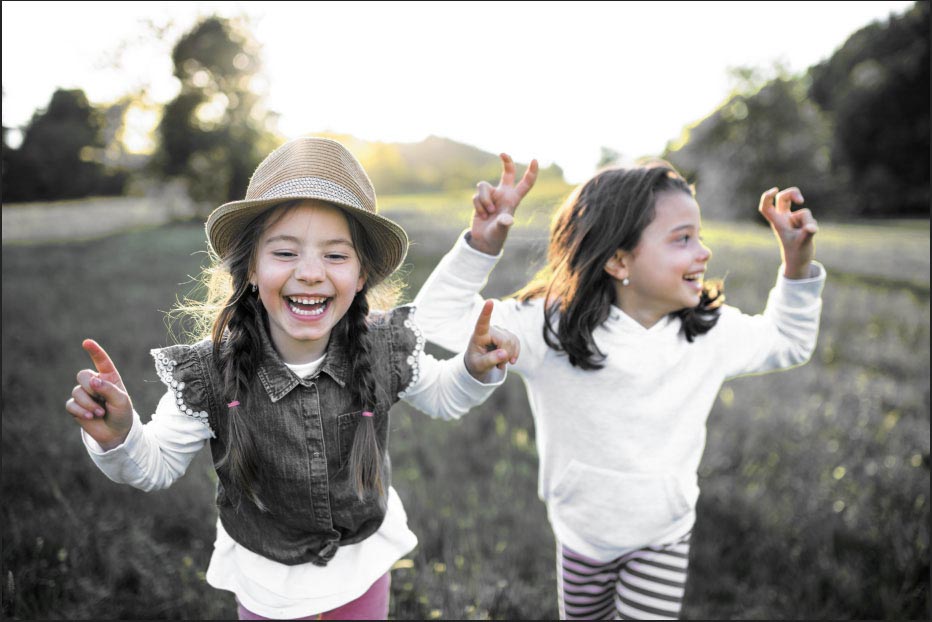
A window will open to allow you to choose the color range you would like to keep in color. Click on the drop-down arrow next to “Select:” and choose the Skin Tones option.
In the same window select the block next to “Invert” to create a selection over all the other colors in the image. Select OK to apply the selection.
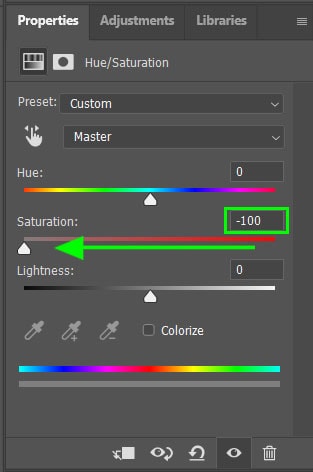
Click on the Hue/Saturation icon to navigate back to the properties for the adjustment layer.

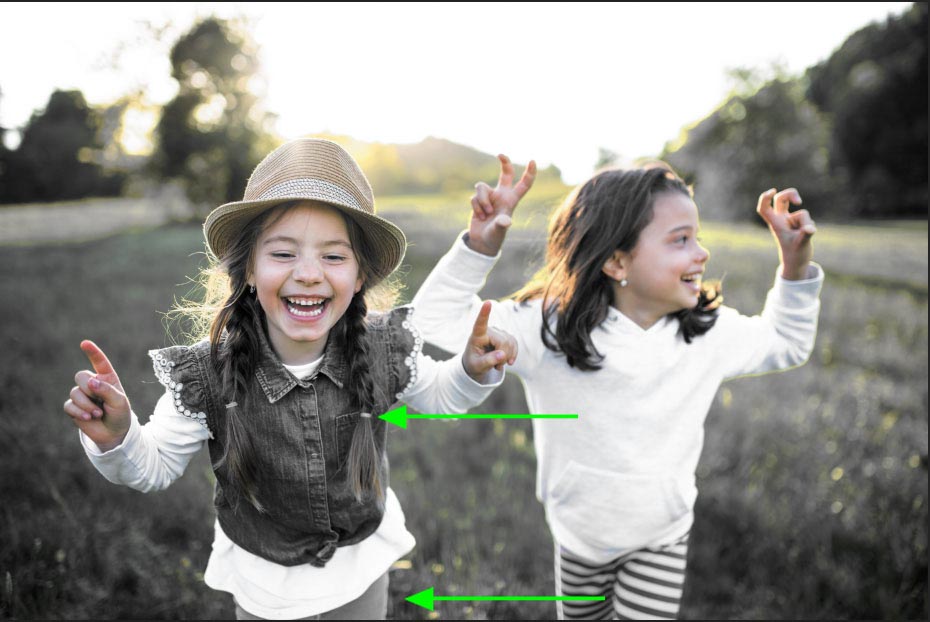
Drag the saturation slider to the left until it reaches -100. This will remove the color in the image from all the areas except for where there are skin tones present. This method doesn’t give you much control over the selected areas.
If the color range has picked up any incorrect colors or kept colors in areas you didn’t want, you can brush these out. The adjustment layer will automatically have a layer mask to show where the bottom layer is still visible.
Select the brush tool from the toolbar and make sure the foreground color is set to white. White will hide pixels from the layer below the layer mask while black will reveal pixels.


Click and drag the brush tool over the areas you want to be converted to black and white. For instance, the pink from the child’s pants and hair ties are now black and white instead of pink.
How To Desaturate An Entire Photo Or Layer In Photoshop
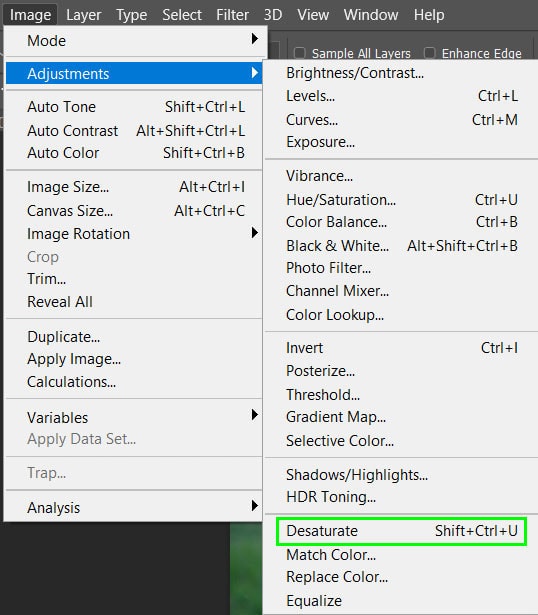
Another quick method of converting your image to black and white is to desaturate the entire image. To desaturate a photo select Image > Adjustments > Desaturate or press Shift + Control + U (Windows) or Shift + Command + U (Mac).
This will convert the layer to black and white by removing all the colors from the image. You will notice that there is no new layer created in the Layers panel since the change is directly applied to the image layer.


The desaturation method is quick and easy without the need for adjustment layers. Layers can get confusing for beginners using the program and it is sometimes easier to just directly edit the layer.
Using the desaturation method prevents you from changing the adjustment as you would be able to when creating a new adjustment layer.
This method will also limit the editing capabilities and it becomes a form of destructive editing. This means you will not be able to remove this edit later on in the project without deleting all your progress.
With these options for turning your images to black and white in Photoshop, you can pick whatever method works best for you. If you are wanting to isolate colors in Photoshop, make sure to check out my Color Splash Photoshop Action that allows you to isolate colors in a single click.
Happy Editing!


