

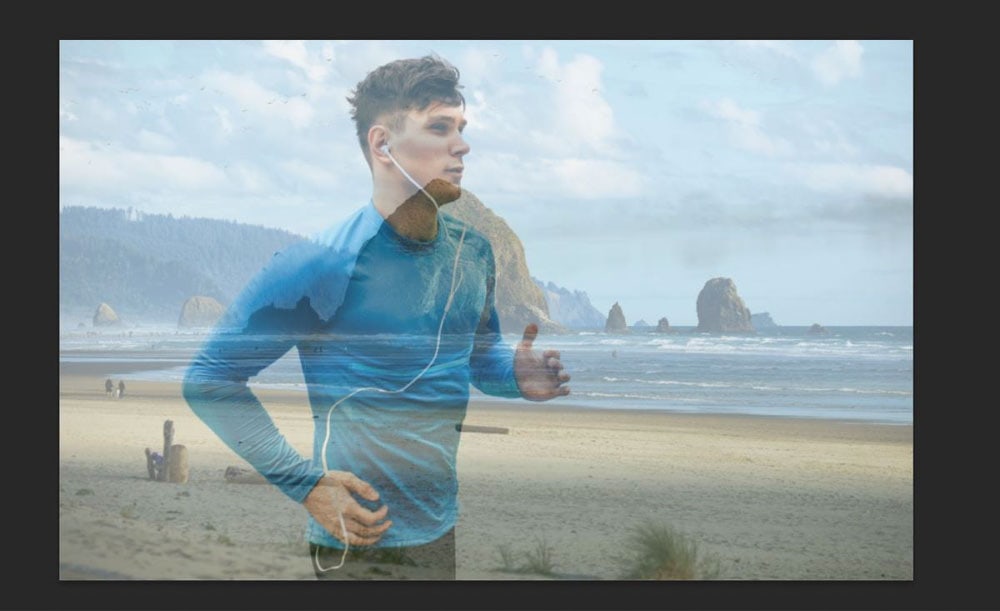
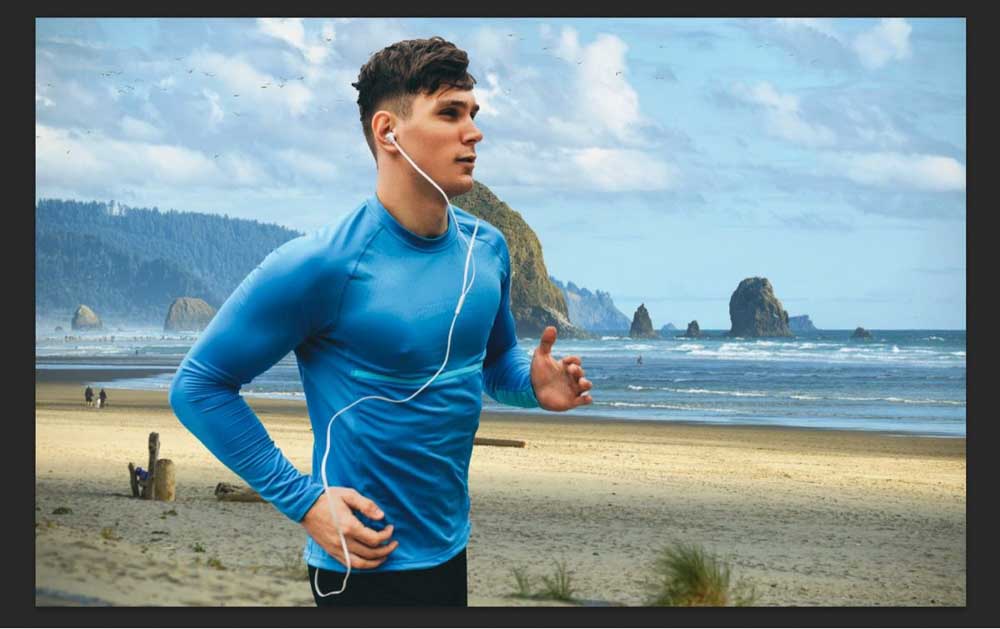
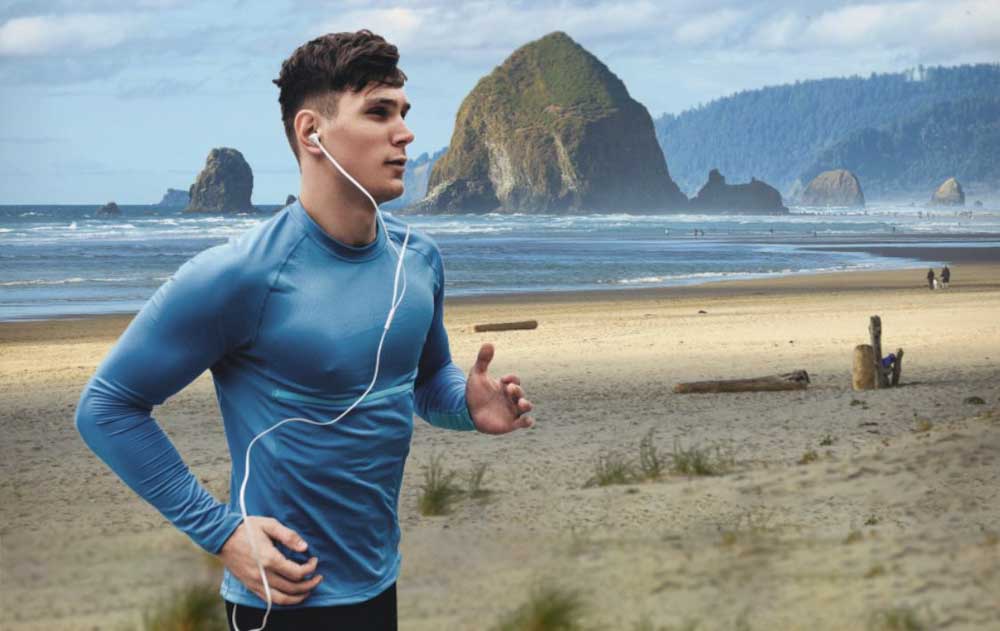
Changing the background of an image in Photoshop used to be a painstaking process. You would have to use the Pen Tool to select your subject, and it would take so long that you wouldn’t be able to feel your wrist afterward. Fortunately for you, there’s excellent news! Nowadays, you can save your wrist by learning how to change a background in Photoshop using AI tools to help you.
Today you will learn how to use Photoshop’s AI to select your subject and adjust your light source and line up your horizon lines. You will learn how to use Content-aware Fill to “complete” your edited background and how to add depth of field with a blur effect. You will also learn how to adjust your color matching, so your final image looks natural. Lastly, you’ll learn a fast and easy way to change the background color of your photo.
How To Change The Background Of A Photo In Photoshop
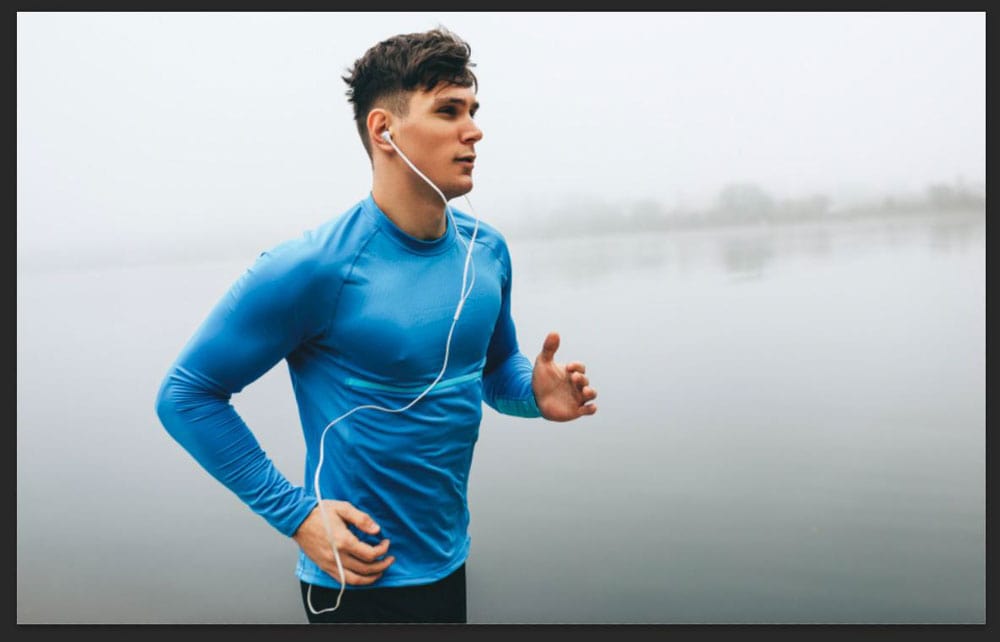
Believe it or not, you don’t have to be a Photoshop master to change the background of a photo realistically. By the end of this segment, you’ll know everything you need to know to be a background swapping pro.
Step 1: Setup The New Background
The first step of changing a background in Photoshop is to line up the new background on your canvas.
To start, go to File > Place Embedded. You will be prompted to add a photo to your project from your computer. Once you find the right image, select it and click Place.

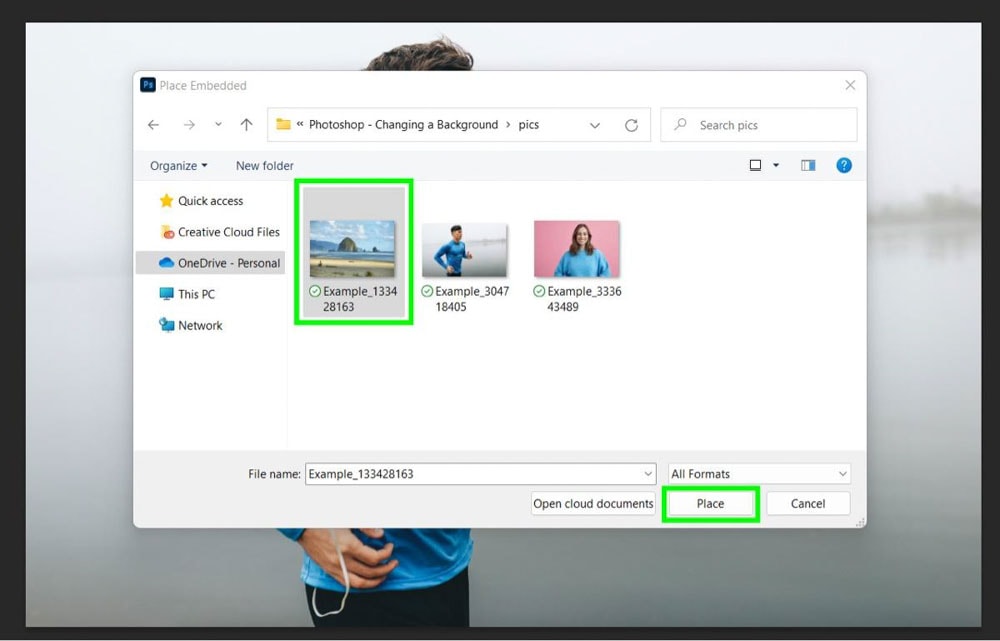
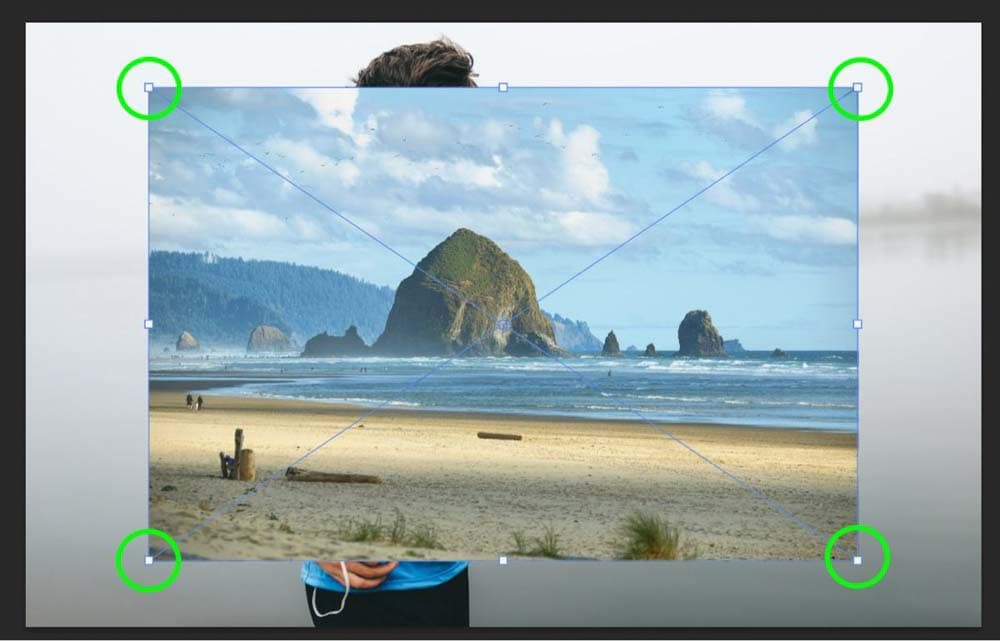
This action places your background image in the middle of your canvas. Use the Corner Handles to expand the image to fill the frame.
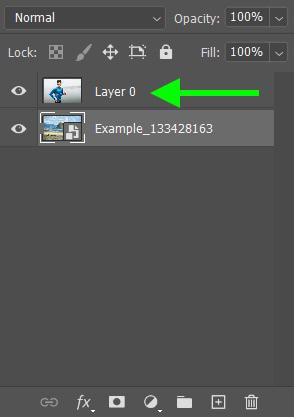
Now that you know roughly how the new background will look, you need to place the new layer behind the original.
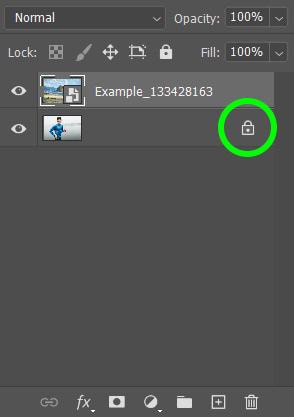
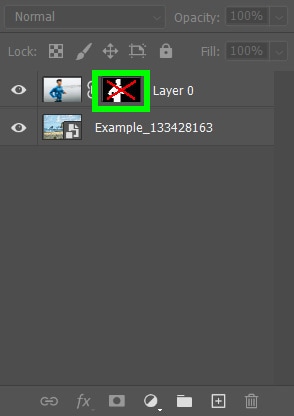
First, unlock your original layer by clicking on the Lock icon. Drag the original layer above the new one.
Step 2: Select Your Subject Using Select And Mask
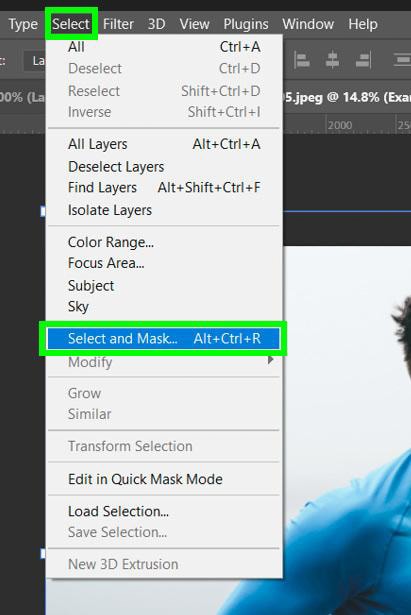
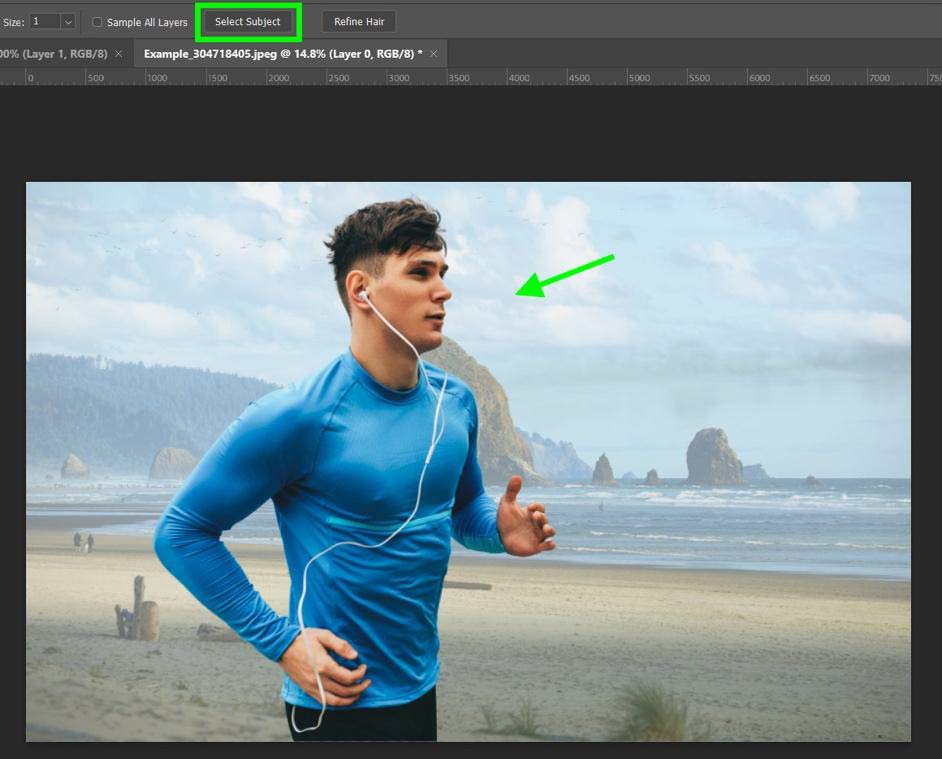
Now that your background is all set, you need to isolate the subject of your original image so you can remove the old background and reveal the new background. It might sound confusing, but trust me, it’s not. There are many ways to select the subject, such as using the Quick Selection Tool, or you can use the Select and Mask workspace.
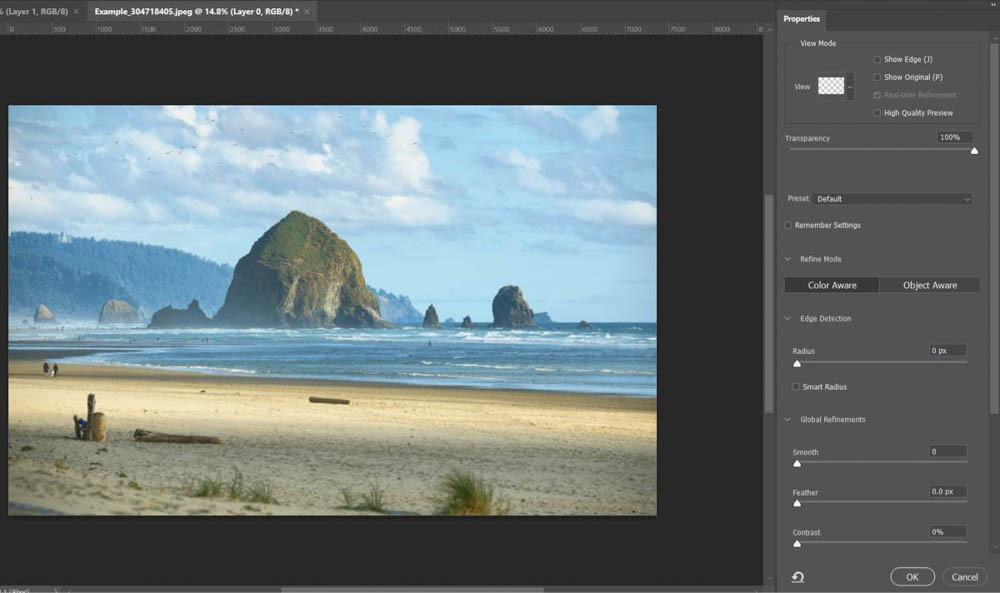
First, make sure your new background image layer is selected, and then go to Select > Select and Mask.
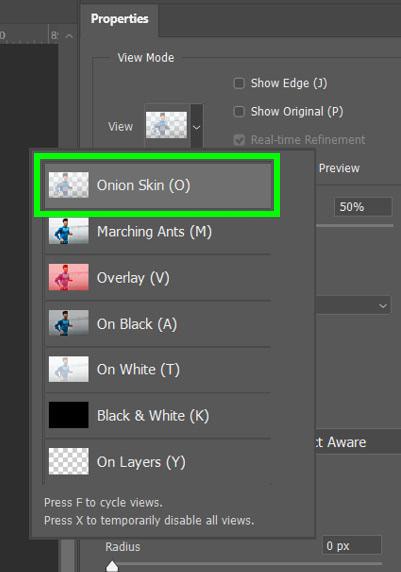
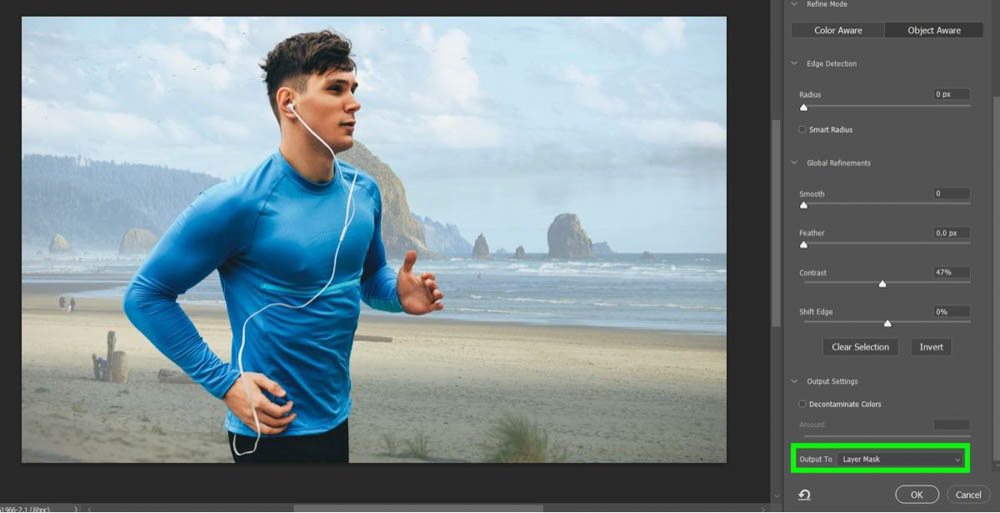
The Select And Mask Workspace will pop up. What you can see in the Preview Window depends on what View is selected and the Transparency.
Your View will be Onion Skin by default. This setting will only show pixels that are selected.
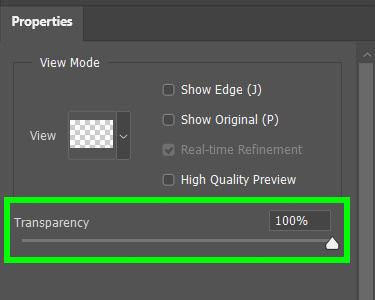
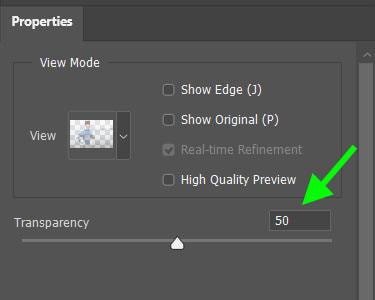
If you want to see your old and new images blended, bring your transparency to 50% or lower.
Once you’re ready to select your subject, click Select Subject.
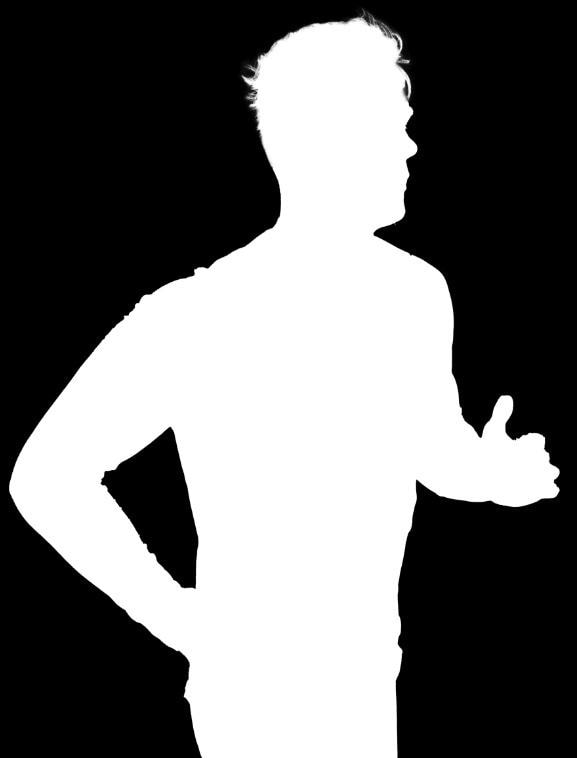
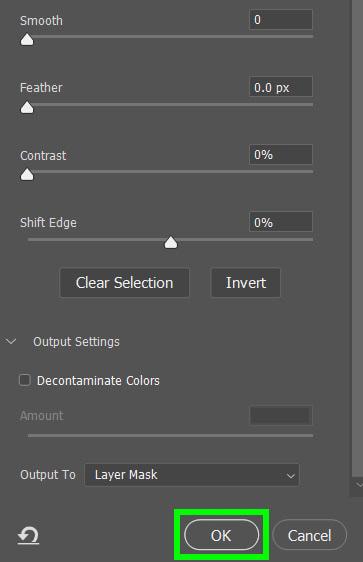
Once your subject is selected, you can double-check the selection by changing the view to Black & White. Your subject will be filled with white with a black background. Depending on your image, the On White or On Black option may work better for your refinements in the following steps.
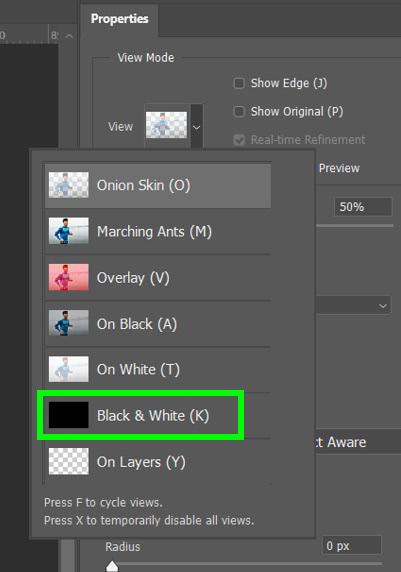
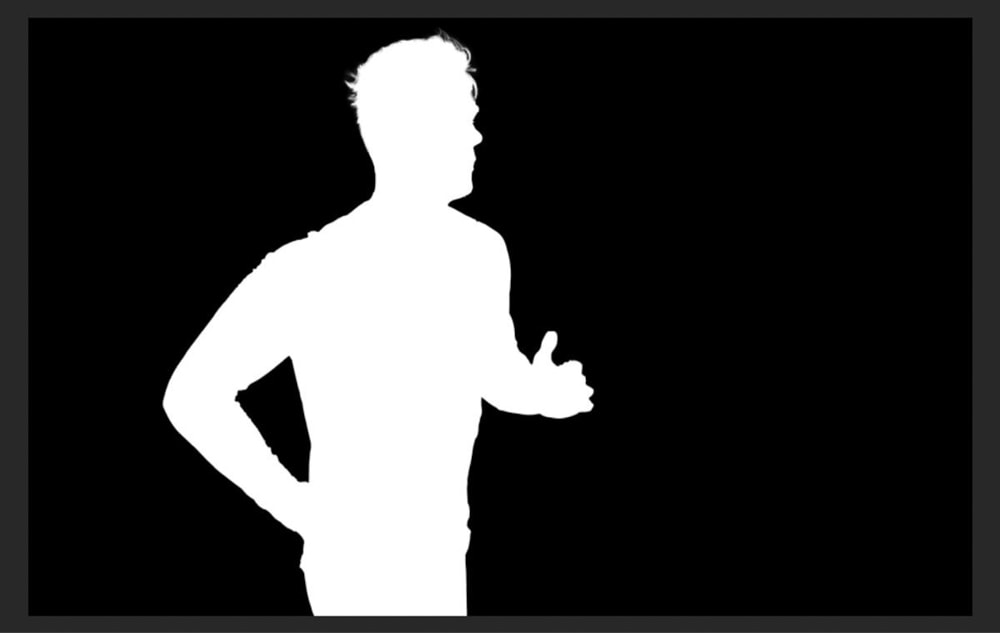
Once in the Black & White view, double-check the edges of your entire mask. If there are places in your mask that look off, the best setting to adjust is the Contrast in the Global Refinements.
This will make your mask tighter and sharper. Click Ok when you are finished. I share more detail on how to smooth the edges of a selection here if you’re new to select and mask.

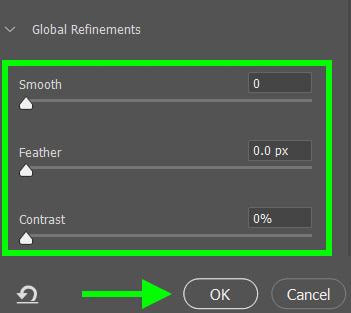
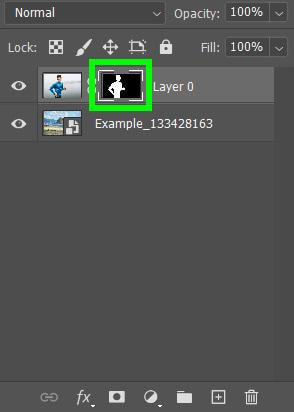
Now that your subject is fully selected change Output To from Selection to Layer Mask. This will create an editable layer mask that you can turn off and on.
Step 3: Check Your Light Source
Now it’s time to think about the technical stuff.
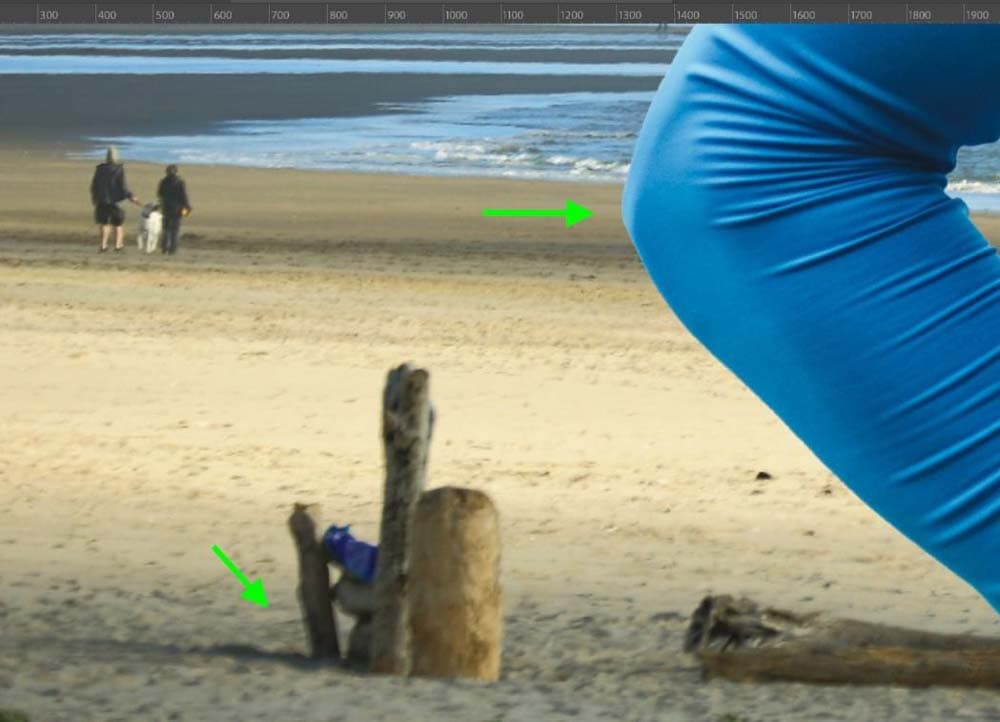
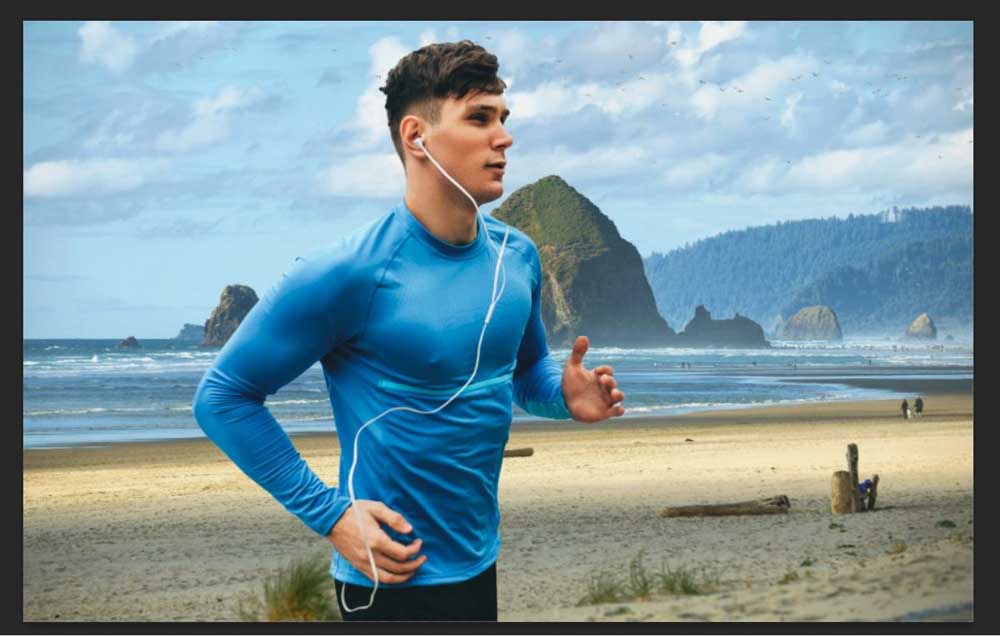
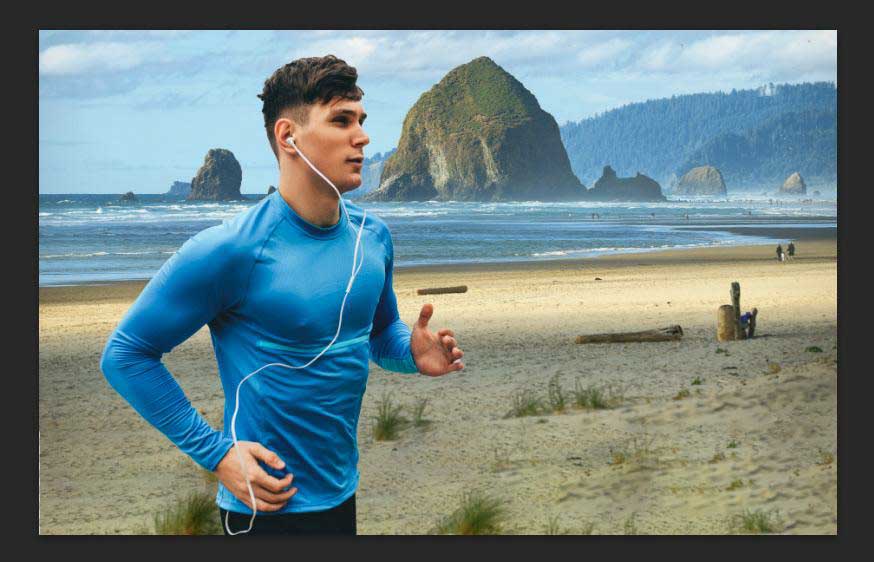
First up, ensure your light source is consistent by zooming into the background and studying the shadows.
In my example below, the shadow on the ground is casting to the left, so the sun is hitting it from the right. Meanwhile, on my subject’s elbow, the sun is hitting it from the left.
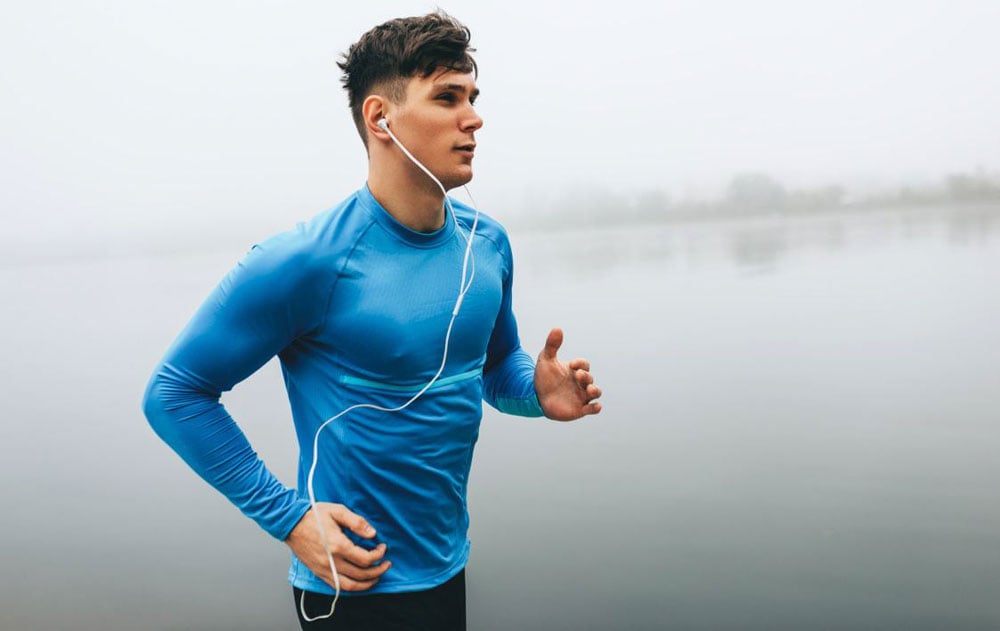
These issues will happen, and the easiest way to handle them is to flip the background.
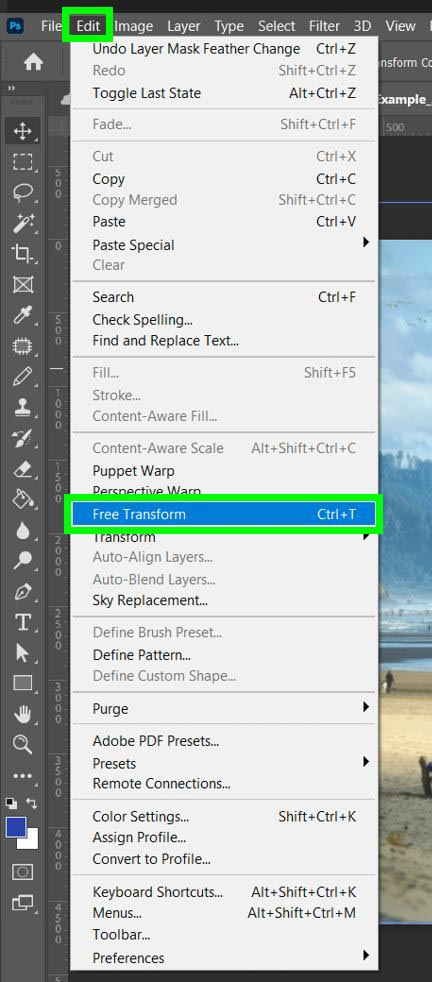
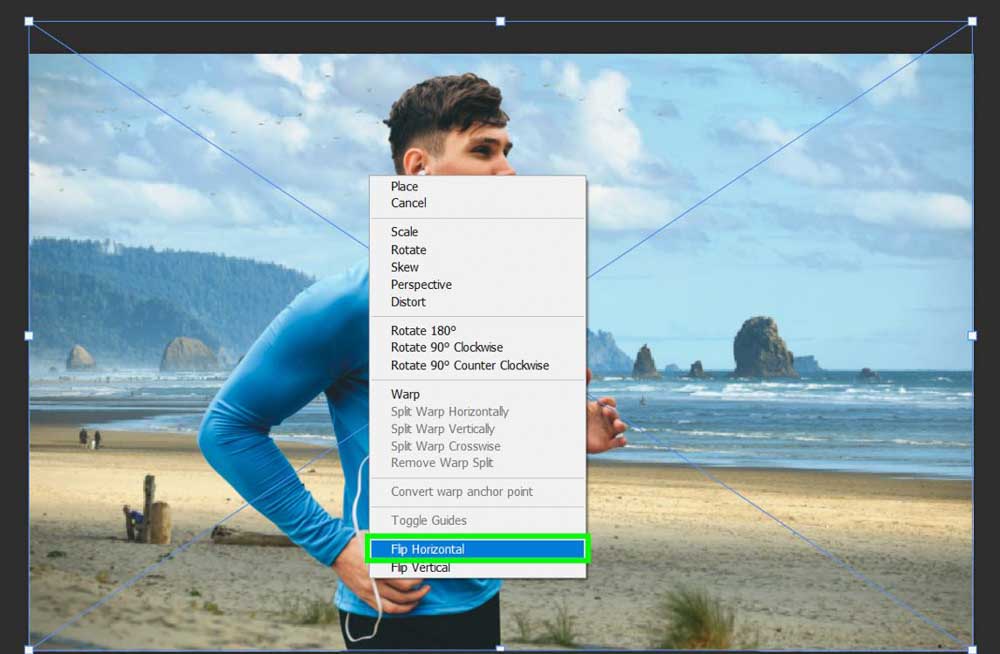
To flip the background, select the background layer and go to Edit > Free Transform, or press Control + T (Win) or Command + T (Mac).
With your background layer in free transform mode, right-click (Win) or Command + Click (Mac) on the background and select Flip Horizontal. Now your light source will be in the right direction.
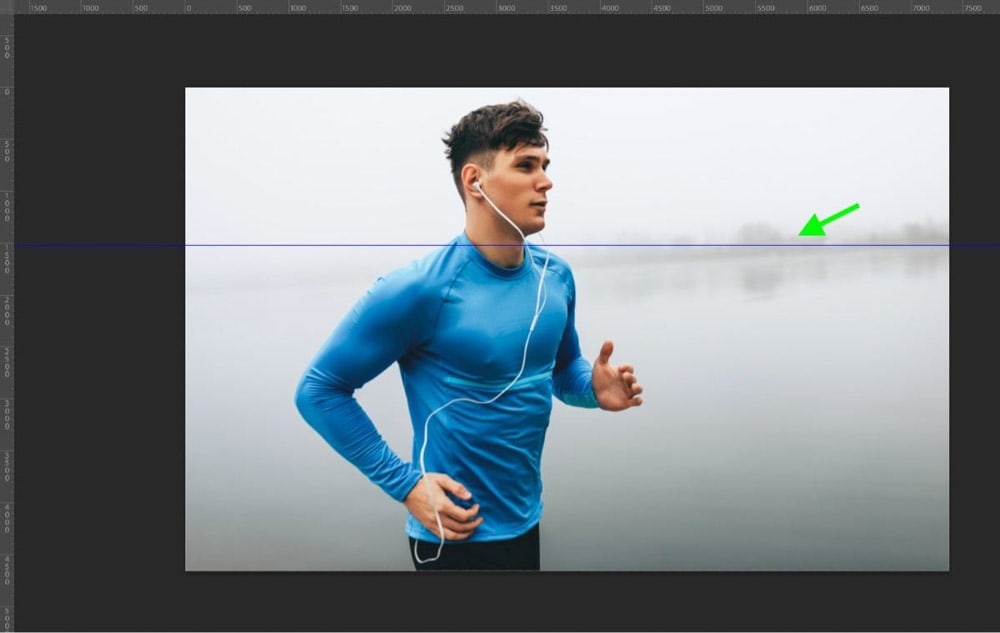
Step 4: Match Your Horizon Lines
This is another technical issue that may not seem important, but it can make a huge difference visually.
To start, turn off your mask by holding the Shift Key and clicking on your mask. A red X will indicate that the mask has been turned off. This will reveal your old background.
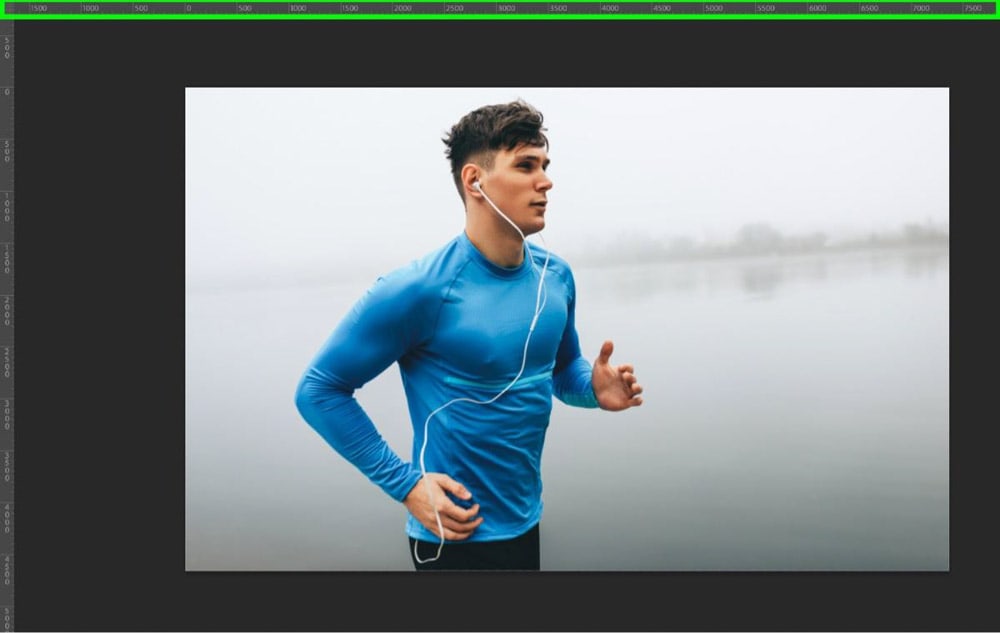
With your old background back, you can determine the horizon line by dragging a Ruler Line from the top Ruler down to the horizon line.
Press Control + R (Win) or Command + R (Mac) if the rulers aren’t visible in your window to reveal them.
Click and hold on to the Ruler and drag down a Ruler Line to where the ground plane meets the sky plane in your image. That’s your horizon line. It doesn’t have to be perfect, you can eyeball it.
Your horizon line is now marked, and you can now bring back your new background by holding Shift and clicking on the mask again.
Now you need to find the horizon line in the new background. Do the same thing as before: find where the ground plane of your image meets where the sky plane ends.
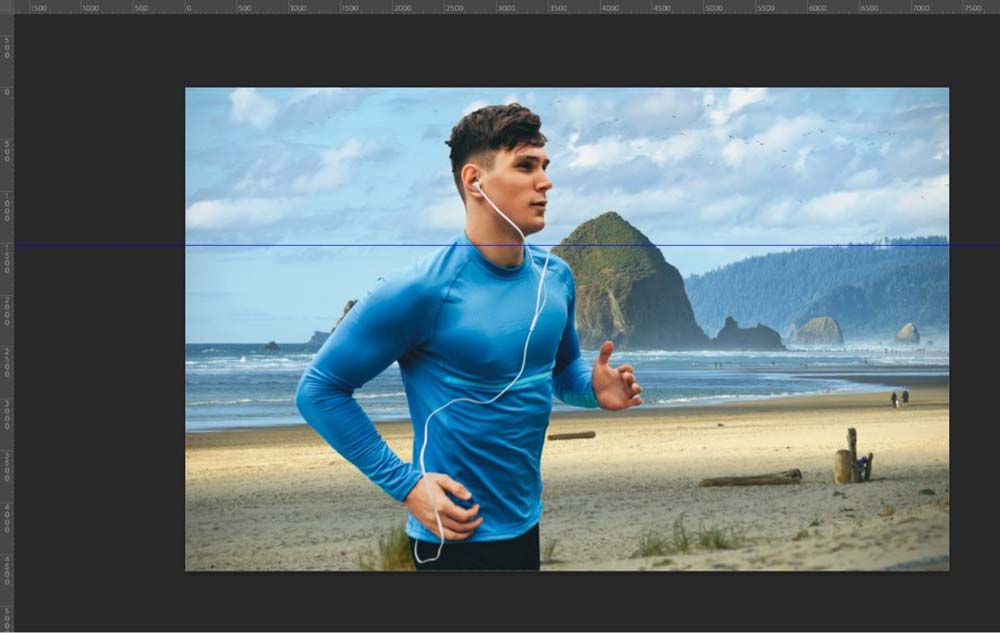
Now that you’ve identified your second horizon line, select the Move Tool (V), click on your new background, and line the two horizon lines together. This doesn’t have to be perfect, you can eyeball this.
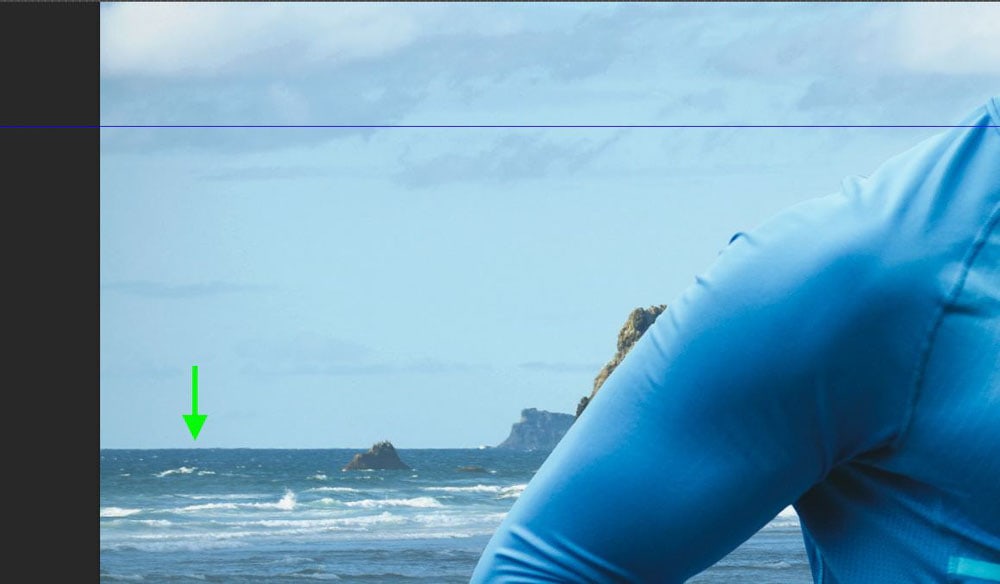
You can then remove your Ruler Line by clicking it and dragging it back to the Ruler.
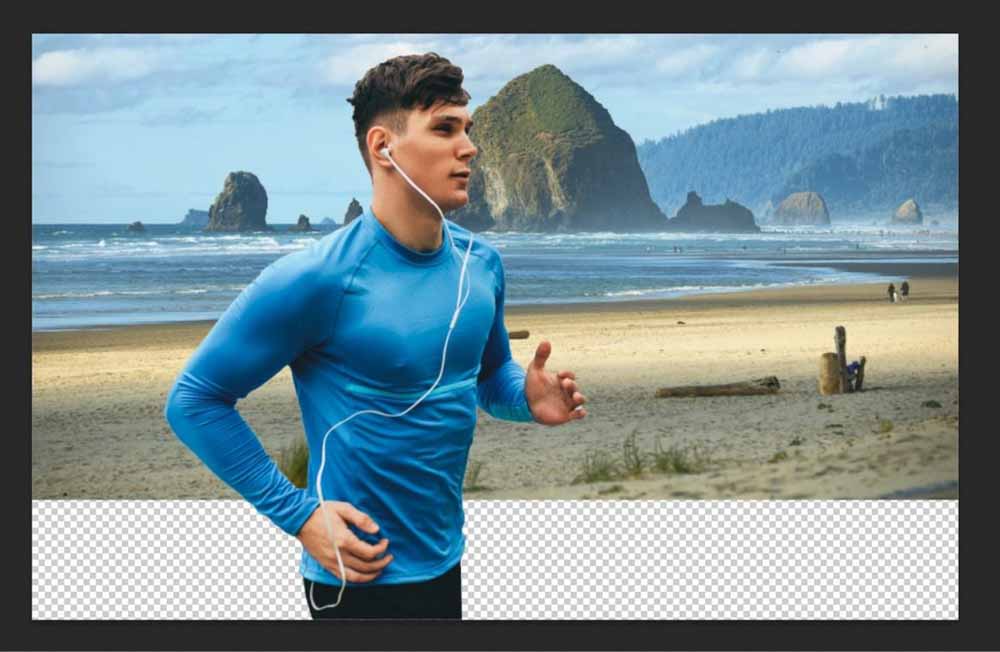
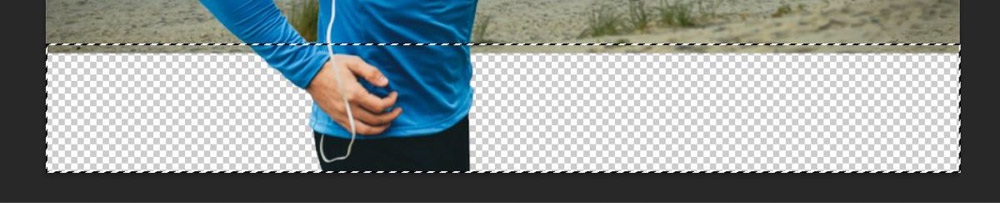
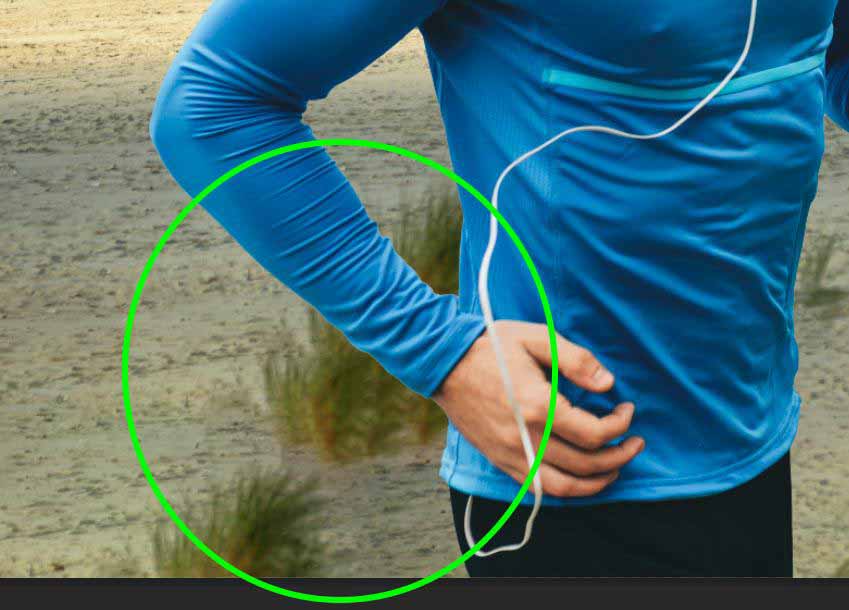
Perfect! Except for the chunk of missing pixels in your photo. To fix this, you will be using content-aware fill to duplicate the area and fill in the space.
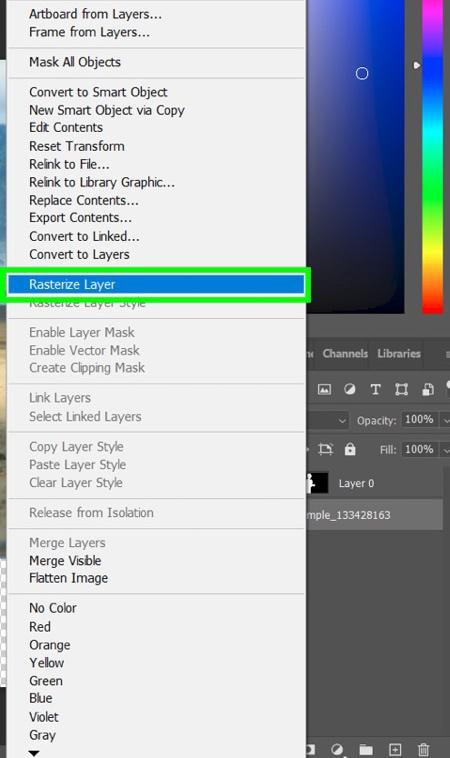
First, rasterize your background by right-clicking (Win) or Control + clicking (Mac) on the layer and selecting Rasterize Layer.
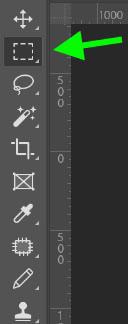
Next, clean up the edge of where you’ll be filling in. You can use the Patch Tool (J) to quickly remove anything you don’t want to be duplicated when you fill in the space.

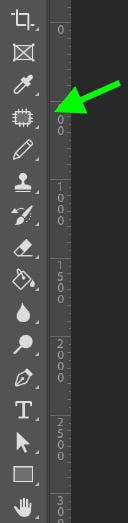

Next, select the Square Marquee Tool (M) and select the gap in your image. Make sure to select some of the pixels against the edge as well.
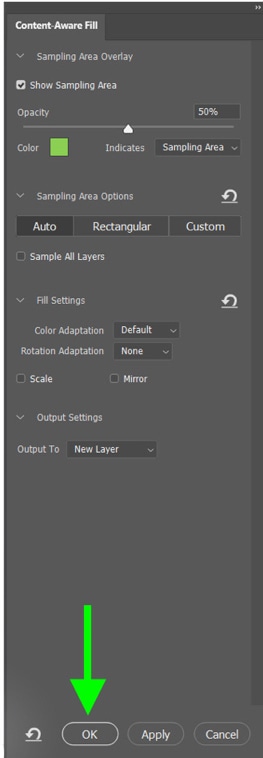
Here’s where the magic happens. Select Edit > Content-Aware Fill. This will open a workspace where you can preview what your background is going to look like. I share how content-aware fill works more in-depth here.
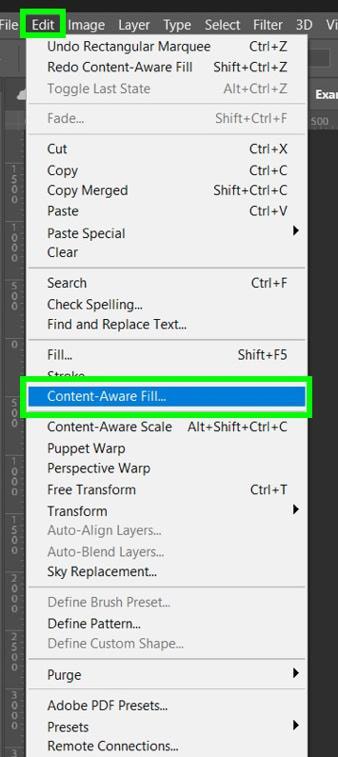
If everything looks good, click OK. Deselect your selection by pressing Control + D (Win) or Command + D (Mac).
If you find any flaws in your background at this point, you can fix them with the Patch Tool, or you can move your subject layer with the Move Tool to hide anything you don’t want to be seen.
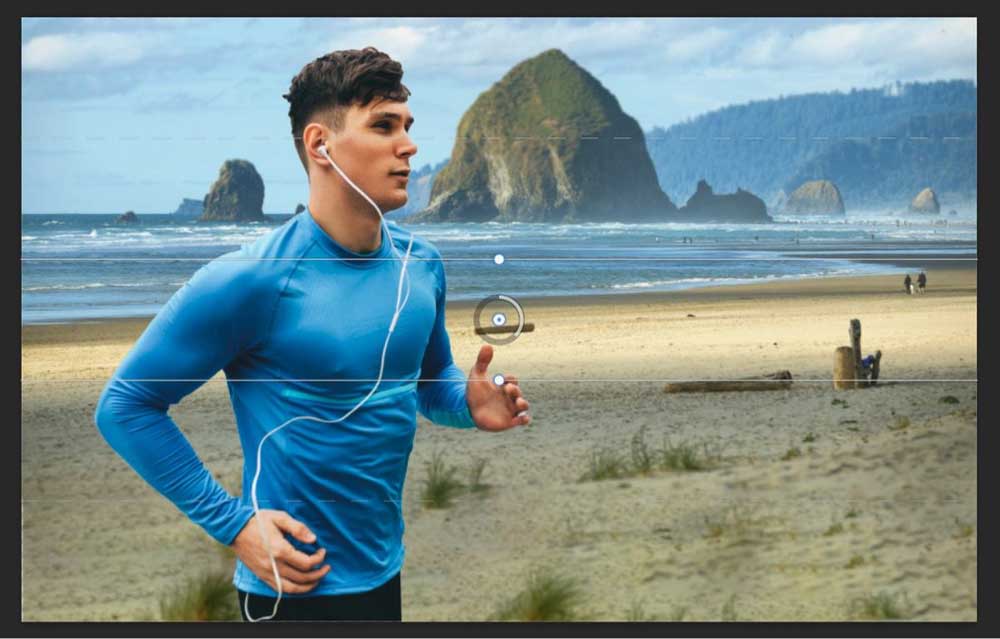
Step 5: Add Depth of Field (Optional)
This step is optional, but if you want to put more of a focus on your subject, you can add a blur effect.
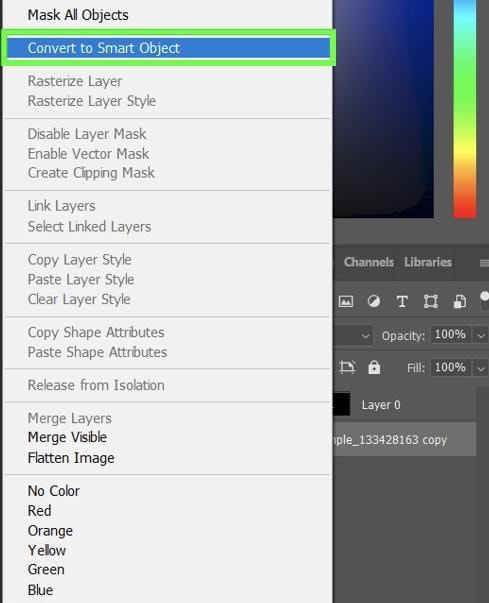
To start, right-click on the background and select Convert To Smart Object. This will let you adjust your blur effect.
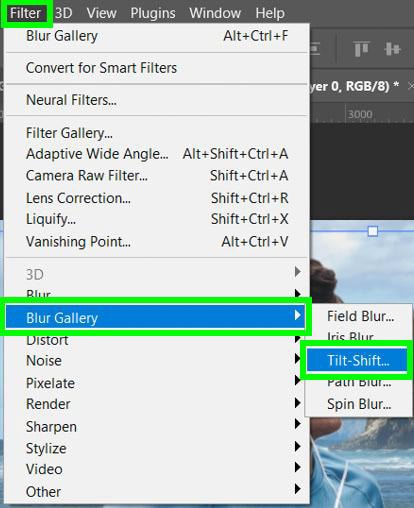
Then, go to Filter > Blur Gallery > Tilt-Shift to add your blur effect.
The best way to show you how the Tilt Shift effect works is for me to turn the Opacity all the way up. Take a look at what happens.
Everything outside the solid lines begins to blur, and pixels beyond the dotted lines are completely blurred. The blur trails off toward the solid lines.
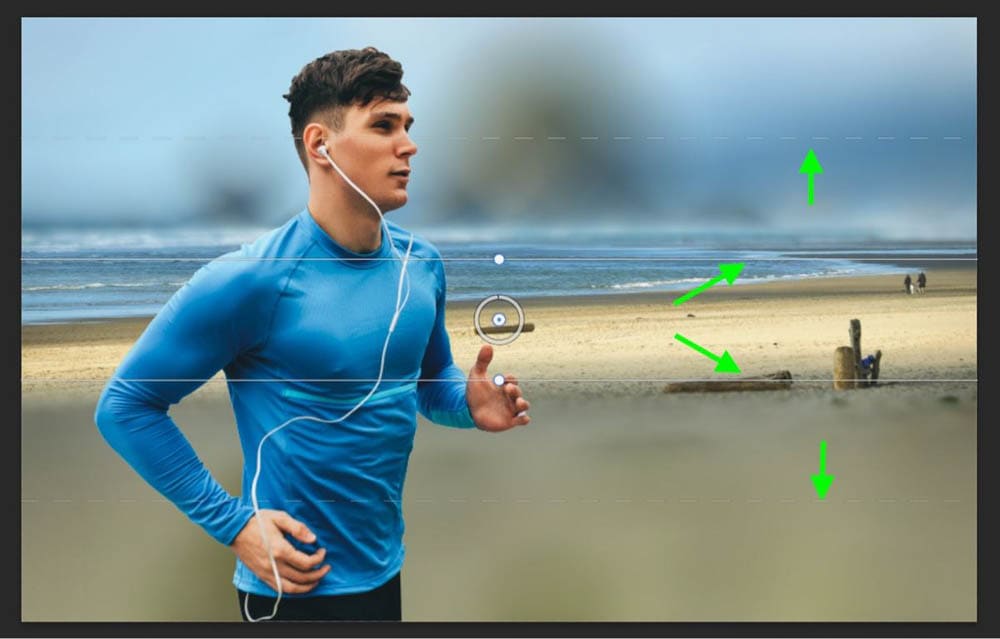
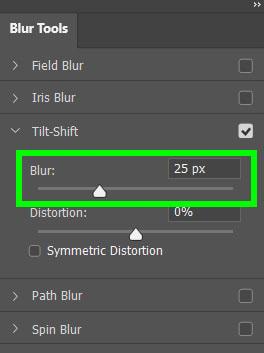
You can adjust the Blur with the Blur Slider. Where you set it depends on your project and how much you want to blur the background.
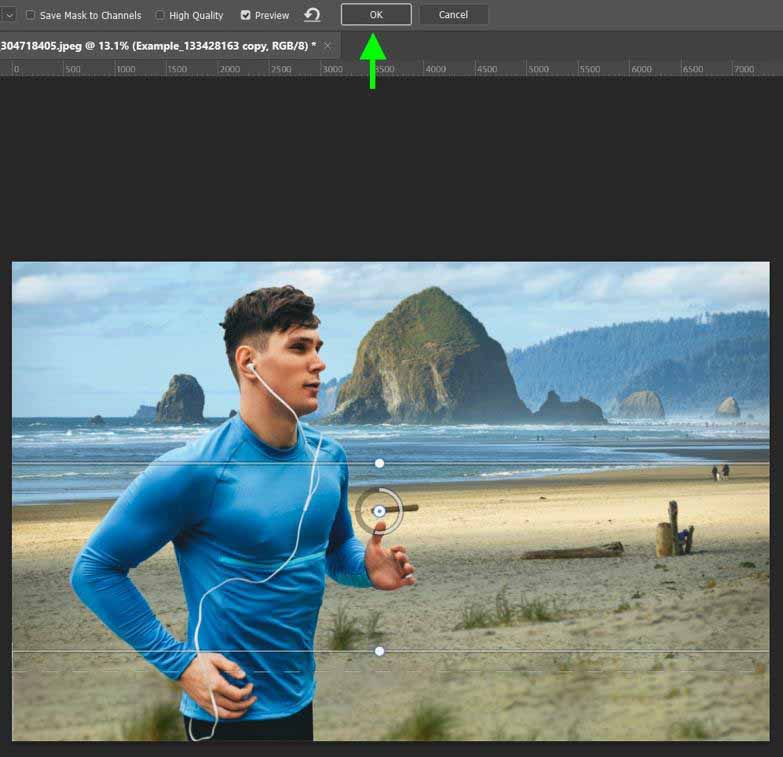
When you’re done adjusting the blur, click OK.
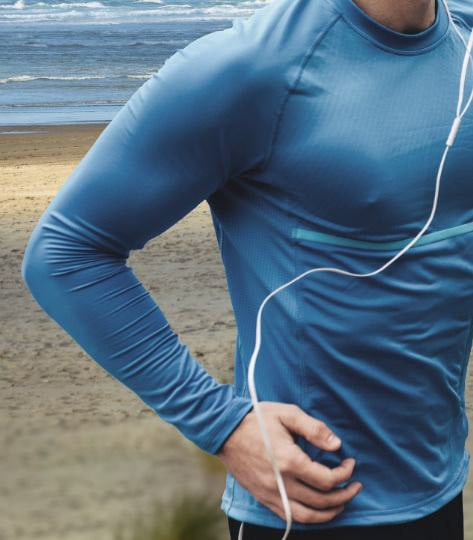
Step 6: Adjust Your Color Matching
To ensure that your subject blends in with the new background, you need to match the colors between both images.
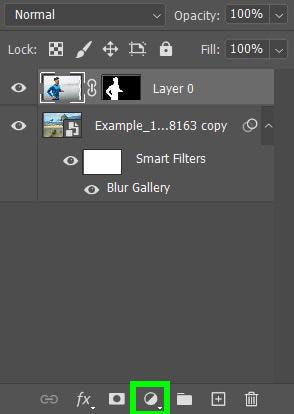
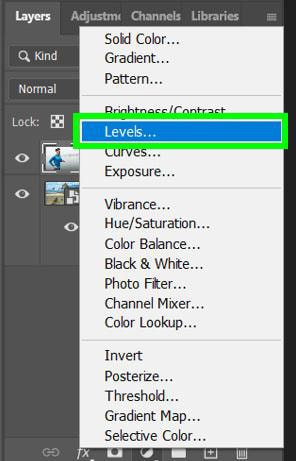
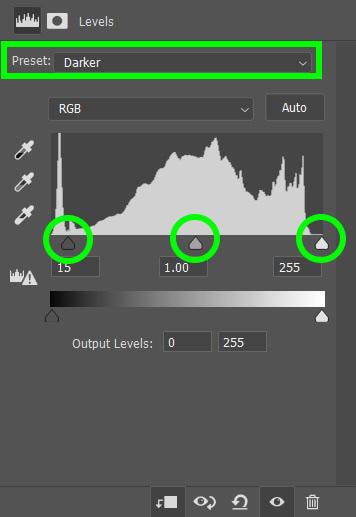
The first step is to adjust the Levels. Do this by selecting the subject layer and clicking on the New Adjustment Layer Button. Then, select Levels.
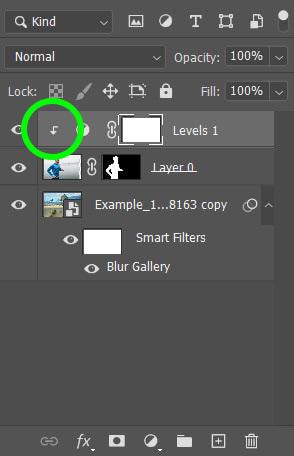
Before adjusting, click on the Clipping Mask Button in the Levels Properties Menu. This will ensure that your Level Adjustments will only affect your subject’s layer. This is indicated by the arrow pointing down in the Layers panel.
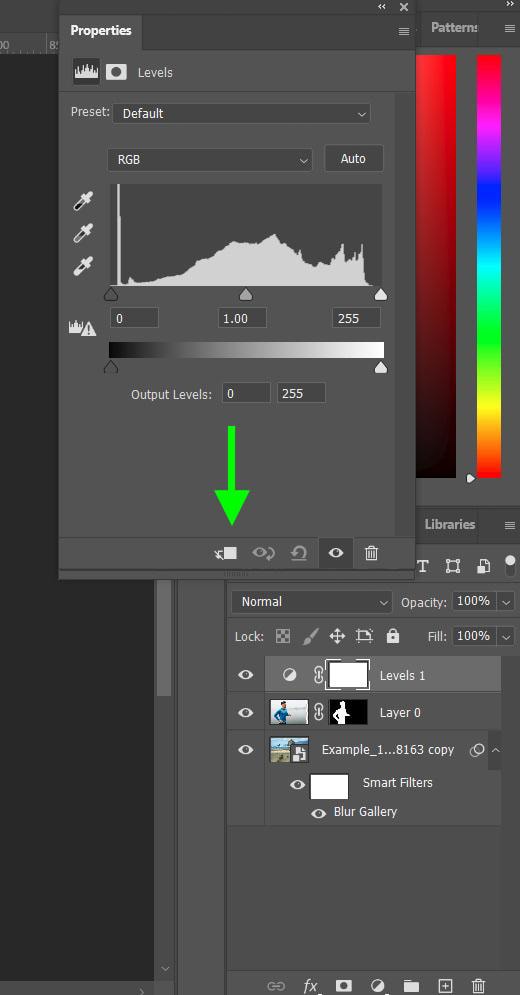
There are two ways you can adjust the Levels for your subject. You can pick a preset from the Drop Down Menu or just start moving the sliders around and experimenting. This all depends on your project, and you’ll know what works when you see it.

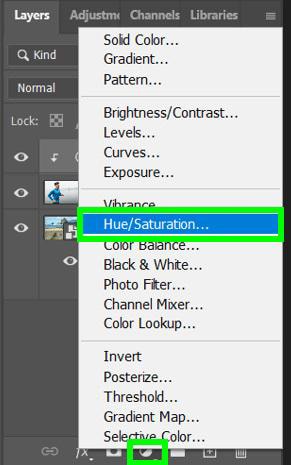
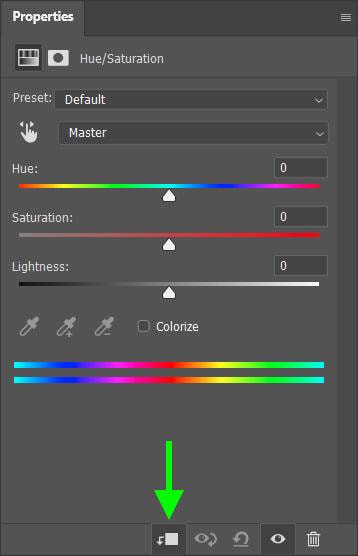
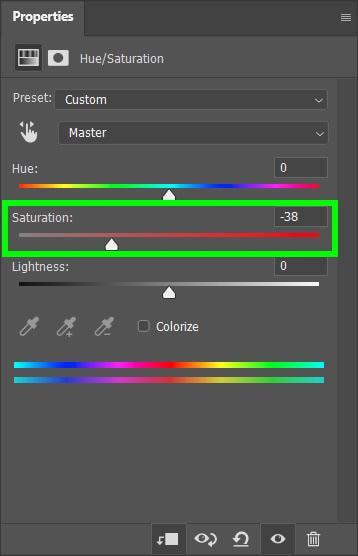
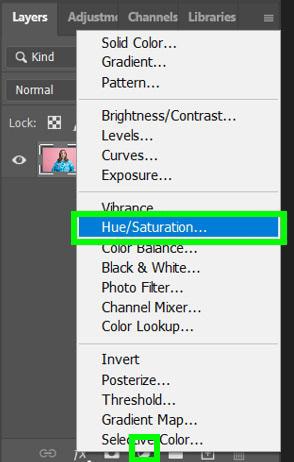
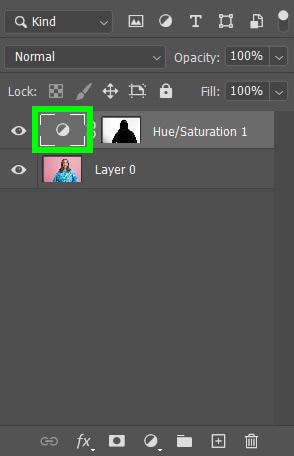
The next color matching adjustment you should make is a saturation adjustment. Do this by selecting the subject layer and adding a Hue/Saturation layer with the New Adjustment Layer Button.
First, click the Clipping Mask Button, then adjust the Saturation Slider until your subject blends in better with the background.

Step 7: Apply A Global Adjustment
Unless you’re a color theorist, you will probably make some mistakes matching the color. Applying a global adjustment is like an Instagram filter that can clean up most of your mistakes.
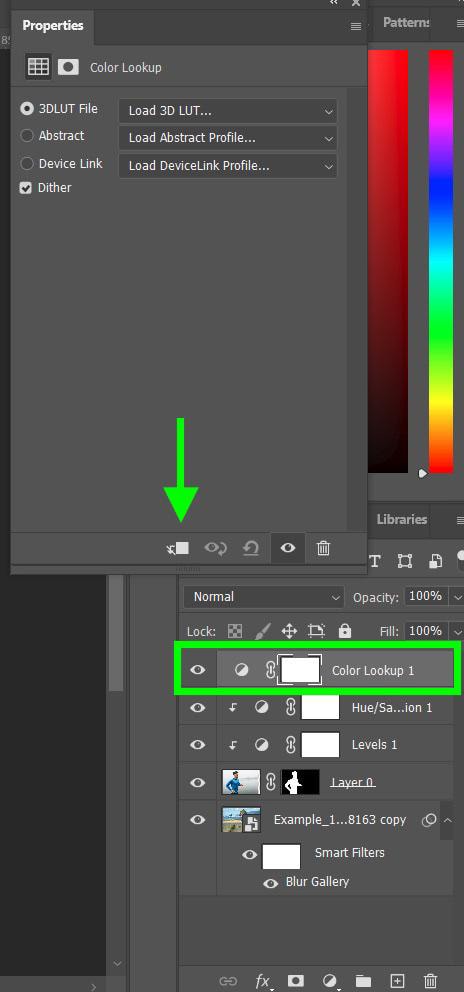
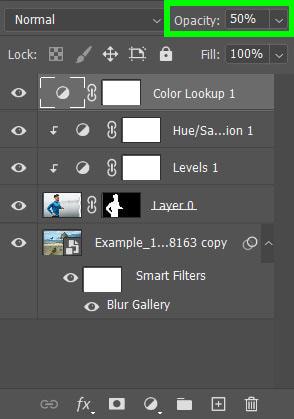
To start, select Color Lookup with the New Adjustment Button. Make sure that this new layer you’re adding is not clipped to any other layer by dragging it to the top of the Layers panel. This way, the Color Lookup will adjust the entire image.

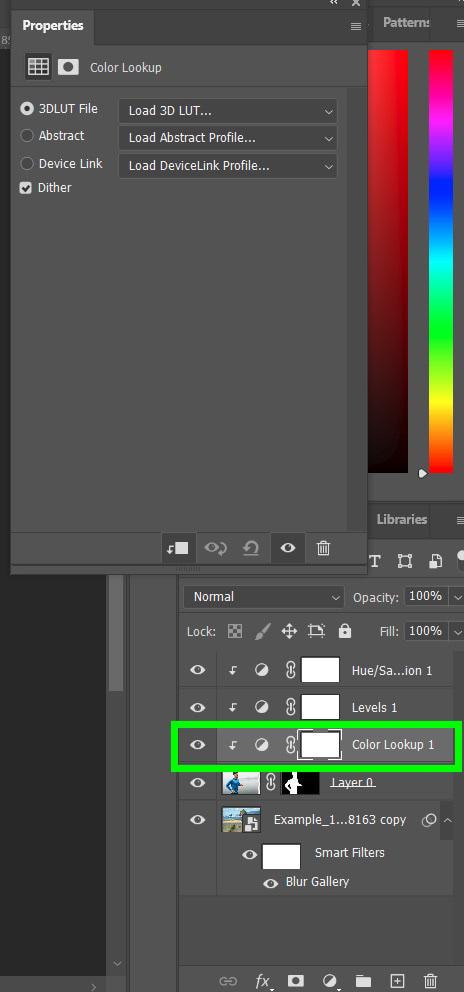
The setting that matters here is the 3DLUT File. Here’s a trick to use it faster. Instead of opening up the Drop Down Menu, just click on it and press the Down Key to cycle through the options until you find the right one for your image.
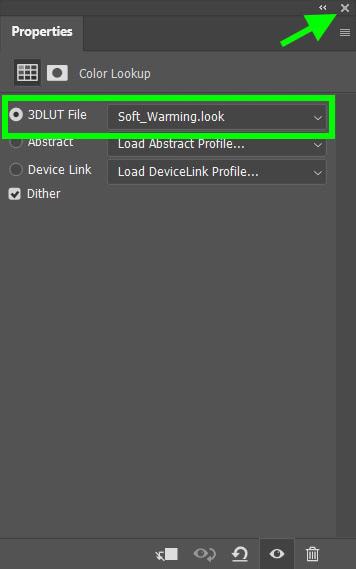
Once you find the perfect 3DLUT File, you can adjust the Opacity in the Layers panel.
Step 8: Feather Your Edges
Now that all of the big edits and adjustments are done, you can add the tiny touches that help sell the effect. One of those tiny touches is to feather your subject’s mask.
To do this, click on the subject’s mask in the Layers panel to open up the options. Adjust the Feather Slider in the Properties panel until your subject looks more blended into the background.
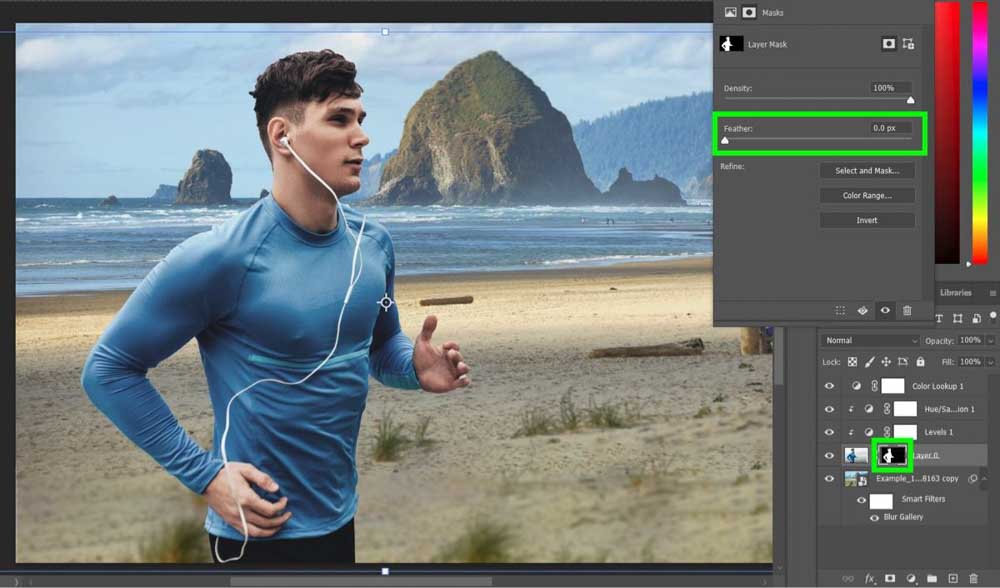
Adjusting the Feather Slider will blur the edges of the subject’s mask. Sometimes the blur will barely look like it did anything, and other times it will make all the difference.

Step 9: Clean Up Your Mask
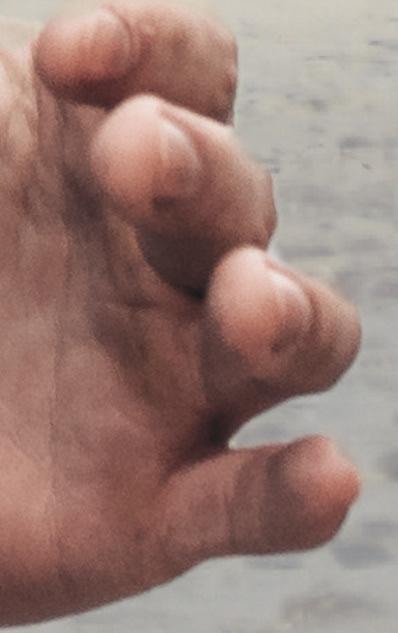
You’ve made many different edits and adjustments so far, and at this point, you may notice some flaws in your mask.
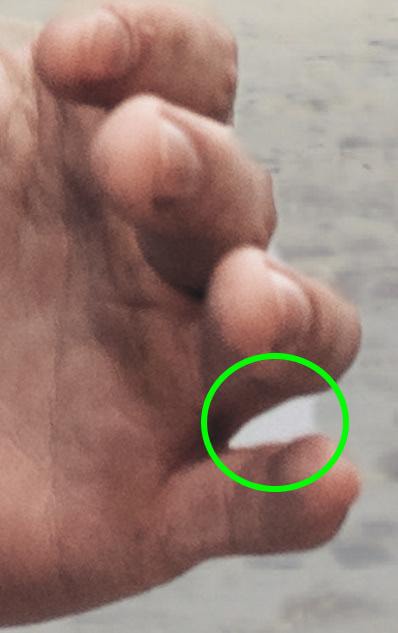
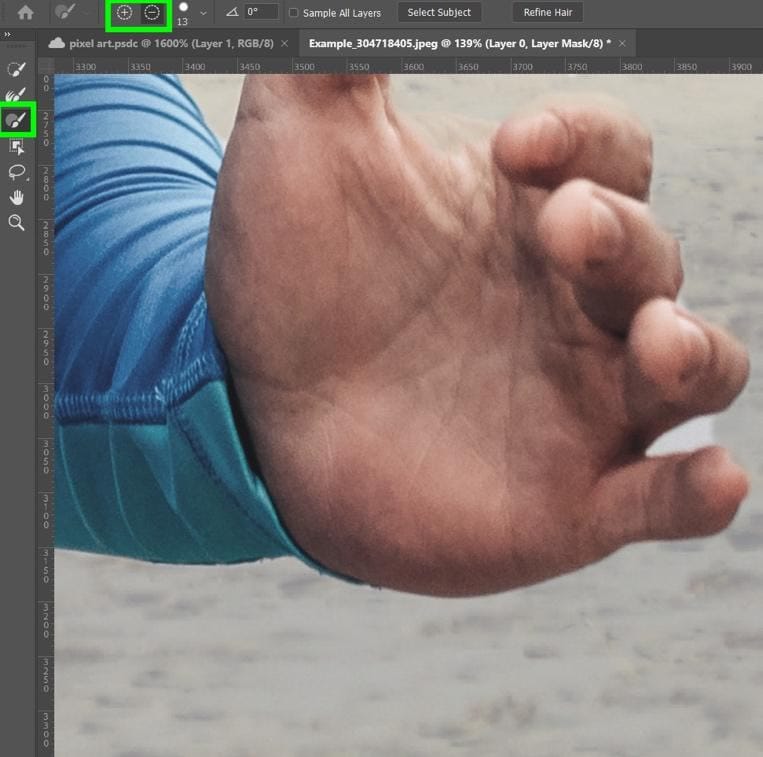
To fix these flaws, click on the mask thumbnail to open the Layer Mask Properties Menu and click Select And Mask.
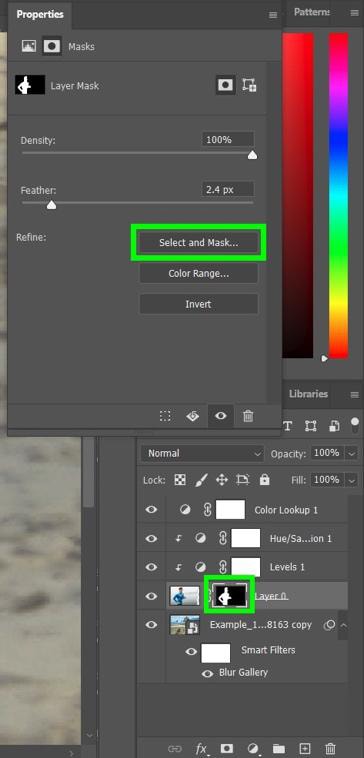
When the Select And Mask Workspace pops up, select the Brush Tool to the right and click the Minus Button to switch the brush to delete mode.
Paint the flaws on your mask away with the brush, then click OK when you’re finished.
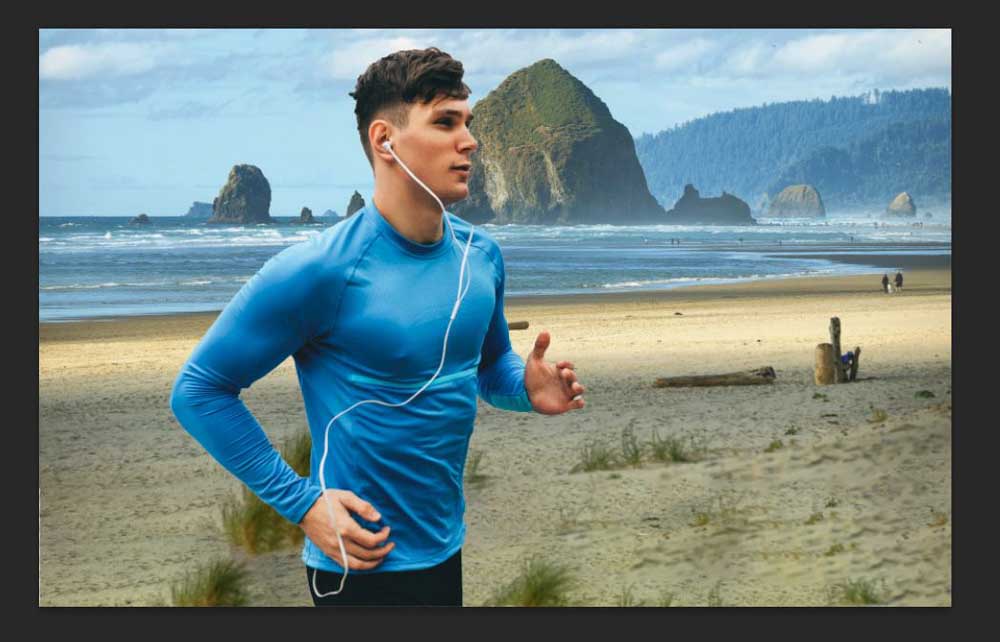
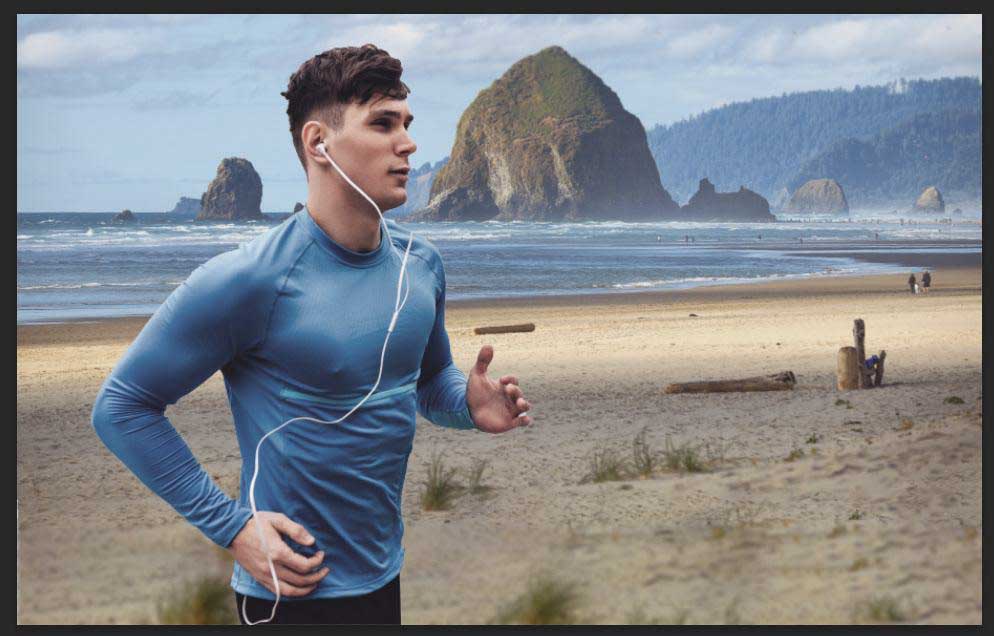
You’ve now successfully changed the background of your photo, and it looks just like the real thing.
How To Change The Background Color Of A Photo In Photoshop
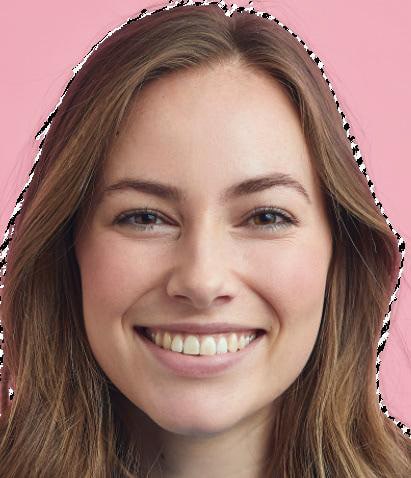
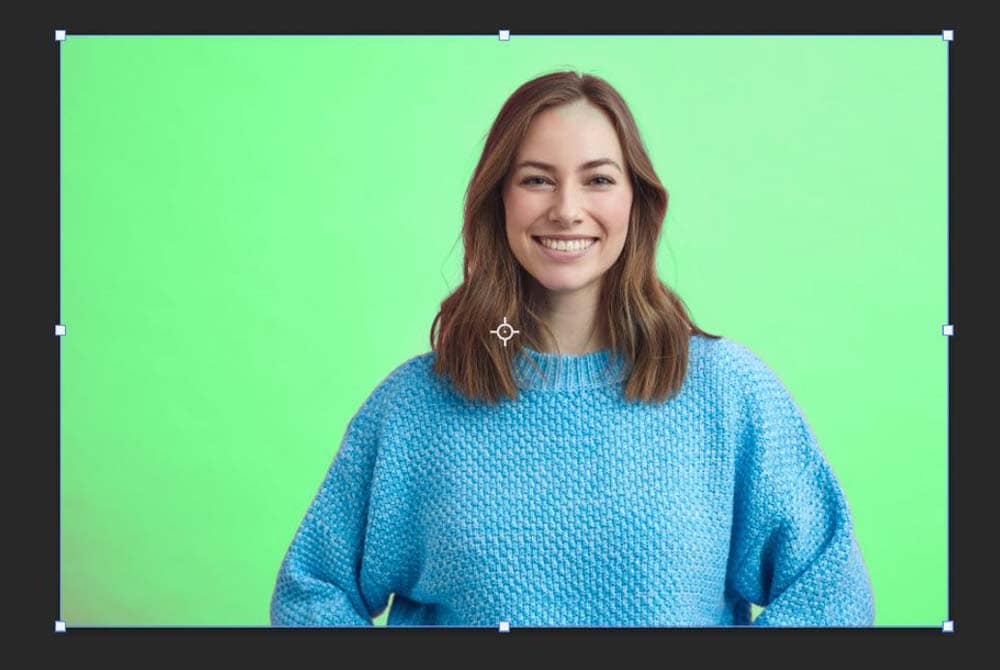
If you have a photo with a background with a single solid color, changing the background can be done in a snap!

Step 1: Select The Background Using The Color Range Function
The first thing you need to do to change the background color of your photo is to select the current background color. Go to Select > Color Range.
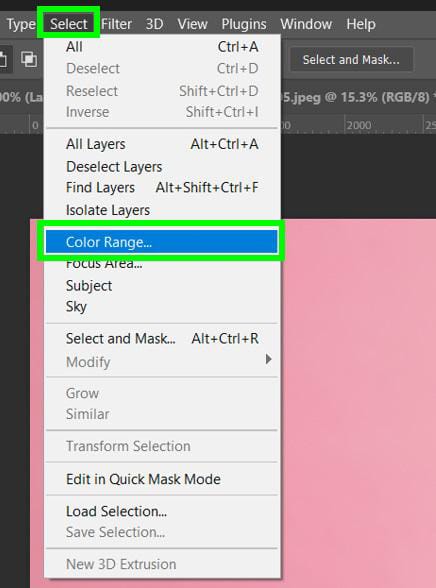
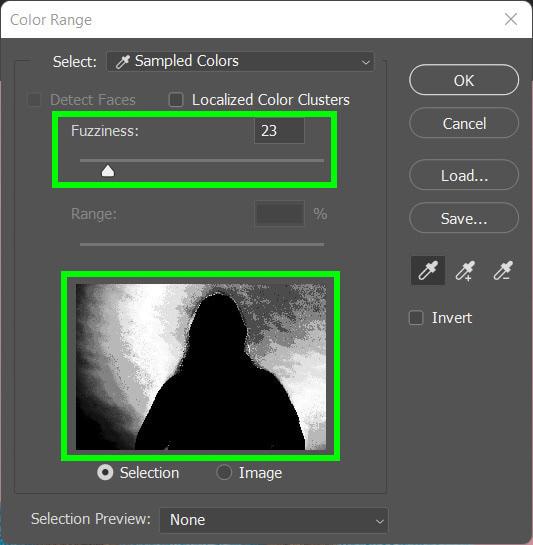
The Color Range Menu will pop up, and with Select set to Sampled Colors, you can click on the background color, and you will see a preview window showing the amount of the color that is currently being selected as lighter pixels.
The goal here is to make sure all of the background color is selected. To do so, adjust the Fuzziness until the entire background is selected. It’s normal if part of your subject is selected, you can fix this afterward.
When you’re done, click OK.


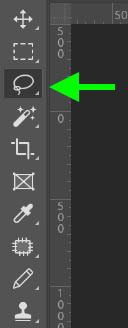
Step 2: Clean Up Your Selection
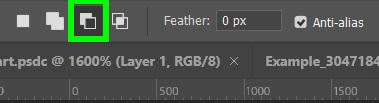
Most likely, part of your subject will be selected when doing this process. This is an easy fix. Just grab the Lasso Tool (L), and in the Options Bar, select Delete From Selection. Then, use the Lasso Tool to circle your trouble spots.

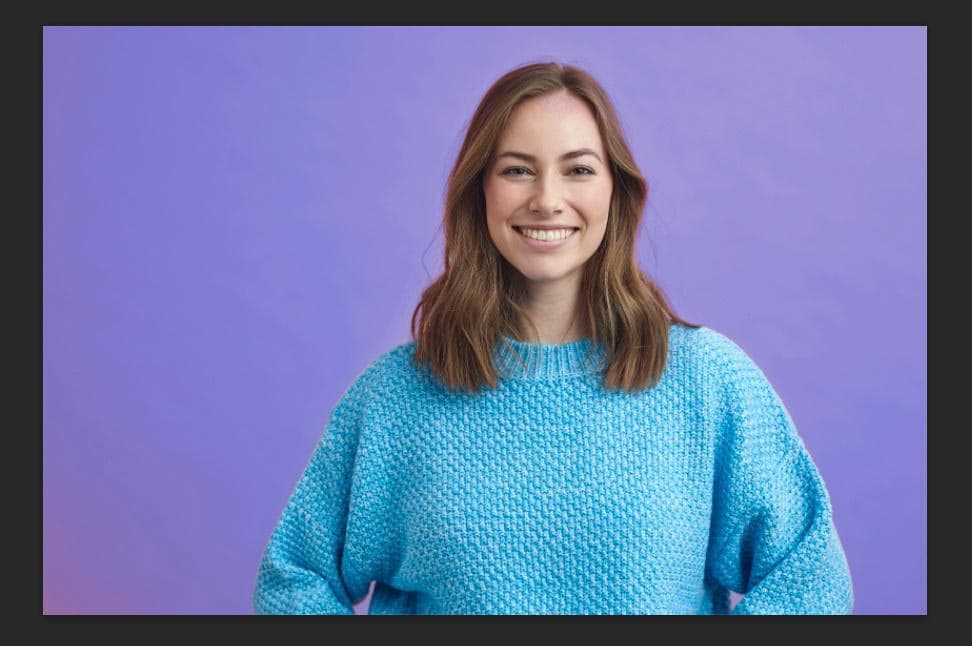
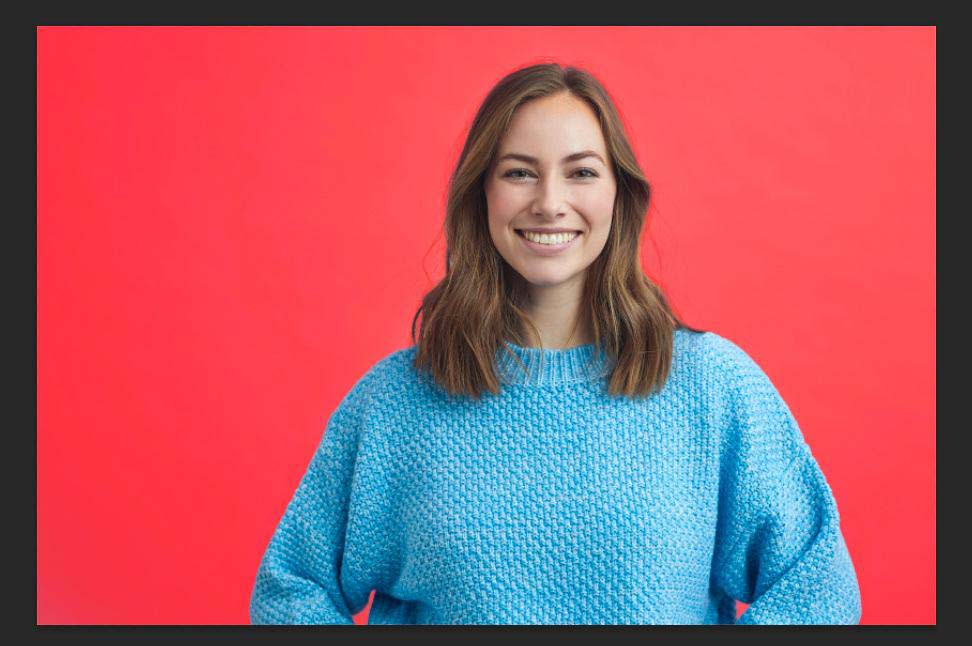
Step 3: Adjust the Hue/Saturation
Now that your background is fully selected, it’s time to change its color.
With your layer selected, add a Hue/Saturation adjustment layer with the New Adjustment Layer Button.
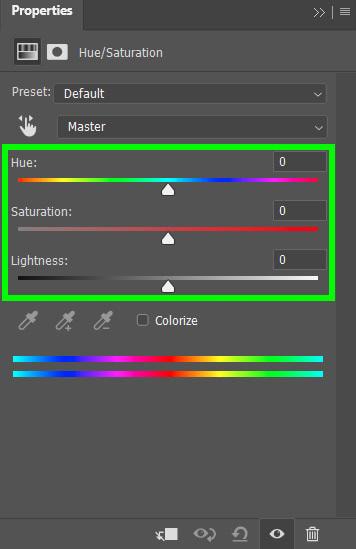
Once your Hue/Saturation Layer is applied, you can change your background to any color by adjusting the sliders for the Hue, Saturation, and Lightness.
- The Hue will change the color itself, and it will depend on what color you’re starting with
- Adjusting the Saturation will determine the intensity of the color of each pixel
- Adjusting the Lightness will determine how bright each pixel will be
It’s quick and easy to change the color of a solid background. If you don’t like the color, you can click on the effect to change it.
With this process, you can quickly make some fantastic backgrounds.
So whether you want to replace the background of a photo with an image or simply change the background’s color, these two methods will help you do it.
Now to help you make sure your selections look as realistic as possible, check out this next tutorial on the best ways to remove backgrounds in Photoshop!
Happy Editing!
