
Lens flares sometimes appear in the photos we take, and if you don’t like the look of one, you can easily learn how to remove a lens flare in Photoshop. Sometimes, lens flares are unwanted because they detract from your subject and overall composition.
Note: If you don’t intend to include a lens flare in the final image, it’s always best to avoid them when shooting (by using better angles or a lens hood). Depending on how prominent and scattered the lens flare is it can be tricky to remove these artifacts.
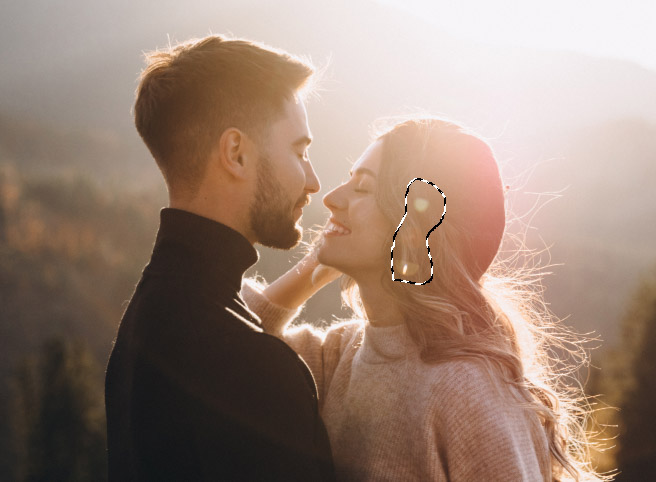
Option 1: Using Generative Fill To Remove Lens Flare In Photoshop
Step 1: Create A Selection Around The Lens Flare
First, use any selection tool to create a selection around the problematic lens flare. You only need to create a rough selection, and you should include some of the surrounding area in the selection. For this, the Lasso Tool (L) works well.
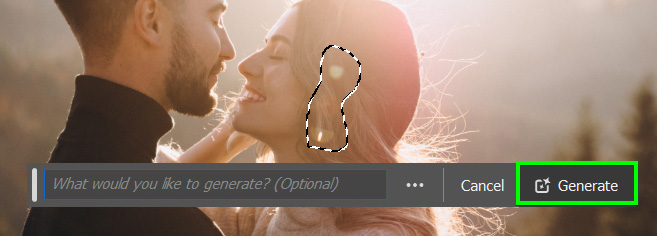
Step 2: Click On Generative Fill And Generate In The Contextual Task Bar
Next, click on Generative Fill in the Contextual Task Bar.

Photoshop will then give you the choice to add a prompt describing what you want to replace the selected area with. For this purpose, you can simply leave it blank and click Generate.
Step 3: Select A Variation From The Properties Panel (Optional)
Without a prompt, Photoshop will remove the obvious issues within the selection. After a few moments, it will create new pixels. There will also be a few variations in the Properties Panel for you to choose from.
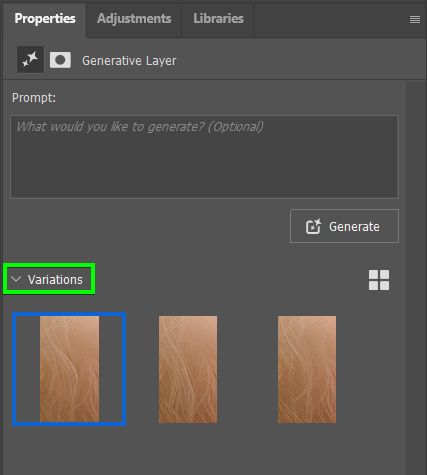
Depending on your desired outcome, you can leave the first changes as they are, select a variation, or re-generate the area.


Option 2: Using The Healing Brush To Remove Lens Flare In Photoshop
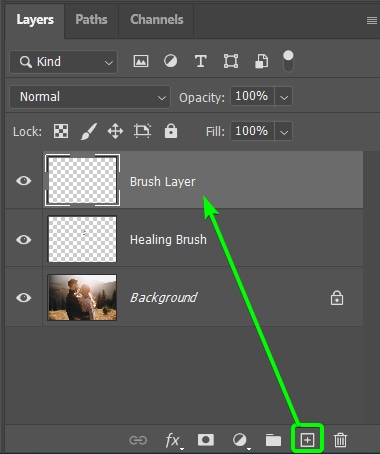
Step 1: Add A New Layer And Activate The Healing Brush Tool
Add a new blank layer by clicking the Create a new layer icon at the bottom of the Layers Panel. You can rename the layer if you’d like to keep the panel organized.
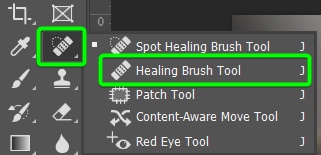
Then, locate the Healing Brush Tool (J) in the Toolbar and click it to activate it. You may need to click and hold on the Spot Healing Brush Tool to open the fly-out menu and find the tool.

You can generally leave the settings as they are in the Options Bar. Just be sure to set the Sample to All Layers or Current and Below so the tool will sample the area from the image layer and paint the new pixels onto the new layer you created.

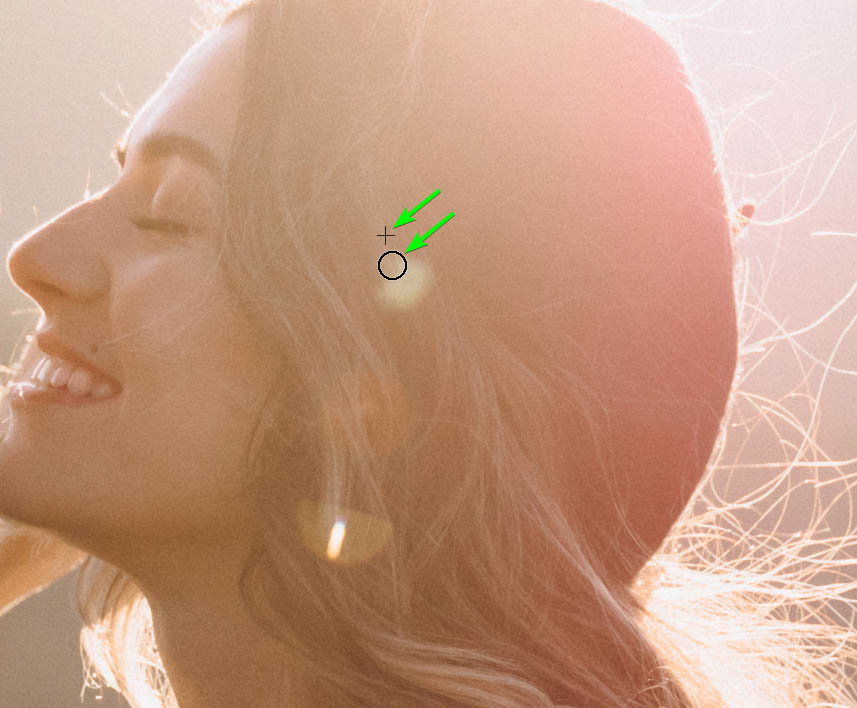
Step 2: Sample An Area And Paint Over The Sun Flare
Sample an area you want to use as the reference point to replace the sun flare pixels. The sample point should be close to the pixels you are covering, and try to get similar colors and textures. Hold in Alt (Win) or Option (Mac) to sample an area, and the pointer will turn into a target icon. Then, click on the area you want to sample.
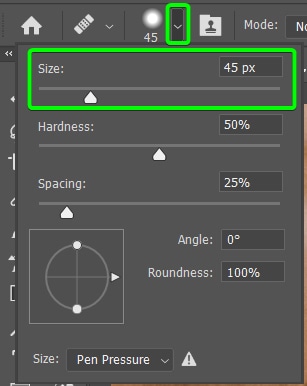
Then, set the brush size using the size setting in the Options Bar or by pressing [ to decrease the brush size or ] to increase it.
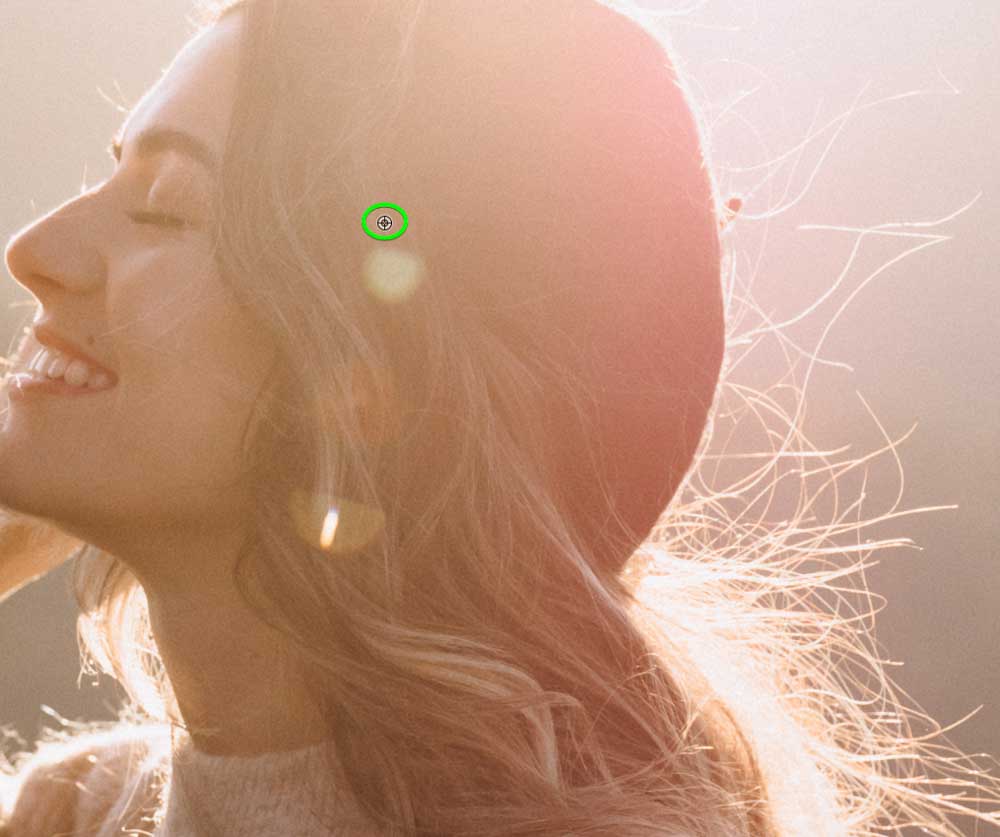
Once the size is correct (you must determine the size based on how complex the background is), then click and drag over the area to cover the pixels. The circle will show where the brush adds the new pixels and the plus icon shows where the new pixels are sampled.
Keep sampling new areas around the spot to keep the replacement pixels as accurate as possible. Then, brush over the areas until the entire sun flare has been removed.
Step 3: Repeat The Steps On Any Other Harsh Sun Flares
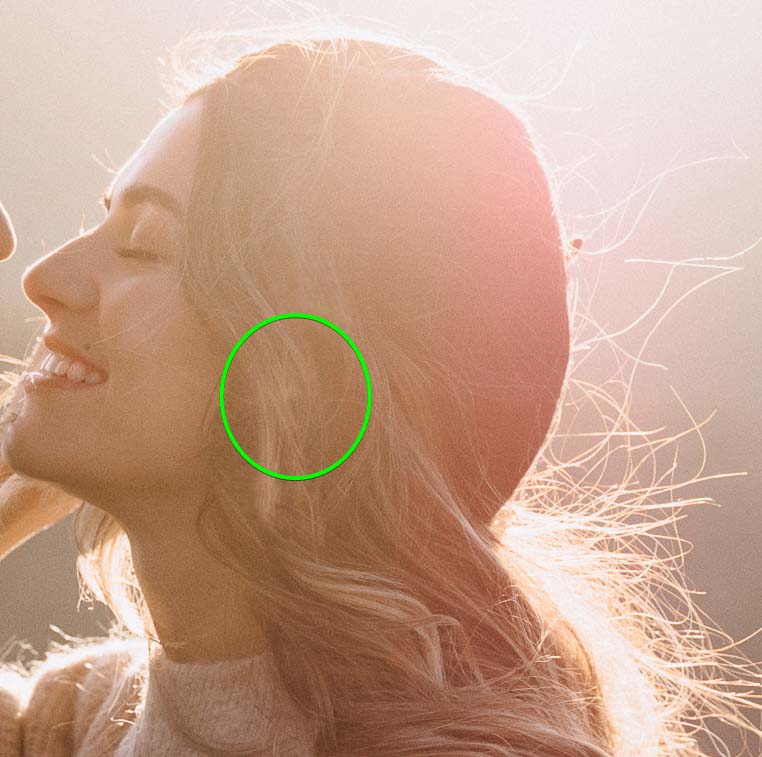
You can now repeat those steps on any other harsh sun flares in your image. Sample an area close to the spot and note the hair’s direction.
Size the brush so that you are adding the new pixels where they look accurate. For instance, I am following the path of the hair, so I am only making the brush as large as the strands above. When you hover the brush over the area, you will see a preview of how the new pixels will look.
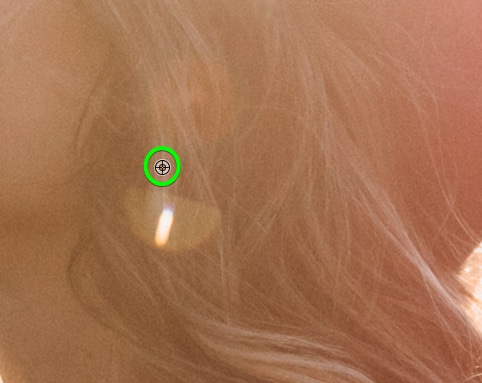
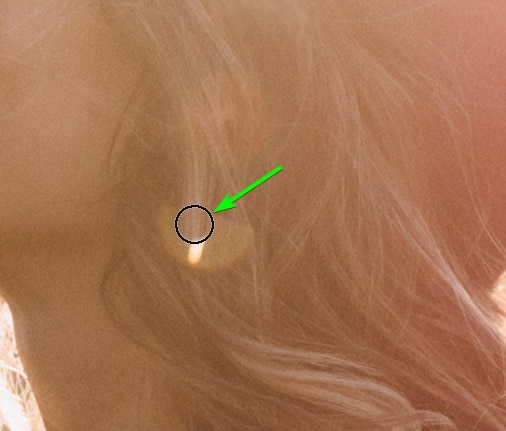
Once I brush over the area while sampling as I go, you will see the hair follows the right path. It may not look perfect the first time, but keep sampling and brushing until you have replaced the pixels and the hair seems accurate.


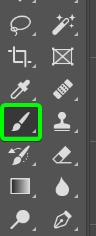
Option 3: Using The Brush Tool To Remove Lens Flare
Step 1: Create A New Blank Layer And Activate The Brush Tool (B)
On the same image, I will fix up the more subtle sun flare. To do this, create a new layer by clicking the Create a new layer icon at the bottom of the Layers Panel. You can rename the layer. Next, activate the Brush Tool from the Toolbar or press B. You will use this to brush a new color over the sun flare.
Then, select a Soft Round Brush from the brush preset picker in the Options Bar and set the Hardness to 0% to allow the new color to blend into the image.
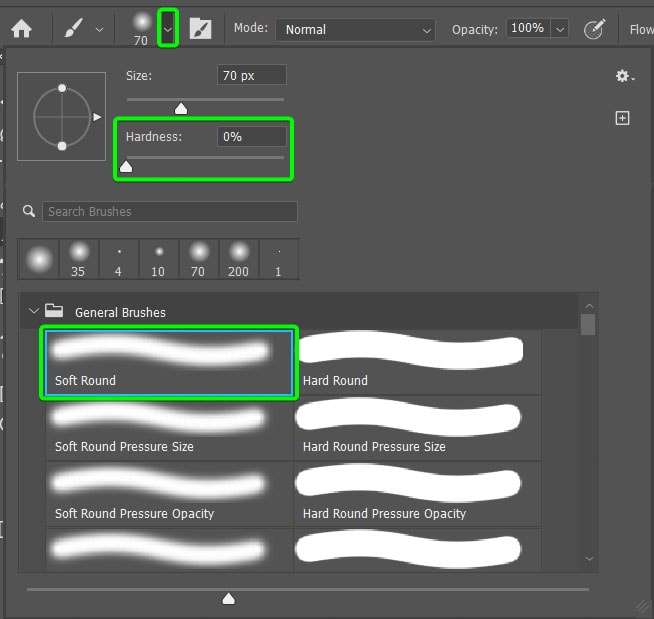
You can set the rest of the brush settings as the defaults: Mode to Normal, Opacity and Flow at 100%, and Smoothing at 0%.

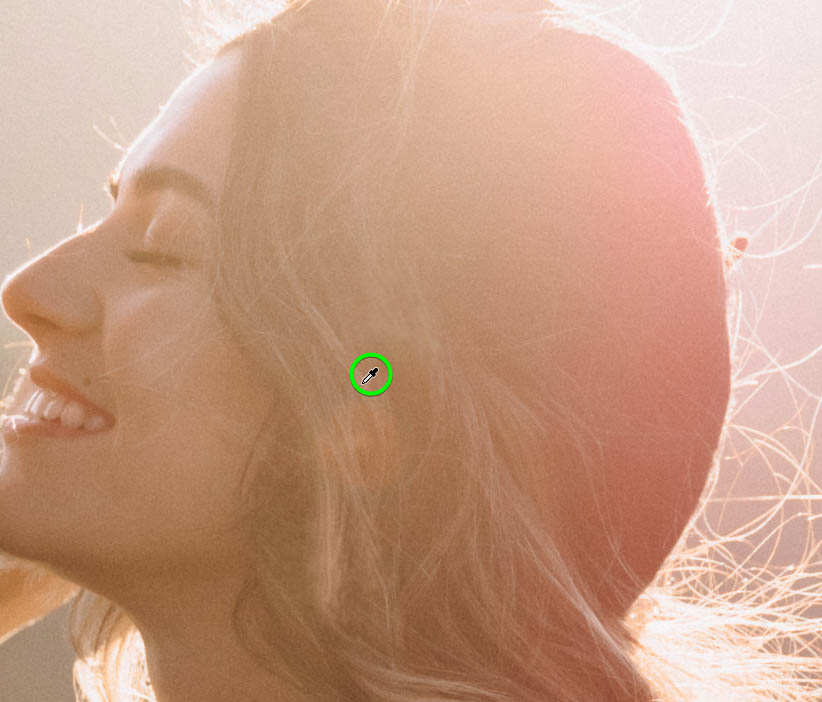
Step 2: Sample A Color Using Alt / Option And Paint Over The Sun Flare
To sample a color while the Brush Tool is active, hold in Alt (Win) or Option (Mac) until you see the eyedropper icon appear, then click to select the color.
Your foreground color in the Toolbar will change to the new color you have sampled from the image. Now, you can use the brush to paint over the sun flare with the new color. You will notice that the color doesn’t look realistic at this stage, but you can fix that in the next step.
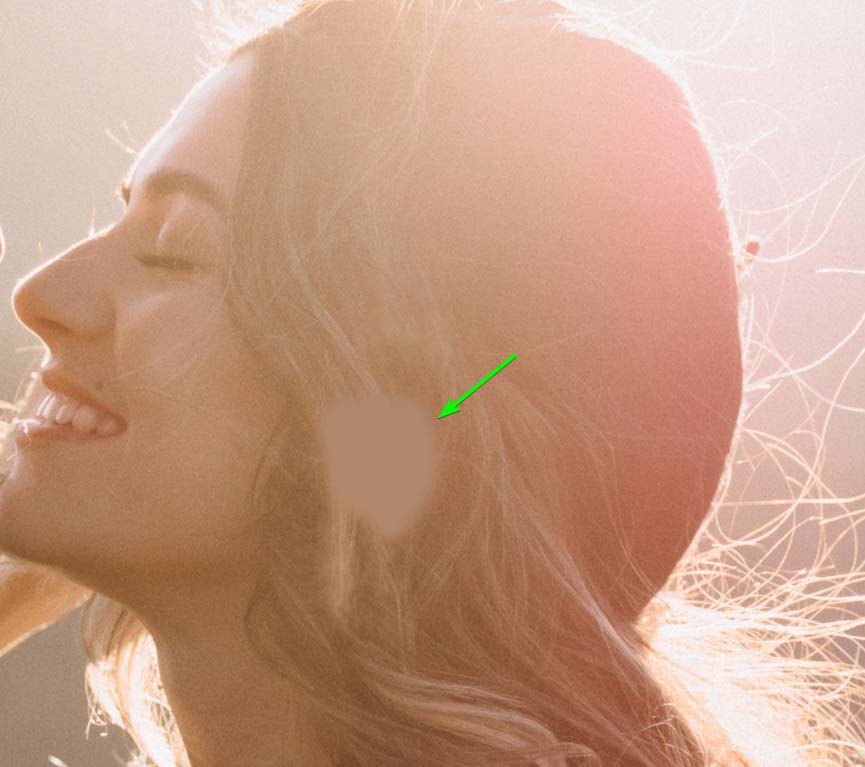
Step 3: Change The Brush Layer’s Blend Mode To Color
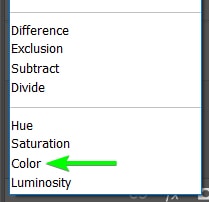
You must change the Blending Mode to blend the harsh color into the image. To change the blend mode, ensure the brush layer is selected and find the drop-down menu in the Layers Panel that says Normal. Click on the drop-down menu and select Color. This mode only keeps the color from the layer while using the texture and luminance from the layers below.
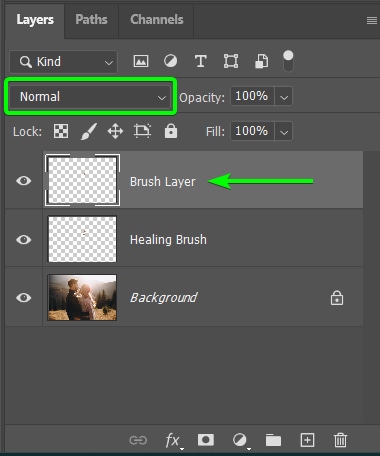
You will notice in your image that the sun flare is gone as the new color has covered it.
These methods should have removed the harsh and subtle sun flares on your image.

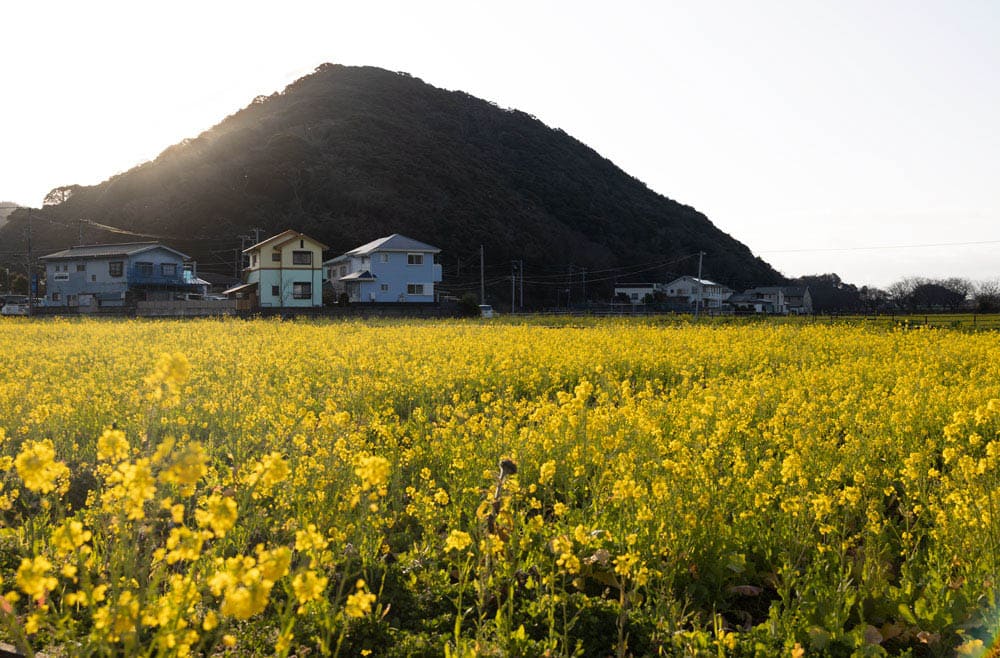
Option 4: Combining Images To Remove Major Lens Flare In Photoshop
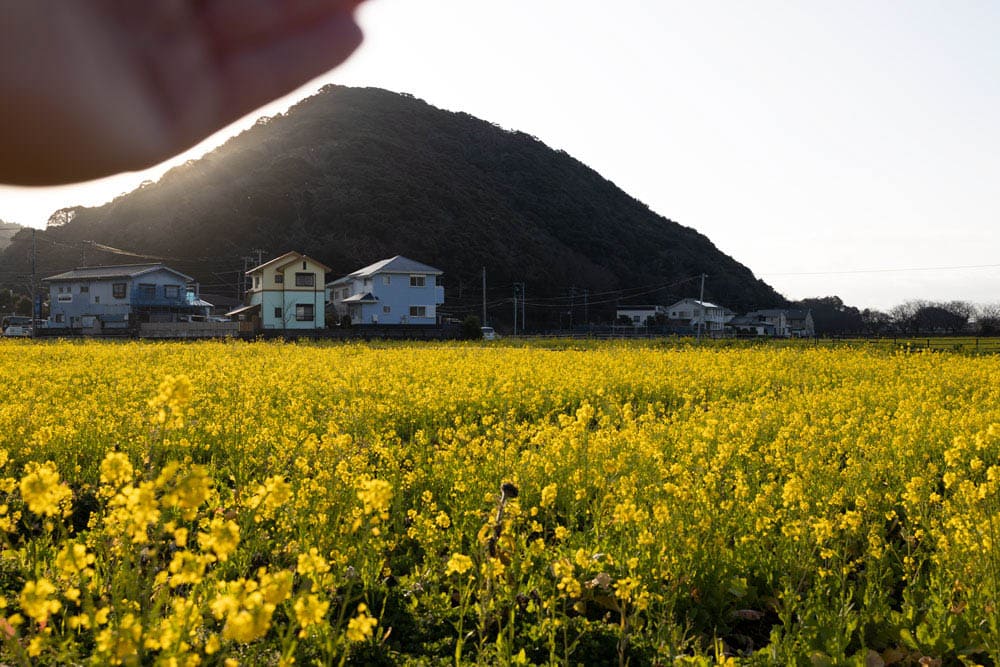
Step 1: Capture An Image With The Sun Flare And One With Your Hand Covering It
When you are out shooting, set up your composition and ensure you have everything you want in the frame. Set your exposure correctly to light up the scene and take the photo.
Immediately after taking the first image, keep your composition and don’t move the camera. Place your other hand over the sun in the image to prevent the sun flare from spilling into your picture. This is where using a tripod comes in handy, but you can do this handheld.
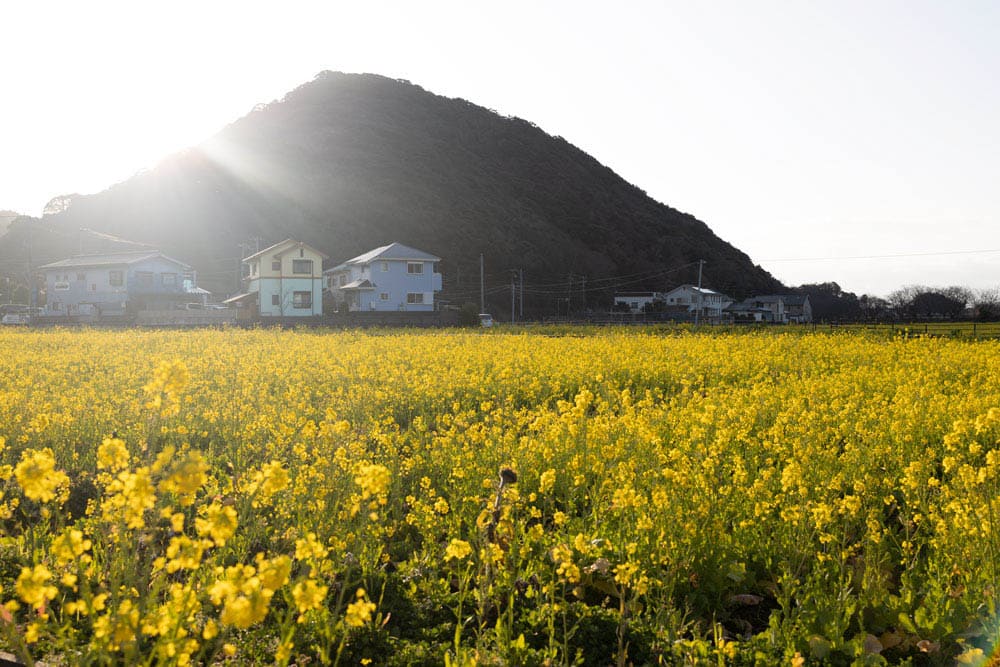
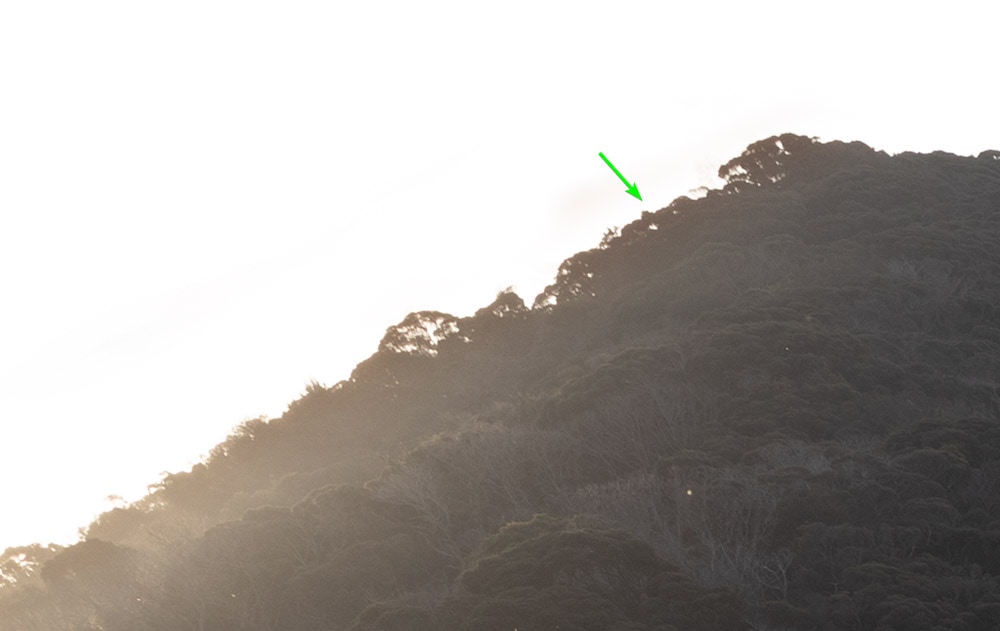
You should keep all the settings the same. Be careful to prevent your hand from covering any important areas, such as the mountain in my example.
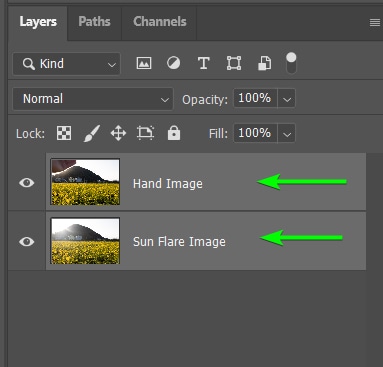
Step 2: Open Both Images On Separate Layers And Go To Edit > Auto-Align Layers
Once you are ready to edit your images, open them both in Photoshop and place them on the same document. You can drag one image layer from its tab, hover over the other image tab, and drop it onto the canvas to place the two layers together. You want the photo with the hand to be at the top of the layer stack.
Once you have the two images in the same document, you can align the layers so the content matches up on both layers. To align the layers, select the layers in the Layers Panel. Then, go to Edit > Auto-Align Layers.

When the Auto-Align Layers window opens, select the Auto option, leave the rest of the settings as they are, and click OK.
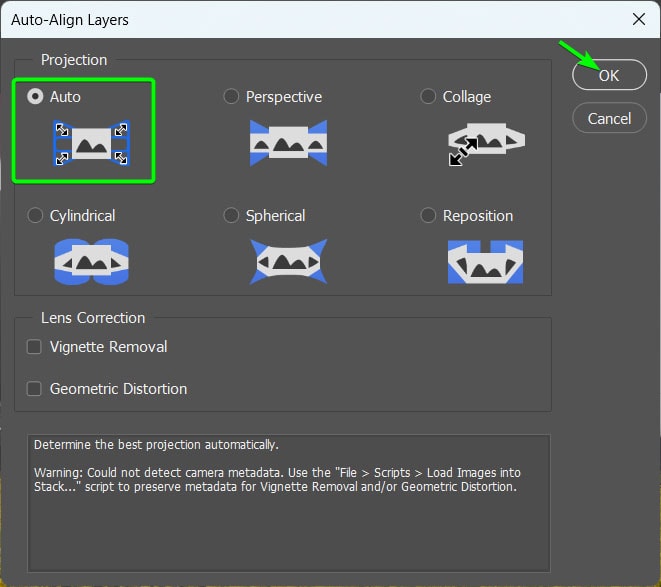
Once Photoshop aligns the layers, you will notice the content is matched up if you hide and unhide layers, but there also may be transparent edges around the image. I will show you how to fix this in step 9.
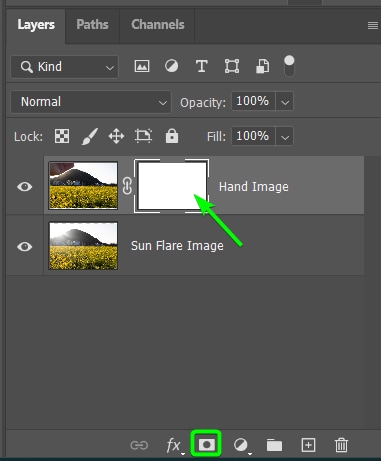
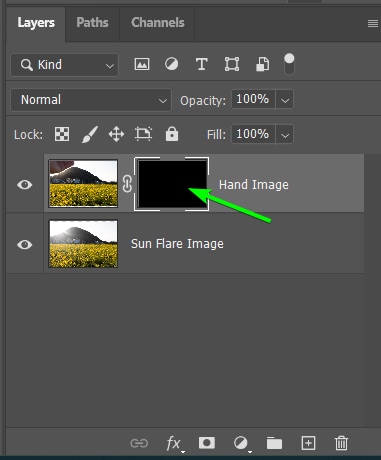
Step 3: Add A Layer Mask To The Hand Layer
Next, add a layer mask to the Hand image layer by selecting the hand layer, then click the Add layer mask icon at the bottom of the Layers Panel. The mask will appear next to the thumbnail and be entirely white.
Invert the layer mask to hide everything on the hand layer by pressing Control + I (Win) or Command + I (Mac). The layer mask will turn black, and the mask will hide the hand layer.
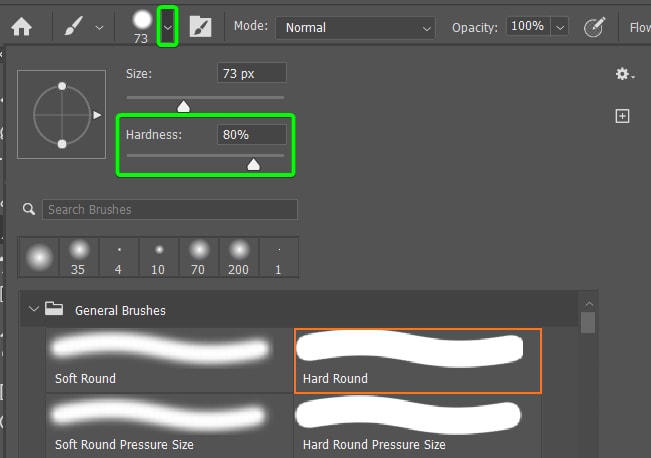
Step 4: Select The Brush Tool (B) And Set The Color To White
Select the Brush Tool (B) and set the foreground color to white. Use the brush preset picker to adjust the brush’s hardness and size. You want a large brush to paint over the sun flare areas and a hard brush for the edges to prevent bringing the hand back into the photo. A hardness of about 80% will work.
Step 5: Brush Over The Areas With The Sun Flare
Then, brush over the edges of the area where the sun flare starts, which, in my case, is the mountain. Brush along the entire horizon line to blend the images.
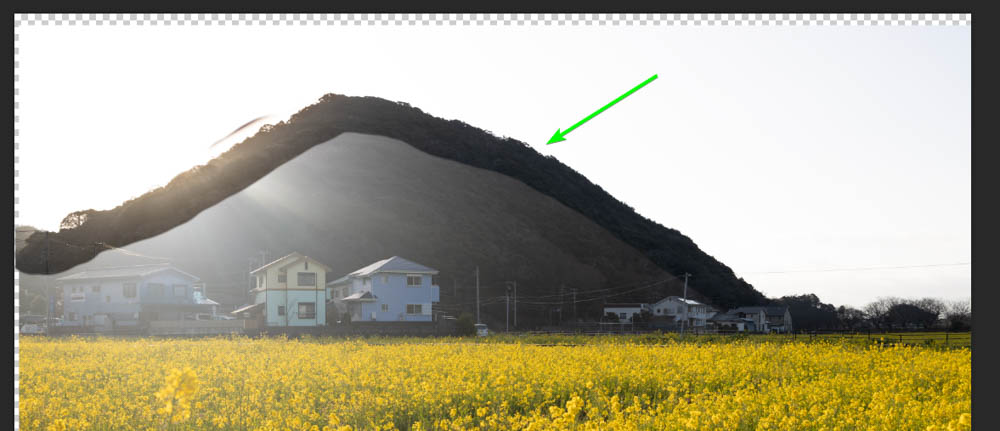
Change the brush hardness to 0% and continue brushing over the mountain (or area where the sun flare covers). Continue brushing until you find a texture edge rather than stopping on objects with hard edges. This will help blend the images. I will paint up to the flower line for my photo to make the blend seamless.
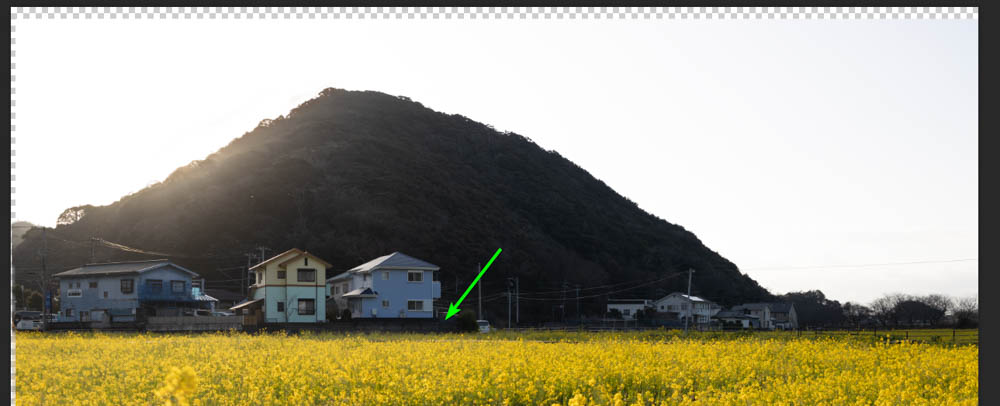
Step 6: Check The Edges And Make Corrections
You can now check the edges and make any corrections. To remove any unwanted areas, switch the foreground color to black and paint over the areas to hide them with the layer mask.
You can also look along the edges for ghosting, which occurs when parts of both layers are visible. To fix these areas, use the brush with the foreground color set to white.

Step 7: Crop The Photo To Remove Transparent Edges
Next, you can crop the image by selecting the Crop Tool (C) and clicking on the canvas to set the crop handles.
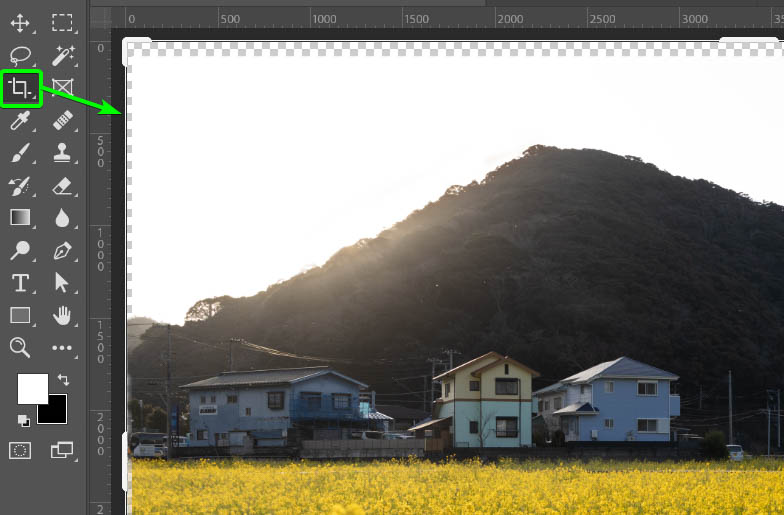
Pull the handles in to remove the transparent edges. Press Enter to confirm the crop. You have now successfully removed the large sun flare from your image.