Knowing how to remove a white background in Photoshop is essential to cut out a subject with ease and precision. Isolating a subject from an image allows you to use logos, graphics, and people on new backgrounds, whether it’s for adverts or creative edits.
There are many ways to achieve this edit, and I have put together my 5 favorite ways, which are fast and easy, even for beginners. You can choose between the one-click Remove Background button, the Channels method for complex subjects, or one of the selective color methods.
Video Tutorial
How To Remove The White Background From An Image Using The Remove Background Button
This little button is hidden in the Properties Panel and automatically creates a selection and applies it to a layer mask. This way, you can cut out an image and make a white background transparent with a single click. No tricky manual selections are required!
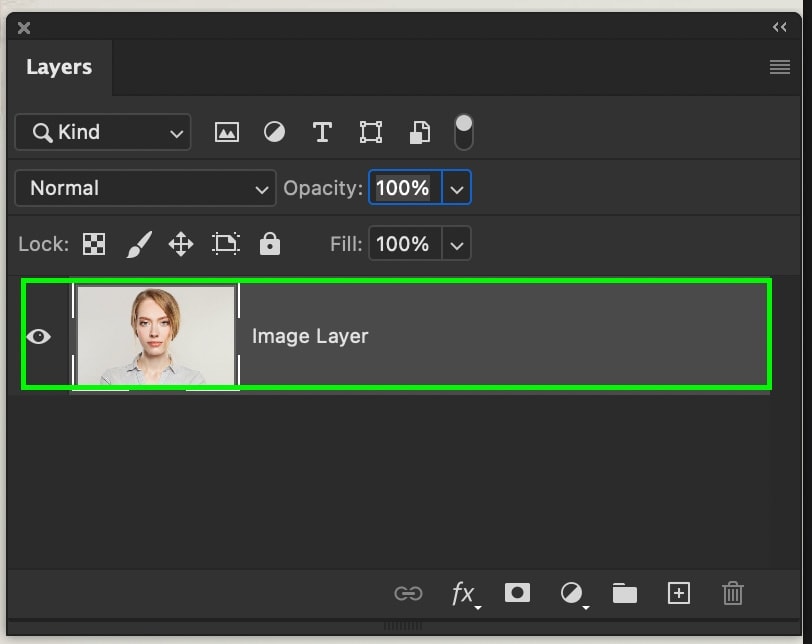
Step 1: Select Your Image Layer
First, ensure your image layer is selected in your Layers Panel and unlocked.
Step 2: Click On Remove Background In The Contextual Task Bar
In the Contextual Task Bar, you will see the Remove Background option. Click the button to automatically remove the background from your image.

Alternatively, you can scroll to the bottom of your Properties Panel and look for the Quick Actions options. Then, click on Remove Background.
Note: If you can’t see the Contextual Task Bar or the Properties Panel, open the Window menu and click on Contextual Task Bar or Properties Panel.
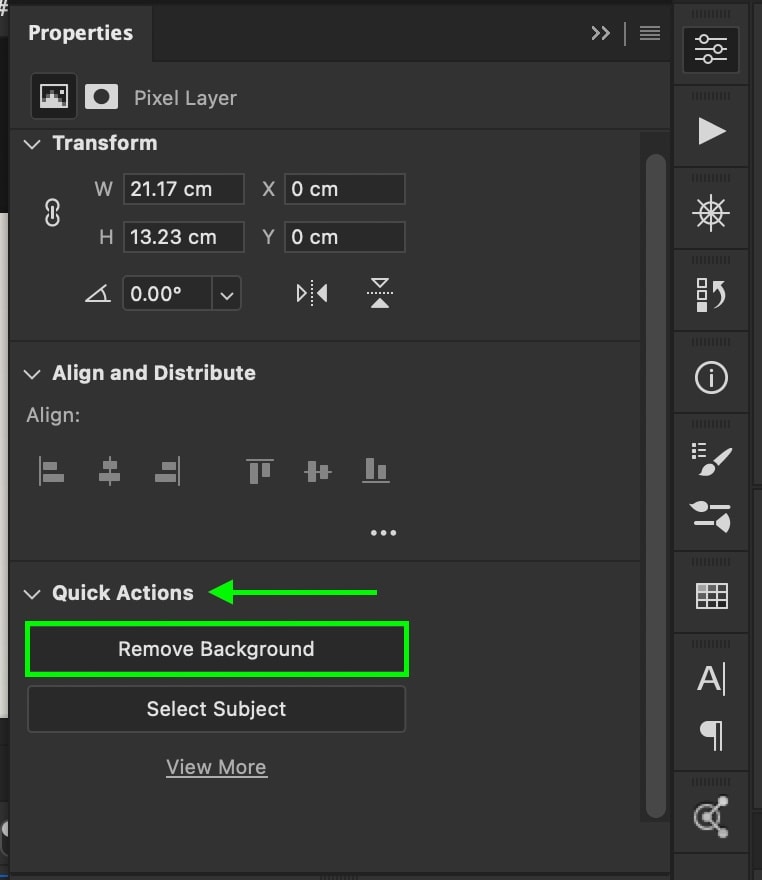
The Remove Background button will create a selection around your subject, then apply that selection to a layer mask. The result is a cut-out image with a transparent background in a single click!
Note: with both these options, you can use the Select Subject button and then refine the selection before adding a layer mask. However, the Remove Background button saves you a few clicks.

Step 3: Refine The Newly Created Layer Mask If Needed
In some cases, you may find that Photoshop made a mistake and removed part of your image that you wanted to keep. This can be easily adjusted at any time with your layer mask.
First, make sure your layer mask is selected by clicking on it.
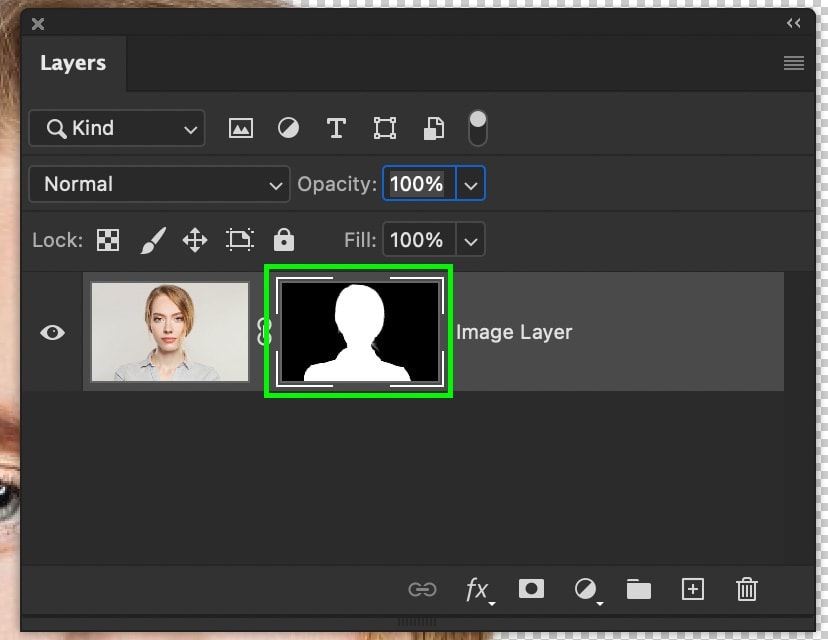
Then, access your Brush Tool (B) and set white to your foreground color to add back part of your image. If you want to remove additional areas from the photo, set the foreground color to black instead.
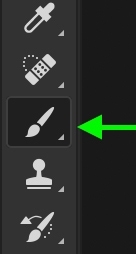
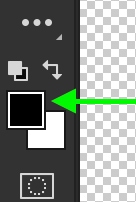
Now, paint over your image to quickly refine your layer mask and add back any important bits that Photoshop might have accidentally removed.
Step 4: Go To File > Save A Copy
To preserve the transparency of the background, you need to export the image as a PNG. There are a few ways to save your image in this format, but the quickest is using the Save A Copy function.
First, go to File > Save A Copy.
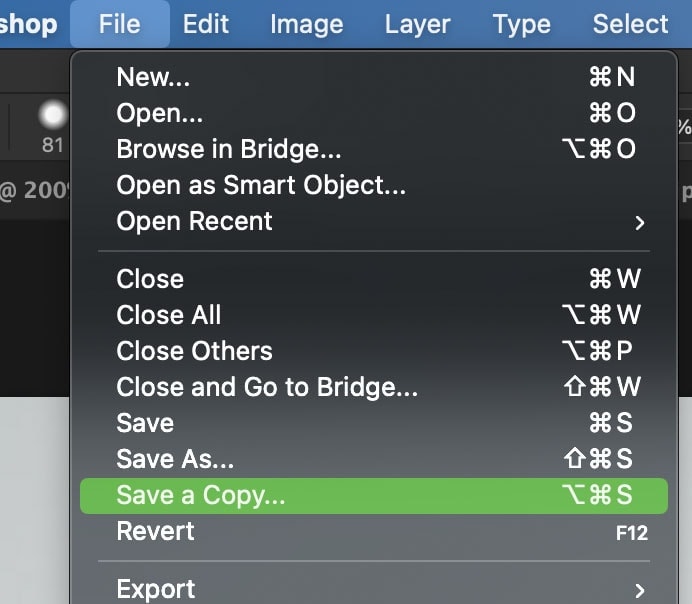
Step 5: Set The File Format To PNG
Then, set your file format to PNG. And pick a location to save your file on your computer.
Now, click Save to export your photo as a PNG image, which will preserve the transparent background.
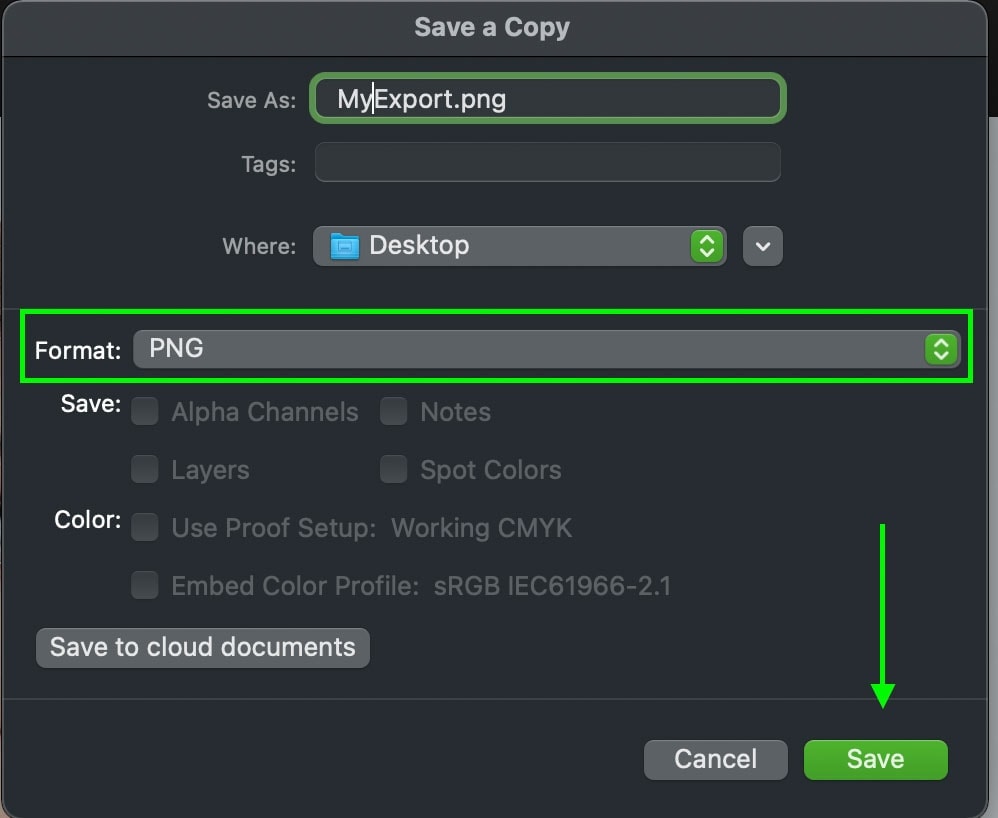
You can use your cut-out image in other projects without worrying about that pesky white background!
Note: You can also go to File > Export > Export As or Save For Web (Legacy) and select the PNG format if you want more customization options for your exported file.


How To Remove A White Background With The Magic Wand Tool
The Magic Wand Tool (W) is fantastic at making selections based on similar colors in your images. In the case of removing a white background, it’s another amazing tool to use. The only trouble is that it requires some specific settings to work just right.
I outline everything you need to know to use the Magic Wand Tool to remove a white background in the steps below.
Step 1: Select The Magic Wand Tool (W)
To access the Magic Wand Tool, simply press W on your keyboard or find it in your Toolbar.
If you do not see it, it may be hidden under other tools, such as the Quick Selection Tool. By clicking and holding on the tool icon, your other tool options will appear. Select the Magic Wand Tool.

Step 2: Set The Sample Size To Point Sample
With your tool selected, go to the Options Bar and set the Sample Size to Point Sample or 5 By 5 Average. These options allow you to choose how much of your sampled color will be taken into consideration.

If you have a graphic with a solid white background, “point sample” will work best. However, if you have a white background taken in a studio with different shades of white, a 5 by 5 average will provide a better selection.
Step 3: Set The Tolerance To 25
Next, set the Tolerance to 25. This is an excellent in-between value that allows some wiggle room from the original sampled color, which will be white in this case. If you have more shades of white in your background, it may be worthwhile to bump this to 50 or 60 instead.

Step 4: Enable Anti-alias
In the final setting option, make sure Anti-alias is checked off while the two remaining options are left unchecked.

Step 5: Click On The White Background To Create A Selection
With all your settings in order, click on your white background to create a selection. Photoshop will sample the colors around where you clicked and find similar colors in your image to add to the selection. Since white is a pretty easy color to select, Photoshop does a great job of creating an accurate selection.

Step 6: Click The Layer Mask Icon To Apply Your Selection
Since you’re left with an active selection, it’s time to add that to a layer mask to make the white background transparent.
With your image layer selected, click on the layer mask icon at the bottom of the Layers Panel.
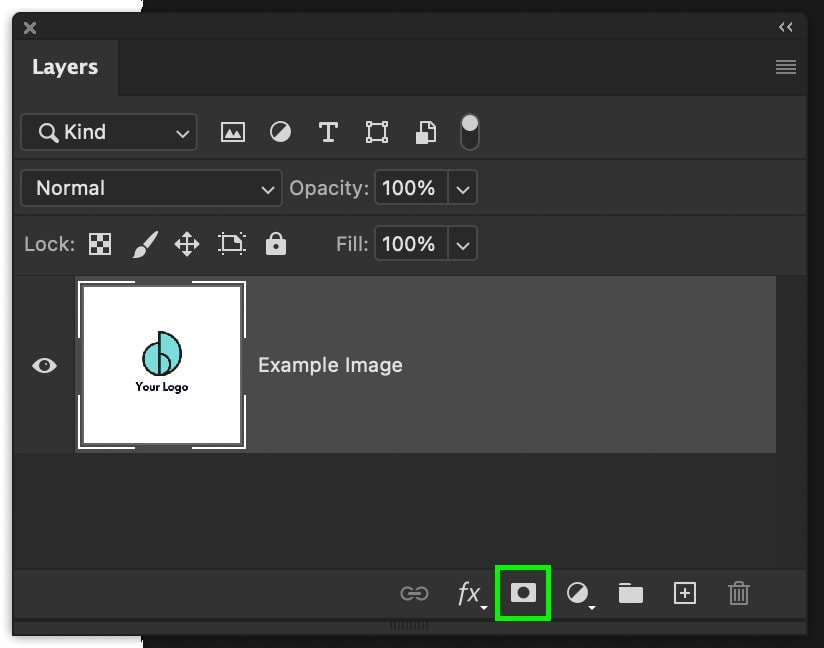
Now, press Control + I (Win) or Command + I (Mac) to invert your layer mask and make the subject visible again.
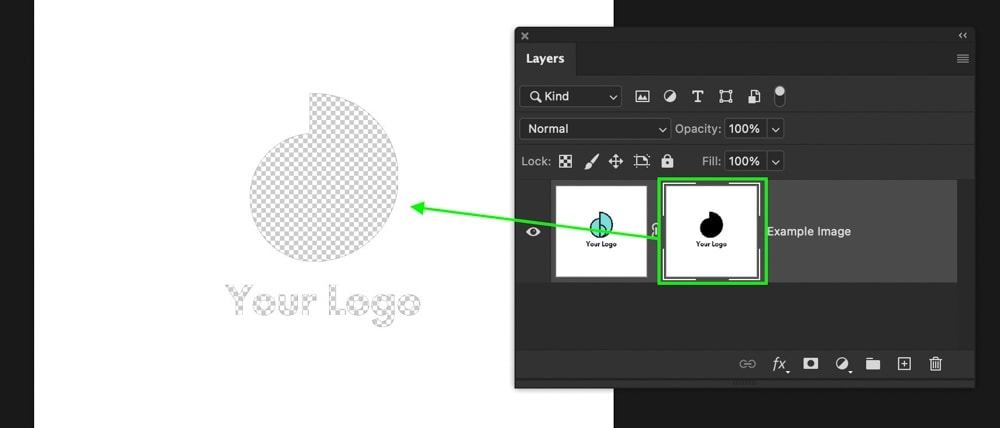
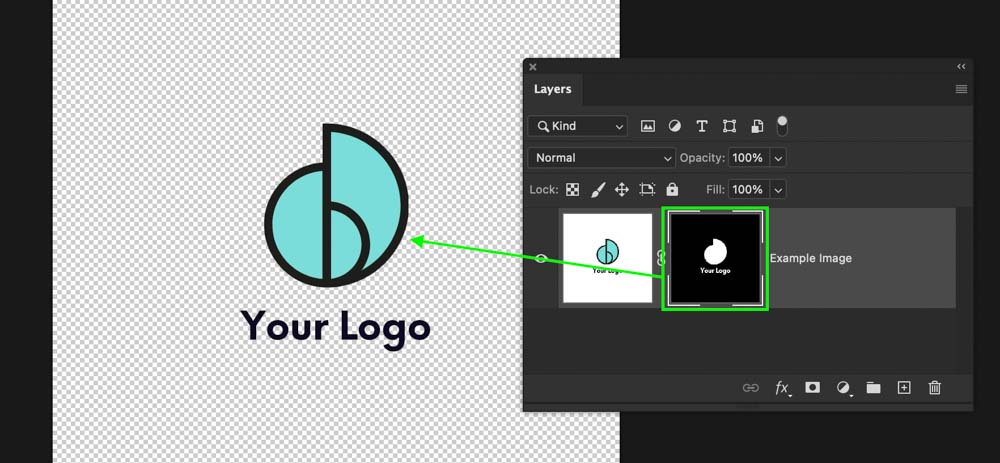
Your selection will be added to your mask, and the background will be removed entirely. The beauty of layer masks is that you can go back and edit them later on if you need to!
Step 7: Export The File As A PNG
After following these steps, you have successfully removed your white background and made it transparent. Now, remember to export the file as a PNG to preserve the transparency by following steps 4 and 5 in the first example.


How To Remove A White Background With The Magic Eraser Tool In Photoshop
The Magic Eraser Tool (E) is similar to the Magic Wand Tool, except it does not work non-destructively. Rather than creating a selection to add to a layer mask, this tool permanently deletes the background.
This is useful if you don’t want to deal with masks and want a straightforward approach to background removal.
Step 1: Select The Magic Eraser Tool (E)
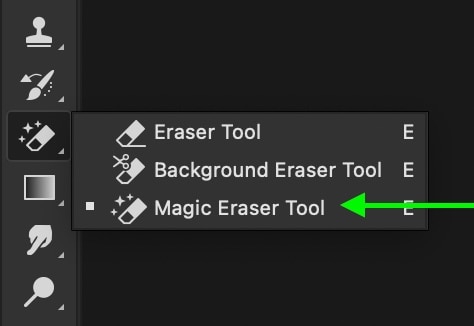
To access the Magic Eraser Tool, press E on your keyboard. If this doesn’t select the proper tool, simply click and hold on the Eraser Tool in your toolbar to reveal the Magic Eraser Tool.
Step 2: Set The Tolerance To 25 Or Higher
With the tool active, go to the Options Bar and change the tolerance to 25 or higher. If you have more shades of white in your image, a higher tolerance will achieve better results.

Step 3: Enable Anti-alias
Next, check off Anti-alias and leave the other settings unchecked.

Step 4: Set The Opacity To 100%
Finally, set the Opacity to 100% if it isn’t already. Without 100% opacity, your background erasing adjustments will only partly remove the white background.

Step 5: Click On The White Background To Erase It
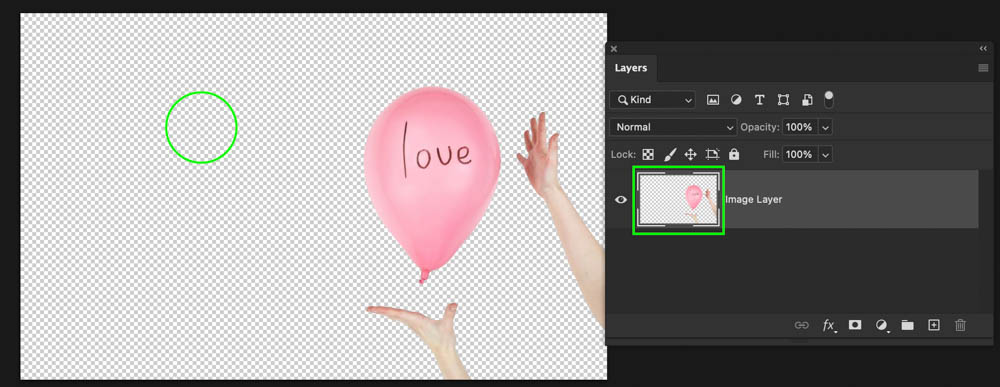
With all your settings in order and your image layer selected, click on the white background to sample and delete it from your layer. Each time you click Photoshop will sample the color under your cursor and find similar colors to remove. Since this tool deletes your background, it’s important to remember that all these changes are permanent.

If you accidentally delete something you want to keep, press Control + Z (Win) or Command + Z (Mac) to undo the action.
Now, you have successfully removed the white background by erasing it directly from your layer! Be sure to save the file as a PNG, as detailed in steps 4 and 5 of the first example, to preserve the transparent background.


How To Remove A White Background From An Image Using Select Color
The select color range tool is perfect for removing all of one color in a photo, including white. With the steps outlined below, you can quickly make a white background transparent in just a few clicks.
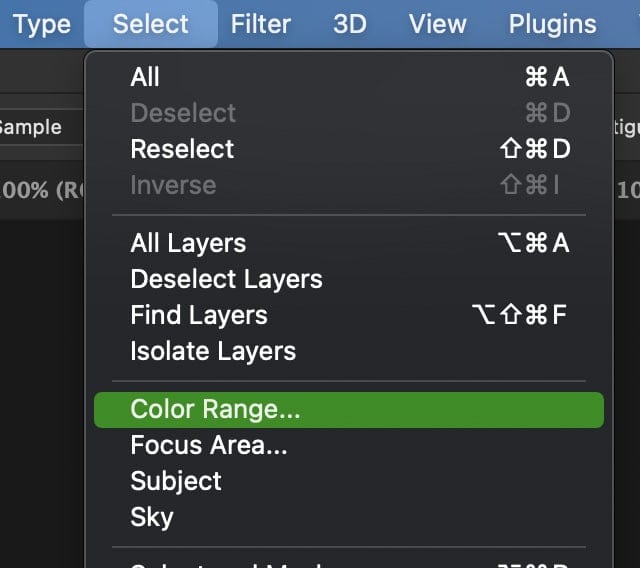
Step 1: Go To Select > Color Range
To start things off, with your image layer selected, go to Select > Color Range.
Step 2: Click The White Background To Sample It
In the dialogue box that appears, you will automatically have the Eyedropper Tool selected. What you need to do now is sample the color you want to create a selection around. In this case, that is white.
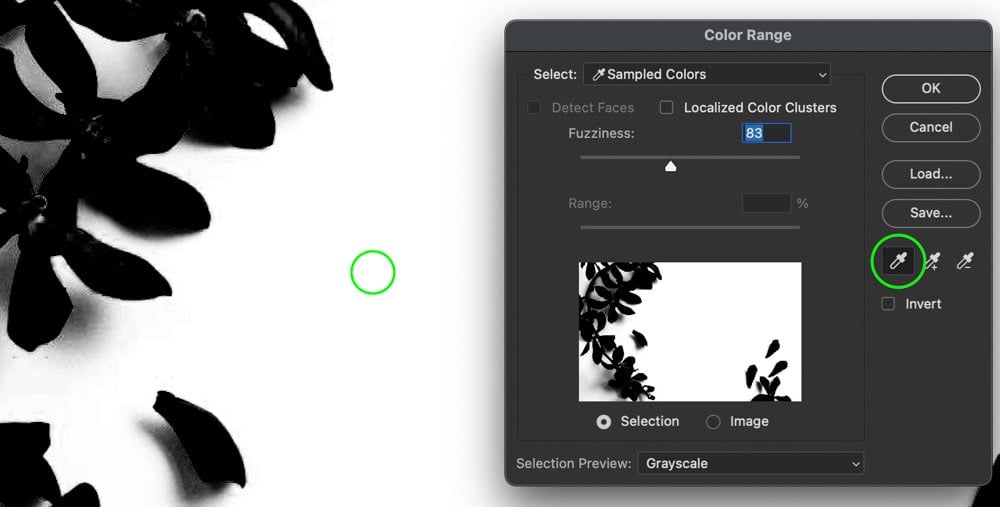
Clicking on the white background, the selection preview will change to show the white background as entirely white. This selection preview works the same as a layer mask where white is 100% visible while black is 100% transparent. In my example, you can see that the entire background is now white.
For simplicity’s sake, sampling the white background to make it white will allow for an easier selection process in later steps.
Step 3: Add Or Subtract From Your Sample To Refine It
If you have a perfect selection after just one sample, then great! Move on to the next step. However, if your selection isn’t looking quite right (the background isn’t completely white), you need to do some refining.
By default, clicking in a new area will reset your entire sample. Once you have a good general sample of the white background, you can add or subtract from this sample using a couple of easy keyboard shortcuts.
To Subtract from your sample, press Alt (Win) or Option (Mac) and click on the colors you don’t want Photoshop to sample.
To Add to your sample, press Shift and click on the shades of white Photoshop may have missed.
Step 4: Adjust The Fuzziness Slider
As a final method of refinements, the fuzziness slider controls the tolerance of which shades are added to your sample. If you have multiple shades of white, increasing the fuzziness slider will help add all these shades to your selection.
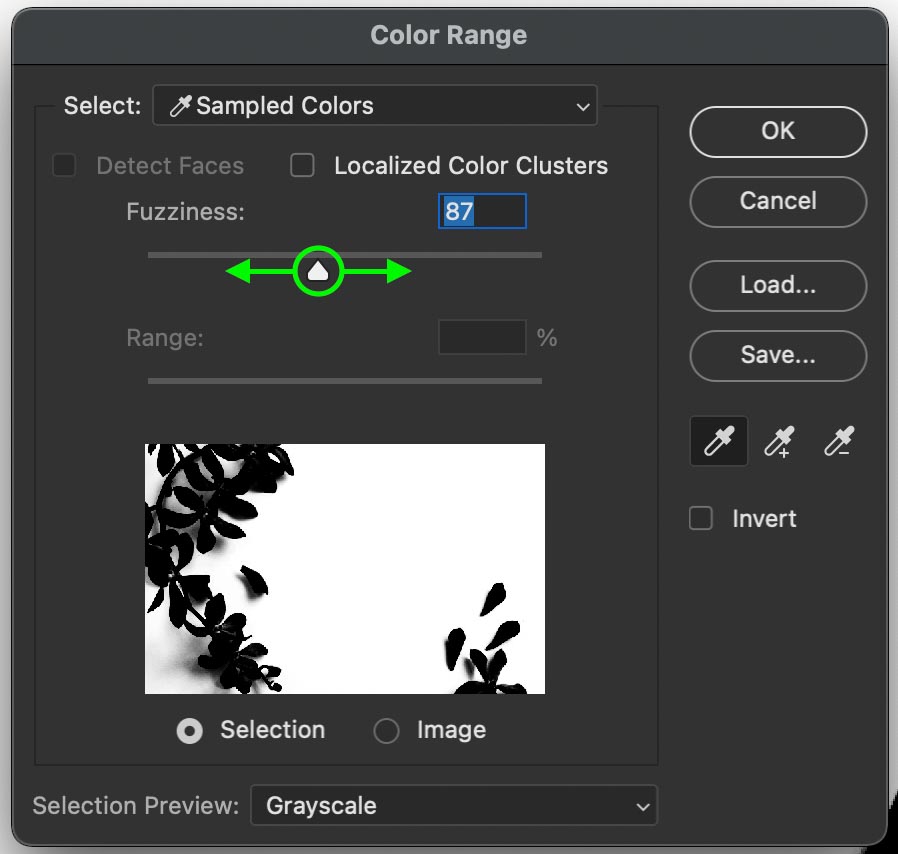
I like to start by setting the fuzziness to 0 and then working my way up from there. This way, you can see exactly what’s going on without any guesswork. Of course, every image will require a different fuzziness value, so click and drag on this slider until you find what works for you.
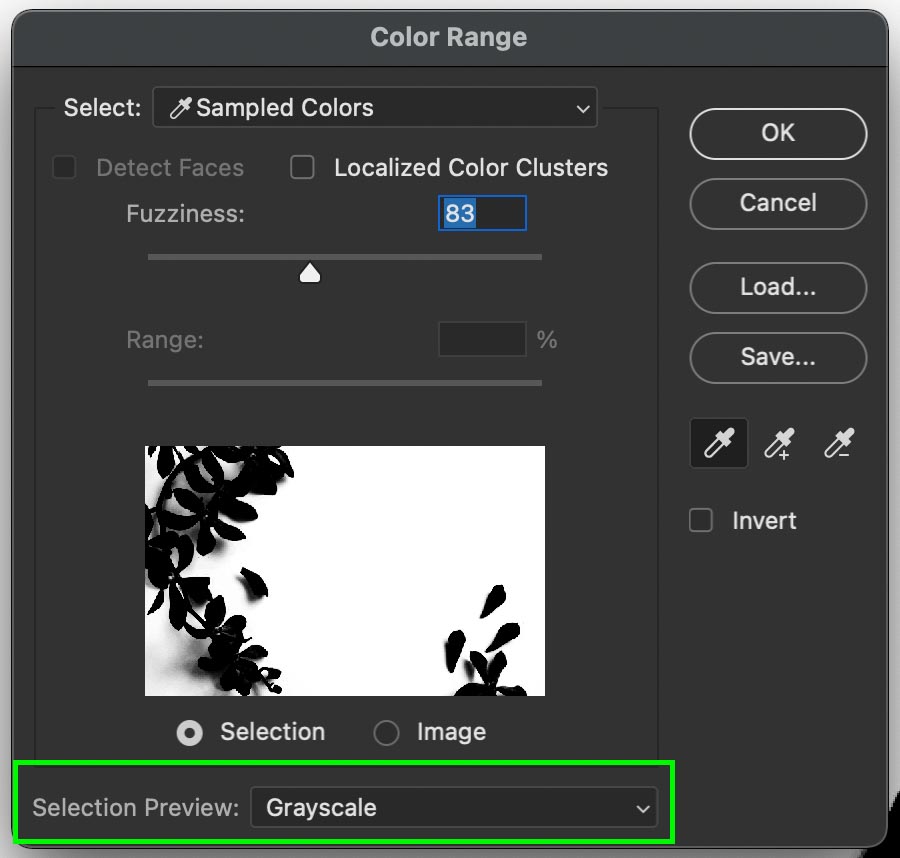
A beneficial trick in this step is to set your Selection Preview to Grayscale so you are viewing what is selected. For now, make sure everything that you don’t want to delete is black.
Step 5: Invert Your Selection Area
With your sample settings in order and the white background fully sampled, click the Invert option.
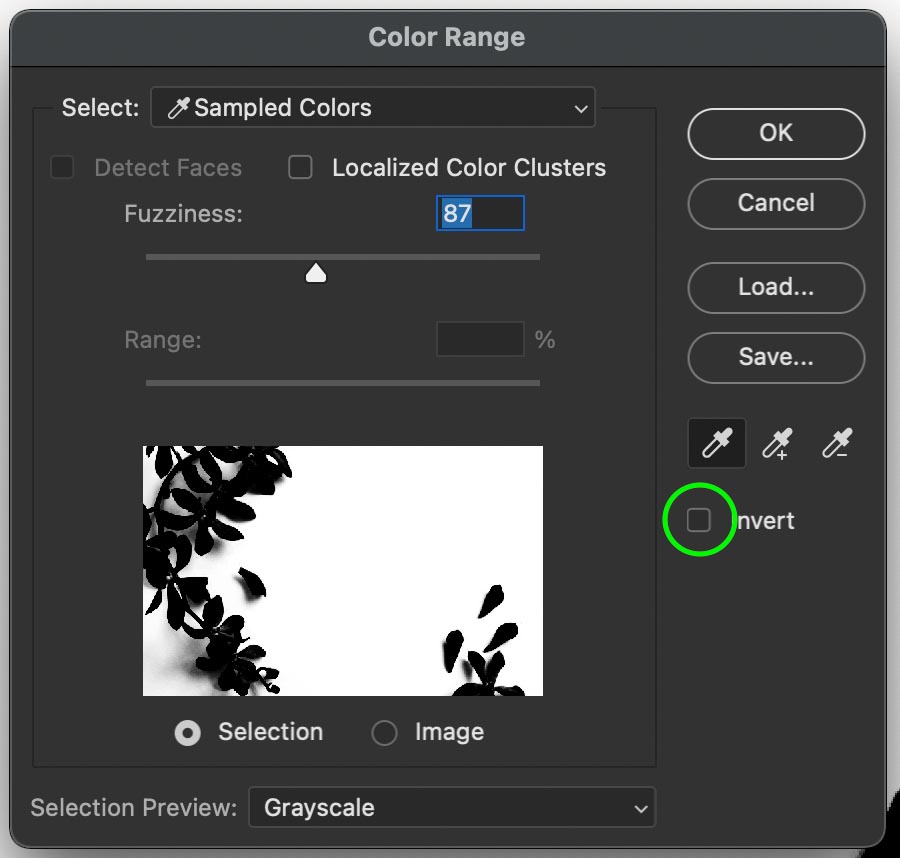
This will switch the colors around so the white background will now get removed, while your subject will remain visible on your selection!
Step 6: Press OK To Create A Selection
Now click OK to turn your samples into a new selection.
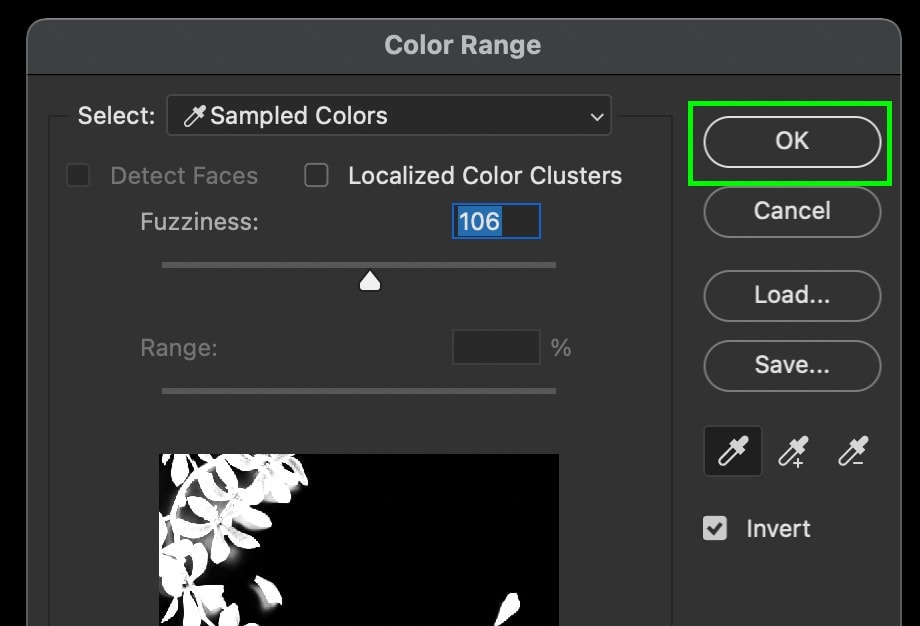
Step 7: Add The Selection To A Layer Mask
With your selection active, click on your image layer and apply a Layer Mask.
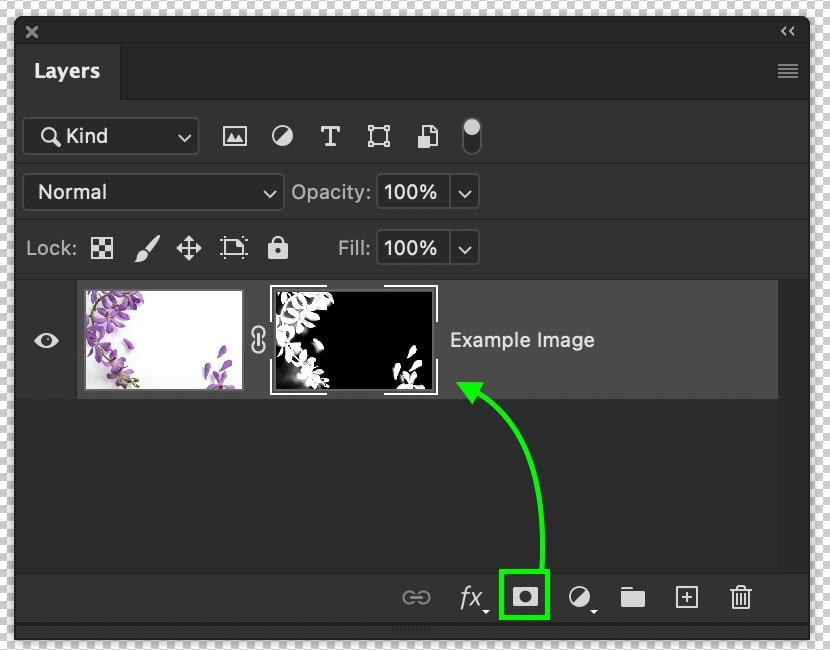
Your selection will be applied to the layer mask and make the white background transparent. Just like before, if you need to adjust your mask later on, you can easily do so using the Brush Tool and painting black (transparent) or white (visible) onto the mask.
Step 8: Export As A PNG
Now, you have successfully learned another fast and easy way to remove white backgrounds in Photoshop. This method isn’t just helpful for removing a white background but also works for colored backgrounds too!
Remember to export the file as a PNG to keep the transparency. Follow steps 4 and 5 in the first example to save a copy as a PNG.


How To Remove A White Background With Channels In Photoshop
The final method for removing a white background in Photoshop is with channels. This method works well for all kinds of images but really shines with complicated subjects. For example, if you have a graphic with a lot of text or a portrait with flyaway hairs, this technique will provide top-quality selections around those complex edges.
Step 1: Access The Channels Panel
First, access the Channels Panel, which can be found beside your Layers in most workspaces.
If you do not see it, go to Window > Channels to reveal it.
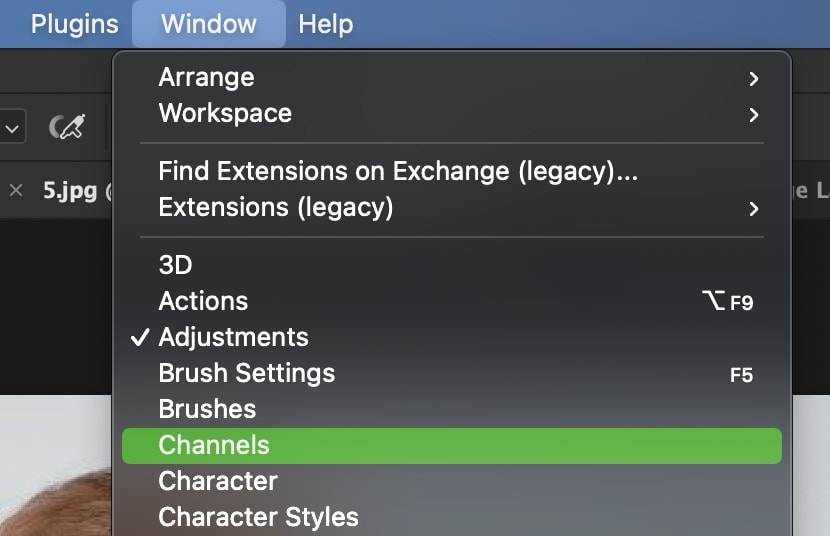
Step 2: Duplicate The Channel With The Most Contrast
In the Channels Panel, you will see three different color channels: Red, Green, and Blue. Each channel will have a varying amount of contrast depending on the hues in your particular image. By clicking between these channels, you can easily view the contrast in each of them.
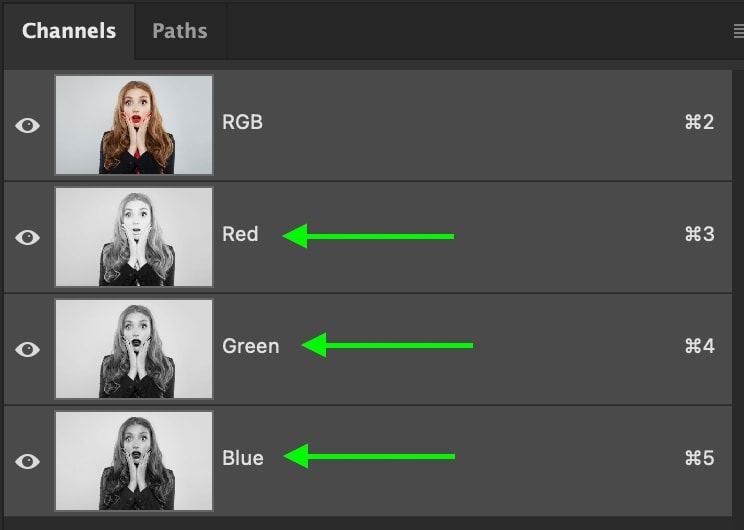
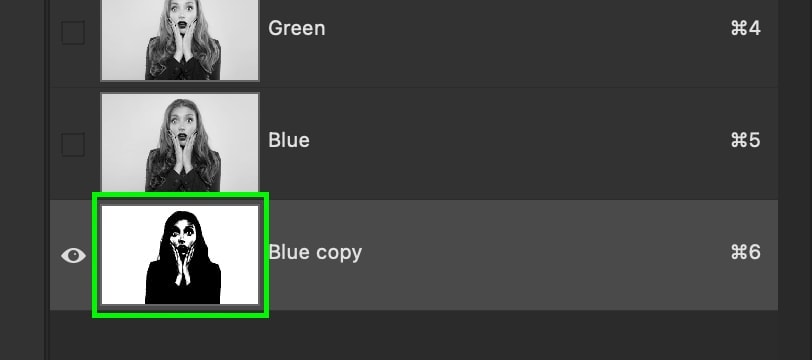
After browsing through your options, select the channel that has the most contrast. In other words, the channel with the darkest blacks and the whitest whites. This is important because you will use this contrast to create a selection and remove the white background, so the more, the merrier!

Once you have identified the channel with the most contrast, click and drag it down to the new layer icon to duplicate it. Now, you will have a channel copy layer that you can begin to work with in the next step.
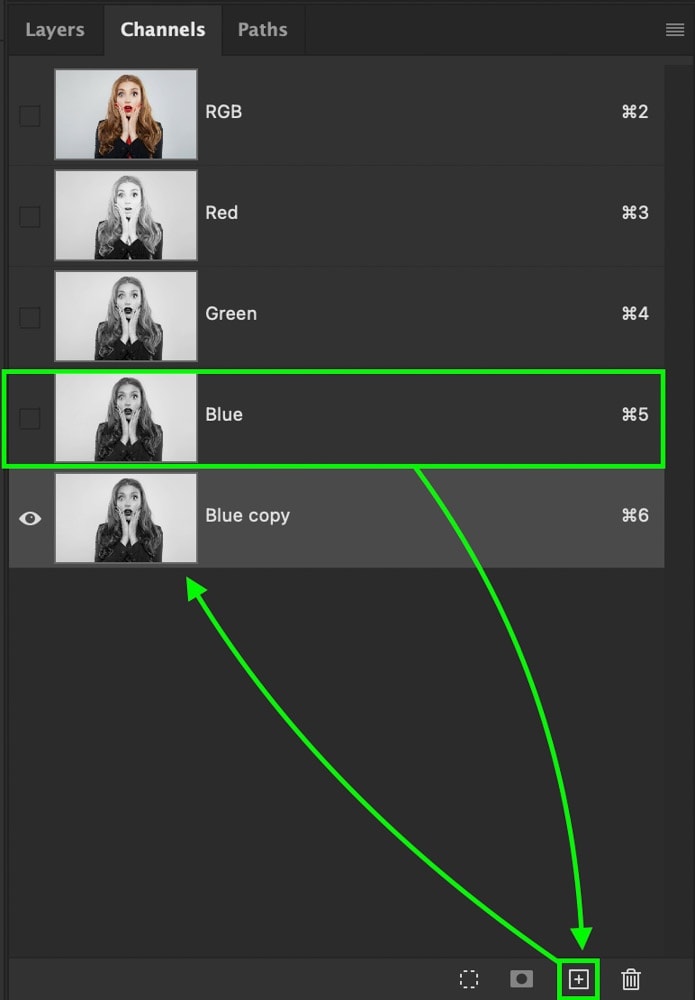
Step 3: Add A Levels Adjustment To Your Duplicated Channel
With the duplicate channel layer selected, press Control + L (Win) or Command + L (Mac) to apply a levels adjustments. In the levels dialogue box that appears, drag the shadows right and the highlights left.
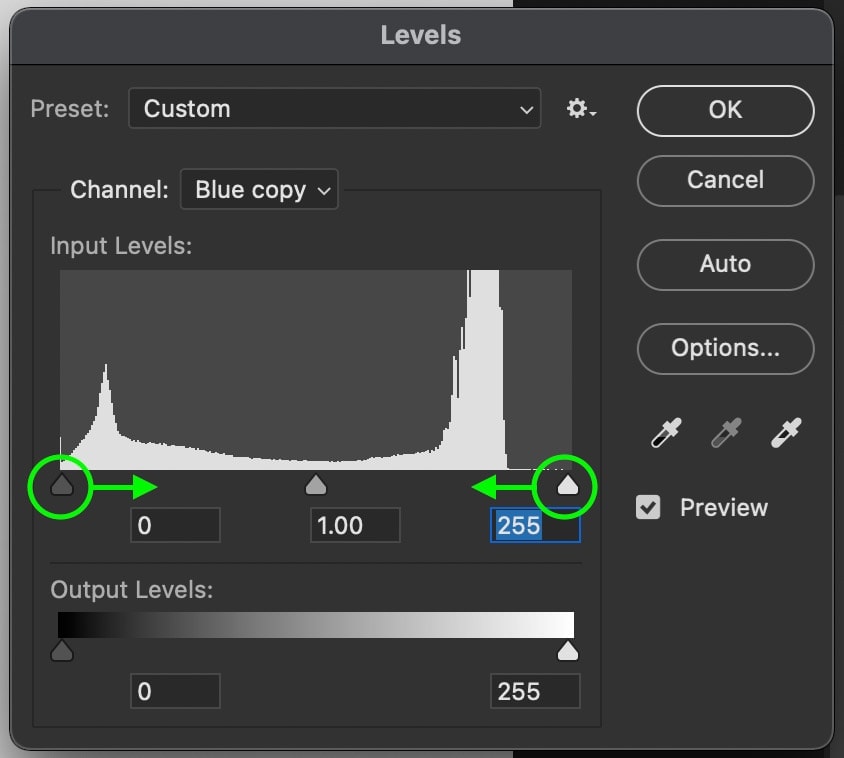
The goal is to add more contrast to your photo until your background is completely white and your subject is black. In some cases, you won’t be able to do this without white or grey spots, so just get it as good as you can. You can touch this up later!
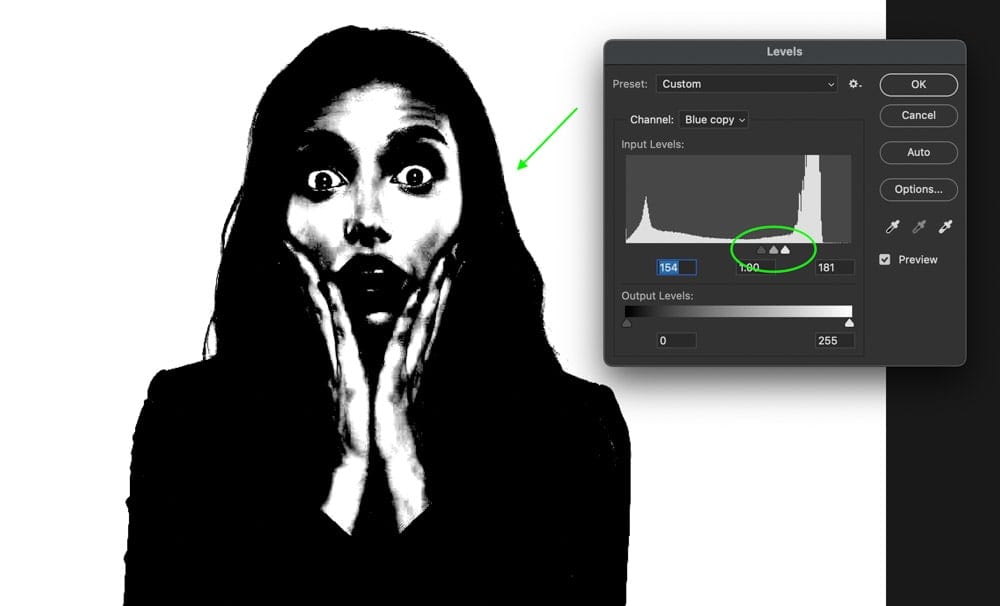
Once you have found the amount of levels adjusting needed for your image, click OK to apply your changes.
Step 4: Turn The Duplicated Channel Into A Selection
Now, you need to turn your duplicated channel into a selection. To do this, simply hold Control (Win) or Command (Mac) and click on your channel layer thumbnail. This will take the black and white in your channel and turn it into a selection.
Step 5: Apply The Selection Onto A Layer Mask
With your selection active, go back to your Layers Panel and click on your image layer. Then, click on the layer mask icon to apply the selection to a mask.
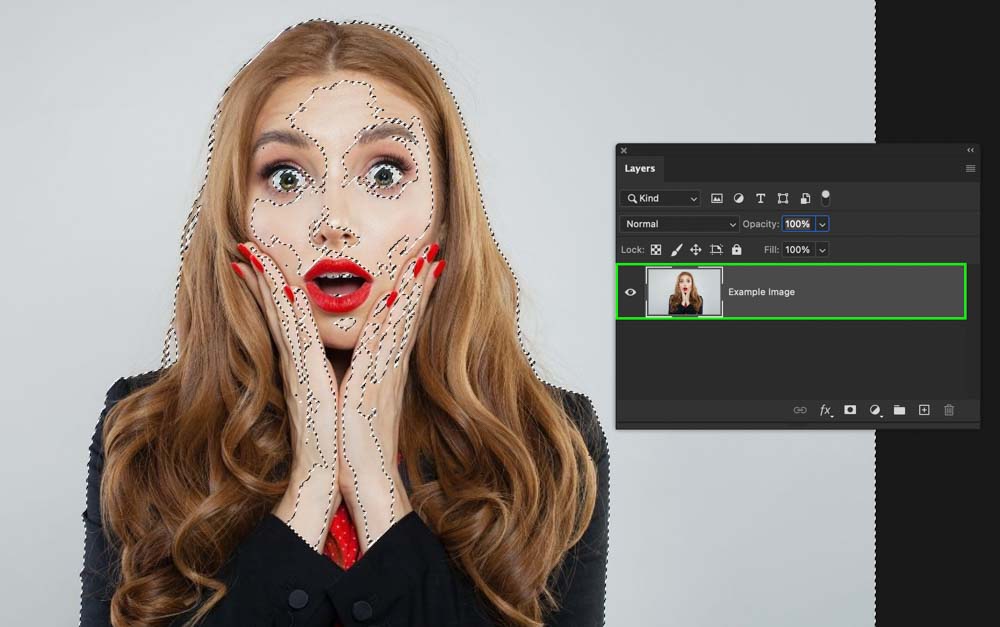
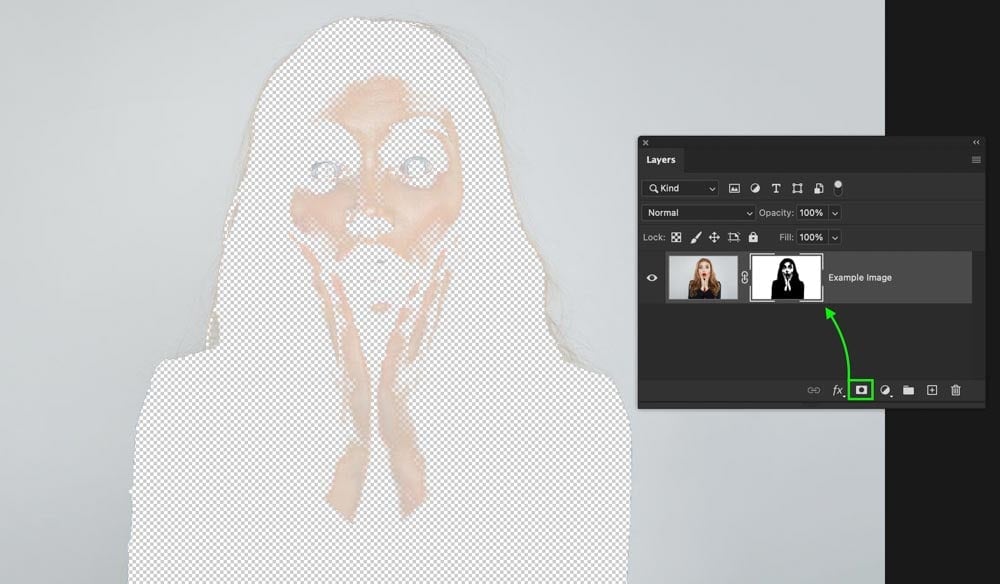
Now press Control + I (Win) or Command + I (Mac) with the layer mask selected to invert your mask. This will remove the white background.

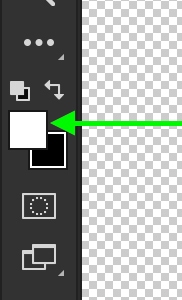
If you have an image like mine, there are transparent areas left over. Luckily, this can be touched up by selecting the Brush Tool (B) and setting your foreground color to white. Now, paint over the transparent areas of your subject to restore the pixels and remove the transparency.
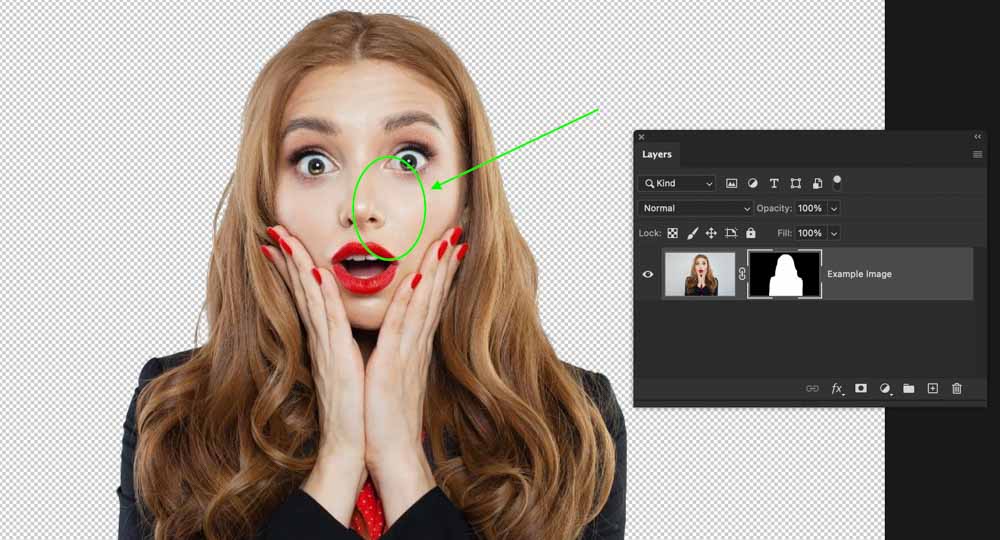
Now, you have mastered a fifth way of removing a white background from a photo in Photoshop! Don’t forget to export the image as a PNG to keep the transparent background. Follow steps 4 and 5 from the first example.


Happy Editing!
Brendan 🙂


