How To Move Images And Layers Between Photoshop Files
Whether you’re creating a graphic, a composite image, or just editing a photo, being able to move layers between Photoshop files is a must. There are a handful of different ways to freely move images around, but each one has its own advantages. In this post, you’ll see four of the fastest ways to move images between Photoshop documents and totally transform your workflow.
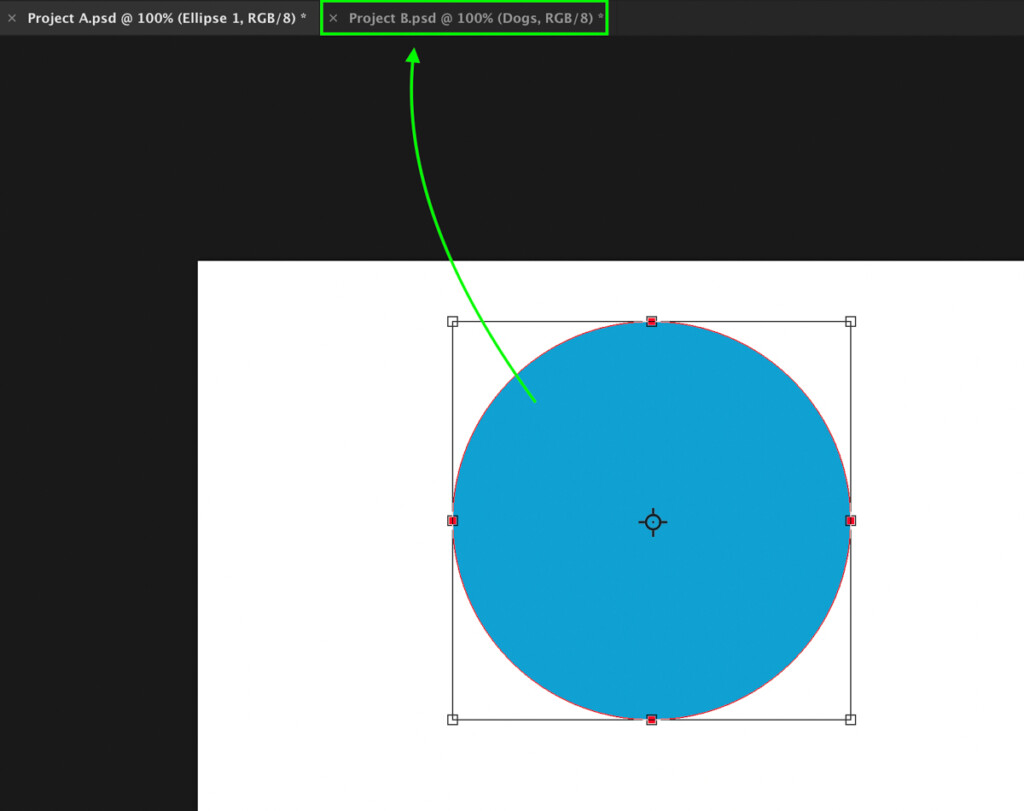
The easiest way to move images or layers between Photoshop Documents is with the Move Tool. By pressing V to access this tool, click and drag your desired layer to your secondary document found tabbed at the top of the window. You’ll then be switch to this secondary document where you can drag and drop your selected layer onto the canvas. Now your layer has been moved!
To help you better visualize this example, let’s walk through it more in-depth while also discussing three alternative methods to use!
How To Move Layers Or Images Between Photoshop Documents
Option 1: Moving Layers Between Documents With The Move Tool
More often than not, you’ll find that all the images you want are already open in Photoshop. Rather than importing from your computer again, it’s far easier to duplicate and move around the files that are already open. With this first method, you can easily move any image or layer between documents by clicking and dragging.
First, select the Move Tool by pressing V or selecting in the toolbar. This is the most valuable tool for moving any layer around in Photoshop.
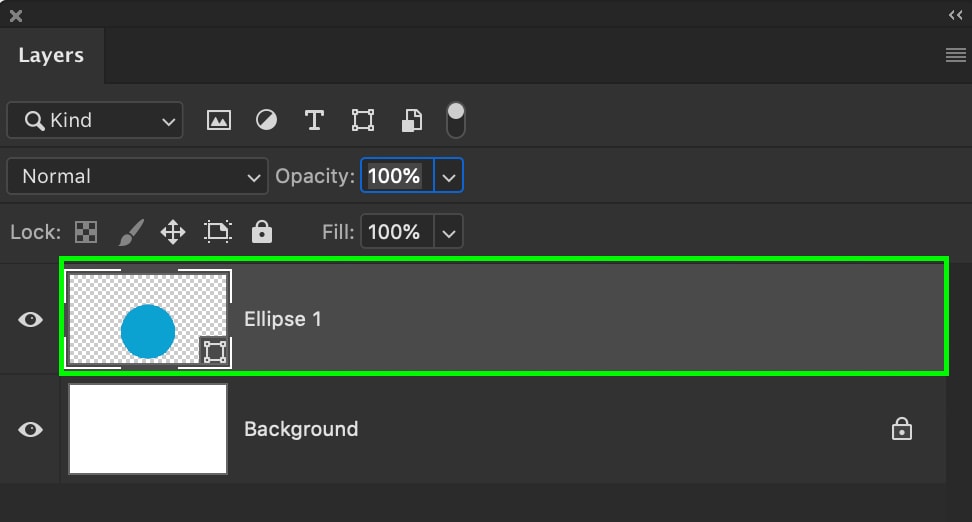
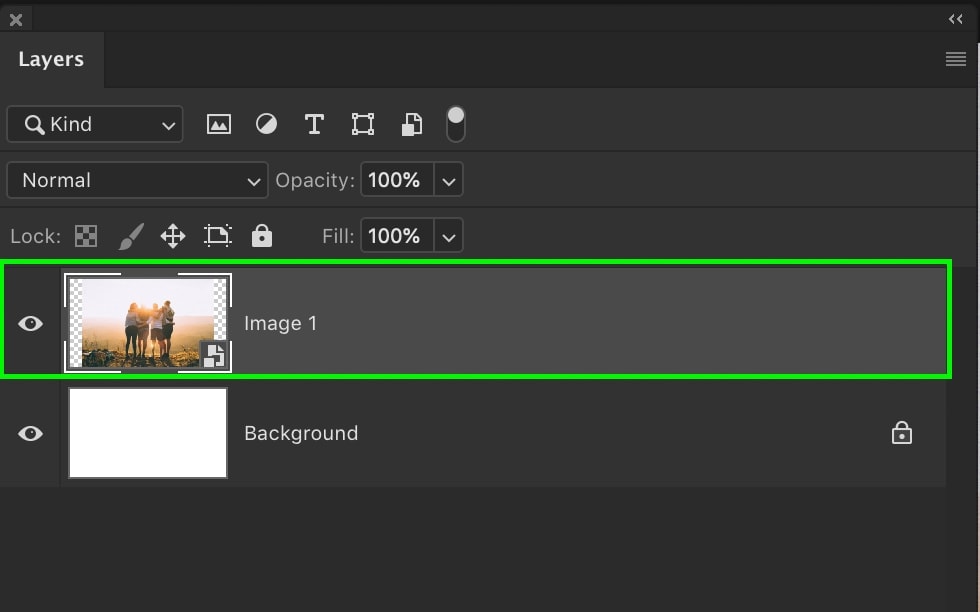
Next, select the layer you want to move in your layers panel. You’ll know it’s selected by the highlight covering the entire layer.
Now all you have to do is click on the selected layer in your canvas, and drag it up to the tabs at the top of the Photoshop window. By hovering over a different tab, you can switch to this secondary document.
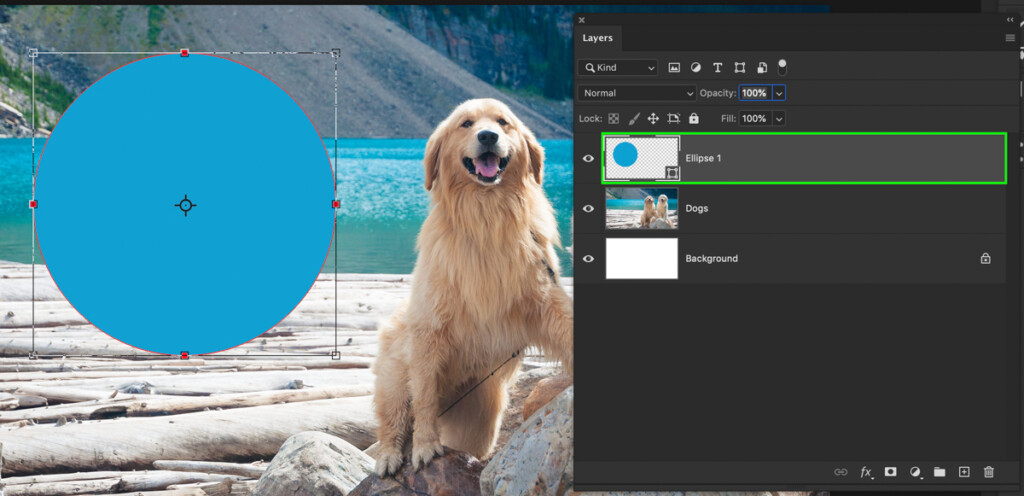
Once you’re in the new document, continue to drag down to hover your cursor over the canvas. Let go of your mouse, and now the layer from your previous Photoshop document will be moved to your new one. Best of all, it will be added to its own layer so you can continue working non-destructively.
My favorite part of this method is that it will automatically duplicate the layer you move between documents. That way, you will still have the same image accessible in both of your projects. How sweet is that?
This step can be applied to text layers, smart objects, shape layers, or even groups. As long as you can select it with the move tool, it’s fair game!
(You can select anything with the move tool, so this technique literally works for everything!)
Option 2: Copy And Paste
If dragging and dropping layers isn’t your thing, copy and paste is always there to have your back. Just like copying and pasting text in a regular word document, Photoshop works the same.
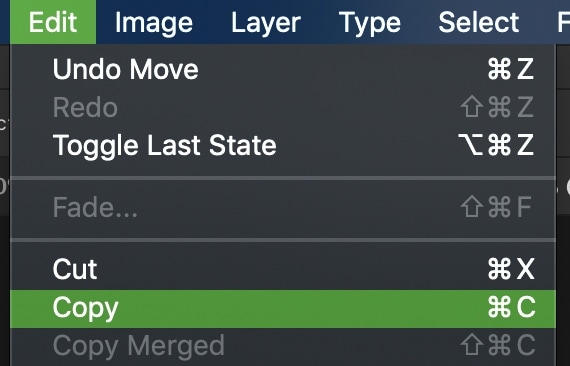
First, you’ll need to copy the layer that you want to move into your other document. With the desired layer selected in your layers panel, go up to Edit > Copy to copy your layer.
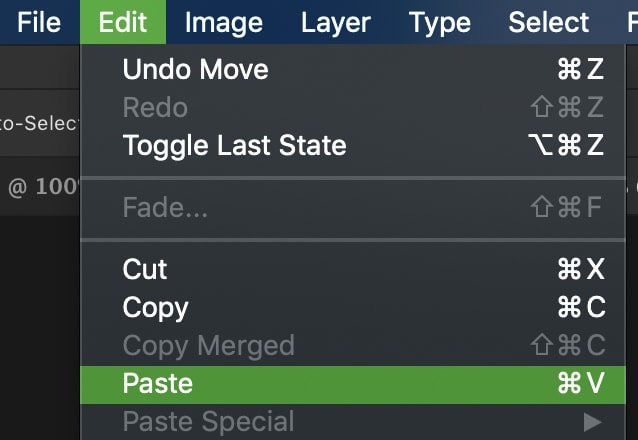
Navigate to your other Photoshop document by switching tabs. To paste your copied layer, go to Edit > Paste.
Just like before, your selected layer will now be added to the new project on its own layer. This is another very simple way to move images between documents in Photoshop.
To help you speed up the process, try using a keyboard shortcut for copying and pasting layers. To copy, just press Command + C (Mac) or Control + C (PC) with your layer selected. After switching over to your other Photoshop document, press Command + V (Mac) or Control + V (PC) to paste the layer into the other project.
Option 3: Duplicate Layer Into New Document
If you want a method that requires the least amount of clicking around possible, here’s your answer. With this method, you can move layers or images between documents by duplicating them into a different project. Rather than duplicating layers with the regular keyboard shortcut, this method requires something a little different.
As usual, select the layer or images you want to move into a new project.
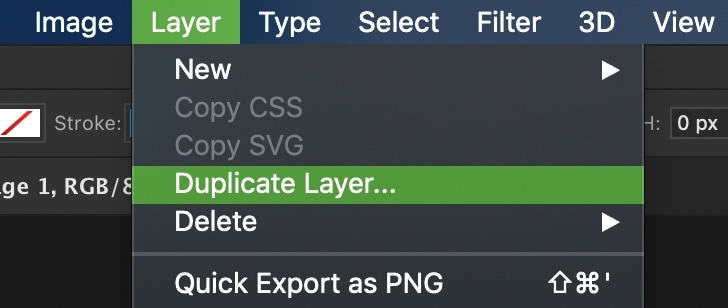
Go up to Layer > Duplicate Layer.
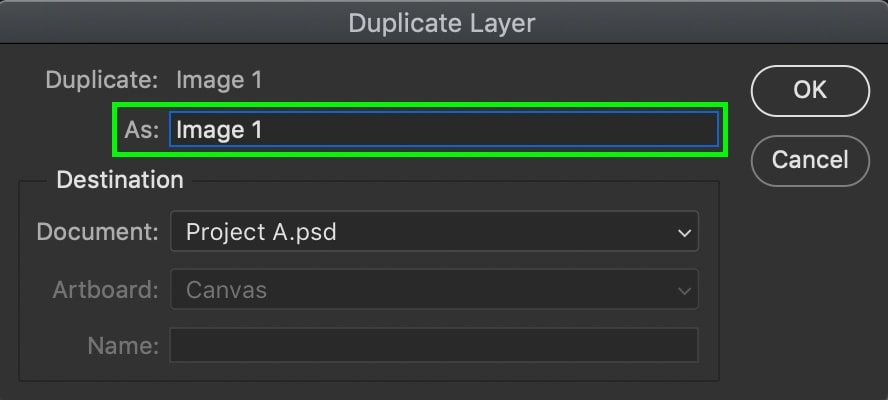
In the dialogue box that appears, type in the layer name you want for the duplicate you’ll create. If you aren’t sure, just leave it as is; you can change it later if need be!
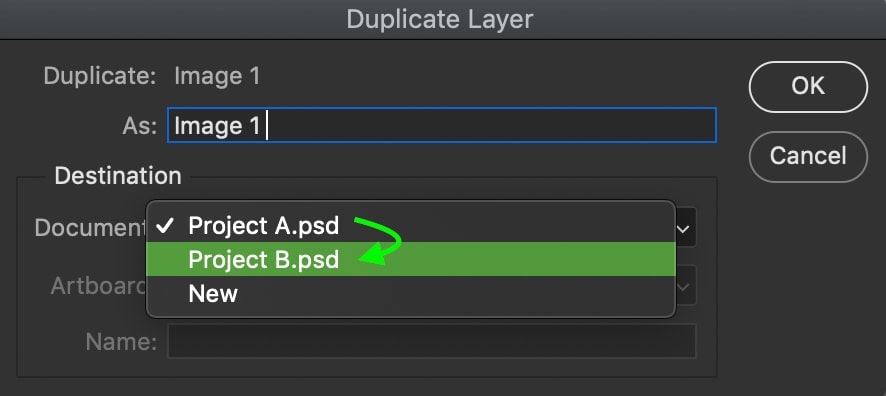
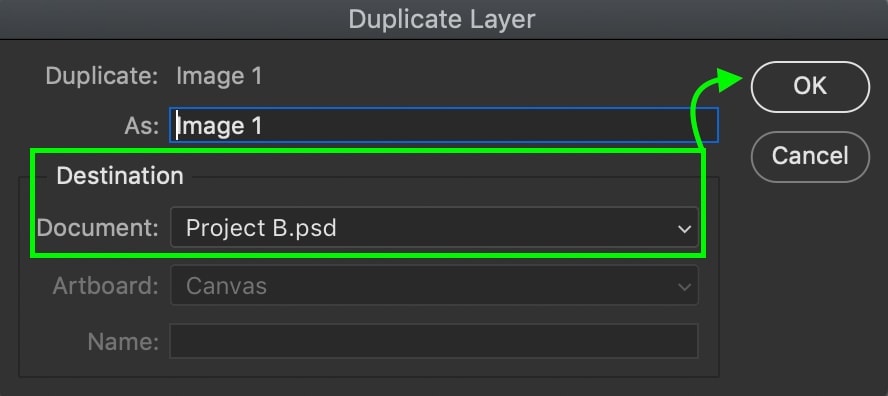
Now for the important part. Set the destination of your duplicate layer to the already opened Photoshop you want to move it to. In this example, I’m currently in “Project A” and want to move my image to “Project B.” That means “Project B” will be set as my destination.
Click OK once everything is in order. Your layer will now be duplicated and moved to your other document.
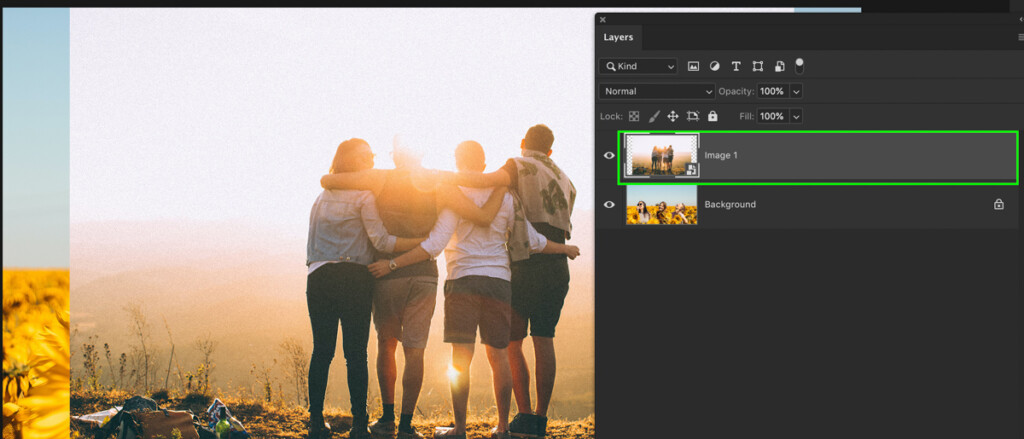
Switching tabs to view the other project, the layer has now been moved and can be edited in your new document.
Option 4: Drag And Drop Files From Your Computer Into Photoshop
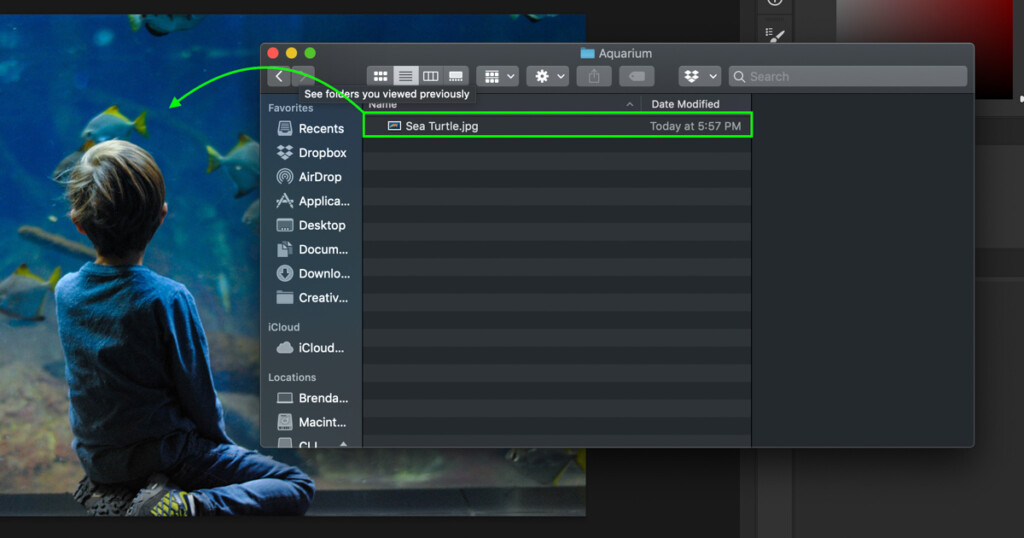
If all else fails, one of the most basic ways to move images into a project is by dragging and dropping them from your computer. With your desired Photoshop file open, bring up your computer files in a new window.
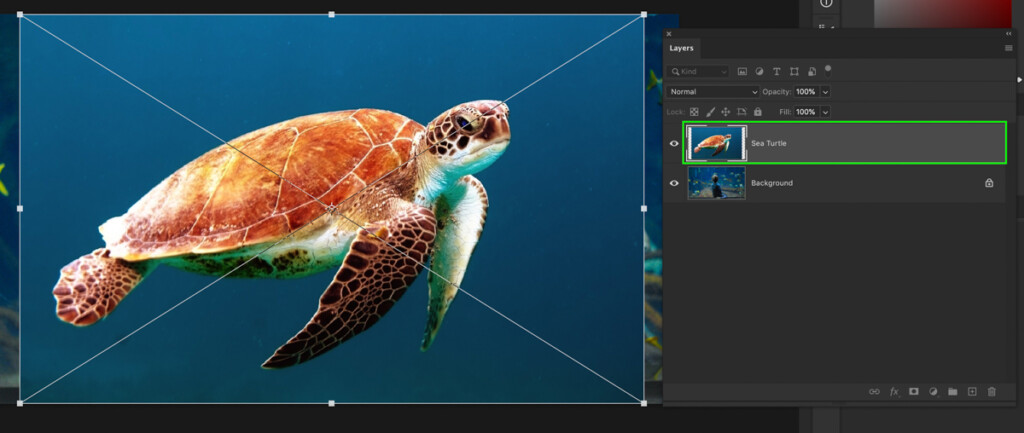
Find the image(s) you want to turn into layers and simply drag and drop them onto the canvas.
Each image will be added as its own layer and can be edited as you wish. You can learn all about how to edit photos in Photoshop in this post.
You can repeat this process between all of your Photoshop documents if you’re having trouble with any of the three previous methods. Since this takes out the use of tools in Photoshop, it’s a surefire and simple way to move images into your different projects with ease!
How To Move An Image In Photoshop After Placing It
After you have your photo imported into your document, you may need to make further adjustments to it. The best way to move around and scale a layer or image is by using the Move Tool. By pressing V to access this tool, you can click and drag your image to reposition it while clicking on the corners to adjust the scale.
To learn more about this tool, see this post.
How To Move An Image Behind Another
Depending on what you’re trying to do with an image, you might want it to sit behind another layer. This can be easily done by making some adjustments in the layers panel.
To hide one photo behind another, simply click and drag it underneath other layers in the Layers panel.
Changing The View Of Photoshop Tabs For Ease Of Use
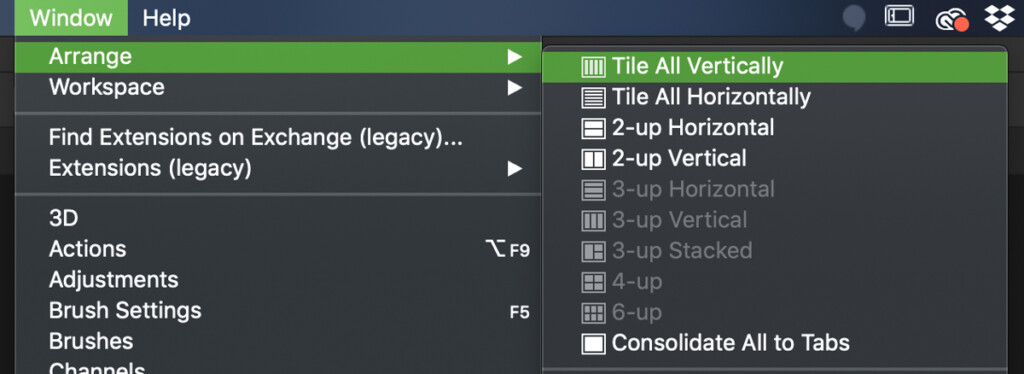
Clicking between tabs can get old after a while. Luckily, you can spice things up by changing the view of your opened Photoshop documents. Rather than consolidating all the projects into different tabs, you can choose to view multiple documents at once.
To change your view, go to Window > Arrange and pick your desired view. For moving layers between documents, my favorite view is the “tile all vertically” option. That way, you only have to drag and drop photos between your open windows, rather than clicking through multiple tabs.
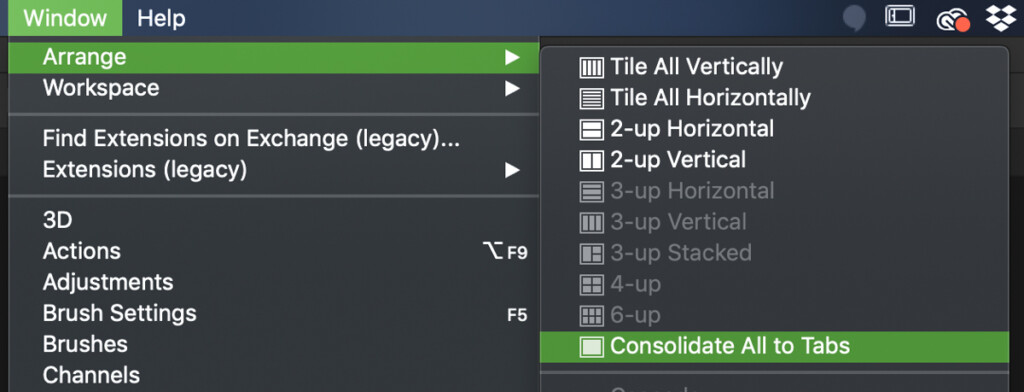
When you’re ready to switch back to the regular tabbed document view, go to Window > Arrange > Consolidate All To Tabs.
Now you know the ins and outs of moving images and layers between documents in Photoshop. Whether you like to drag and drop, copy and paste, or duplicate your layers, there’s a method here for every situation. It’s nice to switch it up between options at first until you settle on a method that works best for you. After all, the best method is the one that feels the most natural!
Happy editing,
– Brendan 🙂
